#apple email backup and restore
Explore tagged Tumblr posts
Visit Tumblr Blog
Explore Tumblr blogs with no restrictions, modern design and the best experience.
Last Seen Tumblr Blogs


Fun Fact
In 2020, 44% of users from Denmark used Tumblr daily.
Text
What Is Apple ID Accounts?
Buy Apple ID Accounts. An Apple ID is a user account that allows access to various Apple services and products, such as the App Store, iCloud, iTunes, Apple Music, and more. It serves as a single sign-in across all Apple devices and services. The account is tied to the user’s email address and is used to manage personal information, make purchases, and synchronize data across devices like iPhones, iPads, Macs, and more.
Key features of an Apple ID account include:
Access to Apple Services: With an Apple ID, users can access Apple services like iCloud for data storage, Apple Music for streaming, iTunes for media purchases, and the App Store for downloading apps.
Device Synchronization: Apple ID allows users to sync their settings, photos, contacts, and apps across all their Apple devices using iCloud.
Security Features: Apple ID comes with security features like two-factor authentication (2FA) to protect against unauthorized access.
Purchase Management: Users can store payment information and make purchases through Apple’s digital stores, including apps, music, movies, and other content.
Backup and Recovery: With iCloud, Apple ID provides a way to back up device data and restore it if the device is lost or replaced.
Find My iPhone/Mac: This feature helps users locate their devices in case they are lost or stolen by using their Apple ID credentials.
Essentially, an Apple ID acts as a digital identity within Apple’s ecosystem, allowing seamless use of Apple’s hardware, software, and services.
24 Hours Reply/Contact Telegram: @smmvirals24 WhatsApp: +6011-63738310 Skype: smmvirals Email: [email protected]
2 notes
·
View notes
Text
How VHS to Digital Conversion Works: A Step-by-Step Guide for Alexander Heights Residents
In today’s digital world, many people in Alexander Heights still have old VHS tapes filled with treasured memories. However, VHS tapes are susceptible to deterioration, and VCRs are becoming obsolete. Converting VHS tapes to a digital format is the best way to preserve these precious moments for future generations. Here’s a step-by-step guide on how VHS to digital conversion works and why it’s beneficial.
Step 1: Assess Your VHS Tapes
Before starting the conversion process, gather all your VHS tapes and check their condition. Look for:
Signs of mold, dust, or physical damage.
Faded labels or missing information about the tape’s content.
Signs of tape degradation, such as warping or sticky residue.
If the tapes are in poor condition, professional restoration may be necessary before conversion.
Step 2: Choose a VHS to Digital Conversion Method
There are two primary ways to convert VHS to digital:
DIY Conversion Using VHS-Digital Equipment
Requires a working VCR, a capture device (USB video converter), a computer, and software.
The VHS tape plays on the VCR while the capture device records the video onto your computer.
Requires manual editing and file formatting.
Professional VHS to Digital Services
Professionals use high-quality equipment to ensure better video and audio quality.
They offer additional services such as video enhancement, noise reduction, and cloud storage options.
Ideal for those who lack the technical expertise or equipment.
Step 3: Preparing the Equipment
For DIY conversions, ensure you have:
A VCR in good working condition.
A USB video capture device that connects the VCR to your computer.
Conversion software (e.g., OBS Studio, Roxio, or Elgato Video Capture) to record the video.
Adequate storage space on your computer for digital files.
For professional services, you simply need to drop off or mail your tapes to the service provider.
Step 4: Connecting and Capturing the Video
For DIY conversions:
Connect the VCR to the Computer – Plug the RCA cables (red, white, yellow) from the VCR into the capture device, then connect the device to your computer via USB.
Launch the Capture Software – Open the software and set the video resolution and format (MP4, AVI, MOV, etc.).
Play the VHS Tape – Start playing the tape while the software records the footage in real-time.
Monitor the Process – Ensure the audio and video sync correctly and make adjustments if needed.
Step 5: Editing and Enhancing the Video
Once the video is recorded:
Trim Unwanted Sections – Cut out blank spaces or static noise.
Enhance Quality – Use software tools to adjust brightness, contrast, and color correction.
Remove Background Noise – Some software allows for noise reduction to improve sound quality.
Add Titles or Chapters – Organize videos into sections for easy navigation.
Professional services often provide these enhancements automatically for optimal quality.
Step 6: Choosing a Storage Format
After editing, save your digital files in a preferred format:
MP4 – Best for universal compatibility.
AVI – High quality but larger file size.
MOV – Ideal for Apple devices.
Consider multiple storage options:
USB Flash Drive – Portable and easy to share.
External Hard Drive – Suitable for storing large video collections.
Cloud Storage – Offers remote access and backup security.
DVDs – Traditional but may not be as future-proof as cloud storage.
Step 7: Organizing and Backing Up Files
Create folders labeled by event or year.
Store files in multiple locations for extra security.
Consider cloud services like Google Drive, Dropbox, or OneDrive for remote access.
Why Convert VHS to Digital?
Prevents Tape Degradation – Digital files do not degrade over time.
Saves Space – Eliminates the need for bulky VHS tapes.
Easier Sharing – Share videos with friends and family via email or social media.
Enhances Accessibility – Watch videos on modern devices like smartphones and smart TVs.
Final Thoughts
Converting VHS to digital is a crucial step in preserving your most treasured memories. Whether you choose DIY conversion or professional services in Alexander Heights, ensuring your tapes are digitized will keep your family’s history alive for generations. Don’t wait until your tapes deteriorate—future-proof your memories today!

youtube
#Vhs To Digital Perth#Vhsc To Digital Perth#Convert Vhsc To Digital Perth#Convert Vhs To Digital Perth#Transfer Vhs To Digital Perth#Vhs To Dvd Perth#Vhsc To Dvd Perth#Transfer Cassette To Digital Perth#Convert Audio Cassette To Digital Perth#Convert Audio Tapes To Digital Perth#Youtube
2 notes
·
View notes
Text
Methods to Recover Deleted Contacts on iPhone
If you've accidentally deleted contacts on your iPhone, don't worry—there are several methods to recover them. While iPhones don't have a traditional "trash" or "recycle bin" for contacts, you can restore deleted contacts through iCloud, email account synchronization, or third-party recovery tools.
1. Restore Contacts via iCloud.com
If your contacts were synced with iCloud, you can restore them from an earlier archive:
Visit iCloud.com and sign in with your Apple ID.
Click on your account name and select Account Settings.
Scroll down to the Advanced section and click Restore Contacts.
Choose an archive date before the contacts were deleted and click Restore.
Note: Restoring contacts will replace the current contacts on all devices synced with iCloud. The current contacts will be archived and can be restored later if needed.
2. Re-enable iCloud Contacts Sync
Sometimes, toggling the iCloud Contacts sync off and on can help recover missing contacts:
Go to Settings > [Your Name] > iCloud.
Toggle Contacts off and choose Keep on My iPhone.
Toggle Contacts back on and select Merge.
This action may restore contacts that were temporarily missing due to sync issues.
3. Restore from iCloud Backup
If you regularly back up your iPhone to iCloud, you can restore contacts by reverting to a previous backup:
Go to Settings > General > Transfer or Reset iPhone > Erase All Content and Settings.
After your iPhone restarts, follow the setup prompts and choose Restore from iCloud Backup.
Select a backup dated before the contacts were deleted.
Caution: This method will replace all current data on your iPhone with the data from the selected backup.
4. Restore from Finder or iTunes Backup
If you have a backup on your computer:
Connect your iPhone to the computer and open Finder (macOS Catalina or later) or iTunes (earlier macOS or Windows).
Select your device and click Restore Backup.
Choose a backup that predates the deletion of contacts and proceed with the restoration.
Note: This process will overwrite current data on your iPhone.
5. Recover Contacts from Email Accounts (e.g., Google, Yahoo)
If your contacts were synced with an email account:
Visit the web interface of your email provider (e.g., Google Contacts).
Check the Trash or Bin folder for deleted contacts.
Select the contacts you wish to restore and choose the Restore option.
Note: Deleted contacts in Google are stored in the Trash for 30 days.
6. Use Third-Party Recovery Tools
If the above methods don't work, consider using third-party software like Disk Drill:
Download and install Disk Drill on your computer.
Connect your iPhone and allow the software to scan for recoverable data.
Preview and recover the deleted contacts.
Note: Recovery success varies, and some tools may require a purchase.
📌 Tips to Prevent Future Contact Loss
Regularly back up your iPhone to iCloud or your computer.
Avoid using third-party cleaner apps that may delete important data.
Ensure contacts are synced with a reliable account (iCloud, Google, etc.).
1 note
·
View note
Text
Authenticator App Neues Handy: How to Securely Transfer Your 2FA Credentials During a Phone Change
In an era where cybersecurity is a top priority for professionals and organizations alike, authenticator apps have become a fundamental layer of account protection. These apps—such as Google Authenticator, Microsoft Authenticator, or Authy—enable two-factor authentication (2FA) through time-based one-time passcodes (TOTP), making unauthorized access significantly harder.
But what happens when you change your smartphone? Whether you’re upgrading your device or replacing a lost or damaged phone, knowing how to handle your authenticator app neues Handy (authenticator app on a new phone) is critical. For professionals managing multiple secure accounts, a seamless authenticator app Handy Wechsel (authenticator app phone switch) is essential to avoid disruptions or permanent lockouts.
In this guide, we’ll walk you through the steps for transferring your authenticator app to a new phone—both with and without access to the old device—and provide expert-level best practices for handling 2FA credentials during a phone transition.
Why Authenticator Apps Matter
Authenticator apps generate 6-digit codes that refresh every 30 seconds and are used alongside your username and password to access sensitive accounts. They are widely used for:
Enterprise cloud services (Google Workspace, Microsoft 365)
Developer platforms (GitHub, AWS, Azure)
Financial and banking apps
Email and social media accounts
For IT professionals, developers, and digital entrepreneurs, keeping these codes accessible and secure during a phone change is non-negotiable.
Preparing for a Phone Switch: What to Do Beforehand
If you still have access to your old device, it’s always best to prepare before making the switch. A proactive approach simplifies the authenticator app Handy Wechsel process and ensures continuity.
Checklist Before Migrating:
✅ Install the same authenticator app on your new device
✅ Ensure your old device is unlocked and functional
✅ Check if your authenticator app supports export/import (e.g., Google Authenticator does)
✅ Back up recovery codes or store them securely in a password manager
Let’s now dive into the detailed steps.
How to Transfer Authenticator App to Neues Handy (New Phone) – With Access to Old Phone
Step 1: Install Authenticator App on the New Phone
Download your preferred app from the Google Play Store or Apple App Store. Make sure it’s the official version published by the provider (Google LLC, Microsoft Corporation, etc.).
Step 2: Export Accounts From Old Phone
For Google Authenticator:
Open the app on your old phone.
Tap the three-dot menu > Transfer accounts > Export accounts.
Authenticate with your device credentials.
Select the accounts you want to move.
A QR code will be generated.
For Microsoft Authenticator or Authy:
These apps typically offer account synchronization through cloud backup, making the transfer process even easier. Sign in on the new device using the same account credentials to restore your tokens.
Step 3: Import Accounts on Neues Handy
On your new device:
Open the authenticator app.
Choose Import accounts or Scan QR code.
Use the phone camera to scan the QR code generated on your old phone.
After successful import, test one or more logins to verify that 2FA works correctly.
Step 4: Deactivate Old Device
Once confirmed:
Remove or reset the app on the old phone.
Log out or delete tokens to prevent unauthorized use.
Alternatively, perform a factory reset if you are disposing of or selling the old device.
How to Set Up Authenticator App on Neues Handy Without Old Phone
Losing your old phone complicates the authenticator app Handy Wechsel, but it’s still possible to regain access. This process involves recovering individual 2FA-enabled accounts and re-enabling the authenticator manually.
Step 1: Install Authenticator App on New Phone
Choose and install the same authenticator app you used previously (Google Authenticator, Authy, etc.).
Step 2: Recover Each Account
For each service where you’ve enabled 2FA:
Go to the login page and click “Can’t access your 2FA device?” or a similar option.
Use backup recovery codes (if previously saved) to log in.
If no backup codes are available, follow the account recovery process (usually email or identity verification).
Once logged in, disable 2FA, then re-enable it by scanning a new QR code using the authenticator app on your new phone.
💡 Pro tip: Prioritize access to critical accounts like your primary email, password manager, and cloud service logins first.
What If You Used Authy or Microsoft Authenticator?
Some apps offer cloud-based sync, making authenticator app Handy Wechsel far more seamless.
Authy allows account sync across multiple devices (with PIN or biometric protection).
Microsoft Authenticator can back up to iCloud (iOS) or your Microsoft account (Android).
If you previously enabled cloud backup:
Log in on your new phone using the same credentials.
Restore your token list automatically.
Best Practices for Professionals Handling Authenticator App Migration
Changing devices should never compromise your security posture. Here are expert recommendations for managing the authenticator app neues Handy process efficiently:
1. Use a Password Manager
Many password managers (like 1Password, Bitwarden, and LastPass) now support integrated 2FA tokens, allowing secure storage and syncing of TOTP codes.
2. Save Backup Codes Offline
When enabling 2FA for any service, you're usually offered backup or recovery codes. Save these in an encrypted file or secure offline location. Never store them in plain text on cloud services.
3. Regularly Audit 2FA Accounts
Periodically:
Remove unused tokens
Update recovery information (email/phone)
Verify access to backup codes
This helps reduce risks during device transitions.
4. Avoid Using One Phone for All Authentication
For added security, professionals often use a dedicated device (e.g., a secure tablet or secondary phone) solely for 2FA apps.
Common Pitfalls to Avoid
❌ Failing to back up recovery codes before device reset
❌ Not verifying all logins after transfer
❌ Using third-party apps with poor security reputations
❌ Relying on SMS-based 2FA only (which is less secure than app-based)
Avoiding these mistakes can make the authenticator app Handy Wechsel much smoother.
Conclusion
For professionals and security-conscious users, changing smartphones is more than a simple upgrade—it’s a sensitive process that requires safeguarding access to critical accounts. Whether you're planning ahead or recovering from the loss of your old phone, understanding how to manage your authenticator app neues Handy setup ensures that you maintain full control of your digital footprint.
From exporting tokens and using secure backups to recovering access without your previous device, the strategies covered here can help make your authenticator app Handy Wechsel as seamless and secure as possible.
0 notes
Text
📲 Switched to a new iPhone and worried about losing all your contacts?
You're not alone — and the solution is smoother than you think.
Here’s how you can transfer your contacts in seconds:
🔄 iCloud Sync: Go to Settings > Apple ID > iCloud > Toggle Contacts ON.
📥 Restore from iCloud Backup: During setup, choose "Restore from iCloud Backup."
✈️ AirDrop: Share individual contacts wirelessly in real-time.
📱 SIM Card Transfer: Old-school but still handy for some models.
Tried it already? Got a better method? Drop it in the comments 👇 Let’s make iPhone transitions seamless for everyone!
#iPhoneTips#iOSGuide#MobileHowTo#TechSimplified#iPhoneContacts#AppleSupport#ProductivityHack#TechTips#iPhoneSetup#iCloud
0 notes
Text
Expert Apple Technicians Recover Crashed Mac Drives
A crashed Mac drive can stop everything in its tracks locking you out of your system and making essential files seem permanently lost. Whether it’s your work machine, personal laptop, or a studio Mac with years of creative projects, a drive crash can feel like a digital disaster. The good news? Expert Apple technicians recover crashed Mac drives every day using tools and techniques specifically designed for Apple hardware and macOS.
If your Mac suddenly won’t boot, is stuck on a loading screen, or displays disk errors, now is the time to call in certified professionals who know exactly how to restore your system—and your data.
What Causes a Mac Drive to Crash?
A crashed drive can occur due to a number of issues, often without warning. Some of the most common causes include:
Hardware Issues
Aging or worn-out hard drives (especially HDDs)
SSD corruption due to bad memory cells
Power surges or unexpected shutdowns
Overheating or physical damage (e.g., from drops)
Software Problems
Failed macOS updates or installations
File system corruption (APFS, HFS+)
Malware or third-party software conflicts
Improper shutdown or forced restarts
A crash can make your Mac unbootable, freeze on the Apple logo, or display a flashing folder with a question mark—indicating your system can't locate a valid startup disk.
Why Trust Expert Apple Technicians?
When it comes to recovering data from a crashed drive, not all recovery services are created equal. Apple-certified technicians bring unique advantages:
Trained in Apple-Specific Systems
They have expert knowledge of macOS, Apple’s custom hardware, and unique security features like FileVault and the T2/M1/M2 chips. These systems require precise handling for successful recovery.
Access to Specialized Tools
From proprietary Apple diagnostics to advanced recovery utilities, certified technicians use industry-grade tools to recover data without causing further damage.
Safe Handling of Encrypted Drives
If your Mac uses FileVault or has a security chip, standard data recovery attempts may fail. Apple technicians understand the correct protocols to access encrypted data—securely and legally.
High Success Rate
Thanks to their experience and equipment, Apple experts boast much higher recovery rates than generic repair shops or consumer software solutions.
The Recovery Process, Simplified
Apple technicians follow a structured, step-by-step approach to recover crashed Mac drives:
1. Initial Assessment
Technicians begin by diagnosing the drive using Apple’s diagnostic tools and external recovery systems to determine the nature and extent of the crash.
2. Non-Invasive Cloning
If the drive is still accessible, a bit-by-bit clone is created to preserve the data and prevent further corruption during the recovery process.
3. Deep File Recovery
Using specialized tools for APFS, HFS+, and encrypted volumes, technicians extract data from the cloned image or directly from the original drive.
4. Data Verification
Recovered files are checked for completeness and integrity, ensuring they are usable and error-free before delivery.
5. Data Delivery & Backup Solutions
Your recovered files are returned to you on an external drive, cloud storage, or a replacement Mac. Apple experts can also help set up Time Machine or iCloud for ongoing protection.
What Can Be Recovered?
Depending on the condition of the drive, Apple technicians can often retrieve:
Documents, spreadsheets, and PDFs
Photos, videos, and music libraries
Email files and app data
iMovie, Final Cut, and Logic Pro projects
User profiles, preferences, and settings
Complete drive images or partitions
Even partially corrupted or encrypted files may be recoverable with the right tools and experience.
Warning Signs of a Failing Mac Drive
Don’t wait until your Mac crashes completely. Contact an expert if you notice:
Frequent crashes or freezes
Mac is stuck on the Apple logo
Apps take unusually long to open
Disk Utility reports drive errors
Files mysteriously disappear or won’t open
Clicking or buzzing noises (on older HDDs)
Catching these early can significantly improve the chances of a successful recovery.
Tips to Prevent Future Drive Crashes
After recovery, Apple experts often recommend proactive steps to prevent another data loss event:
Use Time Machine: Apple's built-in backup system can automatically protect your files.
Enable iCloud Syncing: Especially for documents, desktop files, and photos.
Avoid Forced Shutdowns: Always power down your Mac properly.
Keep macOS Updated: Regular updates patch security holes and improve disk management.
Don’t Ignore Disk Utility Warnings: Run First Aid regularly to fix minor errors before they grow.
A crashed Mac drive doesn’t mean all is lost. With the help of certified professionals, Apple technicians can recover data from even the most stubborn drive failures. Their deep knowledge of Apple systems, secure practices, and advanced recovery tools ensure you get the best chance at saving your data—quickly and safely.
If your Mac is showing signs of a crash or has already failed, don’t delay. Reach out to certified Apple experts today and take the first step toward recovery and peace of mind.
#iPhone Battery Replacement#Iphone Repair#Macbook Repair#iPad Screen Repair#macbook battery replacement
0 notes
Text
iPhone Storage Full? Find and Remove Duplicate Videos with These 5 Methods If you're an iPhone user who loves capturing moments through video, you've likely encountered a common problem: duplicate videos taking up valuable storage space. Whether from accidental double recordings, shared media, or backed-up content, these duplicates can quickly consume gigabytes of storage without you realizing it. Finding and removing duplicate videos on your iPhone not only frees up precious storage space but also helps organize your media library for easier access and management. In this comprehensive guide, we'll explore various methods to identify and remove duplicate videos on your iPhone, from using built-in features to third-party applications designed specifically for this purpose. By the end of this article, you'll have all the tools you need to efficiently manage your video collection and reclaim your iPhone storage. Why Duplicate Videos Accumulate on iPhones Before diving into solutions, it's helpful to understand how duplicate videos end up on your device in the first place: Multiple photo backups: When restoring from different backups or syncing across multiple services (iCloud, Google Photos, etc.) Accidental saving: Downloading the same video multiple times from messaging apps or emails Screen recordings: Creating screen recordings of videos you already have saved Photo sharing: Receiving the same video from different people via AirDrop, Messages, or social media Manual copying: Duplicating videos when organizing files Identifying these patterns can help you prevent duplicate accumulation in the future. Method 1: Using the Built-in Photos App Apple's Photos app includes a basic duplicate detection feature introduced in iOS 16 that can help you locate identical videos. Here's how to use it: Finding Duplicates with the Photos App Open the Photos app on your iPhone Go to the Albums tab at the bottom of the screen Scroll down to the Utilities section Look for and tap on the Duplicates album The app will automatically display all duplicate photos and videos found on your device For each set of duplicates, you'll see options to Merge the files, which keeps the highest quality version and deletes the others Note: This feature only identifies exact duplicates with identical file data. Similar videos with slight differences won't be detected. Method 2: Using the Files App to Manually Search For more control over the process, you can manually search through your videos in the Files app: Open the Files app on your iPhone Navigate to On My iPhone or iCloud Drive where your videos are stored Tap the List icon (three lines) in the top-right corner to change the view Tap on the dropdown arrow and select Sort by Size to group larger video files together Manually check files with similar sizes and names that might be duplicates Preview videos by long-pressing on their thumbnails To delete a duplicate, swipe left on the file and tap Delete While this method requires more effort, it gives you greater control over which files to keep or remove. Method 3: Third-Party Duplicate Finder Apps For more powerful duplicate detection capabilities, third-party apps offer advanced features and algorithms. Here are some top options: Gemini Photos Gemini Photos by MacPaw is one of the most popular duplicate finders: Download Gemini Photos from the App Store Launch the app and allow it to scan your media library Tap on the Videos section Navigate to the Similar or Duplicates category Review the suggested duplicates and select those you want to remove Tap Delete to remove the selected videos Gemini Photos uses smart algorithms to detect not only identical duplicates but also similar videos, making it more effective than the built-in Photos app. Photo & Video Duplicate Cleaner Another excellent option with a focus on media files:
Download Photo & Video Duplicate Cleaner from the App Store Open the app and grant necessary permissions Tap Scan Now to begin analyzing your library Select the Videos tab to focus only on video duplicates Review the found duplicates and check those you want to delete Tap Delete Selected to remove them This app offers a simple interface specifically designed for finding duplicate media files. Method 4: Using iCloud and Mac for Larger Libraries If you have a large video collection, using a Mac with your iCloud account can provide more powerful tools: Ensure your iPhone is synced with iCloud Photos On your Mac, open the Photos app Click on Albums in the sidebar Scroll to Utilities and select Duplicates Filter to show only videos by clicking on the dropdown menu and selecting Videos Review and merge duplicates as needed The larger screen and additional processing power of a Mac make handling large video libraries much easier. Method 5: Smart Storage Management Using iPhone Storage Recommendations Your iPhone offers smart recommendations to manage storage: Go to Settings > General > iPhone Storage Wait for the analysis to complete Check the Recommendations section Look for suggestions related to large videos or duplicated content Follow the provided options to optimize storage Using Optimize iPhone Storage Feature Enable the optimize storage feature to automatically manage video storage: Go to Settings > Photos Enable Optimize iPhone Storage This keeps full-resolution videos in iCloud while storing smaller versions on your device Tips to Prevent Duplicate Videos Preventing duplicate videos is easier than removing them later: Use iCloud Photos consistently: Don't switch between multiple backup services Check before downloading: Verify if you already have a video before saving it again Use the "Save Image" option carefully: In messaging apps, check if you already have the video Organize regularly: Set a monthly reminder to clean up your video library Use Albums: Create logical albums to better track your content Security Considerations When Using Third-Party Apps When using third-party duplicate finder apps, keep these security tips in mind: Only download from the App Store: Avoid sideloaded apps for handling your personal media Check privacy policies: Ensure the app doesn't upload your videos to external servers Review permissions: Only grant necessary access to your media library Look for reputable developers: Choose apps from established companies with good reviews Conclusion Finding and removing duplicate videos on your iPhone doesn't have to be a tedious task. From using the built-in Photos app's duplicates feature to leveraging specialized third-party applications, you have multiple options depending on your needs and preferences. Regular maintenance of your video library not only frees up valuable storage space but also makes your video collection more organized and accessible. By implementing the preventive measures discussed, you can minimize duplicate accumulation in the future and keep your iPhone running smoothly. Whether you choose to use Apple's native tools or third-party solutions, taking control of duplicate videos will enhance your iPhone experience and ensure you always have space for capturing new memories without worrying about storage limitations.
0 notes
Text
Is Apple Mail Backed Up with Time Machine?
Apple Mail is a widely used email client among Mac users, providing seamless integration with macOS and iCloud. Given the importance of email communication, ensuring that your Apple Mail data is securely backed up is crucial. One common method Mac users rely on for backups is Time Machine, Apple’s built-in backup solution. But does Time Machine back up Apple Mail? The short answer is yes, but there are nuances and limitations to be aware of.

In this guide, we will explore how Time Machine backs up Apple Mail, how to restore emails from a Time Machine backup, its limitations, and alternative backup solutions.
Understanding Time Machine and Apple Mail Backups
What is Time Machine?
Time Machine is a built-in backup feature in macOS that automatically creates snapshots of your system at regular intervals. It allows users to restore files, applications, and system settings to previous states in case of accidental deletion, corruption, or hardware failure.
Time Machine backs up:
System files and applications
User data (documents, photos, music, and emails)
System settings and preferences
How Time Machine Backs Up Apple Mail
Apple Mail stores emails in a special folder within your user library. When Time Machine performs a backup, it includes this folder, ensuring that your emails, attachments, and email account settings are saved. The primary locations where Apple Mail stores data are:
Mail Data Location: ~/Library/Mail/
Mail Preferences & Account Settings: ~/Library/Containers/com.apple.mail/
Mail Index & Metadata: ~/Library/Application Support/Mail/
Since these directories are included in Time Machine backups, your Apple Mail data is protected and can be restored if needed.
How to Restore Apple Mail Emails Using Time Machine
If you ever lose important emails or need to recover an older version of an email, you can use Time Machine to restore your Apple Mail data. Follow these steps:
Step 1: Open Apple Mail
Ensure that Apple Mail is open before launching Time Machine. This allows Time Machine to directly interact with Mail’s database.
Connect your Time Machine backup drive if it is not already connected.
Step 2: Launch Time Machine
Click on the Time Machine icon in the menu bar (top-right corner) and select Enter Time Machine.
Alternatively, go to System Settings > Time Machine, then click Enter Time Machine.
Step 3: Browse Backup Snapshots
Once inside Time Machine, you’ll see a timeline of backups.
Use the arrows or the timeline on the right to navigate to the date when the missing emails were still present.
The Mail interface will show the backed-up version of your inbox.
Step 4: Restore Emails
Locate the missing email or folder that you want to restore.
Click the Restore button. Time Machine will restore the email(s) to your Mail app.
Once the restoration process is complete, the email should reappear in your inbox.
Step 5: Restart Apple Mail
If the restored emails do not appear immediately, restart Apple Mail or reboot your Mac.
Limitations of Using Time Machine for Apple Mail Backups
Although Time Machine provides a convenient way to back up Apple Mail, there are some drawbacks to consider:
1. No Granular Email Backup
Time Machine does not allow you to selectively back up individual emails. Instead, it backs up the entire Mail database, which means restoring a single lost email may require restoring the entire Mail folder.
2. Backup Frequency Limitations
Time Machine takes hourly snapshots, but if you need a real-time backup of your emails, Time Machine may not be sufficient. If you receive and delete emails frequently, some emails may be lost between backup intervals.
3. Large Backup Size
Since Apple Mail stores all messages, attachments, and metadata within its directory, your Time Machine backup can grow significantly in size over time. This may result in a shorter retention period for backups due to storage constraints.
4. Corruption Risks
If the Mail database becomes corrupted, restoring from a Time Machine backup may also restore the corrupted database, making data recovery difficult. In such cases, a dedicated email backup tool may be more reliable.
5. External Drive Dependency
Time Machine requires an external drive or a network backup location to function. If you do not have a backup drive connected, your Mail data will not be backed up.
Alternative Backup Solutions for Apple Mail
Given the limitations of Time Machine, it is wise to consider additional backup options for your Apple Mail data. Here are some alternative methods:
1. Mail Backup X
Mail Backup X is a dedicated email backup tool that allows Mac users to:
Perform scheduled backups of Apple Mail
Compress and encrypt email archives
Store backups on external drives, cloud storage, or FTP servers
Search and retrieve emails easily
2. iCloud Backup
If you use an iCloud email account, your emails are already stored in Apple’s cloud servers. However, this does not protect locally stored messages or emails from other providers like Gmail or Outlook.
3. Manual Mail Export
You can manually export and save Apple Mail data by:
Opening Apple Mail and selecting the emails or mailbox you want to save.
Clicking File > Export Mailbox.
Choosing a location (external drive, cloud storage, etc.) to save the exported .mbox file.
This method is useful for creating specific backups but lacks automation.
4. Third-Party Cloud Services
Google Drive, Dropbox, and OneDrive offer cloud backup solutions. Some third-party applications can automatically back up email databases to these services.
Best Practices for Apple Mail Backups
To ensure your emails remain secure, follow these best practices:
Use Multiple Backup Methods: Combine Time Machine with another backup tool for redundancy.
Schedule Regular Backups: Ensure that Time Machine is running and backing up your system frequently.
Store Backups in Different Locations: Keep a copy of backups on an external drive and a cloud service.
Verify Backup Integrity: Periodically test your backups by restoring a small batch of emails.
Archive Old Emails: Store older emails separately to reduce the size of your primary backup.
Conclusion
Time Machine is a useful tool for backing up Apple Mail, but it is not a perfect solution. While it captures email data, it lacks fine control over individual email restoration and may not provide real-time protection.
For a more reliable backup strategy, consider combining Time Machine with a dedicated email backup tool like Mail Backup X or manually exporting your emails for additional security. By implementing a robust backup strategy, you can ensure your Apple Mail data remains protected from loss, corruption, or accidental deletion.
0 notes
Text
youtube
How to Convert MBOX to EML File Format?
The need to convert MBOX files to EML arises for several reasons, primarily to facilitate accessibility, compatibility, and ease of sharing. MBOX and EML are two distinct file formats used in different email clients. While MBOX files consolidate multiple emails into a single file, EML files store each email as a standalone file, compatible with a broader range of email applications. In this article, we’ll dive into an in-depth, step-by-step guide on converting MBOX to EML to improve email portability and ease of use.
Understanding MBOX and EML File Formats
What is MBOX?
MBOX (Mailbox) is a file format used by various email applications to store messages collectively within a single file. Commonly supported by Mozilla Thunderbird, Apple Mail, Entourage, and others, MBOX is an open-source format that saves all emails in a single text file.
What is EML?
EML (Email Message) is a more versatile format and widely used due to its compatibility across a larger variety of email clients, including Microsoft Outlook, Outlook Express, Windows Live Mail, and others. Each email is saved as a separate file with the .eml extension, preserving metadata such as sender, recipient, subject, and attachments.
Reasons to Convert MBOX to EML
1. Enhanced Compatibility EML files are compatible with multiple platforms, making them accessible across most email clients.
2. Better Organization Each email is saved as an individual file in EML format, making email management more organized.
3. Easier Backup and Restoration With each email stored individually, EML files allow for more streamlined backups and recovery in case of data loss.
4. Improved Portability You can transfer EML files to different devices easily, allowing users to read emails offline.
Methods to Convert MBOX to EML
There are several ways to convert MBOX to EML, including manual techniques and the use of automated tools. Here’s a look at the most effective methods available.
1. Manual Method Using Mozilla Thunderbird
Mozilla Thunderbird, an open-source email client, offers a simple way to convert MBOX files to EML format.
Steps to Convert MBOX to EML in Thunderbird:
Install Thunderbird: If you haven’t already, download and install Mozilla Thunderbird on your device.
Import MBOX File:
Go to Tools > Add-ons > Extensions.
In Top right you can see “ImportExportTools NG” and install it.
After installation, restart Thunderbird.
Use ImportExportTools NG to Import MBOX File:
In Thunderbird, click on Local Folders > Right-click > ImportExportTools NG > Import MBOX file.
Choose your MBOX file to import that file in thunderbird.
Export Emails to EML Format:
After MBOX import, select the emails or folders you want to export.
Right-click on the selected emails and choose ImportExportTools NG > Export all messages in folder > EML format.
Choose a path where you want to save the EML files.
This method is free and effective but may require more effort if you have multiple MBOX files to convert.
2. Using Dedicated MBOX to EML Conversion Software
For large volumes of emails or multiple MBOX files, you use our MBOX to EML converter tools are highly recommended like Webbyacad MBOX converter software.
Advantages of Using Webbyacad MBOX Converter Software:
Batch Conversion: Convert multiple MBOX files to EML in one click.
Retention of Metadata: Keeps email details intact, such as date, sender, recipient, and attachments.
Using Webbyacad MBOX Converter Software:
Download and Install: Download the Webbyacad MBOX Converter Software and install the software on your system.
Add MBOX Files: Select the Add File option to import MBOX files.
Select EML: Choose the EML option from the dropdown as the export format.
Choose Output Location: Specify where the converted EML files should be saved.
Start Conversion: Click Export to initiate the conversion.
Our software also comes with a free trial version, this allows users to test functionality before committing to purchase.
3. Online MBOX to EML Converters
For users who prefer not to install software, several online conversion tools can help convert MBOX to EML. These tools are typically free for small conversions, but they may have file size limits or lack privacy assurances. Always check privacy policies and limitations before uploading sensitive data.
How to Use an Online Converter:
Go to the Website: Visit the chosen online conversion tool’s website.
Upload MBOX File: Select and upload the MBOX file.
Select EML Format: Choose EML as the output format.
Download Converted Files: Once the conversion is complete, download the EML files to your device.
Note: Be cautious while using online converters, especially if the data is sensitive, as these tools may not guarantee data confidentiality.
Best Practices and Tips for Converting MBOX to EML
Backup Original Files: Always keep a backup of the original MBOX file in case any errors occur during conversion.
Use Reliable Software: When using third-party software, opt for reliable and reputable solutions to avoid data corruption or loss.
Check Compatibility: Ensure that your email client is compatible with EML files before converting.
Test on a Small File First: If you have a large volume of emails, start with a small file to test the conversion accuracy and software functionality.
Common Issues and Troubleshooting Tips
1. File Size Limitations: Some converters have file size limitations. Consider breaking down large MBOX files or using premium tools.
2. Loss of Attachments: Some conversion methods may not retain attachments. Ensure the software you choose explicitly supports attachment preservation.
3. Formatting Issues: After conversion, some emails may display formatting inconsistencies. Preview a few EML files in your email client before transferring the entire batch.
By following this comprehensive guide, you can successfully convert your MBOX files to EML and enjoy the enhanced flexibility, compatibility, and organization offered by the EML format. Choose the method that best suits your needs, considering factors like email volume, operating system, and any security concerns.
#mbox#migrate#mboxconverter#mboxtoeml#exportermboxtoeml#importmboxtoeml#transformmboxtoeml#outlook#tools#email migration#export mbox to eml#tranform mbox to eml#mbox to eml#Youtube
0 notes
Text
iPhone Data Recovery: How to Retrieve Lost Data from Your Device

Losing data on your iPhone can be a frustrating experience, whether it’s photos, contacts, messages, or important documents. Accidental deletions, software glitches, or hardware failures can all result in lost data. Fortunately, iPhone data recovery services, such as those provided by Apple Expert, offer a solution to recover your valuable information.
Common Causes of Data Loss
Accidental Deletion: This is perhaps the most common cause of lost data. Users often mistakenly delete files, messages, or photos that they later realize were important.
Software Update Issues: Occasionally, updating to a new iOS version can cause unexpected data loss, particularly if the backup process was incomplete.
Physical Damage: Water damage, drops, and other forms of physical harm can make it difficult to access or recover data.
Forgotten Passcodes: If you're locked out of your device due to a forgotten passcode, regaining access to your data can require specialized recovery tools.
Jailbreaking: While jailbreaking an iPhone offers more customization options, it also opens the door to increased risks of data loss or corruption.
Steps to Take After Data Loss
Stop Using the Device: If you suspect data loss, it’s essential to stop using your iPhone immediately. Continued use may overwrite the deleted data, making it more difficult to recover.
Check Your Backup: Before considering professional recovery services, check whether you have recent backups in iCloud or iTunes. If a backup is available, restoring your iPhone to a previous state may solve the problem.
Seek Professional Help: If backups aren’t available or they don’t contain the lost files, professional iPhone data recovery services can offer advanced tools to retrieve your information.
iPhone Data Recovery Methods
Using iCloud Backup: If your iPhone was backed up to iCloud before the data loss, you might be able to recover your data by restoring from the backup.
Go to Settings > General > Reset > Erase All Content and Settings.
After erasing the content, follow the setup process and choose Restore from iCloud Backup.
Using iTunes Backup: If you have synced your iPhone with iTunes, you can restore your lost data using this method.
Connect your iPhone to your computer and open iTunes.
Select your device and choose Restore Backup.
Select the most recent backup and click Restore.
Third-Party Software: Several third-party applications are available to help recover lost iPhone data without a backup. These tools connect to your device, scan it for recoverable files, and allow you to retrieve what was lost.
Professional Data Recovery Services: If you can’t recover the data yourself or the issue is due to physical damage, professional recovery services like Apple Expert use specialized tools to recover data. Their experts can retrieve data from damaged devices or corrupted files that may be beyond the scope of standard recovery tools.
What Data Can Be Recovered?
Professional iPhone data recovery services can often retrieve a wide variety of lost data, including:
Photos and Videos: Personal memories, family pictures, and recorded videos can all be restored.
Contacts: Lost phone numbers and email addresses can be recovered.
Messages: Whether it's iMessages, SMS, or MMS, your lost conversations may be restored.
Documents: Important work files, PDFs, and other documents stored on your iPhone can be retrieved.
App Data: Information from apps, such as notes, calendars, and browsing history, can also be recovered in some cases.
How Long Does iPhone Data Recovery Take?
The time required for iPhone data recovery depends on the extent of the damage and the amount of data that needs to be recovered. In most cases, professional recovery can take anywhere from a few hours to several days. The complexity of the issue, such as physical damage or encrypted data, can also influence the duration of the recovery process.
Preventing Future Data Loss
To avoid the inconvenience of data loss in the future, consider the following precautions:
Regular Backups: Regularly backing up your iPhone to iCloud or iTunes ensures that even if data loss occurs, you can easily restore your device to a previous state.
Enable iCloud Sync: By enabling iCloud sync for essential apps such as Photos, Contacts, and Notes, your data is constantly updated and saved in the cloud.
Use a Passcode and Face ID: Adding a passcode and enabling Face ID can help secure your phone from unauthorized access.
Avoid Jailbreaking: While it may seem appealing to jailbreak your device, it increases the risk of data corruption and loss.
Why Choose Professional Data Recovery?
Choosing a professional iPhone data recovery service like Apple Expert comes with several advantages:
Expertise: Professional technicians are trained to handle complex data recovery processes and can retrieve data even from physically damaged devices.
Advanced Tools: They use advanced data recovery software and hardware tools that are not available to the general public.
Safe Process: Professionals ensure that your iPhone’s hardware and software are not further damaged during the recovery process.
Losing important data on your iPhone doesn’t have to be a permanent problem. By taking the right steps and seeking professional help, you can recover photos, messages, and other crucial data. Services like Apple Expert offer reliable and secure iPhone data recovery solutions, helping you retrieve your lost files efficiently.
0 notes
Text
Know the details of Thunderbird backup email here
In order to keep one’s data safe and updated it is vital that one carries Thunderbird backup email on a regular basis. The process however can be complicated and even induce data safety concerns. With the availability of several third-party software, people have given over the idea of manual backup and archiving. However, even with the availability of such software, it is important that one checks them for their reliability and compatibility with data. The first thing you can do in that direction is to educate yourself about Thunderbird, check here- https://en.wikipedia.org/wiki/Mozilla_Thunderbird.
Thunderbird email backup service in alignment with your requirements

You can backup mail Thunderbird with Mail Backup X and carry a lot of associated tasks with it at no extra cost. It is priced quite reasonably considering how wide-ranging the facilities it provides are. It is also quite safe for all types of data, is compatible with all sorts of mail file formats to. To ensure that the user feels safe using this Thunderbird email backup tool it has been designed to work in the offline mode.
How to restore Thunderbird mail backup without moving your fingers
One does not have to be adept at the task of Thunderbird email backup in order to carry it regularly. Using this software on a regular basis will provide the desired results. Also important is the capacity of this software to backup and archive data not only from Thunderbird but from Gmail, Hotmail, apple mail, yahoo mail, outlook, and postbox.
Closely associated with the ability of this software to backup and archive data from various sources is the integrated mail viewer. In order to work with data from several sources one would not have to skip continuously from one platform to another, the mail viewer makes sure of that. It works by bringing data from various sources at one place.
Convert mail file formats and use ftp client for additional safety
As this software supports several mail file formats it is also capable of providing the facility of changing mail file formats. It can be used to change the format of the data files to and from .olm, .eml, .pst, .mbox, and .rge.
The ftp client on the other hand makes sure that one can carry backup of data on a regular basis without themselves intervening. The ftp client continuously backs up data and provides the facilities of primary backup and mirror backup as well.
Faster search results and more storage space
With this software you will have the freedom to backup as many files as you want since it meanwhile also saves storage space. It manages to do that by compressing the files methodically.
One does not have to waste time looking for even a bit of data. The ultra-fast data search module can find out any variety of data within nanoseconds.
You can try these features out immediately by purchasing the software. A free demo version of it is also available www.mailbackupx.com/thunderbird-backup-email/.
1 note
·
View note
Text
Restore email mac mails with zero tolerance data integrity
Data integrity is often misjudged when it comes restore mac email. It is about overall accuracy, completeness and consistency of data. So whenever, data transfer takes place, the tool is expected to transfer or convert eh files with completeness and accuracy.
A non-accurate or incomplete transfer of data means the file is unreadable or unrecognizable or broken. In worst cases, the data files transfer or conversion does not take place.
This makes it very crucial to use a highly skilled restore mac email tool for an efficient transfer with zero tolerance data integrity.
We deliver a highly skilled and well-engineered product Mail Backup X. The one of its own kind to restore email mac mails. A tool that maintains hundred percent data integrity and also restore mac email addresses.
The factor is also visible in the applications of the restore mac email app delivering complete data file without any deviation.
Different particulars are transferred while taking backup of emails from Mac. Therefore. We also make sure that mac users undergo the information on Mac OS and Apple mail for a detailed tour on different aspects of them. So, it is advisable to browse the below links on Mac OS and Apple mail for more information.
Maintain data integrity factor in various applications that restore mac emails
It is indicative of the fact that different applications of this restore mac email software preserves data integrity while taking backup of emails from Mac.
The third party mail archive application supports reading and import of common mail archives file formats like .mbox, .rge, .olm, .olk, .pst, .eml, that store mail data by mail clients like Outlook Mac, Outlook Windows, Office 365, Thunderbird, Postbox, Gmail, Yahoo etc.
The inbuilt mail archive application allows you to view important mails from different mail clients. The product allows you to read and import archive files from Mbox viewer, RGE viewer, OLM viewer, OLK viewer, PST viewer, EML viewer without the need to switch between or open mails with different mail clients.
The third application of inbuilt mail migration application is an advanced mail conversion feature to use mail client of your choice on Mac OS. It permits you convert and export mail data to all major mail data file formats like .mbox, .rge, .olm, .pst, .eml.
Test the tool to explore the best way to restore mac email
The best way to explore the data integrity factor is by testing the tool for a realistic experience.
All you need is to download the demo version of the restore mac email tool and on Mac. Use it for 15 days until the validity expires.Switch to the licensed version of the tool, once satisfied.
For complete access of the product, you can click on the licensed version of the tool along with a product key.
For more details on the software, log on to the below website and get all your queries answered in a systematic manner www.mailbackupx.com/restore-mac-email/.
#mac restore tool#mac mail restore#restore mac mailbox#restore mac folder#restore mac data#restore mac files#restore mac email
1 note
·
View note
Text
Best solution to restore Apple email
Don’t look any further for a solution to restore Apple email
Maybe you have never felt the need to restore data. But you keep hearing the experts telling you to archive email data and keep ready for restore if need be. You cannot ignore this advice as it is extremely valid and important. Archiving emails and backing up data regularly is what any wise person will do because we know how data is so prone to damage or hacking or other kind of losses. This is especially true when original messages don’t get stored in device like the case with IMAP based services. You will need to restore Apple email in a case you lose data due to any reason like hardware failure or some other. You will be able to restore only if you have backed it up or archived email folders. Else, you will not be able to do anything. You need a good backup and recovery option for this. Although we will be focusing on a method which covers all IMAP based email services like Gmail, Thunderbird, Yahoo, etc., you can read a little about Apple email to get a fair idea why we must backup emails. Here is the link- https://en.wikipedia.org/wiki/Apple_Mail
Best way to restore Apple email is with a certified software

There are a few methods available to backup as well as restore Apple mails and other on Mac. Yet, you see experts recommending only certified tools. Why is it so? Why don’t they recommend a manual method or maybe restore Apple email app which works online? There must be some factor behind it. While manual methods are never recommended for any similar task which is to be done regularly, they also pose a great challenge to novices. And when we talk of online apps, they are fraught with dangers like data loss, data stealth, corruption, etc. Along with these risks, there is almost zero support available for any doubts or mishaps. This means we shouldn’t be using these apps. We should only use a reliable certified archiving and restoring tool like Mail backup X by InventPure. This is the best one out there for end users.
Now restore Apple email account and other multiple accounts in a short, precise, and easy way
This tool makes it really easy, quick, as well as accurate to backup and restore IMAP emails on Mac. There is something else also which we need to look at. If I am in a need of a software, and I have heard good things about it, even then it would be normal for my mind to have some doubts. All users face these doubts and thus this issue must be settled. This issue is settled by bringing to users a free albeit a limited use demo of this backup tool so that their doubts are settled. They can use most of the important functions that the full restore Apple email tool comes with and once satisfied, they can purchase full version for daily data preservation in the manner they prefer https://www.mailbackupx.com/restore-apple-email/.
1 note
·
View note
Text
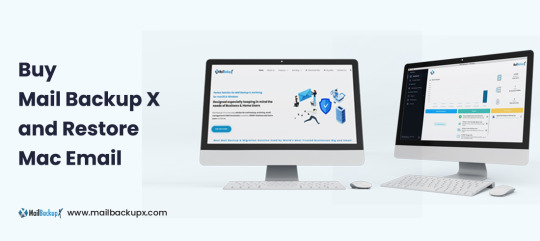
An easy process on how to backup apple email
I want to share my experience on apple email backup because most of the mac users are used to apple mailbox like me. There are various reason to support it however; my favourite reason is configuration of other mail clients in apple.
If you are wondering that apple mail supports other email services as well then you should definitely click below link for more information.
Many people still wonder on the subject ‘apple email backup and restore’, may be because they are confused on how to do it.
So, I thought to introduce an apple email backup tool to provide a perfect apple email backup solution.
So, just follow the easy steps of this apple email backup software.
Step 1 Launch the application of Mail Backup X by InventPure, it will display a dashboard on the screen. Select ‘Add new backup’ under Backup Setup for apple mail.
Step 2 After clicking on Add new backup, it will display a list of different IMAP accounts like Office 365, Mozilla Thunderbird, GMAIL, Postbox and so on. Select apple mail from the dialog box.
Step 3 The next step allows the tool to load data from the selected source yahoo mail. The tool will scan through the database and read the email files that are require for archival. It will take few minutesfor the tool to scan the files in your database. In few minutes, you get an actual status of the files and items being scan and procure.
Step 4 The next step is to choose apple email backup folder as the storage and click on done for completion. It allows picking the location where you want to back up the data. You can browse in your folders and choose the right place to store it. You can assign a name to the yahoo backup file to locate it later. You can also choose the option for automatic detection of changes in your database so that they can be sync to the backup. The tool offers this option as an added benefit that can be rarely found in the tool. The tool is loaded with advanced algorithms, which can detect and sync the changes made in the database.
Step 5 The next screen is the Backup confirmation screen which shows the status of the backup that has been completed. It also shows the total number of files that are back up along with a backup log. You can see how many backups being synchronized. This is the final confirmation step that makes yousure that your files have been backed up successfully and with accuracy.
Demo version of the tool eases the selection process

Even if I have produced the steps, it is important to go ahead with the registered version of the tool but not before you test it. It is advised to test the tool with a fifteen days demo version to understand more about the tool and clear your doubts. That is why, I have produced the link of the website below https://www.mailbackupx.com/how-to-backup-apple-mac-mail-mails-on-mac/.
#apple email backup#apple mail#apple mailbox#apple mailbox backup#backup apple mailbox#apple mail tool
0 notes
Text
Exploit 128GB iCloud Storage to Optimise iPhone!
Apple iCloud Storage
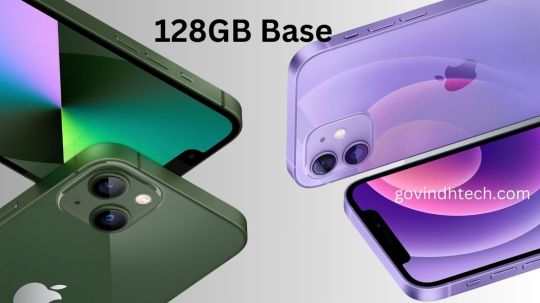
Apple claims in its most recent advertisement that the iPhone 15 provides “lots of storage for lots of photos.” That depends on how you use your iPhone and the storage option you pick. These factors should be considered before spending.
128GB is the minimum storage capacity available for the iPhone 15. So much more than the 64GB standard till the iPhone 13 in 2021. The default storage choice for Apple’s next gadget may seem substantial when compared to 2018’s iPhone X’s 64GB.
This generational upward increase in storage needs, however, is only a reflection of our expanding digital habits, which now include anything from multi-gigabyte triple-A games and high-resolution photos to vast app libraries.
The iPhone 15’s camera now records 4K videos and takes 48-megapixel pictures, so these high-resolution files take up a lot of space. While these developments certainly improve the quality of collected video, they also consume local storage capacity, making what was formerly thought to be sufficient space inadequate for the demands of a large number of users.
Apple iCloud
Free 5GB storage protects your pictures, movies, notes, and more, automatically backed up and accessible anywhere. Upgrade to iCloud+ for greater storage and data privacy. All iCloud power. Plus.
iCloud images
Securely stores and protects your original high-resolution images and videos for life with lightweight space-saving versions on all your devices. Whatever it is a video of your pet at the beach from yesterday or a snapshot of your buddies from years ago your complete collection is accessible and shareable anywhere.
Shared Photo Library
Is the easiest method to share photographs and videos with up to five people. Featured Photos & Memories lets you relive your trips with shared library material.
Shared Albums
Makes it simple to share images with the individuals you desire, like merging road trip photos with pals or updating relatives on kids’ exploits. When the album is updated, your friends are alerted and may contribute photographs, videos, and comments.
iCloud Drive
Makes your saved files and folders accessible and shareable across devices. The iOS and iPadOS Files app and the Mac Finder provide access to them all.
iCloud Backup
Every time your iPhone or the iPad is powered on and connected to Wi-Fi, iCloud Backup automatically backs up your vital data, including your favourite applications.
Restore
Restore or set up a new device from your iCloud backup to effortlessly transfer your images, data, contacts, applications, settings, and more.
iCloud to the Rescue?
The limited capacity on devices is addressed by Apple’s iCloud service, which offers a variety of options beyond the meagre 5GB of free storage, which is, to be honest, inadequate for the majority of users. There are three storage membership tiers available for Apple’s paid iCloud+ storage: 50GB, 200GB, and 2TB. Additional services like iCloud Private Relay, Hide My Email, and Custom Email Domains are included with all of the tiers. Subscribers pay $0.99 for 50GB, $2.99 for 200GB, and $9.99 for 2 TB of cloud storage.
Apple provided 6TB and 12TB storage alternatives for those with large storage demands. These are expensive and need an internet connection to view your data. Monthly prices for iCloud+ plans are $29.99 for 6TB and $59.99 for 12TB. Compare Google’s 5TB and 10TB cloud storage plans for $24.99 and $49.99 per month.
iCloud Storage vs iPhone Storage
While Apple provides 256GB and 512GB upgrade choices, with an extra 1TB option for the iPhone 15 Pro, both the normal iPhone 15 models and the iPhone 15 Pro models start with 128GB of storage. (The initial 256GB of capacity on the iPhone 15 Pro Max models is twice that of subsequent versions, which provide 1TB and 512GB of storage).
For buyers who value enormous amounts of space on their smartphone, Apple offers the iPhone 15 Pro with an aggregate capacity of 1TB. However, it costs $1,499-$700 more than the ordinary model. Thus, considering a lower-capacity device and adding iCloud storage may be more cost-effective and feasible. A 1TB iPhone 15 costs $200 more than five years of 2TB iCloud storage spaces. which is $500 less expensive and may last longer than the gadget itself.
Ultimately, the choice you choose will be based on how you use your data and how much you value instantaneous offline access vs the flexibility and possible cost savings of cloud storage.
Storage alternatives for iPhones
It seems sense that Apple will eventually raise the base storage of all of its iPhone models to 256GB given the present trend. It is certainly past time that it also reevaluates the meagre 5GB of free iCloud storage that it provides in favour of a more substantial allotment that more accurately represents the realities of contemporary digital use habits.
Options for iPhone storage expansion
Make advantage of iCloud storage: You may keep your images, movies, and other material on the cloud by using one of Apple’s premium iCloud storage plans. Your iPhone may have more space after doing this.
Unused applications may be offloaded from your iPhone using a function that allows you to do just that. By doing this, you may make more space on your smartphone without fully removing the app.
FAQS
Who would need more capacity than 128GB?
Power users: These may include anybody who downloads a lot of music or films for offline viewing, photographers or videographers who save a lot of material on their device, or gamers who download big games. Individuals that save a large amount of data on their phone: You could run out of space with 128GB if you don’t want to delete old pictures, movies, or programmes.
Read more on Govindhtech.com
#iPhone15#iPhoneStorage#cloudstorage#govindhtech#ios#ipad#news#technews#technologynews#technology#technologytrends
0 notes
Text
Same Day Geek — Your Trusted Tech Companion in BC, Canada
Welcome to Same Day Geek, where technology meets expertise, and solutions meet satisfaction. We are your one-stop destination for all things tech-related, offering a comprehensive range of services tailored to meet your needs. With a focus on quality, reliability, and customer satisfaction, Same Day Geek is here to elevate your tech experience and simplify your digital journey.
1. Viruses and Spyware Removal — Protecting Your Digital Sanctuary

2. Internet and WiFi Set Up — Connecting You to the Digital World
In an era defined by connectivity, a reliable internet connection is essential for staying connected to the digital world. Whether setting up a new network or optimizing your existing setup, Same Day Geek is here to help. Our experienced technicians are well-versed in internet and WiFi setup, ensuring seamless connectivity and optimal performance for all your devices. From router configuration to network optimization, we’ll have you connected in no time, so you can enjoy smooth and uninterrupted access to the online world.
3. Mac Repair — Restoring Your Apple Experience
Mac users know that when it comes to technology, nothing compares to the Apple experience. But even the most reliable devices can encounter issues from time to time. That’s where Same Day Geek comes in. Our team of Apple-certified technicians is dedicated to providing top-notch Mac repair services, ensuring that your beloved device receives the care and attention it deserves. Whether it’s a hardware issue or a software glitch, we have the expertise and tools to diagnose and repair your Mac quickly and efficiently, so you can get back to enjoying the seamless performance and intuitive design that Mac users love.
4. Disaster Recovery and Backup — Safeguarding Your Digital Assets

5. Cloud Storage and Backup Services — Embracing the Power of the Cloud
In today’s fast-paced world, the cloud offers a powerful solution for storing, accessing, and sharing your data anytime, anywhere. At Same Day Geek, we offer cutting-edge cloud storage and backup services designed to streamline your workflow and enhance your productivity. Whether you’re a small business looking to store critical files securely or an individual seeking seamless access to your data on the go, our cloud storage solutions have you covered. With Same Day Geek’s cloud storage and backup services, you can enjoy the flexibility, scalability, and security of the cloud, without compromising on performance or reliability.
6. Hosted Exchange Service — Streamlining Your Communication
Effective communication is the cornerstone of any successful business. With Same Day Geek’s hosted exchange service, you can streamline your communication processes and enhance collaboration across your organization. Our hosted exchange service offers enterprise-grade email solutions with advanced features like shared calendars, contacts, and tasks, ensuring seamless communication and collaboration among your team members. With Same Day Geek’s hosted exchange service, you can enjoy reliable, secure, and scalable email solutions tailored to meet your business needs, so you can focus on what you do best — growing your business.
7. Network Support Services — Keeping Your Network Running Smoothly
In today’s interconnected world, a reliable network is essential for staying connected and productive. At Same Day Geek, we offer comprehensive network support services designed to keep your network running smoothly and efficiently. Whether you’re a small business looking to optimize your network performance or a large enterprise seeking proactive network monitoring and management, our team of experienced technicians has the knowledge and expertise to meet your needs. From network installation and configuration to troubleshooting and maintenance, we’re here to ensure that your network remains secure, stable, and responsive, so you can focus on achieving your business goals.
8. Computer Training and Lessons — Empowering You with Knowledge

9. Microsoft Office 365 — Unlocking the Power of Productivity
In today’s fast-paced business environment, productivity is key to success. With Microsoft Office 365, you can unlock a world of productivity and collaboration tools designed to streamline your workflow and enhance your efficiency. At Same Day Geek, we offer comprehensive Microsoft Office 365 services tailored to meet your business needs. Whether you’re looking to migrate to Office 365, optimize your existing setup, or troubleshoot technical issues, our team of certified professionals has the expertise and experience to help you get the most out of your Office 365 investment. With Same Day Geek’s Microsoft Office 365 services, you can enjoy seamless access to your favorite Office apps, secure cloud storage, and powerful collaboration tools, so you can focus on what matters most — growing your business.
10. Local SEO Services — Elevating Your Online Presence
In today’s competitive digital landscape, having a strong online presence is essential for attracting customers and growing your business. With Same Day Geek’s local SEO services, you can elevate your online visibility and reach your target audience more effectively. Our team of SEO experts specializes in local search optimization, helping you rank higher in local search results and attract more qualified leads to your website. Whether you’re a small business looking to improve your local search rankings or a large enterprise seeking to expand your online presence, our tailored SEO solutions can help you achieve your goals. With Same Day Geek’s local SEO services, you can drive more traffic to your website, generate more leads, and grow your business online.
Your Trusted Partner in Technology
Same Day Geek is your trusted partner in technology, offering comprehensive solutions to meet your every need. From virus and spyware removal to cloud storage and backup services, we have the expertise and experience to help you navigate the complexities of the digital world. With a focus on quality, reliability, and customer satisfaction, we’re committed to delivering exceptional service and support every step of the way. Whether you’re a small business, a large enterprise, or an individual seeking to enhance your tech experience, Same Day Geek is here to help you succeed. Contact us today to learn more about our services and discover how we can empower you on your tech journey.
0 notes