#cc camera package
Explore tagged Tumblr posts
Visit Tumblr Blog
Explore Tumblr blogs with no restrictions, modern design and the best experience.
Last Seen Tumblr Blogs


Fun Fact
In February 2021, Tumblr had 518.6 million blog accounts.
Text
cc camera price in bangladeshcc camera price in bdmini cc camera price in bangladeshwifi cc camera price in bangladeshcc camera package price in bangladeshcc camera set price in bangladeshbest cc camera in bangladeshcc camera packagesmall cc camera price in bangladeshxiaomi cc cameracc camera price in dhaka4k cc camerabest cc camera brand in bangladeshcc camera bd
#cc camera price in bangladesh#cc camera price in bd#mini cc camera price in bangladesh#wifi cc camera price in bangladesh#cc camera package price in bangladesh#cc camera set price in bangladesh#best cc camera in bangladesh#cc camera package#small cc camera price in bangladesh#xiaomi cc camera#cc camera price in dhaka#4k cc camera#best cc camera brand in bangladesh#cc camera bd
0 notes
Text

Get to Work "Falutenous Awning" + @ravasheencc's Ring Light (as a table lamp) - 4t3 conversion - for @bomberrysims
It's over! OK, actually it has been over for a while, I just wanted to upload the sets thematically, so I ended up putting these two last.
And it's kinda obvious - now the ring light works as a light, and it still has the slot for cameras. No fullbright shader now because now it's functional.
As for the awning - it's really, really pretty. Kinda impressed on how it turned out in game.
p.s. I'm still working on CC outside commissions - some people already know about the kit I'm converting and some accessories that are lamost done except for thumbnails :P
DOWNLOAD (package): Dropbox /SFS
94 notes
·
View notes
Text


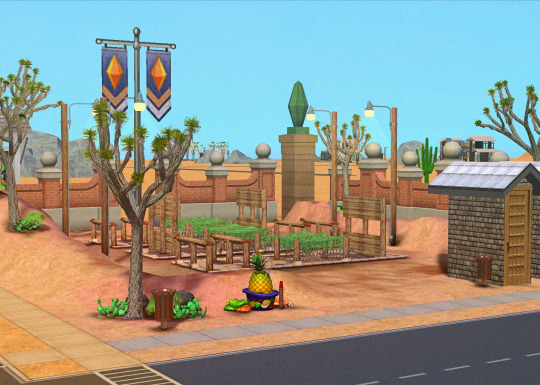


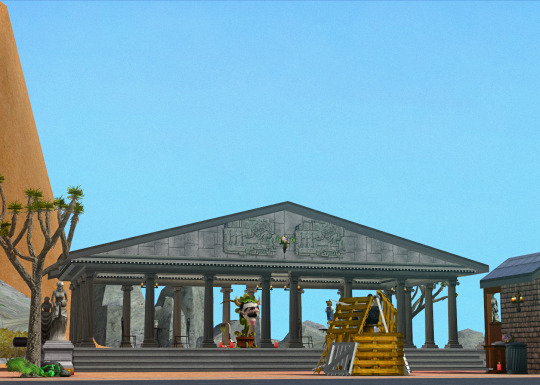

Pretersolaria Institute: CC-Free Uni & Individual Lots
Eventually I want to share the entirety of Rhyolite Valley, but it's a bit hairy with the 47 sims & CC hood deco & the garbage data I let seep in while playing (so I'd have to remake all of that before sharing).
I thought I'd "practice" the process of remaking the hood by starting a little smaller: The uni subhood. Since I only made a handful of sims for it (which are not included... yet) and it works aesthetically without CC hood deco. Sounds simple, right? Weelllll it took about a week of near daily effort to actually do. Makes the prospect of doing the actual hood soooo much more exciting lol /s
Anyway, that's what this is: A new university subhood template that's CLEAN & EMPTY. As a bonus (or if you just don't like the subhood), I've also included individual lot packages for every lot in the subhood to use wherever you want.
The "gimmick" of this hood is that Rhyolite Valley, and by extension Pretersolaria Institute, is entirely self-sufficient & cobbled together by the local residents. Which means there's no indoor plumbing lol.
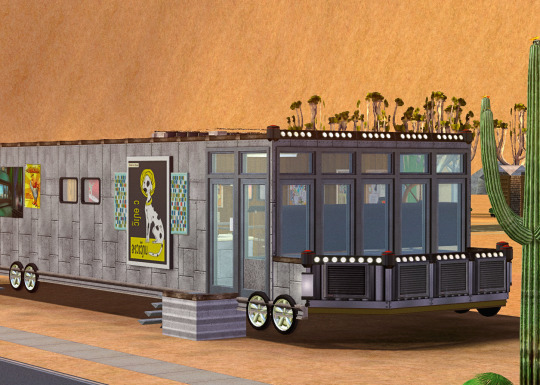
That also means simply sitting down at a computer to write a term paper isn't as easy as a regular uni. Students have to go to THE BOOKMOBILE to access computers. Same goes for the skill building required for each semester/major. You have to venture out to the relevant community lot to find the means for skill building.
I've included in the uni's photo album & the lot descriptions which skills are available to build on each lot. It'll say "+Cooking" or whatever skill(s) the lot can provide based on the objects it has.
— WHERE/HOW TO INSTALL: —————————
Place the "PRTR" folder in its entirety in the "Program Files > EA GAMES > The Sims 2 University > TSData > Res > NeighborhoodTemplate" directory. Or whatever equivalent location you have for a TS2 University folder in the Program Files section.
Mootilda's Subhood Selection Mod is required to see additional universities below the main 3 pre-made ones.
You can then select Pretersolaria Institute in the list of options when creating a new uni subhood in a neighborhood.
— UNI SUBHOOD LOT INFO: ——————————
• Dorms: 1 (Klaatu Mobile Park)
6br / 5ba | Value: §20,444 | Size: 30 x 20
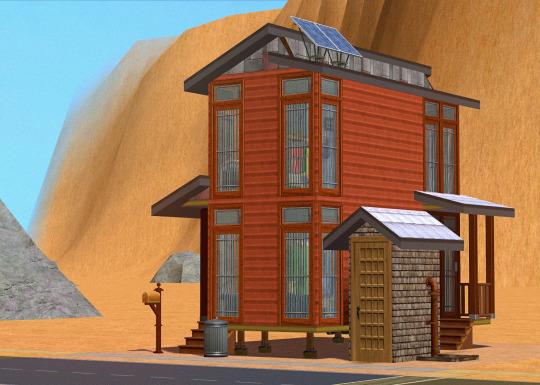
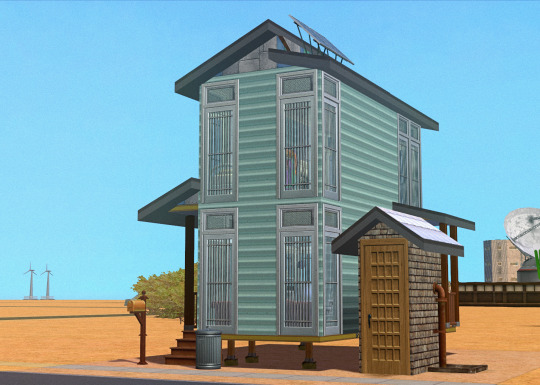
• Residential: 3 (Fulquard, Mushnick, & Burson Shack)
1br / 1ba | Value: §3,816-§3,862 | Size: 10 x 10
• Greek House: 1 (Tobor Testing Bureau)
10br / 10ba | Value: §30,363 | Size: 30 x 20
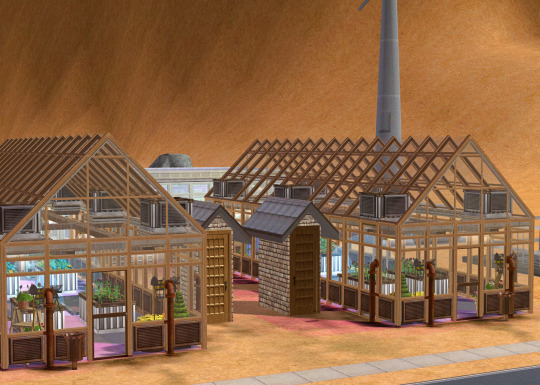
• Community: 6 (Wiploc Amphitheatre, THE BOOKMOBILE, Ikron Confectioneries, Zarkov Training Center, Big Heart Dude, Krelboined Horticulture)
• Secret Society: 1 (Temple of Laganaphyllis)
Value: §56,035 | Size: 20 x 20 | Zone: Community (individual version)
— NOTES: ———————————————————
• On 2 lots (Big Heart Dude & Wiploc Amphitheatre), I used the Seasons Music career reward The Rock Hammer for speaker deco. I used MoveObjects to delete the guitar but keep the speakers.
It's possible that either A. The guitars will respawn when you move the lot in the hood, or B. Sims will attempt to play the guitar and complain about being blocked (because I purposely blocked them).
If the guitars respawn, open the lot in Buy/Build mode and with MoveObjects On use the sledgehammer tool to remove the guitar.
If sims are complaining about not being able to reach the guitar, well they're not supposed to be able to lol. If hearing them complain is annoying, you can either use this mod that makes them stop yelling when something blocks them and leaves only the thought bubble, or delete the whole object.
• The Wiploc Amphitheatre may also have some glitchy-looking ground that you can see in neighborhood view when the camera moves. This is because I shortened the lot with Lot Adjuster. I don't know how to make it stop doing that, because I've transferred the lot to other hoods, packaged the lot, Lot Cleaner'd it, Lot Compressor'd it, moved it to the Lots & Houses Bin, etc. and it has never stopped looking like that. So again if that annoys you, remove the lot I guess?
• Please let me know if there are any additional problems.
I've never done this before specifically with a uni subhood, so it's very likely I messed up somewhere.
Additional Interior/Detail Pictures
DOWNLOAD UNI SUBHOOD: SFS | MF
DOWNLOAD INDIVIDUAL LOTS: SFS | MF
#cc free lot#no cc lot#download: lot#sims 2 cc#ts2cc#s2cc#ts2 download#sims 2 download#my cc#Pretersolaria Institute#download: hood#download: community lot#download: dorm#download: residential lot#grunge sims
981 notes
·
View notes
Text
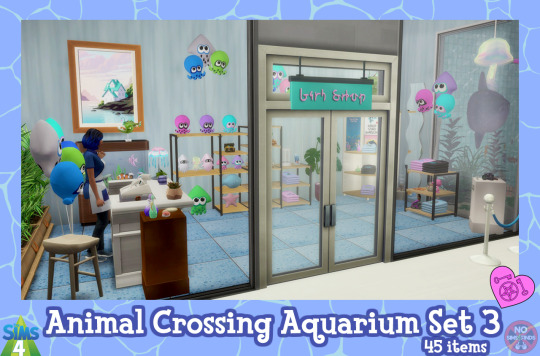

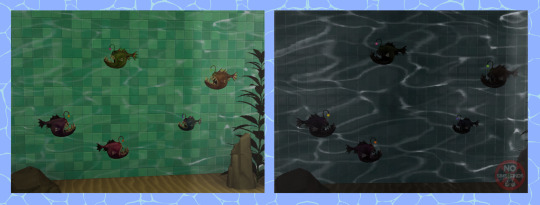

🐟 🎁 ACNH Aquarium Set 3 🎁 🐟
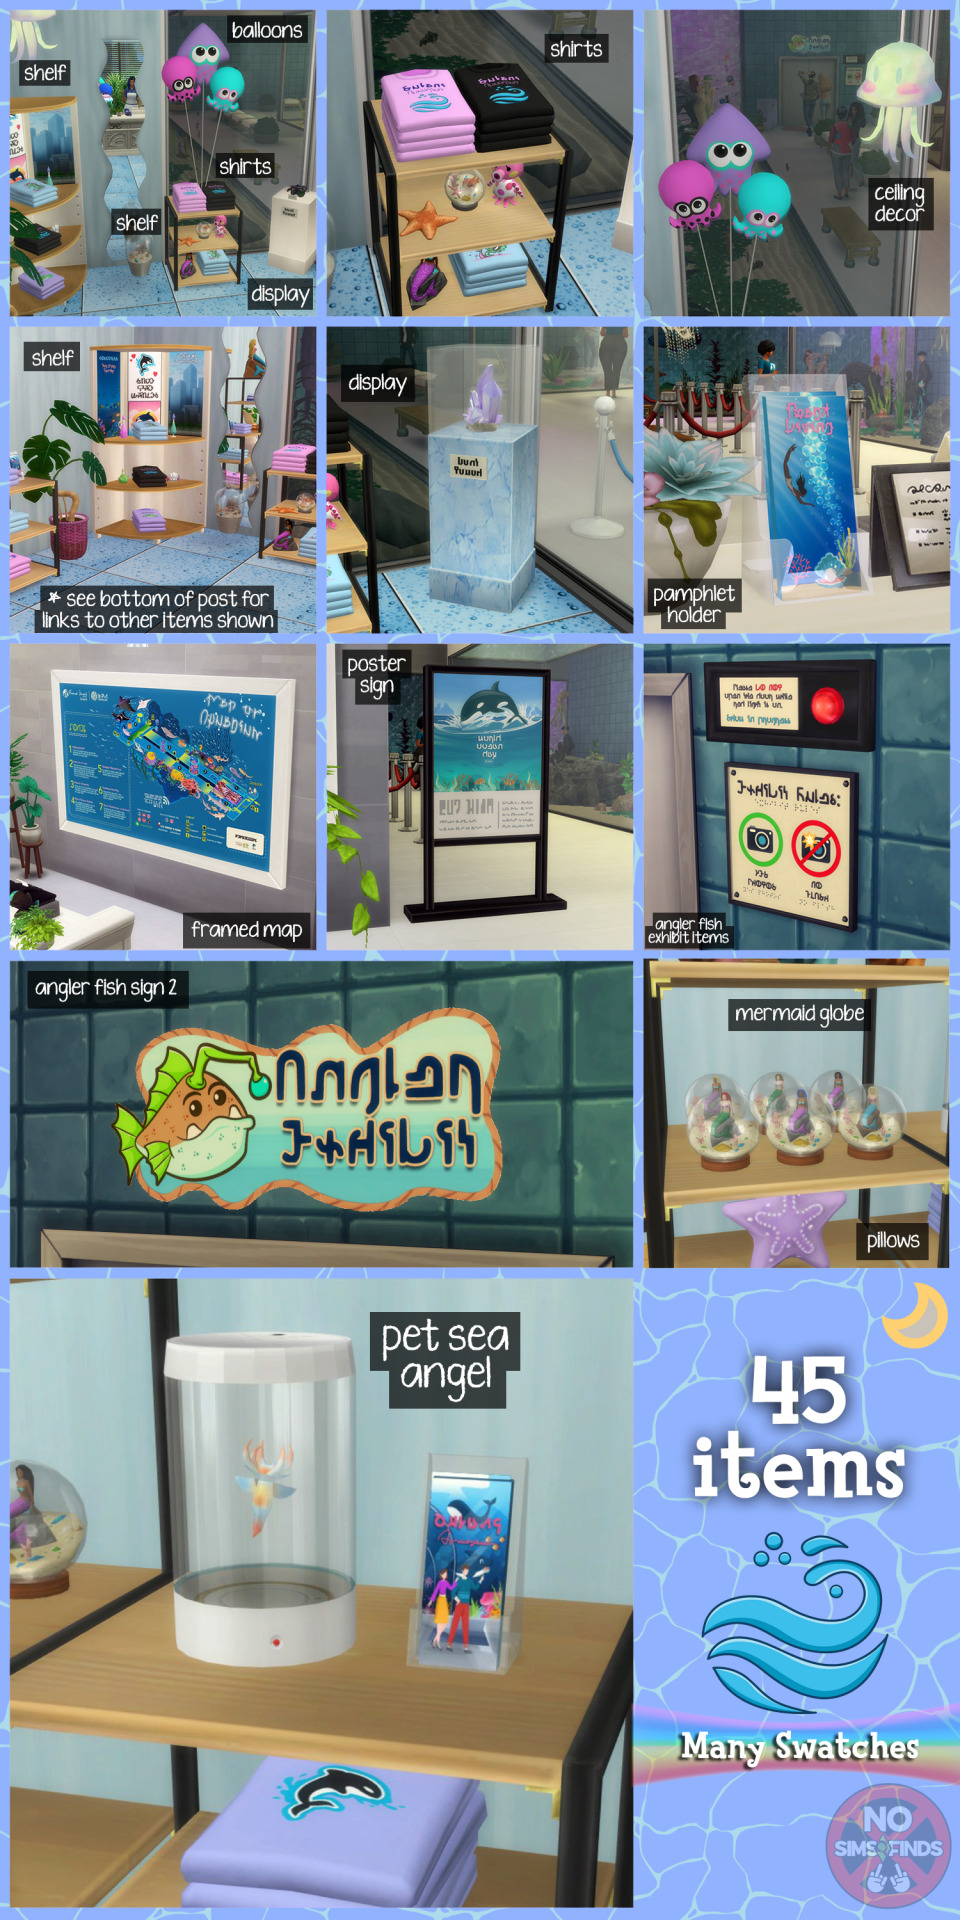
Here is the third part of the aquarium stuff! With some extras added, as always, made with love by me - 💗💗💗 This set mainly focuses on gift shop items, and some Angler Fish exhibit items (but there are lots of things!)
Sims 4, Base game compatible. 45 items | Check item list below for swatch numbers, most items have multiple swatches | Many extra swatches on many items added by me
I hope you enjoy! 💗
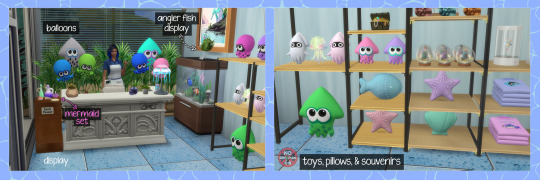
Set contains: -Angler Exhibit Fish Display 1 (ACNH) | 1 swatch | 1177 poly -Angler Exhibit Fish Display 2 (EA) | 5 swatches | 1341 poly -Angler Exhibit Light: On & Off (2 items) | 7 swatches each for light color | 242 poly each -Angler Exhibit Sign 1 (cameras) | 9 swatches frame color | 118 poly -Angler Exhibit Sign 2 (main exhibit sign) | 3 swatches | 2 poly -Angler Fish (glowing ball) | 5 swatches | 1215 poly -Framed Map | 6 swatches frame color | 38 poly -Gift Shop Balloons 1 & 2 (2 items) | 5 swatches each | 1862 poly each -Gift Shop Chest | 3 swatches | 1904 poly -Gift Shop Enclosed Display | 12 swatches | 148 poly -Gift Shop Enclosed Display No Glass | 12 swatches | 98 poly -Gift Shop Enclosed Display with Tag | 12 swatches | 204 poly -Gift Shop Enclosed Display with Tag, No Glass | 12 swatches | 154 poly -Gift Shop Fish Pillow | 5 swatches | 218 poly -Gift Shop Folded Shirts 1 & 2 (2 items) | 19 swatches each | 202 & 162 poly -Gift Shop Mermaid Globe (mermaid item inside borrowed from srslysims!) | 14 swatches | 1273 poly -Gift Shop Octopus Plush | 9 swatches | 638 poly -Gift Shop Pet Sea Angel | 3 container colors, 2 fish colors, 6 total swatches | 622 poly -Gift Shop Shelf 1 (small, 3 shelf) | 13 swatches | 494 poly -Gift Shop Shelf 2 (corner) | 11 swatches | 366 poly -Gift Shop Shelf 3 (tall, 5 shelf) | 13 swatch each | 854 poly -Gift Shop Shelf 4 (large, multi-level) | 13 swatches | 782 poly -Gift Shop Shell Pillow | 6 swatches | 214 poly -Gift Shop Squid (hanging, glows) | 1 swatch | 580 poly -Gift Shop Squid Plush (glows) | 1 swatch | 562 poly -Gift Shop Squid Plush 2 (matches octopus) | 5 swatches | 542 poly -Gift Shop Squid Plush 3 (black & white) | 6 swatches | 2254 poly -Gift Shop Starfish Pillow | 9 swatches | 290 poly -Hanging Sign | 33 swatches | 342 poly -Pamphlet Holder | 10 swatches | 184 poly -Poster Sign (this object has 8 package files, one for each frame color) | 11 swatches for poster each | 174 poly each -Velvet Rope (3 posts, 2 rope) | 17 swatches | 1202 poly -Velvet Rope Post | 9 swatches | 238 poly -Velvet Rope Just Rope | 16 swatches | 246 poly -Velvet Rope Single | 16 swatches | 720 poly
Type “acnh aquarium 3" into the search query in build mode to find quickly. You can always find items like this, just begin typing the title and it will appear.
As always, please let me know if you have any issues!
📁 Download all or pick & choose (SFS, No Ads): HERE
📁 Alt Mega Download (still no ads): HERE
📁 Download on Patreon
Will be public on July 4th, 2024 💗 Midnight CET
Happy Simming! ✨ Some of my sets are early access. If you like my work, please consider supporting me (all support helps me with managing my chronic pain/illness):
★ Patreon 🎉 ❤️ |★ Ko-Fi ☕️ ❤️ ★ Instagram📷
Thank you for reblogging ❤️ ❤️ ❤️
@sssvitlanz @maxismatchccworld @mmoutfitters @coffee-cc-finds @itsjessicaccfinds @gamommypeach @stargazer-sims-finds @khelga68 @suricringe @vaporwavesims @mystictrance15 @moonglitchccfinds @xlost-in-wonderlandx @jbthedisabledvet
-Aquarium Set 1 (fish) -Aquarium Set 2 (fish) -Seashells, glass bottles & other from Mermaid Set -Sea Painting -Sea Globe -Puffer Fish Decor -Aquarium Diver Statue
The rest of my CC
#s4cc#ts4cc#sims 4 aquarium#sims 4 gift shop#sims 4 museum#sims 4 fish#sims 4 wall decor#sims 4 poster#sims 4 sign#sims 4 lighting#sims 4 lamp#sims 4 display#sims 4 shelf#sims 4 retail#sims 4 clothing clutter#sims 4 balloons#sims 4 vacation#sims 4 travel#sims 4 maxis match#simdertalia
246 notes
·
View notes
Text

CAS UNDERWEAR OVERRIDE TUTORIAL!

faq/before you begin: This is a tutorial for personal use ONLY. If you use this tutorial DO NOT reupload your overrides unless it the original creator gives you permission to do so. reuploading a creator's custom content IS theft. I do not condone stealing cc from hard working creators, so please only use this as a tutorial for yourself! to get started, you will need: ꣑ৎ sims 4 studio ꣑ৎ the underwear you want to make your default ꣑ৎ and patience ( ,,◕ ̫ ◕,, ) this tutorial is aimed towards people who have never used ts4 studio before! so if it seems too hand holdy im sorry, i just want to make sure everyone can understand! If you don't understand something, please don't feel shy about reaching out! either through a dm or an ask! i'll be happy to help!
start by downloading TS4 studio. The process is fairly simple, but if you get stuck here's a great tutorial you can follow!
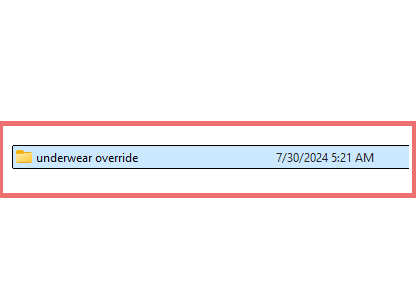
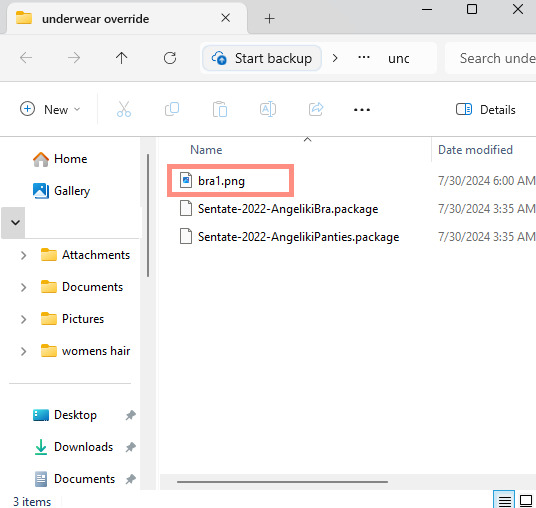
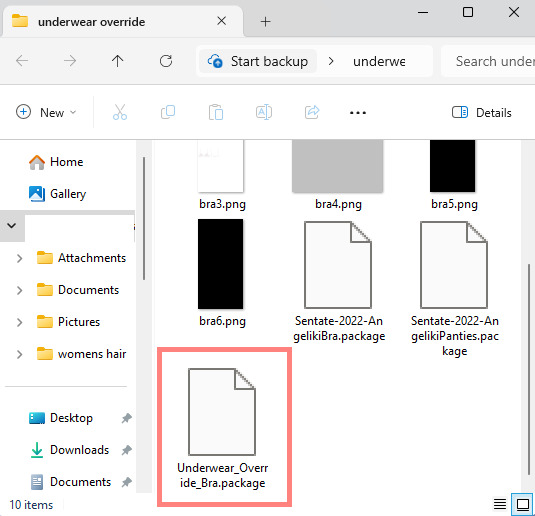
once you have it all installed, you'll want to make a folder on your desktop. This is just for organization purposes, to make digging for the files easier later on:
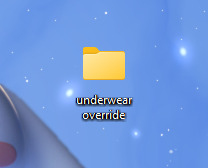
here's an example of what i named my folder! for simplicity's sake though, i'll be referring to the desktop folder as the "underwear override" folder, but you can name yours whatever you want! Just make sure its on your desktop~ ( ˶ˆᗜˆ˵ )
────୨ৎ────────୨ৎ────────୨ৎ────────୨ৎ────
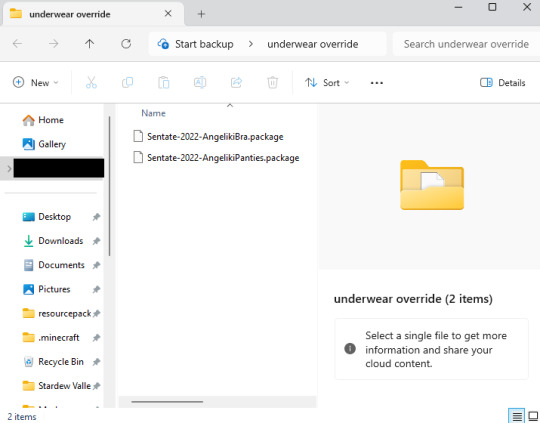
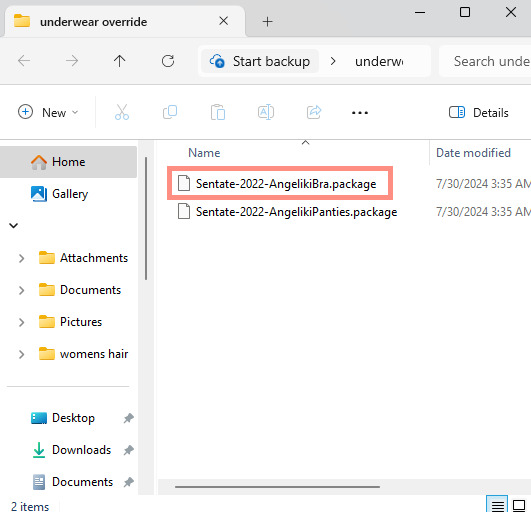
next you'll want to find the underwear you'd like to make a default replacement. I'm using the Sentate's Angeliki set (bra and panties) from their midnight collection found HERE. (Also a gentle reminder, this is for PERSONAL USE only. Sorry i keep repeating this, i'd just hate for people to use this tutorial for bad 。°(°.◜ᯅ◝°)°。 )
any underwear SHOULD work, unless the underwear you pick has 3D pieces. I wish i could explain why, but i honestly have no clue. Im a noob at this haha. Just make sure your mesh isn't 3D!
once you have the undies of your choice secured, go ahead and place both into the "underwear override" folder on your desktop! (photo below)
────୨ৎ────────୨ৎ────────୨ৎ────────୨ৎ────
now it's time for the fun part! You'll go ahead and open sims 4 studio, once in there, you'll want to click where it says "my projects" (photo below)
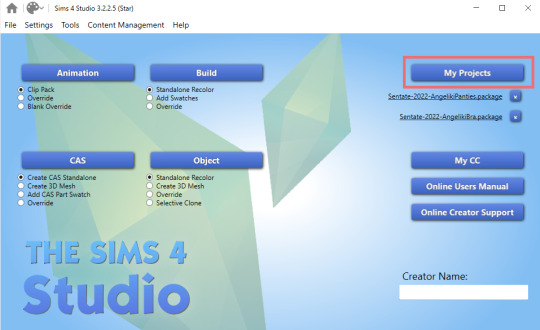
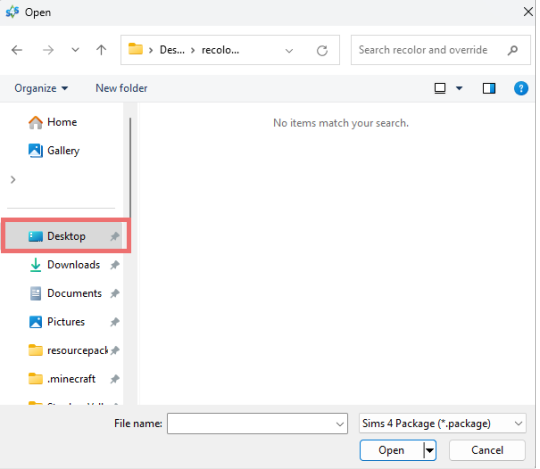
Once you do that, your files should all pop up. It doesn't matter where it takes you, you'll just want to find the "desktop" section of your file menu! Then, you'll find the "underwear override" folder and open that~ Now you'll just go ahead and open the package that you want. I'm going to start with the bra, but the process for the underwear is exactly the same! so it doesn't matter which one you choose to do first ദ്ദി ˉ͈̀꒳ˉ͈́ )✧ (photo below)
────୨ৎ────────୨ৎ────────୨ৎ────────୨ৎ────
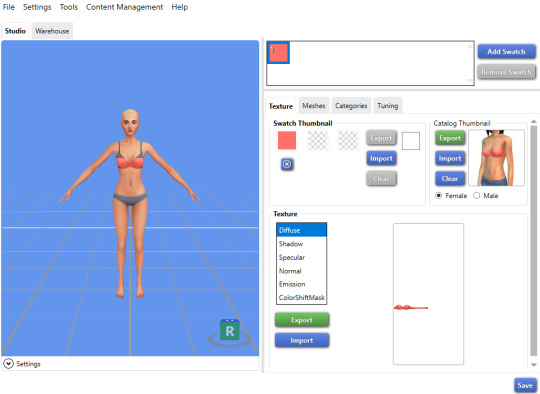
if you did it right, your screen should look similar to mine! ¡¡¡( •̀ ᴗ •́ )و!!! (photo below)
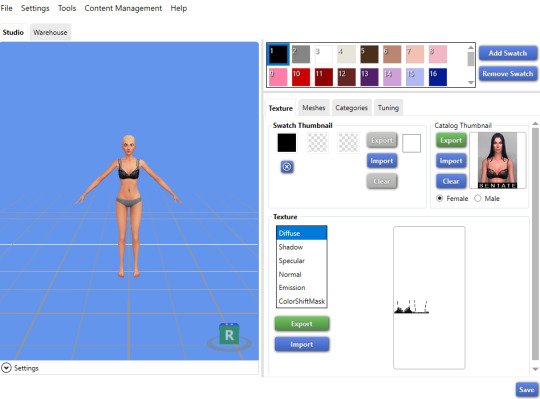
now, you'll just want to select the swatch you'd like at the top! (if you've never used the sims 4 studio before, you can use your mouse wheel and the right mouse button to control the camera in the blue area with the weird bald sim lol- that way you can see the swatch you're picking a bit better! (photo below)
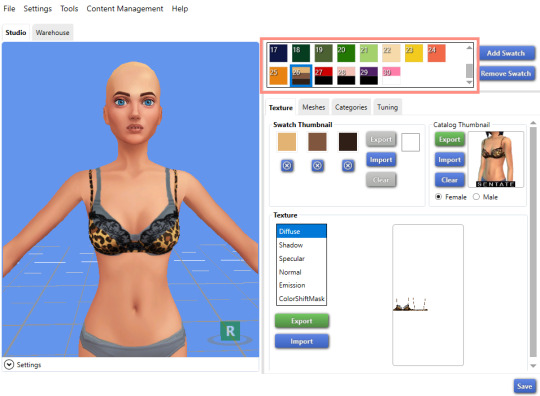
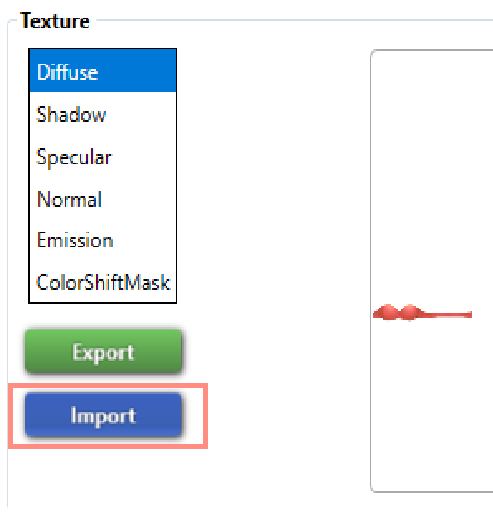
now that you have the swatch you like, in the texture setting, diffuse should already be selected. You'll want to go ahead and click "Export", then name the file "bra1". If you did it correctly, it should save as a PNG! (photo below)

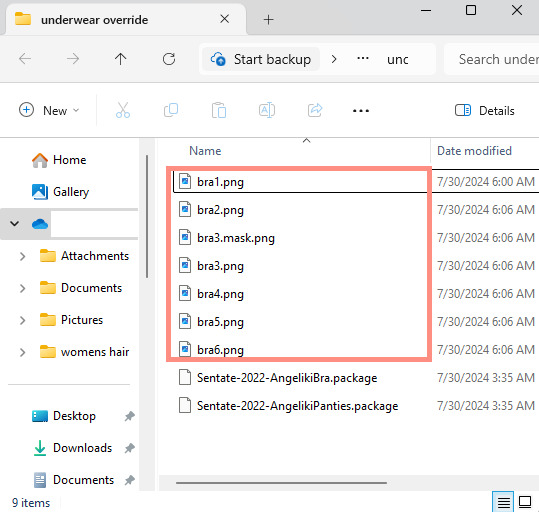
then, you'll want to go down the line of textures (shadow, specural, normal, emission, colorshiftmask) and continue to number them (EX: shadow is bra2, specural is bra3, ect ect) til your folder is full with each texture! It should look like this if you've done it right! (photo below)
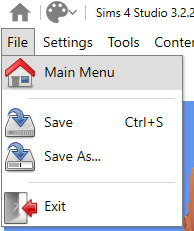
after you're done with that. You'll go ahead and click "File" and "main menu" in your sims 4 studio! (no need to save!) from here, you'll go ahead and select "Override" under the CAS section on the main menu then click the CAS button at the very top. (photo below)

the menu here might look confusing if you've never used sims 4 studio before, but just copy the way mine looks to make the process a bit easier! At the top drop down menus, you'll want to select "Gender: female, Age: Adult, Part Type: Clothing Top, Game Pack: base game" This should narrow down the menu a bit! (photo below)

then, you'll scroll til you find THIS exact bra. This is the bra the sims 4 uses as their default, and we're overriding this, so please be sure to select the exact one! (photo below)

once you select it, click "next", and it should take you to your files once more. You'll want to name THIS file something unique, that way there's no conflicts! I suggest something like: "Underwear_Override_Bra" just so you know which one you're working on, and you also know that this is an override (๑˃́ꇴ˂̀๑)
once you've named your package at the bottom, go ahead and click enter, and the studio should open back up~ (photo below)

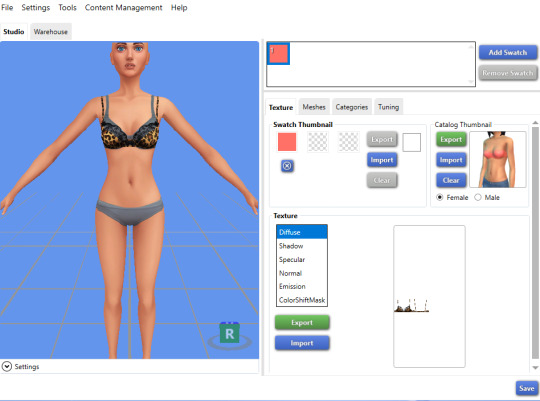
now, you'll want to repeat the same export process from before, but use import instead! Then, you'll import the pngs the same way you saved them. (EX: diffuse is bra1, shadow is bra2, ect). Once you've done that, you should immediately see the textures change (photo below)
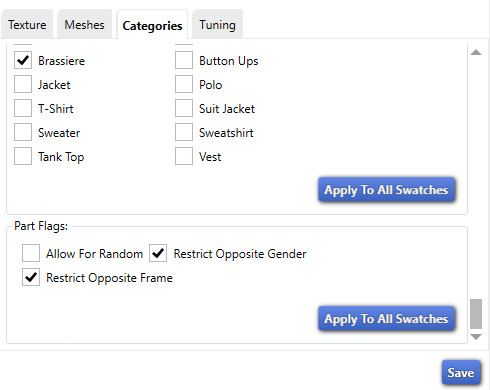
now that your textures are changed, you'll want to make sure to catagorize it properly, just to prevent your male sims from getting a bra when you take their shirt off as well. If you for some reason want your male sims to have an unremoveable bra, feel free to skip this step! if not, then you'll want to click the "catagories" tab right beside "meshes"
once there, you'll scroll all the way to the bottom til you hit "Part Flags", then you'll check "restrict opposite gender" and "restrict opposite frame" (i'm not sure if these mean the same thing, but i just checked both to be extra sure!) (photo below)

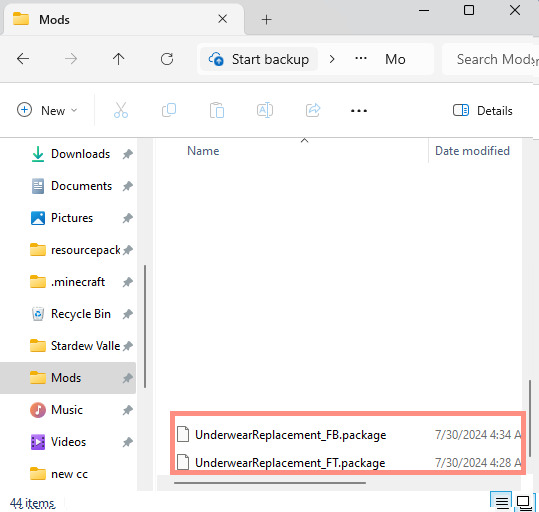
once you've finished replacing all the textures and catagorizing the override, you'll go ahead and click the save button at the bottom right hand corner, then open your "Underwear Override" folder. You should have your "Underwear_Override_bra" package now saved! yay! All that's left to do is repeat these steps with the panties of your choice, then drag both package files into your mods folder just like you would any other cc! (photo below)
(mine are named differently because i already made my own recolors + default replacements ( 〃..).. i'll try and upload a recolor tutorial later today for anyone curious!)
but now, you're done! all that's left to do is open your game and see your overrides in cas! If you did everything correctly, the undies should just appear when you take your sim's clothes off (⁄ ⁄•⁄-⁄•⁄ ⁄)
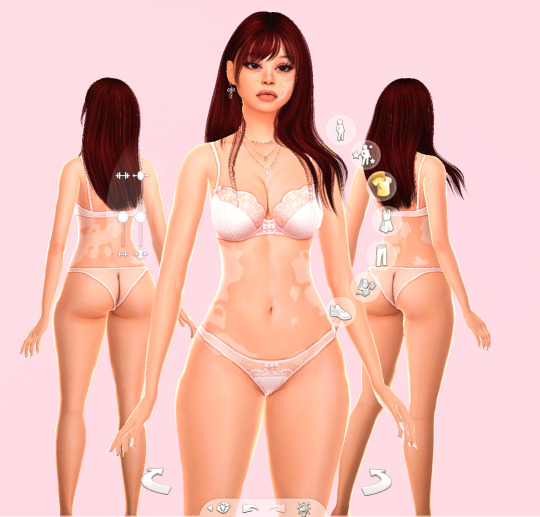
heres how mine turned out! (˵ •̀ ᴗ •́ ˵ ) ✧ im super proud of them!
it took me a few hours to get this tutorial together, so im a bit loopy signing off. If this is completely incomprehensible and confusing im so sorry, again if anyone has questions please do send an ask or message me! i'll do my best to answer any questions :) and also please remember; DO NOT REUPLOAD ANYONE ELSES CUSTOM CONTENT! this is for PERSONAL USE!
thank you for reading! (。•̀ᴗ-)✧
#the sims 4#ts4#sims4#maxis match#maxis mix#s4cc#sims 4 cc#ts4 cc#sims 4 custom content#cc tutorial#cc rec#cc cas#sims 4 cas#sims tutorial
91 notes
·
View notes
Text


Warrior's Rest Blender Scene
❗️This is a scene for blender and WILL NOT WORK in game ❗️
I've spent the last week compiling this cozy, warm medieval bedroom for my OC Unixian. But it turned out so beautiful I wanted to share it with you all too!
The vibes are viking/warrior's retreat (there are weapons and books alike all strewn about)
Some info:
I RUN MY RENDERS IN CYCLES - this was built for cycles and NOT tested with Eevee! (but feel free to adjust/run in Eevee!)
Made with & tested in Blender 4.1
Includes a few preloaded camera setups
Includes an "ambient light" folder to brighten up an otherwise dark scene, feel free to adjust or remove those at your leisure
Organized files for easy editing
Previews are edited for lighting/depth but otherwise straight from blender
Set up with glare and denoising compositing
Features CC (but NO PACKAGE FILES) from @thesensemedieval, @kerriganhouse, @remysa, @tv-sims. @simverses, @lilis-palace, @flowermilksims. @mara45123-blog & others - NO PACKAGE FILES means you will not be able to put any of this cc in your game, but it will work in the scene
Tested but as always please let me know of any issues!
Download all files in the folder, the textures included will be needed if anything shows up fuschia in blender!
TOU
Do not redistribute or claim as your own
Do not put behind a paywall
Otherwise, do literally whatever you want with this scene
FEEL FREE to adjust/move/edit/recolor anything as you need it
DOWNLOAD (sfs, download all files)
#ts4 blender scene free#ts4 blender scene#sims 4 blender scene free#sims 4 blender scene#sims blender scene#sims blender scene free#ts4 render#sims 4 render#sims render#salemsims blender scene#salemsims download#ts4#sims 4#sims#sims 4 blender#ts4 blender#sims blender
93 notes
·
View notes
Text

CC Issues FAQ
Hi :) Following the example of other CC creators, I decided (a bit late, I’m sorry) to make a separate post with questions and answers for the most common CC issues someone might come across. Most of these are valid for all CC in general, not just mine, so you’ll see me repeat some of the things other CC creators have already mentioned. I hope this helps.❤
1. Why can’t I see a CC item in the game?
Please make sure your game is up to date with the latest patch from EA. EA keeps adding new items to the base game, so if you have an older version of the game, the item I cloned as a base for the coding of my CC might not be in your game.
Check if you have the necessary DLC – expansion, game pack, stuff pack or kit – and you haven’t disabled it. Some of my CC (for example, a functional swing, a vanity table, etc.) requires a specific DLC, which is always mentioned in the post about that CC.
Did you install the CC properly? The “.package” files should be unzipped, and placed no more than 2 subfolders deep in the game’s Mods folder, otherwise the game won’t recognize them.
Type “YannaSims4” in the game search bar to find all of my CC because an item might be hiding in plain sight or you might be looking for it in the wrong category.
Did you download the CC directly from my Patreon and not from someone else? Always get your CC from the original creator to ensure the files aren’t messed up.
2. The file got corrupted/ my game won’t launch.
Sometimes a file won’t download properly (for example, your internet connection or a site’s server might drop for a nanosecond even if it seems like it didn’t stop the download). Please remove the old file and re-download. And always download CC from the original creator.
3. CC is incompatible with other mods/ CC.
Sometimes this can happen, even if you don’t fiddle with the coding and file names, and even if the CC is not dependent on other mods. If there is a conflict between CC items, your best option is to check manually which CC/mods are problematic by disabling them. My pose sets are dependent on two other mods to work, so if you have older versions of the Pose Player Mod and Teleport Any Sim Mod, my poses might not be compatible with them.
4. Why am I seeing weird shadows slicing through CC?
It might happen if your SSAO is turned on or before a new patch fixes the issues. There are many tutorials online that will help you turn off SSAO for your game.
5. Weird lines are appearing on CC edges.
Your Nvidia graphics card drivers need to be updated or you might need some adjusting of the anti-aliasing settings. There are many tutorials online that will show you how to fiddle with those settings.
6. Gradient shadows on my earliest CC sets.
If you’re seeing gradient shadows on my 2024 sets “Autumn Bathroom”, “Forest Hammock” and “Back To School Kawaii Desk Clutter”, please download the updated files from those posts.
7. How do I resize your CC items, move them up or down, or place them on surfaces/ next to each other like in your screenshots?
Use the “testingcheats true” and “bb.moveobjects on” cheatcodes. Move objects with the ALT key or rotate them freely by switching to the Sims 3 Camera settings. Use the [ and ] keys to resize them or the 9 and 0 keys to move them up/down. The keys may be different if you’re on a Mac computer. You can look up some of the many tutorials online about all the cool functions these cheats and key commands will unlock.
8. An item vanishes from floor/ surface or goes into my Sim inventory when I try to remove/ recolor a wall, window or some other item.
This has been a reoccurring issue with CC items and with EA’s own items for years. Sometimes a new patch fixes it, sometimes another patch reintroduces it. I know it’s annoying, but unfortunately, it happens. In some cases, the batch fix options from Sims4Studio can temporarily solve the issue.
I hope these answers help. If you're still having issues, please let me know.❤
#sims4#sims 4#sims4cc#sims 4 cc#sims 4 custom content#ts4#ts4cc#ts4ccfinds#thesims4cc#sims4ccfinds#sims 4 cc finds#my cc#my cc finds#simblr#the sims 4#thesims4#maxismatch#maxis match#maxis match cc#sims 4 maxis cc#ts4 maxis match#ts4 maxis cc#ts4 cc#s4cc#s4ccfinds#thesims#the sims
8 notes
·
View notes
Note
could you do quackity headcanons with (east) asian reader? tyy 💞
Quackity headcanon's
Asian reader
Story g: sfw
Language: English/Inglés
⚠️: None (?)
CC's: Quackity
Reader g: Neutral reader
📝: All the content is fictitious and an attempt is made to adapt the PUBLIC personality of the cc's, that is, the personality that is shown in front of cameras, I do not know the true personality and any resemblance to reality is mere coincidence.
🍒: Hello, writing requests are always open, if you want something in particular, ask without fear. I clarify that English is not my main language, I apologize for any error and I accept corrections to improve the quality of the content
Master list

•He has already commented on his desire to visit Asia
•Which is why he's going to be so interested in hearing from you.
•As if you were talking about what life is like there and he leans towards you and puts his hand on his chin, paying all the attention in the world.
•He has Asian friends, so being a little ignorant he will ask them for help to impress you with your customs
•Forgive him, he is afraid of doing something wrong
•He would definitely like to do things well and be formal in front of your parents
•He would say yes to a trip with you
•He would be willing to pay and that you only take him to see good places
•Most likely he has only eaten sushi when it comes to Asian food, so he doesn't know anything about food but it is the main thing
•Dinners trying everything is what you expect to be with him
•Even if you don't believe it, he's going to do some research on your birthplace to impress you that he knows something.
•He is very detail oriented, so he will look for where he can place orders for you when he is traveling and you are in your city
•So maybe you'll get flowers or a package of desserts while he's in Brazil on the other side of the world.
•If you spend a lot of time together, he will begin to integrate some words from your language into his speech, such as casual expressions
•He is very intelligent so he will learn to communicate with you in your language to make you feel comfortable
•If he invites you to dinner at his house, he asks your mother or someone in your family for recipes so you can eat what you like.
•Definitely what he likes most about you are your features
•Music in your language? He will definitely sing it with you even if it seems like he is summoning some demon.
#quackity#quackity x you#quackity fluff#quackity soft#quackity x reader#qsmp quackity#dsmp quackity#quackity fanfic#qsmp fandom#qsmp#gn reader#sfw blog#fem reader#male reader#mcyt x y/n#mcytblr#mcyt#dsmp#x reader#sfw littlespace
58 notes
·
View notes
Text

Blender Tutorial: Building a Scene Part 1: Importing Furniture from Sims 4
Building a scene from scratch is no mean feat, so this will likely be a multi-part tutorial.
In this tutorial I'll be going over the basics on building a scene. This will be the barebones necessities to get a room with a moose and some nice lighting to place your sims in for a render.
There are, of course, more in-depth and complicated ways of doing this, but these are the basics and the easiest (in my opinion!) way to get a nice little scene without too much work.
With that all said, let's get started!
Let's start by adding furniture into our scene. Usually I'd build a room first but I know many of your were asking how to do this so I'll cover this first!
Step 1: Exporting Meshes and Textures from S4S
Appending furniture and decor to a scene works the same way as appending jewelry to a sim. First we have to prepare it for blender in Sims 4 Studio. If you're using a piece of furniture from the game, select "Object" in Sims 4 Studio. It may load slowly so be patient!

Then you'll see the game's full catalogue:

Filter and sort as needed to find what you're looking for. For this tutorial I'm going to remake (and revamp) one of the first blender scenes I've ever made, which looked like this:

So I'll export the fireplace first. It's from Vintage Glamour, so I'll filter my S4S by Vintage Glamour, and here it is:
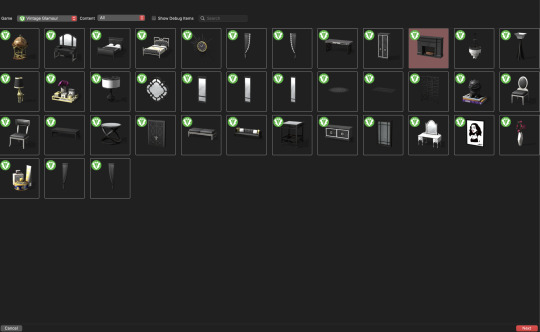
Highlight the fireplace then click "Next" Name the package anything, but make it easy to remember. If you need another swatch in the future you can always open the fireplace directly in S4S instead of searching for it each time. Save it somewhere easy to find! Once opened, you'll see this:

To render furniture, we need to export the Mesh and Texture files. I'm in the habit of exporting my mesh first, so we'll do it that way. Click the "mesh" tab and you'll see this:

Click "Export Mesh" and save the .blend file somewhere easy to find! I typically keep the .package, .mesh, and .png (texture) files all in the same place. I find it easier while working in blender. Do whatever makes sense to you just make sure to stay organized! After saving the mesh, navigate to the Texture tab and do the same thing:

Export the texture and save it somewhere easy to find. Repeat this process for all the furniture you'll need for your scene.
Step Two: Appending Furniture Items into Blender & Applying Textures
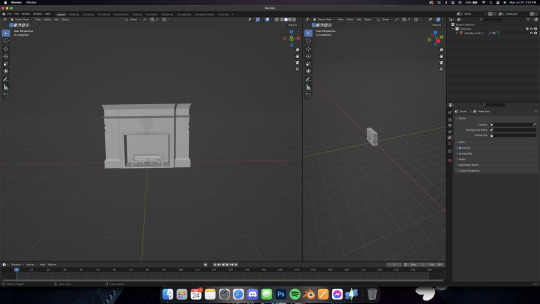
Now let's go into blender. As always, delete the default cube, lamp, and camera, then set up your workspace in whatever way is comfortable for you. I like to set mine up like this:

Now, just like with jewelry, let's append our fireplace in. Go to File -> Append and locate your fireplace .blend file. Open the file, then the Object folder, then select all "studio_mesh" files you see:


You should then have something like this:

Delete the bone_bone and rig as always, then also delete the footprint, which for me was the first studio_mesh in my Outliner list.

Then you'll have the fireplace by itself:
Navigate to the Shader Editor in your preferred workspace, then to the "Material Properties" tab.


Click the minus beside the diffuse texture to get rid of it. Then click the "New" button that appears once the diffuse is gone.


Nodes will appear in your shader tab!

Like we did with jewelry, add in an Image Texture node, a Mix Shader, and a Transparent BSDF. Connect and arrange them exactly like I have here:

Make sure you add in your texture file in the Image Texture node (click open, then navigate to your .png file we exported from S4S). Change the blend mode to Alpha Hashed in your properties window, like this:

And make sure you're in Material Preview mode (I wasn't) by pressing Z on your keyboard and selecting "Material preview"

Now you should have something like this!

In Part Two, we'll add in the walls of the room and maybe a window!
Some notes before I leave you:
Using CC works the same way, you can add it into the custom content folder in S4S OR you can double-click the package file and open it in S4S that way.
Some objects, like trees, have more than one texture. I'll do a separate mini tutorial on that if yall need but basically you'll export both texture files and then apply them to the proper parts of the object (for a tree, for example, the leaves and trunk are often separate texture files)
Please let me know if yall have any questions! And stay tuned for Part Two!
#salemsims tutorial#render school tutorial#sims 4 render tutorial#sims 4 blender tutorial#render tutorial#blender tutorial#tutorial
58 notes
·
View notes
Text
Ensuring the safety of your home, office, or business is a top priority. At TECHNOVISION, we offer high-quality CC cameras at the most competitive CC camera price in Bangladesh. Whether you're looking for a basic camera for home surveillance or an advanced system for large-scale monitoring, we have a variety of options to meet your needs.
#cc camera price in bangladesh#cc camera price in bd#mini cc camera price in bangladesh#wifi cc camera price in bangladesh#cc camera package price in bangladesh#cc camera set price in bangladesh#best cc camera in bangladesh#cc camera package#small cc camera price in bangladesh#xiaomi cc camera#cc camera price in dhaka#4k cc camera#best cc camera brand in bangladesh#cc camera bd
0 notes
Text
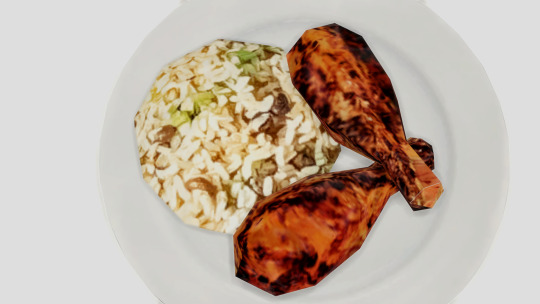
Jamaican Jerk Chicken

Hello, tombler!
I have to rewrite this post since tumblr decided to terminate my previous blog at misoplays -- like, why, tombler!? God forbids a tumblr user who came back to use the platform after leaving it for ten years because she's excited to share her experience with some custom content. Side blogs sucked anyway. Moral of the story: I have to back-up all my posts before and after posting. Update: Tumblr reinstated my blog, all without sending even one e-mail. Nuff said.
Before we begin with today's recipe, let me introduce to Vienna Ito. Vienna lives in the suburban area in Willow Creek with her family, and if her surname sounds familiar -- Yes, Vienna is the daughter of your local Mt. Komorebi hottie, Kiyoshi Ito. In fact, we'll see more of Vienna's extended family as I explore more CCs!
Vienna's a foodie, and also happened to be on the top of Food Critics career as Curator of the Finest Flavors -- two things that explained her love for exploring foods from around the world! Today we're trying Jamaican jerk chicken. Jerk is a style of cooking native to Jamaica, in which the meat is dry-rubbed or marinated with a hot spice mixture called the jerk spice. The recipe is made by robinksimblr (click here to download the recipe). Please be aware that you would need to also install Robin's Food Enabler in order for the recipes to show up in your game.
Shall we begin?

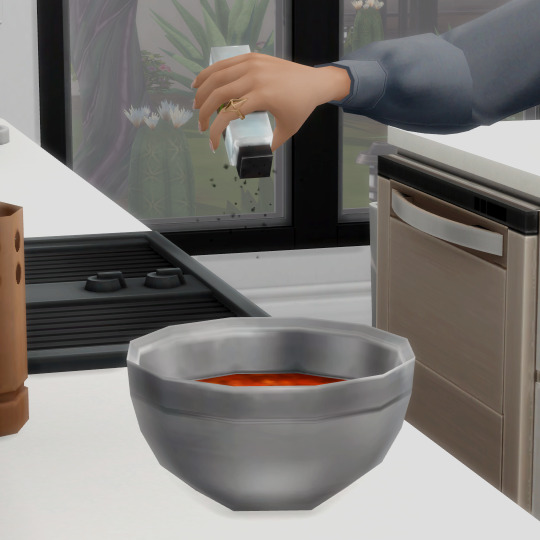

Only the freshest ingredients in this kitchen! A bit of mixing the spices, which includes allspice, ginger, garlic, onion, thyme, and of course -- scotch bonnet chilies!
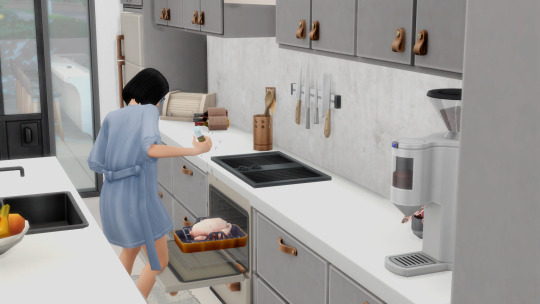
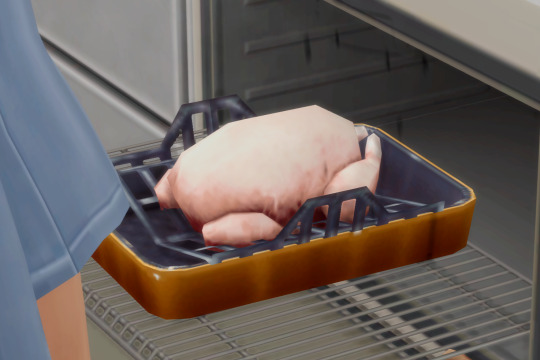

Vienna has marinated the chicken off camera and left it in the fridge for the spices to really penetrate the chicken. The authentic way to cook jerk chicken is by grilling it over wood fire, but for Vienna, the oven would have to do.
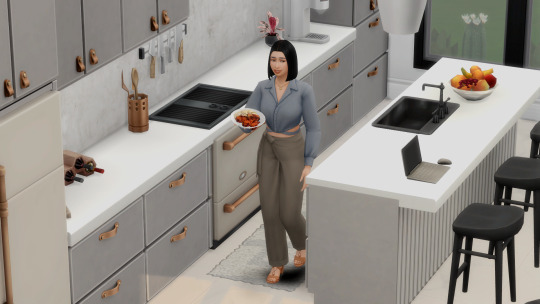
A little bit off the topic, but I recently redid Vienna's kitchen and I love how it looks! Vienna's favorite colors are blue and grey, but I just couldn't justify making a blue kitchen because the rest of her house is very modern and minimalistic. Overall, I like the touch of bronze in her rather monochromatic kitchen.
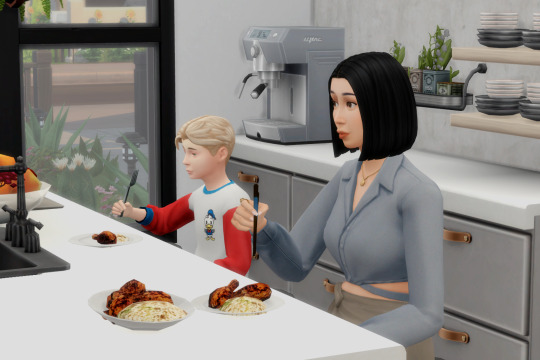
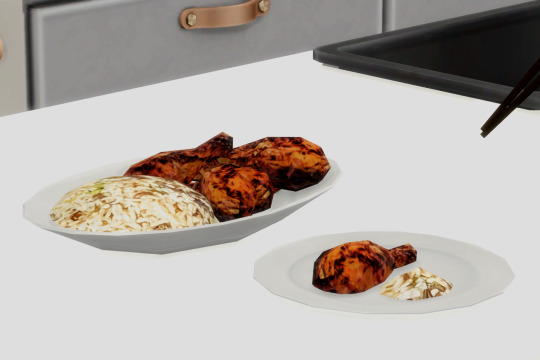
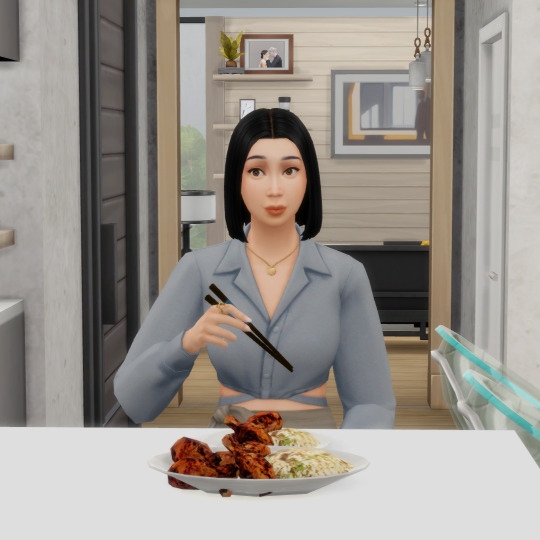
Jerk chicken is served alongside rice and peas, which is made with rice and red kidney beans (the peas). As a native Komorebi-go, Vienna uses chopstick for every possible food combinations -- please do excuse her choice of utensil. They might need to get used to the spiciness level, but Vienna and her son agrees that jerk seasoning is their cup of tea!
'Til next time, dag dag!
P.S. There is a faux-chicken version included in the CC package for your vegetarian sim, but there's no difference either in the cooking process and overall appearance beside the version being vegetarian.
P.S.S. History and recipe details are taken from this article (fully illustrated with beautiful pictures!), this article, this article and this Wikipedia page.
#sims 4#sims 4 cc#sims 4 custom content#sims 4 maxis match#robinksimblr#origin: jamaica#type: mains#sims: vienna ito
4 notes
·
View notes
Note
Hi! Sorry to bother, but I saw another ask on the simmify instant camera and realized that I had the package installed and do not use it because I don't see it either (I do have BBB with CC filter checked and see all my CC, including other CC by you). I can search for the item in the search bar but then I will have "no results found".
PS: I love your cc 😍
Hey - no worries about the message!
A similar issue has been reported before, so I did some further investigation. I have just published the updated file, which should hopefully fix the catalog issue.
Tl;dr: the original item included Get To Work EP tags, even though cameras became base game objects some time ago. The updated file should resolve this issue and make the camera visible to everyone. Apologies for taking some time to figure this out!
22 notes
·
View notes
Text
Now a day each and every Camera companies are in a race to provide a better camera for awesome pictures in low light and fine touch but still all cameras are not providing such a photo of yours which you can say Wow. But we can make our photos look wow with some best Photo editing software. Not only photographers but a different kind of firms also use editing software for rendering, modeling, and simulation technique for DRDO and ISRO like organization. 2D and 3D design for car design and auto car cover Design Company. Even many professional photographers were using software to make their pictures look like the real existing image. Today here I am sharing with you most of the top software in photo editing which will make your pictures more beautiful enjoyable with your friends on social media. In fact, a web designer or UI developer also use photo editing software to create a design for Android apps, website, iOS app etc. Website Builder reviews inform us that Hyundai had an increase of requests by up to 62% once they started using high-quality pictures. This just emphasizes the need to have high-quality images from the right editing software. Below are the best photos editing software? 1. Adobe Photoshop Adobe Photoshop is a type of software which is used to play with photos or in another way, we can say that it is used to do something with the picture. Adobe Photoshop CC, Adobe Photoshop CS6 is some of its versions which make your image real and existing image. It can run on various platforms of windows operating and Mac operating system. Features Adobe Photoshop has some unique features which make your photo live and real. It edits your Easter image in multiple layers. It has a feature which can mask your image. Various color combinations option is available in Adobe Photoshop. It can resize your image to any size easily. It supports various graphics file formats. This Adobe Photoshop application is used by many professionals Photographer. It can run on various platforms of windows and other operating systems. 2. Google Nik Google Nik is a Google supporting application through which you can play with an image. Here you are able to change or modify not a single image but at a time you can modify multiple images. Here various plugin and tools are available for editing image. It’s very popular enhancement application for photo editing. It supports iOS and Android app. Features It has its own unique feature that Applies Film-era camera, lens & film situation to digital images. It has a Package of filters that comes with many effects like HDR effect, etc. It can maintain Noise Reduction in images and videos It has a specialized program for processing HDR pictures. You can share your image with anyone very easily. It can convert the image into a Black and white format easily. Its best feature is Color Control with an advanced function to change the contrast and saturation. 3. Pixel Mator Pixel Mator is photo editing software of MacOs. It made up a combination of open source and Mac technology. It has a transparent head on display which helps the user to work for image easily. It uses Core Image and Open Gl technology. Features It provides open source platform for Mac OS user for editing images. It also supports various graphics file format. It works on layer based image also. There are more than 40 tools for general editing image like selecting, navigating, coloring, retouching, painting etc. It has 16 coloring tool for coloring image. It has 50 above filters options. It provides full facilities for converting an image format file. It has also such a feature insight through which you can take pictures from an app. 4. Paint .net Paint.net is Microsoft Windows image editing software which provides full facilities to edit image like professionals. It supports window platform. It works on .NET Framework platform. This replaces simple paint from Microsoft Windows. Because simple paint does not include features like layer transparency etc.
Features It has very interesting and simple User Interface for a common and new user so that user can use it without any help. paint.net supports many layer blend modes, layer transparency and reordering of layers with drag-and-drop. It has such feature in which you can open multiple images and you can also edit multiple images at a time. It supports various file formats. It supports 22 languages in which it appears. One of the best features is that if a new version comes, it automatically updates. It has extensibility in which it can add another plugin also to support different feature for editing. 5. GIMP GIMP is multi-platform for photo editing software, which provides a user a multi-platform to edit an image. It is used in the manipulation of various image tasks like retouching, selecting, composition image etc. It provides facilities from a simple editor to an expert or professional editor. It can be used to convert various file formats for editing. Features Supports a wide range of file formats, including GIF, JPEG, PNG, XPM, TIFF, TGA, MPEG, PS, PDF, PCX, BMP and many others Supports various plugins. It also supports various tool for retouching layering etc. Its full support layer and transparency Its full support alpha channel pixel for pixel support image. It also supports various undo-redo option. Its transparency effect supports rotate and flip. 6. PixLR PixLR is cloud-based image editing software which provides online facilities for editing image it has a collection of various editing tools. It is browser extension editing software for photo sharing services. It has both UI simple and professional photo editor. It may be available on all system PCs and smartphones or tablets and using a tablet. Features It is an online free image editing software It is available for smartphones and tablets and pc. It is one of best editing software It has many tools for editing image like selecting retouching layering etc. It has its special features that you can access it from a web browser. It is based on cloud computing It has three powerful tools like layer, navigator, and history. 7. Snapseed Snapseed is one of best photo editor software. This software is produced by Google. It was bought by Google a few years ago. This is powerful photo editing software of today's generation. It provides editing on the raw photo which catches the eye of a photographer .It is simple but very deceptively light and powerful photo editor software for Android and iOS. It is a little bit costlier in comparison to other editing software. Features It uses swiping gesture for selecting different effect and enhancement. It automatically adjusts color and contrast. It has unique feature of saving history of user work It also creates and saves filter combination by using the default filter and editing. It has various tools like Grunge, Vintage, center, focus lens etc. Through this software, a user can share their picture on social media easily and directly. It supports all types of file format. It has new filter feature with clear user interface 8. Photo Mate R3 Photo Mate is new among all editing software but rendering engine for editing both raw and jpg file. It can edit a photo with very fine major tools like contrast, shadow, highlights and even exposure. With its rendering engine feature, it can defeat all other software. Features It provides very easier and more intuitive interface to the user. It has new editing effect spit toning. It can make your image unique. It has a very fine sharpening effect. It also has a Dehaze feature which allows you to control the amount of removing haze from landscape or telephoto to shots and restore color. It has very extended watermark feature. It has a feature to create virtual copies of your editing image. 9. Filter Storm Neue Filter storm Neue is a brand new photo editing software. Which provide a power of classic Filterstorm.
Through which it is much faster and easier to use. It is a universal app for all iPhone and iPad. It provides all photo editing tools. Features It provides powerful masking tool for photo editing. It can export PNG file. It has a feature of channel mixer It has ability for determining file size It has the ability to alter different types of color It supports all types of file format Photojournalist will enjoy features like FTP and IPTC metadata. 10. Enlight Introduction: This software brings layer features which can edit multiple images at one time this is a unique feature of this software. Many versions of this software launched but Enlight works awesome in editing. This software is based on Apple and IOS configuration. It has various new features through which image can be edited easily.It allows user to keep multiple images into a single file. Features This support both IOS configuration and Apple. It is based on mobile and desktop pc on both it can use freely It has a panel of control for adjusting time contrast and the detail inside an image. It also pre-loaded with a number of extras for photo editing including fonts graphics and presents. It provides full-on creativity on mobile With the layer feature, it provides user multiple images into single file for editing It has blending transparency features also. 11. Corel PaintShop Pro Corel PaintShop Pro is the best photo editor which gives users an advantage of easy and fast edits with very high-end outcomes. It allows you to learn the menus and toolbars quickly in regardless of your skill level. It puts its users at an advantage over the other software users by offering easy importing, exporting, sharing, organizing and finally a help and support for all your queries. Corel spearheads all the other photo editors. Lastly, using this program is fun accompanied by excellent value. Corel on average costs $79.99 and at the same time given the gold award. Get the right version here 12. Adobe Photoshop Elements It has powerful editing tools that suit the users of any skill levels. It has three editing modes which include Guided, Expert and Quick Edit. It allows you to upload your images to social media sites directly which provides for Flicker, Twitter, and Facebook. Adobe Photoshop Elements keeps advancing as you do and it is the best for the beginners who want to improve their skills quickly. On average the cost of this software is $69.99 and is available here. 13. CyberLink's Photo Director CyberLink's Photo Director is an excellent program that best suits beginners since it has many and necessary tools. It also organized in a simple way for the beginners to find, use and learn about the tools. However, PSD files which allow the user to save his separate files of his projects, are not compatible with this software. Finally, it also lacks vector graphics tools. CyberLink's costs $44.99 14. Zoner Photo Studio Zoner Photo Studio which is available at zoner is organized in sections of a different kind to enable access the feature and means you are in need of without overwhelming options. This program comes with very many helpful tools to help learn both advanced and easy editing ploy. It is also suitable for beginners and the intermediate consumers who want to improve and being permitted to work in layers. 15. ACD See Pro It is a photo viewer, organizer and image editor that was developed by ACD that is used through the following operating systems macOS, iOS, and windows. It offers several photo editing tools such as shape tools, selection tools and drawing and painting tools. It also has automatic edit options that correct and then adjust your photo. The software cannot construct HDR images and panoramic pictures. The software usually shows the EXIF information of your image. Beginners and professional photographers can both use this program with ease. You can get the trial or paid version. 16. Affinity Photo It best suits the advanced image editors who are looking for a cheaper program accompanied by no subscription.
It correctly serves this kind of users as well as supporting PSD, RAW, and files with high resolution. It is designed to help experienced and advanced users in transition to using it. The interface has some minor changes that make the editing process simple. Affinity Photo does not have a photo organizer who makes it the only reason to rank it so low in this comparison. However, it is possible to purchase an Affinity Photo from the website accompanied by another image organizing software. 17. Xara Photo & Graphic Designer Xara Photo & Graphic Designer has a powerful enhancement, and image editing features to enhance photo editing and vector illustration tools. It is a program that comes with high-end feature tools which are very simple to use having a favorable money value. Some of the photo tools it has include magic erase, photo healing, color select, photo effects and finally panorama. However, in regardless of the graphic, image requirements as well as skills level you have, it is a very friendly interface. . 18. Paint.Net It is commonly known for its simplicity. It is also easy and a quick to operate it when editing photos. Over the years many advanced image editing tool such as undo history, layers, a ton of filters and zoom filters to enhance recomposing of photos. If your computer or phone is underpowered, this is the best choice to think of, download it from the website. 19. Photo Pos Pro It not that well known but is a quality photo editor enriched with advanced photo-enhancing tools. It has a smart interface which is more accessible with all its content arranged consistently and logically. It also has a brush to erase unnecessary blemishes and supports batch editing to enable you to save time when you refine the folder of photos. The software is fairly priced at the website. 20. PhotoScape PhotoScape has a wealth of features such as photo merging and splitting, raw conversion, function to print graph or lined papers and finally creating an animated GIF. It is one of the esoteric interfaces among the others but with fewer features. It is most common for the novice users. With that said get the correct version at the website. Conclusion Choosing which photo editing software to use is a tough decision to make. Among all these programs their web-based and free applications as well as programs you can install on your phone or computer. Whether you are a professional photographer or a beginner in this software, there is software that can suit your needs and skill level. Some of the factors that you need to consider are your editing plans, tools that you require, file formats that fit your skills level, and finally the system of your computer or phone run the photo editing software. Article Updates Updated on December 2017 - Added more photo editors including online ones.
0 notes
Text
14 Apr 2025
14th April 2025, Monday Listening: Sick Sad Little World, Incubus
We had a meeting first thing in the morning and the three of us set up shop at different rooms even though we're all hosting the same meeting 😂 But Im not complaining, I LOVE having my own space.

After work had to shop for things to donate for CSR and this is my very first time actually using a shopping cart! I've never needed to shop for big hauls before because the things that I buy either for myself, or for my Mom are usually smaller packaged things that I could carry in the shopping basket.

Not gona lie but pushing the cart as a first-timer was a struggle 😅
--
15 Apr 2025
15th April 2025, Tuesday Listening: Shot at the Night, The Killers
Ive been playing with the camera while Im stuck in traffic. Kind of fun but kind of boring at the same time?


Anyway, today's 'fit!

--
16 Apr 2025
16th April 2025, Wednesday Listening: Trick Me, Kelis
Went to menara with YY to drop off the CSR items. Tasty chap for lunk with the teammates.
Today's 'fit!

Caught up with Zuls later after work and bought tickets for Blood Brothers because he wanted to watch it so ok la, layan la 😂
--
17 Apr 2025
17th April 2025, Thursday Listening: Dreaming of You, The Coral
Woop to 17! But MAJOR cramps day 🥴 Thankfully our movie’s later in the afternoon so I got to rest and sleep in. Popped panadols and thankfully the pain subsided by the time I had to go out. Blood Brothers was a good local movie, I did not feel like it was a waste. Had Padi for late lunk / early dins. Mediocre food, wouldn't necessarily go there again. I remember during my uni days, Padi cyber was all we ever went to lol.
Zuls was recording all these short clips for his little project, he even went to the extreme of crossing a big road..


Insane!!
Before that, we went to Whisk just for him to grab my coffee while I wait in the car hehe. Then went to the MRT for more of his short clips, even took a ride just for the heck of it. It was fun because there weren't any people around so we took some pics and I stupidly wore mismatched sandals when I stepped out the car 😂 (my birkenstocks are my driving slippers).

And then when we got back to the car, I realized I was missing my powtop AND my cc! I immediately concluded that they were both probably on my lap while I was driving and when I stepped out of the car, both items dropped on the ground without me realizing it. I've already accepted that fate but Zuls kept on looking inside and outside of the car and even walked back to the MRT station to check if I had dropped them along the way. Ended up going to brix which thankfully was still open and bought myself a new one 😅
What an eventful day!
--
18 Apr 2025
18th April 2025, Friday Listening: Drawing Rings around the World, Super Furry Animals
Still on leave today but the annoying one still pesters me about work 😮💨
Took Zuls to village park for his first time and he liked it! Wanted coffee afterwards but realized Chase was a bit too far from where we parked and it was extremely windy that day, causing my tudung to be flipping all over the place so ended up having HWC inside starling instead. Not bad. Will repeat. Left to BJ for some random burger that Zuls wanted but I was still full from the nasi lemak earlier so I just ordered loaded fries,

Full fatty day!
--
19 Apr 2025
19th April 2025, Saturday Listening: Bad Habit, Steve Lacy
Earlier today I rudely snapped at my Boss for being so impatient. I had to work on a Saturday even when I didn't have to. Sigh.
Anyway, last minute decish to go out for dins and we went to Hot Bird 😋 And since I have this 'fit out and ready for potential Raya open house (which unfortunately, none received anymore 😅), I decided to wear them out tonight for the sake of it!


Pictures from my Sony!
- -
20 Apr 2025
20th April 2025, Sunday Listening: Whole Wide World, Cage the Elephant
Added the tassels in the hopes that I won't lose it again 😂

Quiet day, lunked with Mom. Went out for dins with Zuls after dropping off clothes for my CSR. I realized I looked like a lollipop with my big head and stick body. Oh well..


Fun W3! Hamdulillah :)
0 notes
Video
vimeo
Transitions for Premiere Pro Motion Design from Antony Parker on Vimeo.
✔️ Get it here: templatesbravo.com/vh/item/transitions-for-premiere-pro/56153991
1500 Fresh Transitions For Premiere Pro Our newest pack of Premiere Pro transitions is here to change the game. Designed with care to keep your videos fresh, smooth, and engaging from start to finish.
Effortlessly glide from one scene to another, creating a fluid narrative flow that keeps viewers engaged and captivated. Take your videos to the next level with this fresh transitions package, where movement and energy collide in a captivating display of visual prowess.
1500+ fresh unique transitions for Adobe Premiere Pro Free Transition Tool extension for an easy and smooth workflow Any resolution up to 4k Premiere Pro CC 2022 and above Free updates
Categories
Camera – Spin, Spin Perspective, Corner Spin, Corner Spin Perspective, Slide,
0 notes
Text
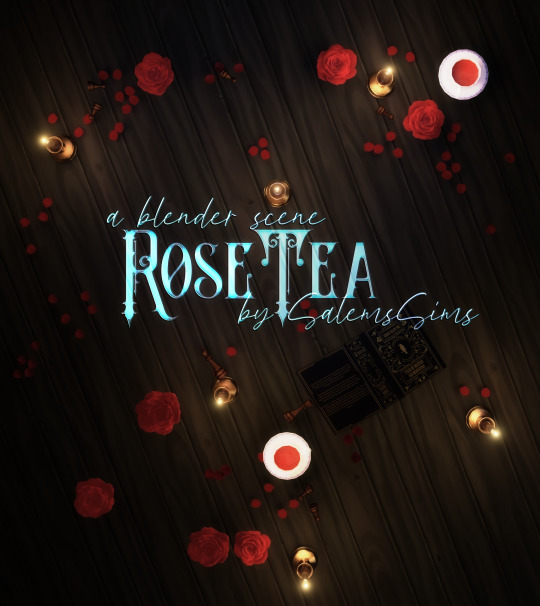
Rose Tea ~ a Blender Scene by SalemsSims
❗️This is a scene for blender and WILL NOT WORK in game ❗️
I wanted to share the companion scene for these poses!
Info:
I RUN MY RENDERS IN CYCLES - this was built for cycles and NOT tested with Eevee! (but feel free to adjust/run in Eevee!)
Made with & tested in Blender 4.1
Includes one camera setup (birdseye)
Organized files for easy editing
Includes a textures folder
Previews are edited for lighting/depth but otherwise straight from blender
Set up with glare and denoising compositing
Optimized for the birdseye angle (there's no other furniture or anything, but feel free to add some!)
Features CC (but NO PACKAGE FILES) from @oydis. @madameriasims4. @simcredibledesigns, @kerriganhouse & others - NO PACKAGE FILES means you will not be able to put any of this cc in your game, but it will work in the scene
Tested but as always please let me know of any issues!
Download all files in the folder, the textures included will be needed if anything shows up fuschia in blender!
TOU:
Do not redistribute or claim as your own
Do not put behind a paywall
Otherwise, do literally whatever you want with this scene
FEEL FREE to adjust/move/edit/recolor anything as you need it
DOWNLOAD (sfs, download all files) Make sure you unzip the file, otherwise everything shows up pink!
#ts4 blender scene free#ts4 blender scene#sims 4 blender scene free#sims 4 blender scene#sims blender scene#sims blender scene free#ts4 blender scene download#sims 4 blender scene download#sims blender scene download#salemsims download#salemsims blender scene#ts4#sims 4#sims
60 notes
·
View notes