#cheap printing and binding
Explore tagged Tumblr posts
Visit Tumblr Blog
Explore Tumblr blogs with no restrictions, modern design and the best experience.
Last Seen Tumblr Blogs


Fun Fact
Tumblr’s reach among the 26-to-35-year-olds in the US is 11%.
Text
#print#printingservices#printers#print design#mvp print#book printing#saddle stitched books#book printing australia#cheap printing#cheap printing and binding
0 notes
Text
so, you wanted to start bookbinding?
so @princetofbone mentioned on my post for "factory settings" about wanting to know more about the binding style that i used for it. so i thought i might make a post about it.
i was as terrible as i always am for taking in progress shots, but i can link you to the resources i used in order to make my book. i would also like to point out that "factory settings" is my 120th bind, and i have been doing bookbinding as a hobby for just over 3 years now. unfortunately this means some of the methods that i used for that bind aren't particularly beginner friendly, just in terms of the tools and methods i have used, but i would love to point you in the right direction when it comes to resources. i dont say this to sound pretentious which i fear i might come across, just so that youre fully informed. getting into this hobby is fun and rewarding, but it can definitely be intimidating.
with that caveat, heres a list of links and resources that i have used for bookbinding in general, with additional links to methods i used specifically in regards to this bind.
ASH's how to make a book document. it gives you a great introduction into typesetting fics (where you format the text of fics to look like a traditionally published books) and then turning them into a case-bound book (the style i used for "factory settings"). it is comprehensive, and explains how to use microsoft word to do your bidding. it was invaluable to me when i was just starting out! currently i use affinity publisher to typeset/format my fics for printing, but i only bought and learned how to use that after i had been binding books for a year and a half. i made some beautiful typesets with word, and some of my close friends use it still and design stuff that i never would be able to in my wildest dreams (basically anything by @no-name-publishing)
DAS Bookbinding's Square Back Bradel Binding. a great style to do your first bind in! this method requires, when making the case, to attach the cover board and the spine board to a connecting piece of paper, which makes it so much easier to match the size of the case to the size of the text block (your printed out and sewn fic). using this method is what allowed me to get much more accurately fitting cases, and made me much more confident with the construction of the books i was making. a well-made book is something that is so wonderful to hold in your hands!
DAS Bookbinding's Rounded and Backed Cased Book. This is the specific method that i used to create my bind for "factory settings"! even before i could back my books, i found that watching DAS's videos in particular helped me see how books were traditionally made, and i was able to see different tips and tricks about how to make nicer books.
Book Edge Trimming Without... i trim the edges of my text block using my finishing press and a chisel i have sharpened using a whetstone and leather strop with buffing compound on it. i follow the method for trimming shown in this video!
Made Endpapers. i follow this method for my endpapers, as i used handmade lokta endpapers, and they can be quite thin, but they look beautiful! i used "tipped on" endpapers (where you have your endpaper and then put a thin strip of glue on the edge and attach it to your text block) i used for a very long time before this, but these feel like they are much more stable, as they are sewn with your text block.
Edge Sprinkling. this is the method that i used for decorating the edges of my text block. but the principle is basically clamping your text block tight and then sprinkling the edges. i do not believe you need to trim the edges in order to do sprinkles on the edges, and that's what makes it accessible! i personally just use really cheap acrylic paint that i water down and then flick it onto the edges with my thumb and a paint brush.
Double-Core Endbands. i sew my own endbands, which i followed this tutorial for. that being said, it's kind of confusing, and this video is a bit easier to follow, but it is a slightly different type of endband.
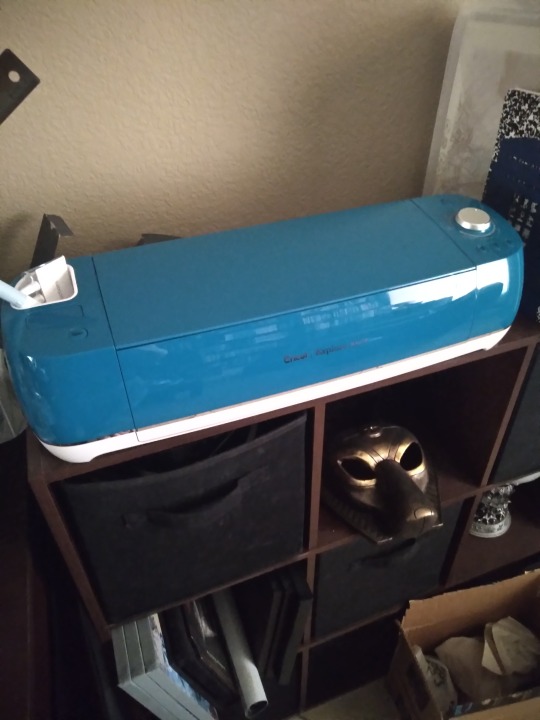
Case decoration. i used my silhouette cameo 4 to cut out my design for "factory settings" in htv (heat transfer vinyl). i also used my cameo 4 to cut out the oval of marbled paper on the front, as i honestly didn't want to try my hand at cutting an oval lol. i also glued some 300 gsm card with an oval cut out of the centre of it onto the cover before covering it with bookcloth, to get a kind of recess on the cover. i then glued the oval of marbled paper onto the top of the recessed area once it was covered with bookcloth, so that it was protected. the images i used were sourced from a mix of rawpixel, canva and pixabay. a more accessible way to get into cover decoration is by painting on a design for your cover as described in @a-gay-old-time's tutorial just here. or even doing paper labels, which look classy imo.
physical materials. sourcing these will depend on your country. i am located in australia, and have compiled a list with some other aussie bookbinders of places to buy from. here is a great post describing beginning materials for getting started binding.
@renegadepublishing. this tumblr is great! its what got me started bookbinding, and being in the discord has been inspiring, motivating, and honestly just one of the best online experiences i have ever had. it is full of resources, and most people in there are amateur bookbinders, with a couple of professionals thrown in. the discord is 18+, and anyone can join!
i'm sorry this post got so long, but i hope that this has a lot of information for you if you would like to get started bookbinding. its one of the best hobbies ive ever had, and i genuinely believe i will have it for the rest of my life.
4K notes
·
View notes
Note
for those in the audience who don't play mtg, could you elaborate on what aspects of the card's design/interaction with the rules makes beans such a pain in the ass?
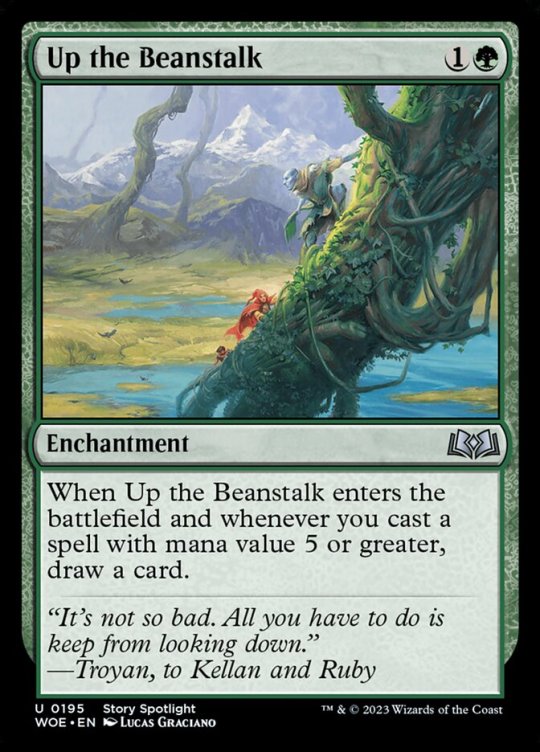
(we're talking about this cunt)
right, basic info first: in magic the gathering, you can't cast spells for free like in yugioh, nor do you gain mana each turn like in hearthstone. you need to play 'lands', which are cards that do nothing except tapping for mana so you can play your other cards. by default, you're limited to playing one land per turn from your hand, but certain spells and abilities (collectively called 'ramp', after rampant growth) let you circumvent this limit.
so: beans draws you a card when you play a card that costs five mana or more. it's designed to reward playing ramp-heavy big-mana strategies (the blue/green archetype for wilds of eldraine limited) by providing a payoff for cards that are normally weak because of how much investment they need--cards that cost a lot of mana either need to come down comparatively late in a match or need you to spend your first few turns ramping while your opponent is free to punch you in the face repeatedly. so beans is printed as a support piece to the WoE ramp archetype, seems sensible.
the problem is, this isn't how it's actually shaken out in constructed play, because there's a lot of cards in standard right now that ''cost'' five mana but have significant discounts stapled on. the most egregious example being the interaction between overlord of the hauntwoods and the domain mechanic (represented here by leyline binding)
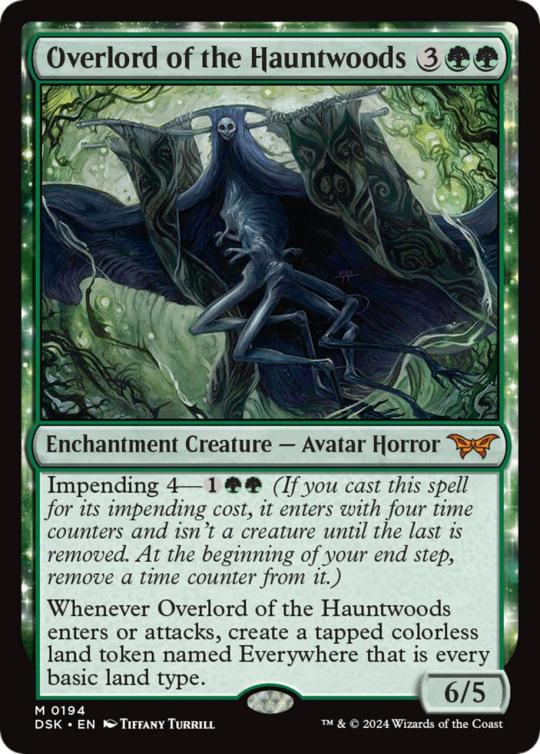
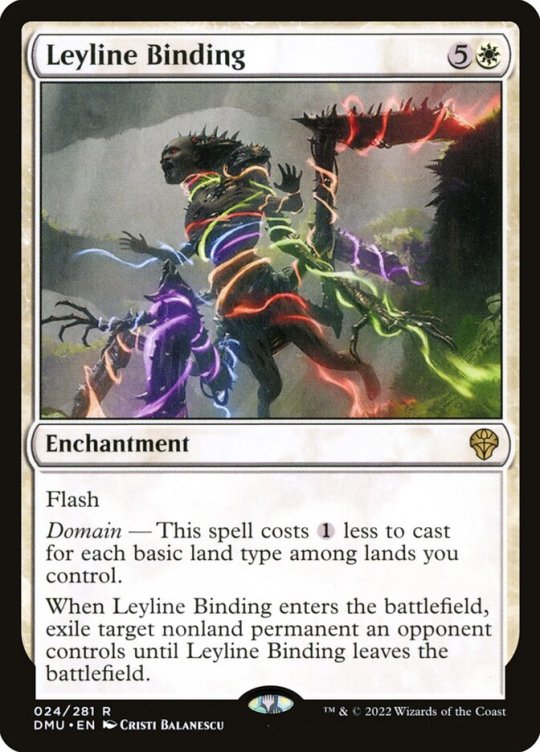
so, you have beans out. you cast overlord of the hauntwoods for its 'impending' cost -- despite only paying 3 mana, you've technically "cast a spell with mana value 5", so beans draws you a card. because overlord creates a token with every basic land type (there are five basic land types), you can now cast leyline binding for an eyewateringly cheap one mana -- but again, beans doesn't care about how much mana you actually spent, just what the mana cost printed on the card is.
so if it sticks beans, the domain/overlords deck (where bean is by far the most problematic, although there's more niche archetypes like simic terror/crab where it plays a role) ends up in a situation where nearly every card in its deck is a cantrip (mtg term for a spell that draws a card when you cast it, therefore replacing itself). this negates the biggest downside of these greedy bomb-filled types of decks in that it makes it nearly impossible for the domain player to run out of resources. the only way to beat domain is to go under it.
okay, so--stop them from sticking beans, right? it is very easy to destroy enchantments, there's even some really good modal enchantment removal in standard right now so you don't have to fully dedicate a mainboard slot to what could be a dead hand:


here's the thing, though: there's two things about beans that make this an inadequate solution. #1 is that it only costs two mana, and the beans player can start going card positive on it the turn after it comes down. to answer this efficiently you have to destroy it the turn it comes down or the turn after. but the thing is, the best non-domain decks (esper pixie, rx mice) are playing cheap, impactful, synergistic creatures--casting a 2-mana spot removal piece on turn 2 or 3 is a serious setback to their gameplan. and the worst part of all: even if you do that, you're left behind, becaues beans replaces itself.
this is the part that i personally think makes it such a huge problem card: the seemingly innocuous bit of text that says up the beanstalk draws a card when it enters. cards are the most valuable resource in magic. you can have all the mana in the world and it doesn't matter if you don't have cards to play with it. having more cards than your opponent ("card advantage") is a serious boon that makes you significantly more likely to win--the more cards in your hand, the more likely you're holding answers to their threats and game-winning threats of your own.
so let's say that you and the beans player both have, i dunno, six cards in hand. they play beans and draw a card. you pawpatch formation it on their end step. the end result of this exchange is that the boardstate is the exact same but they have six cards in hand and you have five! this is what makes beans feel so oppressive imo, that even answering it immediately starts slipping you into the chokehold of snowballing resource advantage that defines the overlord/domain decks
tldr: it is pushed just that little bit too much to take it from a must-answer play to a play that is essentially unanswerable unless you've got your hearthfire/manifold/monstrous rage/turn inside out combo ready to pop next turn
150 notes
·
View notes
Text
English Edition Sailor Moon Manga
There are 4 official English translations of the Sailor Moon manga, spanning from 1997 all the way to 2025. I've seen some confusion over what's what, so I thought it'd be helpful to make a post outlining each edition.
︶︶︶ ⊹ ︶︶ ୨♡୧ ︶︶︶ ⊹ ︶︶︶︶︶ ⊹ ︶︶ ୨♡୧ ︶︶︶ ⊹ ︶︶︶︶︶ ⊹ ︶︶ ୨♡୧ ︶︶︶ ⊹ ︶︶
TokyoPop/Mixx/Chix Comics (1997-early 2000s):
The OG translation and the only official one we had for many years. The translation uses names from the DiC dub, although Usagi is named "Bunny" instead of "Serena." Like most early English translations, the manga was flipped/mirrored and read from left to right to make it reader-friendly for American audiences who were unfamiliar with manga. Eventually this standard faded into obscurity and now we have the famous "STOP! You're reading the wrong way!" page.
Going into the whole history of this translation is kind of a headache because it gets complicated, but just know that it was released as both single-chapter comic books and as actual manga volumes. There are 18 volumes of the manga, same as the original tankoban printing in Japan. The binding on these TokyoPop volumes was notoriously cheap and flimsy, so it's hard to find copies that are in good condition nowadays. Finally, the translation itself was not very good.
︶︶︶ ⊹ ︶︶ ୨♡୧ ︶︶︶ ⊹ ︶︶︶︶︶ ⊹ ︶︶ ୨♡୧ ︶︶︶ ⊹ ︶︶︶︶︶ ⊹ ︶︶ ୨♡୧ ︶︶︶ ⊹ ︶︶
Kodansha Edition (2011)
This was a big deal back in 2011, as the TokyoPop version had been out of print for many years and even back then it was hard to find them for a decent price. The Kodansha edition used the shinsoban (second printing) of the Sailor Moon manga. This printing features colored pages at the beginning of the volume. Some pages were also completely redrawn to match Naoko’s later style, most notably during the first two arcs. The initial 18 volumes of the manga have been consolidated down to 12 volumes, plus 2 additional volumes with the side stories collected apart from the main story.
Unfortunately, the English translation itself is infamous for being subpar (although it was still an improvement over the TokyoPop editions). The translation was overly literal and came across as stilted. Sometimes the translation was so literal they would mistranslate well-known phrases (the one I remember the most is Sailor Jupiter's attack being translated as "Spark Ring Wide Pressure" instead of "Sparkling Wide Pressure"). There were also a number of typos and inaccurate translations.
With all that said, I (and many others) still appreciate the Kodansha editions for giving me access to the Sailor Moon manga in a time when reading it was very important to me. Fortunately, it's been succeeded by two much better translations.
︶︶︶ ⊹ ︶︶ ୨♡୧ ︶︶︶ ⊹ ︶︶︶︶︶ ⊹ ︶︶ ୨♡୧ ︶︶︶ ⊹ ︶︶︶︶︶ ⊹ ︶︶ ୨♡୧ ︶︶︶ ⊹ ︶︶
The Eternal Editions (2018)
Imo the gold standard of Sailor Moon manga. It uses the kanzenban (完全版, lit. “perfect complete edition”) printing from Japan. This edition reproduces individual chapter covers, color pages, and side-stories from its original magazine run, features that are often omitted or converted to grayscale in standard tankobon releases (so basically, color pages are included throughout the entire volume instead of just the front like in the shinsoban edition).
The kanzenban/Eternal Edition retains the artwork changes made in the shinsoban/second printing. It consists of 10 volumes, with the side stories being interspersed throughout the main story; this is also the case with the first edition. Finally, the volumes themselves are large and printed on high-quality paper; it feels more like an artbook than a manga volume.
As for the translation itself, it feels much more natural and is a huge improvement over the previous two editions. I really can't go on enough about how high-quality this edition is. The only downside is that, because it's such high quality, it's more expensive than typical manga volumes (the list price for each volume is $27.99, but thankfully you can usually find them on sale). The volumes are also large and heavy so they're not really manga you can casually take to a coffee shop or whatever. Thankfully the final edition rectifies this issue.
︶︶︶ ⊹ ︶︶ ୨♡୧ ︶︶︶ ⊹ ︶︶︶︶︶ ⊹ ︶︶ ୨♡୧ ︶︶︶ ⊹ ︶︶︶︶︶ ⊹ ︶︶ ୨♡୧ ︶︶︶ ⊹ ︶︶
Naoko Takeuchi Collection (2022)
The final and most current edition. It's a budget-friendly alternative to the Eternal Editions. They feature the same improved translation, but are printed as smaller books on cheaper paper. Like the shinsoban/Kodansha edition, they only feature colored artwork at the beginning of the volume. It uses the kanzenban/Eternal Edition's consolidated format, so it consists of 10 volumes.
︶︶︶ ⊹ ︶︶ ୨♡୧ ︶︶︶ ⊹ ︶︶︶︶︶ ⊹ ︶︶ ୨♡୧ ︶︶︶ ⊹ ︶︶︶︶︶ ⊹ ︶︶ ୨♡୧ ︶︶︶ ⊹ ︶︶
"So What Should I Buy?"
The TokyoPop and Kodansha editions are out of print, so it really just comes down to whether you want the deluxe Eternal Edition or the more affordable and portable Naoko Takeuchi Collection. Because the translation is identical, which edition you buy should be based on your preferences regarding size, paper quality, colored artwork, etc.
Imo, if you're just getting into the Sailor Moon manga the Naoko Takeuchi Collection volumes are a perfect place to start. For people who already love the manga, I highly recommend splurging on the Eternal Editions. It took me like 2 years to buy all of them because I only let myself buy a volume every couple of months, but it was so worth it!
124 notes
·
View notes
Text
How to format, print, and bind a zine

This is a consolidated version of previous posts on zine making, with more detail and screenshots. For a version of this post on gdocs, click here.
This is a step-by-step guide on how to use InDesign (or similar programs) to format and print a zine. This can be used for fanzines, sketchbooks, anything. It’s also only one way to do things - there are as many methods as there are zines under the sun. If you’re interested in other ways, searching for zinemaking on youtube would be a start.
If you are printing your zine, your total page count must be a multiple of 4.
Examples of multiples of 4 ✅
4, 16, 112
Not a multiple of 4 ❌
7, 99, 31
This is because our book will be made of folded A4 sheets (that’s regular printer paper). 1 folded A4 makes 2 A5 pages. Each A5 page has a front and back. Therefore each sheet of paper makes 4 pages.

How to format
Open InDesign. Go to Create New > Print. Choose A5 and tick Facing Pages. Enter your page number (this can be changed later). I’ve put 12. Hit Create.

Locate the Rectangle Frame Tool.

Draw a rectangle over your whole page, or just the part where you want your images to go.

Press Ctrl+D and insert the image you want on that page.

That’s it! Repeat on every page and you’ll have a book. Promise.

Further reading
I need a free alternative to InDesign.
InDesign is free for the savvy but I also recommend Scribus which is free and open source and very lightweight. The method is exactly the same but the Rectangle Frame Tool is called Image Frame and the Ctrl+D shortcut will now be Right click > Get Image instead.
I need help with designing my A5 pages.
For my first sketchbook zines, I arranged several images on an A5 canvas in a program like CSP or Procreate and exported them as a JPG into InDesign or Scribus. You can do this if your images aren’t already A5 size or you don’t want to waste time with InDesign’s formatting tools.
I need to get fancier with it, format text, or export my file as small as possible.
Here are the InDesign tutorials I used and liked:
How to Add Page Numbers
How to keep Page Numbers on Top
How to Create a Table of Contents
What is Overset Text and How to Fix It <- essential for formatting text onto multiple pages
How to Reduce InDesign File Sizes
Formatting best practices
Remember that in addition to your front and back cover you also have an inside front and inside back cover. You can leave these blank or create an endpaper with a pattern or include a short message or something. Look inside any books or zines on your shelf for inspiration. Or don’t listen to me and put your first drawing or poem there. Just be aware printer paper is thin so you might be able to see it through the cover.
Avoid putting anything important in the gutter (inside edge) or outside edges of the page. Also be careful of creating double page spreads that go across the centre of the book. Because of how we will print and fold the pages, each half of your spread might not meet up perfectly.

How to print it out
Open your completed book’s PDF file in Acrobat Reader (free download: https://get.adobe.com/reader/)
Print with the following settings: Booklet, and Booklet subset: Both sides.
We can see a preview of our print-out on the window on the right. The pages will look jumbled up, but form the book in order when folded.

Congratulations! Now you’ll have a stack of paper. Once it’s folded it should resemble your (unbound) final book. Use a bulldog clip or similar to keep your pages together neatly.

How to bind (2 methods)
If your book is less than 30 pages, I recommend using a long arm stapler, or a stapler that can open to lay flat. They are cheap.
There are also special book binding staplers or heavy duty staplers, if your book is thicker than 30 pages. Just position your book so the staples are in the middle of the spine (or as close as you can get) and send it. They will be a little wonky… that’s fine.
You can also separate your book into staple-able segments and then join them into 1 big book with tape or thread.
For my 112-page zine, I used thread to bind it.
These instructions are copied from the video ‘How to Print & Bind a Zine’ by LFONinja.
You can watch it here: https://www.youtube.com/watch?v=zKYy6G7lIy8
You will need: Ruler, awl, thread, sewing needle
Make 5 holes in the crease of the pages like so. (½ page, then ½ of that, then ½ of that again)

If the paper is thick, be careful when making the holes. It helps to have a piece of blu tack, putty, or soft eraser underneath the spine of the book as you work for the point of the awl to push into.
I don’t recommend separating the papers into smaller stacks as your measurements will likely vary and the holes won’t align.
Use a needle and thread to go through the holes in the following pattern. At the end, tie a knot with the ends of the thread (1 and 9) in the centre of the book. You’re now done.

About page creep
Because we are using folded pages inserted into each other, they push each other out like so:

From: https://www.greenerprinter.com/ support/page-creep/
You can use a heavy duty or industrial paper cutter/trimmer to remove this edge. This is why we kept any important contents away from the edge of the page during formatting, because we don’t want this process to destroy our book’s contents.
About image edges
Because of how the printer works, the images in the book don’t extend all the way to the very edges of the paper and have a thin white border on all sides. It’s possible to crop these edges from your book with a heavy duty paper cutter. Be careful and start small (3mm or less). Depending on how much your pages move during the printing process, the size of the white edge can be different on different pages. Or you can just leave them in.
To read some of the zines featured in this post, check out naumin.itch.io.
146 notes
·
View notes
Text
VALENTINE’S DAY BLURB, w. eklund
pairing: w. eklund x bff!reader, fluff!
content: you and william exchange early valentine’s day gifts :) possibly ooc william

valentine’s day was quickly approaching—it was obvious in the grocery stores nearby your apartment. a good portion of the store had become home to all things pink and red since the early days of january.
you stroll through the pink and red aisles, coolly pushing along a small shopping cart filled with your groceries and other miscellaneous goods, the wheels squeaking against the dirtied linoleum flooring.
you finally come to a stop as your eyes fall onto a small heart shaped box, snoopy and woodstock printed on the front of it. your lips twitch into a soft smile as you reach for it, your fingers brushing along the cheap and oddly shaped plush of snoopy that clings to the cardboard. you immediately think of william and place it into your cart with gentle hands, thinking of the little basket back home that you curated for him.
you and william were best friends, nearly inseparable from each other—and every year, the two of you spent valentine’s day together, curled up on his couch watching silly rom coms and enjoying each other’s company. you both always agreed that you wouldn’t give each other any gifts, always saying that being next to one another was the best gift either of you could’ve given, but that was rarely the case.
you’d already made him a little valentine’s day basket, the idea brought to you by a little tiktok you’d seen near the beginning of february. you’d blushed at the words that the original poster had used, calling it a valentine’s day basket for your significant other, but brushed the implication aside—william would understand you meant it in a friendly way.
even if you didn’t want it to be.
you quickly check out with your items and rush home, extra cautious with your small box of chocolates. the little smiley snoopy plush on the front already hangs onto the shiny cover as if its life depends on it, it doesn’t need to suffer any more harm.
when you finally get home, you slide your bagged groceries onto the counter and immediately turn your attention to the small gift basket hidden snugly behind your keurig. small things that remind you of william fill its contents; bags of swedish candy from a local candy shop take up majority of the space, the empty areas shoved full with matching woodstock and snoopy keychains and a gift card to the country club he likes—not that he ever needed the silly card.
the box of chocolates barely fits into the basket, hanging halfway out of it and leaving snoopy’s entire body out in the open. you contemplate dumping the entire basket and reorganizing it before a succession of rabid knocks on your door draws your attention away.
your brows furrow as you check the time, unsure of who could be at the door. when you lean over to look through the tiny peephole, all you see is black, a clear sign that someone has their finger pressed to the little circle—and you know only one person who would ever do that.
you swing your door wide open and grin brightly at william, his hand still outstretched as if to continue covering your peephole. his cheeks and the tip of his nose are flushed a bright pink, a beautiful contrast to his turquoise colored jacket. he has a gorgeous bouquet of flowers pressed to his chest and a very familiar looking box of chocolates tucked into the thick red ribbon that’s binds the flowers together.
“hello,” he says, smiling crookedly. “can i come in?”
you nod and step aside to let him in, careful to leave enough room so he doesn’t crush the large roses against the doorway. “who are those for?” you ask dumbly, shutting the door behind him and leaning into the wood. your heart thumps wildly in your chest, weirdly nervous that he’s going to say something unpleasant—something like he’d just been on his way over to a date and happened to be in the vicinity.
instead, william thrusts the bouquet toward you in a grandiose gesture, the deep red roses bobbing on their thick stems. “for you!” he says, cheeks burning impossibly brighter as he lets out a shy giggle.
you accept with shaky hands, unsure of what to make of this. he’d always given you a gift on the day of valentine’s, never a few days before. your heart beats even harder. “thanks, will,” you murmur gently, looking at the nearly perfect flowers. “i don’t know what to say… they’re very pretty.”
“you’re welcome.” william smiles fondly at you, his eyes rounded with something you think is adoration. “i like you,” he blurts quickly—so quick you almost miss it.
“what?”
william’s head cocks slightly to the side, eyes drifting over your face and then the area surrounding your head as if he’s scared to make eye contact with you. “i like you,” he repeats, “i know we are always each other’s valentine, but… will you be my valentine?” his words lilt with his gentle accent, soothing you like it always does as you fumble to keep hold of the bouquet in your hands.
you start giggling, unsure why, but still laughing. “yes,” you manage through your laughter, placing the roses on the kitchen countertop and throwing your arms around william’s neck. “i would love to be your valentine!”
the way you react is as if he’s done you the greatest favor ever, as if he’d just gotten down on one knee and asked you to marry him—and to you, it almost feels like it. william’s palms grasp the back of your shirt and you can feel him grinning into your shoulder, his cheek pressed snuggly against you.
“is… is that basket on the counter for me?” he asks, voice muffled.
you stiffen in william’s hold, having forgotten about the gift basket on full display atop the kitchen counter. you turn to look at it and cringe when you see that the snoopy plush has fully fallen off of the cardboard, now laying next to the exact same box of chocolates william bought for you.
“yeah,” you murmur, pulling away from his hold to rub at your nape. “it was supposed to be for valentine’s day. it’s got some snacks and stuff in it for movie night…”
william picks the little snoopy up and grins, dimples on full display as he wrestles the box of chocolates out of the bouquet’s ribbon to get access to your own snoopy. he gingerly takes the plushy from the box and situates the two little dogs next to each other, working their little hands together. your heart jumps at the sight of him, all cute and shy as he moves from the two dogs to the basket, his rough fingers brushing through all of the things inside of it.
“i love it,” he whispers, looking back at you and smiling. his head is slightly tilted to the side, cheeks and the tips of his ears bright pink.
“can i kiss you?” you ask suddenly, enamored with the sight of him standing in your kitchen. “it’s just… i also like you and you’re really cute and—“
you continue to ramble, embarrassment flooding your body, until william comes up to you and places a gentle hand on your cheek. when he presses his lips to yours, he’s unbelievably soft—as if you’ll suddenly pull away. instead, you press him closer to you with a placed hand on his nape, feeling him tilt his head to deepen your kiss with a soft brush of his tongue on your bottom lip.
fireworks explode in your stomach and behind your eyelids, all pink and red—the colors of valentine’s day and love.
#val’s writing 🧃#nhl x reader#nhl imagine#nhl blurb#nhl fanfiction#nhl fic#william eklund x reader#william eklund x y/n#william eklund x you#william eklund#william eklund blurb#william eklund fanfiction
70 notes
·
View notes
Text
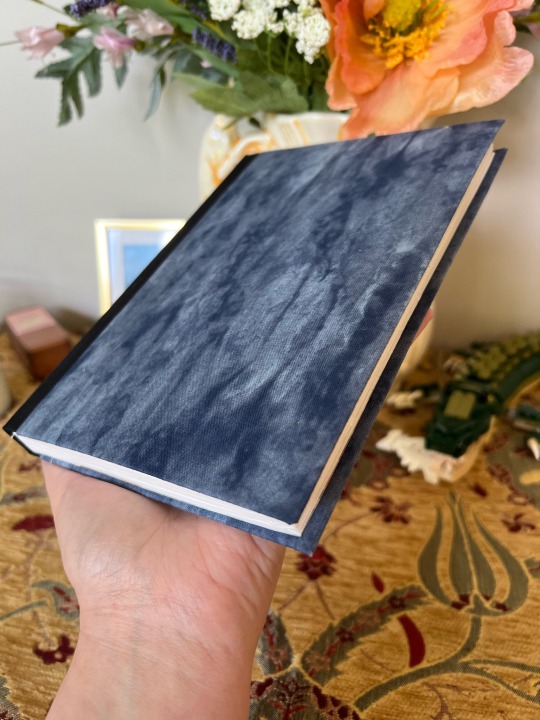

IT'S DONE! I made a book! I never thought I'd ever be able to make a book. Sure mistakes were made but it was still a fun process and I learned so much from making this first one.
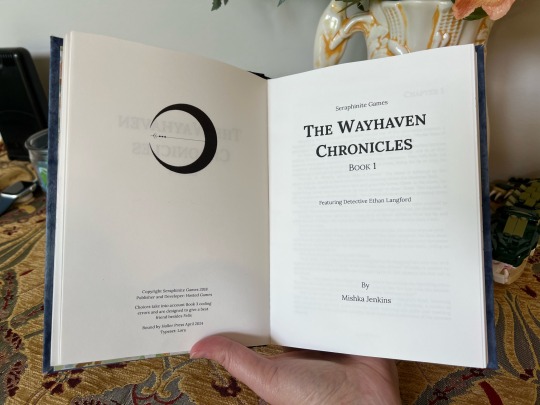
This a binding of The Wayhaven Chronicles IF but with my personal Detective's choices included and the resulting text smoothed out to read more like a novel.
Honestly, I thought something like this would be way beyond my skill set but it wasn't as scary as I thought once I got started. Definitely check out @renegadeguild for some book making and typesetting guides and their discord is super friendly and helpful as well.
If you want to learn from my mistakes I'll go into some trials and tribulations under the cut.
I'm not sure how well this book will hold up long term but that's ok! It was more about learning and I'll make some adjustments and try again with the same text probably.
Typsetting
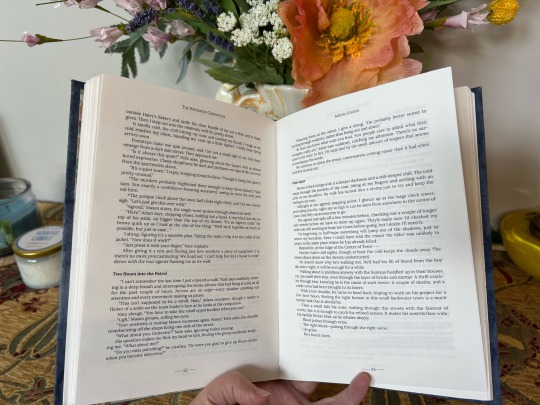
Margins - need to make them bigger. I mostly read paperbacks so I was going for that format with narrower margins but then when I ran into paper problems, I didn't have a ton of room for trimming.
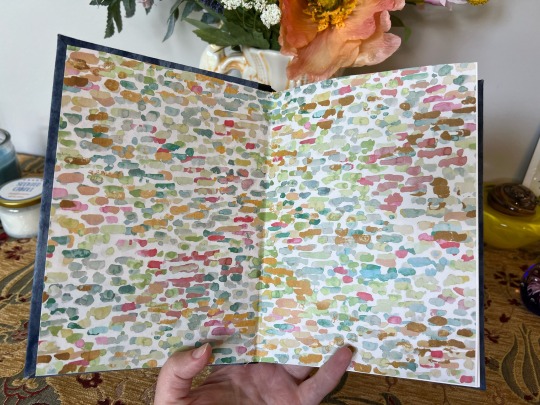
There was an option on the imposer to add dotted lines to the center fold and I clicked that but they're visible still even after binding. Could be that I needed to sew my signatures tighter and that would help but regardless I don't think I need them in the future so I'll be skipping that feature.
The font was intentionally small, along with the margins, because I was trying to minimize the number of signatures I was dealing with for a first project. I'll bump it up in the future.
Paper (so much wrong)
So the grain should run parallel to the spine but I couldn't find short grain paper. I read at some point that someone recommended using sketch books instead because that should be the right grain. It was not, at least not what I bought, so it still ended up going the wrong way.
The sketch note book I bought had perforated pages. It made them easy to get out but I didn't realize that the page widths were inconsistent until everything was printed out. The paper width varied by at least 1/8 of an inch. I wasn't planning on trimming my pages but my top was super uneven because of this so an attempt at trimming was made. It could have gone worse (there was no blood) but the trimming could have been a lot better too.
Should have just used printer paper. The results would have been the same.
Making Book Cloth
Used the Heat and Bond method with some spare fabric and it worked pretty well. The problem was when it came to adding backing. I'd read tissue paper or even plain paper so I grabbed some piecing paper that was close at hand. That was a mistake. It was good quality fabric so it was thicker already and the paper backing made it too thick. I could barely fold it over and it kept wanting to flip up. It's the spine fabric and I'm still concern it's going to do this in the future.
Used tissue paper for the marbled looking fabric and it was much easier to work with.
Book Board
Not measuring right was all on me. The rice box worked in a pinch but I think it will be prone to bending. Got me the experience I needed be wouldn't be my go-to material for a project of this size.
Glue
I used Elmer's All Purpose and it got the job done but, again, probably not going to hold up the best long term. However, I'm glad I didn't buy PVA and basically waste it on this project. Elmer's was good and cheap enough for practice. I'll be getting some PVA for future projects.
#the wayhaven chronicles#twc#bookbinding#life at nerdy holler#nerdy makes a book#Already poking the typeset for a second attempt#I really and truly am pleased with this though#even if it isn't super fancy or didn't come out exactly like I wanted#so jealous of the fancy htv titles and cover designs people make#but sadly I don't know anyone with a cricut or similar to make it
246 notes
·
View notes
Text
To Live In Color Bookbinding Tutorial(s)
Here's how I turned To Live In Color into a book.
This fantastic book binding tutorial by @armoredsuperheavy was incredibly helpful and insightful. It taught me how to format the fic in a Word document. I cannot overstate how detailed and wonderful this tutorial is.


After winning a battle of wills against Word headers, I sent the PDF to a printer in order for it to be printed in color. Shockingly, color was important for the artwork in a story whose title and main theme is about color. I used Armored Super Heavy's method for sewing signatures together using linen ribbon for stability. I took no chances on my masterpiece.


I used this bookbinding tutorial from youtuber Bitter Melon Bindery as a guide for the construction of the book. Two cutting boards still covered in cellophane and two clamps as my bookbinding press were my pressing tools. Is it fancy? No. Is it cheap and does the job? Yes. After the spine was glued, I cut the edges for a smooth, polished look using a box cutter and metal ruler. This was the most nerve wracking step, and the one I struggled with the most, honestly. Mistakes were made. Fine grit sandpaper was key for fixing them and achieving a smooth, professional look. Then I added mull (or the closest fabric I could find acting as mull) to strengthen the spine. I made two copies of the book, one for myself and one for @sparrowmoth, who was the biggest cheerleader for this fic. Seriously, their comments (and friendship which started because of this fic) were so wonderful that I'm gifting them a physical copy.


I measured and cut the book board. The cover is meant to look like Wylan's waistcoat in the fic, Cinderella blue with eye catching silver and blue embroidery. Sparrowmoth helped me design an embroidery pattern to fit the dimensions of the cover. The final design is an adjusted version of this embroidery pattern from Bella Savory on Etsy. I did buy the pattern, for the record. I would have liked the pattern to swoop diagonally across the cover (as pictured above on paper), but the narrow length made this difficult.
I cannot tell you how many times I drew this pattern. First, it was copied onto paper and also copied onto the reverse side of the paper. Then, it copied (backwards) onto the interfacing which was then ironed onto the wrong side of the blue satin used for the cover. All of this was a spacial awareness nightmare for me to make sure it was on the correct side of the cover and facing the correct direction. Woof. Finally, I held the satin up to the light and retraced the pattern AGAIN with pen onto the front of the satin.


I have no real experience embroidering, other than using a simple back stitch once for cosplay. But I looked up stitch tutorials online and made two practice samplers (once exactly as instructed by the original pattern I bought, and once with the modified pattern, satin fabric, and satin silver floss) before attempting the final version. It's not perfect, but I am very proud of how it turned out.


I then turned the satin fabric into bookcloth by using a double sided adhesive (shown with the square paper) and blue tissue paper. The color was not necessary because it's not seen when finished, I was just being extra. The adhesive had the added benefit of securing the back of the embroidery. Then I glued the cover boards. The glue warped the boards, but they were easily fixed by placing the text block between and pressing it down overnight with a heavy textbook.


Unfortunately, the corners were a mess. The satin frayed easily despite being glued and I was forced to use metal corner covers to prevent the fabric from damage. The corner covers actually worked in my favor. Now I like the look of them. They definitely make the book seem more polished and fairy tale fancy.


Finally, I glued the textblock to the cover, completing the book. It's not perfect by any means, but it is my masterpiece. Every part of the book (except for Sparrow's artwork) was created by me. I wrote the story, formatted the text, created all of the other artwork including the title image with the butterflies, and embroidered the cover. It was a labor of love from beginning to end. I am so proud of my fanwork-turned-book.

45 notes
·
View notes
Note
Do you have any advice/suggestions for getting into bookbinding? What is the process like if you don't mind sharing?
Hello! Very happy to share bookbinding advice/resources 💜 it's a wonderful and delightfully rewarding hobby, and while it can be complicated and easy to get stuck in the weeds with it, you can also get started with some really simple binds with materials you may already have around your living space.
Info below the cut:
First off, there are a lot of instructional videos and guides out there for bookbinding. My favorite YouTube channel for those just starting out bookbinding is Sea Lemon, who has a ton of instructional videos for various styles of bookbinding. Her method of explaining things is clear and concise, and she tends to work with simpler tools and materials that don't cost much and that you may already have on hand. She is not a professional bookbinder with professional tools (afaik) but in my opinion, that's perfect for a beginner because it's not as overwhelming and has a much lower barrier to entry. Perusing her channel and watching a bunch of videos was where I started before even picking up tools to start my first bind.
Another guide I highly recommend is How to Make A Book, by ArmoredSuperHeavy. This is a wonderful step-by-step guide for taking a fic from AO3 and turning it into a book. The most helpful part of this guide, for me, was the typesetting instructions. Typesetting is the act of taking a piece of text (eg. a fic on AO3) and formatting it in the correct way for printing and binding into a book. Note that this guide is specifically for MS Word, though you can also typeset in Google Docs, Libre Office, Affinity Publisher, InDesign, and other programs (even LaTex!).
(Pro tip: save yourself the headache of trying to use Word's bookfold option and just set your document page size to the page size of your finished book (if you're printing on letter paper, this is 5.5" x 8.5") and then use this software to put your pages in the correct order: https://momijizukamori.github.io/bookbinder-js/)
A final resource that I recommend, but that can also get a bit overwhelming, is the Renegade Guild Bookbinding Discord. It's a space specifically for people doing fanbinding, and there are a ton of resources within it, including typesetting guides for various softwares, guides for where to get the tools you need and which tools are best, and people who can answer any questions you may have along the way. It's gotten quite big since I joined, and it can be overwhelming since there's so much information available and so many people who have been binding for a while and thus often offer up solutions or advice that's hard for beginners to understand, but it has never failed me when I've had a tricky question that I needed answered that I couldn't find information on anywhere else.
All that said, here's some more advice from me when just starting out!
Start with a simple bind. A single-section pamphlet bind is easy, cheap, and quick. Here's a Sea Lemon video for how to put together a pamphlet bind.
If typesetting seems intimidating, you can bind blank notebooks. This is also a good way to practice new binding styles if you don't want to go through the hassle of typesetting, imposing, and printing for something you worry you might mess up.
A good word count range for fics when you're learning how to bind case-bound books (ie, the typical hardcover books you see in stores) is 25-50k. Shorter than that, and your books will be thin and a bit fiddly to work with. Longer than that is probably fine, but it will be a quicker process for a thinner book, which is nice when you're just starting out. (And then you don't have to worry about rounding and/or backing, which can be complicated.)
There are very, very few tools that you absolutely need to make a book. There are quite a few tools that will make your life easier, or that will make your book look nicer, or that will make your book last longer, but when you're just starting out (especially if you're trying to minimize cost or deal with space constraints), you can forgo a lot of "required" tools. I'll include a list below of the general bookbinding tools you'll want and some substitutions for them.
You might hear talk about the grain direction of paper or bookboard. When you're just getting started, don't worry about this. Once you get more comfortable with the bookbinding process, then you can start ensuring that your bookboard has the correct grain direction (parallel to the spine) to reduce the warping of your covers. The grain direction of your textblock paper matters the least, and I didn't start using "proper" textblock paper (ie short grain) until about 2.5 years after I started binding.
Bind something you like! Pick one of your favorite fics and bind it, even if it's your first bind and you're worried about it turning out ugly. The excited feeling of having bound your first book will be that much more exhilarating when you're able to put a story that you love on your shelf for the first time.
So you're ready to bind a hardcover book! Here are the tools you will want/need:
An awl, for punching holes in your signatures (groups of paper). You can use a thumbtack for this, or even a strong needle if you have something to cushion the end of it that you'll be holding, like an eraser. Awls are typically pretty cheap, though. You'll want a thinner one so you don't make huge holes in your paper. I have this one and it's worked just fine for me.
A bone folder, for creasing the pages. Historically, these are made out of actual bone, and the reason for using one is to get sharp creases in your paper without tearing or damaging it. You can also use basically anything else in your house that can accomplish this task. When I'm feeling lazy and just need to crease one piece of paper, I use my thumbnail. Bone folders are also cheap, though--I have this one. (As a tangent--when you're making your signatures for your book, you're going to be folding and slotting together usually between 4-6 sheets of paper. Fold the paper normally without creasing with the bone folder, slot them together, and then use the bone folder to sharply crease them all together. Trust me on this--the pages will fit together much better if you crease after putting the signature together.)
PVA glue, for all aspects of gluing involved when making the book. You can, I've heard, use Elmer’s glue for this in a pinch, but I've never tried it. PVA will dry flexible, which is what you need for your book, especially when gluing the spine. For things like attaching decorative paper to your covers, this is less important. If you're making a book that doesn't require gluing the spine (like a pamphlet or coptic stitch book), you may not need PVA. There are also lots of other glue mixtures you can use when bookbinding (paste is a popular one) but I've been a straight PVA guy for over three years now and I can't offer any advice when it comes to other types of adhesives. One note about PVA is it dries quick, so once you've stuck something to it, that's that. Prepare yourself for some crooked books until you get the hang of it.
Gluebrush/paintbrush, for applying glue. I recommend something with bristles; the foam brushes technically work but will absorb most of the glue and will probably cause you a headache. Silicone brushes are wonderful, as you can just wait for the PVA to dry and then peel it off, but a regular glue brush will also work; just be sure to put it in water immediately once you're done with it, otherwise the PVA will dry on it and ruin your brush.
Ruler + pencil, for measuring. Any kind of ruler will do, but if you have access to a quilting square or something similar, this will help you get nice and even right angles.
Needle and thread, for sewing the signatures together. You can use regular sewing needles and sewing thread (doubled up for more strength) if you don't want to buy anything specific for this. An easy step up from this that I recommend is buying a block of beeswax (I got mine for like $4 from a farmer's market) and waxing your thread (running the thread along the block a few times). This will keep your thread from tangling and make it easier to work with. You can also use embroidery thread, especially if you're doing a pamphlet or coptic stitch bind and want some color. I recently upgraded to linen thread (thread weight 35/3), which is the standard for archival-quality books, but you absolutely can use cotton thread and it will be fine.
Paper, for the textblock. You can use your standard white copy paper for this and all will be well. Or, if you want to get a bit fancier, you can use cream-colored paper; 8.5 x 11 hammermill 20lb cream colored paper is easy to find and relatively cheap and will make your books look better, as plain white paper can look almost blue in a book. (That said, I also have some actual published books that use white paper, and I've never noticed anything off about them.) If you decide you want to get really into the proper grain direction, I get my short-grain cream-colored paper from Church Paper. They have both 20lb (typical copy paper weight) and 24lb (slightly heavier) weight. I have both and I actually really like the 24lb; it has a luxurious feel to it, with less bleed from my inkjet printer. If you feel like springing for nice paper, check out their site!
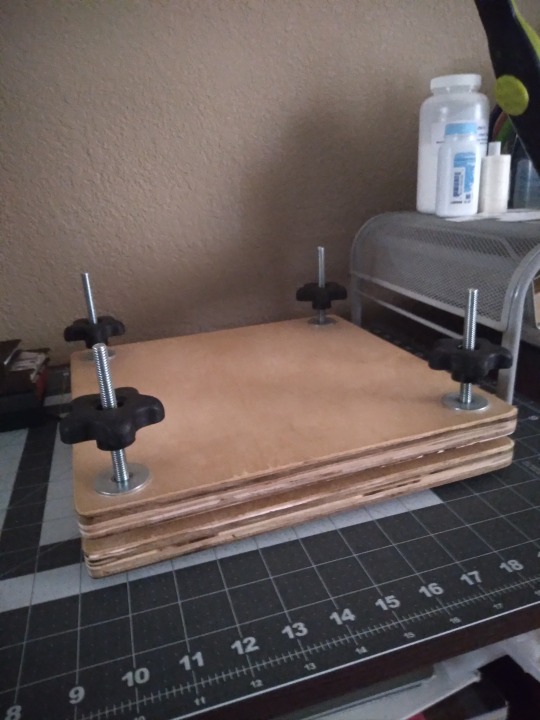
Book press, for pressing your book while it dries and pressing your folded pages before sewing. There are a lot of different kinds of book presses out there, many of which are very very expensive. You can usually make do with some heavy books to weigh down your book while it dries, or thin boards and C-clamps if you have those on hand. If you have access to basic power tools, it's also super easy to make your own press with carriage bolts and cutting boards (this is what I did). There's a lot of videos out there with instructions; here's one from Sea Lemon.
Printer and ink, or a printing service/print shop like Staples. Print shops can get expensive in the long run, and it's nice to have your own printer so you can do test prints of your typesets. If you're going out and buying a printer, I highly recommend either a black and white laser printer (if you're not planning on printing in color; Brother is a good brand) or a tank inkjet printer (like the Epson Ecotank). Do NOT get a new HP if you can help it; their ink subscriptions are brutal. I'm upgrading to a black and white laser this year, but I've been using a very old, cheap HP inkjet that I got off Facebook marketplace for the past few years and it's been reliable (if a bit restrictive). If you do have an inkjet currently that takes cartridges, I highly recommend looking up how to refill your own cartridges. Buying one set of genuine HP cartridges and then refilling them with generic brand ink until they die has saved me probably hundreds of dollars by this point.
Book board, for the covers. Otherwise known as chipboard, which is easy to find on Amazon or at craft stores. This is NOT the same as corrugated cardboard; that will not work. You can cannibalize old three-ring folders, which have chipboard inside them, or even old hardcover books/textbooks. Don't bother with genuine bookbinding chipboard; imo, it's overpriced and unnecessary. You can find chipboard on Amazon for relatively cheap; I recommend the 12x12, as you can get a front and back cover out of one sheet with the correct grain direction. You can use chipboard for your book spine, if you're making a flatback, or you can use a thinner material that you can bend if you're making a rounded book (or for flatbacks as well). For this, thin cardboard (eg. old cereal boxes) or thicker cardstock will work just fine; you don't have to go out and buy genuine bristol board, and I've never bothered with it.
Exacto knife, for cutting things. You could also use a boxcutter, but a craft knife will be easier to handle. You will probably need to frequently change the blade, as cutting chipboard will dull it quickly, so get one that comes with a bunch of replacement blades.
Bookcloth and/or decorative paper, for covering your book board. Bookcloth is basically fabric with a paper backing on it. You can make your own using heat and bond, tissue paper (I use white tissue paper), and fabric; iron the fabric so it doesn't have any wrinkles in it, then iron the heat and bond onto the fabric, then iron the tissue paper onto the heat and bond. There are other methods out there that you may find easier/better, but this is the one I use. The purpose of the paper backing is to prevent glue from striking through the fabric; if you use a thicker fabric or paper, this is not necessary. For your first books, you may find it easiest to just use paper, or to go out and buy some premade bookcloth.
That's a lot of information, but I hope it was helpful! I'm more than happy to answer any more questions you (or anybody else) might have, and happy binding!
30 notes
·
View notes
Note
That National Geographic leather binding for Yellowstone is fucking Gorgeous!!! (Pardon my Language)
How long have you been binding, and what would you recommend to someone who wants to try it for themselves?
hello and thank you so much!! I worked really hard on that one (and no pardon needed haha)!
I started binding in February of 2021, which means in a few months I'll have reached 4 years. It's been an awesome journey!!
If you'd like to try it for yourself, I'd recommenda few things!
1) You can 100% try out the basics with near free or cheap materials. People typeset in Word or Google Docs or Pages. You can print on printer paper & use regular sewing thread & scavenge board from old books or notebook backs or do a limp leather binding & use no boards at all. You can make paper pamphlets. Any comments I make following this are about my preferences for best results. The most expensive part that cannot be avoided is printing. On the other hand expenses can wildly escalate if you're committing to it; once you are doing leather it becomes somewhat unavoidably expensive.
2) Check out some tutorials from SeaLemon or DAS Bookbinding on YouTube for the physical construction. SeaLemon is really clear for a beginner starting out, but then I'd move to DAS for better technique (DAS also has a beginner series though). I watched DAS Bookbinding videos for three weeks straight before I was able to start, & while that doesn't maybe work out for everyone I do think it gave me a pretty strong basis of understanding for structural techniques. DAS is *really* good at explaining why he thinks you should do something. The structure of the NatGeo bind is basically DAS's video on a rounded & backed bradel binding (but with leather & sewn on recessed cords). There is some good stuff on Tiktok/IG, but watch short-form videos/reels with caution. They move a little fast and I've seen a couple give instructions that can result in structural flaws (not that this is unique to the form, cross-referencing on instructions from any source is a good practice). They are good for if you're looking for a specific technique (particularly modern decorative ones, like cricut use, edge gilding, HTV application). There are also published books you can buy or maybe request through your library, such as Hollander's Introduction to Bookbinding. Renegade Bookbinding Guild runs a whole bunch of technique-specific in-house zoom classes annually.
3) Look to other fanbinders for tutorials on how to format the text (this is because most pro bookbinders do not do both text design & book creation! it's a pretty unique feature of fanbinding). @renegadeguild has some publically provided resources on our website here and more typesetting tutorials for a whole host of softwares (Affinity Publisher is my choice - one time purchase, fuck you very much Adobe InDesign) located in the discord server. Anyone 18+ can join the Discord. The NatGeo inspired book (text & dust jacket) was created in Affinity Publisher.
4) Join a community of fanbinders! It's really lovely. The space has exploded & there are tons of people to be friends with, trade tips, & cheer each other on. I'm part of @renegadeguild and we do a whole bunch of events throughout the year, and we have an in-person retreat every other year. I've met with over 20 different renegaders so far, in three different countries, and it's been such a blast. Definitely the community helps keep up the motivation. Renegade isn't the only community out there though! There's groups more rooted in IG/tiktok circles that have their own discords, plus a number of FB groups. I do think most people who are comfortable on tumblr enjoy Renegade's vibe.
5) While I learned most of what I do online, some things really benefit from in-person learning. If you want to do leather binding I would really recommend trying to take an in-person class. I did two attempts at a leather binding on my own before I decided to hold off until I'd had at least one in-person class. Leather binding can be extremely frustrating, especially when you can easily end up with a book that looks worse than a cloth binding at your same skill level but for double the cost. Imo this is mostly because the leather specific skills like paring, warp management, and assessing a random piece of leather for bookbinding suitability are all pretty tactile experiences, all of which are difficult to assess through a screen and can result in an unpleasantly bulky/stiff/shapeless book if ignored. For example- while this book of mine is a pretty popular post, I don't enjoy holding it and reading it, especially in contrast to the NatGeo bind. Part of this was the material I chose; part was not being able to adhere to the instructions quite well enough; part was just not knowing enough about what I was doing; part is they're different constructions. This might just be a me thing though; I'm sure others have had success with online only tutorials for leather.
6) I'm not going to get into specific tools bc that could be a whole post, but some things are necessary (printer access), some things are necessary depending on style, some things are "makes life easier but only drop the money if it's stopping you from making books out of frustration", some things are just technique-specific tools. Examples - sewing frames are often brought up but are never necessary unless sewing on cords; cricuts & cutting machines are commonly used in fanbinding circles but I don't have one (& don't intend to atm).
7) Don't be shy to offer the author a copy!! Like other fan activities, fanbinding is part of our fandom community ecosystem. Your fanbinding is in communication with the author's story. Giving a bind to the author is a great way of keeping the ecosystem going. I tend to think of binds as a combo of comment, fic rec, and fan art inspired by the fic.
8) Paper grain sounds stupid but it IS IMPORTANT! My personal hierarchy of give-a-fuck for grain: Board grain, spine card grain, endpaper grain, cover paper grain, text block grain, book cloth grain. The only thing I personally sometimes ignore is book cloth grain; but many people will not worry too much about text block paper grain.
Gonna stop there for now. If you've got specific questions or want elaboration, feel free to ask. As with all things, YMMV, this is my own opinions/experience and may not apply in all cases. There's a whole lot of different techniques out there, and it's hard to ever say something is wrong, per se - but I think it's important to understand if a method has an outcome you may want to avoid. Prioritize your goals & adapt for them - what's your goal? Longevity, readability, aesthetics? You might make different choices depending on them. My choices influence the techniques I chose to focus on, the tools I buy, and thus the final aesthetic of my binds.
32 notes
·
View notes
Text


English :
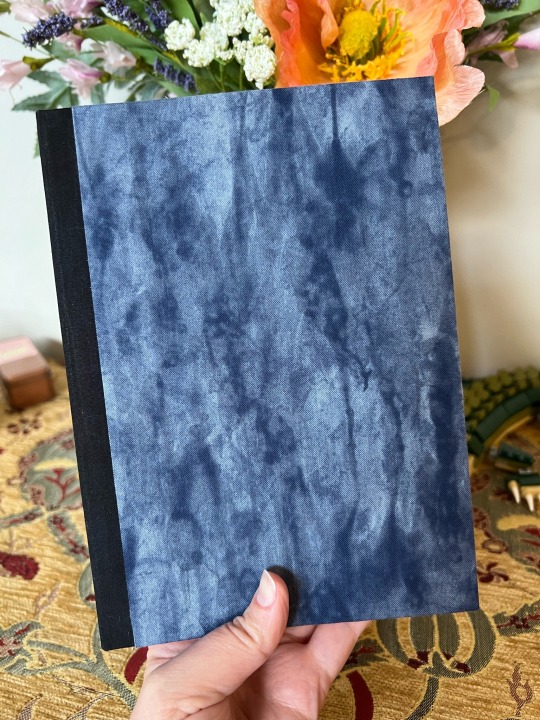
I've written many little one shots these last two years and I decided I needed physical copies.
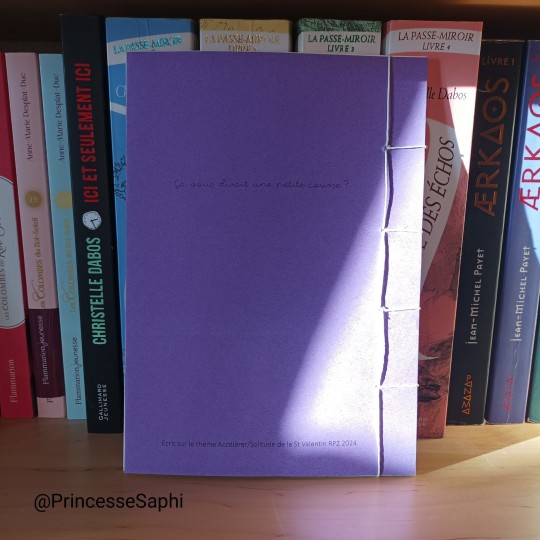
I chose a simple japanese binding because i could just fold the pages without dealing with double side printing and since the books where small the extra thickness was in fact quite welcome. These are rather cheap materials found in an ordinary office supply shop I just found fun to work with stuff anyone could use.
Here you can see I used the flap to print the comments too. I makes me happy to have them with the text.
This is à l'infini I wrote in febuary 2023 for a Valentine mounth event.
Français :
J'ai écrit pas mal de petit one shots ces dernières années. Et je voulais en garder une trace physique.
Je suis partie sur une reliure japonaise toute simple parce que ça m'évitait d'avoir à gérer des recto verso (surtout que je croyais que mon imprimante ne pouvait pas en faire alors que finalement, si !!) Il suffisait de plier les pages en deux. D'ailleurs vu le petit nombre de page avoir un peu plus d'épaisseur était finalement pas plus mal. J'ai utilisé que du matériel trouvé en papeterie ordinaire et en fourniture de bureau, c'était marrant de bosser avec du matériel que tout le monde pourrait se procurer.
Ici, on voit que j'ai profité des rabats pour imprimer aussi les commentaires, je suis contente de me dire qu'ils sont là avec le texte.
Cette fic, c'est à l'infini que j'ai écrit en février 2023 pour un évènement st Valentin.
29 notes
·
View notes
Text
Backslide by Blackkat!
I was testing to see what the limit was for "how big can I make a paperback!" Turns out anything over 125k in this method (legal size quarto) won't fit under my guillotine! Lots of sanding occurred because Backslide (by @blackkatmagick ) was a perfect (for testing) 128k and it did NOT fit under my guillotine. Very educational!
It's a gorgeous and chonky boy. A whopping 776 pages!!! I used my thermal binding machine and it did not flinch.
The cover is designed in canva and printed on cheap cardstock. Then I half laminated it (only laminated the cover side, the back side is plain cardstock so it can be glued).
I also learned why we don't use scrap paper to protect the book in the thermal binding machine-- some of the text from my scrap paper rubbed off onto the spine and won't come off! Fortunately this book is for my own shelf and I'm not bothered by mistakes at all :)
I did spend about an hour fighting the guillotine, sanding, and even got out a chisel to whack at it.
I made many, many mistakes but thankfully few are evident in the final form of the book!
Hope you enjoy :)


The fic can be found here on ao3!
Longtext:
83 notes
·
View notes
Text


Right. Fail photos. You can see the bend on the covers due to the lamination on the one side. I’ve been trying to squish it but I think it’ll probably only squish so far.
More process discussion below cut.
The cover is delaminating on the spine and taking some of the toner with it. 😐
Pros: double fan bind worked really well, was quick and easy, and my guillotine did very nice square cuts to trim the book after. Also, the materials involved are all cheap without the cost of book cloth and board. So I can afford to try again!
The bind itself is a quarto legal size, which is new for me. I like it, a good compromise between the tiny quarto letter and the pretty large folio letter.
Ideas I have to try the cover again using materials and equipment I have/can access include trying with coloured cardstock and vinyl for decoration (though the spine will be way too tiny for text) and using my work colour copier for a cheeky print to see if the copier toner is more robust than my cheap off brand toner at home.
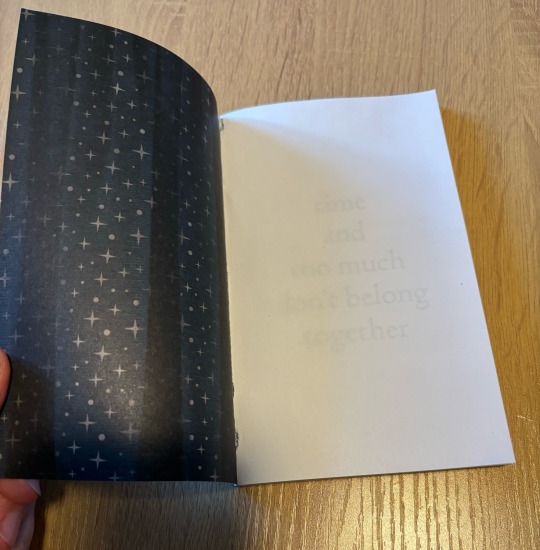
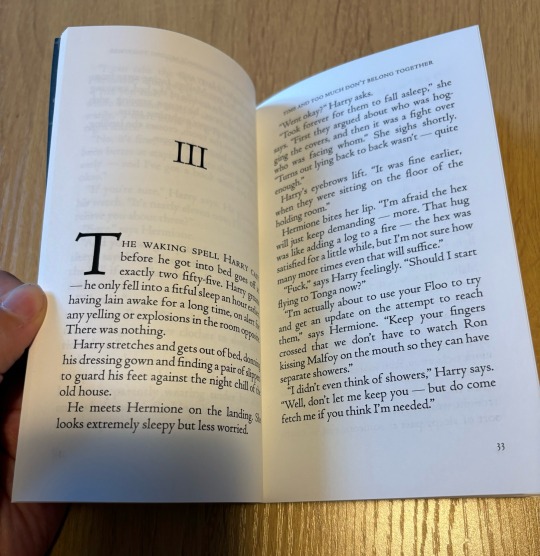
Typeset was a lightning quick and very bare bones setting of my own short fic time and too much don’t belong together. Because some part of my brain remains convinced it's somehow rude to try new techniques on someone else's writing, lol.
42 notes
·
View notes
Text
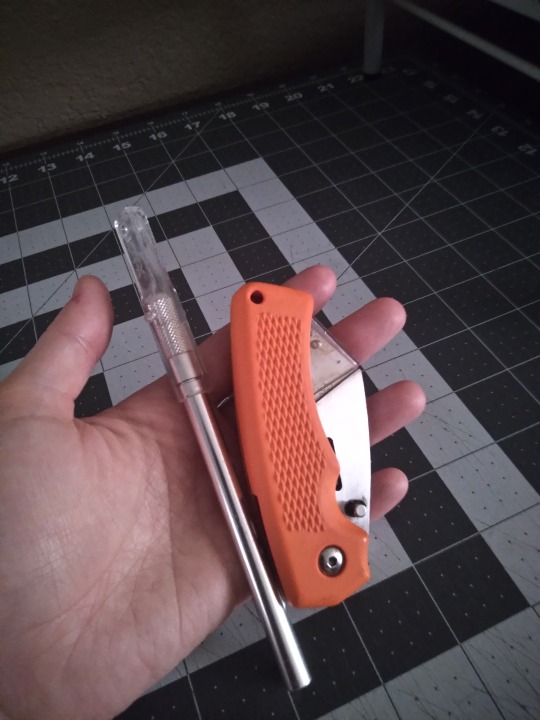
I had a message the other day asking (among other things) what kind of tools and equipment I use in making books, and as it's something I like to go into detail on, I realized I couldn't fit everything I had to say in a message so it's getting its own post. With photos!
Disclaimer that I'm not a professional bookbinder, I'm entirely self-taught and probably have habits and practices that would drive a pro nuts. I'm no authority, but these are the things that have worked for me, and maybe you can adapt them to work for you too.
This post will not cover: storage options, materials like board and glue, or equipment specific to one narrower aspect of the hobby like embossing or gilding. It is also not a tutorial on how to make a book, though I am covering things in more-or-less the order I use them in during the book-making process.
This post will cover: What I've found useful, what I've regretted buying, and some things you can co-opt from other, more common hobbies. A lot of it you may already have in your house. Some of it is for beginners, some is nicer equipment you might want as you get further into making books. They are not separated, it's just a list and some description.
Keep reading below the cut; this is gonna be a very long one and there are a lot of photos of everything.
If you want to make books you will need access to a printer. I'm not going to go into detail on this part and I didn't take a photo of my HP (not the best brand, but that's a long discussion in and of itself). Once you've got your pages printed and it's time to fold it into signatures, it helps to have a folding tool like these:
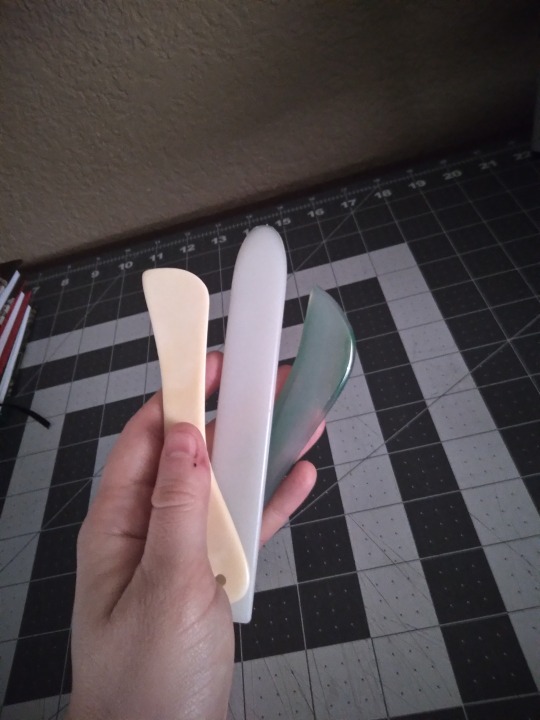
Folding tools can be anything as long as they're smooth and flat. The one on the left here is an actual bone folder from an art supply shop, but the center one is a plastic leatherworking tool that I got at Hobby Lobby, and the one on the right is an agate burnisher that I got from Amazon. None of these cost more than $10, and you can also use the edge of a pen (as long as it has no rubber grip or cap/clip) or the back of a spoon. Or your fingers, but the tools make it faster and the folds are more precise. I once worked a job where I had to fold maps, and all my coworkers were wondering how I did them so much faster and why mine were flatter than everyone else's, and it was because I'd grabbed a sharpie and started using the back end like a bone folder.
Once it's folded, you'll need to poke holes for sewing. I use one of these:
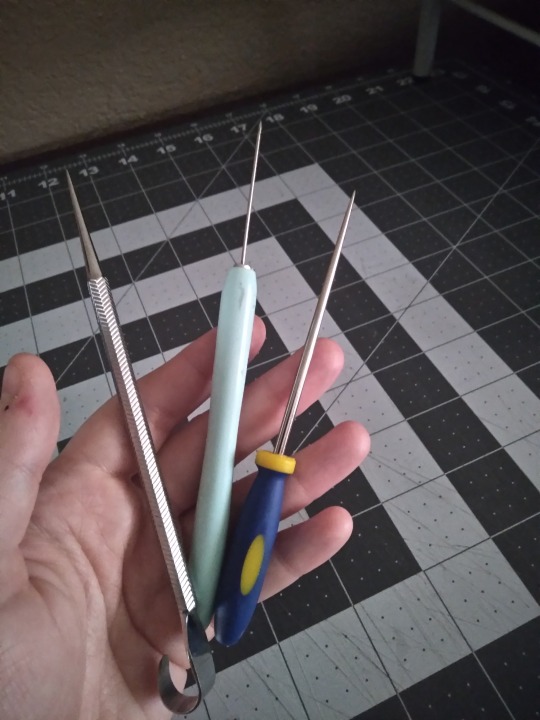
Left is, again, an actual bookbinding awl from an art supply store, while the center one is a paper quilling tool and the right one is a beadwork awl, both of which came from a big chain craft store. The bead one is my favorite; it's a good size and very stable. The quilling thing has too long and thin of a blade and it's wobbly, and I don't like the tapering on the bookbinding awl. It tends to make the holes in the middle page too big, and the outer ones too small. Again, these were cheap, about $10 each, but you can also use a sewing needle stuck in a cork, or a thumbtack or pushpin. If it's pointy and rigid, it'll work.

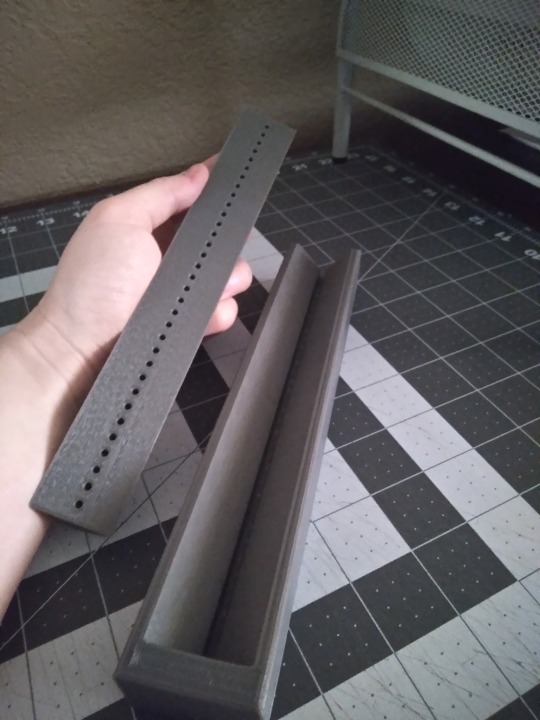
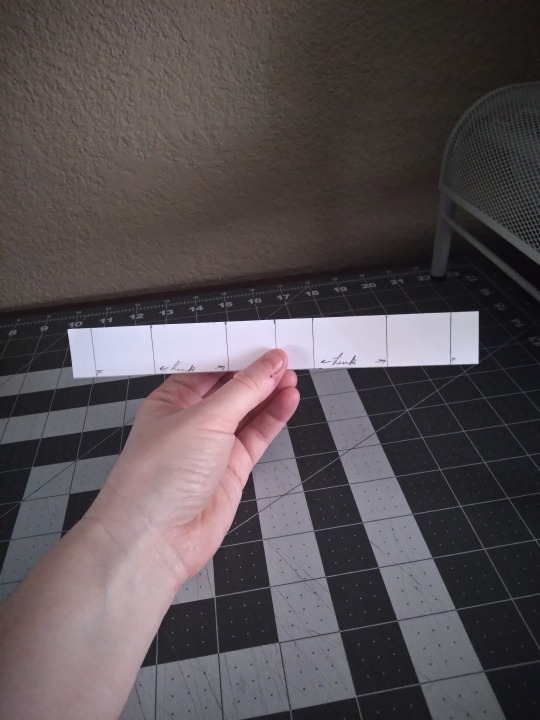
This isn't a requirement by any means, but I've found I like having a punching cradle for the hole-poking step. I got this 3d printed one from a fellow bookbinder, who was designing their own and made this one as a prototype. There are a lot of tutorials on how to make a punching cradle, or you can buy them online from several different vendors. They don's all look like this, and you can make them from wood or cardboard (though those don't usually have guide holes). If you're just starting out or this doesn't appeal, you can just use a paper template like the one on the far right. The cradle helps get the holes lined up and evenly spaced, and I've never liked this step so anything that makes it faster and less fussy is a win. If you use this kind, check that your hole-poking tool fits in the guide holes--the binding awl pictured above doesn't, but the other two do.
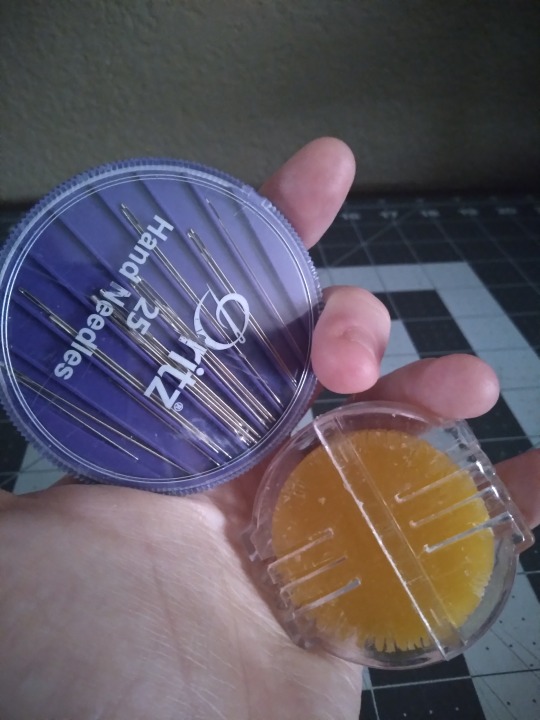
We've made holes, so let's stitch them up. These are just regular sewing needles and beeswax, to make your thread less prone to tangling. You can get both of them in any store that has a sewing department. There are dedicated bookbinding needles, like curved needles, and some binders like them, but I've never gotten the hang of the curved ones and they aren't necessary, especially when you're just starting out. If it fits through the holes you made, it will work.

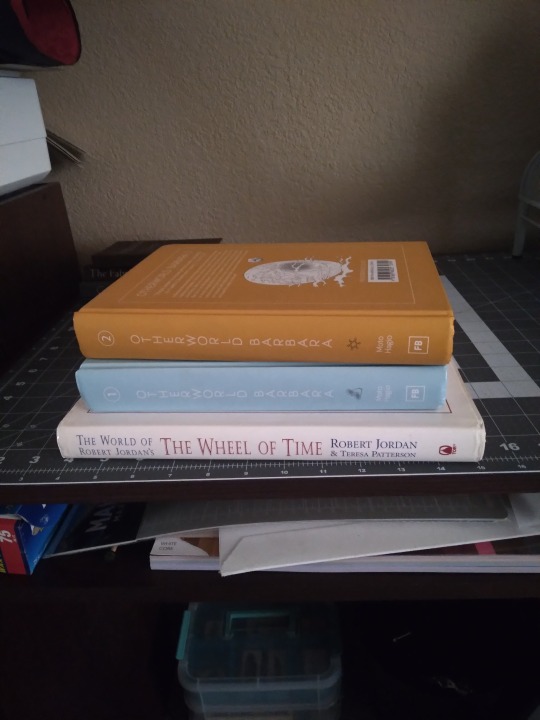
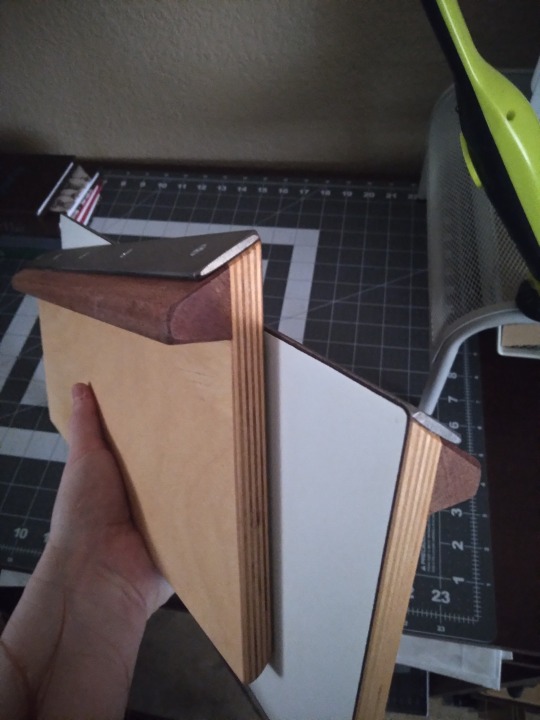
Once it's sewn, you probably want to squish your new text block so it's flat. I've got a laying press that I bought a couple of years ago when I was first getting started. It was marketed as a book and flower press, and it's honestly not the best. I would probably not have bought it if I had known that it wasn't essential to the process, and I mainly use it now when I'm squishing a text block and still want to use my work space, because once it's tight I can move it somewhere else. You can really use almost anything for squishing as long as it's heavy and flat and rigid on one side, like the stack of books in the right-hand photo. Textbooks, encyclopedias, art and photo books, and comic book omnibuses are all great. I've seen people use all kinds of things, like paper-wrapped bricks and doorstops, and there are tutorials out there to make your own press out of cutting boards if you do want one.
If you like your books to have smooth, flat page edges you're going to have to trim them. This is a book plow from Affordable Binding Equipment, and it was the first piece of actual expensive equipment that I bought. Not all plows look like this; I think the design is unique to ABE, but I've never used the traditional kind. In the interest of full disclosure, you can also trim edges with a sharpened chisel, which is much cheaper and can be bought at any hardware store, and some binders love this method. I do not love this method and have had zero regrets about caving and getting the plow. Very easy to use but does require some grip strength. Not pictured: the setup for sharpening the blade, which isn't hard but requires a bit of space and a small sheet of plate glass that you have to source yourself. Even with that, I still prefer it to the chisel. That said, this is not an essential step and you can leave your books with a "sawtooth" or deckled edge. Most of my early books have them, and some people just like them better than the flat ones and never learn to trim them. As another side note, some tutorials will say that you can trim your edges flat with a knife. You can't. Maybe on a pamphlet you can, but if it's more than 10 or 20 pages you just can't. It will look terrible.
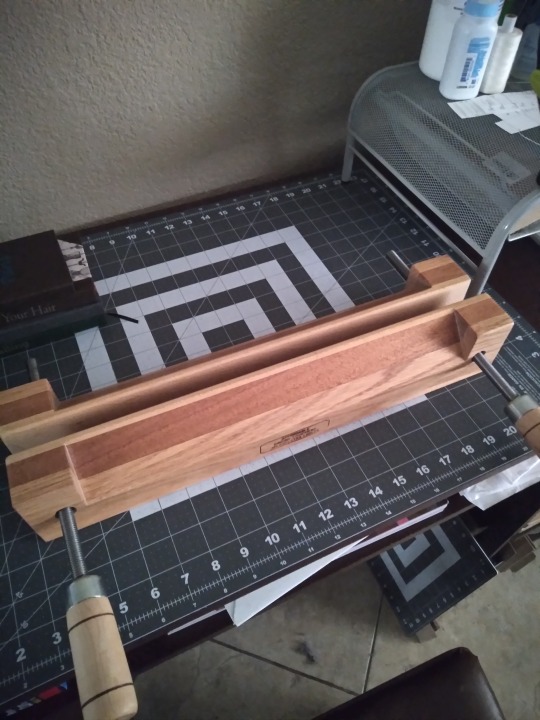
If you're going to use a plow, you've got to have the right kind of press. The one I talked about further up the thread is the wrong kind (full disclosure: I did use it with that press turned on its side, before I bought this one. But it's harder, more time-consuming, less comfortable, and less safe. Don't be like me). So here's a photo of my finishing press (also from Affordable Binding Equipment). I bought it so I could make backed books, but I use it for trimming too. The top part here has a narrow tapered section for backing, but if you flip it over it's totally flat, which is what you need for trimming. Not pictured: the stand that it came with for backing, or the c-clamps that I use to attach it to the desk for trimming. Again, though--this isn't a requirement for bookbinding. This is a later stage that's entirely optional. On the subject of backing, though:
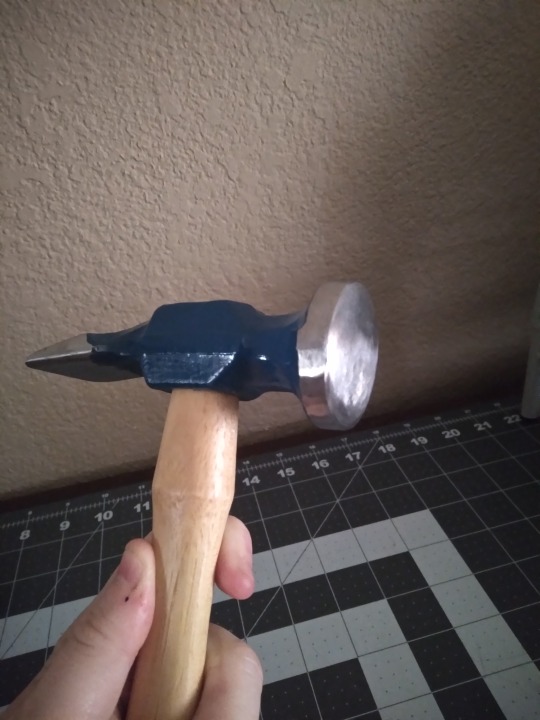
You don't need special equipment to round the spines of your books, but you do for backing. Left image is the set of backing boards I got from, once again, Affordable Binding Equipment, and on the right is a backing hammer from Hollander's. Neither of these are essential. Even if you get the boards (which have to be used in a press with a tapered edge, like the one directly above) you can actually use a regular hammer as long as the front part has no scratches or gouges. This one is a backing hammer, the primary difference being that it has a wider, convex head than a regular household hammer, to make the kind of glancing blows needed for backing a little easier. Honestly, I'm still learning how to use these and I'm not very good with them yet. Comes of being self-taught, probably. I don't think youtube is the best vehicle for learning this part, but it's what I have and I'm making do. Not every book is going to benefit from backing, either; it's primarily for helping mitigate spine swell.
Okay, time for my favorite repurposed equipment hack.
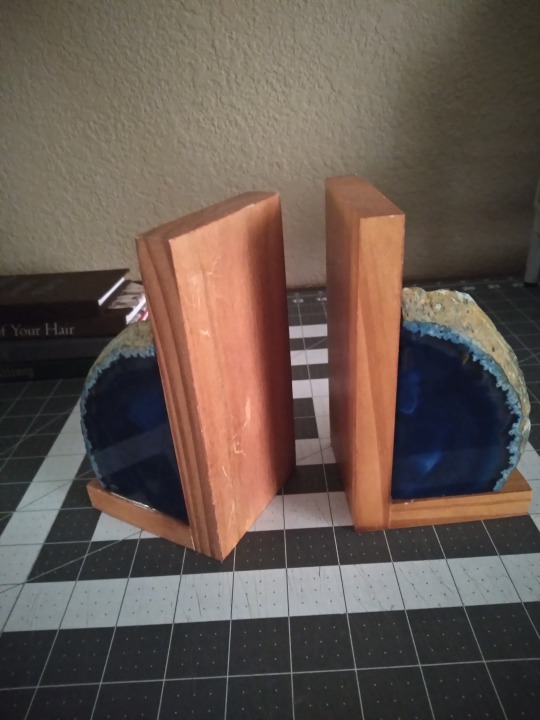
It's bookends. Regular bookends that I've had for ages and that probably came from Ross or some other place that doesn't even sell craft supplies.


Want to keep the text block upright while you glue it? Bookends. Want to sew some custom end bands but your text block keeps falling over? Bookends. They won't provide pressure for squishing, but if you just need to hold something upright while you work on it, bookends are the answer. They hold up books, it's right there in the name. Having said that, you want some with a little weight to them, like these agate slices, so they won't slide around. And you want something with a smooth finished edge like these, so they won't scratch up your text block or leave dents. I have other sets but these are the only ones I use for this purpose, and they're better for it than anything else I've got.
Moving on from making the text block, let's look at what I use to make covers.

It's appeared in the background of most of the other photos, but here's a photo of just the desk surface covered in cutting mats. I really recommend a mat to protect the surface of your furniture and keep your knives from going immediately dull. I've got a big one that covers almost the full surface, and a small one for when I want to be more mobile. I started with just the small one and it was good until I started working with larger sheets of paper. The big one was bought largely for convenience but I have no regrets about it. They're self-healing, non-slip, and you can get them in the sewing section of any big craft store.
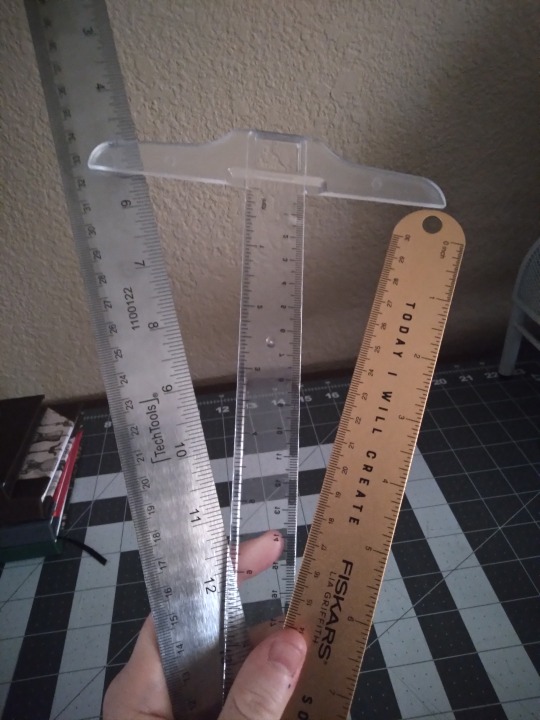
I'll be honest, I am not big on knives. I've got a regular box cutter for trimming board, and a razor knife for paper and cloth, and that's it. There are a lot of kinds and really all you need is one sharp blade for board. Paper and cloth can be cut with scissors if you want, though I find I get more consistently straight lines with the knives. Also pictured: Metal rulers and a T-square. You want a metal ruler for this. Plastic will flex and wood won't lay flat. Ideally you want one without a cork backing (my 18" one has this problem) and with the tick marks etched in rather than printed (my 12" one has this problem). For larger sheets of paper and cloth, the 18" one is great, but you can get by with the smaller one. The T-square is for making right angles; mine is plastic and only 12", and I really wish I had a longer one that was metal. These are drafting tools and you'll find them in the section of the craft store that has easels and sketch pads and they're usually pretty cheap.
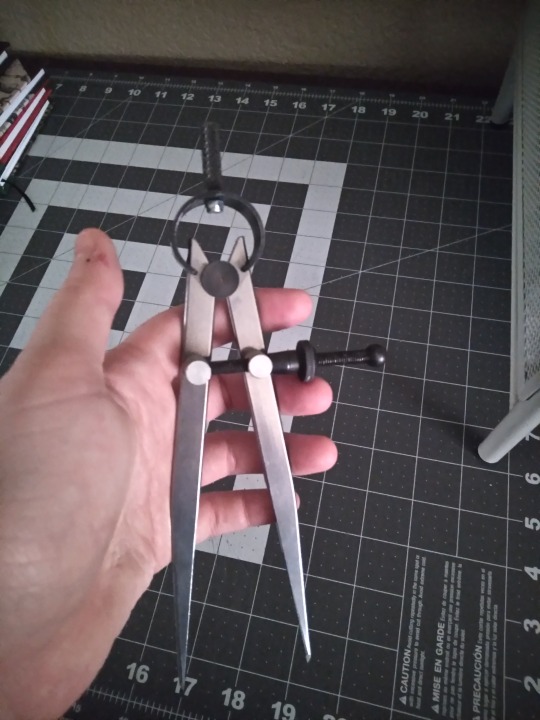
This is an adjustable compass. You can probably get these at craft stores but I got mine on Amazon. It's for measuring hinge gaps and the width of spines, both essential for making sure your cover fits your text block and your hinges open the way they should. Both of those are incredibly frustrating situations, and this thing makes it so much easier to avoid them.
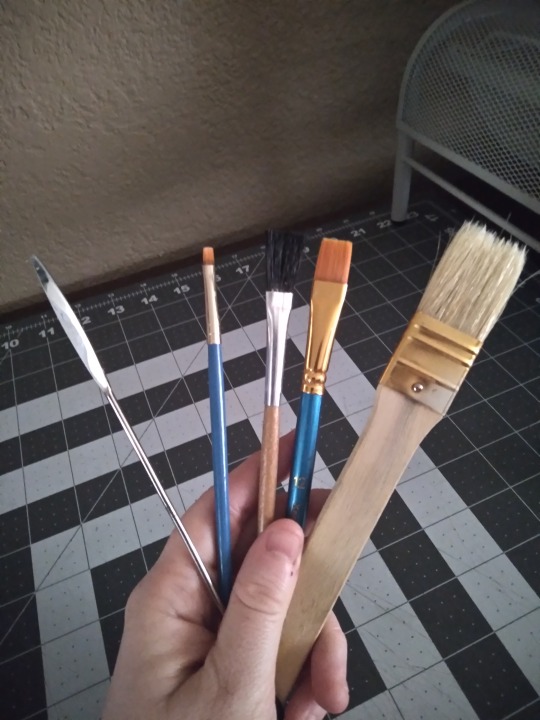
Things to spread glue with! Any old paintbrush will do, though I like to have a few different sizes and textures on hand to choose from. I like the big one for cover boards and casing in, the mid-size ones for doing turn-ins, and the little fellow for details and touch-ups. I don't care for foam brushes because I find them hard to clean when glue is involved, but if you like you can use those. The metal thing on the left is a micro-spatula, and I did have to special order it from an art supply place but it was cheap and it's very helpful to have on hand for when the brushes are too thick, for doing turn-ins on rounded spines, and for separating pages if you decide to learn edge foiling. Not essential, but recommended.
One thing I neglected to take a photo of is my crepe eraser. Despite the best intentions, no matter how careful you are, you will at some point get glue where you don't want it, where it will be visible on the finished book. This is where the crepe eraser comes in; you can use it to remove dried glue from cloth or (to a lesser extent) paper. Very annoyingly, none of the craft or art supply places I went to had even heard of these and I had to get mine from Amazon. It was cheap (under $10) and I strongly recommend getting one.
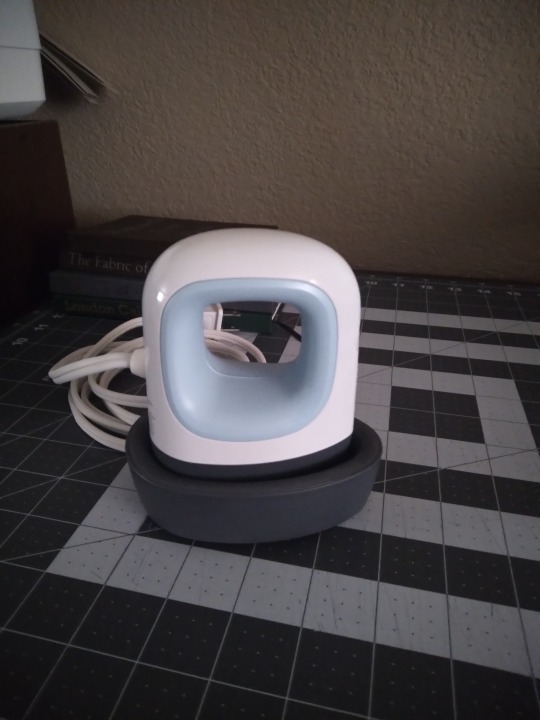
Once your cover is made, you have some options. You can leave it blank, hand-letter or draw an image, stamp it with ink or embossing powder, use a stencil, or do what I usually do these days and make a cover graphic from HTV. I've got a cricut for this (though they're not the only kind of cutting machine; it pays to research other brands) and a mini heat press (I want a bigger one, but I got this one cheap because the box is messed up). A lot of libraries have cricuts you can use, and you can use a regular iron to apply the HTV. Getting it to stick is a bit tricky, but that's true no matter which tools you use. Not pictured: a cutting mat, different than the kind shown above, necessary with most materials you can cut (mine came with one, they're about $20 at most craft stores, and they're lightly sticky to keep your materials in place while it's being cut). I don't know if other brands require them, but cricut does unless you're using their Smart Materials (I have never used these). If your library has a cutting machine, they will also have the appropriate cutting mats. Also not pictured: weeding tools. Weeding is when you remove the bits of HTV that you don't want in the final image, usually the spaces between letters and such. The negative space, if you want to get artsy. The special tools cricut sells aren't necessary, you can use an awl or needle and the dull edge of your knife blade, but I have a set of theirs and I like mine.
I didn't take a photo of it, but sometimes I use embossing inks and powder to make cover designs and text. You only need a heat gun for embossing powder, it takes up way less space than the cricut does, and it's cheaper. I got mine free from a family member so I don't know what it cost initially, but cutting machines are a really big expense; the cricut is my third most expensive piece of equipment, after the finishing press and the plow.
Good god I think that's everything. It sounds intimidating, I know. And it sounds like it takes up tons of space in your home, and to be honest it can, but it doesn't have to. The first dozen or so books I made, I made completely to my satisfaction with tools and materials that fit in one 12x16" moving box. If you love the hobby and can make the space, the bulkier items might be worth it down the line, but especially when you're first getting started it's smart to keep things low-cost and compact. Most of the basics are simple and your fellow bookbinders are delighted to share their shortcuts and substitutions if you ask.
The end! I hope it was helpful, @cardassianexpats! I did warn you it would be wordy, lol.
#bookbinding#fanbinding#long post#like ridiculously long post omg#my own verbosity will be my downfall#if anything is unclear please tell me#i can't always tell when i'm over-explaining#or when i think i've given enough info but my audience thinks i haven't#snek makes books#but sometimes she just talks about them
26 notes
·
View notes
Note
Do you have any resources for learning to bind books that you'd recommend?
These are the resources I used when first starting, which are pretty beginner friendly and mainly use software and craft supplies you're probably already familiar with or could get for fairly cheap:
ArmoredSuperHeavy's guide, a google doc ref mainly focused on typesetting in word
in depth beginner tutorial by ally- the little key, a youtube guide focused on the actual binding process
More general resources:
DAS bookbinding is a youtube channel with information on basically everything bookbinding under the sun, would trust him with my life
this tool will do the imposition (laying out the pages to be printed in folios) for you if you upload a pdf
the renegade discord server is full of people who'd love to offer more help, advice, and cheerleading, and it's been an invaluable resource for me for having questions answered, crowdsourcing design ideas, and getting inspired by everyone else's great work
8 notes
·
View notes
Text
Nothing Above the Knee
Inspired by @eggcats post on Vox's hoof worship, here is my radiostatic hoof fic. OG post can be found here.
⪫ Pairing: Alastor/Vox (Radiostatic)
⪫ Wordcount: 4k
⪫ Summary: Alastor wants something from Vox. All Vox asks in return is a few hours with Alastor's hooves.
⪫ Content notes: Explicit sexual content, hoof stuff, contractual obligation, interdigital scent gland play, hoof licking, hoof fucking, electrostimulation, Vox is very much on top here, did I mention this is about hooves?

“You’re slapping the contract down on the table?” Vox narrowed his eyes. “What are you, twelve?”
“You’re the one stipulating such a juvenile… thing,” said Alastor.
“It’s called a kink, Al,” said Vox, shaking his head.
“I suppose you always were a twisted one,” rejoined Alastor, a spark of something returning to his eye. “I’ve specified my own terms. I trust you remember how to read old fashioned paper contracts?”
“Not like I haven’t been an overlord for the better part of a decade now,” grumbled Vox, to Alastor’s terse smile. He picked up the sheaf of paper, reading through it. He knew Alastor well enough to pay attention to the fine print. He didn’t expect any cheap shots in the clauses, no I own Vox’s soul forever with no conditions, Al was too classy for that kind of bullshit, but that didn’t stop Vox looking for them, out of force of habit.
The meat of the contract was as Vox had initially proposed; Vox would get to look, touch and manipulate Alastor’s hooves as he saw fit, between the proposed times, a binding nondisclosure clause preventing either of them broadcasting the event during or after the fact, with an exception for recordings for personal use. In return, Vox would owe a favor of Alastor’s choosing; nothing suicidal, nothing that would cost above a certain price, a list of caveats that went on for a page and a half. Vox stopped when he got to the clauses Alastor had added, reading them through a second time. “Nothing above the knee, huh?”
Alastor lowered his eyelashes. “Since you only seemed interested in my… hooves… I thought it was a fair addition.”
Vox grinned to himself, sensing the discomfort that radiated from Alastor as he ran through the wording. “No-one gets to touch you above the knee, your pants stay on throughout the act… you realize that this applies to you, too, right?”
Alastor sniffed. “If you’re implying that your inept pawings might cause me to become so overcome with lust that I divest myself of all dignity and jump into your arms, Vox, then you’re a bigger narcissist than I feared.”
The truth lay low and unpleasant between them, unacknowledged by either party. Alastor needed the other end of the contract, needed the unspecified favor from Vox, or he wouldn't be here.
And much as Vox would have enjoyed Alastor's complete subjugation, he suspected that the man would rather die than endure it. Which led them to this interesting compromise. It was something he had wanted for a long time; even when they had been friends, he had fantasized about that part of Alastor's body. And, as Velvette liked to say, you were only unalived once.
“I'm surprised you didn't put in a clause stopping me inflicting pain,” said Vox.
Alastor shrugged. “I've never seen you torture someone when you didn't have to. You're not much of a sadist, old chum.”
“I could prove you wrong,” said Vox, an eyebrow raised.
“But you won't,” said Alastor, comfortably. “Are you going to sign it?”
Vox produced a pen with a flourish, blue electricity sparking around it. “One more stipulation. You have to be paying attention. The whole time. No tuning out.” He added the line to the bottom of the document.
“As you insist,” said Alastor, his voice level.
Vox grinned and signed his name, sliding the contract and pen across to Alastor, who signed in turn. Their human names. Not in blood. This wasn't a contract for their souls, after all. Just a favor for a favor.
And nothing above the knee.
There was something about kneeling between Alastor's legs that made Vox feel a little light-headed, even if it was simply to remove his shoes. The signal that Alastor gave off at close range was so strong that it was nearly tangible to Vox, his antennae giving a soft quiver as he bowed his head, taking Alastor's right hoof in his hands, the sole of his boot against Vox’s palm.
Alastor didn't seem immune to the tension either, his red eyes lighting with something like interest as he looked down from his seat on the edge of the bed, his ankle flexing to allow Vox to pull off his boot. He wore black cotton socks with nearly no elastic to them, a sight that made Vox start, his gaze running up Alastor's leg to the knee.
Vox ran his hand up Alastor's shin, the bump under the fabric of his trousers confirming his suspicions. “You're wearing fucking sock garters?”
“Is there something wrong with that?”
“Oh, you freaky fucker.” Vox swallowed an error message. “You have no idea how fucking hot that is.”
The sock was shaped to accommodate a hoof rather than a human foot, the toe wide for the spread of the standing toes, a woven circle at the back to protect the dewclaws and allow for the ankle.
Vox cuffed the leg of Alastor's trouser, rolling it up to the knee, staring all the while at the gracile limb beneath.
Taupe skin faded into dark fur, the slenderness of it making Vox's breath catch in his throat. He could wrap his fingers around the limb at any point. Cradling Alastor's calf in his palm and along his forearm, he lifted the hoof to his lips and breathed in.
Holy fuck, the smell. Even through the cotton, Vox could smell Alastor's musk, deep and earthy and pungent. Vox pressed in with his screen, until Alastor's hoof pressed squarely between his eyes, a groan escaping his lips as he felt his cock twitch to half mast just from the sensation.
Alastor himself was meticulously clean, Vox knew, but part of the curse of a deer body was the scent glands, constantly excreting musk that would help an earthly deer find its way but held little use for a demonic one. It was why Alastor rarely removed his shoes. It was also why, when Vox opened his eyes to look back at Alastor, he found the smile strained, eyes wide, a flush of embarrassment coloring his cheeks. Fuck, that was almost better than the smell.
“I love the smell of you, Al,” Vox purred, reaching for the clasps on Alastor’s sock garter. “You’re fucking musky, ripe, you stink like a damn animal. I am so fucking hard right now.”
“I can see that,” said Alastor, his smile fixed. “I don’t need you to tell me.”
“Oh, but the contract says I can talk as much as I fucking want. So I’m gonna talk.” Slowly, as if unwrapping a gift, Vox pulled the sock from Alastor’s hoof, eyes widening as he took in the sight.
Alastor’s standing nails were perfectly formed, the same crimson as his fingernails and lustrous, a beautiful end to the long, elegant limb.
“Holy shit, you are fucking beautiful,” breathed Vox, running his hands over the hoof, fingers over the smooth keratin, round and into the fleshy pads behind the standing nails. He felt Alastor shiver at the touch, and made a mental note to probe there some more later. “You have no idea how fucking perfect you are.”
He stripped Alastor’s other hoof in a similar manner and pressed his lips to each of them, learning the shape of them with his hands as he praised them.
“Are you quite done?”
“Oh, you’re bored?” asked Vox, taking a slender hoof in his hands and feeling the arch, the space between the crimson dewclaws and the pads beneath the standing toes. “Let’s see if I can fix that for you, Al.” With a grin, he pushed the knuckle of his thumb between the tendons in the arch, pushing hard into the flesh as he stroked up and down.
A strangled hiss from Alastor was his reward, another shiver through the Radio Demon’s body. “What’s that, Al?” Vox teased. “Speechless for once?”
“No, I-” Alastor started, but Vox picked the moment to push his knuckle into the pad of Alastor’s standing toe, and Alastor gave a little gasp instead, a noise that went right to Vox’s already hard cock.
“If I didn’t know better, I’d say you were enjoying this, Al,” said Vox, continuing the massage with a smirk.
“Fuck you,” Alastor snarled, his grin dangerous and sharp.
“Not on the menu tonight,” said Vox, his answering grin triumphant, his fingers kneading the pads of Alastor’s standing toes. “Nothing above the knee, remember? So, instead-” Vox ran fingertips over the red of Alastor’s nails, tracing the gap between the two. “Instead you get this.”
Vox pushed a finger between the two crimson nails, spreading the hoof apart, and grinning as he felt the fur around Alastor’s scent gland, oily and slick with his musk. The noise that Alastor made was everything; as if Alastor had just tuned to the wrong station, his voice thick with distortion. “What are you doing to me?”
Looking up, Vox noticed two things. First, Alastor was angry, antlers branching, eyes black with glowing red dials. Second, Alastor was hard.
“Holy shit. Fuck. Christ.” Vox stared. Al’s cock was pitching an impressive tent in his pants; any larger and he would be threatening to tear the seams. Vox had expected Alastor to endure the attention, maybe enjoy the hoof rub in a sensual sort of way, maybe be embarrassed. Not for it to do something for him. From Alastor’s expression, he hadn’t been expecting this either. Vox realized he was salivating, and swallowed.
Vox pushed his fingertip further into the gap between Alastor’s toes, feeling the weeping slit of his scent gland, the stink from the hoof intensifying as Vox smeared the musk back and forth.
“You frivolous piece of technological frippery- ngh!” Alastor’s grin was unhinged now, gums bared as well as teeth.
“I’m just doing what you agreed I could,” said Vox, drinking in the scene before him, glad he wasn’t the one coming apart at the seams this time. He kept his fingers moving, back and forth, looking at the spread of Alastor’s beautiful toes. “Speaking of which, uh…” Vox trailed off. His cock could fit between them, at a stretch. “You didn’t stipulate that I couldn’t use your hooves to jack off.”
Alastor was silent, but the widening of his eyes told Vox that he hadn’t considered the possibility. His poker face wasn’t that good, smile or no.
“If you object, I won’t,” said Vox, quietly. “I’m an asshole, not a monster.”
Alastor gave an annoyed little huff, staring at the two fingers that Vox had wedged between his toes. “I signed the contract. I don’t need your pity.”
Vox smiled when he heard it. “Atta boy,” he growled, spreading Alastor’s toes further apart as he freed his cock from his pants. His first glimpse of the slit of Al’s scent gland, the whitish discharge beading on it like dew, set an ache to the base of his cock, and he swore under his breath. “Oh, that’s fucking pretty, Al. Jesus, look at you.”
Vox lifted the hoof to his face, fingers still forcing the standing nails apart, and opened his mouth, curling his tongue into the gap. Oh, Alastor tasted fucking filthy, organic and overwhelmingly male. If Vox’s head had been biological, the combination of smell and taste would have made him gag, but as it was, he simply pushed away the mounting pile of error messages, keeping his senses as highly tuned as he could without shutting down entirely, feeling the emotion in his gut flicker from disgust to arousal and back again like a fucking metronome. The stink was soaking into his casing; he was going to smell like hoof for weeks. Tongue laving wet between Alastor’s toes, Vox groaned, teasing the slit of the scent gland as he made the crevice nice and slick for his cock.
From a secondary camera, Vox watched Alastor’s face, the quivering at the corners of his smile, the bobbing of his larynx. The tent in his pants, where an honest-to-god wet spot was forming, dark against the red. Alastor reached for his own crotch, looking to find friction, only to have his wrists snapped back into place by the chains of their contract. Vox groaned into the crevice of Alastor’s hoof as he watched Al snarl at the chains, hand going to his own cock and giving it a slow pump as he drew his head back.
“I’d love to help with that,” leered Vox, Alastor’s ankle still in his hand. “But no-one touches you above the knee, Al, not even you. You put it in the contract yourself.”
Alastor stared down at him, dial-eyed. “Fuck you, you tacky rectangle fuck.”
“Is this your idea of dirty talk?” Vox matched Alastor’s grin as he lowered Alastor’s hoof to his dick, a shock through his system as he made contact, pushing his dribbling glans against the pads on the undersides of Al’s standing toes, rubbing small circles into the yielding flesh there. Alastor made a soft, animal noise in his throat, and Vox guided himself to the gap between the toes, rubbing his glans there. “Haah- I think you need practice.”
“Why?” Alastor’s gaze on him was intense, even as his breath huffed between his teeth. “It seems to be working, after all.”
Vox glitched, freezing for a second before shaking it off. How the fuck did Alastor always seem to know just how to get under his skin? Vox watched Alastor’s face as he smeared his glans between Alastor’s spread toes, the pearly white of Alastor’s musk mixing with the neon blue of his precum, back and forth until the space was slick with it and Vox could push the shaft of his cock between Alastor’s toes without much friction. The contract compelled Alastor to watch, so he did, his hips rolling futile as he sought friction the air above him could not give him.
“You’re looking pretty out of it there, Al,” teased Vox. “Sure you don’t want any help?”
“What-” said Alastor, chest heaving, monocle askew. “-can you do to help, Vox?”
“Roll over,” said Vox, sitting back a little. “You can hump the mattress.”
Alastor gave a radio hiss. “Fuck you.”
“Would love to, believe me,” Vox shot back.
“The contract says I have to watch you.”
“Is that all?” Vox snapped his fingers, feeding his visual inputs through to the screen on the wall on the other side of the bed, his view of Alastor’s hoof, the lustrous crimson of his standing nails spread apart with Vox’s shaft between them, Vox’s electric blue claws wrapped around Alastor’s slender arch. “There- that should count.”
Alastor glanced at the screen, then back at Vox. “Are you going soft?” Alastor hissed. “Why give mercy? You want to humiliate me.”
“Says who? Says you?” Vox pulled a face, stroking his hand up the delicate bones of Alastor’s ankle. “I’m not here to play carnival freak show dominant, Al- god knows I get enough of that at home. I just wanna worship your hooves.”
“And stick your garish dick between my toes.”
“Yeah. And stick my garish dick between your toes, so sue me.” Vox shrugged. Just hearing Alastor say dick was a pleasant little throb. “I think you’re enjoying this, Al. Tell me I’m wrong.”
Another heave of Alastor’s chest. “You’re wrong, Vox. You’re wrong and you’re tacky.”
“Then why are you still hard, Al?” Vox raised an eyebrow. Alastor didn’t have an answer for him, so he continued, pushing the head of his cock back between Alastor’s standing toes and into Alastor’s intercapital notch, as far as it would go, wedging the two halves of the hoof apart. Vox slid himself back and forth, and Alastor shivered, blood running from his lip where he had bitten it, his grin fixed as he refused to make a noise, refused to groan, or whimper or gasp.
“You wanna know what I think?”
Alastor stared at him. “No.”
“I think,” Vox continued, unperturbed. “That you’re just too fucking proud to admit you like this. You like me, on the floor in front of you, you like my touch, and you like me fucking your hoof like the sloppy little pussy that it is.” With each like, Vox gave a thrust of his hips, Alastor’s hoof slick and tight around him, his thumb curling round the standing toes to the flesh underneath, pressing through the fascia and against the cruciate ligament. Alastor cried out; ears back, eyes wide, still deliciously hard in his pants, as Vox continued. “I think you’re too fucking proud to take me up on my offer and roll over and hump the mattress like the rabid animal that you are. Because you’re afraid that you’ll like it when you cum from me fucking your hooves.”
Alastor snarled at him, arms lashing out and catching on the chains of the deal. “You’re pap,” he growled. “Slop. Mass-marketed, overhyped, underproduced, noisy garbage. Your viewers are idiots and so are you.”
Usually this would get right under Vox’s skin, but usually he wasn’t using Alastor’s hoof to jerk off, so the insults lacked their usual barb. It was easy to see who was in charge, which one of them was an animal snapping at the bars of their cage. Vox grinned, radiating smugness. “Are you gonna roll over and hump the mattress for me or not, Al?”
“Go fuck yourself,” growled Alastor, which meant yes. Vox pulled himself out of Alastor’s hoof, and got to his feet as he watched the Radio Demon roll over for him.
With Alastor face down, Vox ran his fingers over each of Alastor’s hooves in turn; one slick and covered in the blue smears of his precum, the other untouched, the scent gland still beading white with musk. Alastor’s narrow ass, fully clothed, flexed back and forth as Alastor found friction in the bedding below him, grinding himself into the bedding with a strangled groan that seemed to thrum through Vox’s loins.
Vox felt an irrational surge of jealousy for the mattress, and dismissed it.
“It’s a shame an old fucker like you gets pretty hooves like this,” said Vox, running a talon over the edge of one crimson nail, dipping his fingers between the toes of the unfucked hoof and smearing the musk over it, watching Alastor watch him do it on the big screen in front of them. “Anyone else, and they would be out on display, for the world to see, all shiny and crimson and shit.”
“Really? I thought you’d appreciate exclusivity.” Alastor’s tone was sarcastic, but his words made Vox’s cock ache. The thought that he was deflowering Alastor’s hooves. Despoiling them. A part of Al that pretty much no-one else would even see.
“Oh, I do, Al.” Vox’s voice was a groan as he stacked Alastor’s hooves one atop the other, lined up so that he could slide himself between both sets of toes, and pushed himself in.
“Fuck,” hissed Alastor, his voice lower in his register now, his eyes losing focus. Vox wondered what his O-face looked like, wondered if he stopped smiling when he came. Al’s hips were still twitching, still grinding himself sordidly into the bedding, and Vox matched his jackrabbit place, grinning as the motion brought a whine to Alastor’s throat.
“Look at you, Al, you wanton little minx,” purred Vox, listening to the obscene squelch his cock now made sliding in and out. “You’re gonna cum with my cock in your hooves, arentcha?”
“N-no-” Alastor groaned, gritting his teeth, a quiver through his body as he willed himself to stop humping the mattress. A good attempt, but futile.
Alastor’s assessment when writing the contract hadn’t been wrong, per se; Vox didn’t much enjoy torture. But, long experience as an overlord had shown him a thing or two, and his powers. Well, his powers were quite useful for this sort of thing.
The electricity that ran through power sockets and the electricity that ran through nerve endings were pretty similar, after all, and Vox could feel all of Alastor’s nerve endings, firing through the strands that wrapped the bones of each hoof, up into the braid of nerves that ruled his body. What sensation went where wasn’t an exact science, but Vox was practiced. A zap to the prostate was always surefire, but hooves had a lot of nerve endings too, enough to get someone off.
Carefully, Vox brought electricity to the surface of his cock as he pushed it once more between the pads of the prone Alastor’s feet, enough to tickle the nerve endings. The reaction was instant; not an orgasm, but a quiver through Alastor’s body, a strangled capacitive whine in his throat. Alastor’s fingers clenched, rending the bedsheets with his claws.
“Good?” asked Vox, gentle because gentle pissed Alastor off more than rough did. “We can stop anytime, y’know. Nullify the contract. Just say the word.”
“Cheap tricks-” gasped Alastor, trying to turn in on himself and finding he could not, too stubborn to do anything save submit as the electricity from Vox’s cock made him quiver again, whine again. His breathing was shallow, his eyes wide as Vox fucked his hooves, squeezing his delicate ankles as the sound of electricity arcing through air and into skin sounded at the apex of each squelching thrust. “-fuck.”
“Good boy,” Vox ground out, his voice breathy as he applied a little more voltage. “Give in. Lemme make you cum.”
“Damnable -ngh- picturebox,” whimpered Alastor, a sweet sound on his lips as he came, quivering, into the bedsheets.
“A picturebox who makes you cum,” growled Vox, wishing to hell that he could touch more of Al than just his calves and shins as he fucked the still-slick still-sensitive space between Al’s standing toes. “How does it feel, Al? Getting fucked senseless by a clout-chasing, mediocre video podcast? Fucked by mass-marketed, overhyped- ngh- noisy garbage?” Vox could feel himself getting close, his audio lagging and glitching, the movement of his hips becoming irregular, a pressure in his shaft, his balls hitting the underside of Alastor’s neatly manicured crimson nails at each stroke.
Alastor gave a noise that wasn’t even a word, half animal, half distorted signal, and Vox came, hard, one arc hitting the side of the bed, the second hitting the backs of Alastor’s legs as he pulled out, vivid blue stripes over dark flesh and fur. A third and fourth spurt drizzled over his own hand and Alastor’s sublingual pads. Vox stood there for a moment, cock in hand, staring at his handiwork as he blinked away the error messages displayed on his screen. The great Radio Demon, covered in his cum. His cock, smeared with Alastor’s musk. Fuck.
Alastor sighed into the bedsheets, a slightly sulky edge to his tone. “You’ll clean that up, I hope.”
Vox felt a swell of something other than triumph in his chest; something warm. “Yeah, I’ll wipe you down, Al.”
There was something nice about both being in a post orgasmic haze, Vox thought, as he knelt again at Alastor’s feet, a warm cloth and basin in hand. Alastor, now back in the position he had started in, had little inclination to do anything other than regard Vox with languid red eyes as he wiped the evidence of their encounter from Alastor’s ruby red hooves, the bones delicate in his hands.
Vox planted a soft kiss on the front of Alastor’s hoof, below the dewclaws. “We should do this again sometime.”
Alastor lifted his leg from Vox’s hands, and in a fluid, measured movement, pressed his hoof to Vox’s forehead, grinding it back and forth with a twist from his hip, leaving a damp, scent-laden mark on Vox’s screen. “Absolutely not.”
“Say next week? I have the quarterly review Tuesday, so I’ve gotta keep the board happy, but Wednesday I don’t have anything I couldn’t blow off.”
Alastor gave Vox a level smile, pushing his face with his hoof. “If there is one quality of yours I have never had reason to doubt, Vox, it is your capacity for blowing things.”
Vox grinned. “That sounds like Wednesday night to me.”
#alastor x vox#alastor x vox smut#hoofplay#deer hooves#hoof smut#hoof worship#hoof kink#not much antlers tho
43 notes
·
View notes