#drying and storing herbs
Explore tagged Tumblr posts
Visit Tumblr Blog
Explore Tumblr blogs with no restrictions, modern design and the best experience.
Last Seen Tumblr Blogs


Fun Fact
Tumblr has been banned in Indonesia for providing people with access to pornographic content.
Text
Herb Drying Extended
[herb drying extended]


Herb drying(link)
Answering Benji in an extension to my last post on the topic!
best method, best tea
depending on the herb you use to make your tea, any of the three methods i talked about can work just fine for making a tea blend from.
it's most a matter of time as each method and plant have a different time span of drying out.
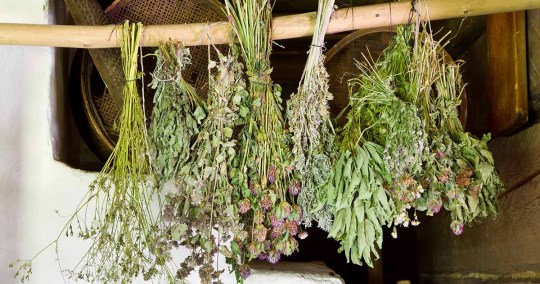
air drying by hanging is likely the longest but is most commonly used for flowering herbs like lavender or even sage, mainly for the lingering scent they give off while hanging.
you could very well use the microwave method for a faster batch of dried herbs.
when it comes to the herb youre using for tea, leaves and buds could be crushed up or steeped whole, so regardless of the method you choose however you go about making your tea from dried herbs is fine and completely up to you.
of course things like how ling they sit to dry and loose theor moisture can effect how they might taste when sitting in hot water but not by very much, the amount of time they sit in the water can be recommended differently depending on the plant or part of said plant as well.
its perfectly fine to experiment until you find the right combination that you like best.
there are plenty of other methods for drying tea herbs as well, some onclude the oven rather than the microwave or the stove, or you can use tools like a dehydrator if you have one. no one method is best over all, its very much up to opinion.
whatever method you find best is a-okay.
moldy stash
how can herbs expire after storing and drying if the idea is to do that so they last longer?
a lot of things have a different length of shelf life, canned goods included.
if you dont keep your herbs tightly seald and stored awat from sunlight and moisture, you risk them rotting amd molding. they are dead plants after all and dead plants do eventually rot away at some point.
the average shelf life for dried leafy herbs is 1-3 years before it looses its flavor, 4 years for seeds and a week to 6 months for fresh (ground) spices. salt is really the only thing that lasts indefinitely.
after the dried herbs loose their flavor theres really no use keeping them around as anything with them will just taste bland or very very mild if at all.
the herbs will start to lose their colour and brown after being stored for that long so its best to throw them away at the 3 year mark.
i hope this helped! if theres anything else i can expand on please let me know.
@benji-screem @kodiescove @writingbrainrot
(thought you might like to see)

I'd for banner in pinned
#sparrow posting#drying and storing herbs#drying herbs#herb storing#storing herbs#cpunk#cpunk blog#cripplepunk#herbs#herb post#herb drying#tea plants#plants#plantblr
16 notes
·
View notes
Photo

Congratulations! You had a bumper crop of sage this year! Or maybe you found a baker’s dozen of potted basil plants on clearance at your grocery store. Whatever the reason, you have more herbs than you’re able to use fresh and you need to figure out a way to make them last. Drying herbs to preserve them is a practice that has been around for as long as cultivation has been a part of human civilization. The concept of drying is extremely simple. You just want to expose as much of the surface area of the plant to the air as you can so the moisture evaporates – the quicker, the better. But as with many things that are conceptually simple, the execution requires a little more nuance. To help you save those herbs, we’re going to discuss the many methods of dehydrating. Here’s what to expect, coming right up: Almost any herb can be dried, so long as you understand the various methods available and when to use them. The flavor of the plants comes from the oils stored inside their cells. Dehydrating concentrates these oils while removing the moisture that can cause herbs to spoil. Get your screens, hangers, or dehydrators ready. Those herbs aren’t going to dry themselves! Methods of Drying There are many ways to dry herbs. Some work faster than others, and some are better for larger or thicker plants, but all of them will work if you’re patient. Air drying has the distinct advantage of being free. However, it takes much more time and it usually takes up more space than other methods. You can do this by hanging harvested plants or laying them out. Bonus points if you can lay them out on a screen. Dehydrators usually take up less room and they’re much, much faster than air drying. They’re also more expensive than the air method and unless you have a monster-sized dehydrator, you can only process small batches at a time. The biggest advantage to this option is that you can dry the leaves quickly but at a controlled, low temperature, retaining the flavor better than other methods as a result. You can also often use your oven, though this method isn’t always effective for those that must be dried on low heat. Most ovens can’t go below about 175°F or so, and most herbs should ideally be dehydrated at around 90 to 110°F. Some microwaves are also good for drying herbs, depending on the available wattage. How to Harvest Herbs for Drying Harvesting starts the day before you intend to do the work. Water the soil well and then spray the plants with water to remove any debris, pollen, sprays you’ve applied, or dirt. While every herb is different, most should be harvested in the morning while the plants are full of moisture, but after the dew has evaporated. Whenever possible, harvest entire stems rather than individual leaves. Most are best harvested before or just as they start to flower. Of course, this doesn’t apply to plants that you want to dry to harvest the seeds. With herbs, we’re generally talking specifically about the edible leaves, as opposed to the seeds, bark, or roots, which would classically be described as spices. The younger leaves toward the end of the stems usually have the most flavor, with the highest concentration of oils. You can leave behind a six-inch length of stem when you harvest, and most will regenerate new growth. Use a sharp pair of scissors to snip the parts you intend to use. Pulling or twisting bruises the plant and causes it to deteriorate more quickly. Immediately after harvesting, place what you’ve picked in a cool, sheltered spot until you can process it for drying. Even better, place the stems in a glass of water as you would a bouquet. Don’t leave harvested stems in direct sunlight. Once you arrive indoors, or wherever you intend to prep your harvest, trim off and discard any damaged leaves. Air Drying When air drying, the ideal spot is indoors in a warm, sheltered space with good air circulation. You can also do this outdoors, but try to find an area that’s well protected from sun, insects, and wind. Hanging works best for plants with woody or firm stems. Think rosemary, sage, lemon verbena, and the like. For flimsier, more tender types like basil and parsley, lay the harvest out on a screen. To bundle herbs for hanging, loosely secure a handful of stems towards the lower, cut end with a rubber band or string. You don’t want to create a bundle that is too large or you run the risk of mold forming. Then, hang the bundles singly with a few inches between each one. I like to suspend a few bundles on a hanger in my attic, basement, or covered patio, depending on the time of year. But you can use anything really, from a clothesline to nails over a doorway. Be aware that as the stems dry, they shrink, which means some may fall out of the bundle. Experienced air dryers often use rubber bands to avoid this problem, because the bands usually tighten up as the bundle dries. If you want to collect the seeds from whatever plant you’ve harvested, fasten paper bags over the heads to collect the seeds as they fall. To dry flat, use a screen, mesh, or wire to lay the herbs in a single layer. If you don’t have any of those available, use a baking sheet with a few layers of newspaper or paper towels on top. Try to keep the herbs from touching, if possible. You can leave the leaves on the stems if you want, but things will go faster if you strip the leaves from the stem if you go with this option. Whether you hang them or lay them flat, location is important. It should be as dark as possible, with good air circulation and fairly warm temperatures around 70°F. Avoid the bathroom, laundry room, areas near the sink or dishwasher, or any other place that has high moisture. Don’t hang them in front of a window, even though that looks awfully pretty. Hanging can take a week or more, while laying flat takes a bit longer. Using a Dehydrator A dehydrator is ideal for plants that have a high moisture content. Basil, mint, tarragon, sage, thyme, and parsley are common ones to preserve this way. These plants need to dry quickly or they risk developing mold. Use leaves of a similar size and place them in a single layer. The leaves shouldn’t be touching. Set your dehydrator to 90 to 110°F and run it for as long as necessary to remove all of the moisture from the leaves so they’re dry and crumbly. This should take anywhere from one to three hours. If you notice that it seems to be taking a long time to dry the leaves, turn the dehydrator up a few degrees. Feel free to flip or shift the leaves or trays around, for even heating. If you live in an area with high humidity, you can dry all the way up to 125°F, but remember that lower temperatures are always better. Don’t have a dehydrator? No problem! Check out this roundup of some of the best models on our sister site, Foodal. Drying in the Oven Oven drying isn’t ideal. Most ovens can’t hold a low enough temperature to dehydrate the plant matter rather than cooking it, and that means you lose nutrients and flavor. Remember how we talked about the flavor of an herb coming from the concentrated oils that it contains? If you use too high of a temperature, you lose some of those oils – and the flavor as well. To dry, turn your oven on as low as it can go, and place the leaves in a single layer on a baking sheet. If your oven doesn’t go as low as 125°F, leave the door open a bit to reduce the heat level inside. This is a terrible waste of energy, but it works in a pinch if you need to dry some herbs quickly. It helps to flip them and turn the trays every 20 minutes or so. Depending on the temperature and the amount of plant matter in the oven, it will take an hour or two to completely dry the leaves. As with the other methods on this list, you’ll know the plants are done when you can crumble the leaves between your fingers. Don’t let them bake for too long or the leaves will burn. Using the Microwave You might curse your low-wattage (1000 or below) microwave when you’re trying to heat up a big pot of soup, but that low power is a big plus when it comes to drying herbs. Place a single layer of leaves between two paper towels. Set the microwave to defrost or the lowest heat setting and run it for two to three minutes, depending on the thickness of the leaves. Flip the paper towels and cook for another few minutes. Continue doing this until the leaves are dry and crumbly. Do not leave the microwave unattended during this process. The paper towels can catch on fire, particularly if you don’t have enough leaves in the microwave. Also, never use recycled paper towels because they can contain metal, and we all know how well metal and microwaves get along. Storage Regardless of which method you choose, you can be sure the leaves are dry when they crumble easily between your fingers. This is important, because you don’t want them to get moldy in storage. Fully dried leaves should be stored in airtight containers in a cool, dark place. Don’t expose them to light or high heat. If you’ve been processing your harvest in a warm kitchen, leave the lids off when you move them to the cooler storage area. Once the jars have cooled, put the lids in place. This process helps to avoid condensation inside the jars. Don’t forget to label the jars. You’d be surprised how much dry herbs can look alike and it can be hard to tell the difference even if you smell them. Most herbs can be stored for up to a year. When using, keep in mind that dried herbs are typically twice as strong (or more!) than fresh ones. Savor the Flavor of Your Herbs Drying is a classic choice of preserving for a reason. It’s incredibly easy and it works. You don’t need fancy tools or equipment, though having a food dehydrator is a real advantage. Don’t stress if you don’t have one, though. There are lots of other methods to choose from. Which method are you using? Which herbs are you drying? Fill us in via the comments below! Hopefully, this guide gave you the confidence to fill your cupboard with herbs galore! And for more information about growing and using herbs, check out these guides next: © Ask the Experts, LLC. ALL RIGHTS RESERVED. See our TOS for more details. Originally published April 28th, 2022. Last updated April 27th, 2025. Uncredited photos: Shutterstock. !function(f,b,e,v,n,t,s) if(f.fbq)return;n=f.fbq=function()n.callMethod? n.callMethod.apply(n,arguments):n.queue.push(arguments); if(!f._fbq)f._fbq=n;n.push=n;n.loaded=!0;n.version='2.0'; n.queue=[];t=b.createElement(e);t.async=!0; t.src=v;s=b.getElementsByTagName(e)[0]; s.parentNode.insertBefore(t,s)(window, document,'script', ' fbq('init', '176410929431717'); fbq('track', 'PageView'); Source link
3 notes
·
View notes
Photo

Congratulations! You had a bumper crop of sage this year! Or maybe you found a baker’s dozen of potted basil plants on clearance at your grocery store. Whatever the reason, you have more herbs than you’re able to use fresh and you need to figure out a way to make them last. Drying herbs to preserve them is a practice that has been around for as long as cultivation has been a part of human civilization. The concept of drying is extremely simple. You just want to expose as much of the surface area of the plant to the air as you can so the moisture evaporates – the quicker, the better. But as with many things that are conceptually simple, the execution requires a little more nuance. To help you save those herbs, we’re going to discuss the many methods of dehydrating. Here’s what to expect, coming right up: Almost any herb can be dried, so long as you understand the various methods available and when to use them. The flavor of the plants comes from the oils stored inside their cells. Dehydrating concentrates these oils while removing the moisture that can cause herbs to spoil. Get your screens, hangers, or dehydrators ready. Those herbs aren’t going to dry themselves! Methods of Drying There are many ways to dry herbs. Some work faster than others, and some are better for larger or thicker plants, but all of them will work if you’re patient. Air drying has the distinct advantage of being free. However, it takes much more time and it usually takes up more space than other methods. You can do this by hanging harvested plants or laying them out. Bonus points if you can lay them out on a screen. Dehydrators usually take up less room and they’re much, much faster than air drying. They’re also more expensive than the air method and unless you have a monster-sized dehydrator, you can only process small batches at a time. The biggest advantage to this option is that you can dry the leaves quickly but at a controlled, low temperature, retaining the flavor better than other methods as a result. You can also often use your oven, though this method isn’t always effective for those that must be dried on low heat. Most ovens can’t go below about 175°F or so, and most herbs should ideally be dehydrated at around 90 to 110°F. Some microwaves are also good for drying herbs, depending on the available wattage. How to Harvest Herbs for Drying Harvesting starts the day before you intend to do the work. Water the soil well and then spray the plants with water to remove any debris, pollen, sprays you’ve applied, or dirt. While every herb is different, most should be harvested in the morning while the plants are full of moisture, but after the dew has evaporated. Whenever possible, harvest entire stems rather than individual leaves. Most are best harvested before or just as they start to flower. Of course, this doesn’t apply to plants that you want to dry to harvest the seeds. With herbs, we’re generally talking specifically about the edible leaves, as opposed to the seeds, bark, or roots, which would classically be described as spices. The younger leaves toward the end of the stems usually have the most flavor, with the highest concentration of oils. You can leave behind a six-inch length of stem when you harvest, and most will regenerate new growth. Use a sharp pair of scissors to snip the parts you intend to use. Pulling or twisting bruises the plant and causes it to deteriorate more quickly. Immediately after harvesting, place what you’ve picked in a cool, sheltered spot until you can process it for drying. Even better, place the stems in a glass of water as you would a bouquet. Don’t leave harvested stems in direct sunlight. Once you arrive indoors, or wherever you intend to prep your harvest, trim off and discard any damaged leaves. Air Drying When air drying, the ideal spot is indoors in a warm, sheltered space with good air circulation. You can also do this outdoors, but try to find an area that’s well protected from sun, insects, and wind. Hanging works best for plants with woody or firm stems. Think rosemary, sage, lemon verbena, and the like. For flimsier, more tender types like basil and parsley, lay the harvest out on a screen. To bundle herbs for hanging, loosely secure a handful of stems towards the lower, cut end with a rubber band or string. You don’t want to create a bundle that is too large or you run the risk of mold forming. Then, hang the bundles singly with a few inches between each one. I like to suspend a few bundles on a hanger in my attic, basement, or covered patio, depending on the time of year. But you can use anything really, from a clothesline to nails over a doorway. Be aware that as the stems dry, they shrink, which means some may fall out of the bundle. Experienced air dryers often use rubber bands to avoid this problem, because the bands usually tighten up as the bundle dries. If you want to collect the seeds from whatever plant you’ve harvested, fasten paper bags over the heads to collect the seeds as they fall. To dry flat, use a screen, mesh, or wire to lay the herbs in a single layer. If you don’t have any of those available, use a baking sheet with a few layers of newspaper or paper towels on top. Try to keep the herbs from touching, if possible. You can leave the leaves on the stems if you want, but things will go faster if you strip the leaves from the stem if you go with this option. Whether you hang them or lay them flat, location is important. It should be as dark as possible, with good air circulation and fairly warm temperatures around 70°F. Avoid the bathroom, laundry room, areas near the sink or dishwasher, or any other place that has high moisture. Don’t hang them in front of a window, even though that looks awfully pretty. Hanging can take a week or more, while laying flat takes a bit longer. Using a Dehydrator A dehydrator is ideal for plants that have a high moisture content. Basil, mint, tarragon, sage, thyme, and parsley are common ones to preserve this way. These plants need to dry quickly or they risk developing mold. Use leaves of a similar size and place them in a single layer. The leaves shouldn’t be touching. Set your dehydrator to 90 to 110°F and run it for as long as necessary to remove all of the moisture from the leaves so they’re dry and crumbly. This should take anywhere from one to three hours. If you notice that it seems to be taking a long time to dry the leaves, turn the dehydrator up a few degrees. Feel free to flip or shift the leaves or trays around, for even heating. If you live in an area with high humidity, you can dry all the way up to 125°F, but remember that lower temperatures are always better. Don’t have a dehydrator? No problem! Check out this roundup of some of the best models on our sister site, Foodal. Drying in the Oven Oven drying isn’t ideal. Most ovens can’t hold a low enough temperature to dehydrate the plant matter rather than cooking it, and that means you lose nutrients and flavor. Remember how we talked about the flavor of an herb coming from the concentrated oils that it contains? If you use too high of a temperature, you lose some of those oils – and the flavor as well. To dry, turn your oven on as low as it can go, and place the leaves in a single layer on a baking sheet. If your oven doesn’t go as low as 125°F, leave the door open a bit to reduce the heat level inside. This is a terrible waste of energy, but it works in a pinch if you need to dry some herbs quickly. It helps to flip them and turn the trays every 20 minutes or so. Depending on the temperature and the amount of plant matter in the oven, it will take an hour or two to completely dry the leaves. As with the other methods on this list, you’ll know the plants are done when you can crumble the leaves between your fingers. Don’t let them bake for too long or the leaves will burn. Using the Microwave You might curse your low-wattage (1000 or below) microwave when you’re trying to heat up a big pot of soup, but that low power is a big plus when it comes to drying herbs. Place a single layer of leaves between two paper towels. Set the microwave to defrost or the lowest heat setting and run it for two to three minutes, depending on the thickness of the leaves. Flip the paper towels and cook for another few minutes. Continue doing this until the leaves are dry and crumbly. Do not leave the microwave unattended during this process. The paper towels can catch on fire, particularly if you don’t have enough leaves in the microwave. Also, never use recycled paper towels because they can contain metal, and we all know how well metal and microwaves get along. Storage Regardless of which method you choose, you can be sure the leaves are dry when they crumble easily between your fingers. This is important, because you don’t want them to get moldy in storage. Fully dried leaves should be stored in airtight containers in a cool, dark place. Don’t expose them to light or high heat. If you’ve been processing your harvest in a warm kitchen, leave the lids off when you move them to the cooler storage area. Once the jars have cooled, put the lids in place. This process helps to avoid condensation inside the jars. Don’t forget to label the jars. You’d be surprised how much dry herbs can look alike and it can be hard to tell the difference even if you smell them. Most herbs can be stored for up to a year. When using, keep in mind that dried herbs are typically twice as strong (or more!) than fresh ones. Savor the Flavor of Your Herbs Drying is a classic choice of preserving for a reason. It’s incredibly easy and it works. You don’t need fancy tools or equipment, though having a food dehydrator is a real advantage. Don’t stress if you don’t have one, though. There are lots of other methods to choose from. Which method are you using? Which herbs are you drying? Fill us in via the comments below! Hopefully, this guide gave you the confidence to fill your cupboard with herbs galore! And for more information about growing and using herbs, check out these guides next: © Ask the Experts, LLC. ALL RIGHTS RESERVED. See our TOS for more details. Originally published April 28th, 2022. Last updated April 27th, 2025. Uncredited photos: Shutterstock. !function(f,b,e,v,n,t,s) if(f.fbq)return;n=f.fbq=function()n.callMethod? n.callMethod.apply(n,arguments):n.queue.push(arguments); if(!f._fbq)f._fbq=n;n.push=n;n.loaded=!0;n.version='2.0'; n.queue=[];t=b.createElement(e);t.async=!0; t.src=v;s=b.getElementsByTagName(e)[0]; s.parentNode.insertBefore(t,s)(window, document,'script', ' fbq('init', '176410929431717'); fbq('track', 'PageView'); Source link
0 notes
Photo

Congratulations! You had a bumper crop of sage this year! Or maybe you found a baker’s dozen of potted basil plants on clearance at your grocery store. Whatever the reason, you have more herbs than you’re able to use fresh and you need to figure out a way to make them last. Drying herbs to preserve them is a practice that has been around for as long as cultivation has been a part of human civilization. The concept of drying is extremely simple. You just want to expose as much of the surface area of the plant to the air as you can so the moisture evaporates – the quicker, the better. But as with many things that are conceptually simple, the execution requires a little more nuance. To help you save those herbs, we’re going to discuss the many methods of dehydrating. Here’s what to expect, coming right up: Almost any herb can be dried, so long as you understand the various methods available and when to use them. The flavor of the plants comes from the oils stored inside their cells. Dehydrating concentrates these oils while removing the moisture that can cause herbs to spoil. Get your screens, hangers, or dehydrators ready. Those herbs aren’t going to dry themselves! Methods of Drying There are many ways to dry herbs. Some work faster than others, and some are better for larger or thicker plants, but all of them will work if you’re patient. Air drying has the distinct advantage of being free. However, it takes much more time and it usually takes up more space than other methods. You can do this by hanging harvested plants or laying them out. Bonus points if you can lay them out on a screen. Dehydrators usually take up less room and they’re much, much faster than air drying. They’re also more expensive than the air method and unless you have a monster-sized dehydrator, you can only process small batches at a time. The biggest advantage to this option is that you can dry the leaves quickly but at a controlled, low temperature, retaining the flavor better than other methods as a result. You can also often use your oven, though this method isn’t always effective for those that must be dried on low heat. Most ovens can’t go below about 175°F or so, and most herbs should ideally be dehydrated at around 90 to 110°F. Some microwaves are also good for drying herbs, depending on the available wattage. How to Harvest Herbs for Drying Harvesting starts the day before you intend to do the work. Water the soil well and then spray the plants with water to remove any debris, pollen, sprays you’ve applied, or dirt. While every herb is different, most should be harvested in the morning while the plants are full of moisture, but after the dew has evaporated. Whenever possible, harvest entire stems rather than individual leaves. Most are best harvested before or just as they start to flower. Of course, this doesn’t apply to plants that you want to dry to harvest the seeds. With herbs, we’re generally talking specifically about the edible leaves, as opposed to the seeds, bark, or roots, which would classically be described as spices. The younger leaves toward the end of the stems usually have the most flavor, with the highest concentration of oils. You can leave behind a six-inch length of stem when you harvest, and most will regenerate new growth. Use a sharp pair of scissors to snip the parts you intend to use. Pulling or twisting bruises the plant and causes it to deteriorate more quickly. Immediately after harvesting, place what you’ve picked in a cool, sheltered spot until you can process it for drying. Even better, place the stems in a glass of water as you would a bouquet. Don’t leave harvested stems in direct sunlight. Once you arrive indoors, or wherever you intend to prep your harvest, trim off and discard any damaged leaves. Air Drying When air drying, the ideal spot is indoors in a warm, sheltered space with good air circulation. You can also do this outdoors, but try to find an area that’s well protected from sun, insects, and wind. Hanging works best for plants with woody or firm stems. Think rosemary, sage, lemon verbena, and the like. For flimsier, more tender types like basil and parsley, lay the harvest out on a screen. To bundle herbs for hanging, loosely secure a handful of stems towards the lower, cut end with a rubber band or string. You don’t want to create a bundle that is too large or you run the risk of mold forming. Then, hang the bundles singly with a few inches between each one. I like to suspend a few bundles on a hanger in my attic, basement, or covered patio, depending on the time of year. But you can use anything really, from a clothesline to nails over a doorway. Be aware that as the stems dry, they shrink, which means some may fall out of the bundle. Experienced air dryers often use rubber bands to avoid this problem, because the bands usually tighten up as the bundle dries. If you want to collect the seeds from whatever plant you’ve harvested, fasten paper bags over the heads to collect the seeds as they fall. To dry flat, use a screen, mesh, or wire to lay the herbs in a single layer. If you don’t have any of those available, use a baking sheet with a few layers of newspaper or paper towels on top. Try to keep the herbs from touching, if possible. You can leave the leaves on the stems if you want, but things will go faster if you strip the leaves from the stem if you go with this option. Whether you hang them or lay them flat, location is important. It should be as dark as possible, with good air circulation and fairly warm temperatures around 70°F. Avoid the bathroom, laundry room, areas near the sink or dishwasher, or any other place that has high moisture. Don’t hang them in front of a window, even though that looks awfully pretty. Hanging can take a week or more, while laying flat takes a bit longer. Using a Dehydrator A dehydrator is ideal for plants that have a high moisture content. Basil, mint, tarragon, sage, thyme, and parsley are common ones to preserve this way. These plants need to dry quickly or they risk developing mold. Use leaves of a similar size and place them in a single layer. The leaves shouldn’t be touching. Set your dehydrator to 90 to 110°F and run it for as long as necessary to remove all of the moisture from the leaves so they’re dry and crumbly. This should take anywhere from one to three hours. If you notice that it seems to be taking a long time to dry the leaves, turn the dehydrator up a few degrees. Feel free to flip or shift the leaves or trays around, for even heating. If you live in an area with high humidity, you can dry all the way up to 125°F, but remember that lower temperatures are always better. Don’t have a dehydrator? No problem! Check out this roundup of some of the best models on our sister site, Foodal. Drying in the Oven Oven drying isn’t ideal. Most ovens can’t hold a low enough temperature to dehydrate the plant matter rather than cooking it, and that means you lose nutrients and flavor. Remember how we talked about the flavor of an herb coming from the concentrated oils that it contains? If you use too high of a temperature, you lose some of those oils – and the flavor as well. To dry, turn your oven on as low as it can go, and place the leaves in a single layer on a baking sheet. If your oven doesn’t go as low as 125°F, leave the door open a bit to reduce the heat level inside. This is a terrible waste of energy, but it works in a pinch if you need to dry some herbs quickly. It helps to flip them and turn the trays every 20 minutes or so. Depending on the temperature and the amount of plant matter in the oven, it will take an hour or two to completely dry the leaves. As with the other methods on this list, you’ll know the plants are done when you can crumble the leaves between your fingers. Don’t let them bake for too long or the leaves will burn. Using the Microwave You might curse your low-wattage (1000 or below) microwave when you’re trying to heat up a big pot of soup, but that low power is a big plus when it comes to drying herbs. Place a single layer of leaves between two paper towels. Set the microwave to defrost or the lowest heat setting and run it for two to three minutes, depending on the thickness of the leaves. Flip the paper towels and cook for another few minutes. Continue doing this until the leaves are dry and crumbly. Do not leave the microwave unattended during this process. The paper towels can catch on fire, particularly if you don’t have enough leaves in the microwave. Also, never use recycled paper towels because they can contain metal, and we all know how well metal and microwaves get along. Storage Regardless of which method you choose, you can be sure the leaves are dry when they crumble easily between your fingers. This is important, because you don’t want them to get moldy in storage. Fully dried leaves should be stored in airtight containers in a cool, dark place. Don’t expose them to light or high heat. If you’ve been processing your harvest in a warm kitchen, leave the lids off when you move them to the cooler storage area. Once the jars have cooled, put the lids in place. This process helps to avoid condensation inside the jars. Don’t forget to label the jars. You’d be surprised how much dry herbs can look alike and it can be hard to tell the difference even if you smell them. Most herbs can be stored for up to a year. When using, keep in mind that dried herbs are typically twice as strong (or more!) than fresh ones. Savor the Flavor of Your Herbs Drying is a classic choice of preserving for a reason. It’s incredibly easy and it works. You don’t need fancy tools or equipment, though having a food dehydrator is a real advantage. Don’t stress if you don’t have one, though. There are lots of other methods to choose from. Which method are you using? Which herbs are you drying? Fill us in via the comments below! Hopefully, this guide gave you the confidence to fill your cupboard with herbs galore! And for more information about growing and using herbs, check out these guides next: © Ask the Experts, LLC. ALL RIGHTS RESERVED. See our TOS for more details. Originally published April 28th, 2022. Last updated April 27th, 2025. Uncredited photos: Shutterstock. !function(f,b,e,v,n,t,s) if(f.fbq)return;n=f.fbq=function()n.callMethod? n.callMethod.apply(n,arguments):n.queue.push(arguments); if(!f._fbq)f._fbq=n;n.push=n;n.loaded=!0;n.version='2.0'; n.queue=[];t=b.createElement(e);t.async=!0; t.src=v;s=b.getElementsByTagName(e)[0]; s.parentNode.insertBefore(t,s)(window, document,'script', ' fbq('init', '176410929431717'); fbq('track', 'PageView'); Source link
0 notes
Text
Drying and storing herbs
[drying and storing herbs]

Extension(link)
Drying and storing herbs requires little effort depending on the plant and method you choose.
There are multiple ways to dry herbs and some might be easier for you than others while some might take more spoons, whichever method you feel fits you best is perfectly fine to stick with!
Storing herbs is possibly the easiest part of having plants and harvesting herbs. With a tight seal and a dark dry space, you can store any herb from days to months!
However some plants have different expiration dates, so while it's best to pay attention to what part of the plant to harvest you should also check the amount of time the plant can be stored for after drying before it either goes bad or can no longer be used.
You do not want a bundle of herbs rotting and molding in your pantry, trust me.
Beep Boop mmMMmmmm...
One of the easiest and quickest ways to dry herbs is to pop em in the microwave!
Setting the harvested plant on a plate, with a piece of paper towel underneath it to absorb the moisture instead of letting it sit on the plate, and putting it in for a minute or so until it's dry, can speed up the time required to dry them without costing you too many spoons.
If they still aren't dry when you take them out, it's safe to put it back in for another 30s until they're dry.
This works best with a revolving microwave, but any microwave should be fine. Just keep an eye on the herbs.
Sun bathing~
Setting your harvest to sit in the sun takes longer than microwaving, and some plants require more time than others, but this still works just fine.
The only thing you need to watch out for it's animals getting to them! Be it outdoors where squirrels will snatch at them or indoors with an overly curious pet who might just snack on anything it deems edible.
Setting your herbs on a tray, preferably something with absorption or otherwise on paper towel to absorb the moisture from the drying herbs, even setting them on cloth in direct sunlight, will heat them up and start drying them.
This method can take anywhere from hours to a few days, checking in on the drying herbs periodically to make sure they're dry before storing them is the best call.
Hanging by a string ≈
Hanging herbs probably takes the most spoons from these three methods as hanging them up in bundles requires more effort than setting them on paper towel and leaving them to the elements.
Getting a good bunch tied together from the stems and tieing them around the kitchen can require more use in your hands and the occasional stretch up to reach a spot to hang them.
You can hang them on cupboard handles or on curtain rods!
the higher they are the less likely they are to be touched by pets. Hanging them is probably the safest method when you have animals.
You don't have to hand them in direct sunlight but doing so can dry them a little quicker, they still air dry fine without it.
This method does tend to take the longest of the three as well, but hanging herbs can also give the place a nice scent.
Hanging certain plants even have good benefits in magical or cultural practices.
Lock em up
As mentioned before, storing herbs is very likely the easiest part of all this.
Once your herbs are fully dry, all you need to do is make sure they stay that way, avoid sunlight and dampness to avoid damaging them or discourage rot, and they can be put just about anywhere.
You can store them in a plastic container or even a plastic bag so long as they are tightly sealed, and they'll fit in your pantry or a cupboard.
While it's not recommended to put them in a fridge or freezer as it's not exactly a dry place, if you don't plan on storing them for too long it's fine to put them in the fridge overnight as long as they remain sealed up.
If you have any questions, additions or even corrections, feel free to leave them in the notes or send me an ask!
And if you have any plants, how are they doing?
What herbs are your favorite?

Id in pinned
#sparrow posting#disability blogging#cpunk#physically disabled#actually disabled#physical disability#cripplepunk#cpunk blog#herbs#drying herbs#herb drying#storing herbs#herb storing#drying and storing herbs#crippled#cripple#cripple punk#crip punk#cripplepunk blog#cpunk witch#crippunk#cripple witch#disabled witch#plants#spoonie witch#spoonie
14 notes
·
View notes
Photo

Congratulations! You had a bumper crop of sage this year! Or maybe you found a baker’s dozen of potted basil plants on clearance at your grocery store. Whatever the reason, you have more herbs than you’re able to use fresh and you need to figure out a way to make them last. Drying herbs to preserve them is a practice that has been around for as long as cultivation has been a part of human civilization. The concept of drying is extremely simple. You just want to expose as much of the surface area of the plant to the air as you can so the moisture evaporates – the quicker, the better. But as with many things that are conceptually simple, the execution requires a little more nuance. To help you save those herbs, we’re going to discuss the many methods of dehydrating. Here’s what to expect, coming right up: Almost any herb can be dried, so long as you understand the various methods available and when to use them. The flavor of the plants comes from the oils stored inside their cells. Dehydrating concentrates these oils while removing the moisture that can cause herbs to spoil. Get your screens, hangers, or dehydrators ready. Those herbs aren’t going to dry themselves! Methods of Drying There are many ways to dry herbs. Some work faster than others, and some are better for larger or thicker plants, but all of them will work if you’re patient. Air drying has the distinct advantage of being free. However, it takes much more time and it usually takes up more space than other methods. You can do this by hanging harvested plants or laying them out. Bonus points if you can lay them out on a screen. Dehydrators usually take up less room and they’re much, much faster than air drying. They’re also more expensive than the air method and unless you have a monster-sized dehydrator, you can only process small batches at a time. The biggest advantage to this option is that you can dry the leaves quickly but at a controlled, low temperature, retaining the flavor better than other methods as a result. You can also often use your oven, though this method isn’t always effective for those that must be dried on low heat. Most ovens can’t go below about 175°F or so, and most herbs should ideally be dehydrated at around 90 to 110°F. Some microwaves are also good for drying herbs, depending on the available wattage. How to Harvest Herbs for Drying Harvesting starts the day before you intend to do the work. Water the soil well and then spray the plants with water to remove any debris, pollen, sprays you’ve applied, or dirt. While every herb is different, most should be harvested in the morning while the plants are full of moisture, but after the dew has evaporated. Whenever possible, harvest entire stems rather than individual leaves. Most are best harvested before or just as they start to flower. Of course, this doesn’t apply to plants that you want to dry to harvest the seeds. With herbs, we’re generally talking specifically about the edible leaves, as opposed to the seeds, bark, or roots, which would classically be described as spices. The younger leaves toward the end of the stems usually have the most flavor, with the highest concentration of oils. You can leave behind a six-inch length of stem when you harvest, and most will regenerate new growth. Use a sharp pair of scissors to snip the parts you intend to use. Pulling or twisting bruises the plant and causes it to deteriorate more quickly. Immediately after harvesting, place what you’ve picked in a cool, sheltered spot until you can process it for drying. Even better, place the stems in a glass of water as you would a bouquet. Don’t leave harvested stems in direct sunlight. Once you arrive indoors, or wherever you intend to prep your harvest, trim off and discard any damaged leaves. Air Drying When air drying, the ideal spot is indoors in a warm, sheltered space with good air circulation. You can also do this outdoors, but try to find an area that’s well protected from sun, insects, and wind. Hanging works best for plants with woody or firm stems. Think rosemary, sage, lemon verbena, and the like. For flimsier, more tender types like basil and parsley, lay the harvest out on a screen. To bundle herbs for hanging, loosely secure a handful of stems towards the lower, cut end with a rubber band or string. You don’t want to create a bundle that is too large or you run the risk of mold forming. Then, hang the bundles singly with a few inches between each one. I like to suspend a few bundles on a hanger in my attic, basement, or covered patio, depending on the time of year. But you can use anything really, from a clothesline to nails over a doorway. Be aware that as the stems dry, they shrink, which means some may fall out of the bundle. Experienced air dryers often use rubber bands to avoid this problem, because the bands usually tighten up as the bundle dries. If you want to collect the seeds from whatever plant you’ve harvested, fasten paper bags over the heads to collect the seeds as they fall. To dry flat, use a screen, mesh, or wire to lay the herbs in a single layer. If you don’t have any of those available, use a baking sheet with a few layers of newspaper or paper towels on top. Try to keep the herbs from touching, if possible. You can leave the leaves on the stems if you want, but things will go faster if you strip the leaves from the stem if you go with this option. Whether you hang them or lay them flat, location is important. It should be as dark as possible, with good air circulation and fairly warm temperatures around 70°F. Avoid the bathroom, laundry room, areas near the sink or dishwasher, or any other place that has high moisture. Don’t hang them in front of a window, even though that looks awfully pretty. Hanging can take a week or more, while laying flat takes a bit longer. Using a Dehydrator A dehydrator is ideal for plants that have a high moisture content. Basil, mint, tarragon, sage, thyme, and parsley are common ones to preserve this way. These plants need to dry quickly or they risk developing mold. Use leaves of a similar size and place them in a single layer. The leaves shouldn’t be touching. Set your dehydrator to 90 to 110°F and run it for as long as necessary to remove all of the moisture from the leaves so they’re dry and crumbly. This should take anywhere from one to three hours. If you notice that it seems to be taking a long time to dry the leaves, turn the dehydrator up a few degrees. Feel free to flip or shift the leaves or trays around, for even heating. If you live in an area with high humidity, you can dry all the way up to 125°F, but remember that lower temperatures are always better. Don’t have a dehydrator? No problem! Check out this roundup of some of the best models on our sister site, Foodal. Drying in the Oven Oven drying isn’t ideal. Most ovens can’t hold a low enough temperature to dehydrate the plant matter rather than cooking it, and that means you lose nutrients and flavor. Remember how we talked about the flavor of an herb coming from the concentrated oils that it contains? If you use too high of a temperature, you lose some of those oils – and the flavor as well. To dry, turn your oven on as low as it can go, and place the leaves in a single layer on a baking sheet. If your oven doesn’t go as low as 125°F, leave the door open a bit to reduce the heat level inside. This is a terrible waste of energy, but it works in a pinch if you need to dry some herbs quickly. It helps to flip them and turn the trays every 20 minutes or so. Depending on the temperature and the amount of plant matter in the oven, it will take an hour or two to completely dry the leaves. As with the other methods on this list, you’ll know the plants are done when you can crumble the leaves between your fingers. Don’t let them bake for too long or the leaves will burn. Using the Microwave You might curse your low-wattage (1000 or below) microwave when you’re trying to heat up a big pot of soup, but that low power is a big plus when it comes to drying herbs. Place a single layer of leaves between two paper towels. Set the microwave to defrost or the lowest heat setting and run it for two to three minutes, depending on the thickness of the leaves. Flip the paper towels and cook for another few minutes. Continue doing this until the leaves are dry and crumbly. Do not leave the microwave unattended during this process. The paper towels can catch on fire, particularly if you don’t have enough leaves in the microwave. Also, never use recycled paper towels because they can contain metal, and we all know how well metal and microwaves get along. Storage Regardless of which method you choose, you can be sure the leaves are dry when they crumble easily between your fingers. This is important, because you don’t want them to get moldy in storage. Fully dried leaves should be stored in airtight containers in a cool, dark place. Don’t expose them to light or high heat. If you’ve been processing your harvest in a warm kitchen, leave the lids off when you move them to the cooler storage area. Once the jars have cooled, put the lids in place. This process helps to avoid condensation inside the jars. Don’t forget to label the jars. You’d be surprised how much dry herbs can look alike and it can be hard to tell the difference even if you smell them. Most herbs can be stored for up to a year. When using, keep in mind that dried herbs are typically twice as strong (or more!) than fresh ones. Savor the Flavor of Your Herbs Drying is a classic choice of preserving for a reason. It’s incredibly easy and it works. You don’t need fancy tools or equipment, though having a food dehydrator is a real advantage. Don’t stress if you don’t have one, though. There are lots of other methods to choose from. Which method are you using? Which herbs are you drying? Fill us in via the comments below! Hopefully, this guide gave you the confidence to fill your cupboard with herbs galore! And for more information about growing and using herbs, check out these guides next: © Ask the Experts, LLC. ALL RIGHTS RESERVED. See our TOS for more details. Originally published April 28th, 2022. Last updated April 27th, 2025. Uncredited photos: Shutterstock. !function(f,b,e,v,n,t,s) if(f.fbq)return;n=f.fbq=function()n.callMethod? n.callMethod.apply(n,arguments):n.queue.push(arguments); if(!f._fbq)f._fbq=n;n.push=n;n.loaded=!0;n.version='2.0'; n.queue=[];t=b.createElement(e);t.async=!0; t.src=v;s=b.getElementsByTagName(e)[0]; s.parentNode.insertBefore(t,s)(window, document,'script', ' fbq('init', '176410929431717'); fbq('track', 'PageView'); Source link
0 notes
Photo

Congratulations! You had a bumper crop of sage this year! Or maybe you found a baker’s dozen of potted basil plants on clearance at your grocery store. Whatever the reason, you have more herbs than you’re able to use fresh and you need to figure out a way to make them last. Drying herbs to preserve them is a practice that has been around for as long as cultivation has been a part of human civilization. The concept of drying is extremely simple. You just want to expose as much of the surface area of the plant to the air as you can so the moisture evaporates – the quicker, the better. But as with many things that are conceptually simple, the execution requires a little more nuance. To help you save those herbs, we’re going to discuss the many methods of dehydrating. Here’s what to expect, coming right up: Almost any herb can be dried, so long as you understand the various methods available and when to use them. The flavor of the plants comes from the oils stored inside their cells. Dehydrating concentrates these oils while removing the moisture that can cause herbs to spoil. Get your screens, hangers, or dehydrators ready. Those herbs aren’t going to dry themselves! Methods of Drying There are many ways to dry herbs. Some work faster than others, and some are better for larger or thicker plants, but all of them will work if you’re patient. Air drying has the distinct advantage of being free. However, it takes much more time and it usually takes up more space than other methods. You can do this by hanging harvested plants or laying them out. Bonus points if you can lay them out on a screen. Dehydrators usually take up less room and they’re much, much faster than air drying. They’re also more expensive than the air method and unless you have a monster-sized dehydrator, you can only process small batches at a time. The biggest advantage to this option is that you can dry the leaves quickly but at a controlled, low temperature, retaining the flavor better than other methods as a result. You can also often use your oven, though this method isn’t always effective for those that must be dried on low heat. Most ovens can’t go below about 175°F or so, and most herbs should ideally be dehydrated at around 90 to 110°F. Some microwaves are also good for drying herbs, depending on the available wattage. How to Harvest Herbs for Drying Harvesting starts the day before you intend to do the work. Water the soil well and then spray the plants with water to remove any debris, pollen, sprays you’ve applied, or dirt. While every herb is different, most should be harvested in the morning while the plants are full of moisture, but after the dew has evaporated. Whenever possible, harvest entire stems rather than individual leaves. Most are best harvested before or just as they start to flower. Of course, this doesn’t apply to plants that you want to dry to harvest the seeds. With herbs, we’re generally talking specifically about the edible leaves, as opposed to the seeds, bark, or roots, which would classically be described as spices. The younger leaves toward the end of the stems usually have the most flavor, with the highest concentration of oils. You can leave behind a six-inch length of stem when you harvest, and most will regenerate new growth. Use a sharp pair of scissors to snip the parts you intend to use. Pulling or twisting bruises the plant and causes it to deteriorate more quickly. Immediately after harvesting, place what you’ve picked in a cool, sheltered spot until you can process it for drying. Even better, place the stems in a glass of water as you would a bouquet. Don’t leave harvested stems in direct sunlight. Once you arrive indoors, or wherever you intend to prep your harvest, trim off and discard any damaged leaves. Air Drying When air drying, the ideal spot is indoors in a warm, sheltered space with good air circulation. You can also do this outdoors, but try to find an area that’s well protected from sun, insects, and wind. Hanging works best for plants with woody or firm stems. Think rosemary, sage, lemon verbena, and the like. For flimsier, more tender types like basil and parsley, lay the harvest out on a screen. To bundle herbs for hanging, loosely secure a handful of stems towards the lower, cut end with a rubber band or string. You don’t want to create a bundle that is too large or you run the risk of mold forming. Then, hang the bundles singly with a few inches between each one. I like to suspend a few bundles on a hanger in my attic, basement, or covered patio, depending on the time of year. But you can use anything really, from a clothesline to nails over a doorway. Be aware that as the stems dry, they shrink, which means some may fall out of the bundle. Experienced air dryers often use rubber bands to avoid this problem, because the bands usually tighten up as the bundle dries. If you want to collect the seeds from whatever plant you’ve harvested, fasten paper bags over the heads to collect the seeds as they fall. To dry flat, use a screen, mesh, or wire to lay the herbs in a single layer. If you don’t have any of those available, use a baking sheet with a few layers of newspaper or paper towels on top. Try to keep the herbs from touching, if possible. You can leave the leaves on the stems if you want, but things will go faster if you strip the leaves from the stem if you go with this option. Whether you hang them or lay them flat, location is important. It should be as dark as possible, with good air circulation and fairly warm temperatures around 70°F. Avoid the bathroom, laundry room, areas near the sink or dishwasher, or any other place that has high moisture. Don’t hang them in front of a window, even though that looks awfully pretty. Hanging can take a week or more, while laying flat takes a bit longer. Using a Dehydrator A dehydrator is ideal for plants that have a high moisture content. Basil, mint, tarragon, sage, thyme, and parsley are common ones to preserve this way. These plants need to dry quickly or they risk developing mold. Use leaves of a similar size and place them in a single layer. The leaves shouldn’t be touching. Set your dehydrator to 90 to 110°F and run it for as long as necessary to remove all of the moisture from the leaves so they’re dry and crumbly. This should take anywhere from one to three hours. If you notice that it seems to be taking a long time to dry the leaves, turn the dehydrator up a few degrees. Feel free to flip or shift the leaves or trays around, for even heating. If you live in an area with high humidity, you can dry all the way up to 125°F, but remember that lower temperatures are always better. Don’t have a dehydrator? No problem! Check out this roundup of some of the best models on our sister site, Foodal. Drying in the Oven Oven drying isn’t ideal. Most ovens can’t hold a low enough temperature to dehydrate the plant matter rather than cooking it, and that means you lose nutrients and flavor. Remember how we talked about the flavor of an herb coming from the concentrated oils that it contains? If you use too high of a temperature, you lose some of those oils – and the flavor as well. To dry, turn your oven on as low as it can go, and place the leaves in a single layer on a baking sheet. If your oven doesn’t go as low as 125°F, leave the door open a bit to reduce the heat level inside. This is a terrible waste of energy, but it works in a pinch if you need to dry some herbs quickly. It helps to flip them and turn the trays every 20 minutes or so. Depending on the temperature and the amount of plant matter in the oven, it will take an hour or two to completely dry the leaves. As with the other methods on this list, you’ll know the plants are done when you can crumble the leaves between your fingers. Don’t let them bake for too long or the leaves will burn. Using the Microwave You might curse your low-wattage (1000 or below) microwave when you’re trying to heat up a big pot of soup, but that low power is a big plus when it comes to drying herbs. Place a single layer of leaves between two paper towels. Set the microwave to defrost or the lowest heat setting and run it for two to three minutes, depending on the thickness of the leaves. Flip the paper towels and cook for another few minutes. Continue doing this until the leaves are dry and crumbly. Do not leave the microwave unattended during this process. The paper towels can catch on fire, particularly if you don’t have enough leaves in the microwave. Also, never use recycled paper towels because they can contain metal, and we all know how well metal and microwaves get along. Storage Regardless of which method you choose, you can be sure the leaves are dry when they crumble easily between your fingers. This is important, because you don’t want them to get moldy in storage. Fully dried leaves should be stored in airtight containers in a cool, dark place. Don’t expose them to light or high heat. If you’ve been processing your harvest in a warm kitchen, leave the lids off when you move them to the cooler storage area. Once the jars have cooled, put the lids in place. This process helps to avoid condensation inside the jars. Don’t forget to label the jars. You’d be surprised how much dry herbs can look alike and it can be hard to tell the difference even if you smell them. Most herbs can be stored for up to a year. When using, keep in mind that dried herbs are typically twice as strong (or more!) than fresh ones. Savor the Flavor of Your Herbs Drying is a classic choice of preserving for a reason. It’s incredibly easy and it works. You don’t need fancy tools or equipment, though having a food dehydrator is a real advantage. Don’t stress if you don’t have one, though. There are lots of other methods to choose from. Which method are you using? Which herbs are you drying? Fill us in via the comments below! Hopefully, this guide gave you the confidence to fill your cupboard with herbs galore! And for more information about growing and using herbs, check out these guides next: © Ask the Experts, LLC. ALL RIGHTS RESERVED. See our TOS for more details. Originally published April 28th, 2022. Last updated April 27th, 2025. Uncredited photos: Shutterstock. !function(f,b,e,v,n,t,s) if(f.fbq)return;n=f.fbq=function()n.callMethod? n.callMethod.apply(n,arguments):n.queue.push(arguments); if(!f._fbq)f._fbq=n;n.push=n;n.loaded=!0;n.version='2.0'; n.queue=[];t=b.createElement(e);t.async=!0; t.src=v;s=b.getElementsByTagName(e)[0]; s.parentNode.insertBefore(t,s)(window, document,'script', ' fbq('init', '176410929431717'); fbq('track', 'PageView'); Source link
0 notes
Photo

Congratulations! You had a bumper crop of sage this year! Or maybe you found a baker’s dozen of potted basil plants on clearance at your grocery store. Whatever the reason, you have more herbs than you’re able to use fresh and you need to figure out a way to make them last. Drying herbs to preserve them is a practice that has been around for as long as cultivation has been a part of human civilization. The concept of drying is extremely simple. You just want to expose as much of the surface area of the plant to the air as you can so the moisture evaporates – the quicker, the better. But as with many things that are conceptually simple, the execution requires a little more nuance. To help you save those herbs, we’re going to discuss the many methods of dehydrating. Here’s what to expect, coming right up: Almost any herb can be dried, so long as you understand the various methods available and when to use them. The flavor of the plants comes from the oils stored inside their cells. Dehydrating concentrates these oils while removing the moisture that can cause herbs to spoil. Get your screens, hangers, or dehydrators ready. Those herbs aren’t going to dry themselves! Methods of Drying There are many ways to dry herbs. Some work faster than others, and some are better for larger or thicker plants, but all of them will work if you’re patient. Air drying has the distinct advantage of being free. However, it takes much more time and it usually takes up more space than other methods. You can do this by hanging harvested plants or laying them out. Bonus points if you can lay them out on a screen. Dehydrators usually take up less room and they’re much, much faster than air drying. They’re also more expensive than the air method and unless you have a monster-sized dehydrator, you can only process small batches at a time. The biggest advantage to this option is that you can dry the leaves quickly but at a controlled, low temperature, retaining the flavor better than other methods as a result. You can also often use your oven, though this method isn’t always effective for those that must be dried on low heat. Most ovens can’t go below about 175°F or so, and most herbs should ideally be dehydrated at around 90 to 110°F. Some microwaves are also good for drying herbs, depending on the available wattage. How to Harvest Herbs for Drying Harvesting starts the day before you intend to do the work. Water the soil well and then spray the plants with water to remove any debris, pollen, sprays you’ve applied, or dirt. While every herb is different, most should be harvested in the morning while the plants are full of moisture, but after the dew has evaporated. Whenever possible, harvest entire stems rather than individual leaves. Most are best harvested before or just as they start to flower. Of course, this doesn’t apply to plants that you want to dry to harvest the seeds. With herbs, we’re generally talking specifically about the edible leaves, as opposed to the seeds, bark, or roots, which would classically be described as spices. The younger leaves toward the end of the stems usually have the most flavor, with the highest concentration of oils. You can leave behind a six-inch length of stem when you harvest, and most will regenerate new growth. Use a sharp pair of scissors to snip the parts you intend to use. Pulling or twisting bruises the plant and causes it to deteriorate more quickly. Immediately after harvesting, place what you’ve picked in a cool, sheltered spot until you can process it for drying. Even better, place the stems in a glass of water as you would a bouquet. Don’t leave harvested stems in direct sunlight. Once you arrive indoors, or wherever you intend to prep your harvest, trim off and discard any damaged leaves. Air Drying When air drying, the ideal spot is indoors in a warm, sheltered space with good air circulation. You can also do this outdoors, but try to find an area that’s well protected from sun, insects, and wind. Hanging works best for plants with woody or firm stems. Think rosemary, sage, lemon verbena, and the like. For flimsier, more tender types like basil and parsley, lay the harvest out on a screen. To bundle herbs for hanging, loosely secure a handful of stems towards the lower, cut end with a rubber band or string. You don’t want to create a bundle that is too large or you run the risk of mold forming. Then, hang the bundles singly with a few inches between each one. I like to suspend a few bundles on a hanger in my attic, basement, or covered patio, depending on the time of year. But you can use anything really, from a clothesline to nails over a doorway. Be aware that as the stems dry, they shrink, which means some may fall out of the bundle. Experienced air dryers often use rubber bands to avoid this problem, because the bands usually tighten up as the bundle dries. If you want to collect the seeds from whatever plant you’ve harvested, fasten paper bags over the heads to collect the seeds as they fall. To dry flat, use a screen, mesh, or wire to lay the herbs in a single layer. If you don’t have any of those available, use a baking sheet with a few layers of newspaper or paper towels on top. Try to keep the herbs from touching, if possible. You can leave the leaves on the stems if you want, but things will go faster if you strip the leaves from the stem if you go with this option. Whether you hang them or lay them flat, location is important. It should be as dark as possible, with good air circulation and fairly warm temperatures around 70°F. Avoid the bathroom, laundry room, areas near the sink or dishwasher, or any other place that has high moisture. Don’t hang them in front of a window, even though that looks awfully pretty. Hanging can take a week or more, while laying flat takes a bit longer. Using a Dehydrator A dehydrator is ideal for plants that have a high moisture content. Basil, mint, tarragon, sage, thyme, and parsley are common ones to preserve this way. These plants need to dry quickly or they risk developing mold. Use leaves of a similar size and place them in a single layer. The leaves shouldn’t be touching. Set your dehydrator to 90 to 110°F and run it for as long as necessary to remove all of the moisture from the leaves so they’re dry and crumbly. This should take anywhere from one to three hours. If you notice that it seems to be taking a long time to dry the leaves, turn the dehydrator up a few degrees. Feel free to flip or shift the leaves or trays around, for even heating. If you live in an area with high humidity, you can dry all the way up to 125°F, but remember that lower temperatures are always better. Don’t have a dehydrator? No problem! Check out this roundup of some of the best models on our sister site, Foodal. Drying in the Oven Oven drying isn’t ideal. Most ovens can’t hold a low enough temperature to dehydrate the plant matter rather than cooking it, and that means you lose nutrients and flavor. Remember how we talked about the flavor of an herb coming from the concentrated oils that it contains? If you use too high of a temperature, you lose some of those oils – and the flavor as well. To dry, turn your oven on as low as it can go, and place the leaves in a single layer on a baking sheet. If your oven doesn’t go as low as 125°F, leave the door open a bit to reduce the heat level inside. This is a terrible waste of energy, but it works in a pinch if you need to dry some herbs quickly. It helps to flip them and turn the trays every 20 minutes or so. Depending on the temperature and the amount of plant matter in the oven, it will take an hour or two to completely dry the leaves. As with the other methods on this list, you’ll know the plants are done when you can crumble the leaves between your fingers. Don’t let them bake for too long or the leaves will burn. Using the Microwave You might curse your low-wattage (1000 or below) microwave when you’re trying to heat up a big pot of soup, but that low power is a big plus when it comes to drying herbs. Place a single layer of leaves between two paper towels. Set the microwave to defrost or the lowest heat setting and run it for two to three minutes, depending on the thickness of the leaves. Flip the paper towels and cook for another few minutes. Continue doing this until the leaves are dry and crumbly. Do not leave the microwave unattended during this process. The paper towels can catch on fire, particularly if you don’t have enough leaves in the microwave. Also, never use recycled paper towels because they can contain metal, and we all know how well metal and microwaves get along. Storage Regardless of which method you choose, you can be sure the leaves are dry when they crumble easily between your fingers. This is important, because you don’t want them to get moldy in storage. Fully dried leaves should be stored in airtight containers in a cool, dark place. Don’t expose them to light or high heat. If you’ve been processing your harvest in a warm kitchen, leave the lids off when you move them to the cooler storage area. Once the jars have cooled, put the lids in place. This process helps to avoid condensation inside the jars. Don’t forget to label the jars. You’d be surprised how much dry herbs can look alike and it can be hard to tell the difference even if you smell them. Most herbs can be stored for up to a year. When using, keep in mind that dried herbs are typically twice as strong (or more!) than fresh ones. Savor the Flavor of Your Herbs Drying is a classic choice of preserving for a reason. It’s incredibly easy and it works. You don’t need fancy tools or equipment, though having a food dehydrator is a real advantage. Don’t stress if you don’t have one, though. There are lots of other methods to choose from. Which method are you using? Which herbs are you drying? Fill us in via the comments below! Hopefully, this guide gave you the confidence to fill your cupboard with herbs galore! And for more information about growing and using herbs, check out these guides next: © Ask the Experts, LLC. ALL RIGHTS RESERVED. See our TOS for more details. Originally published April 28th, 2022. Last updated April 27th, 2025. Uncredited photos: Shutterstock. !function(f,b,e,v,n,t,s) if(f.fbq)return;n=f.fbq=function()n.callMethod? n.callMethod.apply(n,arguments):n.queue.push(arguments); if(!f._fbq)f._fbq=n;n.push=n;n.loaded=!0;n.version='2.0'; n.queue=[];t=b.createElement(e);t.async=!0; t.src=v;s=b.getElementsByTagName(e)[0]; s.parentNode.insertBefore(t,s)(window, document,'script', ' fbq('init', '176410929431717'); fbq('track', 'PageView'); Source link
0 notes
Text
The Ultimate Guide to Herbs: Harvest and Dry Like a Pro
Are you ready to elevate your culinary creations and enjoy fresh, aromatic herbs year-round? Discover the ultimate guide to harvesting and drying herbs in our latest article! Learn the best times to harvest, how to dry your herbs to perfection, and tips f
The Ultimate Guide to Herbs: Harvest and Dry Like a Pro Learn how to harvest and dry herbs like a pro with our ultimate guide. Preserve flavors, maintain potency, and enjoy your garden’s bounty year-round. Introduction Herbs are nature’s little miracles, offering a treasure trove of flavors, fragrances, and health benefits. Whether you’re a seasoned gardener or a curious newbie, the process of…
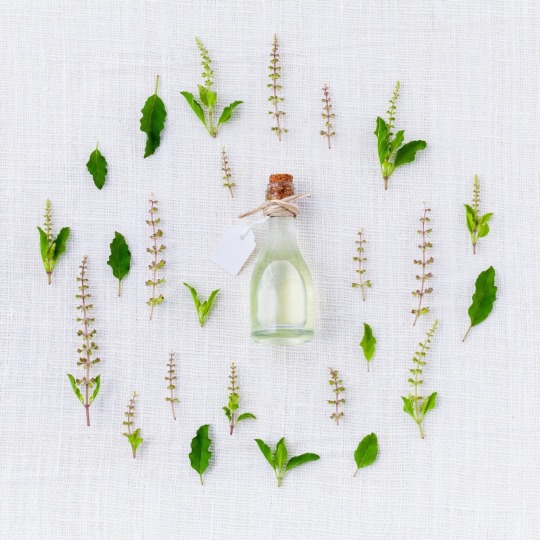
View On WordPress
#air drying herbs#dried herbs#drying herbs#fresh herbs#garden bounty#harvesting herbs#herb gardening#herb harvest tips#herb preservation#herb storage tips#herbs#hoe gardening#Home Gardening#oven drying herbs#storing dried herbs
1 note
·
View note
Text
Super easy and cheap devotional acts for beginners.
A nice cup and some clean, fresh, water on the altar can often be all you need for daily offerings
Grow a plant on your altar, use your weekly watering as a devotional act. Hermes is currently helping my peace lily grow :)
Draw their sigil on your nails and then paint over them with nail polish that matches their color correspondences.
If you can’t acquire alcohol for your deities (wine, vodka etc) because you’re too young, white vinegar also works. The quality we’re looking for is the purification aspect. White vinegar is natural, antibacterial and never goes bad. You can leave it on your altar until it evaporates if you want.
If you work with a deity involved with self love like Aphrodite, investing a little more time into your skin care and scent can be very rewarding. Nothing super boujie, it can be as simple as getting some nice smelling lotion at the dollar store.
Food and water offerings don’t have to be external, especially if you’re in the broom closet and don’t have an altar. Reserve the first bite of your meal for your deity. Savour its taste while you think about them. Pour yourself a crisp glass of cold water and guzzle it as a devotional act.
Use a washable or dry erase marker to draw sigils on your shower wall for bath rituals. It’ll come right off when you’re done.
Tea bags are just bags of dried herbs. You can use these as offerings or draw sigils on them and burn them for witchcraft. No one is ever suspicious about a little tea. Adding a tea bag to your water offerings also gives them an extra kick.
A couple dollars at the thrift store will take you a long way. I love thrifting items because they’re usually well loved. I especially like thrifting spirituality books that past practitioners have written in. Sometimes my deities communicate with me through the books that are available on any given day. If I was just talking to Leviathan about the power of water and I see a book about Hydromancy, I know that he’s sending me a sign. Like, 90% of the books Lucifer has sent me popped up at the thrift store. Most expensive one was $7.99. (and I tag swapped it for 2.99 😊 thanks, Hermes-
and on this note, literally steal. Not from small local thrift stores, but I mean this with my whole chest, steal from Value Village. If you can sneakily swap a tag and get something for cheaper literally do it. Value Village gets all their inventory for free I literally do not care. Corporate thrift stores don’t deserve rights. I steal from Value Village as a devotional act to Hermes 😊 lmao )
If you don’t have money to spend on really nice paintings and posters of your deities for your altar, start buying books about them. It’s a double win. A book about Greek religion will certainly have multiple beautiful sculptures and paintings of Aphrodite that I can cut out and put on my wall. A book about angels might have a cool painting of Lucifer. Books about Goddesses, ancient religions, anthropology, astrology etc. You get the opportunity to learn, and if it’s a book you don’t particularly care too much for, you can take it apart for imagery. People ask me all the time where I got all of my paintings and pictures from. BOOKS.
Does your deity have a kind of complicated sigil that you love but you also kinda hate redrawing every other day? Sorry Cerberus (Naberius) I love you but that sigil is so complicated babe.
Learn how to block print! It’s very simple. You get a block of linoleum (usually pretty cheap, I think mine were like $5) , some ink (~$10), and a carving tool (varies depending), and make a sigil stamp! All you gotta do is draw your sigil and carve it out nicely one time. You can still bless it and imbue it with your energy, and you can easily put it on prayers, talismans etc.
Chalk is your best friend. Use it to draw sigils on the floor or wall that can easily be wiped away. You can imbue special chalk and use it for casting circles if you don’t like the mess of salt.
#pagan#paganism#demonolatry#deity worship#deity work#deity witchcraft#grimoire#witchcraft#witch community#witch aesthetic#magick#witchblr#helpol#occultism#baby witch
2K notes
·
View notes
Text
Magical Oil Recipes - Baneful Blends Edition

For anyone looking to brew up a potion with a less-than-friendly bent, here are some recipes I've created that you might find useful.
To prepare them, blend the ingredients in such proportions as feels correct for your purposes (or as supplies allow). Use dried material except where indicated. Place a few spoonfuls in a mason jar with a screwtop lid and fill the jar with a bland oil of your choice. (Vegetable oil of the sort you would buy for cooking works fine.) Screw the lid on tightly and shake well to combine, then leave the jar in a dark dry place for 2-4 weeks to steep.
Once steeped, prepare a clean storage bottle (also with a secure lid) and label with the type of oil and the bottling date. Strain the oil through paper towels or cheesecloth to remove the plant material, then bottle immediately. Store away from sunlight and heat for up to one year. Use for spellwork as you see fit.
(Please note that NONE of these potions are meant to be taken internally by any means. Observe all proper safety measures related to glass, fire, and potentially harmful plants as necessary during preparation.)
*- Ingredient is potentially harmful if inhaled or ingested. **- Ingredient should not be used or handled if you are pregnant or nursing.
All-Purpose Hexing Oil For general hexing, cursing, and baneful magic.
Dried Chili Pepper
Fresh Lime Peel
Lemongrass (dried or fresh)
Rusted Nail (place in bottle with finished oil)
All-Purpose Hexbreaking Oil For general negation of baneful spells cast by oneself or others.
Agrimony**
Cinquefoil
Fennel
Vervain
Solomon's Seal Root (place in bottle with finished oil)
Backhanded Blessing Oil For blessings that are anything but benevolent.
Burnt Cinquefoil
Bay Leaf
Pine Needles
Bayberry Root NOTE: Prepare as you would a blessing oil, then twist the blessing into a curse, i.e. May You Get Everything You Deserve.
Done in the Dark Concealment Oil For secrecy, confidentiality, and general deception.
Juniper Berries
Licorice Root
Black Hemp (Dogbane)
Ferns or Dried Seaweed Note: For the final ingredient, use whichever is easier to obtain. Both bracken and seaweed work well for basic concealment spells.
Eye of Newt Disruption Oil For disrupting and confounding magical efforts against you.
Black Mustard Seeds
Bloodroot**
Nettle Leaf
Garlic (1 clove, bruised)
No Rest For The Wicked Hexing Oil For punishing one's enemies.
Chili Pepper (any)
Horseradish Root
Cramp Bark
Bayberry Root
On Your Own Head Retribution Oil For counter magic and revenge hexes.
Elderberries*
Bloodroot**
Devil's Shoestring**
Vetiver
Tangled Shoelaces Binding Oil To impede someone's ability to move or act against you.
Pine Needles
Devil's Shoestring**
Scullcap**
Coffee Grounds
Iron Nail in master bottle
Wicked Witch Heavy-Duty Cursing Oil For occasions when a regular-strength hex just won't do.
Wormwood* **
Ghost Chili Pepper (or the hottest chili you can get)
Lemon Seeds
Lobelia* Note: Use With Extreme Caution And Cover Your Ass.
Witchbane Warding Oil For repelling and countering harmful spells.
Bay Leaves
Elderflower
Star Anise
Birch Bark
Should the reader require supplies, I recommend the following:
Penn Herb Company
Starwest Botanicals
Bulk Apothecary
Mountain Rose Herbs
Specialty Bottle
Image Credit - Shaiith
All recipes are (c) 2017 Bree NicGarran, published in Pestlework: A Book of Magical Powders & Oils. Please check out the book if you would like more recipes.
If you’re enjoying my content, please feel free to drop a little something in the tip jar, tune in to my podcast Hex Positive, or check out my published works on Amazon or in the Willow Wings Witch Shop.
#witchblr#witchcraft#curses#baneful magic#potions#potion recipes#witchy things#I'll see your Threefold Law and raise you an I'm Not Wiccan And I Don't Give A Fuck
731 notes
·
View notes