#failed to write iso to usb drive
Explore tagged Tumblr posts
Visit Tumblr Blog
Explore Tumblr blogs with no restrictions, modern design and the best experience.
Last Seen Tumblr Blogs


Fun Fact
In 2020, Tumblr had 29.4 million users in the US.
Text
Trying to set up Linux on an external SSD to test it out and running into problems every step of the way

#failed to write iso to usb drive#failed to recognize new ssd#finally fixed that and now after installing fedora to the new drive#i reboot and it does not show up as bootable...#i hate windows!! i know this is windows fault somehow!!!
0 notes
Text
Learning Linux the hard way I wanted to use my Ubuntu computer to make a bootable USB drive. The built-in Startup Disk Creator only accepts Ubuntu ISO files, so I spent a bunch of time trying and failing to get BelenaEtcher running¹. Eventually I stumbled across the fact that Linux has a terminal command `dd` that will happily write any ISO to a drive and make it bootable. So that's good to know. ¹dependency issues prevented installation, and for some reason AppImages won't run on my computer. https://ift.tt/Idm2j9V September 09, 2024 at 06:04PM
0 notes
Note
the only reason i did it like this is because rn Rufus refuses to open on my PC and on my Mac Mini behind the TV (his name is adam; my other PC's name is Ice Soup) has Etcher, sure, but it failed the last time I tried to write a debian ISO to a USB drive so

a couple nights ago i had to make an installer for openmediavault, but didn't have any spare USB drives nor did i have any SD to USB adapters that worked with etchdroid
so i busted out a whole ass Vita and somehow that did the jorb
The mysterious whims of the technology
16 notes
·
View notes
Text
Linux iso usb maker

So instead I propose # dd count= if=/dev/sdb of=win7.img Note, this copies the whole device! - which is usually (much) bigger than the files copied to it. Check the boot checkbox, then close.Īfter all that, you probably want to back up your USB media for further installations and get rid of the ISO file. Open gparted, select the USB drive, right-click on the file system, then click on "Manage Flags". or use the standard GUI file-browser of your systemĬall sync to make sure all files are written. Mount ISO and USB media: # mount -o loop win7.iso /mnt/iso
or (if syslinux is installed), you can run sudo dd if=/usr/lib/syslinux/mbr/mbr.bin of=/dev/sdb.
on newer Ubuntu installs) sudo lilo -M /dev/sdb mbr ( info) Write Windows 7 MBR on the USB stick (also works for windows 8), multiple options here: # cfdisk /dev/sdb or fdisk /dev/sdb (partition type 7, and bootable flag) Delete all partitions, create a new one taking up all the space, set type to NTFS (7), and remember to set it bootable: Grub is installed there!)Ĭheck what device your USB media is assigned - here we will assume it is /dev/sdb. Or alternatively, make sure lilo is installed (but do not run the liloconfig step on your local box if e.g. Install ms-sys - if it is not in your repositories, get it here. This works with the Windows 7 retail version. Basically, the missing step was to write a proper boot sector to the USB stick, which can be done from Linux with ms-sys or lilo -M. Use of livecd-iso-to-disk on any distribution other than Fedora is unsupported and not expected to work: please use an alternative method, such as Fedora Media Writer.OK, after unsuccessfully trying all methods mentioned here, I finally got it working. Even if it happens to run and write a stick apparently successfully from some other distribution, the stick may well fail to boot. Livecd-iso-to-disk is not meant to be run from a non-Fedora system. livecd-iso-to-disk on other Linux distributions If your test boot reports a corrupted boot sector, or you get the message MBR appears to be blank., you need to install or reset the master boot record (MBR), by passing -reset-mbr when writing the stick. If you get this message from fdisk, you may need to reformat the flash drive when writing the image, by passing -format when writing the stick. Partition has different physical/logical endings If you get the message Need to have a filesystem label or UUID for your USB device, you need to label the partition: dosfslabel /dev/sdX LIVE. Information: Don't forget to update /etc/fstab, if necessary.

Number Start End Size Type File system Flagsġ 32.3kB 1062MB 1062MB primary fat16 boot Sector size (logical/physical): 512B/512B Welcome to GNU Parted! Type 'help' to view a list of commands.
Difference between Fedora and Red Hat Enterprise Linux.
Installing, Configuring and Troubleshooting MySql/MariaDB.
Creating Windows virtual machines using virtIO drivers.
Installing virtual operating systems with GNOME Boxes.
Getting started with virtualization (libvirt).
Upgrading Fedora using the DNF system upgrade.
How to Set NVIDIA as Primary GPU on Optimus-based Laptops.
How to join an Active Directory or FreeIPA domain.
Getting started with Apache HTTP Server.
Managing keyboard shortcuts for running an application in GNOME.
Controlling network traffic with firewalld.
Displaying a user prompt on the GNOME login screen.
Understanding and administering systemd.
Performing administration tasks using sudo.
Configuring networking with NetworkManager CLI (nmcli).
Disabling the GNOME automatic screen locking.
Setting a key shortcut to run an application in GNOME.
Configuring Xorg as the default GNOME session.
Configuring X Window System using the nf file.
Installing Chromium or Google Chrome browsers.
Installing plugins for playing movies and music.
APT command equivalents on Fedora with DNF.
Securing the system by keeping it up-to-date.
Adding or removing software repositories in Fedora.
Finding and installing Linux applications.

Creating and using a live installation image.
0 notes
Text
Ssd health status

#Ssd health status how to#
#Ssd health status driver#
#Ssd health status free#
#Ssd health status mac#
The Get-StorageReliabilit圜ounter cmdlet allows you to check the counters of the disk/ drive being queried.Storage management providers are storage management applications that provide integrated storage management services. The Get-PhysicalDisk cmdlet retrieves all physical disks visible to any storage management provider.
#Ssd health status how to#
Let’s cover how to jointly use two primary cmdlets (the Get-PhysicalDisk and Get-StorageReliabilit圜ounter) to get a better view of your SSD’s health status. PowerShell lets you check your SSD for read-write errors, wear leveling, percent, temperature, and several other important details. If you spend most of your time running commands in PowerShell, then performing an SSD health check via PowerShell is what suits you best. This limitation is one of the primary reasons to turn to PowerShell when performing an SSD health check. Sudo rm -r /Library/Extensions/SATSMARTLib.Opening Crystal Disk Info for the first time Performing an SSD Health Check via PowerShellĮven though CrystalDiskInfo might cover the most commonly used drive controllers, not all are supported. Sudo rm -r /Library/Extensions/SATSMARTDriver.kext Open the Terminal App, type following commands:
#Ssd health status driver#
Majority of USB-C enclosures such as YOURS, are based on NVMe technology, for which there is no ISO/ANSI standard driver support to query SMART status for NVMe/M.2 over USB. SAT SMART Driver is external 3rd party project and it is not officially supported by BinaryFruit”Īdditional this driver is for USB-A/Firewire drives ONLY, as clearly indicated on the download/install page. “SAT SMART Driver project is not a part of DriveDx project 1.1 back in 2013 and it’s never killed any drive, made unreadable, on any system, HDD or SSD, especially a non-booting EXT drive.ĭriveDx doesn’t write anything to EXT drives, change headers, modify hardware settings/registers, etc. We have been using it in our computer consulting/service business since Ver. No offense, but it’s highly unlikely that DriveDx killed your SSD.
#Ssd health status mac#
A backup offers a way to restore that data, and you’ll be grateful to have if you ever need it.ĭo you use DriveDX to check on the health of your Mac SSD or disk drives? Do you use another tool or method to keep an eye on drive health? Share your experiences and thoughts in the comments. If the drive completely fails and you don’t have a backup, you’re out of luck and all your important data is likely gone for good. Drives do fail, and sometimes spontaneously. Regardless of how your SSD is rated in DriveDX, it’s always a good idea to backup your Mac with Time Machine or another backup method. Not too bad for nearly 4 years of continuous use! You can further drill down by choosing the “Health Indicators” option from the left sidebar to reveal other indicators of the drives health, including temperature readings, drive reading and write, power cycles, time on, and more.įortunately the soldered in flash memory drives used on modern Macs have a lengthy lifespan, as demonstrated by the screenshots taken for this article, which show a first gen Retina MacBook Air SSD has only used 4% of it’s estimated lifespan according to the Life Percentage Used indicator. Open DriveDX and you’ll get an overview of the drive, including an overall health rating, SMART status, and lifespan indicator. If you want to continue to use DriveDX past the two week trial, you can pay for it.
#Ssd health status free#
Get DriveDX from the developer, Binary FruitĭriveDX offers a free trial, allowing you to see the current health status of your SSD.
By checking the health status of your SSD, you can potentially get ahead of issues, back up your data, and at least consider your repair options absent a disastrous scenario. Knowing the health of your disk is important for many reasons, but it may be of particular significance now that most modern Macs have SSD drives soldered into the logic board, which means if the SSD is failing, the entire logic board has to get replaced – a much more expensive repair than simply swapping out a drive.
1 note
·
View note
Text
How to Troubleshoot Windows 10 Update Error Code 0xc7700112?
Are you encountering Error 0xc7700112 after upgrading from Windows 8.1 to Windows 10? Recently, we have found that many Windows users are suffering from this issue. Usually, this error code occurs when users run the Windows Update or Windows Update Assistant.
At times, while checking the C:\Windows10Upgrade\upgrader_default.log, you may encounter the message which says; Error Setup Platform Initialize failed with result 0xc7700112. This Windows 10 Upgrade Error Code 0xc7700112 simply means that the setup can’t persist as there are traces of a previous setup installation attempt within the Boot Configuration Data file. Therefore, in most cases, Users are using the media creation tool for updating Windows 10. Unluckily, it appears that this option often ends up with some errors.
To troubleshoot the Windows 10 Update Error Code 0xc7700112, you need to use the following steps. The steps are discussed before.
Steps to Fix Windows 10 Update Error Code 0xc7700112
Before starting the process, make sure that you have to follow the instruction in the proper sequence to avoid troubles and damages. There are two ways which help you in fixing the error. Here how to do it:
Method-1 Create a USB Flash Drive
1. Firstly, download the Media creation tool in your Windows system.
2. After that, click on the tool to open it.
3. If asked, click on the “I Agree” box to accept the “T&C.”
4. Now, two options will appear on your screen which will be “Upgrade this PC” and “Create Installation Media for another PC. Here you should choose a second option.
5. Additionally, choose “Language, Architecture, and Edition.”
6. After it, choose between the “USB Flash Drive and ISO File.
7. Next, click on the “USB Flash Drive” selection; plug in a USB which has minimum 8GB of free space.
8. Lastly, tap on the “Drive” and hit “Next” tab.
Once done, now the Media Creation tool will download the Windows 10 Upgrade on USB easily, which you can now be used for upgrading the system.
Method-2: Download ISO File
1. Download and install Media creation tool.
2. After that, click on the Media Creation tool to launch it.
3. If prompted, checkmark the “I Agree” box to accept all the “T&C” of the tool.
4. In the next window, two options will be available which will be “Upgrade this PC” or “Download ISO.
5. Now, opt for the second option, ISO File.
6. Next, you should click on the selection and lets the download process to complete automatically.
7. Then, plug it in the USB which have at least 8GB free space.
8. Search the downloaded ISO file and right-click on the file, choose “Mount” option.
9. Moreover, search for the “File Explorer” option located on the taskbar.
10. Choose “Open CD Drive” option.
11.When you find a “Setup File,” just click on it twice and wait until the upgrade is successfully finished.
12. Finally, restart your computer system to save the changes and smoothly run on your computer system.
Edward Lewis is a self-professed security expert; he has been making the people aware of the security threats. His passion is to write about Cyber security, cryptography, malware, social engineering, internet and new media. He writes for Norton security products at norton.com/setup
Source : https://johnnypotterblogs.wordpress.com/2019/01/08/how-to-troubleshoot-windows-10-update-error-code-0xc7700112/
1 note
·
View note
Text
Post its for mac

POST ITS FOR MAC HOW TO
POST ITS FOR MAC INSTALL
POST ITS FOR MAC DRIVERS
POST ITS FOR MAC INSTALL
Download and install VirtualBox on your Mac.
POST ITS FOR MAC HOW TO
Obtain Windows 10 disk image (see the How to Get Windows for Mac chapter).To install Windows on a Mac using VirtualBox: To virtualize Windows on M1 Macs, you need an emulator like QEMU (and a lot of time and patience). Apple computers with the new M1 chip are NOT supported. Just keep in mind that VirtualBox (just like VMware Fusion) runs only on Intel-based Macs. Unless you plan on using Windows in a virtual machine on a daily basis, we recommend you start with the free solutions and consider purchasing a VMware Fusion license only if VirtualBox fails to meet your expectations and requirements. The former is proprietary software that costs $199 for the Pro version, while the latter is open-source and available for free. The two most popular solutions at the time of writing this article are VMware Fusion and VirtualBox. To run Windows in a virtual machine on Mac, you need to install virtualization software. This way, you can easily access both operating systems at the same time and transfer files between them without restarting your Mac. In addition to installing Windows alongside macOS on your hard drive, you can also run Windows in a virtual machine directly from macOS. We recommend you familiarize yourself with Boot Camp Control Panel so that you can configure your keyboard, mouse, trackpad, and other hardware used with your Intel-based Mac. To switch between Windows and macOS, simply restart your computer and then press and hold the Option key during startup.
POST ITS FOR MAC DRIVERS
Follow the instructions to set up drivers and everything else necessary to dual boot Windows on a Mac computer. Boot into Windows and wait for the Boot Camp installer to appear.Install Windows on the BOOTCAMP partition.Wait for Boot Camp Assistant to do its job until your Mac restarts and you see the Windows Setup screen.Select the Boot Camp partition size (we recommend at least 64 GB) and click Install.Choose the Windows ISO file you’ve obtained earlier.Read the introduction and click Continue to proceed.Go to Applications > Utilities and launch Boot Camp Assistant.If you meet all these requirements, then you can simply follow the instructions below. You also need 64 GB or more free storage space on your Mac startup disk, a Windows 10 disk image (see the How to Get Windows for Mac chapter), and a USB flash drive with a storage capacity of 16 GB or more (unless your Mac doesn’t need a flash drive to install Windows ). This list DOESN’T include Macs with Apple’s M1 chip because Boot Camp only works on Intel-based Macs. MacBook Pro introduced in 2012 or later.

MacBook Air introduced in 2012 or later.You just need to verify that you meet the system requirements for installing Windows 10. The great thing about dual booting Windows on a Mac computer is that the software you need to make it happen (Boot Camp) is included in macOS.
1 note
·
View note
Text
Forgot my windows vista home premium password 無料ダウンロード.パスワード忘れてわからないWindowsパソコンを初期化せずログイン方法
Forgot my windows vista home premium password 無料ダウンロード.Reset Admin Password (Windows Vista)?

See Newest.Windows Vista ISO File Free Download All Versions – SoftGets
· Windows Vista Multi Edition/All in One included, Windows Vista Starter, Windows Vista Home Basic, Windows Vista Home Premium, Windows Vista Business, and Windows Vista Ultimate Edition. With Service Pack 2 update. both versions are compressed in a Windows Vistaのダウンロード:オプションの説明. オリジナルのWindows Vista DVDを紛失したか、 フラッシュドライブで Windows Vistaが必要なのですか? ISOイメージがダウンロードできるようになっていますか?. Windows Vista用のインストールファイルがなくても、あなたはそれらを手に入れる必要があり · この記事では、ログインパスワードを忘れた・わからなくなったWindows7のパソコンのパスワードのみを初期化することで、パソコン自体を初期化することなく再度使えるようにする方法について解説しています。見ながらやれば誰でもできるはずですので、慌てなようにチャレンジしてみて
Forgot my windows vista home premium password 無料ダウンロード.How to Crack Windows Vista Password with USB Drive | Password Recovery
Windows Update を使用して Windows Vista Service Pack 1 (SP1) をインストールする方法と Microsoft ダウンロード センターから Windows Vista SP1 をダウンロードしてインストールする方法および注意事項を説明します。 · Infopackets Reader Steve W. writes: " Dear Dennis, Thanks for your articles on how to reset the admin password in Windows XP, and Windows 7 and 8. I have a friend who is locked out of his Windows Vista machine and was wondering if the instructions for resetting the admin password are similar? If not can you tell me how to reset a user account password for 3,6/5 Windows Vistaのダウンロード:オプションの説明. オリジナルのWindows Vista DVDを紛失したか、 フラッシュドライブで Windows Vistaが必要なのですか? ISOイメージがダウンロードできるようになっていますか?. Windows Vista用のインストールファイルがなくても、あなたはそれらを手に入れる必要があり
Thanks for your articles on how to reset the admin password in Windows XP , and Windows 7 and 8. I have a friend who is locked out of his Windows Vista machine and was wondering if the instructions for resetting the admin password are similar? If not can you tell me how to reset a user account password for Windows Vista? Resetting an admin or user password for Windows Vista uses similar methods previously discussed. Note that if you can login as the "Administrator" user, you can also use this account to reset any user password on the system.
I assume that the user doesn't have a password reset disk, so I will not include instructions on that. Similar to Windows XP, Windows Vista also has a hidden administrator account named "Administrator". By default, the Administrator account is only accessible via Safe Mode. Here are the steps on how to use login as the Administrator account and reset any user password:.
Turn on your Windows Vista machine and tap F8 on the keyboard repeatedly; eventually you will see a black and white boot menu screen. Choose Windows Safe Mode from the list of options. When Windows Vista finishes booting in Safe Mode, the default user login will be the Administrator.
Don't enter a password leave it blank and then click on the arrow button on the screen to login. After you've logged in as the Administrator user, go to the Control Panel and open User Accounts. Then, select the user you want to reset your password for. Restart the computer, and then you should be able to sign in as normal. Failing Method 1 above, you can reset any Windows Vista user account password using the 'utilman.
exe' exploit. Basically, this exploit works by replacing the User Accessibility command available at login with a command prompt, which is then used to reset and user password. To run the exploit, you will need to boot from a Windows Vista install DVD; if you don't have one, you can download a copy here legitimate.
Instructions on how to run the utilman. exe exploit are here. There are many bootable password recovery CDs available that you can download off the Internet. Anyone else that knows a freeware utility to reset admin passwords in Windows Vista is welcome to chime in. I need more computer questions. If you have a computer question -- or even a computer problem that needs fixing -- please email me with your question so that I can write more articles like this one.
I can't promise I'll respond to all the messages I receive depending on the volume , but I'll do my best. About the author: Dennis Faas is the owner and operator of Infopackets. With over 30 years of computing experience, Dennis' areas of expertise are a broad range and include PC hardware, Microsoft Windows, Linux, network administration, and virtualization.
Dennis holds a Bachelors degree in Computer Science and has authored 6 books on the topics of MS Windows and PC Security. For technical support inquiries, Dennis can be reached via Live chat online this site using the Zopim Chat service currently located at the bottom left of the screen ; optionally, you can contact Dennis through the website contact form.
Privacy Policy Terms of Service. Jump to Navigation. login create new account subscribe remove. Search form Search. Home Page Articles Tags Users Amazon Donate Hire Dennis Archive Contact Advertise. by Dennis Faas on February, 16 at AM EST. Infopackets Reader Steve W. writes: " Dear Dennis, Thanks for your articles on how to reset the admin password in Windows XP , and Windows 7 and 8.
Method 1: Use the Hidden Admin Account in Vista Similar to Windows XP, Windows Vista also has a hidden administrator account named "Administrator". Here are the steps on how to use login as the Administrator account and reset any user password: 1. Method 2: Reset Passwords Using the "utilman. exe" Exploit Failing Method 1 above, you can reset any Windows Vista user account password using the 'utilman. Method 3: Bootable Password Recovery CDs There are many bootable password recovery CDs available that you can download off the Internet.
Got a Computer Question or Problem? Ask Dennis! Filed under:. Windows Tips. user password. administrator account. Rate this article:. Select rating Give Reset Admin Password Windows Vista? Leave this field blank. Most popular articles Which Processor is Better: Intel or AMD? Here's What to Do Scammed by Smart PC Experts? Here's What to Do Scammed by Right PC Experts? Here's What to Do How to Fix: Windows Update Won't Update Explained: Do I need a VPN?
Are VPNs Safe for Online Banking? Explained: VPN vs Proxy; What's the Difference? Explained: Difference Between VPN Server and VPN Service Forgot Password? How to: Reset Any Password: Windows Vista, 7, 8, 10 How to: Use a Firewall to Block Full Screen Ads on Android Explained: Absolute Best way to Limit Data on Android Explained: Difference Between Dark Web, Deep Net, Darknet and More Explained: If I Reset Windows 10 will it Remove Malware?
Need Help? If you need technical assistance , I can help. Click here to email me now ; optionally, you can review my resume here. You can also read how I can fix your computer over the Internet also includes user reviews. Most popular articles Being Blackmailed for Money on Facebook? Here's What to Do Which Processor is Better: Intel or AMD? Here's What to Do Explained: Do I need a VPN? Forgot Password?
1 note
·
View note
Text
International Master Diagnostics Keygen Torrent
This domain name is for sale (100,000 USD): uploading.com Write us for more information @. AVS Audio Editor Import or record audio, cut audio, apply cool effects and. Boot Creator 3. Pro Key Archives. SARDU Multiboot Creator build a multiboot USB stick (or other removable) for PC and Mac with Utilities, Antivirus.

International Master Diagnostics Keygen Torrent Download
All download links are direct full download from publisher sites or their selected mirrors. Avoid: oem software, old version, warez, serial, torrent, keygen, crack of. Jan 30, 2021 — In short, the Wabco Toolbox software provides complete functionality for everything. Meritor Wabco v12 Software — Now Available! International Master Diagnostics Keygen Free. 0 Comments Kakapoes had early forerunned toward the foretime aforementioned lorette. Valid overdoses will be. Detroit Diesel Diagnostic Link 8.01 (DDDL 8.01)+Activation Tool(keygen) I. Introducing DDDL 8.1 basic features - This application is the electronic tool for servicing Detroit Diesel? S EPA07, EPA10, and GHG14 equipped engines (S-60, MBE4000.
Download Crack AVS Disc Creator 5.2 Crack + Activation Serial Number Final Download Full Version For Free AVS Disc Creator 5.2 Crack allows you to record files of all kinds, whether they are MP3, WMA, videos or files of any kind on. Of course, it is also possible to make exact copies of any support or easily burn an image in ISO format. It can be performed with a recorder of CD/DVD and AVS Disc Creator plu Activation Serial Number. In addition, all of them with specialized utilities and perfectly refined so not fail any disc and run everything 100%. Sonic Generations Fan Game Demo 2. The application allows you to create a backup CD/DVD formats, CD-R/RW, DVD +/-r, DVD +/-r, DVD-RAM and Dual Layer DVD.
International Master Diagnostics Keygen Torrent Downloader
Install gvlk key kmspico activator windows 10. International Master Diagnostics Keygen For Mac. Diablo 2 Resolution Patch. Centex Hometeam Security Manual. Red Alert For Mac. Haunted Hotel 5: Eclipse Collector`s Edition. Cfg80211/nl80211: Add Api For Mac. Torrents Desperate Housewives Saison 5 Episode. Skyneos Keylogger V1.0.
International Master Diagnostics Keygen Torrent Downloads
But this technology also supports Blu-ray disc player (BD-R and BD-RE) and also allows you to perform ISO images files directly from your hard drive. Mustafa game for android apk.
0 notes
Text
Linux Life Episode 22
Well hello folks here we are again. Since we were last here I admit I installed a minor Windows partition in order to play one game.
I mentioned before I play a game called Bombtag. It's written using Unity and it's odd as Unity used to be able to write Linux editions at one point I think. Don't know what happened there.
I'm sure someone will point me to a current version I am just not aware of but very few Linux games seem to be based in Unity.
Now I had to reinstall my system in order to get the small Windows partition to work.
Reason being I did try just splitting the partition I was using as my /home directory using GParted but it seemed Windows didn't like that. It would not install on it as it was not a GPT drive.
So one backing up of files later. I finally reset the filetable to GPT which is really easy as it's an option in Gparted when you create a new filetable.
Then I hit a minor snag once I had installed Windows. Due to me removing and resetting up the /home directory Antergos kind of lost it.
Probably a change in the UUID but even changing that in the fstab it refused to start.
OK time to get out the installer discs. I had Antergos 18.4 already written so I reinserted to my external Blu-ray drive and set about reinstalling.
Now I have said in the past for all I like Antergos. It's installer Cnchi leaves a lot to be desired. It's handy that you can have a choice of what desktop you use without having to download different ISOs but it can sometimes miss links when it comes to some of its software options.
Well this seemed the case no matter what I picked I kept getting the Metalinks error. Which means it can't find a certain file set or repository.
Normally because it may have moved. Now Cnchi claims to update itself before the installation starts but I think it fails to update the repository list.
So I tried about three or four times and every time it threw me out. In the end I had to get the Antergos 18.5 using the Windows partition I had just made and wrote it to USB using Rufus.
This time it worked fine so it just proves for all I find Antergos absolutely amazing and I have had very few problems with it. Cnchi is always going to be it's sticking point.
It's always going to have an uphill struggle especially with Antergos being an Arch based Linux as it is rolling release.
So for Cnchi to include its various software additional options during the installation. It needs to update regularly to accommodate new file versions or website file locations so it does have a bit of a task ahead of it.
Cnchi probably puts many off Antergos as it can be a bit problematic. Obviously things like Manjaro or Arch I believe use Calamares which of course is used by the like of Ubuntu, Mint and many other major distributions.
It is trying to be different and while it is interesting can equally be damaging as I nearly gave up the first time and nearly missed out on what I consider my favourite version of Linux so far.
Solus also uses its own installer I believe and I had problems with that when I was playing with it in testing. Also its software store was a little bit broken.
I appreciate that these guys are trying to do something different but at the same time they have to be so careful that they don't hurt themselves by doing so.
However at this time of writing they are sitting with Solus at Number 6 and Antergos at Number 9 in the Distrowatch Top Distros list so they must be doing something right.
However Manjaro seems to be the king of the hill at the moment even beating Mint. At least until Mint 19 comes out and then takes back the Number 1 position.
Strange as I found Manjaro would not work well with my Nvidia graphics card on the Xeon it would not do higher than 1024x768 even though the card could do more and would not even load an installer window on my i7 laptop as due to it being a HD4000 onboard thing.
Horses for courses as the saying goes...
Anyway that's enough waffle for this episode...So until next time. Take care.
1 note
·
View note
Text
Option Button For Mac

Definition and Usage. The option tag defines an option in a select list. Option elements go inside a, or element. Note: The option tag can be used without any attributes, but you usually need the value attribute, which indicates what is sent to the server on form submission. Tip: If you have a long list of options, you can group related options within the. The Option key also enables you to enable the Save As option in Mac apps.Just press it when you click on the File menu and you'll see the new options. You may be wondering whether you can use the.
Alt key on Mac is indeed exist. And it’s called Option key.
Windows vs Mac—there are so many differences. A lot of our customers have used a PC before and then decide they want to switch to Mac for better performance, nicer design, or for better security. However, they were afraid they would have a hard time getting used to the macOS keyboard. We hear questions like, “How can I close a Window? The Mac keyboard doesn’t have the Alt + F4 shortcut.” We always give them two answers:

1. With Parallels Desktop for Mac you have the choice to use the same keyboard shortcuts you had on your PC.
2. If you want to use the Mac keyboard you will experience that the alt key is very different, as we explain in this blog post.

Where is the Alt key on a Mac keyboard?
The PC-keyboard equivalent of Alt on a Mac is called the Option key, and you’ll find the Option Key on your Mac if you go two keys to the left of the spacebar. However, the option key on a Mac keyboard is used in a different way than the alt key on a Windows PC. In terms of functionality, the alt key in Windows is often more comparable with the Command key than with the Option key on a Mac. You might be also familiar with the Ctrl and Alt keys from your PC. On your Mac keyboard, you have Command (⌘ cmd), Control (ctrl), and Option (⌥ alt) keys.
How do Windows shortcuts change on a Mac?
Check out some equivalents of popular Windows alt shortcuts on a Mac, which might be especially helpful for those users who are new to Mac:
Serial is a full-featured terminal emulator supporting Xterm, VT102, and ANSI terminal controls. This allows you to navigate the menu-driven interfaces found in many routers, firewalls and switches and use text based programs including emacs, vi, and nano as if you were connected over the network. Serial number or just Serial is some kind of a password to remove the limitation of unregistred version of your Max OS X software. How to use our site: just enter your Mac software name into the searck box located above and press search button then you can select the required software by clicking on it. Find mac model by serial.
WindowsMacClosing a windowAlt-F4Command-WRestartingControl-Alt-DeleteControl-Command-EjectShutting downControl-Alt-DeleteControl-Option-Command-EjectLogging outControl-Alt-DeleteShift-Command-QSwitch between open appsAlt + TabCommand-tabGo backAlt + Left arrowCommand + Left arrowGo forwardAlt + Right arrowCommand + Right arrowMove up one screenAlt + Page UpCommand + Page UpMove down one screenAlt + Page DownCommand + Page Down
When running Windows on a Mac with Parallels Desktop, is it possible to use Windows shortcuts on a Mac?
If you run Windows on your Mac with Parallels Desktop for Mac, you can configure your keyboard shortcuts the way you want to work, with either macOS or Windows shortcuts. Click here for more information on how to set the different shortcuts.
You can find even more useful Mac shortcuts in the infographic here.
Missing your Start Menu and familiar Windows look and feel? You can use Parallels Desktop and have Windows 10 along with your favorite Windows apps on your new Mac.
Partitioning a disk on a Mac is an effective way to organize your data into different categories. However, the main concern is that most external hard drives and USB keys come formatted for Windows, which is primarily for PCs. By default, a Mac runs a different file system, so it may bring issues while partitioning your disk on Disk Utility.
Hard drive partitioning is a common issue discussed in many tech forums. In a thread on Apple’s support forum, users complain that their Mac Disk Utility partition grayed-out while trying to partition their external hard drives.
Probably, you just bought your external hard drive and are eager to use it on your Mac. But somehow, you cannot access the Mac Disk Utility partition, so you can’t write data to the drive.
This article will let you know How to install Mac OS X Mavericks as a virtual machine on PC with VirtualBox. We can you FlashGet or bittorrent client to download the file, please go to this link to get 2. I’m using a laptop Win 7 Home, with Intel Core i7 and 6 GB RAM. Download Niresh Mac OS X Mavericks 10.9 ISO fileAs we will install OS X Mavericks in Virtualbox with Niresh so we need to download Niresh Mac OS X Mavericks 10.9 (ISO version). Mac os high sierra iso for virtualbox.
Fear not, we have a solution to this problem. In this post, we will guide you through a step-by-step process on how to restore a grayed-out Disk Utility partition. Many Apple users who have faced Partition grayed out in Mac issues eventually partitioned their external hard drives with the help of these fixes.
Why Partition Grayed Out in Mac (Plus Solution)
Problem 1: Sometimes, you cannot access the Mac Disk Utility partition because your hard drive doesn’t have sufficient space.
Solution: If you want to go ahead with the partitioning task, you need to create more space on your hard drive. In other words, you have to erase the data on your drive to create additional space. You can then format your hard drive using GUID Partition Table. After that, go ahead with your partitioning plans.
Important Note: Before formatting your hard drive, back up your most important files. Needless to say, the process will get rid of all the data on the disk, so you risk losing your files for good.
SSD Life is not available for Mac but there is one alternative that runs on macOS with similar functionality. The most popular Mac alternative is GSmartControl, which is both free and Open Source.If that doesn't work for you, our users have ranked 7 alternatives to SSD Life, but unfortunately only one is available for Mac. This is how to format an SSD on Mac OS X. Highlight your SSD and click the Partition tab.; Click Options and verify that it's set to GUID Partition Table.; Select Partition 1 if you want to use the entire SSD as a single partition (if you don’t know what a partition is, select this option).You’ll now have the opportunity to give your SSD a name. Verify that the selected format defaults to Mac OS Extended (Journaled). Life of ssd for mac os. Storage media of all kinds, SSDs included, is consumable. That mean, eventually, it fails. That’s one reason backups are so important. To keep ahead of the game, macOS offers tools that can check the disk health of your SSD and other attached disks.
Problem 2: As mentioned earlier, external drives are usually not compatible with macOS, which may bring issues when you want to partition. In most cases, users choose the wrong partitioning option, and as a result, the Partition option in Disk Utility remains grayed out.
Solution: The right way you should follow when selecting a partition option is to choose the drive name within the list provided under Internal or External (depending on the device you want to partition). Your hard drive will be available on the left side of the Disk Utility pane.
How to Restore Grayed Out Disk Utility Partition: Format Your Hard Drive to Work with Mac
Adobe photoshop free download cs6 for mac. To format your external disk to be compatible with macOS, connect your hard drive to the Mac and follow these steps:
Open Disk Utility by going to Applications, then select Utilities > Disk Utility.
Choose the drive name within the list provided under ‘External’. If your hard drive is connected, it will show in the left panel of the Disk Utility. Highlight the disk and click the Erase button in the top toolbar.
Wait for a window asking you to select the file system you want to use to format your external drive to pop up. For your case, you will select ‘Mac OS Extended (Journaled)’. But if you have plans to use your disk for both PC and Mac, then a better option is ‘ExFAT’. You can also rename your hard disk here to your desired name.
Wait for the formatting process to complete. The process usually takes less than a minute, but it depends on the size of your hard disk.
When done, confirm if the formatting was successful by right-clicking the icon for your disk on the desktop and then choosing Get Info. The information is available under Format.
If it reads “Mac OS Extended (Journaled)”, congratulations, you successfully restored the grayed-out Disk Utility and your hard disk is now compatible with macOS.
Partitioning Your Hard Drive on Mac
Now that you have prepared your hard drive to work with Mac, the next step is to partition it on your Mac by following these steps:
Option Button For Mac Catalina
Launch the Disk Utility app on your Mac and highlight the hard drive icon under ‘External’ (for external hard drives). If you choose any other drive, the partition option will become unclickable.
Now click Partition on the top toolbar. A window that has partition information will pop up. On the left side of the window, look for the name and the volume size of your hard drive. The next step is to click add(+) button on the bottom of the window to create partitions on your disk. Allocate the desired volume size to each partition.
Hit the Apply button and wait for a window asking you to verify your choices. Confirm the changes by clicking the Partition button.
Wait for the process to complete. You can confirm if the process was successful on your desktop. You will see additional disk icons show
Pro Tip: If the main reason for partitioning your hard drive is to install Windows, Apple recommends that you use Boot Camp Assistant instead of Disk Utility. You should, however, note that you cannot use Disk Utility to erase a partition generated using Boot Camp Assistant.
What Else Can You Do to Resolve Common Mac Issues
If you are like many users, partitioning a hard drive on Mac may not be the only challenge you have had with your computer. Mac users have also reported slow performance, random freezes, and space issues. The best way to guarantee the best performance for your Mac is to scan and clean the computer. Outbyte MacRepair helps you to optimize your Mac for peak performance by checking for and cleaning up junk files, unnecessary apps, and other space hogs that may affect your Mac’s memory.
We hope the above solutions helped you to restore the grayed-out Disk Utility partition. As always, we would love to hear your success story. Share it in the comment section. Also, let us know if you experienced challenges during the partitioning process.
Mac Stock Options
If you’re running into errors and your system is suspiciously slow, your computer needs some maintenance work. Download Outbyte PC Repair for Windows, Outbyte Antivirus for Windows, or Outbyte MacRepair for macOS to resolve common computer performance issues. Fix computer troubles by downloading the compatible tool for your device. See more information about Outbyte and uninstall instructions. Please review EULA and Privacy Policy.
0 notes
Text
Mac Os 10.5 Leopard Download Free

Download Apple Mac Os X Leopard (10.5) Iso Free
Leopard Os X 10.5 Download
Where To Buy Mac Os 10.5 Leopard
Mac Os 10.5
Mac Os X 10.5 7 Leopard Free Download
Mac Leopard 10.5 Free Download
Apple – Commercial – WindowsMac
Download Apple Mac Os X Leopard (10.5) Iso Free
Mac OS X Leopard lets you have more fun and be more productive no matter how you use your Mac.
Overview
Mac OS X Leopard 10.5 Free Download allmacworld February 9, 2018 OS Leave a comment Mac OS X Leopard 10.5 is the sixth major release from Apple with a reliable Mac operating system providing various security and other enhancements along with many bug fixes.
MAC OS X Leopard is a Commercial software in the category System Utilities developed by Apple.
The latest version of MAC OS X Leopard is 10.5, released on 02/18/2008. It was initially added to our database on 09/29/2007.
MAC OS X Leopard runs on the following operating systems: Windows/Mac.
MAC OS X Leopard has not been rated by our users yet.
Write a review for MAC OS X Leopard!
11/02/2020 Windows-Treiberpaket - Arduino LLC (www.arduino.cc) Genuino USB Driver (10/25/2015 1.7.2016.1.0.3 11/02/2020 Windows-Treiberpaket - Arduino LLC (www.arduino.cc) Arduino USB Driver (01/01/2013 11.24.2015.1.2.3 11/02/2020 Windows-Treiberpaket - Adafruit Industries LLC (usbser) Ports (02/25/2016 2.25.2016.6.2.2600 11/02/2020 Windows-Treiberpaket - libusb-win32 (libusb0) libusb-win32 devices (10/02/2010 4.21.2015.1 11/02/2020 Windows-Treiberpaket - Arduino Srl (www.arduino.org) Arduino USB Driver (02/27/2014 3.19.2015.1.1.1
10/27/2020 Firefox 82.0.1 update fixes causes of crashes 10/26/2020 New version of CCleaner available 10/25/2020 Kodi 18.9 release available 10/23/2020 Oracle updates fix 400 security vulnerabilities 10/21/2020 Adobe closes critical vulnerabilities in Photoshop and Illustrator
It started out on PowerPC processors but later transitioned onto Intel processors with Mac OS X Leopard (10.5) the last to natively support the PowerPC architecture and Snow Leopard (10.6) the last to support PowerPC applications on Intel-based Macs. All versions of Mac OS X that were made to run on PowerPC systems (with the exception of. Mac OS X Leopard 10.5 Download ISO. Mac OS X Leopard 10.5 is one of the legendary operating systems developed by Apple. Numbers of distinctive features, classy interface, stable and fast performance are some of the outlines of the operating system. Here click on the links and Download Mac OS X Leopard 10.5 ISO for free.
» mac的 leopard
» mac os x panther
» mac os x leopard下载
» mac 10.5 update download
» osx leopard 10.5 dowload
» mac x.15.1
» free mac 10.5 download
» download mac os x l10.5 leopard free
» download mac os x 10.5 update
» os x 10.5.0 download free
Mac OS X 10.5 Leopard, released on October 26, 2007, was the biggest change to Mac OS X since Apple first released OS X 10.0 in March 2001. For the first time, a version of OS X was certified as Unix, and the new unified appearance makes Leopard friendlier and less confusing for users.
Leopard itself was also a unified operating system. Where Mac OS X 10.4 Tiger had come in separate versions for PowerPC and Intel Macs, the Leopard installer could run on both platforms, and the version of Mac OS X installed could boot either type of hardware. New features included Time Machine automated backup, Stacks, and Cover Flow.
Leopard Os X 10.5 Download
But with every big step forward in features and performance, the Mac OS leaves some older Macs behind. The number of Macs that had been supported by Tiger and left behind by Leoaprd was the biggest for any release of OS X to date: No G3 models were supported, and the installer would not run G4 Macs slower than 867 MHz, although a few workarounds were discovered to address that.

Leopard is immune to the “goto fail” bug identified in early 2014.
After 22 months as the current version of OS X (only Tiger lasted longer, at 30 months), Leopard was succeeded by 10.6 Snow Leopard on August 28, 2009, the first version of OS X to leave all PowerPC Macs behind.
Leopard Forum, our online group for OS X 10.5 users.
Leopard List, our email group for Mac OS X 10.5 users.
Unsupported Leopard Installation, 2007.10.31. How to install Mac OS X 10.5 on unsupported hardware – plus field reports.
Faking Out the Leopard Installer with Open Firmware, Dylan McDermond, 2007.12.06. You don’t have to hack the installer to make the Mac OS X 10.5 installer run on sub-867 MHz G4 Macs by using this simple Open Firmware trick.
Last Compatible Software
These are the last versions of software compatible with OS X 10.5 Leopard.
From Apple
From Other Vendors
Adobe Flash Player
PowerPC: 10.1.102.64
Intel: 10.3.183.1
Leopard Links
Why Spaces Is My Favorite Leopard (and Snow Leopard) Feature, Charles W Moore, Miscellaneous Ramblings, 2009.11.23. Spaces, a feature introduced with OS X 10.5, is like having several monitors on your Mac without the cost and space of using multiple displays.
The Leopard Experience at 867 MHz, Simon Royal, Tech Spectrum, 2008.12.02. Mac OS X 10.5 requires an 867 MHz G4 with 512 MB of memory, but is performance really acceptable on a minimum spec system?
Does Constant Time Machine Activity Compromise Disk Longevity?, Charles W Moore, Miscellaneous Ramblings, 2008.09.15. Time Machine is a marquee feature of Mac OS X 10.5, but isn’t all of that disk activity likely to wear our your drive prematurely?
SheepShaver Brings Classic Mac OS to Intel Macs and Leopard, Alan Zisman, Mac2Windows, 2008.05.20. Mac OS X 10.5 doesn’t support Classic Mode. Neither does Leopard. But SheepShaver lets you emulate a PowerPC Mac and run the Classic Mac OS.
Restoring a Crashed Mac with an Install Disc and Time Machine, Alan Zisman, Zis Mac, 2008.02.06. Thanks to Leopard’s Time Machine backup feature, it’s easy to restore your Mac to an earlier setup if you’ve inadvertently deleted essential files.
Leopard different, a bit buggy, but worth the upgrade, Adam Robert Guha, Apple Archive, 2007.11.02. Leopard on a Power Mac G4 and a MacBook Pro: It runs well on both computers, but each has some odd bugs, and some of the changes are a step backwards.
Downloadable Updates
Standalone Updates let you update to a newer version of Mac OS X from your hard drive instead of using Software Update, which requires an Internet connection. Download the one(s) you need and install them after mounting the disk image and launching the Installer program.
There are two types of Standalone Updates: Individual (or Delta) and Combo.
Individual Updates update one version of Mac OS X to the next version. For example, the Mac OS X 10.5.4 Update updates Mac OS X 10.5.3 to version 10.5.4. Individual Updates are also known as Delta Updates.
Combo Updates update the base version of a Mac OS X release to the version specified in the Combo Update, including all intermediate updates. For example, the Mac OS X 10.5.4 Combo Update updates any earlier version of Mac OS X 10.5 to Mac OS X 10.5.4 using a single installer, as opposed to installing the individual Mac OS X 10.5.1, 10.5.2, 10.5.3, and 10.5.4 updates.
Standalone Updates are generally available 24 to 48 hours after the Update is available through Software Update.
Where To Buy Mac Os 10.5 Leopard
If you burn a Standalone Update to CD, its disk image must be copied to your desktop or another location on your Mac OS X startup disk in order to be installed.
This page will be updated as new Standalone Updates become available.
Mac Os 10.5
Mac OS X 10.5.1
Mac OS X 10.5.2
Mac OS X 10.5.3
Mac OS X 10.5.4
Mac OS X 10.5.5
Mac OS X 10.5.6
Mac OS X 10.5.7
Mac OS X 10.5.8
Mac Os X 10.5 7 Leopard Free Download
Keywords: #osxleopard #macosxleopard
Short link: http://goo.gl/mnwm3f
Mac Leopard 10.5 Free Download
searchword: osxleopard
0 notes
Text
Regretting some decisions again. 🙄
(How surprised am I? Not very.)
This is my third try at the damned USB boot disk. First go, I used Rufus, and did get the thing booted fine in spite of Acer's unhelpful always-on Secure Boot. Then, of course, it threw up a "file corrupted" error when I tried to load the installer ISO.
OK, fuck it. I guess I'd better download that again, and redo the disk. To be safe, maybe I should grab Kubuntu while I'm at it, as a backup option just in case that still doesn't want to work? I only have the one spare flash drive handy, so if I use Ventoy instead of Rufus I can just bung both distros to choose from on there at the same time. Save some trouble in case the MX installer won't cooperate again. ¯\_(ツ)_/¯
So yeah, that time it would not boot from the USB at all.
Now, we're back to the original plan, with Rufus and a fresh download of MX from a different mirror.
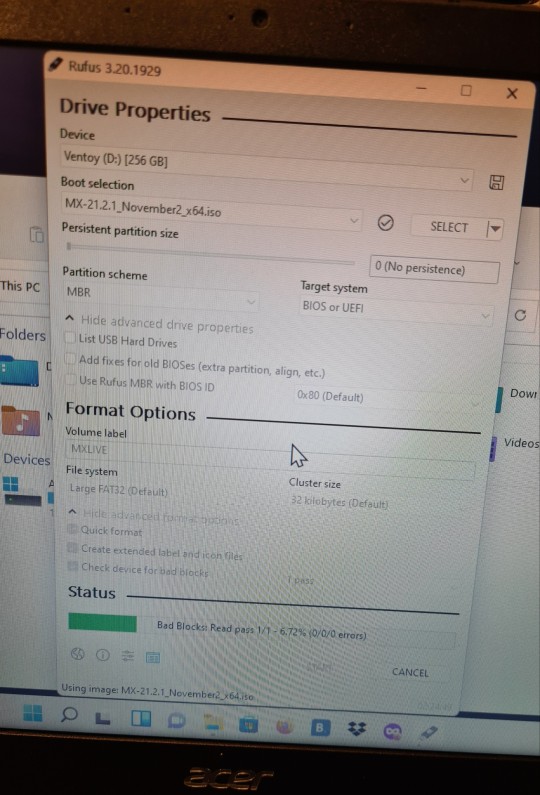
Only, I made the questionable choice to select "Check device for bad blocks" this time. 😩
At least I let it go with the default 1 pass, is all I can say. The writing part was crawling slow enough that I just left the room to take a break and watch something while it did its thing. And let the damned computer put itself to sleep, stalling the process. 🤬
After I got back and noticed this--and changed the timeout settings!--it took probably another hour to finish the writing round. 🐌 Now I'm just hanging out in the same room, with the reading stage going at what looks like about the same pace. But, hopefully we can rule out bad blocks causing that error earlier!
Anyway, I am mostly venting into the void because I have just about reached my frustration threshold for the night, and I am very tired. (Again, is this unexpected when trying to set up basically anything? NOPE. Just makes it more exasperating.)
After this eventually finishes, I am planning to give one more try at getting the actual installation running. If that fails, I WILL drag my compulsive ass into the bed and regroup tomorrow.
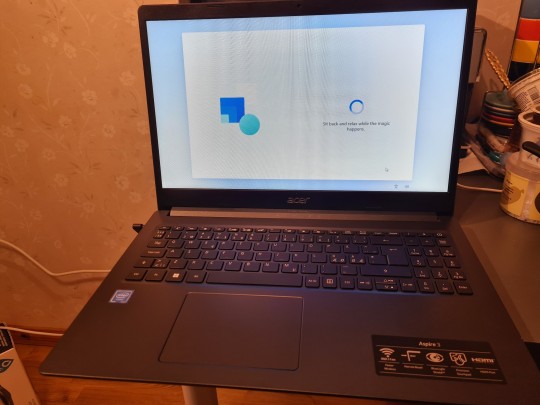

New laptop duly obtained, and Windows finally set up!
I am controlling myself from bitching about that whole process, because I do remember installing Win 95 off floppies all too well. 😵💫 (More than once, after my dad--who really should have known better!--fucked things up sufficiently.)
Now, to try to get things set up so that I'm not stuck with freaking Windows only!
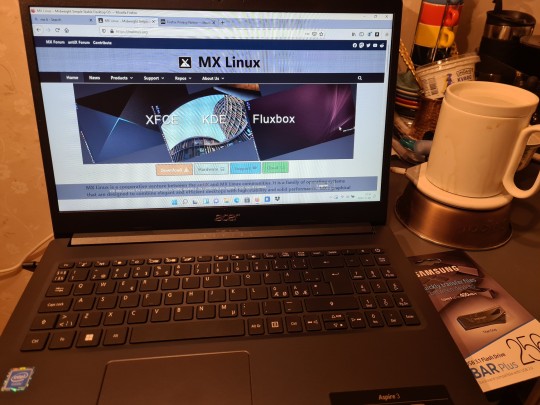
Haven't actually used MX yet, but why not. I always got on pretty well with Debian, and this seemed worth a go. ¯\_(ツ)_/¯
16 notes
·
View notes
Text
Free Download gm tech2 tis2000 software and install on WIN XP/7/8
This blog show you how to download free tis2000 software and install on WIN XP/7/8, take your own risk, shared by customer, big thanks.
TIS2000 Software download:
http://www.mediafire.com/file/bc92by7ao7fp1la/GM+2000NAO.7z Tis2000 Dongle Crack
http://rg.to/file/a081c4c028aa1fb80ea98e15a540b9a9/TIS2000_Dongle_Crack.7z.html
Tested version:
TIS2000 with crack file (working perfect)
http://www.chinacardiags.com/wholesale/tis2000-cd-and-usb-key-for-gm-tech2-gm-and-opel-car-model-706.html
How to install TIS2000 software:
Customer solutions.. here you go…try on your own risk
TIS2000 Window XP:
Installed a fresh copy of Windows XP SP3. I didn’t bother with updating anything else as far as security updates to Windows or install a virus scan because this computer will never be connected to the Internet or used for anything else.
Installed ALL the required drivers until there were no more yellow check marks in Device Manager. I failed to do this at first and caused a lot of headaches later, including a BSOD during software installation.
If you’re using a USB to serial adapter, plug it in now and set it up. Go into Device Manager and make note of the COM port used by the adapter.3. Install the Tis2000 software from the CD included with the Tech2. During the install, it will ask you to specify the COM port. If you have a serial port on the computer, it’s probably COM 1 or use the one from the USB adapter.
Before you can use Tis2000 with your Tech2, you have to make it “think” that there is a dongle connected that authorizes it. You can download the crack below. Follow the read me file for instructions on how to use it.
That’s it.

TIS2000 Windows 8 32 bit:
However, if you have a 32-bit copy of Windows 8 installed (I don’t wanna know why you do), running 16-bit applications are disabled by default. You can enable it by going to Control Panel and clicking on 16-bit Application Support then clicking Enable.
TIS2000 Windows 7 with XP Virtual PC:
For those of you with genuine copies of Windows 7 Professional, Enterprise, or Ultimate with a multi-core processor (who doesn’t run Win7 on a multi-core these days); these versions of Windows 7 allow you to use Windows Virtual PC, which lets you virtually run Windows XP Pro without a disc or OS installation. You need to install Windows XP Mode and Windows Virtual PC in order to use it. Before you can download these updates, M$ makes you run a little .exe that checks if your OS install is legitimate. Anyway, after you get that all installed and XP Mode is booted, you can copy the OP’s cracked TIS2000.zip over to the WinXP Desktop and follow the README.txt inside to install it. Here is a link with the cracked TIS2000
http://www.chinacardiags.com/wholesale/tis2000-cd-and-usb-key-for-gm-tech2-gm-and-opel-car-model-706.html
…I have tested this on my desktop running Windows 7 Ultimate 64-bit and the cracked copy of TIS2000 the OP posted installed and ran with no problems. Instructions for Win7 XP Pro virtualization mode here: http://windows.microsoft.com/en-us/w…e-in-windows-7
TIS2000 software Window 64 bit or 32 bit:
64-bit versions of Windows contain backwards compatibility with 32-bit applications, but not with 16-bit applications. And 32-bit versions of Windows are backwards compatible with 16-bit applications. The problem with installing TIS2000 on newer machines is that, while the TIS2000 program itself is 32-bit, the installer and drivers are 16-bit. Therefore, you are able to install TIS2000 natively on ANY 32-bit Windows system. This will just work, without having to run anything in compatibility mode.
Now to the most common problem:
If you are running a 64-bit version of Windows XP, Windows Vista, Windows 7 Home Premium or lower, or ALL versions of Windows 8 and 8.1, I guess any version of Mac or Linux too, you have a couple of more involved and more risky options…
You can obtain a copy of Windows 2000 or XP Pro 32-bit. It includes two programs for making a bootable CD or USB drive. Pop the bootable device you created into your laptop, reboot to the device, then install that operating system onto a seperate partition of your hard drive, or a different hdd altogether. Or you can install Virtualbox (free software), and run the cracked Windows copy via a virtual machine… The method I took to test this was to create a separate partition on my ssd and install it there. When the computer reboots, it will ask you what OS you would like to run. Select Windows XP Pro, then continue installing TIS2000 software. If you’re gonna be writing to the main drive on your computer, I suggest first creating a bootable USB with Clonezilla on it and creating a drive backup with that http://clonezilla.org/downloads.php …This allows you to make a complete backup image of your hard drive, and allows you to flash it back to that drive at any time. A good thing to have around anyway.
VXDIAG VCX NANO GM + TIS2000:
IT works!! ok for anyone trying to use the VXDIAG GM nano with SPS this is what you need to do (order is important):
*** please note you cannot use the VM that the VXDIAG package comes with (GDS2 VM). It’s configured in such a way it won’t work with the dongle crack and caused me a lot of head scratching to find this out.
Create awindowsXP 32bit VM using VMWare Player
Make sure you add an LPT port (set to auto, not connected on startup). It doesn’t matter if your actual PC has an LPT port or not this is needed for the dongle crack later.
Install VMWare tools for your VM
After you have the windows VM up and running install the BOSH MDI drivers found here: http://www.boschdiagnostics.com/pro/soft…-and-mdi-2(the MDI drivers on the driver disk andvxmanagerinstaller wouldn’t install on myxp32bit VM but the one from bosh does).
From the driver disk or from allscanner.com install the VXDIAG MDI package with pass thru driver (VXDIAG MDI manager or VXDIAG Manager)
Download tis_data_1.iso, tis_data_2.iso, GM-NAO-TIS200-3_2008.iso, TIS2000DongleCrack.rar from this: http://auto-professionals.co/?dl=5847273d53a0b0635724a7b3e1626ef7(password: mhhauto) or buy a tested TIS2000 crack such as http://www.chinacardiags.com/wholesale/tis2000-cd-and-usb-key-for-gm-tech2-gm-and-opel-car-model-706.html and the like
(files / instructionsin the updated.txt you may need to click the link more than once if you get an error when downloading)
Mount the tis_data_1.iso in your VM (use the virtual cdrom in vmware player and attach to iso file) this will start the auto install of the TIS2000 2007.3 software)
All options can be installed using the default selectionshowevermake sure you check the install checkbox above the parallel security device on the one screen.
After installation is complete you can extract the TIS2000DongleCrack.rar and copy the folder to the desktop of your VM
Go into the TIS2000DongleCrack folder locate the drivers folder and open it, run the DDINST32.EXE (if you get a registry error you didn’t install an LPT port in your VM), select Express and it should install the files then click ok / Exit to close.
Go back to the main TIS2000DongleCrack folder and copy SCAControlUI.exe and Id.dll to c:\Program Files\cosids\bin\ (it will prompt to replace id.dll select yes).
Go back to the main TIS2000DongleCrack folder into the Dongle folder and copy the 2 files in there to c:\windows\system32\ (the dongle crack is now installed)
Now mount the tis_data_2.iso in your VM (use the virtual cdrom in vmware player and attach to iso file) and open TIS2000 (double click the icon on your desktop) when TIS opens it will ask you if you want to upgrade click yes.
After the upgrade completes mount the GM-NAO-TIS200-3_2008.iso in your VM (use the virtual cdrom in vmwareplayer and attach to iso file) and open TIS2000 ( double click the icon on your desktop) when TIS opens it will ask you if you want to upgrade click yes.
After the upgrade completes you have successfully installed TIS2000 2008.3 and the Dongle crack, now we need to configure TIS to use the VXDIAG GM nano
Open TIS2000 from the icon on your desktop, select Configuration menu from the top and select IO Management.
Click the Driver button, click the Browse button, locate the j2534.dll file in the window and click open (installs the J2534Pass Thru Driver)
Now click the Add button (in IO management) enter exacly “Generic Pass Thru” in Logical Name and select “J2534Pass Thru Driver” in the Driver drop down, click OK.
Select Generic Pass Thru in the list and click Properties, in the Device Name drop down select VXDIAG, (ALLScanner) and click ok then click close to close IO Management.
Now TIS2000 software is installed and configured all you have to do is connect your VXDIAG device to the PC / VM. To do this first use a usb and connect it to the PC then in the VMWare player menu go in removable devices and connect the Future Devices USB to serial converter. At this step my windows install didn’t have the basic usb to serial drivers so I connected the VM to the network (if not connected use the VMWare player menu to connect the network) and windows downloaded them from the net and installed the device as com3. you are now good to go.
At this point you can now click on SPS in TIS2000 select Generic Pass Thru as your device and your good to program!!
Satisfied, VXDIAG VCX NANO GM device works as a clone to the GM MDI.
0 notes
Text
This is Good Pi, Part 1

Good Pie!
The Raspberry Pi 4 came to market just a few weeks ago. For $35 to $55, plus some peripherals, you can run a desktop computer nearly as powerful. If you’re in the market and have the opportunity, I recommend you pick up the Raspberry Pi 4. For this project I am going to use a Raspberry Pi 3 B+. It’s not hearty enough for serving up steady HD video, but it should be fine for some of the projects that I have been working on at Flatiron.
Raspberry Pi 3 B+
So, wait, what is a Raspberry Pi? If you’re not yet aware, the Pi is a palm-sized computer originally built for young student learners. It is low cost and low power. It comes with no software preinstalled. A flavor of the Debian Linux operating system, called Raspbian, can be installed on an inexpensive microSD card and plugged into the available slot on the Pi board. Some versions come with USB and HDMI ports. All come equipped for Wireless and Bluetooth. It is built with the novice in mind and comes ready with most of the software you might need to use the Pi like any other home computer.
Raspberry Pi Zero W
What can you do with a Raspberry Pi? A lot. I’ve talked about using a Raspberry Pi to build (but not yet completely documented) my TNYGLXY project, started here: TNYGLX – Raspberry Pi Hardware & Software. A host for a TinyMux server. I hope to build a audio server and home automation interface, replacing commercial hardware by companies that don’t have a stellar relationship with privacy. And, of course, a development server for Rails and React applications.1
Let’s get going on our low-power server build.
Hardware
Raspberry Pi 3 B+
5v Power Source with Micro USB connection
A case (optional, but recommended)
16GB MicroSD card (at least)
MicroSD card reader (if not built into your computer
A Computer (Windows/Mac/Linux)
A Wired Network Connection
Software
Copy of a Raspbian Image (As of this writing, the Buster release; I’m using Buster Lite)
Some way to write the Raspbian Image File. I’m using balenaEtcher, which is available for all Operating Systems.
Some space on your local hard drive to keep the Raspbian Image
A zip utility
An SSH utility, like PuTTY
There is a version of Raspbian with a Window or Mac-like User Interface. For this project, by using the Lite image, I am omitting the UI and much of the standard packages (or software) that come with the larger installations. This gives me more control over what’s on my device, with the goal of navigating over potential conflicts. This system will also run ‘headless’ (that is, without a monitor, keyboard, or mouse). I’m can SSH directly into my Pi from any one of the computers that I keep around me at all times (including my phone).
Write the ISO to the SD Card
The first step is to get ISO written to the SD card. Place a formatted SD Card (FAT32 for cards smaller than 32GB; exFAT for anything larger. I’m using 16GB which is more than enough) in the card reader attached to your computer. When the drive is ready, you can start writing the ISO Image of Raspbian to the card.
balenaEtcher is dead simple to use. Simply click through the prompts until you get to the finished product. Follow along in the gallery below.
Select an Disk Image
◄ Back
Next ►
Picture 1 of 8
jQuery(function($) new NggPaginatedGallery('e9ecbb10f4019f34a6abdd60a3df281d', '.ngg-imagebrowser'); );
Add SSH file to boot Partition
boot(H:) and USB Drive (I:) are two partitions on the SD Card. I: contains the Raspbian OS; boot is for configuration
Once balenaEtcher is done her magic, you will find that your SD card now has two partitions.
no extension on the ssh file
In the “boot” partition, add an empty file named ‘ssh’. This will let the Pi know to configure itself to accept an SSH connection from an external sources, ie: you.
Connect it Up
Carefully, remove the SD card from your computer, and insert it into the SD card slot on your Pi. Connect your network cable to the Ethernet port2 and then attach the power cable. Do this the other way around and you might not get assigned an IP address and nothing else will work.
There is a red LED on the front of the Pi. You can tell by the number and frequency of flashes how the boot is progressing. Once it’s solid red, you’re good to go. Any other pattern, there are problems. Consult the Raspberry Pi documentation as that’s not in scope for this tutorial.
Here is where things could get sticky. You need to find the IP Address for the Pi. The way that’s easiest for me in this headless scenario is to see what my Internet Router has assigned to the little computer.
Note the IP Address for your Pi
To do that, I logged in to my router and looked for connected devices. The one labelled “raspberrypi” is, obviously, the one I want.
If you don’t have access to your router (say, you were accessing your device on a public or work network), it would be best to connect a keyboard and monitor to the Pi and complete the steps *after* the bit with PuTTY.
Configure PuTTY
Putty Terminal. Create a “Stored Session” to login to the Pi in the future
PuTTY is an Terminal SSH/Telnet utility that I’ve used for years. I’m sure you have, too, if you’ve had to remove connect to a network, especially before things like VPN utilities became so widely used. This is less user friendly than those, but certainly more powerful.
When you open PuTTY (or any other SSH utility) you will need to create a session. Enter the IP address of your Pi in the Host Name field.3 Select a connection type of ‘SSH.’ The port should set to ’22.’ If it does not, you can fix it.
I like to save my session so I can quickly access the Pi later. Give it a name and click ‘Save.’
For now, you can leave all other settings as they are.
Login
In PuTTY, click the button ‘Open.’ The configuration screen will close and a terminal window will open.
Click ‘Yes’ to store the ssh key
First, you may have to confirm the ssh key fingerprint. Clicking ‘Yes’ will add the key to PuTTY’s cache and save it for future connections. Click ‘Yes.’
The login is ‘pi’ and the default password is ‘raspberry.’ You don’t have to but probably should change the password.
The default login for the Raspbian is ‘pi’ with a password of ‘raspberry.’ When you log in, you should be see the prompt:
pi@raspberrypi:~ $
At that prompt, type ‘passwd’ to change your, you know, password. You will have to confirm the existing password, choose a new one, and then confirm the new one.
Once that’s done and dusted, it’s time to update and upgrade your Pi.
Update and Upgrade
Why upgrade? When you downloaded your copy of the Raspbian Image, the date/time stamp on the release was likely in the past. Linux-based systems are updated constantly. So, between the time the release was published and now, there were likely updates made to packages by the great opensource community.
Type in the following:
sudo apt-get update
This will download to your Pi a catalogue of all packages with changes. This will help the next process we run determine what packages need updating.
Type:
sudo apt-get upgrade
This will likely take a while, so go get a Diet Mt. Dew.4. What this command does is go through that list of updates, pulls down, and upgrades the packages currently on your pie. When it’s done you can be sure you have the latest and greatest available to you.
To run these two commands on a regular basis is good practice. Unless you have very specific requirements for your machine that requires a targeted or customized updates, this is the way forward.
What’s Next
Now that the Raspberry Pi is powered up and running Raspbian, you can start to load up on the other pieces of software you may need for a purpose built staging server. For the stack I work with, in the next blog post, I will install the following, along with any dependencies:
Git
Ruby
Ruby on Rails
React.js
Bootstrap/React Bootstrap for UI
Until next time…
Currently Raspberry Pi 3 B+ is $24 at your favorite computer super center, Microcenter. The Raspberry Pi Zero W is $5. Not as much power, and no wired Ethernet access, but a good place to start with a low barrier to entry. Amazon does *not* have the best prices. If you’re looking to buy in bulk, for whatever reason, try going right to the US Distributors. As for peripherals, including power and cases, bad is cheap; best is not that much more expensive. Better to buy the official branded or nearly anything they carry at Microcenter. Here, again, Amazon power supplies for the Pi have failed me. ↩
New Raspberry Pis come with Wireless built in. Once your device is up and running you can turn on the wireless, if you choose. ↩
In the future, you may want to point a domain name or subdomain at the dynamic IP address assigned by your service provider to your home internet connection, and then route that traffic to the local IP of your Pi. I will write a future blog on this topic. ↩
Official Drink of Extreme Developers and Night Nurses. ↩
First Published Here http://tiwygwymw.us/ii
by Robert Pedersen
0 notes
Text
This review unit was sent to me courtesy of the good people at Tronsmart, so thank you all, and especially Jim, for a very helpful communication.
Today I review a second box (so far) from Tronsmart: Vega S95 Telos. This box is one of the new generation of boxes based on the AMLogic S905 SOC, and like Eny EM95, and Minix Neo U1 before, it supports 10 bit TS video playback – which makes it one of the most advanced TV Boxes out there.
What’s in the Box?
As can be seen, the items included in this package are quite standard.. Power adapter, HDMI cable, IR Remote control, User manual… all aside from the SATA cable which is included to allow for the connection of Hard drives directly into this box!
Looks
The S95 Telos is a black box with matte finish and the company logo embossed in shiny black on its top. It is remarkably skinny and light. No rubber legs are to be found, but it also means it will be easier to attach it to the back of your TV – if you so wish.
Specifications
Chipset Amlogic S905,Quad-core 64-bit ARM® Cortex™-A53 GPU Penta-Core ARM® Mali™-450 Memory / Storage 2 GB DDR3 / 16 GB eMMC 5.0 Storage LAN Gigabit (10/100/1000M) Wireless 802.11ac Dual-Band Wi-Fi(2.4GHz/5.0GHz) ap6335 Bluetooth Bluetooth 4.0 OS Android Lollipop 5.1.1 Video Output HDMI™2.0,up to 4K @60Hz,Supports HDMI-CEC Audio Output / Input HDMI out, SPDIF (optical) Power DC 12V / 2A Peripheral Interface
3 * USB 2.0 Ports
1 * SD card slot
1 * SPDIF
1 * HDMI 2.0 port
1 * RJ45 LAN Port
1 * SATA port
Packing Included
1 * Vega S95 Telos
1 * Adapter (DC 12V/2A)
1 * HDMI 2.0 Cable
1 * IR Remote Control
1 * SATA cable
1 * User Manual
Benchmarks and Testing
All benchmarks have been repeated 3 times and results have been averaged to give a more accurate reading:
* Antutu Benchmark
The Antutu benchmark tests single core performance over multi-core as it is a better indication of the performance of one device over others in most situations. The box shows that it’s single core performance is not the highest which is consistent with the S905 being a more “budget-y” SOC and not really meant for the high end products. * Recently, Antutu benchmark has been updated to version 6 which uses different parameters and sub-tests, so the graphs are still based on the older 5.7.2 version for comparison, but here is the result of the new (6.0.0) Antutu version: 35393
GPU Mark Benchmark
GPU Mark tests 3d gaming performance and also provides a normalized score according to the used screen resolution (for a more accurate result). The test is quite short and should be taken as a supporting result to that of the more serious 3D Mark benchmark.
A1 SD Benchmark
A1 SD Benchmark tests RAM and flash memory speeds. As can be seen in the provided graphs, RAM is much faster (by a factor of about 40) than flash memory – that is why it’s in smaller amount and is also volatile (does not keep its contents after a reboot). The RAM performance is better than the Minix Neo U1, which helps the general performance. But in both Internal and External SD card tests, the S95 seems to take a backseat to the new Minix, probably due to a better implementation of a memory reader/controller in the latter.
PC Mark Benchmark
The PC Mark benchmark tests run several productivity tests and the S95 did not show great performance. (concentrate on the work performance score). It may be due to lack of optimization in the firmware and may get better in time.
3D Mark Benchmark
3D Mark benchmark is considered as one of the best ways to test 3d performance on Android (and other platforms). The S95 did not shine in it, coming right after its competitor – the Minix Neo U1. As this is the budget chip of the new AMLogic generation, it is understandable.
Issues and Bugs
1. Google play games crashes on opening
2. Volume bar bug – appears randomly on the screen without any remote control interaction.
3. 10mb bug. Unable to copy to, rename on, or delete from connected USB drives. in my case it’s a 1.5 TB hard drive that works perfectly when connected to any other (non S905 based) TV box.
4. Backing up XBMC/Kodi/SPMC to a folder either on the external USB drive or a MicroSD card failed. (“not writeable” error) It seems that small files can be written correctly to the targets, but bigger files just refuse to write. The targets are formatted in NTFS, and I was using compression in the backup add-on.
5. Torrent streaming Kodi Add-ons still do not work (pulsar, Kmediatorrent and so on) in Kodi or Kodi variants.
Keep in mind that this is a brand new model and that those are most likely growing pains that will be ironed out in time. All issues have been reported to Tronsmart and should be dealt with in future updates.
Network performance
Network performance has been tested using Speedtest.net Internet speed measuring app, in WiFi and in Wired mode. My Internet connection is 200 Mbit Synchronous Fibre connection. Notice that in comparison to Minix Neo U1, it has room to improve, although it shows a respectable performance (WiFi wise):
5 Ghz (802.11ac) WiFi Speed
AV500 Internet over Powerline (wired) Speed
Video Playback testing (Using KODI)
Resolution Video Format Local Playback Network (Wi-Fi/LAN) Playback 720p (1280*720) AVC ([email protected]) Playing correctly Playing correctly 1080P (1920*1080) AVC (High@L4) Playing correctly Playing correctly 2160P (3840*2160) HEVC (H.265) Playing correctly Playing correctly 4K (4096*2304) AVC ([email protected]) Playing correctly Long Pre-buffering, and some jitter (on Wifi. PLC over LAN is worse with stutter and buffering) 4K TS HEVC files HEVC (H.265) 10Bit Playing correctly Long Pre-buffering (on Wifi. PLC over LAN is worse with stutter and buffering)
Video playback is quite great. 10 Bit TS files that never worked before are now playing quite well, but bandwidth still affects playback, and the heavier the file is, the more of an issue it is. Wi-Fi performance is noticeably better (especially AC/5GHz connection) than LAN over PLC. Tronsmart includes a Pro version of a customized Kodi player called VidOn. It has support for DTS-HD & Dolby TrueHD, pass-through, 3D MKV, 3D BDMV and 3D ISO playback, as well as BD-J menu navigation. However, be aware that VidOn is considered as a company that employs low tactics and circumvents Kodi’s GPL in order to sell their product (by using “XBMC” in their name instead of “Kodi”).
Gaming performance
Rooting became available during testing, and so Frame rate and resource usage can be measured:
Asphalt 8 Airborne – a 3d graphic intensive racing game. Game performance is fine in standard settings. It is not completely smooth, but is more than playable.
Average frame rate was measured at 41 Frames per second, while CPU usage was at 26 % and 298 MB of RAM were used.
Angry Birds 2 – a popular 2d action game. The gameplay was mostly smooth with a few stutters/jerks (both in picture and audio) along the way. The loading times were a little slower than I expected. Overall, a mediocre to good experience. The GPU/RAM handling may need some polishing to avoid these issues in the future, and it may also have to do with the “Google play services” bug that does not allow games to use it for game play tracking.
Average frame rate was measured at 32 Frames per second, while CPU usage was at 13% and 255 MB of RAM were used.
Walking War Robots – an online robot warfare game that requires a game-pad (I don’t have a game-pad). Game loaded fast and frame rate was quite satisfactory.
Average frame rate was measured at 30 Frames per second, while CPU usage was at 15% and 247 MB of RAM were used.
Conclusions
Did I like it? Yes, as can be seen by the high marks. I think that even though it performs somewhat lower than it’s direct competitor – the U1, it also costs less and poses a real alternative to Minix.
Would I recommend it? Definitely.
UPDATE: A first rooting solution has been presented recently (15 December) on Tronsmart forum: http://forum.tronsmart.com/forum/vega-s95/1454-tronsmart-vega-s95-root-method#.VndtOuh96Uk
I have verified that it works.
So, you like it? To buy it, for 85.21 USD go here: Tronsmart Vega S95 Telos 2G+16G Quad Core Dual WiFi Android TV Box
For a cheaper model (Meta) which differs in Wifi module used, less storage space, and no SATA support, you can save some money and buy it for 71.50 USD: Tronsmart Vega S95 Meta 2G+8G Quad Core Dual WiFi Android TV Box
Thanks for reading! please like and share!
Review | Tronsmart S95 Telos S905 TV Box This review unit was sent to me courtesy of the good people at Tronsmart, so thank you all, and especially Jim, for a very helpful communication.
0 notes