#i reboot and it does not show up as bootable...
Explore tagged Tumblr posts
Visit Tumblr Blog
Explore Tumblr blogs with no restrictions, modern design and the best experience.
Last Seen Tumblr Blogs


Fun Fact
The total number of visits Tumblr.com received during January 2021 is 327 million.
Text
Trying to set up Linux on an external SSD to test it out and running into problems every step of the way

#failed to write iso to usb drive#failed to recognize new ssd#finally fixed that and now after installing fedora to the new drive#i reboot and it does not show up as bootable...#i hate windows!! i know this is windows fault somehow!!!
0 notes
Text

(you might know some of this already, but I'm going in detail because it's not often I get to info-dump this to someone)
What linux is:
Linux is a free and open source operating system kernel -in itself it isn't a full Os, it needs other parts; if you want I can explain what a kernel is/does- made by Linus Torvalds in 1991 based on the Minix Os, which was based on the Berkley Software Distribution version of Unix. Although linux isn't a full Os, people will generally refer to any Os that uses the linux kernel as "linux"
Since then it has become a major corner stone of the internet. ~90% of servers online are running some kind of linux. Although online surveys show that only 3-5% of people use linux as a desktop Os.
because linux is free and open source -meaning anyone can download or edit the source code- there are several distributors (or distro's) to download a version of linux, each with different package managers (a place to download new software), desktop environments (which determines what apps you have installed and how your desktop looks), and other stuff.Some linux distro's are based on others and they may have some things in common. For example: all distro's based on Debian use Debian's "apt" package manager.
Because all linux distro's are based on the same kernel (it's not often that distro's mod the kernel for various reasons) most (not all) software is compatible between distro's with a little finagling.
How to install linux:
installing linux may very from computer to computer, and on some computers it is nearly impossible; although in theory anything with 512 mb of ram could run linux. But a lot of these details may be different on your computer, so look into that first.
find a distro you want to use. Some distro's I'd advise staying away from if you are a beginner, like Arch. There are tons of distro's out there so it may seem like a daunting task, but here are a good few recommendations for beginners. Linux Mint is a good place to start, it's basically the beginner distro. it's simple, works with most computers, and suites just about anyone, from long time users to beginners, to shitty little cousins. Pop_OS! is another good one I've seen recommended, I've never used it personally but I've heard good things. For a long time Ubuntu (mint's daddy in a sort of way) was considered one of the best general distro's, but in recent years it has kind of fallen off, but still, it's good to keep in mind as a backup if something goes wrong.
make a bootable usb thumdrive. to do this you have to download the iso of the OS you are going to use and use a flashing software to make the usb bootable. Don't just put the iso on a thumb drive like what I did when I first installed installed linux, make sure you are using a flashing software. Rufus is a good flashing sofware for Windows (assuming that is what you're using). here is a good article on how to make a bootable usb
go into a one time boot/bios. the next thing you need to do is boot your computer from the usb. which can be done by rearranging the boot order in the bios, or running a one time boot on your computer. this is where things start to change depending on your computer. for most computers if you reboot you will see a little screen flash that may have some technical info and say something like "[key] for bios/uefi setup [key] for one-time boot launch." On my computer those keys are f2 and f12 respectively, but it may be different on yours. Some computers *ahem chromebook* may not give you access to the bios or one time boot. Here is a guide on common ways on how to boot into bios/one time boot. although I recommend looking up your laptop model/mother board model for specific details.
boot from the usb. now that you are in the bios/boot utility you need to boot into the usb. when booted into the usb, most distro's will allow you to test how performance is on your computer, test the desktop environment, and make sure you have all your drivers and other things worked out so you have access to wifi and bluetooth and stuff.
run the installer. on the desktop there should be an installer application that you can run, most of them are pretty simple; they will just ask you stuff like usernames, times zones, pre-installed apps, etc. etc. WARNING: installing linux will wipe your drive clean, anything you had will be gone. Make sure you have backups of anything that may be important.
reboot your computer & unplug the usb; after you run the installer linux should be on your computer now
many distro's have installation guides on their websites if you want to follow those.
if you want to install linux on a chromebook it is possible (my first laptop was a chromebook and I installed Solus on it, it was my first distro and a big regret; nothing aginst Solus, I just didn't like it). here are some resousrces if you want to do that: [1] [2] [3]
How to use linux:
one of the big corner stones of linux is the terminal. due to its development history the terminal is the dominate way to interact with your computer. a lot of distro's may have a way to do things with a gui, but you will always have a terminal, so you best be used to it.
this is what a terminal emulator looks like. Terminals are technically a part of the hardware (and can be found under /dev/tty* in linux), but you can access them from the desktop through the emulator.
on the terminal you will be greeted to a command prompt, from here you can type out different commands. when you type a command the shell (the software that the terminal uses to communicate with the OS) will search through the $PATH variable and check every folder it points to, and if the command you type is found then it will run the command with what ever parameters you give.
commands follow a formula: CommandName parameter1 parameter2 ...
some commands wont have any parameters, others will, it all depends on the command. But here are some common commands to help you understand
before you begin, just know that "~" refers to your home folder; directory is just a fancy term for folders (that is due to the history of computers); "." refers to the directory you are currently in, and ".." refers to the directory about you.
ls (list): lists the contents of whatever folder you're in
pwd (print working directory): prints the file path to your fold (ex: /home/uppereepy/Documents)
cd (change directory): lets you change which folder you're in (ex cd ..)
cat (concatenate): concatenates (prints) files to the screen
mv (move): move files to new locations (ex: mv HelloWorld.txt ~/Desktop), can also be used to rename files (ex: mv HelloWorld.txt Hello.txt)
man (manual): if you don't know what a command does then you can use the man command to look up what a command does (ex: man ls).
some advice: you will grow to understand the terminal in time, and although tutorials will help, using the terminal will help you understand things a lot more. manual entries, when you first start, may seem esoteric and hard to read, so just know it is ok to look up what a command does on the internet. learning the C programing language can really help you understand the terminal, and so does reading about the history of computers or using older computers
Resources to get started:
Wikipedia page for linux computer terminals The GNU project (where took off) top 50 commands how to use pipes online manual linux for beginners yt linux for hackers by network chuck (he is a little annoying, but he's how I got started)
and if you want to get into the history of computers I'd suggest looking into The 8-bit Guy on yt and Unix: a History and a Memoir by Brian Kernighan (one of the developers behind Unix and wrote "The C Programming Language")
anyways, that's all I got, I am tired (it is nearly 12:00 am while I am writing this), sorry for the extremely long post
gee i really want to get into linux but idk how to even start.. I wonder if there are any smart transgender women out there who could explain it to me in extreme detail while i bat my eyes at them.....
#long post#linux#linuxposting#really long post#linux mint#Pop_OS!#linux for beginners#information#infodump
613 notes
·
View notes
Text
Bootable mac usb on windows

Bootable mac usb on windows how to#
Bootable mac usb on windows mac os x#
Bootable mac usb on windows install#
Step 4: For the Command (⌘) Key setting, select (⌥) Option. Step 3: For the Option (⌥) Key setting, select ⌘ Command. Step 2: Select your third-party Windows keyboard via the Select keyboard drop down box. Along with the certain things that we need in order to obtain a bootable windows 10 USB on mac, we also left a great guide on how users can obtain and create the mentioned bootable USB for Mac. This article solely tackles how users can create windows ten bootable USB on Mac.
Bootable mac usb on windows how to#
More videos on YouTube Step 1: Open System Preferences → Keyboard → Modifier Keys. Now, you’ve learned how to create Windows 10 bootable USB on Mac. How do I change the Command key on Windows keyboard? Pull down the Apple menu and choose “System Preferences” Click on “Keyboard” Choose the “Keyboard” tab and then click on the “Modifier Keys” button in the lower right corner of the preference panel. How do I connect a Mac to a Windows keyboard?Ĭonnect the Windows PC keyboard to the Mac as usual, either by USB or Bluetooth. On a PC keyboard the Command key is either the Windows key or the Start key. Where is the command button on a keyboard? Select the volume containing the bootable installer, then click Continue. Turn on your Mac and continue to hold the power button until you see the startup options window, which will show your bootable volumes. It’ll boot into Recovery Mode, and you can click Disk Utility to open it up. Plug the bootable installer into a Mac that is connected to the Internet and compatible with the version of macOS youre installing. To access the Disk Utility on a modern Mac-regardless of whether it even has an operating system installed-reboot or boot up the Mac and hold Command+R as it boots. Psssssst : How to unlock series 2 apple watch? How do I start my Mac in Disk Utility? Startup Manager will then start scanning your device for drives it can boot from, including your USB. Once the Startup Manager appears, you can release the Option key.
Bootable mac usb on windows mac os x#
After a brief delay, you’ll see the Mac OS X Utilities screen.įrequent question, how do I force my Mac to boot from USB? Press and hold the “Option” key when you hear the startup sounds-this will bring you to the Startup Manager.Select Recovery HD and then click the upward-pointing arrow below it to boot from Recovery HD.Start you Mac while pressing the Option key (in your Windows keyboard press the Alt key) until the Startup Manager appears:.
Bootable mac usb on windows install#
Boot Camp Assistant can be used to install Windows on a Mac and create a bootable USB installer drive, eliminating the need for any lengthy Terminal commands or third-party apps. In this regard, how do I boot my Mac from USB using Windows keyboard?īeside above, how do I restore my IMAC with Windows keyboard? Create Windows 11 Bootable Disk Using Boot Camp (Intel Macs) The first method involves using Boot Camp on Intel Macs. If holding alt does not work then you will need a wired USB keyboard, any wired USB keyboard will do. Just holding the alt key will get you to the boot selection menu.
How do I change the Command key on Windows keyboard?.
How do I connect a Mac to a Windows keyboard?.
Where is the command button on a keyboard?.
How do I know if my Mac USB is bootable?.
How do I unlock my iMac without a keyboard?.
0 notes
Text
How to make a flash drive bootable linux in windows

HOW TO MAKE A FLASH DRIVE BOOTABLE LINUX IN WINDOWS FULL
HOW TO MAKE A FLASH DRIVE BOOTABLE LINUX IN WINDOWS SOFTWARE
HOW TO MAKE A FLASH DRIVE BOOTABLE LINUX IN WINDOWS ISO
HOW TO MAKE A FLASH DRIVE BOOTABLE LINUX IN WINDOWS WINDOWS 7
HOW TO MAKE A FLASH DRIVE BOOTABLE LINUX IN WINDOWS DOWNLOAD
Wish me luck - even if it doesn't work though, I now have a bootable OS on a 16GB flash drive which I will set up so that I can add progz and customization that will stay and be ready for repair of others computers.
HOW TO MAKE A FLASH DRIVE BOOTABLE LINUX IN WINDOWS FULL
Damn yous, TrustedInstaller! I swear I gave myself full control the long, arduous way through Windows 10 and deleted it, but it's here. I tried changing the properties, and I swear I was able to delete that folder, but there it is again, taking up 10% of my main drive! Thank you again, even if this doesn't work, I have another computer I am working on with the same chipset (not that *that* matters in this case) and I can use that to delete the damned folder. I don't have UEFI, so I am hoping this will work so I can delete that pesky Windows.old file taking up precious real-estate on my (new, old one died) boot SSD. Thank you, by the way! For some reason, I tried using Windows ISOs burned onto USBs using Rufus and even burning DVDs, but they would not give me the prompt nor even show up properly in the BIOS. All rights reserved.Linux Mint 18 is out now, not that it matters too much, but I thought I would remind you of this article in case you wanted to edit it.
HOW TO MAKE A FLASH DRIVE BOOTABLE LINUX IN WINDOWS SOFTWARE
Raw-write and USB-HDD are suggested writing methods.Ĭopyright 2004-2022 Power Software Ltd. Try another writing method when creating USB drive, Have you correctly prepared the USB drive in step one?ĭoes your USB drive properly support being booted from? Is your BIOS properly configured for booting from the USBĭevice? (Is the USB device listed and does it have top priority?) If it isn’t working, then double-check the following before Step 3: Booting and setup or run Linux from USB driveĪssuming that you properly configured your BIOS and your USBĭrive supports booting, Linux or Linux setup program should now load.ĭepending on the speed of your USB drive, this may take a while. Please notice that you can seriously screw up your system by The 'Create Bootable USB Drive' dialog will popup. Step 3:Choose the menu 'Tools > Create Bootable USB Drive'. Hardware), promote your USB drive to the primary boot device.Įxit from the BIOS configuration, saving all changes. Step 2:Insert the USB drive you intend to boot from. If it isn’t, your system might not support booting from USB.Īssuming that it is supported (as is the case with virtually all modern With your USB drive plugged in, the USB drive should be Go to the section that contains your boot devices. Hotkey instructions are generally provided on the screen. The BIOS configuration screen by hitting something like F1, F2, Delete orĮscape. While booting (before Windows starts loading), get into Instructions for doing so vary wildly from system to system, but You should now reboot and go into the BIOS configuration toīoot from USB. After all data has been written to the USB drive, you should receive a message indicating that theīootable USB drive has been created successfully. PowerISO will then start writing, and show the progress information when writing USB drive.ĩ. Please click "OK" to confirm and continue. Tag:-create bootable pendrive,make a bootable pendrive,how to make bootable. Before writing files to the USB drive, PowerISO will show a dialog prompts you that all data in the USB drive Make A Bootable USB Drive Or Pendrive For Windows / Linux In Multiple. Click "Start" button to start creating bootable USB drive for Linux. However, if "Raw-write" isn't working, please use "USB-HDD" instead.Ĩ. If multiple USB drives are connected to the computer, please make sure that you have selected the correct drive.ħ. Select the USB drive from the "Destination USB drive" list.
HOW TO MAKE A FLASH DRIVE BOOTABLE LINUX IN WINDOWS ISO
In "Create bootable USB Drive" dialog, click "Browse" button to open the iso file for Linux.Ħ.
HOW TO MAKE A FLASH DRIVE BOOTABLE LINUX IN WINDOWS WINDOWS 7
If you are using Windows Vista or Windows 7 / 8 operating system, you need confirm the UAC dialog to continue.ĥ. The " Create Bootable USB Drive" dialog will popup. Choose the menu "Tools > Create Bootable USB Drive.".Ĥ. Insert the USB drive you intend to make bootable.ģ.
HOW TO MAKE A FLASH DRIVE BOOTABLE LINUX IN WINDOWS DOWNLOAD
Start PowerISO (v6.5 or newer version, download here).Ģ. Step1: Create Bootable USB Drive for Linuxġ. The steps to create Linux bootable USB drive, It supports most of the Linuxĭistribution, such as Ubuntu, Fedora, Debian, CentOS, and so on. Select Start & type CMD in the search field, right click on CMD.exe and select Run as administrator. Warning: All data on the USB flash drive will be lost, make sure you save any data before proceeding. PowerISO can create bootable USB drive for Linux. Insert your USB flash drive (4Gb + preferable) into your system. How to create a bootable USB drive for Linux?
0 notes
Text
Chrome imageburner sd card

Chrome imageburner sd card install#
Chrome imageburner sd card iso#
» See Github Issues to file a bug report. Where can I report bugs, submit patches, etc?įirst, make sure you are using the latest version available on this website.
Chrome imageburner sd card install#
» See USB Drive and Hard Disk Install Modes. How does UNetbootin work, and what does it do? How do I use UNetbootin from the command line? If it still isn't showing up, use the targetdrive command line option. Reformat the USB drive as FAT32, then use UNetbootin again. My USB stick/hard drive isn't detected, what should I do? Reformat the USB drive as FAT32, then use UNetbootin again to put your distribution on the USB stick. My USB stick isn't booting, what should I do?
Chrome imageburner sd card iso#
UNetbootin isn't able to download the distribution, what should I do?ĭownload the ISO straight from the website, then provide it to UNetbootin via the diskimage option. » Maybe, see Installing Other Distributions Using UNetbootin. FAQs Distribution X isn't on the list of supported distributions, will it work? Also, ISO files for non-Linux operating systems have a different boot mechanism, so don't expect them to work either. However, not all distributions support booting from USB, and some others require extra boot options or other modifications before they can boot from USB drives, so these ISO files will not work as-is. UNetbootin doesn't use distribution-specific rules for making your live USB drive, so most Linux ISO files should load correctly using this option. Installing Other Distributions Using UNetbootinĭownload and run UNetbootin, then select the "disk image" option and supply it with an ISO (CD image). UNetbootin has built-in support for automatically downloading and loading the following distributions, though installing other distributions is also supported: If you used the "Hard Disk" install mode: After rebooting, select the UNetbootin entry from the Windows Boot Menu. On PCs, this usually involves pressing a button such as Esc or F12 immediately after you turn on your computer, while on Macs, you should hold the Option key before OSX boots. If you used the "USB Drive" install mode: After rebooting, boot from the USB drive. If your USB drive doesn't show up, reformat it as FAT32. Select an ISO file or a distribution to download, select a target drive (USB Drive or Hard Disk), then reboot once done. It loads distributions either by downloading a ISO (CD image) files for you, or by using an ISO file you've already downloaded. UNetbootin can create a bootable Live USB drive You can either let UNetbootin download one of the many distributions supported out-of-the-box for you, or supply your own Linux. UNetbootin allows you to create bootable Live USB drives for Ubuntu and other Linux distributions without burning a CD.
1 note
·
View note
Text
Macos Sierra Patcher Tool For Unsupported Macs

The link itself gives the answer macOS Sierra Patcher Tool for Unsupported Macs Since it’s unsupported, it’s by definition, riskier than install Sierra on supported Macs.
. The “macOS High Sierra Patcher” application is intended for those with unsupported Macs. MacOS Serria 10.12 Vmware image by dmos25 torrent on isoHunt MacOS High Sierra Patcher is a small but powerful tool to help you set up a Mac OS High Sierra.
MacOS Catalina Patcher (formerly macOS Mojave Patcher, macOS High Sierra Patcher and macOS Sierra Patcher) is a small yet powerful tool that can help you create a bootable USB drive that can be used to install macOS Catalina on Mac computers older than mid 2012, basically acting as a macOS Mojave patch for unsupported Macs.
Macos Sierra Patcher Tool For Unsupported Macs Windows 10
Macos Sierra Patcher Tool For Unsupported Macs 7
Macos High Sierra Patcher
Sierra Patcher will now create a macOS installer on the drive you selected, making edits on the fly so that the resulting installer can be used on unsupported machines. Once the installer is created, Sierra Patcher will say Complete! And your USB drive should now show as OS X Base System instead of its previous name. MacOS Mojave Patcher (formerly macOS High Sierra Patcher and macOS Sierra Patcher) is a small yet powerful tool that can help you create a bootable USB drive that can be used to install macOS Mojave on Mac computers older than late 2009, basically acting as a macOS Mojave patch for unsupported Macs.
Questionsor comments? Feel free to contact me at (email protected) Pleasetake a look at the FAQ located at the bottom of this page as well. I also have a YouTube video going over the whole process. Requirements: - Early-2008 or newer Mac Pro, iMac, or MacBook Pro(MacPro 3,1 and 4,1, iMac 8,1 and 9,1, MacBook Pro 4,1, 5,1 5,2, 5,3,5,4, and 5,5) - Late-2008 or newer MacBook Air or Aluminum Unibody MacBook (MacBookAir 2,1, MacBook 5,1) - Early-2009 or newer Mac Mini or white MacBook (Macmini 3,1, MacBook 5,2) - Early-2008 or newer Xserve (Xserve 2,1, Xserve 3,1) Machines that ARE NOT supported: - 2006-2007 Mac Pros, iMacs, MacBookPros, and Mac Minis (MacPro 1,1 and 2,1, iMac 4,1, 5,1, 5,2, 6,1 and7,1, MacBook Pro 1,1, 2,1, and 3,1, Macmini 1,1 and 2,1) -- The 2007 iMac 7,1 is compatible if the CPU is upgraded to a Penryn-based Core 2 Duo, such as a T9300. - 2006-2008 MacBooks (MacBook 1,1, 2,1 3,1 and 4,1) - 2008 MacBook Air (MacBookAir 1,1) -- Note: Make sure SIP is disabled on the system you intend to installHigh Sierra on. If it's not or you're unsure, just boot into your Recoverypartition of your currently installed copy of OS X, open Terminal, andrun 'csrutil disable'. Things you'll need: - A copy of the macOS High Sierra InstallerApp. This can be obtained from the Mac App Store using a machinethat supports High Sierra, or by using the built-in downloading feature of the tool. In the Menu Bar, simply select 'Tools > Download macOS High Sierra...' - A USB drive that's at least 8 GB in size - A copy of the tool - Download here (Current version: 2.7.0, SHA1: 73f180d30200ef5f6d900440fe57b9c7d22bd6bf) -- View changelog and download older versions here Known issues: - Trackpad (MacBook5,2 affected only). The trackpad in the MacBook5,2isn't fully supported in High Sierra. While it works and is fully usable,High Sierra detects it as just a standard mouse, preventing you fromchanging some trackpad-oriented settings. How to use: 1. Insert your desired USB drive, open Disk Utility, and format it as OS X Extended (Journaled). 2. Open the 'macOS High Sierra Patcher' tool, and browse for your copy of the macOS High Sierra Installer App. *Ensure that the tool successfully verifies the app. 3. Next, select your USB drive in the Target Volume list, and click 'Start Operation.' 4. When the operation completes, boot your target unsupported Mac offthe USB drive you just created by holding down the Option key while turning on the machine, and selecting the drive. Note: Only perform steps 5 and 6 if you intend to do a clean install.Otherwise, you can simply skip these steps and install to your volumecontaing a previous version of OS X, and it'll do an in-place upgrade. 5. When the installer boots, open Disk Utility from the Utilities menu, or by double-clicking it in the Utilities window on the bottom left corner of the screen. 6. Select the disk or partition you want to install on, and erase it,ensuring to use either Mac OS Extended (Journaled), or APFS as the filesystem type.If formatting an entire drive, ensure GUID is selected. -- Please note that if you use APFS, you will not have a bootable Recovery partition. -- It is recommended that you only use APFS if the target drive is an SSD. -- If you decide to use APFS, a custom booting method will be installed by the post-install tool, as the firmware of these unsupported machines does not natively support booting from APFS volumes. It is not quite as clean as native booting, but will not cause any issues while running High Sierra. A demo of the modified booting process can be viewed here. 7. Install macOS normally onto the desired volume. 8. When the install completes, reboot back onto the installer drive.This time, open the 'macOS Post Install' application. 9. In the application, select the Mac model you are using. The optimalpatches will be selected for you based on the model you select. You canalso select other patches of your choosing. -- The 'i' button next to each patch will show more details about the respective patch. 10. Select the volume you have just installed macOS High Sierra on, andclick 'Patch.' When it finishes patching, click 'Reboot'. It may sitthere for a few moments rebuilding caches before rebooting. -- If for somereason the system fails to work correctly after rebooting, boot backinto your installer drive, run the post install patch again, and select'Force Cache Rebuild' before rebooting. This isn't necessary under mostcircumstances. 11. When it reboots, it should now boot into a fully working copy ofmacOS High Sierra. Additional Info: - If selected in the macOS Post Install tool, your High Sierra install will have a program named 'Patch Updater' located in your /Applications/Utilities folder. This program will alert you when new updates to patches are available for your machine, and will prompt you to install them. If you do not have Patch Updater installed, but would like it, you can download and run the script found here to do so. Updates System updates, such as 10.13.1, should install normally if 'Software Update Patch' was selected in the macOS Post Install tool, or installed using the Patch Updater program. If for some reason updates aren't showing up, or you did not apply the patch, you can install it manually using the script found here. -- If the machine does not start up properly after applying a system update, you will need to boot off your patched installer volume, and re-run the post-install patch on your High Sierra volume. Ensure you select 'Force Cache Rebuild' before rebooting. FAQ: Q: The tool created the USB drive successfully, but when booting, the progress bar hangs a bit more than half way. A: Check your copy of the Install macOS High Sierra App. If you're using thelatest version of the tool, you must be using the latest version of theInstall macOS High Sierra App. Version 1.1 ofthe patch tool and older support older versions of the installer app. Q: The patch tool gives me errors, such as 'Error copying files...'. A: Check to make sure your USB drive is writeable. Try re-formatting it, or just try a different USB drive. Q: The patch tool gives me a 'Mounting Failed' error A: Check to make sure your Install macOS High Sierra App is the correct one.It should be around 5GB in size. If you used the 'Skip App Verification' option, you have most likely selected an invalid app thatdoesn't contain the necessary files. Q: I cannot open my copy of Install macOS High Sierra with the patch tool. A: If you downloaded the copy linked above, it is distributed inside aDMG file. You must open this file (mount it) to access the InstallmacOS High Sierra App you need to select. Q: I don't see my hard drive partition in the installer screen or in the post-install tool. A: Make sure FileVault is disabled, or use the instructions found here to unlock it manually using Terminal. Q: I get a 'NO' symbol when starting up after successfully installing High Sierra. A: Make sure you have run the post-install patch on the correct volume, as detailed above in steps 8-10. Q: I get a 'NO' symbol when starting up from the patched USB drive A: Check the supported/not supported list at the top of this page. Ensure your machine is in the supported list. Q: My iSight camera doesn't work after installing High Sierra A: Make sure you properly remove (using the program's uninstaller, not by simply dragging the application to the Trash) all virtual machine software installed on your machine, such as VirtualBox, VMWare, etc. Q: I get 'NSURL' errors when trying to update my machine or use the App Store A: This is usually the result of having an invalid CatalogURL set. To revert to stock, simply run 'sudo softwareupdate --clear-catalog' in Terminal, and then run the software update patch script located above. Q: Safari, App Store, and/or Mail stopped working after installing a system update A: Download and run the Onyx application, select 'Maintenence' at the top, then click the Run button. Q: I get a 'No packages were eligible for install' error when attepting to install High Sierra A: This is due to your system's date and time being set incorrectly. To fix it, you can either boot into your current OS X install and set the date, or you can use Terminal after booting from your patched USB installer drive to set the date. Instructions to set the date using Terminal can be found here.
To get the latest features and maintain the security, stability, compatibility, and performance of your Mac, it's important to keep your software up to date. Apple recommends that you always use the latest macOS that is compatible with your Mac.
Learn how to upgrade to macOS Big Sur, the latest version of macOS.
Check compatibility
MacOS Patcher is a command line tool for running macOS Sierra, macOS High Sierra, macOS Mojave, and macOS Catalina on unsupported Macs Catalina Unus It's integrated into macOS Patcher so you if you have a Mac supported by it, you can create your patched installer using Catalina Unus, and then add macOS Patcher's patches to it by selecting the. MacOS Sierra Patcher is a free-to-use application for Mac OS that allows you to easily create a modified install drive. MacOS Sierra Patcher is a free. Install drive to use for installing macOS Sierra.
If a macOS installer can't be used on your Mac, the installer will let you know. For example, it might say that it's too old to be opened on this version of macOS, or that your Mac doesn't have enough free storage space for the installation.
To confirm compatibility before downloading, check the minimum requirements for macOS Catalina, Mojave, High Sierra, Sierra, El Capitan, or Yosemite. You can also find compatibility information on the product-ID page for MacBook Pro, MacBook Air, MacBook, iMac, Mac mini, or Mac Pro.
Make a backup
Before installing, it’s a good idea to back up your Mac. Time Machine makes it simple, and other backup methods are also available. Learn how to back up your Mac.
Download macOS
It takes time to download and install macOS, so make sure that you're plugged into AC power and have a reliable internet connection.
Safari uses these links to find the old installers in the App Store. After downloading from the App Store, the installer opens automatically.
macOS Catalina 10.15 can upgrade Mojave, High Sierra, Sierra, El Capitan, Yosemite, Mavericks
macOS Mojave 10.14 can upgrade High Sierra, Sierra, El Capitan, Yosemite, Mavericks, Mountain Lion
macOS High Sierra 10.13 can upgrade Sierra, El Capitan, Yosemite, Mavericks, Mountain Lion
Safari downloads the following older installers as a disk image named InstallOS.dmg or InstallMacOSX.dmg. Open the disk image, then open the .pkg installer inside the disk image. It installs an app named Install (Version Name). Open that app from your Applications folder to begin installing the operating system.
macOS Sierra 10.12 can upgrade El Capitan, Yosemite, Mavericks, Mountain Lion, or Lion
OS X El Capitan 10.11 can upgrade Yosemite, Mavericks, Mountain Lion, Lion, or Snow Leopard
OS X Yosemite 10.10can upgrade Mavericks, Mountain Lion, Lion, or Snow Leopard
Install macOS
Follow the onscreen instructions in the installer. It might be easiest to begin installation in the evening so that it can complete overnight, if needed.
If the installer asks for permission to install a helper tool, enter the administrator name and password that you use to log in to your Mac, then click Add Helper.
Please allow installation to complete without putting your Mac to sleep or closing its lid. Your Mac might restart, show a progress bar, or show a blank screen several times as it installs macOS and related firmware updates.
Learn more
You might also be able to use macOS Recovery to reinstall the macOS you're using now, upgrade to the latest compatible macOS, or install the macOS that came with your Mac.
Within this post, I will illustrate How To Install macOS Unlocker For Vmware Patch Tool. While we have provided macOS VMware Unlocker Patch Tool on Windows, we will install macOS VMware Unlocker Patch Tool. Installing macOS Catalina or alternative versions on Windows can be very complicated and hard without VMware Workstation Player, especially a macOS VMware Unlocker Patch Tool. That’s why we’ve supplied VMware Workstation Player first, which is a pretty useful virtual machine program. There are two types of VMware Workstation. The first one is the VMware Workstation Pro, and the next one is the VMware Workstation Player. We are going to explain more and also make you more aware.
VMWARE UNLOCKER
The VMware Workstation Pro is the top edition of this VMware Workstation and is somewhat expensive. Here’s the URL to buy it. The VMware Workstation Player is your free version of this VMware Workstation, free for students or other personal use. When you install VMware Workstation Guru or Player, it will have to install macOS VMware Unlocker Patch Tool to install macOS. That is because, as we have mentioned previously, VMware straightly supports macOS on VMware in Windows. That’s because Apple does not let its operating system to be set up someplace else except on its hardware. That includes the complete of its operating system such as iOS, macOS, WatchOS.
MACOS MOJAVE
Update following the update comes in Apple. Following macOS High Sierra, macOS Mojave, and then macOS Catalina. These upgrades come really late for Apple fans and even Windows macOS fans. The main reason is, Windows users may even install macOS High Sierra, set up macOS Mojave, and set up macOS Catalina on their Windows PC. All these are possible because of these essential tools, especially macOS Catalina VMware Unlocker Patch Tool, macOS Mojave VMware Unlocker Patch Tool, macOS High Sierra Unlocker Patch Tool. The only blackened tool which is important is VMware Workstation set up beforehand. Once the VMware is set up, it is pretty easy to install macOS VMware Unlocker Patch Tool on Windows.
While we have some idea about what’s VMware, it is kinds and also catch it in the previous post. Now it is time to Understand about VMware Unlocker Patch Tool for macOS (Unlocker for VMware). Here is everything you need to know about macOS High Sierra VMware Unlocker.
VMware Unlocker Patch Tool, which is also frequent as VMware Unlocker for macOS, macOS VMware Unlocker, macOS Mojave Unlocker, and Unlocker for VMware. These are the most common names of the Unlocker, which we know. That means if any of these is explained, you should likely they are calling off VMware Unlocker Tool. The VMware Unlocker Patch is actually a set of tools that’s a particular program like some other software such as VMware Workstation.
DOWNLOAD UNLOCKER FOR VMWARE PATCH TOOL
Although it isn’t required to patch VMware for installing macOS on Mac, even if it’s to a virtual machine, that’s because Apple supports installing macOS within Mac but not external. This specific tool or application includes a few and much more of the technical tools such as VMware-vmx, vmwarebase.dll, VMware base, which completely functions to spot and alter VMware Workstation’s configurations, options and also downloads the VMware Tools for your specific machine. In the end, it will help run and install macOS on VMware using all the options that macOS Unlocker does.
To install and operate macOS on VMware on Windows, we certainly need VMware Unlocker, in which case, we have provided macOS VMware Unlocker. Download VMware Unlocker Patch Tool for macOS (Unlocker for VMware). With this, there is no chance to install macOS Catalina on VMware. It is nearly impossible. So select a copy of this in the download link below.
This Unlocker for VMware works for any VMware version such as VMware Workstation 15, VMware Workstation 14, or other.
When you’ve downloaded it, extract it and proceed with steps to set up VMware Unlocker Patch Tool.
INSTALL MACOS UNLOCKER FOR VMWARE PATCH TOOL (UNLOCKER FOR VMWARE)
Macos Sierra Patcher Tool For Unsupported Macs Windows 10
When installing macOS is simple with those tools, there’s no reason not to take action. It doesn’t make sense. Fifa 2012 for mac. Irrespective of which Windows version and VMware Workstation, the VMware Unlocker is the best instrument to help us set up macOS Catalina on VMware. Regrettably, installing macOS on VMware on AMD does not operate for now. But it works on VirtualBox for many. We’ve established an exclusive tutorial on How to Install macOS Big Sur on VirtualBox on Windows.
To set up VMware Unlocker Tool, initially, installing VMware Workstation is demanded. Just VMware Fusion doesn’t work, and many others like VMware Workstation and Player works.
High Sierra Patcher Dosdude1
Whenever the VMware is set up, shut it if it’s open.
Now browse to the VMware Unlocker documents and click on win-install, and select Run As Administrator.
This can run the command prompt and will automatically close.
Great! The VMware has been patched, and it is now ready to do the job.
Fire up VMware and click on Create a New Virtual Machine.
Next up, click on the magician.
Macos High Sierra Patcher Tool For Unsupported Mac Pro Early 2008 3.1
Then select I’ll set up the operating system later.
Macos High Sierra Patcher Tool Download
So there it is! The Apple Mac OS X is currently there with its version in the drop-down menu. Select macOS 10.15 or 10.14 or anything version and click on Next.
Mac Os Sierra Patch Tool
Wallpaper for mac os x hd. Following this, then proceed with the setup from the tutorial we have provided below.
Macos High Sierra Patcher Download
Macos Sierra Patcher Tool For Unsupported Macs 7
That was about VMware Unlocker Patch Tool. With all these, we end up this post now. I am hoping it works, and it should help. When something we’ve left or might love to include or create some nice suggestions, we are delighted to hear.
Macos High Sierra Patcher
0 notes
Text
Mavericks Dmg File Download

Download Os X Mavericks Installer
Mac Os Mavericks Dmg Download
Mac Dmg Downloads
Mac Os Mavericks Dmg
Hey guys, Here is a guide on 'How to install OS X 10.9 on a PC with a Gigabyte 990FXA Series Motherboard and AMD FX Series CPU'.
Download Apple Mac Os X 10.9 Mavericks Dmg Dmg File Aiseesoft FoneLab iPhone Data Recovery 9 is a new version of data retrieving software that works with most of Apple devices, including iPhones X, 8, 7, SE, 6s, 6, 5s, 5, 4s.
It will also show you how to dual boot windows and OS X and even run the same windows install inside of OS X with VMWare Fusion.
Before we start, Here is the exact specification i am using for my Hackintosh install.

Motherboard: Gigabyte 990FXA-UD3
CPU: AMD FX-6100
Memory: Corsair Vengeance 8GB 1600Mhz (2x4gb)
Graphics Card: Sapphire AMD Radeon HD 7850 2GB OC Edition (1002 6819)
Operating Systems: Windows 8 and OS X 10.9.1
How To Download El Capitan Dmg File Daern's Instant Fortress Dmg 160 Getting Dmg File From Osx Installer App Niresh Mavericks Dmg Direct Download How To Convert Dmg To Mp3 Os X El Capitan Download Dmg Free Max Osx 10.5 Dmg Can Windows Open Dmg Files Does Jax Do More Ap Or Ad Dmg.
Download file - Install Mac OS X 10.9.0 Mavericks.dmg. FAST INSTANT DOWNLOAD Download type.
Ok so although this guide is intended for install on the above hardware it may or may not work on other hardware, It will most likely work on the UD3, UD5 and UD7 motherboards aswell as most modern Radeon HD Graphics.
Requirements
The following items will be required in order for this to work.
Windows 7, 8 or 8.1 (DVD or USB)
Niresh 10.9 (Torrent: http://www.niresh12495.com (it's the most downloaded file currently))
A USB Pen (Niresh - 10.9 - Mavericks USB Version.zip) or Dual Layer DVD+R (Niresh - 10.9 - Mavericks ISO Version.zip)
Access to both Windows and the Niresh Mavericks USB at the same time.
You need to take your time and be patient. Both windows and OS X take some time to install.
1 HDD that is able to be completely formatted (wipe partition table)
Note: you don't need Windows if you don't want to dual boot
Preparation
I am not going to cover how to write the DMG file to a USB pen or DVD and instead will just link you to http://www.macbreaker.com/2014/01/instal...iresh.html (Step 1a if your currently in OS X and 1b if your in Windows)
So once you have the Bootable USB/DVD with Niresh on it we are ready to begin.
We need to format the HDD with the partition type MBR (for some reason when i did this with windows it didn't work) to do this will shall boot to the Niresh USB/DVD and at the prompt highlight 'Niresh Mavericks' and simply type 'amdfx GraphicsEnabler=No PCIRootUID=1 -v' and press 'Enter'.
If you don't plan on dual booting you can skip to 'Installing OS X 10.9'.
After a short time it should start booting to the OS X installer, Select your language and then in the menu bar Select Utilities > Disk Utilities > Select the HDD you want to use > Partition > 2 Partitions and then set the 1st as MS-DOS (FAT) name it 'Windows' and the 2nd as 'Mac OS Extended (Journaled)' name it 'Mavericks' now select 'Options' and make sure it's set to 'MBR (Master Boot Record)' then press 'Apply'
OK now the HDD is properly partitioned, We now move on to installing Windows.
Installing Windows 7, 8 or 8.1
This is installed just like normal, Except you need to make sure it doesn't install the UEFI version (make sure to select the non UEFI DVD/USB entry from the boot menu)
Once your at the install simply do a 'Custom Install' and then install windows to the 1st Partition it will need to be formated to NTFS via the format button below prior to being installed.
After the install is complete go through the standard welcome screen and post install setup and then we can move on to installing Niresh's OS X 10.9
Installing Niresh OS X 10.9
And now we are on to the main event, Installing OS X.
Boot to the Niresh USB/DVD and then at the prompt highlight 'Niresh Mavericks' and simply type 'amdfx GraphicsEnabler=No PCIRootUID=1 -v' and press 'Enter'
Now you should be back at the OS X install screen, This time we will actually install it, Follow the on screen wizard until you get to the HDD Select page then select the 'Mavericks' disk but DO NOT PRESS NEXT/INSTALL instead press 'Customize' and uncheck the option 'GraphicsEnabler' located under the 'Graphics' section.
Now you can begin the install. Press the install button and prepare to wait a while depending on your SSD/HDD.
Fixing A Few Issues With OS X
Ok now we have OS X and Windows installed but most likely booting OS X from the HDD won't work and instead you will need to use the USB/DVD.
So once again boot to the Niresh USB/DVD but then at the prompt highlight 'Mavericks' instead of 'Niresh Mavericks' enter ' 'Kernel Cache'=amd GraphicsEnabler=No PCIRootUID=1 -v ' note the quotes need to be entered around the words 'Kernel Cache'.
After a little while it should boot to OS X and ask you to enter various information for the welcome screen, After you have entered this you should be at either the 'Login Screen' or the 'Desktop'.
If your using the exact same card as mine you most likely are not running at native resolution and are instead forced to 1024x768, To fix this we need to modify 2 kext files, if your running at native resolution skip the step below.
Load up a Terminal (Search > Terminal) and then type 'sudo su' and enter admin password, Now type 'nano /System/Library/Extensions/AMD7000Controller.kext/Contents/Info.plist' and then find '68181002' and change it to your device and vendor ID (mine is 68191002) once done press 'Ctrl or Win + X' and then repeat the same change for '/System/Library/Extensions/AMDRadeonX4000.kext/Contents/Info.plist'.
Now the graphics is sorted provided your using a similar card to mine atleast, Now we can sort out issues with the bootloader on the HDD, Download 'Chameleon Wizard' then run it and select 'Boot0HFS' as the install mode and then press 'Install'.
Now reboot and you should be able to boot from the HDD and select the 'Mavericks' option, you may need to enter 'GraphicsEnabler=No' and '-v' is useful to see more detailed/verbose information.
Congratulations you are done sorting out OS X, The steps below are optional but highly recommended.
Updating the AMD Kernel and OS X
So you successfully got OS X working on your system, Now we should update OS X to the latest version (10.9.1 as of the time i was writing this) and the AMD Kernel to a newer and faster version.
Download the following file http://www.osx86.net/files/download/3736...4-support/ and extract it.
Next select 'Go' on the menu bar, and then 'Go to folder' and then '/', This will put you to the root of the OS X Partition, Now we need to replace the mach_kernel with the download mach_kernel file. Simply copy and paste and confirm the authentication.
Now we need to copy the downloaded 'System.kext' to '/System/Library/Extensions/', once this is done you will most likely get some errors don't panic!.
Now we load 'Kext Wizard' (installed with niresh) and select 'Repair' and 'Rebuild' under the '/System/Library/Extensions/'.
Once 'Kext Wizard' is done, Click the 'Apple icon' in the 'Menu Bar' and select 'Software Update' and 'Update All', This will take a little while, When asked to reboot say yes.
Now your system should reboot and you should be back at OS X at 10.9.1 instead of 10.9.0.
Running Windows 8 Inside OS X Using VMWare Fusion
Ok so, So far we have Windows and OS X installed to the same HDD on your PC, Now we will use the physical install of Windows inside of VMWare Fusion this will allow us to use Windows both inside of OS X and as a actual boot option.
Of Course this requires VMWare Fusion and this is a commercial piece of software therefore you will need to acquire VMWare Fusion prior to continuing.
Ok so now that you have acquired VMWare Fusion and installed it we can continue on to setting up the 'boot camp' partition.
Download Os X Mavericks Installer
Firstly we need to make sure that the windows partition is set to be the active partition, to do this we can load 'Terminal' > 'sudo su' > 'fdisk -e /dev/rdisk0' > 'f 1' > 'write' > 'y' > 'exit'.
Ok now it should have set the windows partition as the active partition, Now load up 'VMWare Fusion' and select 'More Options' and then 'Install from bootcamp' and then 'Create bootcamp virtual machine'.
Now the VM should be created and you should be able to simply start the VM and Windows 7, 8 or 8.1 should start and start the vmware tools install procedure. Now exit the VM and VMWare.
Now we need to restore the active partition back to OS X by doing the following load 'Terminal' > 'sudo su' > 'fdisk -e /dev/rdisk0' > 'f 2' > 'write' > 'y' > 'exit'.
And now we are done! click the 'unity' button in VMWare to integrate it even more. We now have VMWare with Windows + Windows as Dual Boot with OS X.
Extras
R9 270 and R9 270x users can use this file to get graphics working correctly (http://www.osx86.net/files/file/3711-amd...70-series/) DON'T UNCHECK GRAPHICSENABLER DURING INSTALL OF OS X
Thanks to Niresh and everyone else involved!
To get the latest features and maintain the security, stability, compatibility, and performance of your Mac, it's important to keep your software up to date. Apple recommends that you always use the latest macOS that is compatible with your Mac.
Learn how to upgrade to macOS Big Sur, the latest version of macOS.
Check compatibility
The version of macOS that came with your Mac is the earliest version it can use. For example, if your Mac came with macOS Big Sur, it will not accept installation of macOS Catalina or earlier.
If a macOS can't be used on your Mac, the App Store or installer will let you know. For example, it might say that it's not compatible with this device or is too old to be opened on this version of macOS. To confirm compatibility before downloading, check the minimum hardware requirements:
Mac Os Mavericks Dmg Download
macOS Catalina 10.15 hardware requirements
macOS Mojave 10.14 hardware requirements
macOS High Sierra 10.13 hardware requirements
macOS Sierra 10.12 hardware requirements
OS X El Capitan 10.11 hardware requirements
OS X Yosemite 10.10 hardware requirements
Download macOS using Safari on your Mac
Mac Dmg Downloads
Safari uses these links to find the old installers in the App Store. After downloading from the App Store, the installer opens automatically.
macOS Catalina 10.15 can upgrade Mojave, High Sierra, Sierra, El Capitan, Yosemite, Mavericks
macOS Mojave 10.14 can upgrade High Sierra, Sierra, El Capitan, Yosemite, Mavericks, Mountain Lion
macOS High Sierra 10.13 can upgrade Sierra, El Capitan, Yosemite, Mavericks, Mountain Lion
Safari downloads the following older installers as a disk image named InstallOS.dmg or InstallMacOSX.dmg. Open the disk image, then open the .pkg installer inside the disk image. It installs an app named Install (Version Name). Open that app from your Applications folder to begin installing the operating system.
Mac Os Mavericks Dmg
macOS Sierra 10.12 can upgrade El Capitan, Yosemite, Mavericks, Mountain Lion, or Lion
OS X El Capitan 10.11 can upgrade Yosemite, Mavericks, Mountain Lion, Lion, or Snow Leopard
OS X Yosemite 10.10can upgrade Mavericks, Mountain Lion, Lion, or Snow Leopard
0 notes
Text
Drivers Pcnet Laptops & Desktops

Since this is now became a common request by many, I decided to write a tutorial about Windows 9x (95/98/98SE/Me) usage on VirtualBox.
Drivers Pcnet Laptops & Desktops Refurbished
Drivers Pcnet Laptops & Desktops Best Buy
Drivers Pcnet Laptops & Desktops Cheap
Drivers Pcnet Laptops & Desktops
1,172 Followers, 293 Following, 11 Posts - See Instagram photos and videos from abdou now online (@abdoualittlebit). Omega usb devices driver download for windows. Network Adapter 1 Use Bridged Adapter and ensure it’s a PCNET-Fast III; USB Set the USB controller to USB 1.1 (USB 2.0 didn’t gain widespread adoption until Windows XP) Whilst still in the Settings dialog box of your VM, you may mount the Windows 98 CD or ISO image before running it. Pelham laptops & desktops driver download. Once done, select OK to close the dialog box.
PenMount Windows Universal Driver V2.4.0.306(WHQL) for Windows 2k/ XP/ 2003/2008/Vista/7/8/WES7. The content is empty Download file missing Invalid download link. PenMount Windows Universal Driver V2.0.0.113 2007-12-24. The content is empty Download file missing Invalid download link Download speed is slow Others. Penmount driver download for windows 8.1.
Forenote: Windows 9x is not officially supported by VirtualBox team, which means, that it lacks Guest VM Additions, and it runs slowly, because VirtualBox is not optimized to run Win 9x. 1. Installation - I won't cover here in detail, except few points. Most CD-ROMs available for Windows 95/98 are not bootable, which means, that you must boot from DOS floppy, install DOS first and only then install Windows 95/98. *It does require DOS skills* Official bootable CD media is starting from 98SE. So if you're newbie, you should use Windows 98 SE bootable CD. Additionally I strongly suggest to limit system RAM to 512 MB for those OSes. Otherwise it will crash. (There are workarounds, that allow Win 9x run on modern physical systems, but I won't go into detail here) In some cases enabling or disabling AMD-V/VT-x can help you install the O.S. For this tutorial, I presume, that you are able to install the OS. Installing with ACPI: (contributed by Richard_S) Contrary to what you may have read here in some of the other VirtualBox Win98 threads, this is NOT because Win98se is a poorly written piece of antiquated crap that doesn't even know how to properly handle CPU IDLE. Back when a lot of todays young Linux geeks were still pooping their dipiys, Win98 was already supporting ACPI functions to create greener PCs and help keep laptops from running down their batteries in 10 minutes (which is exactly what DID happen to me the first time I installed Linux on a laptop that was working FINE in Win98). So, long story short, there is NOTHING really wrong with Win98, the problem is that VirtualBox's emulated BIOS doesn't fully match up with what Win98 expects a real ACPI BIOS to look like, so by default Win98 will not install ACPI support (and unfortunately, the older APM support doesn't handle CPU IDLE, so we get problems). The solution is to FORCE ACPI support to be installed, by using the /p j command line switch when running the setup program that installs Win98. This means that you can't just jam the virtual CD into the virtual CD drive and let 'autorun' take care of everything. The best way to handle this is to simply move the Win98 install folder from the Windows 98 SE CD onto your virtual C: drive in VirtualBox, then change directory to that folder in a DOS prompt and run the setup program manually: setup /p j This will force ACPI power management (and the associated CPU IDLE functions) to be installed, and your Win98 virtual machine will consume no more system resources when running than a similar XP or Linux virtual machine. 2. Sound /Audio Integration. In VirtualBox, you must enable Sound, and use 'Sound Blaster 16'. It is available since VBox 1.6.0. The procedure for installation is rather simple: NOTE: The procedure below is only needed if you switch from AC'97 to SB16. It is not needed, if you create new VM with SB16, then install Win98 on it. 2.1. Delete your sound card device and all unknown devices from 'Device Manager'. 2.2 Add New Hardware (from Control Panel).
Code: Select allExpand viewCollapse view
(img)http://img178.imageshack.us/img178/2780/win98soundscreenshot01xg6.png(/img)
win98soundscreenshot01xg6.png (44.95 KiB) Viewed 805988 times
Code: Select allExpand viewCollapse view
(img)http://img502.imageshack.us/img502/3426/win98soundscreenshot02sd3.png(/img)
win98soundscreenshot02sd3.png (39.97 KiB) Viewed 805988 times
2.3 Select 'no, device is not listed in the list'.
Code: Select allExpand viewCollapse view
(img)http://img397.imageshack.us/img397/7972/win98soundscreenshot03so7.png(/img)
win98soundscreenshot03so7.png (40.95 KiB) Viewed 805988 times
2.4 Let Windows search for non-plug'n'play devices.
Code: Select allExpand viewCollapse view
(img)http://img168.imageshack.us/img168/1111/win98soundscreenshot04gd2.png(/img)
win98soundscreenshot04gd2.png (42.2 KiB) Viewed 805988 times
2.5 It will manually detect non-plug-n-play devices. Click on 'Details' to show them.
Code: Select allExpand viewCollapse view
(img)http://img413.imageshack.us/img413/9726/win98soundscreenshot05yx4.png(/img)
2.6. It will find 'Soundblaster 16 or AWE 32 or compatible'.
Code: Select allExpand viewCollapse view
(img)http://img413.imageshack.us/img413/2001/win98soundscreenshot06me3.png(/img)
win98soundscreenshot06me3.png (39.92 KiB) Viewed 805988 times
2.7. Restart the VM. 3. Video driver integration. By default Windows 98 will run only in 640x480 resolution, 16-colors. Performance Note: VirtualBox is not optimized for 16-colors (4-bit) emulation. It works very slow this way. Having 32-bit True Color driver makes Win98 VMs run on VirtualBox *much* faster. If you want True color or high resolution, you need to download special drivers. 3.1. bearwindows driver (unstable) http://bearwindows.zcm.com.au/ NOTE: You must install 'Universal version' (2nd link), as the 'VirtualBox' version is known to have problems. WARNING: This driver is buggy, and many Windows fonts do not render correctly with it. Not recommended. 3.2. SciTech Display Doctor (recommended) The second option is to get the SciTech Display Doctor version 7 beta driver (12 MB) -
Drivers Pcnet Laptops & Desktops Refurbished
(contributed by Richard_S) https://www.dropbox.com/s/226caou8x0jf8 .. ctor-7.iso -or- https://docs.google.com/open?id=0BycgkM .. UhnWGRycVE The driver is a high quality commercial grade video driver (even includes some software emulated Open GL 3D support), and it does include an exe installer program. Despite having an installer, the SciTech Display Doctor is a little tricky to get going. After the program launches, you have to find the little round radio button link to click to 'enable' the new driver (otherwise you still have VGA). Even then, you can't select any higher resolution modes until you ditch the 'default monitor' and select one of the 'Super VGA' types. After fiddling around with the above changes and rebooting several times you should be able to select 800x600 or 1024x768 (or higher) resolutions with 32 bit color depth. (setting 32 bit color mode optimizes the interface with Virtualbox and really speeds things up) 4. Network Easiest thing, is to setup VirtualBox to NAT, and AMD PCnet-II network chip. It will be auto-detected by Win 9x.

5. Mouse (contributed by stefan.becker) VirtualBox 4.1 provides for Windows-98-compatible USB tablet device. Enable USB Tablet: VM->Settings->System->Enable Absolute pointing device then do: (enable Windows-98 mode) VBoxManage setextradata 'VM name' 'VBoxInternal/USB/HidMouse/0/Config/CoordShift' 0 docs: '12.3.8 USB tablet coordinates .. in Windows 98 guests' 6. Shared Folders Since VirtualBox shared folders won't work, there are other ways, such as SMB/Windows File Sharing. Recommended for Windows hosts. (Tested with VBox 2.1.2.-- and was successful with 'bridged' network. I had no success with NAT.) WARNING: I admit that with VirtualBox the network is very unstable, presumably due to very slow performance of Win 9x guests under VBox. For Unix hosts, WinSCP is recommended. Another way of read-only file sharing is to create a virtual CD-ROM *.iso file on the host and insert it into the guest VM. 7. Clipboard Host<=>Guest (contributed by stefan.becker) Clipboard integrated in VirtualBox only works with the Guest Additions, so not for Windows9x. But there is another solution: Clipboard over TCP/IP. A Solution tested successfull with Linux Host is ShareClip: http://homepage.mac.com/bnej/shareclip/ -Technologov Written on 2.9.2008, updated on 18.07.2011.
Drivers Pcnet Laptops & Desktops Best Buy
Please discuss this tutorial here
Drivers Pcnet Laptops & Desktops Cheap
Drivers Pcnet Laptops & Desktops
This topic is only for additions to this tutorial. Do not ask questions about how to get something working. Use a separate topic for that.
0 notes
Text
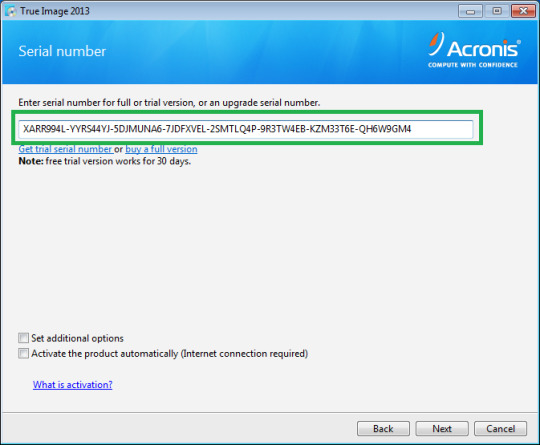
Acronis 2013

Acronis 2013 Iso Download
Acronis 2013 Download
Acronis 2013
Acronis 2013 Key
It is recommended to clone the disks from Acronis Bootable Media
This article applies to:
True Image 2013 by Acronis
Introduction
Acronis True Image Home 2013 assures that all your important data, including photos, videos, music, documents and applications, are fully protected and can be recovered quickly in the event of any disaster. Use our intuitive graphical user interface to easily define where you’ll be backing up your PC and how often. I have Windows 7 64 bit installed, I loaded Acronis True Image 2013 on it and everything worked immediately. I used the program to clone a hard drive (Changed out the WD10EZEX hard drive to a SSD (Solid State Drive), it worked flawlessly.
Using True Image 2013 you can clone basic MBR disks.
(!) True Image 2013 does not allow to clone a single partition, only cloning of an entire disk is possible.
Source disk volumes can be cloned to the target disk 'as is' or resized proportionally.
It is recommended not to format the source hard disk after the cloning until you are sure that the cloned target disk boots fine.
It is possible to clone a larger disk to a smaller one, provided that the smaller hard disk has enough capacity to fit the contents of the larger disk.
(!) Only basic disks can be cloned with True Image 2013.
(!) If you clone a disk with Windows to external USB hard drive, you will not be able to boot from it. Windows does not support booting from external USB hard drives. Please clone to internal SATA SSD or HDD instead.
You can use Windows Disk Management to see if you have basic or dynamic disks:
Hit Start-Run and type in diskmgmt.msc
If it shows Basic, then you can do the cloning:
If it shows Dynamic, then cloning is not possible:
(!) True Image 2013Plus Pack does not allow to clone dynamic disks as well. As a workaround, you can create a backup of the source dynamic disk and restore it to the new disk using True Image 2013 Plus Pack.
Solution
If you are going to do system disk cloning, it recommended to do it from Acronis Bootable Media.
Cloning from Acronis Bootable Media

Create Acronis Bootable Media. See ;
Boot your computer from Acronis Bootable Media and select Tools&Utilities -> Clone disk:
Select the Automatic mode to have your old disk's partitions automatically and proportionally resized to fit the new disk:
Select your old hard disk as the source disk and click Next:
Select the new hard disk as the destination disk and click Next:
If the destination disk is partitioned, click OK to allow the product to erase all data from the destination disk (required to do the cloning):
Review the operation on the Summary window and click Proceed to start the cloning:
When the cloning completes, shut down the system and remove one of the hard drives.
Acronis 2013 Iso Download
Cloning from Windows
Run True Image 2013 and go to Tools and utilities -> Clone disk:
Select the Automatic mode to have your old disk's partitions automatically and proportionally resized to fit the new disk:
Select your old hard disk as the source disk and click Next:
Select the new hard disk as the destination disk and click Next:
If the destination disk is partitioned, click OK to allow the product to erase all data from the destination disk (required to do the cloning):
Review the operation on the Summary window and click Proceed to start the cloning:
If you are cloning a disk with currently active operating system, the program will ask for a reboot. Press Reboot to continue cloning:
(!) If you press Cancel, the operation will be aborted.
When the cloning completes, you will be offered to press any key to shut down the computer. Shut down the system and remove one of the hard drives:
Acronis 2013 Download
More information
Acronis 2013
See also:
Acronis 2013 Key
Tags:
0 notes
Text
RAM test: Keeping a tab on yours Computer Memory
In today’s globe everyone strive for rate specifically when it comes to the computer. Nobody wishes to wait for doing any job. The majority of the people do not know “Exactly how to evaluate Computer Ram Memory?” RAM of the computer play significant duty in speed on every computer. Abandoned RAM can trigger computer to cause unforeseeable mistake. It can trigger the computer to ice up suddenly, produce trouble while booting process and also maybe among the reasons in charge of BSOD (Blue Display of Fatality). In this article I will certainly allow you understand about the characteristics of RAM and the approaches which you can make use of to check your computer’s RAM.
In computers we have 3 kinds of memories such as RAM, ROM as well as Cache memory. RAM stands for Random Accessibility Memory. It is additionally known as a Read/Write memory of the computer system. ROM means Read Just Memory. It does not allow individual to write/store any type of information. Cache memory is the smallest however the fastest memory readily available in the computer system. This memory is positioned closest to the CPU. It is classified as L1, L2 and L3 cache relying on its setting in computer architecture.
RAM plays the most important function for preserving the rate of the computer. Qualities of RAM:
RAM is unstable in nature. It suggests that data is saved in RAM as long as power is switched on. When the power goes off the data kept in Ram is disappeared.
RAM gives Random Gain access to ability for the individual. It implies the moment needed for accessing the information is independent of the position kept in RAM.
RAM allows individual to review and also create ability where as ROM do not permit customer to compose anything in the ROM memory.
A lot of the individuals do not recognize how to check the rate of RAM. In this post I will allow you learn about the essential actions which you ought to comply with for figuring out the speed of the Ram.
First off examine the Complete amount of RAM you have:
1. Make a Right click on “My computer”, choose “Quality” and after that you will have System Characteristic on your display.
2. Click on the General tab after that your computer system will show your System setup along with overall amount of RAM installed in your computer system.
3. Currently a days generally people utilize 1GB RAM. Yet on the more secure side usage 2GB RAM.
For identifying the rate of RAM you can utilize the complimentary tools available on the Microsoft internet site. I have made use of the Windows Memory Diagnostics device or MEMTEST86+ and also in my point of view it will give convincing results. This device performs couple of extensive tests on your computer system, analyzes RAM performance and also generates outcomes. You need to comply with the steps discussed below for checking the rate of your Computer system’s RAM:
For using MEMTEST86+ you need to crate bootable media. You can create start-up disk on USB, Optical disk or floppy drive. After that executable the documents (mtinst.exe) adhering to the download Free Reprint Articles, and also selects “Develop Startup Disk” to develop optical disk of the diagnostic tool.
Close down your computer system and reboot MEMTEST86+ from the optical disk. If you have trouble booting the media after that see to it the boot order in your system’s BIOS is set to boot the optical drive or USB flash Drive ahead of your hard disk.
After that MEMTEST86+ will certainly start to examine your Computer system’s RAM. This test consists of eight phases if your RAM finishes every one of them with no deadly problem after that you need not to stress else if RAM falls short in the test then you have no other option and also you need to obtain a brand-new RAM. You will get result that will show the existing condition of you RAM problem on your computer system user interface. Departure the analysis tool once the examination has finished.

0 notes
Text
Guide to Run Android Effortlessly on PC
All the Android mobile users know how smoothly Android runs and the features that it offers. You can now use Android on your PC using the Bliss operating system. Installing Android on your PC will allow you to run multiple apps simultaneously, use apps using the side-by-side feature, and it will bring all your favorite and useful apps directly to your PC.
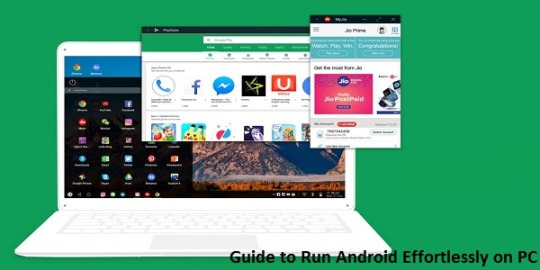
Bliss OS will help you bring Android to your PC along with stable performance, customized settings, security, and more. Using the Bliss ROMs, you can install Android on your PC. But there is an additional step to download Android on your device which involves you installing Rufus from their official website on your PC, and then downloading the Bliss OS.
You will also require a flash drive of minimum 4GB storage, and then follow the steps given below:
Open the Rufus app after installing it and click on the Select button.
Choose the downloaded Bliss OS and tap on the Open button.
Choose your flash drive for installation and click on the Start button.
Click on the Yes option, when the ‘Download Required’ window opens up.
After completing the above-mentioned steps, don’t forget to reboot your disk. Once your flash drive is set for the purpose, you can begin installing Bliss OS on your PC.
Press ESC or F10 or F12 key to open the Boot menu.
Choose your disk. Under the Live menu, select Live CD.
Bliss OS will immediately start booting, and it will show on your screen. But in case you see the text after an hour, then note that your system does not support this OS. This means that you cannot install Android on your PC.
If your device supports Bliss OS, then reboot your PC to boot from your flash disk. Use Esc, F10, or F12 key for choosing the drive.
From the Live menu, select the Installation option.
If you don’t find your PC supporting the Bliss OS, you can always check your Wi-Fi connectivity and other essential hardware to ensure they are not interrupting in the installation process.
You can create some free space on your system’s disk before installing the Bliss OS by creating a new partition. Follow these steps to create and modify partitions:
From the next screen, click on C and press the Enter key to create partitions.
Press N and hit Enter for answering ‘Do You Want To Use GPT?’
Click on Free Space using the up and down arrow keys and then select New option at the bottom of the page, using the left and right arrow keys. Hit Enter to create a partition.
Press the Enter key to select Primary, then press it once more to select Size. You can edit the size according to your preferences to create the partitions.
Hit the Enter key again when the Bootable is highlighted.
To highlight the Write option, use right and left arrow keys, and then press Enter key.
You will get a confirmation message, where you have to type Yes and click on the Enter key.
You can use the left and right arrow keys again to highlight the Quit option and click on the Enter key to continue the procedure.
After completing the aforementioned steps, your device will be ready to install Android. Follow these steps to install Bliss OS:
From the partitions you have created, choose the one where you want to install Bliss OS and then press the Enter key.
Use the up and down arrow keys to choose Ext4 and tap on the Enter key to format the partition.
You will find a confirmation dialogue opening up, from where you have to click on the Y key, and then hit Enter key to start formatting it.
Choose the Yes option, using the left and right arrow keys. Hit Enter to install GRUB.
When the ‘No’ option is highlighted, click on the Enter key to install the system as read-only.
Bliss OS will be installed on your PC. To begin using it, click on the Enter key. As soon as the OS gets installed, you will find the lock screen with a beautiful wallpaper just the way you see on your Android mobile. You have to select your Home Page apps and you can use the Desktop Mode so that you don’t miss out on the taskbar present at the bottom of the screen. You will be using Android 10’s Desktop Mode on your PC for multitasking and other customizable features. To tweak any changes, you have to go to Settings and select Blissify.
I’m Bond walker . I’m a web developer living in New york. I am a fan of technology, a publisher of guides at Bussiness Directory and programming. You can read my blog with a click on the button above.
Source:- Guide to Run Android Effortlessly on PC
0 notes
Text
Free Download gm tech2 tis2000 software and install on WIN XP/7/8
This blog show you how to download free tis2000 software and install on WIN XP/7/8, take your own risk, shared by customer, big thanks.
TIS2000 Software download:
http://www.mediafire.com/file/bc92by7ao7fp1la/GM+2000NAO.7z Tis2000 Dongle Crack
http://rg.to/file/a081c4c028aa1fb80ea98e15a540b9a9/TIS2000_Dongle_Crack.7z.html
Tested version:
TIS2000 with crack file (working perfect)
http://www.chinacardiags.com/wholesale/tis2000-cd-and-usb-key-for-gm-tech2-gm-and-opel-car-model-706.html
How to install TIS2000 software:
Customer solutions.. here you go…try on your own risk
TIS2000 Window XP:
Installed a fresh copy of Windows XP SP3. I didn’t bother with updating anything else as far as security updates to Windows or install a virus scan because this computer will never be connected to the Internet or used for anything else.
Installed ALL the required drivers until there were no more yellow check marks in Device Manager. I failed to do this at first and caused a lot of headaches later, including a BSOD during software installation.
If you’re using a USB to serial adapter, plug it in now and set it up. Go into Device Manager and make note of the COM port used by the adapter.3. Install the Tis2000 software from the CD included with the Tech2. During the install, it will ask you to specify the COM port. If you have a serial port on the computer, it’s probably COM 1 or use the one from the USB adapter.
Before you can use Tis2000 with your Tech2, you have to make it “think” that there is a dongle connected that authorizes it. You can download the crack below. Follow the read me file for instructions on how to use it.
That’s it.

TIS2000 Windows 8 32 bit:
However, if you have a 32-bit copy of Windows 8 installed (I don’t wanna know why you do), running 16-bit applications are disabled by default. You can enable it by going to Control Panel and clicking on 16-bit Application Support then clicking Enable.
TIS2000 Windows 7 with XP Virtual PC:
For those of you with genuine copies of Windows 7 Professional, Enterprise, or Ultimate with a multi-core processor (who doesn’t run Win7 on a multi-core these days); these versions of Windows 7 allow you to use Windows Virtual PC, which lets you virtually run Windows XP Pro without a disc or OS installation. You need to install Windows XP Mode and Windows Virtual PC in order to use it. Before you can download these updates, M$ makes you run a little .exe that checks if your OS install is legitimate. Anyway, after you get that all installed and XP Mode is booted, you can copy the OP’s cracked TIS2000.zip over to the WinXP Desktop and follow the README.txt inside to install it. Here is a link with the cracked TIS2000
http://www.chinacardiags.com/wholesale/tis2000-cd-and-usb-key-for-gm-tech2-gm-and-opel-car-model-706.html
…I have tested this on my desktop running Windows 7 Ultimate 64-bit and the cracked copy of TIS2000 the OP posted installed and ran with no problems. Instructions for Win7 XP Pro virtualization mode here: http://windows.microsoft.com/en-us/w…e-in-windows-7
TIS2000 software Window 64 bit or 32 bit:
64-bit versions of Windows contain backwards compatibility with 32-bit applications, but not with 16-bit applications. And 32-bit versions of Windows are backwards compatible with 16-bit applications. The problem with installing TIS2000 on newer machines is that, while the TIS2000 program itself is 32-bit, the installer and drivers are 16-bit. Therefore, you are able to install TIS2000 natively on ANY 32-bit Windows system. This will just work, without having to run anything in compatibility mode.
Now to the most common problem:
If you are running a 64-bit version of Windows XP, Windows Vista, Windows 7 Home Premium or lower, or ALL versions of Windows 8 and 8.1, I guess any version of Mac or Linux too, you have a couple of more involved and more risky options…
You can obtain a copy of Windows 2000 or XP Pro 32-bit. It includes two programs for making a bootable CD or USB drive. Pop the bootable device you created into your laptop, reboot to the device, then install that operating system onto a seperate partition of your hard drive, or a different hdd altogether. Or you can install Virtualbox (free software), and run the cracked Windows copy via a virtual machine… The method I took to test this was to create a separate partition on my ssd and install it there. When the computer reboots, it will ask you what OS you would like to run. Select Windows XP Pro, then continue installing TIS2000 software. If you’re gonna be writing to the main drive on your computer, I suggest first creating a bootable USB with Clonezilla on it and creating a drive backup with that http://clonezilla.org/downloads.php …This allows you to make a complete backup image of your hard drive, and allows you to flash it back to that drive at any time. A good thing to have around anyway.
VXDIAG VCX NANO GM + TIS2000:
IT works!! ok for anyone trying to use the VXDIAG GM nano with SPS this is what you need to do (order is important):
*** please note you cannot use the VM that the VXDIAG package comes with (GDS2 VM). It’s configured in such a way it won’t work with the dongle crack and caused me a lot of head scratching to find this out.
Create awindowsXP 32bit VM using VMWare Player
Make sure you add an LPT port (set to auto, not connected on startup). It doesn’t matter if your actual PC has an LPT port or not this is needed for the dongle crack later.
Install VMWare tools for your VM
After you have the windows VM up and running install the BOSH MDI drivers found here: http://www.boschdiagnostics.com/pro/soft…-and-mdi-2(the MDI drivers on the driver disk andvxmanagerinstaller wouldn’t install on myxp32bit VM but the one from bosh does).
From the driver disk or from allscanner.com install the VXDIAG MDI package with pass thru driver (VXDIAG MDI manager or VXDIAG Manager)
Download tis_data_1.iso, tis_data_2.iso, GM-NAO-TIS200-3_2008.iso, TIS2000DongleCrack.rar from this: http://auto-professionals.co/?dl=5847273d53a0b0635724a7b3e1626ef7(password: mhhauto) or buy a tested TIS2000 crack such as http://www.chinacardiags.com/wholesale/tis2000-cd-and-usb-key-for-gm-tech2-gm-and-opel-car-model-706.html and the like
(files / instructionsin the updated.txt you may need to click the link more than once if you get an error when downloading)
Mount the tis_data_1.iso in your VM (use the virtual cdrom in vmware player and attach to iso file) this will start the auto install of the TIS2000 2007.3 software)
All options can be installed using the default selectionshowevermake sure you check the install checkbox above the parallel security device on the one screen.
After installation is complete you can extract the TIS2000DongleCrack.rar and copy the folder to the desktop of your VM
Go into the TIS2000DongleCrack folder locate the drivers folder and open it, run the DDINST32.EXE (if you get a registry error you didn’t install an LPT port in your VM), select Express and it should install the files then click ok / Exit to close.
Go back to the main TIS2000DongleCrack folder and copy SCAControlUI.exe and Id.dll to c:\Program Files\cosids\bin\ (it will prompt to replace id.dll select yes).
Go back to the main TIS2000DongleCrack folder into the Dongle folder and copy the 2 files in there to c:\windows\system32\ (the dongle crack is now installed)
Now mount the tis_data_2.iso in your VM (use the virtual cdrom in vmware player and attach to iso file) and open TIS2000 (double click the icon on your desktop) when TIS opens it will ask you if you want to upgrade click yes.
After the upgrade completes mount the GM-NAO-TIS200-3_2008.iso in your VM (use the virtual cdrom in vmwareplayer and attach to iso file) and open TIS2000 ( double click the icon on your desktop) when TIS opens it will ask you if you want to upgrade click yes.
After the upgrade completes you have successfully installed TIS2000 2008.3 and the Dongle crack, now we need to configure TIS to use the VXDIAG GM nano
Open TIS2000 from the icon on your desktop, select Configuration menu from the top and select IO Management.
Click the Driver button, click the Browse button, locate the j2534.dll file in the window and click open (installs the J2534Pass Thru Driver)
Now click the Add button (in IO management) enter exacly “Generic Pass Thru” in Logical Name and select “J2534Pass Thru Driver” in the Driver drop down, click OK.
Select Generic Pass Thru in the list and click Properties, in the Device Name drop down select VXDIAG, (ALLScanner) and click ok then click close to close IO Management.
Now TIS2000 software is installed and configured all you have to do is connect your VXDIAG device to the PC / VM. To do this first use a usb and connect it to the PC then in the VMWare player menu go in removable devices and connect the Future Devices USB to serial converter. At this step my windows install didn’t have the basic usb to serial drivers so I connected the VM to the network (if not connected use the VMWare player menu to connect the network) and windows downloaded them from the net and installed the device as com3. you are now good to go.
At this point you can now click on SPS in TIS2000 select Generic Pass Thru as your device and your good to program!!
Satisfied, VXDIAG VCX NANO GM device works as a clone to the GM MDI.
0 notes
Text
Get in touch with Time For Congress Shows How Fundraising Controls Bleak Job Daily life.
I'm not sure if I need to feel thus unstable in the legs every time I activate Supermarket Management HD, however golly I do. Time management activities could be exciting, yet when they are actually made along with as best a rhythm as well as the prettiest of graphics as SMHDis, they are actually the sweetest from senior high school passions. Suggestion supplies practically unlimited customization options, it can alarm you at a certain instant or run regularly, and also tell you prior to a pointed out activity or go on advising you after it. The suggestion can easily show message, participate in songs, open up a link or even documentation, or stopped your PC. Opportunity Salvager is actually action-packed as well as rigorous, filled with fresh, cutting-edge tips as well as has terrific, impressive world-building. Launch that, as well as this will certainly seek any open copy of GarageBand (or Reasoning Pro X or MainStage 3) on your regional network. There are two main reason whies I gave this action such a high ranking as well as among them is actually Sir Toby Belch. The fantastic aspect of these questionnaire training courses is the natural inclination of my brain to hold away my recent analyses for random hookup time along with potential reads ends up being valuable for much more than only review creating. As in the past, TimeTag could be exited at any time while operating an active cooking timer, enabling you to remain effective. That said, the moment 2 is actually slightly bigger and bigger, coming in at 10.8 mm thick as well as 64.6 g, while the Marble Opportunity is actually 9.5 mm thick and also 42.5 g, though the staying sizes of 40.5 x 37.5 are identical. Connected music keyboards utilize one thing phoned MIDI (Music Equipment Digital Interface) to send the keys you're using the songs keyboard to your Mac computer. Like various other digital reality headsets on the market, PlayStation Virtual Reality has the demanding duty from fully submersing you in a computer game through generating pair of images at the same time and afterwards sending all of them to a headset a few feets away. The good news is, the stable of choices is actually huge-- I've assembled a checklist from greater than ONE HUNDRED Mac back-up plans Room doesn't allow a dialogue from all them listed here (so I ask forgiveness if I don't mention your favorite), but I desire to call your attention to a few depictive systems that take care of particular disadvantages of Time Equipment. And although it's occasionally feasible to utilize MobileMe's Back to My Macintosh attribute to access an Opportunity Pill on a distant system, Time Equipment's higher transmission capacity needs make such a setup bothersome for most customers. The formal Apple Watch reenergize opportunity is 1.5 hours to 80% and also and 2.5 hours to ONE HUNDRED%. Check This Out making use of Back to My Mac to attach to your Opportunity Capsule are going to rely considerably on the network connection at your current area, and the connection back in your home. In amount mode you'll experience over 200 surges of zombies across 4 various maps. Compare that with the initial Z as well as its other version the Z Pressure, which sets you back an extra $200 or even additional, the Z Play offers you all the goodies coming from Motorola's Z set, without cracking your budget. With FileVault enabled, Time Equipment can backed-up your documents simply when you're logged out, and if you want to restore a backed-up report, you need to do so manually-- the 3D celebrity field interface will not function. The Time Visitor seems to become additional badass as well as aggressive than I bear in mind off the Wells publication. Time Snatchers raises several intriguing ideas concerning Time-Traveling which are actually exceptionally enjoyable to imagine about and I 'd point out that this has actually performed it is actually project to create me intend to learn more TT stories. First of all, opportunity taking a trip tales are actually regularly complicated to pull off, and undoubtedly I can not think about excessive where some willingness to disregard to temporal mysteries and disputes goes to the very least demanded. Streaming media works in a different way relying on where the music or even video recording stems from, in addition to exactly what application you begin with. In the past, Terms Along with Buddies (free of charge) felt like the biggest mobile multiplayer video game worldwide, as the asynchronous turn-based technique was actually ideal for on-the-go play as well as followers commonly handled many games immediately. This are going to force him to play a more energetic job in fights, finding out the most ideal time to set his origins. Does not Produce Bootable Duplicates Even though Time Device supports every data on your disk to another hard disk drive, you can not launch your pc off your Opportunity Device back-up. It is actually going to be actually so hard to wait for book 3 in this particular artistic, special globe of time trip performed flawlessly! CBS CEO Les Moonves mentioned in December that Apple had struck the time out button on growth from its own streaming service as a result of challenge nailing down networks, as well as a Time Detector package would likely reboot that process. Instantaneous (free of charge, iPhone, IPad, as well as Apple Watch) still allows you track the moment you spend on your iPhone, getting in shape, resting as well as going locations. Within a few clicks, you could be backed-uping your documents, and whenever you hook up that drive Time Machine will, after a handful of few seconds, start backing up everything that's modified or even brand-new. In addition to the campaign method there is an ironman survival mode where you have to participate in via all the levels together until you cannot conserve the time clock. Opportunity trip is hard, and also is actually practically exactly what this book concerns - the details of being an opportunity visitor. At its own simplest, TimeLogger lets you begin the cooking timer when you begin a job, and cease this when you are actually performed. Ortofon put an end to the fabric interweave that helped make the eQ7 cable appearance very and ruined it for transportable use as a result of horrible microphonic touch sound. Unless the TELEVISION intensity is up as well loud or even others in the room are speaking, the PlayStation Electronic camera are going to often recognize your terms. click to read more (free of charge), as the label suggests, is actually the social offshoot from the collection: As opposed to participate in only to acquire all the stars, you'll contrast your credit ratings against those of your Facebook good friends, as well as compete in weekly leaderboard competitions. The option is to utilize Time Equipment's non-obvious feature for surfing second Opportunity Maker travels.
0 notes
Link
Just How To Clean Up Mac Pc
To receive the clean mac disk full benefit of automated cleanup, you also need to setup the excellent system-cleaning program CCleaner to automatically run each evening. Along with that, this Network Admission Control (NAC) merchandise is not difficult to deploy. With the newest November Update (1511), users no longer must go by means of the procedure If it still won’t start then download and run an application called RKill. The GUI is user friendly, created from an one window that supplies direct access to all or any accessible selections. Then You will be revealed with a display containing a Scan and Clean button. It really can be downloaded from this site. This program is really simple to utilize I could comprehend all of it is characteristics at the first glimpse. If you’d enjoy an entirely new system, though, you got a couple choices.
Clear Cache – Replies
Please bear in mind that this software will just have the ability to eliminate diseases for 30 days after it’s installed. There’s also the choice to edit the record of applications that begin as well as the operating system. Make sure you choose the right version on your own operating system. All these may be deleted, and they’ll never ( nearly ) change the correct operation of my own system. If this really is accurate then taking away the illness may cripple the machine. PC cleanup is among the primary components of computer care. To raise your PC speed it’s always required to hold your disk clean and free from pretty much any mess. This can be an one of a kind signature of the computer that’s saved on Microsoft Activation Servers.
Adobe Assistance Specialist
Please note that in case your computer cannot boot you should happen after the advice on this particular page as a way to back up all vital files. It shows the total path of every item during the scanner. Yet, it does not enable you to analyze the files in detail that will help you decide whether or not you like to eliminate them. Over there, you only have to tap on Download button together with the applications starts downloading. Instead, it is possible to opt to retain your own personal files ( including the ones in the Desktop and Documents folders) which will continue to keep the files inside your profile intact. This could be downloaded from this site. Subsequently download the complimentary version of SUPERAntiSpyware from these pages. After affirming your computer is currently clean now you can try to repair any damage which might have been caused. Should you be pleased with the variety, just click the Clean button, which will cause AdwCleaner to reboot your pc and eliminate the files and registry entries related to the various adware that you are removing.
Password protect any folder without any 3rd party application? Super-User
The typical user only doesn’t possess the experience to clean out the registry manually. It ought to be capable enough to help make your pc bootable again. The very best registry cleaner requires no unique technical knowledge. The notion is that nearly all individuals won’t need to go any farther in relation to the really first strategy so as to clean their computers of active malware. This will have the ability to ruin just about any kind of malware. Previously, many of you’ve asked the most practical way to back up your own files. So the initial scenario to do, if you’re able to, will be to backup whatever data you had need to keep love your saved documents, downloaded music and videos, etc.. Also, if even following the suggestions in this section another time is insufficient to clean your own computer you must continue to the very next section.
The post Just How To Clean Up Mac Pc appeared first on ECOPOWER (DAERYEOK).
http://ift.tt/2kVoHOv
0 notes
Photo
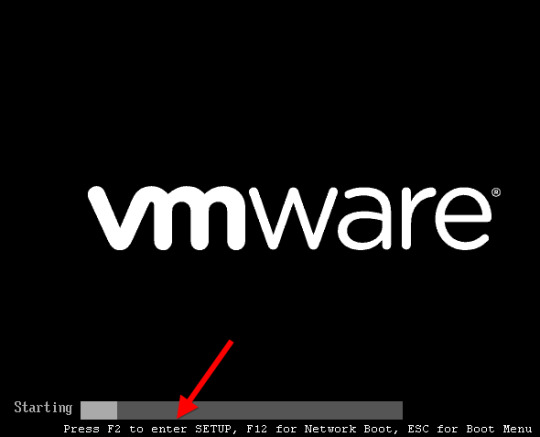
https://jpkee.com/pc-mobile/how-to-access-the-bios-on-a-windows-8-computer/
How to Access the BIOS on a Windows 8 Computer
Advertisement
Among the many changes coming with Windows 8 What’s Missing From Windows 8? What’s Missing From Windows 8? Windows 8 has seen the removal of many features that have been key to Windows over the years, including the Start button, Start menu, and Windows Aero. We tend to focus on the new features… Read More and new computers designed for it is a change in the way we access our computers’ BIOS. No longer do we press a certain key during the boot process to reveal the BIOS – instead, an option to access the BIOS is located in Windows 8’s boot options menu.
Traditionally, computers displayed a message like “Press F2 to enter setup” at the beginning of the boot process. Pressing this key entered the computer’s BIOS. However, Windows 8 hardware uses the UEFI replacement for the traditional BIOS, like Macs do. Some solid-state drive How Do Solid-State Drives Work? [MakeUseOf Explains] How Do Solid-State Drives Work? [MakeUseOf Explains] Over the past few decades, there has been a considerable amount of work in the field of computer hardware. While computer technology is constantly improving and evolving, rarely do we experience moments where we simply… Read More -equipped Windows 8 PCs boot so fast that you’d only have a 200 millisecond (that’s 0.2 seconds) window of opportunity to press the key combination.
Windows 8 Hardware vs. Old Computers With Windows 8
Note that this new method only applies if you purchased a new computer with Windows 8 preinstalled – these will use UEFI What Is UEFI And How Does It Keep You More Secure? What Is UEFI And How Does It Keep You More Secure? Read More . However, if you’ve installed Windows 8 on an existing computer that uses the legacy BIOS system, you’ll access the BIOS in the same way as always by pressing the key that appears during your boot process.
This key is often F2 or Delete, but it can also be other keys. The exact key depends on your computer – if you don’t see the appropriate key displayed on your screen during the boot-up process, consult your computer’s manual.
Accessing Boot Options
There are several ways to access Windows 8’s boot options menu. The easiest one to find is in the PC Settings application. Press Windows key + C A Handy Keyboard Shortcuts List for the Upcoming Microsoft Windows 8 A Handy Keyboard Shortcuts List for the Upcoming Microsoft Windows 8 Not having to reach for your mouse to do the most routine task is one huge benefit I enjoy every day. That’s because I’ve memorized my list of Windows 7 keyboard shortcuts, and I use… Read More to reveal the Charms bar, click Settings, and select Change PC settings to access it.
In the PC Settings application, select the General category and click the Restart now button under Advanced startup. Your computer will restart and you’ll enter the Windows 8’s boot options menu, where you can access the UEFI BIOS and change other settings.
You can also hold Shift while clicking Restart in the Shut Down menu How To Shut Down Windows 8 How To Shut Down Windows 8 Windows 8 brings the biggest changes to the familiar Windows interface since Windows 95. The Shut Down option isn’t where you’d expect to find it – in fact, the entire classic Start menu and Start… Read More to restart your computer into the boot options menu.
This is a quick way to restart into the boot options menu, as you can access the Shut Down button from the Charms anywhere on your system.
Command-line geeks Essential Windows CMD Commands You Should Know Essential Windows CMD Commands You Should Know The bleak interface of the command prompt is your gateway to advanced Windows tools. We show you essential CMD commands that will let you access them. Read More will be happy to know they can run a special shutdown.exe command 3 Ways To Speed Up The Windows 7 Shutdown Process 3 Ways To Speed Up The Windows 7 Shutdown Process One of the key improvements of Windows 7 is its lightning fast start-up. However, one thing which is not so fast is the shutdown process. If you also happen to be looking for ways to… Read More in a Command Prompt window to restart their computer directly into the boot options menu.
Here’s the command you need to use:
Shutdown.exe /r /o
Accessing UEFI BIOS
The boot options menu has been designed to integrate some commonly used options that people went into the BIOS for. For example, if you want to boot your computer off of a USB drive How to Create a Bootable USB Drive from Your Windows CD How to Create a Bootable USB Drive from Your Windows CD Do you have a Windows CD or DVD, but can’t use your optical drive to install the OS? You can use a bootable USB drive to install Windows instead. We show you how. Read More , DVD or CD, or another device, you can click the Use a device tile in the boot options menu and select the device you want to boot from.
If you’re just here to access your computer’s UEFI BIOS, click the Troubleshoot tile.
This will reveal an Advanced Options screen with a variety of tools – the UEFI Firmware Settings tile will take you to your computer’s BIOS. (On UEFI, which stands for “Unified Extensible Firmware Interface”, the firmware settings menu is equivalent to a traditional PC’s BIOS.)
If you don’t see the UEFI Firmware Settings tile here, your computer doesn’t use UEFI. You’ll need to access the BIOS in the traditional way Discover Your BIOS & Learn How to Make the Most of It Discover Your BIOS & Learn How to Make the Most of It What the heck is the BIOS, anyway? Is it really that important to know? We think so and fortunately it’s pretty easy. Let us introduce you. Read More , by pressing a specific key during the boot-up process. See the first section above for more information.
If there’s an error booting Windows, you won’t be locked out of the BIOS — the boot options screen will appear when you start your computer. From here, you can repair Windows or enter your BIOS.
Why the Change?
While this may be slightly inconvenient, as there’s no way to access the BIOS in normal use without booting into Windows first, it’s surely necessary.
Microsoft’s blog post about this on the Building Windows 8 blog describes how this new system came to be. With the increased boot speed, some systems had a less than 200-millisecond window of opportunity to press a key How To Enter The BIOS On Your Computer How To Enter The BIOS On Your Computer Inside the BIOS you can change basic computer settings, like the boot order. The exact key you need to strike depends on your hardware. We have compiled a list of strategies & keys to enter… Read More . Even the best key-tappers at Microsoft could only press a key once every 250ms — to access the BIOS, frantic tapping, luck, and several computer reboots were all necessary.
This also brings some much-needed consistency to Windows 8 computers — they’ll all have a consistent way of accessing the BIOS. Currently, different computers use different keys at start-up.
While Windows 8 may have some questionable design decisions 6 Ways Microsoft Is Killing The Traditional Desktop In Windows 8 [Opinion] 6 Ways Microsoft Is Killing The Traditional Desktop In Windows 8 [Opinion] The traditional desktop is still around in Windows 8, and it’s probably the best Windows desktop yet (aside from not having a Start menu.) But Microsoft is setting it up for the kill. The writing… Read More that some people will dislike, this shouldn’t be one of them. The new method of accessing the BIOS is necessary and well-implemented.
Do you still remember the key combination for entering the BIOS or do you use the advanced Windows menu?
Updated by Tina Sieber.
The Best Windows XP Software That Still WorksHow to Change the System Language in Windows 8
!function(f,b,e,v,n,t,s)if(f.fbq)return;n=f.fbq=function()n.callMethod? n.callMethod.apply(n,arguments):n.queue.push(arguments);if(!f._fbq)f._fbq=n; n.push=n;n.loaded=!0;n.version='2.0';n.queue=[];t=b.createElement(e);t.async=!0; t.src=v;s=b.getElementsByTagName(e)[0];s.parentNode.insertBefore(t,s)(window, document,'script','https://connect.facebook.net/en_US/fbevents.js');
fbq('init', '1039155796172671'); fbq('track', "PageView");
Source link
0 notes
Text
Home Computer Repair – Do It Yourself?
Home computer repair is not brain surgery! Most computer repairs can be broken down into two specific areas, software and hardware. Now I do admit that in some people’s hand, a screwdriver can be a dangerous object. But if you can change a light bulb without shocking yourself, I’d bet you could swap out a computer part. Software gets a little trickier but is still within the grasp of most computer users.
I’ve been involved in computer repair in one way or another for over 25 years. The three major repairs I get called for on a weekly basis are:
Spyware/Malware Issues Hardware failure (power supplies, hard drives, and ram usually) Computer boot problems (lost password, toasted OS, hardware failure)
All of these can be quite a challenge depending on the value and risk of losing important data, which can be anything from tax records to photos. Any computer can be repaired; it just depends on time and budget. But not all data can be rescued. If a hard drive suffers a catastrophic hardware failure, data recovery is doubtful (unless you want spend 100’s if not 1000’s of dollars for special services).
So the best scenario in any home computer repair solution is have a good backup of your important data before you start any repair. I never work on anything for over an hour without immediately backing it up on another media (USB thumb drives are only about $30 for up to 5 gigs of storage and CD or DVD prices are under a buck). I learned the hard way very early in my computer using experience. It’s much easier to deal with any home computer repair if you don’t have to worry about important data. *Please, backup your data right after you finish this article and start doing it on regular basis.
When you have a secure backup, the home computer repair is a matter of a little investigative work (to determine the real issue – sometimes Windows will point you in the wrong direction) and coming up with a good solution. Let’s look at the best way to prevent each of the three most common computer repairs and if you already have the problem, some possible solutions.
Spyware/Malware – Two good preventive measures to eliminate Spyware and Malware is to keep your OS (normally Windows) up to date on security patches from your friends at Microsoft. This is pretty easy to do if you turn on Automatic Updating in your Security Center (go to Control Panel, click on Security Center, then check that Automatic Updates is turned on). The other is to make sure you have a good Anti-Virus software installed and it gets updated automatically. These two programs give you about a 93% solution.
Another 5% can be addressed with Anti-Spyware software such as Windows Defender (free from Microsoft, just do a search for it on your choice of Search Engine) or Spybot, a free program from www.spybot.info that does a good job too. Where’s the last 2%, well there is no 100% solution I’m sorry to say. Although common sense on where you surf, what email you open, and where you click can generally keep you safe.
What if you are already infected? Well, there are manual ways of removing Spyware/Malware programs but they aren’t pretty and involve a whole lot of searching around and rebooting in safe mode. If you search on the offender (normally most have a common problem) you can find a manual solution. If you would rather skip all that hassle, the most effective commercial program I’ve seen is SpySweeper. Last time I looked it was only $30 per year and could save you a lot of time and pain. You can find it here: www.webroot.com
Hardware Failure – OK, not a lot of prevention available for this home computer repair. Keep in mind that most modern computer components have a 3-5 year mean failure rate. Depending on how much you use or leave your computer on each day, this time period can expand. I have several testing computers that are very old (plus 7 years) that don’t get used often.
But one point I do want to make is that almost every customer I call on for a hardware failure issues had warning signs before the final crash. Strange noises, computer freezing up, frequent re-starts, etc. are causes for alarm. Don’t wait until the computer literally dies, if any of these events start occurring, go to the proactive mode and replace the power supply, hard drive, or ram. Which one? That’s a challenge, I’ve found that some diagnostic programs can be helpful, but a lot of the time it’s experience.
Basic rules of thumb; Freezing, rebooting can be both flaky power supply and RAM going bad. Power supplies slowly loose ability to supply enough wattage, so if you run fine for the first 30 minutes that’s another tip it could be the power supply. RAM just gets flaky due to constant heating and cooling. It will usually start dying slowly too. Both are cheap to replace but the power supply has anywhere from 8 to 10 plugs you get to keep an eye on when changing out. Any power supply above 250 watt will be fine for most computers, 300 watt is better. Match the power supply or RAM exactly or look up the motherboard requirements if you want to jump up in speed or wattage.
On hard drives, boot failure with the message “no operating system” or similar is almost always a controller or hard drive (some hard drives have controllers on them that go south too). When you go to save or copy files and get an error can also indicate a hard drive issue. Noises of any kind coming from your computer can only be the power supply fan or hard drive. Sometimes you can low level format a drive and bring it back but with the cost being so low on new hard drives, why take a chance.
Boot Up Problems – Number one offender is Windows of any flavor. All versions use a “registry” to manage all software, user, and hardware settings. This is just a fancy database of settings but can easily destroy itself. Open files don’t close properly when there’s a software problem and there goes the database integrity. When you go to reboot, the registry is not readable or flat gone. In Windows XP, there are several files involved in the “hive” (5 to be exact). Any one of these can toast itself, but I always replace all five since they are so interdependent on settings.
The easiest fix, if you can access the Recovery Console, is to find a usable set of back up files and copy them to the current area of access. This sounds pretty simple but the directory structure is fairly long and you have to unhide the backup locations. If you go to Microsoft’s knowledge base here you can read all about the Recovery Console and how to replace registry files: http://support.microsoft.com/search/?adv=1 .
You can run the Recovery Console from Windows XP if it is installed or from your install CD if not. But what if you don’t have an install CD (many computers manufacturers don’t provide one anymore)? You can always use a bootable CD with an NTFS write enabled OS (like Linux) and do the same copying of files recommended in the Recover Console information. If that sounds too scary, you can always borrow some friends Windows XP install CD of the same flavor (Home or Pro) to use Recovery Console. OK, no friends have an install CD and no access or desire to Linux CD, now what?
Well, plan B is to take your hard drive out of the computer, change the little connector on the back of the hard drive to slave (most hard drives have instructions right on the case to show how), and connect it to a working Windows XP computer. Now you have access to the drive with an NTFS write enabled OS. Go back to the instructions on Recovery Console fix and get after it.
If the hard drive won’t even light up or spin, well then you get to install a new one. Most of the new units have a CD that will handle all the details of adding the new hard drive. Then you get to use your Recovery CDs from the manufacturer to install the all the original software on the new hard drive. Don’t have the restore disks? Check with the computer manufacturer and they’ll sell you a set for under $20 usually. Make sure you give the exact model number to get the right software for your unit. Whenever I buy a new computer, if I don’t get a set of recovery CDs, I order them right then and there. That way I’m ready for what ever happens.
So, now you have the basics on home computer repair for the three most common problems. It’s not that hard for most people, just take it slow and read the instructions. Push comes to shove, find a friend who may have a little more experience to help. You buy the pizza and they provide a little experience and moral support.
See Full PLR Article Here: Home Computer Repair – Do It Yourself?
0 notes