#fire emblem guide
Explore tagged Tumblr posts
Visit Tumblr Blog
Explore Tumblr blogs with no restrictions, modern design and the best experience.
Last Seen Tumblr Blogs


Fun Fact
Tumblr’s reach among the 26-to-35-year-olds in the US is 11%.
Text
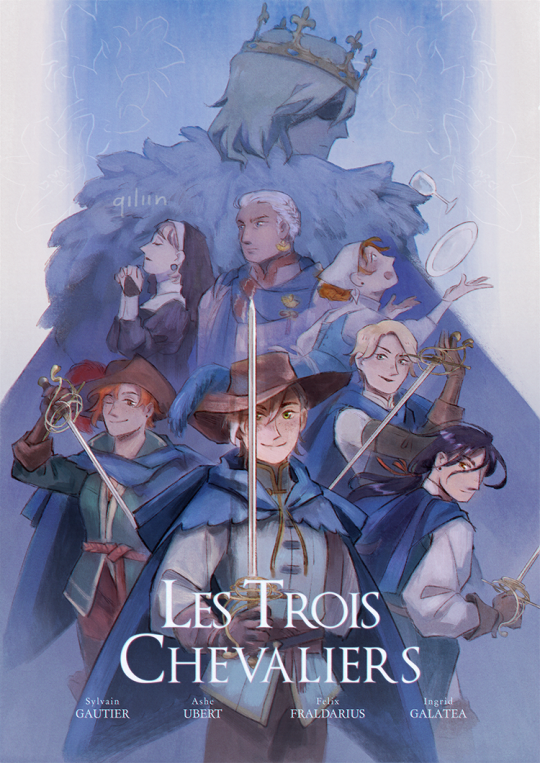
three musketeers inspired AU for Guiding Stars: a Blue Lions zine
🛒 leftover sales just opened!
※ please do not repost my art ※ ➜ commission and ko-fi links in bio
#fire emblem#fire emblem three houses#blue lions#ashe ubert#sylvain jose gautier#felix hugo fraldarius#ingrid brandl galatea#dedue molinaro#annette fantine dominic#mercedes von martritz#dimitri alexandre blaiddyd#blue lions zine#guiding stars zine#zine#zine work#priintaniere#three musketeers au
603 notes
·
View notes
Text


hear me out okay. there are 78 tarot cards in a deck. now you will not believe how many units are in fe12
#fire emblem#my art#fe11#fe12#fire emblem shadow dragon#fire emblem new mystery of the emblem#marth#merric#est#abel fire emblem#katarina fire emblem#kris fire emblem#HEAR ME OUT#okay techincally bc i put both kris' on the same card there are 77 units. but there r plenty of npcs id rather include#than like say. the least popular fe character of all time. frost.#or belf And roberto And reiden#NOT TO SAY I WILL DRAW ALL 78 CARDS. BECAUSE I WONT (not bc i dont want to but bc i physically cannot)#all major arcana are assigned. i hope to draw all of those or at least most of them.#im struggling w minor arcana bc half the characters have 0 personality and 0 backstory rip#abel and est were the first cards i thought of#this is real science (dual tab w a fe12 tierlist on one and a tarot guide website on the other)
93 notes
·
View notes
Text

blorbo from my prison break
#macha#machyua#fe5#fire emblem 5#fire emblem#thracia 776#yup i did get weirdly attached to another character with almost 0 screentime#(currently playing fe5 for the first time and am on chapter 16!)#not looking up any guides or anything so pls no spoilers/mechanic discussion lol
65 notes
·
View notes
Text

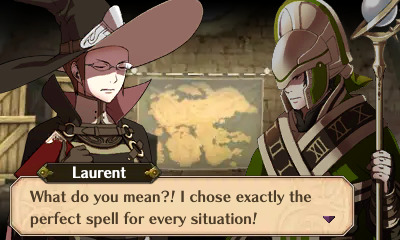
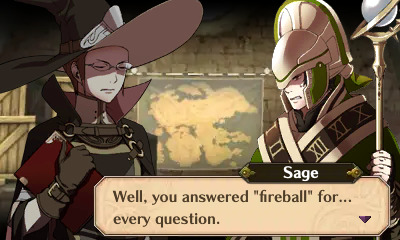
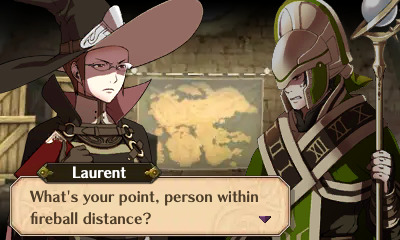
laurent attends a regular magic school (gone wrong)
#fire emblem#fire emblem awakening#fe awakening#fe13#laurent fire emblem#laurent fe#fe laurent#incorrect quotes#source: a crap guide to d&d#my content#shitpost#awakening#maybe this is ooc but i couldnt care less. its funny.
291 notes
·
View notes
Text
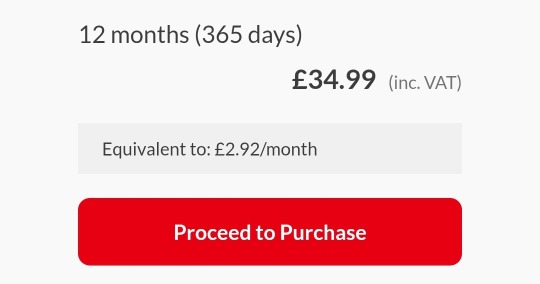
In light of the Gamecube coming to Nintendo Switch online (Expansion) - I got curious and went to see how much a Gamecube is compared to the yearly subscription:
Please note these are UK prices. I don't have knowledge or access to USA prices.
Price of NSO (Expansion):
Prices of Nintendo Gamecubes I found on Ebay


And here are prices of Gamecube games on Ebay:
Path of Radiance


Wind Waker


F Zero GX


- - -
Soooooooooo imo for the price of the NSO Subscription....I think it's best to go for that 😬
#or just continue to emulate I'm not gonna stop you#holy shit you guys weren't kidding about path of radiance !#is the game made out of gold wtf why is it so pricy????#kind of sad to see wind waker so high now#I think brand new it was about 40 or 50? i don't remember I was only about 8 when this game first released#we had the stragety guide and everything ☺#nintendo switch#nintendo switch 2#nintendo switch online#wind waker#fire emblem path of radiance#path of radiance#the legend of zelda#tloz wind waker#f zero gx#f zero#fire emblem#gamecube#nintendo gamecube
12 notes
·
View notes
Text
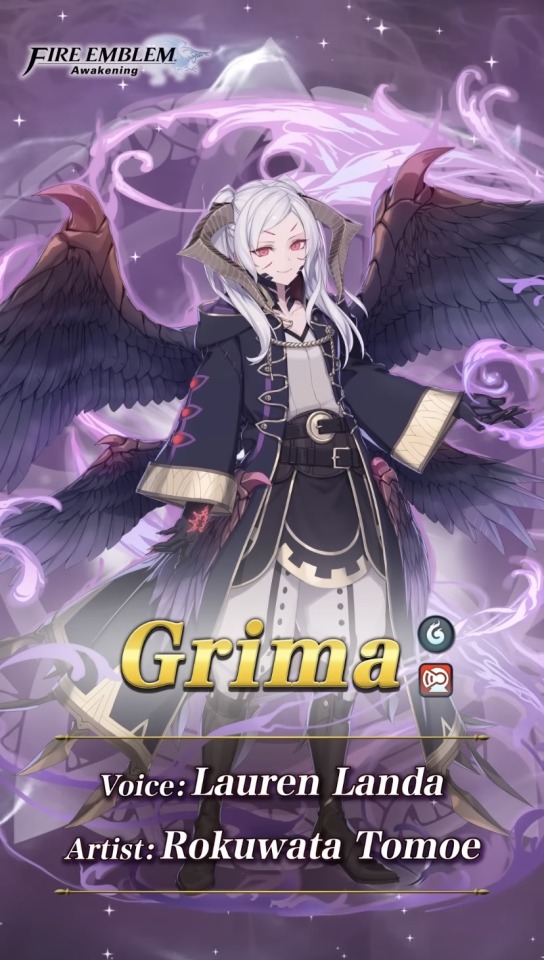


I'm sorry but this is so funny
#feh#fire emblem#fire emblem heroes#anyways we finally have six eye six wing Grima Robin in FEH#that's all that matters#also noticed that#despite having different artists the details are very consistent between them there must be some kind of style guide for this form
9 notes
·
View notes
Text
Fire Emblem: Three Houses Comprehensive Guide
I'm making this guide because I noticed that while there are others with the same information elsewhere, many of them are incorrect or not as comprehensive as one might like. It started as my own personal notes, but I figured I'd go a little deeper and post it for anyone else like me who wishes to choose the "correct" dialog options/is curious what the choices not picked lead to, among other things. I plan on going through the main story to start, and then do guides for all advice/classroom questions as well as tea time and gifts for each character. This will be a post as I go project with no specific schedule in mind, so stay tuned for each chapter's guide as I will only be posting them as I complete them!! Please feel free to ask questions about any route though, or if you have something to add I may have missed and/or corrections to anything I might have gotten wrong!! I have an ungodly amount of knowledge and time into this game, may as well put it to use lol
All that being said, there WILL be spoilers!! I will do my my best to be as vague as I can overall, seeing as I can't block them out on tumblr, but I apologize if I miss something!!
General Notes:
- Byleth's canon birthday is 20th of Horsebow Moon (9/20 or September 20th for us), this makes a good default if you dont have one in mind like me
Male Romance Options (Alphabetical):
• Alois (Platonic)
• Annette
• Bernadetta
• Catherine (Unless you choose Edelgard at the midpoint in the Black Eagles Route)
• Constance
• Dorothea
• Edelgard (Black Eagles Only, Must choose her at the midpoint of the game in the Black Eagles Route)
• Flayn (Unless choosing Edelgard at midpoint in the Black Eagles route)
• Gilbert (Blue Lions only, Platonic)
• Hilda (Unless you choose Edelgard at midpoint in Black Eagles route)
• Hapi
• Ingrid
• Jeritza (Same restrictions as Edelgard)
• Leonie
• Linhardt
• Lysithea
• Manuela
• Marianne
• Mercedes
• Petra
• Rhea (Unless choosing Edelgard at the midpoint in the Black Eagles Route)
• Shamir
• Sothis
• Yuri
- Female Romance Options (Alphabetical):
• Alois (Platonic)
• Ashe
• Balthus
• Caspar
• Claude (Golden Deer Only)
• Cyril (Unless choosing Edelgard at the midpoint in the Black Eagles Route)
• Dedue (Blue Lions Only & You complete his paralouge/save at least half of the Duscar army before time skip)
• Dimitri (Blue Lions Only)
• Dorothea
• Edelgard (Same restrictions as male Byleth)
• Felix
• Ferdinand
• Gilbert (Blue Lions Only, Platonic)
• Hanneman
• Hubert (Same restrictions as Edelgard)
• Ignatz
• Jeritza (Same restrictions as male Byleth)
• Linhardt
• Lorenz
• Mercedes
• Raphael
• Rhea (Unless choosing Edelgard at the midpoint in the Black Eagles Route)
• Seteth (Unless chooseing Edelgard at midpoint during Black Eagles route)
• Sothis
• Sylvain
• Yuri
- It should be mentioned that while it is possible to gain or lose approval with Jeralt, there are no rewards or penelties for this as he does not have supports like the other characters, though he was originally intended to have them according to the game files
- Similarly; Sothis' approval only matters if you plan on pursuing her paired ending/"romance" route. Dialog options are the only way to gain or lose points, so choices that gain approval are important if you want this path, otherwise they sereve no purpose
- With gaining approval between the three house leaders, you can only earn supports with them if you choose to teach their house, afterwards you can no longer gain or lose approval with the other two. The choices during the prologue that can gain you points simply serve as a headstart of sorts for whichever house you plan to choose in the long-run.
- Each route, of which there are four despite there only being three houses, has a story of its own with different characters only accessible in that specific route. Those characters are listed above under the Romance Options for both male and female Byleth since supports between characters/Byleth's chosen S support/Ending Route are the only things really affected by them. Characters with these route specific restrictions will become locked via their supports with all characters even if they were accessible before the timeskip
- There are many supports between all the characters that also become locked after the time skip/need to be accessed before a certain point or can only be unlocked after reaching a certain point in the story. I will list those in another post and link it once finished
- As far as I can tell, if you skip a scene of dialog, if there was a choice to gain or lose approval somewhere along it, it simply doesn't affect the approval rating it was tied to. However, I would imagine if you get until a choice needs to be made, it will count towards the tally should you skip after choosing it
----
Part One; Prologue: An Inevitable Enoucounter
General information:
- You don't need to follow Jeralt's instructions if you do not wish to
- You will only lose the battle if you, Edelgard, Dimitri and Claude all fall. - Because of this, on higher difficulties it may be better to simply let Jeralt handle most, if not all of the enemies he can
Dialog Choices (In Order):
(The choices that are bolded are the ones I tend to pick simply because I feel they fit or flow better than the others, they're just there for fun uwu)
Before battle (Game Start):
- Human, ghost, demon - You have to choose human to progress, she will make you choose again minus the one you picked the first time around if you answer ghost or demon, both of which earn same response of "Do not deceive, you would do well to keep your wit in line."
- War: "Massive armies clashing on a vast field, right? There hasn't been a battle like that in over three centuries..."
Girl: "You've described her to me before, I don't think I've ever met anyone like that.."
- "Oh, right" or "Of course" Both earn the same response but "of course" nets Jeralt approval +1 while "oh, right" is -1
Battle Dialog:
- Have the three kids talk to you (Byleth) if you'd like, it's just there as extra flavor. If not, here's what they say:
Edelgard: "You have a strange aura about you...You say you're a mercenary, so show me what you can do."
Dimitri: "Thank you. We are in your debt. It wouldn't do for us to fall in a place like this. Please, lend us your strength. Let's work together to drive our these thieves!"
Claude: "It's because of you guys I'm not dead right now. Thanks for that! I didn't expect to run into mercenaries like you in some remote village. The gods of fortune must be smiling on me!"
Unique boss dialog upon first initiated combat against/by Kostas (also a simple extra):
- Byleth - "Hey, you with the blank stare! Outta my way!"
- Dimitri, Claude, Edelgard - "I'm gonna kill you where you stand..."
- Jeralt - K: "What the?! Aren't you Jeralt the blade breaker? What's a renowned mercenary like you doing here?"
J: "I'm the one who should be complaining. I'm caught up in the mess you started!"
After battle w/ Sothis:
- "What are you talking about?" or "Sothis?" both earn "I was not able to recall my name... until just now."
- "I am no child." - "Ha! Such arrogance. You look the part, but are you truly an adult?"
"I'm less than a child?" - "Correct! You understnad." (+1 Sothis approval)
- "Thank you." - "There now. Is gratitude so much to ask? I did deem you worth saving, after all"
"You stopped time?" - "Hm. I do not hear your gratitude. Perhaps I should force you to leave?"
Either way you give your thanks and earn the same response as if you thanked her right off
- "What will happen when time resumes?" or "What now?" both earn "When time begins again, the axe will tear into your flesh, and you will surely meet your end."
- "Turn back the hands of time" - "Of course! I must turn back the hands of time!" (+1 Sothis approval)
"Keep time frozen until I'm safe" - "That is ridiculous! Oh, but perhaps..."
"I'll just stay here and wait to die" - "As if I could stand idly by and watch that come to pass! Oh, but perhaps..." (-1 Sothis approval)
After Battle:
"He is a stranger to me" & "I'm a bandit" both earn "Great sense of humor, this one. Clearly cut from the same cloth as the captain" from Alois BUT the first earns -1 approval from Jeralt while the second you get +1 from Alois instead
"That is correct" - "Is that so? Well, physical differences aside, your mannerisms do remind me of the captain."
- "The Knights of Seiros?" - E: "You haven't heard of the Knight's of Seiros? The most famous knights in all of Fodlan?
"I didn't know he was a captain" - "How curious. I'd wager the explaination for that is fascinating indeed." (+1 Edelgard Approval)
- Andrestian Empire: "A wise choice. Though the Empire has fallen from its former glory, the other regions are merely offshoots that pale in comparison." (+1 Edelgard Approval)
Fareghus: "Understood. Faerghus is a noble and distinguished kingdom that has always valued chivalry." (+1 Dimitri Approval)
Alliance: "Is that right? Well, that's a win for the Alliance, so I suppose I'm obligated to be happy." (+1 Claude Approval)
- At the choice to ruminate in your thoughts between Dimitri, Edelgard, and Claude it doesn't matter which one nor the order you pick them in as you will go through all three before progressing.
Edelgard: (She is a refined young woman...But I feel as though she is always evaluating me...)
Dimitri: (He seems quite sincere...But I sense a darkness lurking beneath...)
Claude: (His easy smile is striking...But that smile doesn't reach his eyes...)
After that, you all begin your trek to the Monastery
(End of Prologue)
Chapter One, Part One: White Clouds
General Notes:
- You are considered part of the church until choosing a house, this is a good point to save after completeing the first quest but before you report back to Rhea if you wish to do different routes in the future but do not wish to go through the prologue or charcter interactions again. Any dialog choices made during it will not have an effect on anything but approval points, which are easily gained even if you didn't choose whichever options would gain you one of the three's approval
- During your first quest, Informal Introductions, while you do have to speak to each leader to progress the quest, you do not have to actually go through all the students they will tell you about. It's just a general look into their stats as well as a short insight as to what the house leader thinks of them. Interesting, but not nessecary. When they ask if you would like to hear more, say no and it will end the conversation but count as "speaking" to them. They do not comment on this nor is there a penelty for not listening to them
- You can speak with many other students/faculty in greeting in this stage as well. It doesn't count towards anything, but again, it's an intersting look into the characters.
- In order to speak with those on the far end of the second floor (the offices/library), you either should go at any point beforespeaking with all three of the house leaders, or choose to keep exploring if prompted once speaking with the three, then head to the second floor, speak to who you wish and head back to the glowing spot at the entrance of the audience chamber where you started to complete the quest
Dialog Options:
-"Her?" - "You saw her in the courtyard earlier, didn't you? The archbishop...Lady Rhea."
"You've been here before?" - "I've never spoken of this to you before, but...many years ago, I was a knight here. I reported to the archbishop...Lady Rhea."
- "The archbishop?" & "Lady Rhea?" both earn "As you know, the majority of the folks in Fodlan are devout followers of the teachings or Seiros. The leader of that ridiculously large relious organization is the archbishop. Lady Rhea."
- "My name is..." Rhea: "A fine name indeed" (+1 Rhea Approval)
"..." - Seteth: "You must at least show the basic curtosy of telling us your name! Do you not think you are being a bit rude to the archbishop?"
Rhea: "It is alright, Seteth. My Dear, I am called Lady Rhea. I am the archbishop of the Church of Seiros.
In truth, I was only being polite. I already know your name, and what a fine name it is."
- "As a servent?" & "As a mercenary?" both earn "Nothing like that. They want you to teach, by the sound of it"
-"You're a physician?" - "(Good-natured laugh) I look too pretty for that line of work, do I? But yes, when I'm not teaching, I can be found in the infirmary."
"You're a songstress?" "Of course. Before I came here, I belonged to a renowned opera comapny. Perhaps you've heard of me? The Mittelfrank Opera Comapny's beautiful, peerless--"
After choosing house (Happens no matter the choice):
- "Do what you can to find out "- "Yes of course. I'll get to the bottom of it straight away" (+1 Hanneman Approval)
"There is no need" - I most strongly disagree! There absolutly is a need. My Crest research is of critical importance to the church, I'll have you know. Since you are now a professor here, I must insist that you aid in my research.
Of course, there are those who lack the foresight to aid in my endeavors, such as that stubborn Seteth. But such individuals are the rare exception."
Either way, you comply and discover you have a "Mystery Crest"
---
This is the end of the prologue/the initial start of chapter one where you become the professor for the class you picked earlier. I'm starting with the Blue Lions route as I feel it is best for the first playthrough because of how it plays out in the key points of the story. Ultimately it doesn't matter which order you play them in, it's simply my opinion this is a good place to start if you wish to better understand the main plotline (I'm also biased for Dimitri, but that's neither here nor there lol)
I will post the dialog options and other such important moments/information like that above as I complete the chapters. Again, I cannot promise this will be done in a timely manner nor on a schedule, simply when they are completed I will post them. I will link back to Chapter One of each route here as they're posted as well!!
#listen.#i might as well use the hyper focus lmao#didnt know where to put this#so tumblr will do for now lol#might put it on reddit or smth too idl#i have no idea how reddit works ive never actually like#used it despite having an account lmao#ooc#mun stuff#fe3h#fe3h guide#fire emblem three houses#mobile bound
10 notes
·
View notes
Text
So, I've been playing the original NES/Famicom version of Fire Emblem: Shadow Dragon and the Blade of Light. I downloaded it on Switch sometime ago, and I've put it off for a while, and caused it to collect digital dust until fairly recently. I've had a pretty fun time playing it, and will put much of my impressions about the units here. I will be using "NES" as a synonym for "Famicom" for simplicity's sake. And so far, my impressions are as follows. Spoiler warning for those who haven't played. Though this is a 35 year old NES game. And I apologize for any repeated information throughout this blog post.
The trading and convoy systems both suck. Big time. One literally isn't trading. It's just one unit giving items to another, one. At a time. And if that's not bad enough, you're charged 10 Gil for every single transaction you make at the convoy, be it withdrawing an item or depositing one. Also, you have a Convoy capacity of 50. So chances are that, even if you're pretty conservative with your resources, you're gonna need a spare unit to act as a makeshift item storage. (Maybe that's why some units have such poor growths?) Thank God that these two mechanics got reworked and streamlined.
Res caps at 7. On top of that, Pure Waters, Parthia as an item, and the Barrier staff, all temporarily raise Resistance, with the amount raised dropping by 1 every turn, just as they always have done. But the difference here is that they don't raise Resistance past the cap, unlike in future titles. I even tried testing this out when I had given Linde a Talisman to boost her durability when fighting against Gharnef with and later having Wendell use Barrier on her, only for the Barrier staff to have no effect.
There's no battle forecast. Meaning that you have to make battle calculations yourself if you want to be sure that your units will come out okay. You also won't know if an enemy will drop an item or not unless you have previous knowledge like from personal experience from a previous playthrough or a guide like on Serenes Forest or the Spanish Fire Emblem resource called "Fire Emblem: Wars of Dragons", which does have an English Language option for most of its pages. (That's literally what it's called. Abbreviated as FireEmblemWod.)
Marth is undeniably a great unit in this. However, he's not invincible. 7 base physical defense, and 18 base HP can only get you so far. Luckily, that 18 base HP has a 90% growth. So, he's almost guaranteed to get more health. But still. You never want to give him more than he can chew. That same 7 Def has a growth rate of 20%. Which is not great, but also pretty par for the course in terms of Def growths and bases for most units in this version of the game. He's the only unit who can use Rapiers, which are surprisingly common in this game. Making him a great unit to eliminate Cavaliers, Paladins, and Armor Knights with. At the end of Chapter 6, he'll get the eponymous shield, the Fire Emblem, which lets him function as a Thief without the ability to use Master Keys. In Chapter 18, after speaking with Est, he'll get Mercurius, which boosts his stat gains, albeit by a random increase on level up. Which is a 25% chance to grow 2 points in one stat in all of the stats he gains on a level up. It's pretty solid, but not very consistent. (Why Mercurius is locked to him in this, I'll never know. But, at the same time, it's probably good that it is in this game, considering its effect.) However, this highlights a flaw of Marth's that prevents him from getting notably stronger than most of your units, that being that he can't promote. Most other units in this game have access to about another 10-20 levels, depending on when they promote. Marth has only 19 levels throughout the whole game to level up through, and his growths aren't high enough to help make up for his lack of promotion. (I can see why he was given 10 extra levels on DS.) He's also the only unit who will have the easiest time against Medeus. (More on him later.) But you need to defeat Gharnef in order to ensure that. As Gharnef will drop the Falchion. Speaking of, yes it can't break. But contrary to what you might think, it only prevents Marth from being countered by anything that isn't a Manakete in this game, on top of being effective against Medeus, specifically. It doesn't negate all non-manakete attacks, and in fact WON'T prevent Marth from being attacked at all. (It's also not effective against enemy Manaketes other than Medeus, unlike in later titles.) And it can be used like a Elixir, which is always a plus, and way better than the 10 HP recovery in the DS version. It also has 10 Mt, though, which isn't spectacular. While a nice weapon, it's not on the level of, say, Ike having Ragnell towards the end of Path of Radiance, or Sigurd having Tyrfing towards the end of Genealogy of the Holy War's first part, Dimitri having Areadbhar, or Edelgard having Aymr. I genuinely feel like Falchion had better outings on Super Nintendo, the 3DS, and in Engage. (And Gaiden and its remake, if you want to count them.) Definitely feed him stat boosters to help ensure ease against Medeus. But still a very solid unit without them. Undeniably one of the best units in this game, even if a tad overrated. Joins automatically in the first chapter, and is your main character. He dies, and you have to restart the entire chapter.
Caeda is easily your best Lance user, bar none. Her only downsides are that she's on the frail side to an extent, and her physical Strength is practically non-existent, being a 3 base and a 20% growth. Her ability to cap Speed easily makes her the best user of Silver Lances in particular. In fact, she'll likely cap Spd before she ever reaches Lvl 10. But without a Power Ring or two, she will struggle to kill foes at some point. Thankfully, her combat and her durability get a boost once she promotes. Still, a solid unit. Though she has better outings on the Super Nintendo, the Nintendo DS, and in Heroes. Her high Mov also means that she's the first to visit shops. Joins automatically in the first chapter.
Cain and Jagen are effectively two copies of the same unit. The most notable differences being that Jagen has more movement, durability, and can use more weapons, and Cain does get faster without stat boosters. That is at first. Jagen's growths generally don't let him grow any higher than his bases. (Unless you're lucky.) If you're not using stat boosters on him, what you see is what you get with him. But growths alone do not make a unit. And this fact is why I refer to him and Cain as copies of each other. Without stat boosters, however, Cain will undoubtedly surpass Jagen. But at the same time, unless you give him too much more than he can chew, Jagen's rarely going to die from things in this version of Shadow Dragon. If you give him a Speed Ring, he'll be doubling most enemies (14 Spd is no joke in this game), and giving him a Power Ring will drive his Atk with a Silver weapon to 25. Stat boosters really go a long way in this game, it's Super NES remake, and its Super NES sequel. Both join automatically in the first chapter.
On the note of Jagen's growths not letting him get any higher than his bases without stat boosters, I should mention that his poor growths are pretty much a way to discourage using him too much. Especially since EXP growths are all the same for everyone across the board, regardless of level: whatever the enemy gives you. For you, the EXP stat shows you how much EXP a unit has. Their level, as expected, goes up by 1, whenever you get 100 EXP. However, you'll notice that enemies have an EXP stat as well. What that generally means is that is how much EXP you'll get upon defeating one. No exceptions. It doesn't matter what level your units have, or if they're promoted. What you see is how much you'll get.
Speaking of promotion, your units' levels all truly reset after promoting. So there's typically no real incentive for using growth units over prepromoted ones beyond potential stat boost that vary from level to level and aren't even guaranteed to raise upon a level up. Adding salt to the wound, promotion gains on your unit are pretty wonky. They work like this: If your unit, at the time of promotion, has stats that match or surpass the base stats of the class they're promoting to, they basically get zilch except for movement, and access to another weapon type in the case of Mages and Clerics. If at least one of their stats are below the of the class they're promoting to, their stats will be adjusted accordingly to match that of the class they're promoting to. In Caeda's case, for example, on top of a level reset, a promotion for her behaves like, at most, 2 Dracoshields and a Power Ring. So that's worth considering. What units you promote is at your own discretion.
Abel is the only Cavalier you get who has a Strength growth above 40% until Arran joins. He's otherwise as useful as Cain and Jagen. And his growths, like with Cain, will let him surpass Jagen provided Jagen doesn't get stat boosters. Especially in Str, which he edges out over Cain. Both aren't lacking in the Spd department, which gives Abel a slight edge. Joins automatically in the first chapter.
Draug is there to help you form choke points and nothing else. Joins automatically in the first chapter.
Gordin is there to help you deal with earlygame fliers and nothing else. If you can get him up to Level 10 before you get that first Orion's Bolt, more power to you. Joins automatically in the first chapter.
Wrys is only valuable as your healer until Lena joins. Bench him afterwards. Recruit him in the first chapter by having Marth visit the westernmost village. Neat that he teaches you about the possibility of recruiting characters in villages.
Ogma is basically a Cavalier without a horse and without the ability to use Lances. Solid outing for his first time. But if you're playing through this game quickly, he will struggle to level up. Joins automatically in Chapter 2.
Barst is the best one among the three axe fighters that accompany Ogma. Unfortunately, like Marth, he will never promote, and axes have almost no variety in this game. They don't even have a legendary weapon. It says a lot when the strongest axe in the game is the Devil Axe, which has a base 21% chance of hurting its user. On that note, Axes can be pretty hard to come by at certain points. Like Ogma, he will struggle to level up without a mount. He also has the semi-unique niche of having a 50% Def growth, interestingly enough. The only other unit that shares that niche is Bord, who sucks. Joins automatically in Chapter 2.
Bord, as mentioned before, sucks. Cord also sucks. Don't bother with them. Both join automatically in Chapter 2.
Darros manages to be somehow worse than Bord and Cord. Bench him if you recruit him. Even though he has the unique niche of being the only ground unit who can swim effectively, he's not worth it. Recruit him with Marth in Chapter 2, will likely recruit himself to your team. I like that he teaches you about recruitable enemies, though.
Castor for a while is marginally better than Gordin, with the emphasis on "for a while". Recruit him in Chapter 2 with Caeda.
Julian oddly has solid growths despite being a Thief. However, he cannot promote, like Marth, and he's not important to bring into the final battle in this game except to open doors. And since he has no Weapon Level growth, he's not wielding Silver Swords without Manuals. On that note, Rickard is just Julian but joins later, has worse bases, has worse accuracy, and is less important. I've so far only ever used them to open doors and chests in this game, anyways. Julian joins automatically in Chapter 3, and Rickard joins after speaking to him with Marth or Julian in Chapter 6.
Lena is going to be your main healer throughout the game apart from Wendell and eventually Boah, Merric, and Linde. However, Priests and Clerics in this game have this odd mechanic that only ever lets them gain EXP if they manage to take a hit from an enemy and survive. Ugh... So glad that this was fixed in the Super NES remake and sequel. But yeah. In this game, don't bother leveling her up. Just use her as your healer and that's it. Thankfully, she eventually gets Hammerne, which is her Prf. And it can be used to fix some of your weapons and staves. So there's that. The only downside is that Hammerne cannot be used to repair Mercurius, Gradivus, Parthia, Excalibur and Aura. The most valuable of things to repair are Warp, Barrier, Physic, and Fortify staves. Keep that in consideration as you're using it. There's also a lone manual that you can get in the game. Since she can't level up without tanking hits, she's a solid candidate for it, opening possibilities of her using staves like the aforementioned Fortify and Barrier. There's not much competition for it, either, since Jeorge could possibly use it so he can use Parthia, he can take a few levels to reach that kind of capability anyways. So Lena edges out in competition in this regard. Joins automatically in Chapter 3.
Navarre in this is basically Ogma with slightly worse bases, but better growths. Either one is good, though they lack mounts and ranged options,. Just don't expect either one to be dominating. Recruit him in Chapter 3 by talking to him with Caeda.
Merric is your best offensive magic user, period. (At least until Linde joins.) However, with the way offensive magic works in this game, Str is wasted on him, Wendell, Linde, and Boah. Every tome's Mt is the magic user's attack power, no exceptions. But Skl has some value in determining crits, even though accuracy is similarly calculated by the tome's Acc and. Furthermore, he does come with Excalibur, which is strong enough to work as a boss killer as well as a deleter of problematic enemies such as Wyvern Knights, Armor Knights, Generals, Ballisticians, and Fire Dragon Manaketes. (Mage Dragon Manaketes are immune to magic, unfortunately.) It's worth noting that Excalibur in this game has no effectiveness against fliers and otherwise has almost identical stats to Thoron. So it is effectively replaceable at some point. And, of course, he's a prime candidate for Starlight and thus fighting Gharnef. Also, he gets staff utility after promotion. Meaning utility for things like Warp, Physic, Barrier, and Fortify, which is amazing by itself. Solid unit. Worth using him. Recruit him in Chapter 4 by visiting the northwestern village, by the squad of Cavaliers.
Matthis sucks. Bench him if you recruit him. He can be recruited by having him speak to Lena in Chapter 4.
Hardin is an amazing Cavalier to use right off the bat. Silver access at base. Solid bases. And good growths. He definitely deserves the moniker "Coyote". I've heard that some people call him "Jagen with growths", and I can definitely see why. Joins automatically in Chapter 5.
The same, however, cannot be said for his squad. The best one among them is Wolf. But that's not really saying much, seeing as he requires investment to use anyways, and you're not gonna get much long term use from his growths. His Skl growths prevent him from being any more accurate with Bows beyond what his Luck and his weapons themselves allow, and his Spd growth limits his doubling abilities. Sedgar sucks. Vyland sucks. And Roshea sucks. Don't use them any more than you have to. Especially in regards to enemy fliers in Wolf and Sedgar's case. They all join automatically in Chapter 5.
For Wendell, remember Pent? From Fire Emblem: The Blazing Blade? This guy pretty much laid the foundation for Pent later on, though he joins earlier in this game and their remakes than Pent joins in his game. His bases are solid, especially his SPD, which is amazing, and his Weapon Level lets him use every single time and staff that isn't a Prf. His offensive utility depends on what tomes he has, so you won't be able to see him one round most enemies until he gets stronger tomes. Because of this, you're definitely gonna want him to weaken enemies. Alternatively, he can use Warp, Physic, Barrier, and Fortify staves no issues. With regular use, he should be able to do pretty well against Gharnef. Though he'll have lower HP than a promoted Merric or Linde, the key word here is "promoted", and he's still solid even after Merric and/or Linde promotes. Easily one of if not his best outing, here. Recruit him in Chapter 5 with Marth or Merric.
Bantu is easily your best tank throughout your entire playthrough until Minerva joins. Bantu outright benefits from the +12 defense the Firestone gives, due to himself having a 3 base Def and no Def growth. It also gives him 18 Atk, and no way to boost it without boosters. Making him pretty much a pure damage sponge for any enemy that doesn't use magic. (Enemies that can use magic are pretty much ripping through him, unfortunately.) Shame he got nerfed after this game. It's worth noting, however, that getting his Str to max gets him to 36 Atk; 4 points higher than the highest attack one can reach in this game with a Silver weapon. And that he's one of 2 units you can play with that can break the 20 Def cap, reaching up to 32 Def when maxed out. Which I would say is awesome, but impractical. Especially since he gets nothing from EXP. And you generally don't want anything with Def past 20 in this game, anyways. Recruit him in Chapter 7 in a closed off village near where you first see Minerva.
Caesar and Radd are essentially Ogma and Navarre with even worse bases, and lower availability. Casar also seems to have the worst growths of the mercenaries in this game. Don't bother with Caesar, use Radd only as a replacement. They join automatically in Chapter 8.
Roger sucks. Bench him if you recruit him. Recruit him with Caeda in Chapter 8.
Jeorge is your best bow user in the game. Sure, his growths are nothing special. You really want him, however, for his bases. He can use Silver Bows with no investment, and is a points in his own Weapon Level away from being able to use Parthia, which one-shots Wyvern Knights, and can be used as a Pure Water to prepare for Mage deletion. Definitely use him to delete enemy fliers and weaken or perhaps delete enemy Bishops. You can recruit him by visiting the northeastern village in Chapter 9, but you have to be quick about it, as there's a Thief looking to destroy it.
Maria is basically a replacement healer, and nothing more. One interesting point about her is that she can use every staff except for Hammerne (which is exclusive to Lena) and Aum (exclusive to Elice) right off the bat. But when you have guys like Wendell and eventually Boah do the same thing and with the ability to defend themselves using Tomes, you'll find that she doesn't have much use beyond being a replacement. She'll be locked up when you first see her. Unless you really need her for something, just have Marth recruit her so Minerva can recruit herself to your team, and that's it. Open her cell in Chapter 10, and then have Marth talk to her to recruit her.
Going back to Minerva, she's easily your best mobile tank, boasting 14 Def on top of 10 Mov. She's essentially an Armor Knight on Wyvernback. And that 9 base Strength gives her solid attack. However, that 6 base Speed with a 40% growth isn't particularly great. Meaning that she's behind your other units, offensively, for quite a while. But she's still a decent unit. Even if only to serve as a meat shield. Or Arena Abusing. Just keep her away from enemy Bishops, Archers, Snipers, Hunters, and Horsemen. To recruit her in Chapter 10, recruit Maria first, then she'll track Marth down to recruit herself to your army.
Linde in terms of gameplay pretty much laid the groundwork for later-joining female mages that tend to have their own benefits compared to their male contemporaries. Like Tailtiu, Tine, Lilina, Ilyana (PoR), Miriel, Nyx, Ophelia, Lysithea, etc. And it's nice to see where this idea has its roots. In her case, she's essentially a nuke, not unlike Micaiah in Radiant Dawn. Aura is that freaking strong in this game. 20 Atk and nothing that enemies can defend against it with? Yes please. Don't ever feel bad about using Aura. Definitely comes in handy in that chapter with all the Ballisticians. And useful against Wyvern Knights, Armor Knights, Generals, and Fire Dragon Manaketes, as well. Once she's trained up, she's essentially a second Merric. With liberal use, she'll even end up faster and more accurate than Merric, but more frail as a tradeoff. In fact, she'll likely cap Skl, Spd, and maybe even Luck, before you even see your first Bishop's Ring. Promote her or not, she's a solid candidate for Starlight. And if you promote her, she'll even be able to do everything that Wendell and Boah can, meaning utility for staves including but not limited to Warp, Physic, Barrier, and Fortify. Very solid. Recruited in the village in eastern town in Chapter 11.
Jake is literally a weaker version of Jeorge in this game. Stuck to 2 range and 4 Mov. Situationally useful against Wyvern Knights thanks to his Arrowspate. But that's about it. To recruit him in Chapter 11, talk to Anna in a house to the east near where you recruit Linde first, and then have Caeda to talk to him to recruit him.
Boah is pretty much a replacement for Wendell, should Wendell perish. Or to act as a second Wendell should the actual Wendell be carrying too much stuff to use the Tomes and Staves you want him to use. Also, he can double most enemies at base. Dude has quite a lot of utility in this game. Thanks to his bases, mainly, his growths are horrible otherwise, but still. Joins automatically in Chapter 12.
Midia is pretty interesting in this version of the game. The influence she has on Isadora from The Blazing Blade shines pretty greatly here, even gameplay-wise. Mostly identical bases to Jagen. Might not stack up to Cain, Abel, or Hardin, assuming you've been regularly using them. But still very solid. Especially since Paladins are so good in this game. Could use a Seraph Robe to bolster her durability. Joins automatically in Chapter 12.
Dolph and Macellan are a couple of jokers. Don't bother. Especially not with Macellan. Both join automatically in Chapter 12.
Tomas is a filler unit. Joins at Level 8. But his growths are horrid. Thankfully, there's not much competition for Orion's Bolts, since Gordin is the only character that could actually use one. Speaking of Orion's Bolts, I wish you could sell them in this version of the game.
Beck is the second of your Ballisticians, and just as situationally useful as Jake. He comes toting the Thunderbolt, the only weapon with effective damage against Ballisticians. But since Ballisticians have 4 Mov and 2 range in this game, it's better to use a Mage or Bishop to take care of enemy Ballisticians. He's recruited in a village along the middle of the three paths.
Astram is basically a replacement unit. Solid, but nothing more. If you have been using Ogma or Navarre by this point, he's pretty much a benchwarmer. If you haven't, he serves a nice use on your team. You definitely want his Wyrmslayer to deal with Manaketes, especially Mage Dragons, later on. Recruit him with Midia.
Palla will be nearing promotion when you first see her. Her bases are quite solid, just about a point away from being able to double most enemies. 7 Str is pretty par for the course for units that join you when you get her, and she has a 50% growth in that. So she's not exactly lacking in offense, even with her terrible Spd growth of 20%. However, she's competing with Caeda for that first Skydrake Whip. But it is understandable if Caeda's 20% Str growth turns you off from giving it to her, making Palla a solid alternative. Doesn't help that enemies in this game grow alongside your own units. And even if you don't promote her, Palla is still a solid and flexible unit. Like Astram, she too has the valuable Wyrmslayer, making her excellent against enemy Manaketes, especially Mage Dragons. She recruits herself to your team by speaking with Marth.
Catria, on the other hand, joins underleveled, literally Level 3, in the middle of the game. Her bases are also pretty low for that point in the game. Even though she does hover around her older sister's bases at Level 8, the issue is getting there. Not exactly hard to set up, but not exactly a breeze, either. Especially since you're getting about 35 or so EXP from each kill. Meaning there's not much EXP to go around for her if you're playing quickly. Decent filler, but not much else. Like Palla, she recruits herself to your team by speaking to Marth.
Arran is pretty much in the same boat as Midia. That said, his growths are pretty impressive, sans Def. But he'll be nothing more than filler or a replacement. You can recruit him by visiting the western village in the northwest quadrant of the map in Chapter 16. But recruiting him locks you out of recruiting Samson. It's up to you if you value better growths and movement (Arran) or better bases (Samson) in a replacement/filler unit.
Samson is likewise in a similar boat to Astram. But in his case, it's his bases that carry him. Unfortunately, he has worse growths than not just Astram, but Arran as well. Still. He's solid if you want a replacement unit or a filler unit. You can recruit him by visiting the eastern village in the northwest quadrant of the map in Chapter 16. Everything that I said about recruiting Arran and what you prefer from either one applies here as well.
Xane is, full stop, essentially a copy of your strongest unit. No investment required. Free to use right off the bat. Just place him next to your strongest unit, and have him transform into it. You don't even have to heal him in this version of the game after he starts mimicking your units, unless if the unit he's mimicking is already hurt. The only drawbacks are that he requires his own equipment, and that his transformation can only last 5 turns. Neither of which are a significant issue. Especially the 5 turn transformation, since keeping him next to your team is pretty easy. He cannot gain EXP when mimicking an ally, though, not that it matters. He won't ever need it. And a little bit of a funny thing about him in this game. He can mimic allied Manaketes, but has no real way to use Dragonstones without being given one. Perhaps that's foreshadowing about his true identity that early on in the series? You recruit him by speaking to him with Marth, in Chapter 16, in the jail on the east side of the map.
Est manages to join with slightly better bases and offensive growths than Catria. But she suffers from much of the same problems as her, but worse due to her later join time. Don't expect her to nab that first Skydrake Whip even if you spoon-feed her kills. At least she gives you access to Mercurius as soon as she recruits herself to your team just like her sisters 4 chapters ago.
Tiki is an actually useful example of "Magikarp Power". However, due to how high her Def is anyways, WITH her Divinestone BTW (20 Def, literally the cap every non-manakete unit can reach), you're not gonna want to give her Dracoshields at least. Maybe just one Seraph Robe, because some enemies won't even attack her if her Def is too high. (Especially since the Divinestone boosts combined with stat boosters helps her outright break the Def cap.) This isn't to say that she's useless. Far from it. Just, like with anyone else, be careful with how you use her, and she should be alright after some time being spoon-fed kills. She shouldn't have much trouble with enemy Manaketes, not even Mage Dragons, thankfully. Except maybe Medeus's bodyguard, but how quickly he goes down depends on how high Tiki's Str is. In fact, she can one-round the majority of Manaketes in the penultimate chapter with base stats alone, even Xemcel, the chapter boss. Oddly, in this version of the game, she can't do anything against Medeus, himself, even with stat boosters. As that she has no bonus damage against him whatsoever, and her Divinestone without bonus damage is just as strong as a Silver weapon. This means that she can only ever reach 32 Atk against him. She's not even denting him. She also cannot promote, just like Marth and the Thieves. Unlike Marth and the Thieves, her growths are generally high enough to cover for this downside. The only growth that she has that doesn't is in Str, and a Power Ring or two can fix that. She's definitely worth your investment should you use her. Especially since she's deleting enemy Manaketes without much effort. Recruit her by having Bantu speak to her.
Lorenz is a filler unit meant to fill the same niche as Draug. Solid bases, but not much else. His movement is his biggest weakness. Also worth pointing out is that, in this game, Generals are locked to Swords, and are considered a separate class from Armor Knights as well. Recruit him by speaking to him with Marth or Caeda.
Elice is mainly there to give you a means to revive a unit that died that you want to badly bring back. Could come in clutch, but it requires specific circumstances. Also, Aum in this version of Shadow Dragon requires Elice to be in a specific building. Which is actually where the Aum staff is located in the remakes. Other than that, she's a filler staff user.
Gotoh is pretty much mainly there to help you beat the game. Pretty solid durability, as well as capped Skl, Spd, Weapon Level, and even Res. Just have him use staves and delete high Def units and that's it. I also find it kinda funny how he tells you that he can't do anything to Medeus. This extends to every Bishop you have, as well. More on that later.
There's going to be secret shops towards the end of the game, one in Chapter 21, I.E. the one with all the Wyvern Knights and that one boss that, in the DS remake, looks like Ocelot, and another in Chapter 24, I.E. the penultimate story map in the game, that sell stat boosters for your units. On one hand, you're given a crap load of money to spend on them, on the other, you're still limited. I would recommend just giving stat boosters to your most important units such as those you're going to use to fight Medeus with. This means that you should focus mainly on Marth, any Wyvern Knight or Paladin you have that can use Gradivus, Linde or Merric, and, assuming you've been using him until now, Barst. Anyone else, you decide at your own discretion.
Medeus. Hoo boy. He's a doozy. First off, 35 Def? Yeah most of your guys aren't gonna scratch him. Even going back to the Awesome But Impractical 36 Atk Bantu, given that Medeus is on a throne, he's healing any scratches that particular Bantu would do on him. Secondly, his Earthstone has the ability to negate magic and ranged attacks. Not only does this render your Bishops, including Merric and Linde, useless against him (Gotoh wasn't kidding when he said that he can't do anything to scratch Medeus), it also eliminates the possibility of using Bows against him. Maxed out versions of Wolf, Sedgar, Castor, and your Sniper of choice wouldn't do anything to him with Parthia, anyways due to him being on a throne and having high Def. With Parthia and maxed Str, you're looking at 2 damage per strike. If you actually manage to miss the Starlight tome, and thus were unable to defeat Gharnef, then your best bet against Medeus is using either Barst with the Devil Axe (technically, any axe user could work here, but Barst is the only one whose growths give him long term viability), or a Paladin or a Wyvern Knight with capped Str toting Gradivus. But if you did indeed defeat Gharnef, then Medeus is pretty much a cakewalk, as you just need to park Marth next to him, equipped with Falchion, and wait a few turns. How long this takes depends on how high Marth's Str is, but it should be high enough regardless. On average with no stat boosters, you're looking at 10 damage per phase, same as with stat boosters force fed to either of Barst with the Devil Axe or the Paladin or Wyvern Knight with Gradivus. With stat boosters, 30, which no other method can match. Alternatively, and this will take the longest to do, you can use Barst with the Devil Axe, or a capped Str Paladin or Wyvern Knight wielding Gradivus, and hope for the best, given that he or she is doing 5 damage per attack, which translates to about 10 damage per phase. (Also, it's pretty funny how a Str capped axe user with the Devil Axe, or a Str capped Paladin or Wyvern Knight with Gradivus, both do as much damage to Medeus with a crit as a Str capped Marth can do with Falchion but no crit.) It's clear that the Falchion is the intended method, given the ease of use in trying to defeat him with it, assuming Marth has capped Str. At any rate, if you don't have the Devil Axe, if Gradivus broke, AND you haven't gotten Starlight and defeated Gharnef, then you're pretty much SOL and have to restart the entire playthrough. So make sure you defeat Gharnef and get Falchion, get the Devil Axe, and keep Gradivus intact, and give the units that can use them stat boosters until they max out, if you have the money for it.
And now, my breakdown of each class; how I feel about each unit in those classes is independent from this.
Pegasus Knights and Wyvern Knights
+ Access to Swords and Lances
+ High movement, 8 MOV for Pegasus Knights, 10 MOV for Wyvern Knights.
+ Unhindered by most terrain
+ Playable Pegasus Knights can potentially obtain a significant Def boost if their Def stat isn't high enough before promotion.
+ They can also get a Str boost upon promotion, but Caeda's the most likely one who will see that.
- Weak to Bows and Arrowspates.
- Wyvern Knights are also weak to Wyrmslayers.
- Cannot take advantage of terrain bonuses besides the healing effect of Forts, Gates, and Thrones.
- Lances are generally heavier than Swords, and thus are situationally useful as a result.
From a class standpoint, this is the best one in the game, no contest. The drawbacks listed here are generally nothing to worry about in most situations. They will generally have solid offense. And once they promote, they will be able to serve as effective baiting and chokehold units on having solid offense. But they're not invincible. Be smart with them, and they'll reward you.
Cavaliers and Paladins
+ Access to Swords and Lances.
+ High movement, 9 MOV for Cavaliers, 10 MOV for Paladins.
- Weak to Ridersbanes and Rapiers.
- Lances are generally heavier than Swords, and thus are situationally useful as a result.
Another great class to have. Second only to Pegasus Knights and Wyvern Knights. Their only downside in comparison is the lack of freedom over terrain, but they can in turn reap more terrain bonuses. They, however, won't be as durable as Wyvern Knights, Armor Knights, Generals, or Manaketes, however. Meaning that they're mainly used for offense, generally cleanup. Their high movement also helps ensure that they'll get a lot of EXP. They'll likely be ready for promotion by the time you see your first Paladin's Honor.
Freelancers
+ Free copy of your strongest unit.
- Requires his own equipment.
- Transformation lasts for 5 turns.
- Cannot use Falchion
Basically the best of the unique classes because it can be an extra of any unit you need. Just make sure he stays with the group, and he's solid.
Mercenaries and Heroes
+All around solid stats, leaning more towards SPD and Skl.
- Swordlocked, making Levin Swords your only option for ranged attacks.
• 7 MOV.
Best of the grounded classes, besides Manaketes and Freelancers. The key word here is "grounded", however. Since they can't boost their own MOV without Boots.
Lords
+ Can use Rapiers, Mercurius, and the Falchion.
+ Draws enemies towards him, due to the enemy A.I.
+ Essentially becomes a stronger Thief without the ability to use Master Keys once you obtain the game's eponymous object.
- Cannot promote.
- Marth falling in battle triggers a Game Over and thus a map restart.
• Everything about Mercenaries and Heroes applies here.
Great as a unique class, especially when considering that it's Marth's class. Just be careful when using him.
Thieves
+ Can open chests without keys.
+ Can use Master Keys to open doors and drawbridges.
- Swordlocked, making Levin Swords your only option for ranged attacks.
- Generally have low Str at base.
- Cannot promote.
- Cannot use Swords besides Iron Swords without Manuals.
- Low durability.
• 7 MOV.
Good class on paper. But in practice, you're just going to use them to open doors and bridges, and loot chests. Not much else use for them.
Manaketes
+ Weapons have infinite uses.
+ Weapons grant them high Def boosts, which makes them effective tanks, and can potentially make them break the Def cap past 20.
+ Tiki in particular has effective damage against enemy Manaketes (sans Medeus for some reason).
- Weak against Wyrmslayers.
• 6 MOV.
A solid semi-unique class. Like I said, they can break the Def cap, but you don't want to have them do that. Easily the best chokehold class alongside Wyvern Knights. Just be careful with enemies using magic or Wyrmslayers.
Clerics
+ Can use Staves
+ Staves can heal (even from long distances), enhance, or warp units.
- Are generally frail units.
- Requires taking hits to gain EXP.
- 5 MOV.
- Effectively requires manuals to increase Weapon Level.
A must-have for your team. Just don't let them in enemy range, despite the EXP gain. They're nowhere near durable enough.
Mages
+ Can attack enemies from close range or 2 spaces away.
+ Can deal effectively fixed damage.
+ Great against enemies with high Def such as Armor Knights, Generals, Ballisticians, and Fire Dragon Manaketes. Especially in a game where Res can only be boosted by Talismans, Pure Waters, Parthia, and the Barrier staff.
- Are generally frail units.
- Fixed damage means that the mage's offensive power cannot be increased, and that Spd is the only other main factor that determines overall total damage.
- Tomes have fixed accuracy, and thus cannot be influenced by the Mage's Skl or Luck.
• 6 MOV.
Amazing units from a combat perspective. But their uses are generally situational, mainly used to weaken enemies, or in the most extreme situations, delete enemy units. Thoron will be the best tome any Mage can use, overshadowed by only Merric's Excalibur and Linde's Aura. You'll likely be using them liberally to the point where they'll reach Level 20 before you see your first Bishop's Ring. Just try to keep them from being seriously injured.
Bishops
+ Combines the best of both Clerics and Mages.
- Has the disadvantages Mages have.
You'll generally be using these guys to be staffbots and extra chip damage. You can't go wrong with having them on your team, be it a promoted Merric or Linde, or a prepromote like Wendell or Boah.
• 6 MOV.
Fighters
+ Can use Axes.
-Are axe locked.
- Axes are the heaviest Weapon type in the game, being heavier than Lances.
- Axes are also the rarest Weapon type in the game, being carried by few shops.
- No Silver weapons.
- Cannot promote.
- Only Barst has the most impressive growths among the three playable Fighters.
• 6 MOV.
Another class that's good on paper. But they're meant to be used as combat units, making them trickier to use as a class. Doesn't help that only one of them can actually become a truly competent unit.
Pirates
+ Can use Axes.
+ Can cross water
- Are Axe locked.
- Axes are the heaviest Weapon type in the game, being heavier than Lances.
- Axes are also the rarest Weapon type in the game, being carried by few shops.
- No Silver weapons.
- Cannot promote.
- Only 1 playable Pirate in the whole game.
- The only playable Pirate, Darros, stinks as a unit.
• 6 MOV.
Again. Good on paper. But in this case even less useful in practice than Fighters due to Darros's poor growths.
Armor Knights
+ High Def.
+ Access to Swords and Lances.
- Cannot promote.
- Lances are generally heavier than Swords, and thus are situationally useful as a result.
- 5 MOV.
- Playable characters have generally poor growths.
You're gonna be using this class for chokeholds and, whenever possible, bait, and that's it. They're not exactly good to use in the long run due to poor movement and growths, and you end up getting other units that are better at doing what these guys are supposed to do.
Generals
+ High Def.
- Swordlocked, making Levin Swords your only option for ranged attacks.
- Cannot promote.
- 5 MOV.
- Only 1 playable General in the whole game.
These guys, or rather this guy, is basically there to serve as chokehold and baiting filler. Nothing more. Great bases sans Spd, and obviously MOV. But nothing else. Pretty much a worse version of the Hero class.
Archers
+ Can attack enemies 2 spaces away.
+ Every weapon is effective against Pegasus Knights and Wyvern Knights.
+ Very little competition for promotion items.
- No close-range option for offense, limiting their abilities as units and thus their opportunities for gaining EXP.
- 5 MOV.
- All playable Archers have poor growths.
Easily the second worst class in the game. Doesn't help that the units in it don't have much long-term usability. Luckily, they don't have to stick to their MOV, gaining +2 MOV upon promotion. But I heavily doubt that Gordin will be used long enough to be able to use an Orion's Bolt. Luckily, him and Tomas aren't the only Bow users that you can get. And between the two, Tomas is the one who's going to promote to be able to serve as filler, but nothing else.
Hunters
+ Can attack enemies 2 spaces away.
+ Every weapon is effective against Pegasus Knights and Wyvern Knights.
- Cannot promote.
- No close-range option for offense, limiting their abilities as units and thus their opportunities for gaining EXP.
- Only 1 playable Hunter in the whole game.
• 6 MOV.
Basically a marginally better version of the Archer. But not much else. Castor's growths are wasted in this class.
Horsemen
+ Can attack enemies 2 spaces away.
+ Every weapon is effective against Pegasus Knights and Wyvern Knights.
+ 9 MOV.
- Cannot promote.
- No close-range option for offense, limiting their abilities as units and thus their opportunities for gaining EXP.
- All playable Horsemen have poor growths.
Another class that's good on paper. They thankfully can keep up with the rest of your units. But that's not gonna matter when both of the Horsemen you can get have poor growths. Wolf has the best growths between the two. But they're still not high enough to make up for his lack of promotion, or for his bases being comparable to Cain and Abel. Speaking of, this class was made the promotion for the Hunter class in the remakes and sequel for this game. Unfortunately, this is not the case.
Snipers
+ Can attack enemies 2 spaces away.
+ Every weapon is effective against Pegasus Knights and Wyvern Knights.
+ Is promoted.
+ Archers promoting to Snipers gain a substantial SPD growth upon promotion, allowing them to double many enemies, as well as a slight Def boost that would be the soonest seen by Tomas.
- No close-range option for offense, limiting their abilities as units and thus their opportunities for gaining EXP.
• 7 MOV
As stated, this is what Snipers promote to. Among them, Jeorge is easily the best, being 3 points of Weapon Level away from being able to use Parthia, which he's the best user of. And the abundance of Silver Bows immensely helps with any deficiencies in growths Jeorge may have.
Ballisticians
+ Can attack enemies 2 spaces away.
+ High Def.
- Cannot promote.
- No close-range option for offense, limiting their abilities as units and thus their opportunities for gaining EXP.
- 4 MOV.
- Only 1 Ballista is good against Pegasus Knights and Wyvern Knights.
Easily the worst class in the whole game. Good for nothing but filler. Only one of their weapons is good against enemy fliers. The only weapon they have that's effective against enemy Ballisticians is practically useless, given that Mages can do the same thing, and without fear of counterattack. And their MOV, being a measly 4, is pathetic. They have good durability, but that's the only thing that's actually notable about them. Thank goodness that they were reworked in future titles, getting buffs in the DS remake, and being merged with the Archer/Sniper class in the GBA and Tellius games.
On a side note, curse this platform for not allowing more than 10 images in a blog post.
#fire emblem#Fire Emblem: Shadow Dragon and the Blade of Light#Fire Emblem Shadow Dragon and the Blade of Light#impressions#fire emblem shadow dragon#nes#nintendo#nintendo entertainment system#famicom#nintendo nes#nintendo famicom#character guide#sort of
6 notes
·
View notes
Text
I'm like, 10 chapters into Fire Emblem Fates Birthright and Idk why I let the internet convince me that it's bad I'm having a pretty good time so far.
#mary34's musings#is it a bit cheezy? perhaps#but like#it's a far cry from being “complete trash”#fire emblem fates#i mean i am very early into the game but i'm having a good time so far#mary34 plays fe fates#i guess i am making that a tag#i will say i have fuck all idea what i'm doing gameplay wise#i constantly have a tab open on my browser for guides
8 notes
·
View notes
Text


Draw Your Swords T | 2k words | Ingrid & Sylvain Sylvain and Ingrid meet at Gronder Field. Read it on AO3
-
My contribution to the Guiding Stars: Blue Lions Zine for charity! I've been simmering this fic pretty much since FE3H came out, and I'm so happy to finally have it published! Check out @guidingstarsfz and their leftover sales, open July 20th - August 17th 2024. This zine had such an amazing team and I am absolutely in love with everyone's work. (Most of them aren't as angsty as mine!)
#fe3h#fe3h fanfic#sylvain jose gautier#ingrid brandl galatea#fire emblem 3 houses#fire emblem three houses#fe3h zine#guiding stars zine
12 notes
·
View notes
Text

Hi, I’m Vanillin! 23, she/her. This is my little archive for things I write for various fandoms, mostly character x reader. I write mostly yandere stuff these days, but i sometimes try my hand at non yan stuff too, feel free to request either.
And feel free to chat with me in my inbox! Id love to bounce ideas back and forth, as well as talk about various things. I always appreciate hearing from you!
Writing styles:
imagines- short blurbs about a particular idea or character. Questions like “what character would do…” “What character would like…” etc also count as imagines!
Headcanons- list format of drabbles, still considered long form, but normally covers more scenarios or ideas than a drabble.
Drabbles- story formatted one-shots based on a particular character and scenario.

Fandoms:
Fire Emblem Three Houses! (All of the students, Seteth, Flayn, Rhea, Jeritza)
DDLC / Doki Doki Literature Club! (monika, sayori, yuri, natuski)
HXH / Hunter x Hunter! (the phantom troupe mostly, but feel free to request anyone and I'll let you know!)
Mobile Suit Gundam 0079 / Origin (char, sayla, garma, dozle, kycilia, gihren, bright, mirai, ramba ral and hamon)
If you want someone from one of these fandoms who isn't on the list, feel free to ask anyways! I might have forgotten them! The worst I can say is no!
Expect more fandoms to be added over time!

Masterlist:
Any character under 18 will be aged up! Characters under 15 in canon can only be requested platonically!
Request guidelines:
Please specify-
Reader’s gender (if unspecified, i will default to female reader)
The writing style you would prefer (drabbles, headcanons, etc)
The character(s) you’d like ((i will do up to three characters in one ask if its an imagine or headcanons))
Any other specific requests you’d like, such as; reader’s traits, the scenario you had in mind, a poly ship, etc!
If any of these aren’t specified, i’ll write it however it comes to mind

Will write:
Character x reader
Any gender reader ( if not specified, i will default to female reader )
Specific traits ( such as weight, height, hair color, etc. including mental health!)
Monogamous or polyamorous
Smut // Angst // Fluff
Omegaverse
Yandere // non-yandere (if not specified, I'll choose)
Won't write:
Character x character (i’m picky about ships, and generally have low motivation for writing character x character fics. I may sometimes post character x character fics, but i don't take requests for them)
Any romantic/sexual content for underage characters
Pregnancy
Daddy kink
Scat
I reserve the right to turn down any request and might not be able to write all of the ones I get! Thank you for reading! Please enjoy your stay!

Dividers used here and on my posts are by
@diviniyae @sweetmelodygraphics
who are both incredible creators who I reccomend highly!
#blog guide#blog guidelines#requests are open#requests open#reqs open#vanillin speaks#now vanillin#vanillin#my blog#blog setup#blog management#blog maintenance#masterlist#fic masterlist#yandere hxh#hunter x hunter#hxh#yandere#x reader#yandere gundam#yandere mobile suit gundam#mobile suit gundam#doki doki literature club#fire emblem three houses#fe3h#yandere fe3h
6 notes
·
View notes
Text

@hulloitsdani I HAD TO. ROTATE THIS. IN MY MIND. SO MUCH. CAUSE HERE'S THE THING I think on the surface it COULD make sense and has SO much potential writing-wise and I have hardly thought about that before -- but!!!!
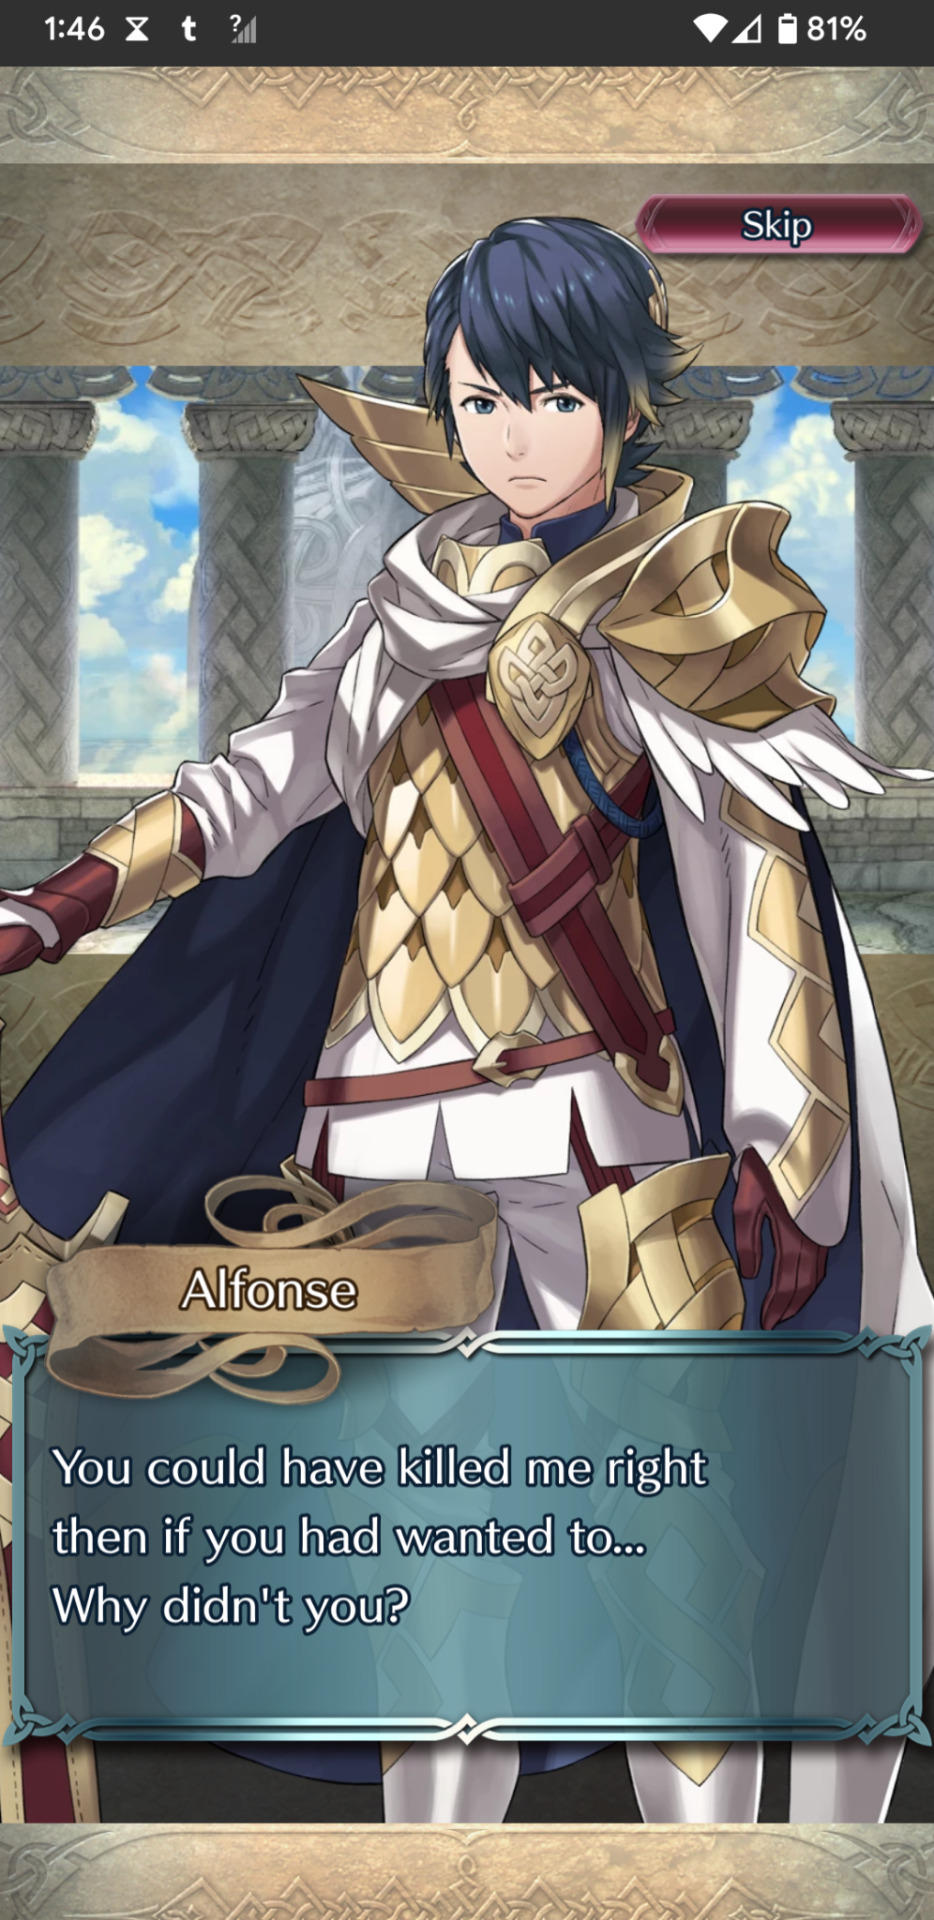
While I have been goofing on Ratatoskr and how she's just a poor little thang, upon meeting she DID tell Alfonse this:

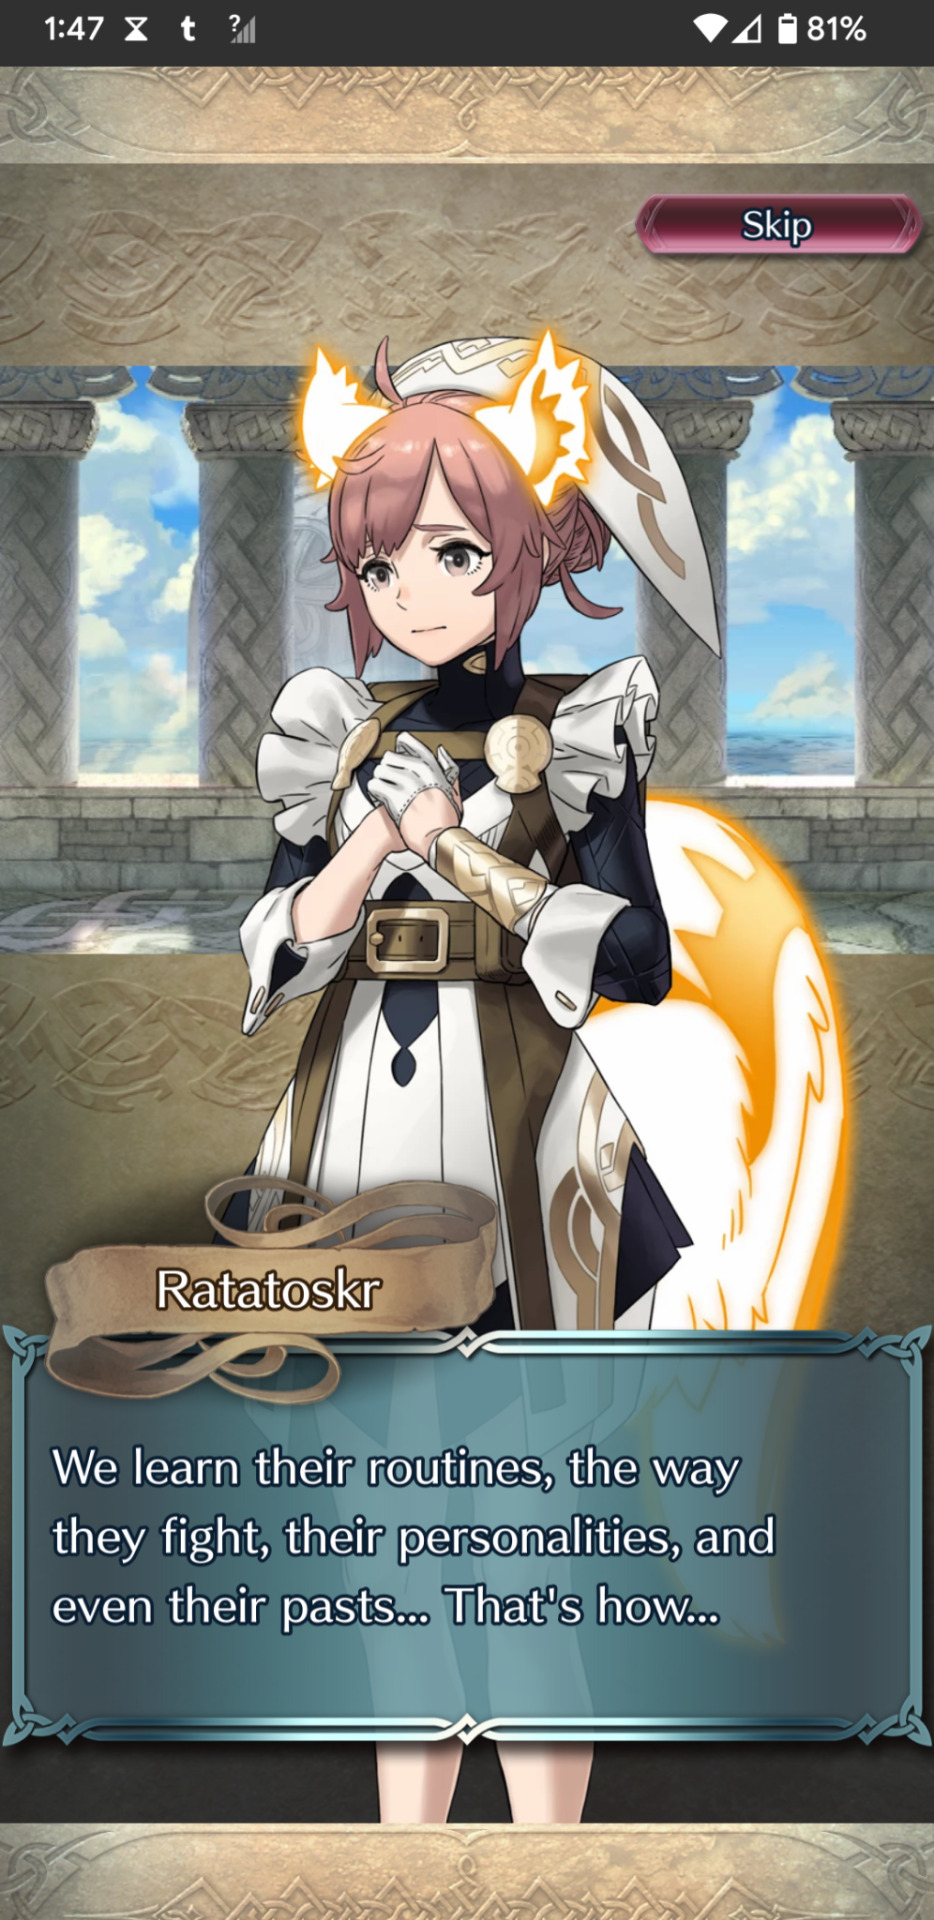


Which gives you SO much information actually. Like. She knows a lot more than she lets on -- not because she's lying outright or even putting up a front, but because she's just. So overwhelmed and emotional and sensitive (LOUDLY so) that may be the only thing you notice, maybe even underestimating her. But I feel Alfonse took this information and did the opposite -- it's an odd position to be in, to be known presumably very well by someone who's a stranger to you. But I think he takes this in, and takes his first impression of her and her personality, motives, the conflict within her, and decides to put his faith in her.
I think ALSO he could be viewing her as a valuable ally, acknowledging:

I think, he sees she has potential, if he can win her over and have her fight on his side. I THINK. Primarily his motivation is practical. Making a quick judgement of her, coming to the conclusion she could be a valuable asset and could help the Heroes even more (going back to, him saying "She can even tell them I asked her to get us more information on the assassination plot" and "If our enemy thinks like I do... they'll see a similar opportunity in front of them.")
AUGH INTERRUPTING THAT THOUGHT THOUGH!!!!!! I FEEL LIKE!!!!!! PART OF THE GAMBIT IS "She would be a valuable ally" AND on the flipside "She could pose a considerable threat if she changed her mind and strengthened her resolve in the opposite direction (to kill me)" so winning her over is part of defusing the threat. AND it's an extra win to have all that information if she does choose the Heroes. AND it's an extra LOSS if she does leave, since she takes all that information with her AND has the advantage while the Order is left scrambling in the dark. Plus also!!!!!! Her having that intimate knowledge of his routines!!!!!! If he loses Ratatoskr, he Knows he's gonna suffer severe consequences.
ALSO. ALSO!!!!!!!! I FEEL LIKE!!!!!!!!!! That is WHY him letting her go and EMPHASIZING she can do whatever she deems necessary, EVEN giving her sisters inside knowledge on the Heroes. I FEEL LIKE. THIS IS ACTUALLY. VERY MUCH (on a much smaller scale!!!!) another Letizia moment. HEAR ME OUT
Right before The Moment, he's judging Letizia's character, what he knows to be true about her, her PERSONALITY and the way she thinks. Which leads him to go sicko mode on her (because! That Was the course of action to take with her!!!!)
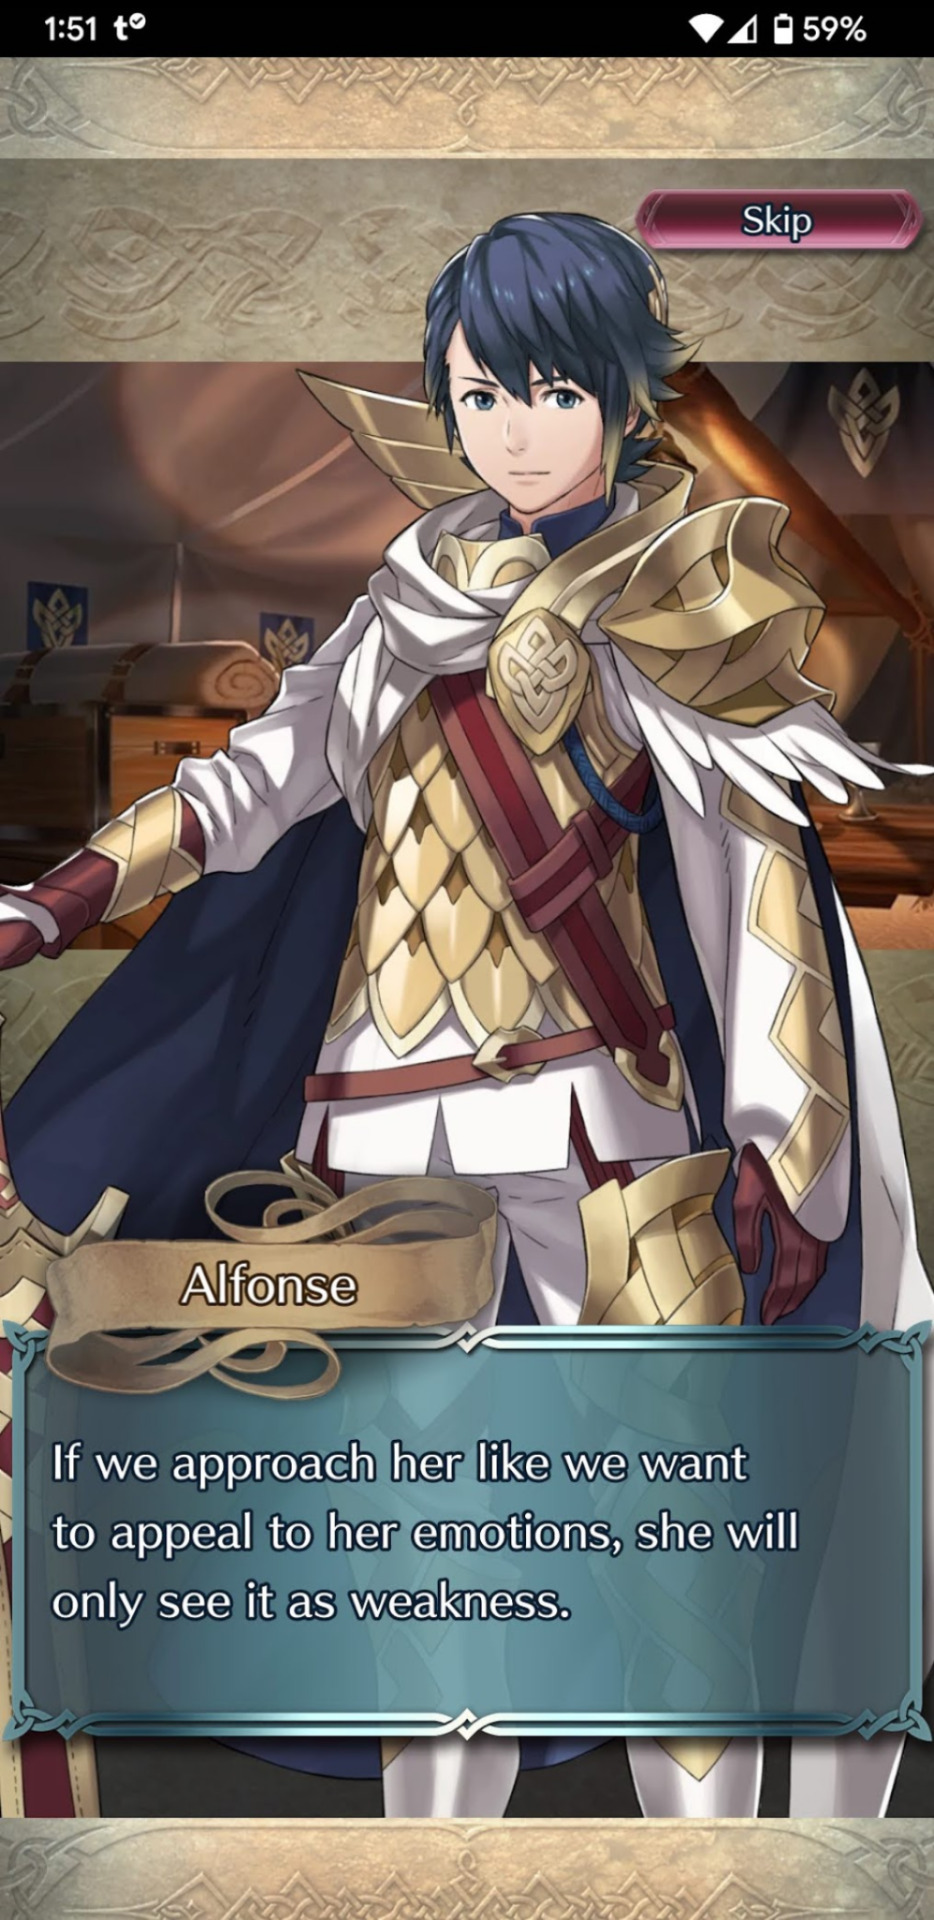
THIS TIME. He's met with a very emotional, very distressed and conflicted assassin who seems to have a moral compass and is conflicted about what she's been ordered to do. In one way, she's almost like a bomb that has to be defused -- she Does pose a threat, and the threat needs to be addressed before it goes off/is out of his hands. And in this case, appealing to her emotions IS the answer!
AND. I THINK. PART of that appeal WAS to place That Much trust in her. ESPECIALLY communicating to her, she's not Required to remain loyal to the Heroes. Giving her a choice, between them and her sisters. He's heavily relying on Ratatoskr's internal conflict and also (surely it hasn't been missed on him) her attachment to him, or at very least her respect for him as a person she's come to admire. It's an extreme chance to take, but I think he knows if Ratatoskr can 1) Feel like she made the choice herself, and 2) He can catch her on another emotionally driven motivation (When she requests a favor in return, which is for the Heroes to Save her Sisters) -- I think he's fully confident he can win her over without forcing her to do anything.
WHICH. ALSO. HELPS WIN HER OVER BC her MAIN conflict she's struggling with is Being Forced To Do Something She Doesn't Want To. By NOT being forceful with her, by EMPHASIZING she can take any action she deems fit, he's set up a situation WHERE the Order of Heroes is the preferable option. He leaves her with the impression that her feelings matter, that she has agency, and ultimately it's up to her.
I FEEL LIKE........ I am talking in circles LMFAOOO BUT. I think Another thing (before thought interruption) was Alfonse's lines saying, "It's a gamble on our part, but if our enemy thinks like I do... they will see a similar opportunity in front of them." ESPECIALLY into:
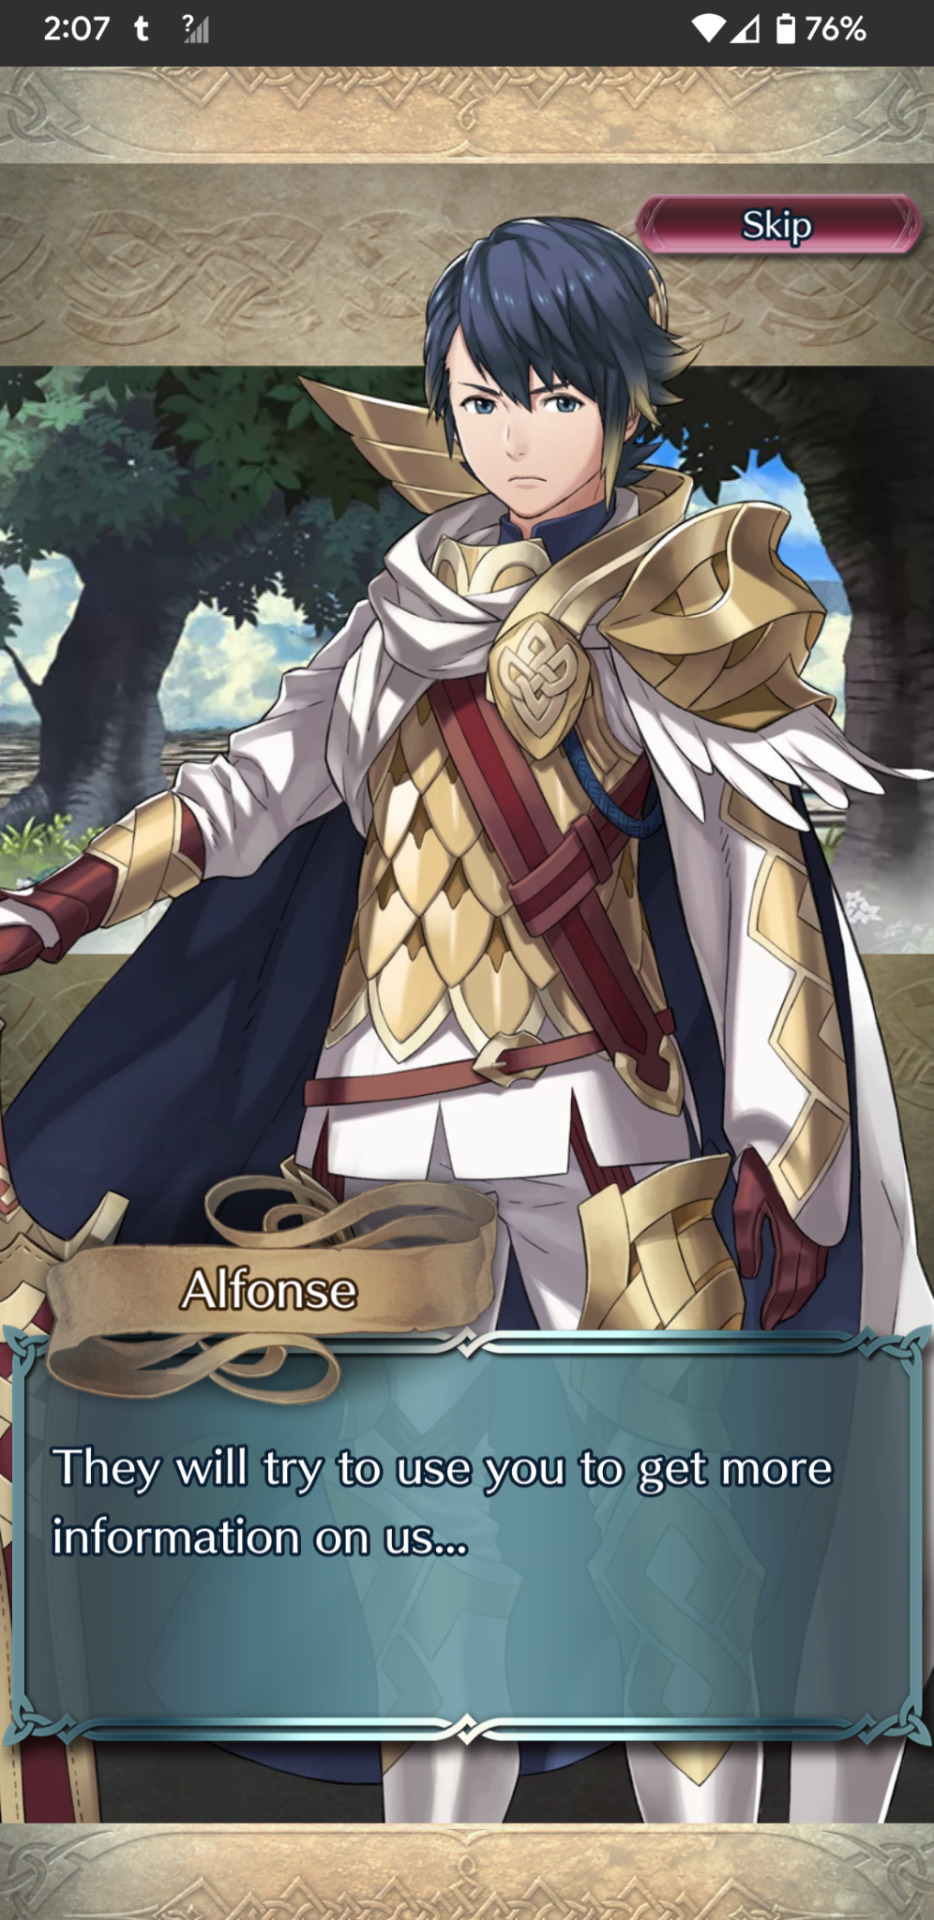
WHICH stood out to me SO much because I think it really captures how practically motivated he IS here. He is using her. He's acknowledging, that if their enemy is Like Him, they're using her, too. He's creating a situation with a desired outcome, making the Order of Heroes the more desirable option to align with, giving her the feeling that she Can choose -- and, this is true! He's entirely put the choice in her hands. But in DOING that, it strengthens the possibility of her seeing the Heroes AS the desirable option. Which is the goal. Which is what he wants. He Is prepared, most likely, for the event this backfires, but also he's fully confident Ratatoskr Will choose them. (Also, as I say he was "most likely prepared for backfire"..... honestly that may not even be the case. Alfonse bluffs and bullshits his way around and out of things so much it would make Phoenix Wright blush).
WHICH ALSO LIKE..... AAAUGHGHHHH rotating him in my mind forever. You can See his traits and tendencies, see how he uses them for the benefit of his allies and those he cares about, but also SO clearly you can see. How A Lot of That is deeply rooted in his own moral compass (which is good!) and his own perspective (which is limited and sometimes flawed) and you can see. EXACTLY how these things can twist and turn and get really ugly LMFAOO
And man I haven't even gotten to Alear yet but I have THOUGHTS about his interactions w her too I need to make a separate post about LMFAOO 😅 (hit image limit and also feels like another topic entirely 🫡)
#fire emblem#feh#THIS FEELS. v rambley and all over the place but i hope it's coherent.#also like my thoughts about reginn (i don't even know if i've elaborated) and how he acted towards her#LIKE. HONESTLY. it drives me so insane like i'm imagining all of this they way he treated reginn#(which a harshness motivated by wanting to guide her to do what must be done) and how he treats veronica (friend or foe)#and how he's been handling ratatoskr. SO STRONGLY. i just feel like the root of it all is sharena.#how i think it's EXTREMELY likely he did Not escape parentfication and how he must have had to raise her#more than their actual parents did (ALL GUESSWORK cause we don't know for sure)#but i think there IS a strong sense of it was just the two of them. for a very long time.#and i think about how he's the one who taught her how to fight (alongside bruno ofc but likely before then too!!!)#I THINK ABOUT IT. ALL OF THE TIME. HOW IT SEEPS INTO SO MANY ASPECTS OF HIM.#AND THE. THE FUCMING. THE FYCKING CHANGELING -- *gets shot*#like in my head he devoted so much to her and. and. it's still so strongly present in him to this day and. and#what if i cried about it forwver. what then#fe alfonse#ratatoskr
39 notes
·
View notes
Text
A Spoiler-Free Guide for Fire Emblem: Genealogy of the Holy War
With a short introduction, mechanics, and notable sticky situations.
(A PDF version of this guide is available upon request.)
Fire Emblem: Genealogy of the Holy War is a SRPG (Simulation RPG) for the Super Famicom, released in 1996. You have likely arrived at this guide either because someone has recommended it to you or because, far in the future after I have written this, a remake of it has released and you want to go back and play the original to see what has changed and what hasn't. Either way, you were likely inspired to play it from its strong story- rumored or experienced- and aren't too clear on what the mechanics of it are. Maybe you've played a number of Fire Emblem games, but are nervous about this one due to its reputation as an odd duck. Maybe you've never touched a SRPG before, and have a very excited Jugdral fan of a friend shepherding you into playing it. Either way, this guide is for you.
This guide will attempt to avoid spoiling any story events, but for those who mind gameplay spoilers, it is organized in ascending order of how obscure each gameplay feature is to stumble upon- the last two sections (Sticky Situations and Secret Events) in particular are not usually encountered by an unspoiled first-time player. Nevertheless, I highly recommend at least reading up to the fourth to last section, "Recruitments"; it contains no identifying character information besides time of encounter and class, and you will likely reach no end of frustration attempting some of them without foreknowledge (or some very good guesses). NOTE: List of Conversations (Section 8b) does contain spoilers for recruitable characters. Peruse that section with caution if you do read past the Recruitments section.
This guide is meant for use with the Project Naga patch, though some characters will be referred to by their more modern names; these will be indicated with a slash mark between the two. (E.g. Edain/Aideen.)
Table of Contents: Section 1. The Small Differences of Genealogy of the Holy War Section 2. Main Objectives Section 3. Finances and Resource Management Section 4. Skills Section 5. Side Objectives Section 6. Genealogy Section 7. Recruitments Section 8. Conversations Section 9. Sticky Situations Section 10. Secret Events
Section 1. The Small Differences of Genealogy of the Holy War
Genealogy of the Holy War is similar to most other Fire Emblem games in the broad strokes of its mechanics. It has general gameplay of fighting enemy units with your army on a grid-based map, chance-based unit growth, most of your usual classes and weapons, et cetera. However, it has a number of differences, large and small, with later (and earlier) Fire Emblem games, some of which may make gameplay more difficult if unknown. The small differences are catalogued here.
1a. Movement
There are two principal differences to movement in Genealogy compared to in other Fire Emblem games. Firstly, all mounted units may move with their remaining movement after performing any action except conversation or seizing of a castle. Secondly, though terrain in this game that decreases movement exists as usual, there is also some terrain that increases movement; when walking on roads, all units may move 1.4x as many spaces as usual, rounded down. So, for example, a paladin (9 mov) on roads may move 12.6 spaces, but this is rounded down to 12. As a trade-off for this, roads, like some rare terrain seen in other Fire Emblem games, lower the avoid of any unit standing on them by 10% (represented by the small shield icon in the terrain window):

1b. Follow-up Attacks
While units in most Fire Emblem games can attack an enemy unit twice if they are faster by a certain amount, units in Genealogy require a skill to do so. This skill is called Pursuit (or Follow-Up, depending on your translation.) There are ways to attack more than once without Pursuit, but they are either more rare or not guaranteed. Pursuit allows for a follow-up attack if a unit's attack speed is greater than that of their opponent by 1 or more points.
1c. Critical Hits and Effective Damage
Much like follow-up attacks, units in Genealogy cannot naturally perform critical hits. There are four ways to perform a critical hit on most enemies in Genealogy: Being next to an immediate family member or lover (flat 20% critical hit rate bonus to anyone, including those who cannot naturally crit); having the Critical skill (skill% chance); or using a weapon that has been used to kill at least 50 enemies (skill% chance, plus 1% for each enemy killed above 50, up to 50% bonus at 100 kills); or having the Wrath skill (guaranteed critical hit as long as you are at 50%+1 HP or lower).
Critical hits in Genealogy follow the damage formula of doubling a unit's attack power before subtracting enemy defensive stats, rather than the more common tripling of a unit's damage output after enemy defense is subtracted. They are generally much more useful in the hands of units with lower Attack than normal.
Effective damage in Genealogy (bows vs. fliers, etc.) is simply calculated as an automatic critical hit on the target unit (if the attacking unit hits, of course.)
There is no critical avoid (dodge) stat in Genealogy.
Also, the minimum damage for any attack which lands is 1.
1d. Weapon Weight
All weapons in Genealogy have a weight stat. This stat is subtracted from the attack speed of the unit wielding the weapon. There is no way to counteract this speed penalty, and attack speed may be decreased below zero when utilizing particularly heavy weapons. This can lead to a negative Avoid stat.
1e. Weapon Repair
Weapons in Genealogy are infinitely reparable at any castle on the map. The price of repair is equal to the weapon's price, divided by the number of uses the weapon has when new, times the number of uses to be repaired.
For example, repairing a 38 use Silver Sword to full durability costs 5000 (sale price) / 50 (maximum uses) * 12 (uses missing) = 1200 gold.
Each weapon in the game that the player can receive is unique.
1f. Weapon Triangle
The weapon triangle in Genealogy of the Holy War is generally similar to in other Fire Emblem games. However, it is notably stronger; units gain Hit/Avo ±20 for advantage/disadvantage. Additionally, there is a magic "triangle", which functions similarly.
The weapon triangle is Swords>Axes>Lances>Swords
The anima magic triangle is Fire>Wind>Thunder>Fire
The interaction of light and dark magic with other varieties is Light=Dark>Fire/Wind/Thunder
1g. Experience Gain and Class Change
Units gain experience based on their level in relation to the enemy's. The lower their level is in comparison to the enemy's, the greater their experience gain. Class changes don't affect level; you will gain equal experience as a level 1 Knight Lord and a level 1 Troubadour.
Class changes can be performed once a unit reaches level 20, if they are not already a promoted class. They can be performed using the Class Change option at one's home castle. There is no reason not to promote as soon as possible; all classes have a flat level cap of 30.
The stat caps for each class are each class' stat bases plus 15, excepting HP which caps at 80. There is data out there on the base stats; however, I won't go into it here.
1h. Weapon Level
If you've played Engage, you'll be familiar with this, but if not: weapon level is inherent to the class a unit occupies, and can only be changed by class change or personal modifiers (more on the latter in the Genealogy section.) So, if your paladin has B swords, he will never have A swords, even if other paladins you encounter might have the latter.
1j. Enemy Reinforcements
Reinforcements generally do not spawn on the map as in other Fire Emblem games; they will almost always appear from the mouth of a castle. If you defeat all of an enemy commander's allied units and said commander is capable of movement, they will return to the castle they came from, enter it, and 1-2 turns later exit it with a squad of new units statistically identical to their previous squad.
1k. Saving
At the start of each turn, before you have moved any units, you can save in the map menu (i.e. the menu that appears when you press A on the map.) It's highly recommended to keep at least two saves; one save every turn, and one save after you capture a new castle. You can set the game to save automatically each turn in the Options menu by scrolling down to Autosave and selecting a slot (1 to 4).
Section 2. Main Objectives
2a. Seizing Castles
Chapter progression is made by seizing enemy castles after defeating the boss standing on them. Theoretically, castles may be captured in any order that you like; in practice, in most cases the way ahead to the next castle will be blocked until you capture the previous castle.
When you seize a castle, a short cutscene will play and the enemy units whose allegiance lies with that castle will disappear (allegiance can be checked in the second page of the unit menu; this same page contains skills and weapon level). At the start of the next enemy phase, the "[Name] castle seized" map events will trigger; formerly neutral castles may turn red, enemy and ally units may spawn, and terrain may be changed (for example, a bridge may be lowered or raised, a path may appear through difficult terrain, a gate may be opened, etc.) Keep an eye on castles you have not yet seized due to this.
Allied (green) and neutral (yellow) castles cannot be seized, and may lack some amenities of allied castles upon entrance.
2b. Losing Castles
Any enemy unit who reaches the entrance of a castle (that is not their own) will capture it. Allied and neutral castles will become enemy castles when this happens, and can be recaptured by your own units; however, player castles will be pillaged and will no longer be able to be recaptured.
If the player's home castle (the castle where you start the chapter) is captured by the enemy, it's game over, and you'll have to restart from your last save.
Section 3. Finances and Resource Management
3a. Unit-Specific Gold Pools and Trading
Unlike in every other Fire Emblem game to date, units in Genealogy have their own specific gold pools. They cannot trade gold with other units, unless those units are their lovers; if so, they can use the Give Gold command to give their lover all of their money.
Units also cannot trade with each other. In order to exchange items, they will have to sell them off at the Pawn Shop in the castle menu, where another unit may rebuy them for twice the sale price. Therefore, it's best to think carefully about who should defeat enemy units when a droppable item is in play. The money cap in the wallet is 50,000 gold; if you're reaching that cap, consider spending it on something so you don't waste any new money you earn.
3b. Thieves
Thieves are an exception to the above gold rules. Though they still can't receive gold from just anyone, they can attack enemy units to steal all the gold in their wallet. Additionally, they can give gold to any unit in the army.
3d. The Arena
Each chapter, beginning with Chapter 1, has an arena. This arena consists of seven opponents per chapter whom, upon defeat, will give the unit who defeated them experience and 1000-4000 gold (beginning with the weakest and increasing by 500 until the strongest is reached.) All units can enter the arena as many times as they like until they've reaped all the rewards- each and every unit in your army may face and defeat the seven opponents, rather than just one. If your unit's HP hits zero in the arena, they won't die, but their HP will be reduced to 1. However, winning a match in the arena restores a unit to full HP.
It's recommended to challenge the arena each chapter with all the units you intend to use, but you don't have to in order to complete the game. So, if you start getting tired of it, you can skip it... but it might be best not to.
Section 4. Skills
4a. What are Skills?
Skills are abilities that a unit can activate- generally in-combat, though sometimes they have out-of-combat effects. Various skills have various chances of activation (some are guaranteed, some rely on specific stat thresholds), so be aware.
4b. Skill Types
There are two different skill types- "Class Skills", those granted based on a unit's class, and "Personal Skills", those a unit has innately. All skills can mechanically either be class or personal skills- though most skills are only personal. Class skills, however, apply to every unit that is a member of the class- including faceless enemies. So watch out, and check out the skills present on the unit menu to make sure you do not meet a dire error.
4c. Skill List
(Note: Attack Speed is here abbreviated as Aspd.)
Pursuit/Follow-Up: Allows a unit to strike again after an enemy counterattack (or twice in a row if the unit themselves is counterattacking). Trigger: Unit's Aspd > enemy unit Aspd.
Critical: Allows a unit to perform a critical hit in combat, doubling their attack before enemy defense. Trigger: Skl%.
Adept: Allows a unit to attack twice in a row. Trigger: (Aspd + 20)%.
Accost: Triggers another round of combat upon the completion of the prior round. Trigger: [Unit Aspd - enemy Aspd + (unit HP/2)]%.
Pavise: Negates all incoming damage for 1 hit. Trigger: (Unit Level)%.
Steal: Takes all of an enemy's gold upon hit and adds it to the unit's personal wallet. Always activates.
Vantage: Unit attacks first when enemy unit initiates combat (treats it as if unit initiates combat). Trigger: Unit HP ≤ (50% of unit's Max HP + 1). When conditions are met, always activates.
Wrath: Unit always performs a critical hit (if unit hits). Trigger: Unit HP ≤ (50% of unit's Max HP + 1). When conditions are met, always activates.
Astra: Unit performs 5 attacks in a row. Trigger: Skl%.
Luna: Unit negates enemy defense for 1 strike. Trigger: Skl%.
Sol: Unit recovers HP equal to damage dealt. Trigger: Skl%.
(Note: Only one of Astra/Luna/Sol may activate at once. Additionally, they are only usable by infantry sword units.)
Nihil: Prevents the activation of Astra, Luna, Sol and critical hits against this unit. Always activates.
Bargain: Shop prices for this unit are reduced by 50%.
Charm: Hit and Avoid +10 to allied units within 3 spaces.
Dance: Grants another action to all adjacent allies.
Miracle: When unit HP is ≤10, increases unit's Avo by [(11- Unit HP)*10] points.
Paragon: Double's unit's gained experience.
Renewal: At start of turn, unit recovers 5-10 HP (random).
Section 5. Side Objectives
5a. Villages
Visiting a village gives a unit 5000 Gold and may also grant an item. Bandits will attack villages; a village will be destroyed when a bandit attacks it for 10 turns, and every turn that a bandit attacks it will subtract 500 Gold from the total that a unit will gain from visiting it.
5b. Combatant NPCs
NPCs ("green units") that have normal classes will grant items when spoken to by certain units of yours. Their status screen will tell you who they should talk to.
5c. Civilian Rescue
NPCs who do not have normal classes (i.e. their class is Civilian) will grant 100 EXP when interacted with.
Section 6. Genealogy
6a. What's All This About Children?
Like Gaul, Genealogy of the Holy War is divided into two parts... Er, it seems I've misread my notes. Gaul is divided into three. Nevertheless, Genealogy takes place over a long period of time- 24 years, in fact. As the characters you recruit at the beginning of the game are in the prime of their lives, it's only natural that, over such a long period, some of them will marry and have children. However, the latter half of the game takes place over two decades later than the beginning- the characters that you've recruited back then, such as Edain, may be in their forties by that point. By no means can characters in their early middle ages not fight in the early middle ages, but this IS an anime- the timeskip calls for a new cast of teenagers, the children of your early units all grown up.
6b. Can Love Bloom on the Battlefield?
Units can only have children if they become lovers. Some units will be- or become- lovers automatically, such as Quan and Ethlyn. In this case, their children will always be theirs. Some units do not- take, for example, Edain. She will not automatically take a lover, and you'll have to get her to fall in love with another (male) unit in order to have children. (Evidently, Jugdral has not yet invented magic that allows for cloning or IVF. Sad.) Even if she doesn't fall in love, however, you'll still have the same number of teenagers fighting for you later in the game- two of them will simply not be the child of any of your own units, and will be "substitute" characters with their own backstories. However, the children of early-game units will have some gameplay advantages, which I'll explain in a bit. Either way, each potential mother has two associated children, one of which will take after her to a greater extent and the other of which will take after her lover to a greater extent. No male unit has any associated children without falling in love.
As for how units fall in love, it's quite simple. Units have a certain number of "love points" with each other- all of them start with a certain number of points shared with each other unit. Once a unit reaches 500 love points with another unit, they become lovers, and can have conversations, gameplay interactions, and children. Units gain +5 love points per turn from standing next to each other, as long as they are the only two units standing next to each other; there is a bug that can cause units to gain love points meant for other units if they stand next to another unit who is standing next to that unit's prospective lover. There is a more detailed explanation, but it would involve some spoilers, so I'll leave it at that for now. Units also gain a certain number of love points by being on the same map together; this can be as low as 1 and as high as 10 per turn for a given pair. Finally, units gain love points by having conversations with each other- conversations between unrelated men and women often come with love points attached.
Perhaps this explanation has been tiresome, and I haven't convinced you you shouldn't just toss up your hands and go for the substitutes. Well, there are many gameplay benefits to kids, starting with the following...
6c. Holy Blood
It's hard to miss, considering how constantly it's talked about. Some of your units are descendants of the Twelve Crusaders, who destroyed the darkness about a hundred and twenty years ago. This has numerous story implications. However, it also has gameplay ones!
If you open up a unit's Holy Blood menu (press A on the unit menu) you'll see a circle showing all twelve of the Crusaders' weapons and their names. Some of these will have green dots next to them; when a green dot is next to a Crusader's weapon, that means that the unit has Minor holy blood of that crusader; when the green dot is glowing (there's a yellow light surrounding it) that means that the unit has Major holy blood of that crusader.
Minor holy blood boosts a unit's rank in the associated weapon by 1 letter grade. For example, Troubadours naturally have a B rank in swords, but because Ethlyn has minor Baldr blood, she starts with an A rank. Meanwhile, Major holy blood boosts a unit's rank in the associated weapon to the maximum, and allows them to use the associated holy weapon if they can get their hands on it. For example, because Sigurd has major Baldr blood, he can use any sword in the game (excepting other holy weapons), including Tyrfing. This isn't just a nice bonus- most holy weapons give a total of +30 to a character's stats, spread out across a varying number. Some give more or less, or have other special effects (for example, Mystletainn grants the Critical skill), but they are universally extraordinarily powerful. A unit with holy blood can turn the tide of battle on their own, in both gameplay and story.
Holy blood also increases a unit's growths. Depending on which holy blood they bear, various stat growths are boosted; a list is shown below. Note that minor blood cuts these boosts in half.
Baldr: Associated with swords. HP+20%, Str+10%, Skl+10%, Lck+10%. Od: Associated with swords. HP+20%, Skl+30%.
Dáinn: Associated with lances. HP+20%, Spd+30%.
Ullr: Associated with bows. HP+20%, Lck+30%.
Bragi: Associated with staves. HP+10%, Mag+10%, Lck+10%, Res+20%.
Thrud: Associated with thunder magic. HP+20%, Skl+30%.
Fjalar: Associated with fire magic. HP+20%, Mag+30%.
Hoðr: Associated with swords. HP+20%, Str+30%.
Njörun: Associated with lances. HP+20%, Str+10%, Spd+10%, Def+10%.
Nál: Associated with axes. HP+20%, Def+30%.
Naga: Associated with light magic. HP+10%, Mag+20%, Res+20%.
Forseti: Associated with wind magic. HP+20%, Spd+30%.
Children will inherit their parents' holy blood, but only partially; both children will inherit minor holy blood, if it is held, but only the child which most resembles the parent will inherit major holy blood. The other child will again receive minor holy blood, unless both parents share a holy blood type, in which case they will both bear major holy blood. This is the case even if both parents' holy blood is minor.
6d. Weapon and Skill Inheritance
Units will inherit the weapons and items of the parent they most resemble, but only if they can use them in their base class. The exception to this is Holy Weapons, which will be inherited even if the child unit can never use them.
Both parents' personal skills pass on to both of their children. However, their class skills do not. Check carefully to see that the skills you want to pass on actually belong to the unit innately!
6e. Growth Rate Inheritance
Child units' growth rates are equal to 100% of those of the parent they resemble most + 50% of those of the parent they resemble less. Therefore, all child units will be equally or more competent in battle than their resembling parent.
Section 7. Recruitments
7a. From Enemy to Friend
Units in Genealogy of the Holy War won't always be on your side from the start. Oftentimes, they'll start out as green allied units, or even enemy units. While talking to enemies to recruit them is common in Fire Emblem games, Genealogy has some more esoteric methods on its hands. Therefore, a list of (non-automatic) recruitment methods and chapters (without mentioning unit names) is below.
7b. Spoiler-Free Recruitment List
Chapter 1.
-Speak to the swordfighter with your lord after seizing Genoa.
Chapter 2.
-Complete all seven Arena matches with any unit.
-Speak to the princess with your lord.
-Speak to the free knight with anyone holding more than 10,000 Gold.
-Speak to the pegasus with the bard.
Chapter 6.
-Speak to either the axe fighter or the axe knight with the lady swordfighter.
Chapter 7.
-Enter Dahna castle with the cavalier who worries for it.
-Speak to the mage girl with the other mage.
Chapter 8.
-Speak to the archer with the thief.
-Speak to the sage with your lord.
Chapter 9.
-Seize Luthecia while the general still lives.
-Talk to the general with the cleric from Luthecia.
-Talk to the wyvern knight with the prince.
-Talk to the wyvern knight with your lord.
Epilogue.
-Speak to them with your lord after seizing Velthomer.
Section 8. Conversations
8a. Communication is Key
Though supports weren't introduced into the Fire Emblem series until Binding Blade, that by no means that units did not talk about their past and present with each other prior to it. Units in Genealogy of the Holy War can talk to each other on the map for lore, love, stats, and items. The "Unit" section of the map menu contains a list of all units who can speak to each other on page 4 ("Personal Data"). It's highly recommended that you utilize this; though all units will have who they can talk to listed on the second page of their unit screen, it's easy to miss conversations without this.
Conversations have several triggers, but the most common one is the seizure of a castle. A list of all conversations between allied units, triggers, and results (things obtained from said conversation) is below. Initiator of the conversation is listed first, who they speak to is listed afterwards, trigger conditions third, and rewards fourth.
8b. List of Conversations, Conditions, and Results
Note that all events that can cause love point gain will not occur if either participant in the conversation already has a lover.
Prologue:
Azelle->Sigurd, Azelle recruited Lex->Sigurd, Lex recruited Ethlyn->Sigurd, Ethlyn recruited Quan->Sigurd, Quan recruited
Chapter 1:
Quan->Finn, from start of chapter, Finn gains +1 Str/Skl/Def Sigurd->Edain/Aideen, Edain recruited Midir->Edain, Edain recruited and Azelle has not spoken to her, +100 love points Azelle->Edain, Edain recruited and Midir has not spoken to her, +100 love points Edain->Ethlyn, Edain recruited, Ethlyn gains Return staff Quan->Ayra, Ayra recruited Dew->Edain, Genoa seized, 50 love points + Edain gains Warp staff
Chapter 2:
Deirdre->Ethlyn, from start of chapter, Ethlyn gains Light Brand Dew->Raquesis/Lachesis, Lachesis recruited, +50 love points and Lachesis gains Thief Sword Quan->Finn, Heirhein seized, Finn gains Brave Lance Sigurd->Lewyn, Lewyn recruited Beowulf->Lachesis, Anphony/Infini seized, +100 love points and Lachesis gains Str+2, Skl+2, Def+1 Alec->Sylvia/Silvia, Infini seized, +100 love points Silvia->Sigurd, Silvia recruited Fury/Erin/Erinys->Sigurd, Erinys recruited
Chapter 3:
Lex->Ayra, from start of chapter and Chulainn has not spoken to Ayra, +100 love points and Ayra gains Brave Sword Holyn/Chulainn->Ayra, from start of chapter and Lex has not spoken to Ayra, +100 love points and Ayra gains Brave Sword Ethlyn→Quan, Sylvale seized, Quan gains Gae Bolg Sigurd -> Brigid, Brigid recruited Edain→Brigid, Brigid recruited, Brigid gains Yewfelle Midir-> Brigid, Brigid recruited, +100 love points Claud->Sigurd, Claud recruited
Chapter 4:
Taillte/Tailtiu->Azelle, if the two are not lovers, +100 love points and Azelle gains HP+5 Sigurd->Claud, from start of chapter Edain->Midir, if the two are lovers, Midir gains Brave Bow Edain->Jamke, if the two are lovers, Jamke gains Brave Bow Edain->Azelle, if the two are lovers, Edain gains Rescue staff Silvia->Claud, Thove/Tófa seized, +100 love points Lewyn->Sigurd, Silesse seized Erinys->Lewyn, Silesse seized, +290 love points
Chapter 5:
Edain->Brigid, from start of chapter Claud->Edain, if the two are lovers, Edain gains Rescue staff Sigurd->Ayra, Lubeck seized Lex->Azelle, Lubeck seized Dew->Jamke, Lubeck seized Tailtiu->Azelle/Claud/Lex, if the two are lovers and Phinora seized Erinys->Lewyn/Arden/(Noish/Naoise), if the two are lovers and Phinora seized Silvia->Claud/Lewyn/Alec, if the two are lovers and Phinora seized Lachesis->Beowolf/Naoise/Dew, if the two are lovers and Phinora seized Ayra->Lex/Chulainn/Arden, if the two are lovers and Phinora seized Brigid->Alec/Jamke/Midir, if the two are lovers and Phinora seized
Chapter 6:
(Scathach/Ulster)/(Roddlevan/Dalvin)->Larcei/(Radney/Creidne), from start of chapter, Larcei/Creidne gains Lck+1 Lester/(Dimna/Deimne)->Lana/(Mana/Muirne), Lester/Deimne recruited, Lana/Muirne gains Lck+1 Oifey->Seliph, Oifey recruited Lana/Muirne->Julia, Julia recruited, Julia gains Mend staff Fee/(Femina/Hermina)->Seliph, Fee/Hermina recruited Arthur/Amid->Seliph, Arthur/Amid recruited Julia->Seliph, Isaach conquered, Julia gains Nosferatu tome (recommended) Julia->Seliph, Sophara conquered, Julia gains Aura tome Seliph->Lana/Muirne, Sophara conquered, +100 love points
Chapter 7:
Shannan->Patty/Daisy, from start of chapter, +100 love points and Shannan gains Balmung Oifey->(Dermott/Diarmuid)/Tristan, from start of chapter, Diarmuid/Tristan gains +1 Str/Skl/Def Seliph->Shannan, from start of chapter, Seliph gains +1 Skl Larcei/Creidne->Shannan, from start of chapter, +100 love points and Larcei/Creidne gains +2 Skl Patty/Daisy->Seliph, Yied/Aed is seized, +100 love points and Seliph gains Brave Sword Leif->Seliph, from start of chapter Diarmuid/Tristan->Nanna/Jeanne, from start of chapter, Nanna/Jeanne gains +1 Lck Ares->Seliph, Ares recruited Lene/Laylea->Seliph, Lene/Laylea recruited (Tine/Tinni)/Linda→Seliph, Tine/Linda recruited Finn→Nanna, if he is her father, Nanna gains +5 Spd Finn-> Lana, if he is her father, Lana gains +5 Mag Finn-> Larcei, if he is her father, Larcei gains +5 Skl
Chapter 8:
Julia->Seliph, at start of map, Seliph gains Lck+1 Arthur/Amid->Fee/Hermina, from start of map, +100 love points and Fee/Hermina gains +3 HP Finn->Leif, from start of map, Leif gains Str +3 Faval/Febail->Seliph, Febail recruited Seliph->Tine/Linda, Connacht seized, +100 love points and Tine/Linda gains +3 HP Nanna->Ares, Connacht seized, Nanna gains +2 Str/Def Ced->Seliph, Ced recruited with Lewyn as his father, Ced gains +3 Lck Fee/Hermina->Ced/Hawk, Ced/Hawk recruited, Fee/Hermina gains +1 Lck
Chapter 9:
Febail/Asaello->Patty/Daisy, from start of map, Patty/Daisy gains +1 Lck Patty/Daisy->(Coirpre/Cairpre)/(Sharlow/Charlot), Coirpre/Charlot recruited, +100 love points and Coirpre/Charlot gains +3 HP Seliph->Hannibal, Hannibal recruited Lene/Laylea->Coirpre/Charlot, Hannibal recruited, Coirpre/Charlot gains +1 Lck Julia->Seliph, Grutia seized, Seliph gains +3 Res Finn/Hannibal->Altena, Grutia seized, Altena gains +3 HP
Chapter 10:
Lester/Deimne->Patty/Daisy, from start of map, +100 love points and Patty/Daisy gains +3 HP Nanna/Jeanne->Leif, from start of map, +100 love points and Nanna/Jeanne gains +3 HP Shannan->Seliph, from start of map, Shannan gains +3 HP Febail/Asaello->Lana/Muirne, from start of map, +100 love points and Lana/Muirne gains +3 HP Oifey->Seliph, Chronos seized, Oifey gains +3 HP Leif->Altena, from start of map, Altena gains +1 Lck Seliph->Fee, Rados seized and Lewyn is her father, Fee gains Str +5 Seliph->Lene, Rados seized and Lewyn is her father, Lene gains Def +5 Seliph->Tine, Rados seized and Lewyn is her father, Tine gains Mag +5 Coirpre/Charlot->Altena, Miletos seized, Altena gains +5 Res
Epilogue:
Arthur/Amid->Tine/Linda, from start of map if neither has a lover, Tine/Linda gains Lck+1 Tine/Linda->Seliph/Ced/Hawk/Leif, if the two are lovers, Seliph/Ced/Hawk/Leif gains Mag+3 Patty/Daisy->Seliph/Shannan/Lester, if the two are lovers, Seliph/Shannan/Lester gains +3 HP/Spd Daisy->Deimne, if the two are lovers, Deimne gains +5 HP Jeanne->Leif, if Edda is seized and the two are lovers, Leif gains +5 HP Muirne->Asaello, if Edda is seized and the two are lovers, Asaello gains +5 HP Nanna/Jeanne->Seliph, if Edda is seized and the two are lovers, Seliph gains +3 HP Nanna->Ares/Leif, if Edda is seized and the two are lovers, Ares/Leif gains +3 Def Lana/Muirne->Seliph/Scathach/Dalvin, if Dozel is seized and the two are lovers, Seliph/Scathach/Dalvin gains +3 Res Lana->Febail, if Dozel is seized and the two are lovers, Febail gains +3 Res Larcei/Creidne->Seliph/Iuchar/Iucharba/Shannan, if Dozel is seized and the two are lovers, Seliph/Iuchar/Iucharba/Shannan gains +3 Str Fee->Oifey, if Friege is seized and the two are lovers, Oifey gains +3 Skl Fee/Hermina->Seliph/Arthur/Amid, if Friege is seized and the two are lovers, Seliph/Arthur/Amid gains +3 Skl
Section 9. Sticky Situations
9a. Large, Progressive Maps
Portions of the maps in Genealogy open up as you progress through them and seize castles. While this does lead to some impressive storytelling, it can also lead to you being caught in an unfortunate situation because you're halfway across the map for where some new event is happening. I call this a "sticky situation", and have provided hints for dealing with them below.
9b. Hints for Sticky Situations
Chapter 1. Leave a unit to guard your home castle. The young man won't attack the woman he saved, but his fellows will.
Chapter 2. The northeast passage will open when your lord is in the least convenient location for it. Consider preparing for the worst beforehand, and sending a particularly moralizing young artist home ahead of time.
Chapter 3. Be prepared for sneak attacks from the west and the north, again when you're in the most inconvenient location for them. Think of the feelings of your recently-recruited units about the ones closest to them- maybe communication is the answer.
Chapter 4. If you like money, don't abandon the northeast entirely when duty calls elsewhere. Just don't leave your best units there. It's only provincial. Thieves can pick any lock, even when it's that of a drawbridge. If one were to be raised, they could lower it in no time.
Chapter 5. Units will automatically equip plot-relevant weapons. Even if they're broken.
Chapter 6. Better movement options don't necessarily result in a better outcome. Weigh all the pros and cons first.
Chapter 7. Your unlucky number is one greater than the number of Crusaders. Get a move on! Pegasi are broadly applicable to understaffing situations.
Chapter 8. Just because someone doesn't have Pursuit doesn't mean they won't attack you twice. Use more reliable methods. Thieves work in exactly the same way when they're your enemies.
Chapter 9. Never trust convenient roads that you didn't ride in on. Keep your guard up at home.
Chapter 10. If you're not willing to abuse critical hits and avoid stacking in the face of insurmountable odds, you'll have to either make sacrifices or count tiles very precisely. Consider sending winged beasts as close as you can to the cliffs east of your homeland before arriving there yourself.
Epilogue. Keep the one who inherited a blessing they knew not of until recently close to home. If you give a sage a magic ring and the right tools to use it wisely, you might be able to minimize your distress from enemies who mirror their abilities in the final stages of the war. Beware movement ranges.
Section 10. Secret Events
10a. What Is A Secret Event?
Secret events are events that the game does not outright inform you will occur if you perform certain actions. Some of these events are meant to be easy to infer (the Not-So-Secret-Events) and some a player would only figure out by looking them up in the manual (the Truly Secret Events). The Not-So-Secret Events are highly recommended for all players to prioritize due to their notable gameplay impact, and are difficult to miss if you read every conversation. The Truly Secret Events are fun, but if you wish to stay as unspoiled as possible, consider skipping them.
10b. Not-So-Secret Events
Chapter 4: After seizing Silesse, have its heir enter it. They will receive an important item.
Epilogue: After seizing Velthomer, have the most recently recruited character enter it. They will receive an important item.
10c. Truly Secret Events
Chapter 1:
A. Have Lex wait on the marked spot with an Iron Axe equipped. A conversation will occur, and he will receive a Brave Axe.
Chapter 2:
A. Have Arden wait on the marked spot. If he does not have a lover, a conversation will occur, and he will receive the Pursuit Ring.

B. After capturing Heirhein, have a male character wait next to the neutral soldier just north of Evans castle for a conversation to occur.
Chapter 3:
A. Have Dew wait directly in front of Bragi Tower and he will receive the Wind Sword.
Chapter 4:
A. Prior to seizing Tófa/Thove, if neither Silvia, Lewyn, or Erinys have a lover, a conversation will occur if Silvia waits next to Erinys. Silvia will gain a large number of love points with Lewyn, while Erinys will gain a smaller number.
B. Have Silvia visit the second-most right-hand village on the map. An event will occur, and Silvia will receive the Safeguard/Defense Sword.
Chapter 5:
A. Have Arden wait on the marked spot. If he has a lover, he will gain 5 points of Skill.

Chapter 6:
A. Have Seliph visit the village directly northwest of Isaach castle, and a different conversation will occur than usual.
B. Before conquering Ganeishire, Lester, Deimne/Dimna, Diarmuid/Dermott/Delmud, or Tristan can speak to the neutral soldiers of Sophara or Isaach castle.
C. If Deimne enters Isaach castle, a conversation will occur, and his Strength will increase by 5 points.
D. If Johan/Iuchar or Johalva/Iucharba waits next to Radney/Creidne for 10 turns, a conversation will occur, and Creidne's Strength and Luck will increase by 2 and 3 points, respectively.
Chapter 7:
A. If Laylea visits one of the villages south of Leonster, a conversation will occur, and she will receive the Barrier Blade.
B. After the boss of Ulster castle has been defeated, if Daisy waits next to Shanan, a conversation will occur, and Daisy's Skill and Speed will increase by 3 points.
C. After Melgen has been seized, if Tristan and Roddlevan/Dalvin are both below level 10, having them wait next to each other will cause a conversation to occur and both of them to gain Strength +2 and Def +1; Tristan will gain Speed +1, while Dalvin will gain Defense +1.
Chapter 8:
A. If Fee waits on the marked location before the character guarding Munster castle is recruited, a conversation will occur.
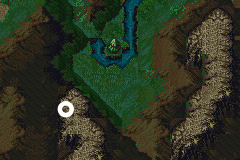
B. If Linda waits on the left-hand marked spot, a conversation will occur, and she will gain Resistance +3. If Amid waits on the right-hand marked spot, a conversation will occur, and he will gain Resistance +3.

C. If Asaello visits the village northwest of Connacht, a conversation will occur and his Strength will increase by 3.
D. After Connacht has been seized, if neither Seliph nor Muirne/Mana have a lover, and if all characters recruited from chapter 6 onwards have survived so far, have Seliph wait next to Muirne. A conversation will occur, and Muirne will gain Luck +5.
Chapter 9:
A. If Hawk enters Luthecia, a conversation will occur, and he will gain +3 Magic and Resistance.
B. After Grutia is conquered, have Charlot/Sharlow wait next to Hannibal. A conversation will occur, and he will receive the Berserk staff.
C. If Femina/Hermina or Janne/Jeanne visits one of the northwest villages, a conversation will occur and she will gain +3 Defense.
Chapter 10:
A. If Seliph defeats the boss of the final castle and before seizing it waits next to the water on the beach below, something will happen.
59 notes
·
View notes
Text

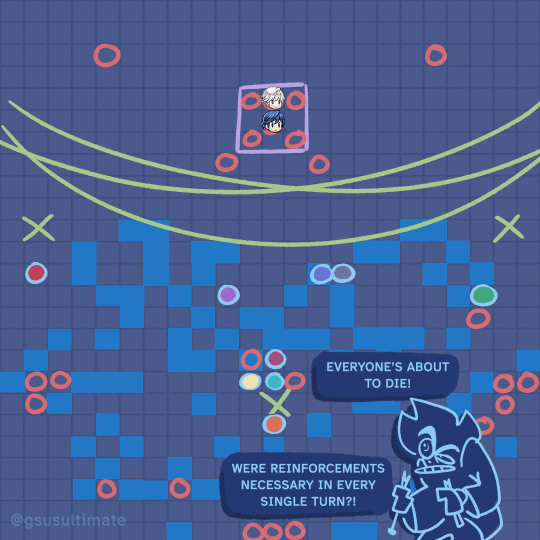


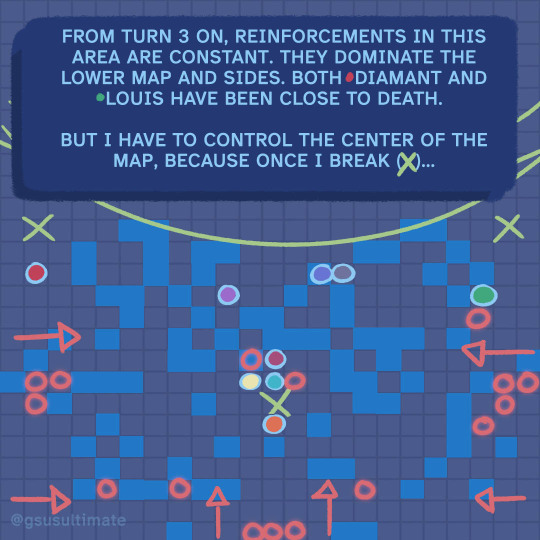
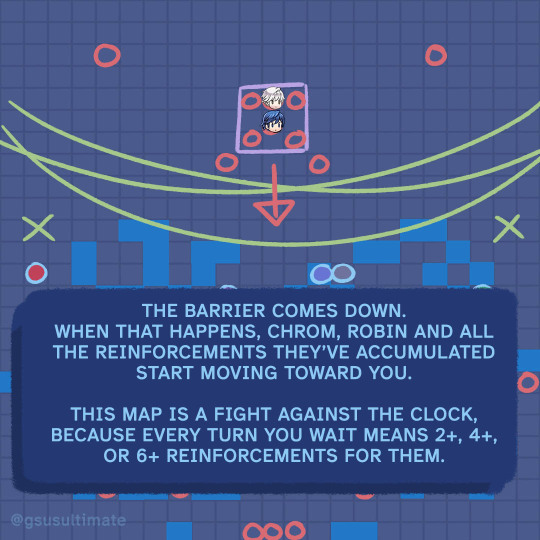

[PART 2/4]
I honestly don't understand why the main menu estimates 30 turns for this map when it all goes to shit in 5 or less.
#fire embem awakening#fire emblem awakening chrom#fire emblem awakening fanart#fire emblem engage#fire emblem#playthrough#video games#art#digital art#artists on tumblr#fanart#illustration#chrobin#m!chrobin#game guide#fe engage#fe17 fanart#fe17
27 notes
·
View notes
Text
decided to start playing sacred stones today because i’ve been on one hell of a fire emblem kick and it seems like a good pick of the older games to have a whack at, and at first i was worried about the whole locked into if a units dies they die thing, but i am saved by the fact that seth is, in fact, ridiculously fucking strong
#like i know seth has a reputation for being Nuts but i wasnt expecting spectacular out the box with like. great growths#i was so stuck in worrying that he’d be a jagen thing but no he’s just insanely good????#fire emblem#fe sacred stones#salty talks#otherwise having fun i think i want to get colm and neimi trained up theyre fun#not sure how the route split or. other game mechanics work#(im playing through a sorr of emulator and it doesnt seem like the shoulder buttons work which is. i feel like i can supplement that#by looking up guides for enemy items maybe)
2 notes
·
View notes
Text

... >:)) bedazzling crimes have started
#btw this was done without doing a guide lmao#i used my shield of seiros tattoo as a reference#fire emblem#rhea#barks.txt#bedazzling#my crafts#i do kind of want to buy red and black rhinestones to make a Quattro addition to my backpack now
6 notes
·
View notes