#google ads editor tutorial
Explore tagged Tumblr posts
Visit Tumblr Blog
Explore Tumblr blogs with no restrictions, modern design and the best experience.
Last Seen Tumblr Blogs


Fun Fact
There are dozens of funny blogs to kill time on Tumblr.
Text
Why Should You Use Google Ads Editor for Your Campaigns?

In the fast-paced realm of digital marketing, where precision and agility are paramount, Google Ads Editor emerges as a strategic powerhouse for campaign management. When milliseconds can define market dominance, relying solely on browser-based interfaces is no longer sufficient. A tool that empowers advertisers to operate offline, make bulk changes swiftly, and streamline their workflows is not merely a convenience—it’s a necessity.
Its functionality supports marketers in managing complex account structures, ensuring error-free campaign deployment while working in high-pressure environments. With its robust features and intuitive design, advertisers gain a competitive edge through seamless optimization and operational efficiency.
Unlocking the Core Features and Strategic Value
Ads Editor of Google allows users to download their entire account and make bulk changes offline. This includes editing ad groups, updating bids, adjusting targeting, and even crafting new campaigns without affecting live data until you're ready. Some standout features include:

Bulk Editing: Modify thousands of ads or keywords simultaneously.
Advanced Filtering: Easily locate elements using powerful search tools.
Error Detection and Custom Rules: Identify issues before changes go live.
Cross-Account Copying: Seamlessly replicate campaigns across multiple accounts.
Offline Access: Work from anywhere, regardless of internet connectivity.
Spec-wise, it performs best on a 64-bit system (Windows 10+ or macOS 11+), with 8 GB RAM or more and SSD storage. For agencies and enterprises, this results in quicker campaign deployment, enhanced accuracy in implementation, and reduced operational delays—ensuring a smoother and more reliable advertising workflow.
The software becomes even more impactful when integrated into broader task management strategies, improving schedule adherence, workflow automation, and operational clarity.
Top 3 Tools That Complement Your Ad Campaign Management
While offline editing and bulk campaign control offer a major advantage, using additional tools can significantly expand your advertising strategy. The following three platforms are among the most effective for enhancing insight, creativity, and optimization.
#1 PowerAdSpy – Competitive Ad Intelligence Tool

PowerAdSpy provides comprehensive ad intelligence by allowing users to monitor and analyze advertisements across major platforms like Facebook, Instagram, YouTube, and Google. With advanced filtering options by niche, engagement, and ad format, it lets marketers dissect top-performing ads from competitors. This insight helps in designing more effective creatives, refining audience targeting, and aligning strategies with industry trends. By informing ad content and structure, PowerAdSpy lays a strategic foundation for high-performing campaigns.
#2 SpyFu – Deep SEO and PPC Competitive Insights
SpyFu focuses on keyword research and competitive analysis in both organic and paid search spaces. It allows users to see the keywords competitors are buying on Google Ads, how much they’re spending, and which ad variations they’re running. The platform also reveals long-term performance ad trends and backlink strategies. For marketers focused on improving PPC outcomes and dominating search results, SpyFu offers actionable insights that can inform both strategic planning and tactical adjustments.
#3 BigSpy – Cross-Platform Ad Inspiration at Scale

BigSpy is a powerful ad database that tracks millions of ads across platforms such as Facebook, TikTok, Google, Twitter, and Pinterest. Its real-time ad library helps marketers uncover trending content and identify high-converting creatives. With filtering by country, industry, and platform, it enables strategic creative development and testing. BigSpy’s sheer volume of searchable ads makes it a go-to tool for brands seeking inspiration and validation.
Together, these tools contribute essential functions—intelligence gathering, creative testing, and simplified campaign oversight—that elevate your digital advertising efforts. Each enhances a specific phase of the campaign lifecycle, creating a well-rounded, strategic ad management approach.
You can also watch : How to Search Google Ads using PowerAdSpy: A Step-by-Step Tutorial Series
youtube
Final Thoughts
In a landscape where timing, precision, and strategic clarity are non-negotiable, Google Ads Editor delivers a suite of features that modern advertisers cannot afford to ignore. It offers a refined approach to campaign management, freeing marketers from browser limitations and injecting efficiency into every stage of the advertising lifecycle.
For professionals looking to operate at the pinnacle of campaign performance, Ads Editor of Google isn’t just a tool—it’s an essential extension of strategic execution. Its value becomes even more evident in high-stakes scenarios—product launches, seasonal promotions, or rapid-response campaigns—where every second counts and even minor errors can be costly. The ability to draft, review, and deploy changes in a controlled offline environment ensures consistency, accuracy, and speed. By integrating seamlessly into existing workflows, it not only enhances productivity but also empowers teams to execute with confidence, knowing they have full control over every facet of their advertising strategy.
#google ads editor#google ads#google ads editor tutorial#how to use google ads editor#google adwords editor#Youtube
0 notes
Text
For everyone who asked: a dialogue parser for BG3 alongside with the parsed dialogue for the newest patch. The parser is not mine, but its creator a) is amazing, b) wished to stay anonymous, and c) uploaded the parser to github - any future versions will be uploaded there first!
UPD: The parser was updated!! Now all the lines are parsed, AND there are new features like audio and dialogue tree visualisation. See below!
Patch 7 dialogue is uploaded!
If you don't want to touch the parser and just want the dialogues, make sure to download the whole "BG3 ... (1.6)" folder and keep the "styles" folder within: it is needed for the html files functionality (hide/show certain types of information as per the menu at the top, jumps when you click on [jump], color for better readability, etc). See the image below for what it should look like. The formatting was borrowed from TORcommunity with their blessing.

If you want to run the parser yourself instead of downloading my parsed files, it's easy:
run bg3dialogreader.exe, OPEN any .pak file inside of your game's '\steamapps\common\Baldurs Gate 3\Data' folder,
select your language
press ‘LOAD’, it'll create a database file with all the tags, flags, etc.
Once that is done, press ‘EXPORT all dialogs to html’, and give it a minute or two to finish.
Find the parser dialogue in ‘Dialogs’ folder. If you move the folder elsewhere, move the ‘styles’ folder as well! It contains the styles you need for the color coding and functionality to keep working!
New features:
Once you've created the database (after step three above), you can also preview the dialogue trees inside of the parser and extract only what you need:

You can also listen to the correspinding audio files by clicking the line in the right window. But to do that, as the parser tells you, you need to download and put the filed from vgmstream-win64.zip inside of the parser's main folder (restart the parser after).
You can CONVERT the bg3 dialogue to the format that the Divinity Original Sin 2's Editor understands. That way, you can view the dialogues as trees! Unlike the html files, the trees don't show ALL the relevant information, but it's much easier to orient yourself in.


To get that, you DO need to have bought and installed Larian's previous game, Divinity Original Sin 2. It comes with a tool called 'The Divinity Engine 2'. Here you can read about how to unstall and lauch it. Once you have it, you need to load/create a project. We're trying to get to the point where the tool allows you to open the Dialog Editor. Then you can Open any bg3 dialogue file you want. And in case you want it, here's an in-depth Dialog Editor tutorial. But if you simply want to know how to open the Editor, here's the gist:
Update: In order to see the names of the speakers (up to ten), you can put the _merged.lsf file inside of the "\Divinity Original Sin 2\DefEd\Data\Public\[your project's name here]\RootTemplates\_merged.lsf" file path.
Feel free to ask if you have any questions! Please let me know if you modify the parser, I'd be curious to know what you added, and will possibly add it to the google drive.
2K notes
·
View notes
Note
hi can you please make a tutorial how you made the soundwave in this gifset /post/764144877729628160/
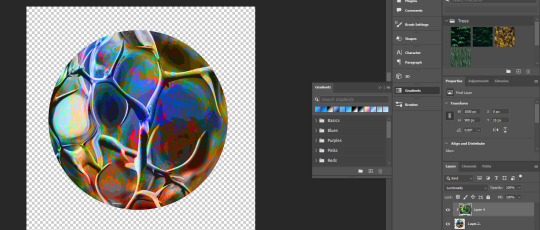
omg i'm flattered that i'm still getting curious people asking about this set because i'm still so proud of it!! yes, i will try to explain how i made the song player (for fun!) and soundwave, it was quite easy :)
here is the gif you are referring to:

this post was my inspiration. however, i did not use any premade templates for this set, so i made the song player myself.
here are what my layers looked like for that:
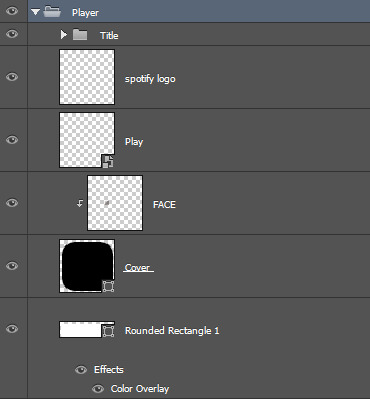
first, i used the rounded rectangle tool to make my shape (white fill, no stroke, 10px radius, 217px by 58px), then set this layer's blending mode to exclusion before adding my layer style (yellow color overlay with it's own blending mode set to color).
next, i used the same tool to draw a square with a black fill this time inside that shape. it's not perfectly aligned or sized, but mine is 47px by 45px. then i layered my album art on top and created a clipping mask before sizing it down to the shape.
i googled a spotify logo .png and used this for the play button, then made them smart objects (with a hue/saturation later on them to make them white if needed) and sized/positioned them where i wanted.
for the song title and artist, i used the font figtree bold at 15px and 11px with some drop shadow respectively. the elypses are 17px with the letter spacing set to 40.
now for the soundwave! i used the website veed.io and imported the song. you're gonna want an actual audio file of the song you're using. then you'll be directed to an editor where you can trim down your file on the timeline. i selected about 12 seconds of the song and chose the exact lyric i wanted to include as text so that the soundwave actually matches what he's singing. will people know this when they look at it? no but the details mean a lot to me lol.
then you're gonna click "elements" on the left. you'll see a tab that says "visualizers" and then "soundwaves". here you'll find a bunch of cool soundwave styles. select the one you like and it'll appear on your video screen. since we're gonna export this and make a gif overlay out of it, you want the background to be black. click on the element to resize the soundwave to fit the whole screen without cutting any of it off and change the color to white. play it back to make sure it looks okay!

when you're set, export the video and go through your gif process to open it up as a gif in photoshop. i use the screencapture method, so i opened it in kmplayer and took screencaptures like i would for any other gif.
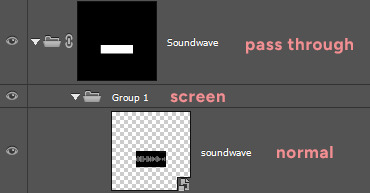
once it's in photoshop and converted to a smart object, i layed it over my gif below the music player and used free transform to size it down. trim the layer to be the same length as your gif!
i put the soundwave layer inside a folder and set the folder's blending mode to "screen". then i put this folder in ANOTHER FOLDER and it'll automatically set it's blending mode to "pass through". notice the video exported with a watermark in the top right corner, so i just selected around the soundwave on the pass through group and created a layer mask to hide it.
that's basically it!
this tutorial goes a lot more in depth with the soundwaves and setting certain blending modes if you're going for a different look/effect. i recommend checking it out.
15 notes
·
View notes
Text

Big Canva Tutorial Document
Hi guys! Canva's been my hyperfixation for a while now, so why not try to compile everything I've learned into one place? This Google Doc is intended to introduce you to this browser-based editor and help guide you through using it for RP graphics. It contains a couple tutorials, and some questions along the way to help inspire you to create your own awesome stuff.
Tutorials already present:
— How to use a Canva template to make icons — Making a pride icon in just a few seconds — Adding freckles/moles/etc features to your faceclaims — "Fancier" pride icons/regular icons once you've got the basics
This Doc will be continually updated with more tutorials, templates, and tips. So once you have access to the Doc, you'll get to see those as I add them!
★Link★ ✰Alt link✰
30 notes
·
View notes
Note
Yo. How do you code? (I only know the basics to HTML and CSS :/)
Idk which specific question you’re asking, like like how do I code as in what tools do I use, or what do I do and what is my process, or how did I learn to code, or can you teach me to code
And because I don’t know I’ll answer all of them :3
1. What tools do I use?
I use a few things to code, VS Code for actually writing the code, GitHub for storing projects and collaboration, Google and StackOverflow and depending on the project various other apps
2. How do I do it and my workflow process
Uh I have like no idea, I kinda just learn how certain things work via Google and then I slot them together, But the workflow process, I know exactly how to do that, ok so get a white board or a notepad or something, write what you want your program to do, and then break it down into steps and then break it down again and again, so for example,
For my current project, (The Incorrect Quote Generator), I need to take inputs, from a list of quotes choose one that fits the parameters, replace names in the quote with the inputted ones and then print the whole thing
Breaking down the first bit I need the inputs, what inputs do I need? I need the amount of characters and the names of the characters, ok done, second bit, take the quotes, sort them based off of character amount, using the amount of characters from the previous step, pick a set of quotes that match, replace the names, last bit, take the quote with it replaced and done
Breaking down again, first bit, done already, second bit, do we want something like autocapitalisation to make it nicer , yeah sure, what about capitalising the entire name if it fits the circumstance, makes it smoother, done, last bit done
Ok what about formatting, do we want all of this on one line or do we want separate lines for each person speaking, yeah we want separate lines, ok use an “&” symbol to represent a space and when the piece of code that assembles the end string encounters it, print the string and reset continuing from where we are to make a new line
That’s the design process for that
But first you make a prototype of it, to see if it works, like I didn’t have the autocaps or anything at first, I only added that when one of the submissions needed it
Anyways-
3. How did I learn to code
Through a number of ways, first I had gone to this computer club thing when I was like 8 or something and I found Scratch and learned about that, then when I was about 10 I was curious about html and websites, so I ended up making websites for classmates, then lockdown hit and I had nothing to do, I wanted to make a game, so what did I do? I jumped headfirst into Unity and struggled to get absolutely anything done (DON’T DO THIS), at some point I ended up joining this thing called Coderdojo which is like a coding class which worked really well (I actually still go there every Saturday although I’m at more advanced stuff now) and I learned about python and then kept learning more, then I made my own projects and learned more on my own from that
If you are looking to learn on your own, I’d recommend W3Schools, they have tons of courses, are entirely free and very in depth
But first I’d recommend you check out Scratch, it’s great for learning how to think in computer terms
4. Can I teach you to code
I know this probably wasn’t what you were asking but I’ll answer it anyway
Sure, I’d love to, coding one of the things I enjoy a lot because it combines logic and making things, and I love helping and teaching people things so teaching someone else to code sounds good to me :3
Stuff mentioned here
5 notes
·
View notes
Note
Hey mik! what's the process you use to make lands? They all look super amazing btw
i follow this tutorial but i dont follow it word-for-word
here i can do a quick lil thang
i like to use photoshop for this, idk how to translate it to other programs
i start w a canvas 1000x1000pixels, that way u can get a lotta detail in and then it looks even better when u inevitably shrink it for whatever ur using it for
use shape tool to make a circle. hold shift + click while dragging the tool to make a perfectly symmetrical circle. (or dont im not ur mom)

merge the shape layer down onto a raster layer.
turns into

now ur basically just adding textures n shit. i like doing it Hussie Style and using google images to add texture, basically just taking that shit and bastardizing the hell out of them through fucking around w/ the contrast/exposure/colors/etc. u can also use the photoshop generative tool to generate random texture shit (i love putting in nonsensical prompts to confuse the hell out of it--my favorite results are the really shitty ones that look like terrible collages), but its the same process for each one.
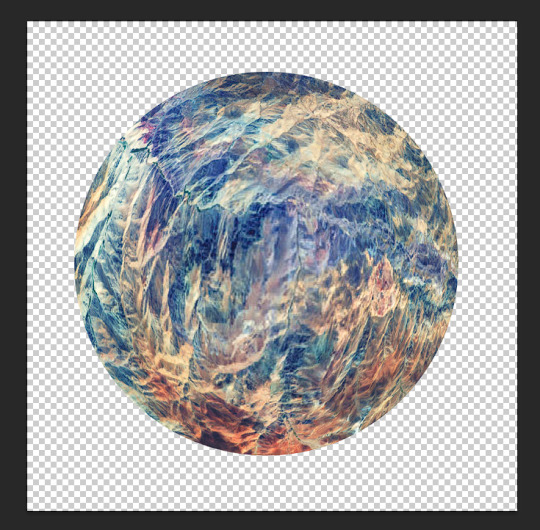
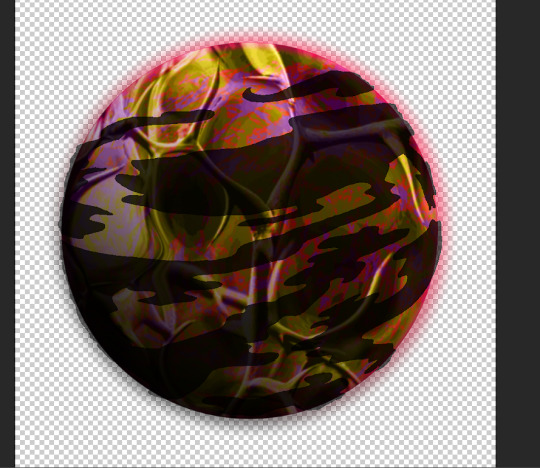
lets make up a planet. Land of Horns and Thorns.
i like to use satellite images to get that planet-y texture. i try to think of a relevant land-type. thorns are triangular, so are mountains. lets grab this image

next what we're about to do is called "transformative use"
copy+paste image on a new layer

right click on the image's layer, select "create clipping mask"
this should be the result:

but its a little flat. so lets make it rounder. i use the Liquefy tool in photoshop, but im sure theres other ways of doing it.
click filter > liquefy, then make sure u have the bloat tool selected. now bloat that mfer to ur liking. its ok if it looks a bit shit right now. when uve bloated it as much as u want, click ok. now u have smth like this
now start messing w/ filters and colors. i try to ascertain the mood im going for with a planet. Land of Horns and Thorns sounds a bit whimsical, but maybe subtly dangerous? so, translating that to color, maybe it's fun and colorful, but like, in the same way those deadly poisonous frogs are fun and colorful. maybe there will be some dark pits as well. lets see what we can do
i start w/ messing around w/ contrast. go to image > adjustments > brightness/contrast. fuck around w it to ur liking. this is what it looks like now
already we're starting to get some of those dark pits i wanted. lets make the colors pop a little more by messing w the exposure.

u can also mess w/ the vibrance, hue, saturation, etc. basically all those lil tools in the image > adjustments are ur best friends now. i like to increase the saturation to get that shit-jpeg look u see in homestuck sometimes
now create a new layer. we go back to google images. im gonna look up some closeups of thorns

this works fine. copy & paste. create clipping mask. bastardize the image however u want, similar to the first one. using the liquefy tool helps to get shit into place where u want it.
made it a little more abstract.

played w/ the color settings. i dont want this one to be as vibrant b/c im going to be using the layer modes. however, i do want to posterize the hell outta this
ok i like how it looks in luminosity mode.
however, i kinda wanna change the colors of the bottom layer now. lets use a gradient map (image > adjustments > gradient map). just hit ok when the prompt comes up, we can detail it in the side panel.
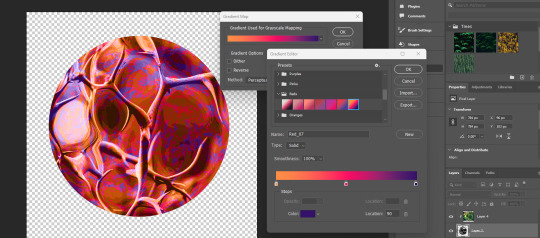
if u just click the actual gradient bar itself, itll open up the gradient editor. there u can make ur own custom gradient and specify the colors n shit. theres also a bunch to choose from.
so, i think that looks pretty fucking cool. i love the contrast, but i kind of want to see what it looks like in other colors too. we head to the hue/saturation tool.

there, i like that. a bright, poisonous color with the threatening blotches of red. now lets make this mfer look like a planet. merge everything into one layer if ya want
the gradient tool is now ur best friend. i like to fuck w the gradients, one of my favorite effects is making a sorta halo gradient (basically just copy the opacity controls i have, im sure u can also google how to do it) and merge the gradient to an empty layer
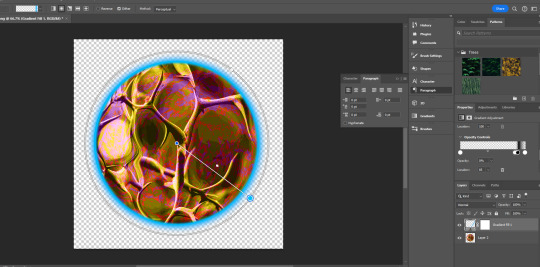
and, yknow, just mess with the settings
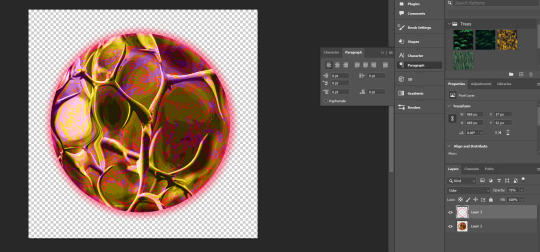
u can add gradients to make it look more like a 3d object. mess w the colors and settings n shit

we add some clouds now. i just use 1px pencil tool. try to use the curvature of the planet to inform how u draw the clouds. think about how u want them to be formed (swirling around the center? stretched out? etc) and think about what u think the atmosphere would be like on ur planet. a completely barren planet like mercury may have no clouds at all. or maybe its like jupiter, where its nothing but clouds? also think about the anemology of the planet. how do the winds form, what directions do they go?
i think the Land of Horns and Thorns sounds like a place that would have a good amount of thunderstorms, so lets make the clouds black. mountains are pretty windy, so maybe the clouds will sporadic but dense.
fuck around w/ it til ur tired of looking at it. then make that fucker smaller (the average mspa panel is 650x450. unless ur planet is taking up the entire page, u can probably get away with smt smaller.) **make sure u have interpolation set to bicubic or nearest neighbor.
and then ur done.
side notes: literally do whatever u want tbh, u can do as many layers as u want, use whatever tools u want. thats pretty much the basic format ive got.
7 notes
·
View notes
Text


Photo editing step-by-step semi-tutorial
Trying something new here on the blog... I don't do much tutorial writing but wanted to share a little behind-the-scenes on how I typically edit my cosplay photos. A lot of this is cobbled together from various tutorials or trial-and-error over time but I think the results are pretty nice. I use Photoshop but a lot of these tips are generalized enough you might could use them in your editor of choice.
Let me know if this is helpful or cool, if you'd like to see more of this sort of thing!
First off I just use the default photo editing tools to clean things up a bit. Tighten the crop and adjust the levels and white balance... mostly just "eyeballing" it. Notably I already like the pose, lighting, and composition - anything you can take care of in-camera rather than post is preferable! Then I gotta black out the gun tip - select the tip, tint orange toward blue, lower the saturation way down, then tweak the levels. Of course it still looks like a cap is on the tip, but the focus of the photo is kind of off the gun barrel anyway so who cares.


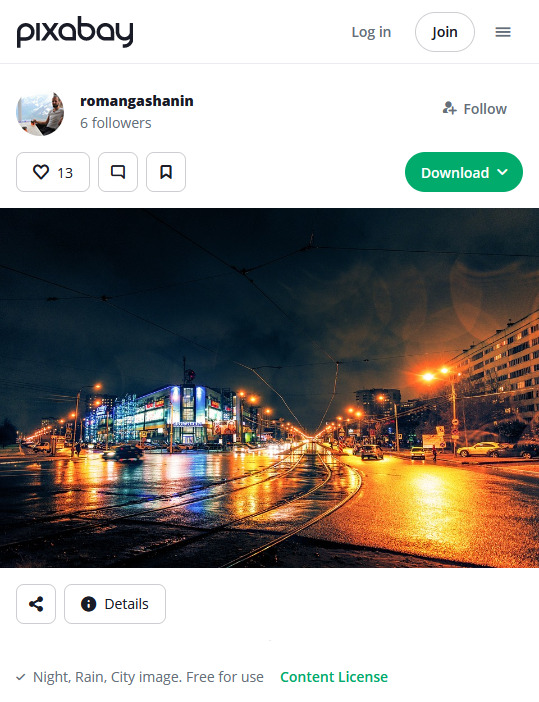
Next up we're going to swap out the background. In this case I want it to feel kind of indistinct - not a "scene" Wick is actively interacting with but more just scenery he's in front of. Wet nighttime streets are pretty prominent in the opening of Chapter 2 so I selected this photo. I try to use sites like Pixabay that offer free-use photos rather than just pulling whatever from Google Images.

Once I have the photo, I crop it to where the horizon line looks good, add a Gaussian blur to imply depth, and mask it in the background. Photoshop's auto-select has gotten pretty robust, I tweak the cutout just a bit for clarity and to add some light leaks around the outline
In this case I set the transparency to 92% to get it a little lighter. In any case, I then add an Exposure layer to darken it for mood lighting.


Next bit is color correction. In this case I wanted to evoke the look of Chapter 3 promo art... pulled a few reference images and took note of the orange/purple contrast and gradient they use:


I don't recall if I used the eyedropper tool but I created a similar gradient, set to split on my face so the two halves of the background ended up as different colors. Set the layer to "Soft Light" (in this case I actually duplicated it and set that duplicate to 25%), and I masked out some parts where the light is hitting particularly hard (left of face, hands, edge of gun) to keep a more natural look.
Since it's raining, I added a subtle "fog" look to the background. Created a single-layer duplicate of everything so far, masked the background, Gaussian blur - then set that layer to "Lighter Color". You can see it in the building lights, mostly - brings back some brightness after the multiple darkening we've done.


Finally bringing in some rain, again referencing the poster above.
To make the rain layers, I first make a solid black layer then "Add Noise" (monochromatic). Tweak the "Levels" so you get pockets of pure white against black (with a couple mid-grays layered in), then resize the layer so the dots are bigger than single pixels (it's fine if they get blurry). Finally, apply a motion blur to get the "falling" motion.
I do this twice to get a sense of depth. First layer is set to "Overlay" at low opacity (~25%), which also slightly darkens the image.


The second layer is set to "Screen", again at low opacity (~20%). Combined, it gives the effect of rain in front and behind throughout the scene.


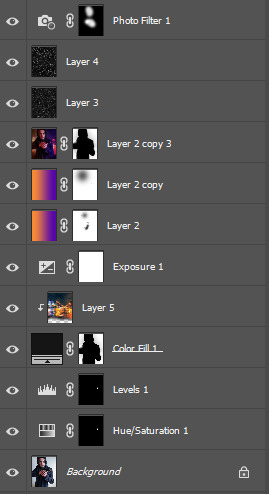
Finally I add a cooling "Photo Filter" layer, masked out to points like my face and hands, to add a little contrast. Sometimes I'll do a final pass with "Levels" or "Exposure", "Add Noise", or use some subtle Instagram filters to make sure it looks good on the small screen, but not really in this case.
All said and done, I usually spend less than an hour per image. Despite ending up with 10+ layers it's not too complex and I find the results quite satisfying!
17 notes
·
View notes
Text
extremely long post below the cut, please read the entire thing b4 brashly doing anything. there's a lot and there is scaling difficulty with the steps you can take.
it's actually better for android users to debloat their phones than to just turn off settings — if done correctly, you're able to fully uninstall apps from your phone.
we already know that, after Facebook being put on trial in 2012 (settled in 2022 for a measely $90m out of their $590b) due to their tracking settings — even if off — are still running. even if you turn phone settings off, apps are able to "see" one another and collect data that way. including your keyboard. i repeat:
YOUR PRE-INSTALLED PHONE KEYBOARD IS A DATA COLLECTOR
the issue is that debloating your phone takes a little know-how, and you need a PC to do it. you cannot just "disable" apps from your phone, they're still functional at some capacity.
i REALLY recommend using UAD (Universal Android Debloater) if possible. which, again, requires a computer — i also recommend that you entirely stop using any and all Google services. i am talking down to: Learning How to Read A Map
no more google maps. yes, it's a total pain in the ass, but data collection is not a joke. gmail is a data collector, YouTube is a data collector any form of docs/sheets is a collector, and again:
i cannot fucking stress this enough.
YOUR PRE-INSTALLED KEYBOARD COLLECTS YOUR KEYSTROKE DATA.
IT. TRACKS. WHAT. YOU. ARE. TYPING.
this link has installation instructions for UAD — this is to debloat your phone, focusing on unnecessary Samsung and Google apps. the major 2 problems are: you will need a computer, and you will need to learn how to use GitHub thru YT tutorials.
learning how to use GitHub will be extremely important for protecting your PC as well from Windows bullshit
🗣️DO THIS FIFTH🗣️
a chart of what apps to uninstall and what they do:
(there are also some other ways to stop/uninstall apps on this post, but i don't know the details behind them and recommend you look into them yourself if you can't use UAD)
🗣️DO THIS FOURTH🗣️
for a Google Play Store replacement:
list of games available on fdroid:
🗣️DO THIS FIRST🗣️
for a non-tracking QWERTY, QWERTZ, AZERTY, Kurdish QWERTY, Russian, and more keyboard:
for a non-tracking Japanese 3x4 keyboard:
🗣️DO THIS SECOND🗣️
NewPipe is the YT alternative; this app prevents Google from collecting your IP and you no longer have 1) ads 2) to login 3) afk prompts to check if "you're still there".
🗣️DO THIS THIRD🗣️
USE FIREFOX AND TOR. set your default search engine to DuckDuckGo on FF
(there's actually discussion on whether or not firefox is completely trustworthy on mobile due to their code not being entirely opensource. something to do with working with google. the f-droid alternative is Fennec)
also please read a bit about how to properly use Tor; the tldr is to not login to anything — social media, emails, news sites — while using it
an endnote:
you do NOT have to do this all at once; i started out with swapping my keyboard and YT over first. i'd recommend at least doing your keyboard.
i just recently swapped to fdroid and installed Tor. i'm currently swapping out all of my gmail accounts for protonmail, tutamail, and mailfence.
i haven't even opened UAD yet, as i'm still in the process of finding app equivalents on fdroid and untangling myself from google services.
these will ALL take time getting used to — it sucks and the keyboards are absolutely not as efficient, but that's because there are no installed keyloggers. do not let laziness borne out of ease of use from proprietary apps and software prevent you from protecting yourself. i cannot stress this enough : do not be lazy about this.
r/privacy, r/cybersecurity, and privacyguides are great places to get started in understanding how to protect yourself online. i definitely recommend you start looking into how to do so on your PC as well, if you've got one
as for iOS users?
you're shit outta luck.


anyway yeah DELETE YOUR FUCKING ADVERTISING IDS
Android:
Settings ➡️ Google ➡️ all services ➡️ Ads ➡️ Delete advertising ID
(may differ slightly depending on android version and manufacturer firmware. you can't just search settings for "advertising ID" of course 🔪)
iOS:
Settings ➡️ privacy ➡️ tracking ➡️ toggle "allow apps to request to track" to OFF
and ALSO settings ➡️ privacy ➡️ Apple advertising ➡️ toggle "personalized ads" to OFF
more details about the process here via the EFF
#data privacy#online privacy#such a long post…#politics#? is it politics idk#iOS is entirely proprietary and closed source‚ that's why you're unable to do anything that android/samsung can do#i personally plan on getting a phone where i can swap the entire OS out but that'll be down the line
44K notes
·
View notes
Text
YouTube Scriptwriting for Brands: What Content Writers Need to Know
YouTube is no longer just a platform for creators and influencers—it’s a powerful tool for brand storytelling, product education, and audience engagement. Businesses across industries, from SaaS to skincare, are tapping into YouTube not just to get views, but to build trust and drive conversions.
But there’s a catch: YouTube scriptwriting isn’t the same as writing blogs or ads. And yet, many content writers treat it that way—resulting in videos that look good but don’t convert, educate, or retain viewers.
Whether you're promoting lifestyle products, thought leadership, or pay per click services, here’s what every content writer must know about writing for YouTube in a brand context.
1. Write for the Ear, Not the Eye
The way we read and the way we listen are very different.
Blog readers can skim, scroll, and reread. YouTube viewers? They tune out in seconds if the language feels unnatural or robotic.
Tip: Write scripts like you speak. Use contractions, simple transitions, and conversational flow.
Bad script line:
“Our software offers a comprehensive suite of tools designed to optimize performance metrics across verticals.”
Better version for YouTube:
“Our tool helps you get better results—fast. No fluff, no wasted spend.”
Reading it out loud during editing helps identify awkward phrasing and pacing.
2. Hook Viewers in the First 10 Seconds
YouTube’s algorithm favours high retention rates. If viewers drop off early, the video won’t rank—even if the rest is excellent.
Start with a strong hook:
Ask a bold question
Call out a pain point
Tease the outcome
Example:
“Still wasting money on PPC ads that don’t convert? In this video, we’ll show you how to fix that—step by step.”
The hook should promise value and preview the transformation the viewer will get.
3. Structure Like a Funnel
Think of your video script as a mini funnel:
Hook – Grab attention
Intro – Explain who you are and what the viewer will get
Body – Deliver value (tutorial, story, walkthrough)
CTA – Guide them to the next step
For brand videos, especially if you're offering services like pay per click services, you don’t need to “sell hard”—just make the next step clear.
4. Keep Sentences Short and Visual
People process spoken words slower than text. Long, complex sentences will lose viewers.
Tips:
Break up ideas into shorter lines
Use action-oriented language
Suggest visuals for editors in brackets (e.g., [show dashboard demo], [insert client testimonial clip])
This makes it easier for both the speaker and video editor to keep pacing tight and dynamic.
5. Embed Branding Subtly
Brand mentions should feel natural, not forced.
Instead of saying:
“We at XYZ Company are the best at PPC.”
Try:
“Here’s how we helped a client cut their ad spend in half using a smart budget reallocation strategy.”
Use real examples, client success stories, or data to let the brand value emerge organically from the content.
6. Use CTAs Strategically
YouTube videos are great lead generators—but only if you tell viewers what to do next.
Good CTA options:
“Download the free checklist in the description”
“Book your free PPC audit today”
“Watch our next video on Google Ads optimization”
CTAs should match the video intent. If it’s educational, offer something to continue learning. If it’s product-focused, offer a free trial or consult—especially useful when marketing pay per click services.
7. Consider Script Length and Viewer Attention
Aim for tight scripts:
1–2 minutes = ~150–250 words
3–5 minutes = ~400–700 words
If your video is longer than 5 minutes, break it into chapters or make sure there's a clear progression (e.g., “3 steps,” “5 common mistakes”).
Long doesn’t mean better—engaging means better.
8. Collaborate With Visual & Voice Teams
Writers don’t operate in isolation. Share the script with:
Video editors to match visuals with narration
Voiceover artists to adjust tone and pacing
Marketing leads to align on CTA and campaign goals
This ensures the final output feels polished, intentional, and aligned with the brand.
Conclusion: Strong Scripts Build Stronger Funnels
YouTube scriptwriting blends marketing psychology, storytelling, and clarity. It’s not about sounding smart—it’s about sounding clear, helpful, and human.
As brands expand their content mix beyond blogs and landing pages, YouTube becomes a key asset. And whether you’re using it to educate new leads or support pay per click services, the script is where the conversion journey begins.
Want help writing high-converting YouTube scripts tailored to your funnel? Let’s collaborate and make your next video your most effective one yet.
1 note
·
View note
Text
Free & Powerful: Best Photo Editing Apps for Android Devices
In the era of phone photography, editing your images prior to posting them is just as crucial as capturing them. Whether you are an occasional user or an emerging content designer, the best free photo editor for Android can totally change your images into scroll-stopping images. Happily, the Play Store teems with good choices—most of them free and surprisingly capable.
In this tutorial, we'll walk you through the best free image editing application for Android, including the top choices that have professional-level capabilities without requiring you to spend a rupee.
Why You Need a Good Photo Editing App
Smartphones have advanced with in-camera capabilities, but editing apps allow you to tweak the minute details—brightness, contrast, saturation, filters, and even eliminate unwanted objects. With the top free photo editing app for Android, you get to do all this on-the-go, from your phone, without a computer.
Apps now provide features such as:
AI-driven background removal
Filters in one tap
Object cloning and healing
Multi-step color correction
Text overlays and stickers
So, let's get started with the best free photo editor apps for Android.
1. Snapseed – By Google
Snapseed is still a go-to for many and pros alike. It provides a smooth, ad-free experience along with an enormous collection of editing tools. From selective editing to accurate color adjustments, it's a clear winner as a best free photo editing app for Android.
Key Features:
29+ editing tools and filters
RAW file editing
Blemish healing tool
Lens blur and HDR scape
2. Lightroom Mobile – Adobe Quality for Free
Lightroom Mobile provides robust capabilities under a free plan that are well-suited for color grading and high-end editing. It is generally recommended as the best free photo editor app for Android for someone who is already familiar with Adobe's desktop software.
Key Features:
Professional presets
Auto-adjust AI tools
Selective edits and healing brush
Cloud sync for Adobe subscribers
If you're a beginner or want precise control over your photos, Lightroom is a solid choice for the best free photo editing software for Android.
3. PicsArt – Creative Freedom
PicsArt is the ideal app for artistic editing. It's filled with filters, stickers, collage features, and more. Though it does have in-app purchases, its gratis features make it a reliable choice when on the lookout for the best free photo editing app for Android.
Key Features:
AI effects
Background changer
Drawing tools and brushes
Meme and sticker generator
4. PhotoDirector – Real-Time Editing Fun
PhotoDirector integrates beauty filters, animations, and visual effects into a super-intuitive interface. Most users think of it as a best free photo editing app for Android due to how simple it makes advanced edits.
Top Features:
Sky replacement
Object removal
Animated decorations and overlays
Face retouch tools
PhotoDirector sits high among apps with advanced effects without cost, according to World Tech Zone.
5. Canva – Simple Yet Powerful
Though mostly recognized as a design application, Canva's mobile app features a useful photo editor. If you're a social media fan, this may be the best free photo editing software for Android to suit your tastes.
Major Features:
Drag-and-drop interface
Tools for overlaying text and graphics
Pre-made templates for Instagram, YouTube, etc.
One-tap improvements
6. Pixlr – No-Nonsense Editing
Pixlr has been relied upon by Android users for a long time because of its balance of simplicity and functionality. It's easily accessible and does not consume device memory, and so it's an underappreciated best free photo editing app for Android.
Major Features:
Double exposure
Auto-fix and stylize filters
Collage maker
Easy UI for quick editing
Choosing the Right App for You
With there being so many fantastic options, choosing the best free photo editing app for Android comes down to your needs:
Rapid social posts? Try Canva or PicsArt.
Pro retouching? Lightroom or Snapseed works best.
Artistic collages? Pixlr or PhotoDirector are perfect.
Whatever you do, each app listed here is a best free photo editing app for Android and all provide robust capabilities without requiring you to pay upfront.
Tricks for Getting the Most Out of Your App
Use all tools: Most users only work with basic filters. Get into curves, tuning, and layering controls.
Save presets: You can save your look with apps such as Lightroom and Snapseed.
Don't over-edit: Make images stand out, not appear phony.
High-resolution exports: Always export your photo in the highest resolution available.
According to World Tech Zone, AI-powered photo editing trends will only increase in 2025, so the time is ideal for playing around with your choices.
Final Thoughts
Having the top free photo editing application for Android is equivalent to having a pocket photo studio. Whether you are beauty-fying a selfie or producing content for your audience, these applications guarantee that you don't require costly software or a desktop computer in order to achieve professional-looking outcomes.
Keep in mind, the proper app has the potential to take your smartphone photography from great to incredible—and the top free photo editor app for Android is only a click away.
0 notes
Text
Explore LinkyDoo: Your All-in-One Platform for Bookmarks, Classified Ads, Business Listings, Articles, and Profiles

Page Content - Bookmark Manager - Classified Ads - Business Listings - Article Publishing - Profile Creation - Why Use LinkyDoo? - Start Exploring LinkyDoo Today The internet is overflowing with tools, content, and platforms — but wouldn't it be great if everything you needed to stay organized, informed, and connected was all in one place? That’s exactly what LinkyDoo delivers. LinkyDoo is a dynamic web platform designed to cater to individuals, entrepreneurs, and professionals by offering a suite of powerful features — including Bookmark Management, Classified Ads, Business Listings, Article Publishing, and Profile Creation. It simplifies digital engagement and gives users the tools to share, promote, and organize content efficiently.
🔖 Bookmark Manager: Save, Organize, and Share
The internet is vast, and keeping track of useful links can be a daunting task. LinkyDoo’s Bookmark feature provides a streamlined way to store, categorize, and retrieve your favorite web pages. Key Features: Save unlimited bookmarks with titles, descriptions, and categories Tag bookmarks for easy search and filtering Public and private visibility settings Generate public URLs for shared bookmarks Browse latest and trending links submitted by other users Whether you’re collecting educational resources, keeping track of useful tools, or curating personal favorites, LinkyDoo makes sure you never lose a link again.
📢 Classified Ads: Buy, Sell, or Offer Services
Looking to sell something locally or promote a service? The Classified Ads section on LinkyDoo allows users to post and browse listings across a wide variety of categories including Electronics, Jobs, Real Estate, Services, and more. Key Features: Easy-to-use submission form with rich text formatting Upload images to support your listing Set categories and tags for improved discoverability View and manage your ads from a personalized dashboard Search ads with smart filters by category, keywords, or tags Paginated results for fast loading and organization The classifieds section is perfect for freelancers, small businesses, or anyone looking to reach an engaged local or online audience.
🏪 Business Listings: Promote Your Business Like a Pro
A strong online presence starts with a well-crafted business listing. LinkyDoo enables businesses to create rich, interactive profiles that showcase their offerings and connect with potential customers. Key Features: Add your business name, contact details, logo, and address Use Google Maps integration with location pin and autocomplete Upload a business gallery with multiple image support and previews List services offered with dynamic input fields Input operating hours and days Include GMB (Google My Business) links for added credibility Searchable by category and city/state location From restaurants and local shops to digital agencies and service providers, LinkyDoo provides a powerful platform to make your business more visible.
✍️ Article Publishing: Share Knowledge, Stories, and News
If you’re a blogger, writer, or domain expert, LinkyDoo gives you a voice through its Article feature. You can create and publish long-form content using an intuitive rich-text editor. Key Features: Supports heading tags (H1 to H6), paragraphs, line breaks, and horizontal rules Customize font size, font color, and font family Upload and insert images, links, and media content SEO-friendly URLs with custom slugs and unique alphanumeric IDs Articles organized by category and tags Public visibility and easy sharing on social media Whether you're writing tutorials, company updates, or opinion pieces, LinkyDoo turns your words into professionally formatted, easily shareable content. Learn More about Article Publishing.
👤 Profile Creation: Build Your Online Identity
LinkyDoo supports individual users through public profiles that serve as a hub for all their activity on the platform. From bookmarks to business listings, your profile showcases your contributions and builds your digital footprint. Key Features: Custom username with public profile URL (e.g., ?profile=username) Displays user's submitted bookmarks, classifieds, listings, and articles Edit and manage your content from a personal dashboard Profile dropdown for easy navigation: View Profile, Edit Profile, Public Profile This makes LinkyDoo ideal not only for individuals but also for creators, marketers, and professionals looking to display a unified online presence.
🌟 Why Use LinkyDoo?
LinkyDoo is more than a simple content submission platform. It is a centralized digital ecosystem that: Encourages organization and productivity Helps users share and promote information easily Boosts local SEO for businesses Offers an intuitive and mobile-friendly interface Supports multi-format content including text, images, links, and maps
🔗 Start Exploring LinkyDoo Today
Ready to explore everything in one place? Visit https://linkydoo.taoremtls.in/ and start bookmarking, posting, promoting, and connecting with the world — the smarter way. From students to entrepreneurs, LinkyDoo is the platform that brings it all together. Read the full article
0 notes
Text
Best Freelance Niches in 2025 That Pay Well
Discover the top high-paying freelance niches in 2025. Learn which industries offer the most opportunities and how to find freelance work that pays well.

Best Niches to Find Freelance Work That Pays Well in 2025
The freelance economy is booming in 2025. With the rise of remote work, AI tools, and global hiring platforms, more professionals are ditching the traditional 9-to-5 in favor of flexible, well-paying freelance gigs. But here's the catch—not all freelance work pays the same. If you want to build a sustainable freelance career, choosing the right niche is crucial.
In this blog, we’ll explore the best niches to find freelance work that pays well in 2025, and show you how to get started on platforms like Workflexi.com to land premium freelance gigs online.
Why Picking the Right Freelance Niche Matters
Choosing a high-demand, high-paying niche allows you to:
Command better rates
Stand out in a crowded market
Work with top-tier clients
Enjoy consistent project flow
Let’s dive into the top 10 niches that freelancers should explore in 2025.
Top 10 High-Paying Freelance Niches in 2025
1. Software Development & Web Development
Tech skills are always in demand. Freelance developers earn top dollar, especially those proficient in full-stack development, React, Node.js, and Python. Businesses are always looking for skilled coders to build apps, websites, and custom solutions.
2. Digital Marketing & SEO
Every business wants to grow online, and they need digital marketers to make it happen. Skills in SEO, Google Ads, email marketing, and funnel optimization are highly sought-after. If you can deliver measurable results, clients will pay premium rates.
3. Graphic Design & Branding
From social media graphics to brand identity design, companies are constantly investing in visual content. Tools like Figma and Adobe Creative Suite are must-haves. Designers who understand UX/UI trends can find freelance work that pays extremely well.
4. Content Writing & Copywriting
Words still matter in 2025! Businesses need writers for blog posts, web copy, product descriptions, and more. Niches like SaaS writing, technical writing, and persuasive copywriting command high rates.
5. Video Editing & Animation
With short-form video content dominating platforms like Instagram, TikTok, and YouTube, video editors are in high demand. Whether it’s for ads, tutorials, or motion graphics, this creative field offers a lot of freelance gigs online.
6. Virtual Assistance & Admin Support
Freelancers who can manage emails, organize calendars, book appointments, and handle admin tasks are invaluable to solopreneurs and startups. If you're organized and tech-savvy, virtual assistant gigs are worth exploring.
7. Finance & Accounting
From bookkeeping to tax filing, financial professionals can easily find freelance work assisting small businesses and startups. Platforms like Workflexi often feature accounting-related projects that are remote and well-paid.
8. Online Tutoring & Coaching
Online education continues to grow. If you’re skilled in academics, fitness, business, or personal development, tutoring or coaching online can be both fulfilling and profitable.
9. Cybersecurity & IT Consulting
Cyber threats are increasing, and companies are investing more in protecting their data. Freelancers with skills in IT security, risk analysis, and compliance audits are earning high hourly rates.
10. AI & Machine Learning Specialists
With businesses incorporating AI into operations, freelancers with expertise in machine learning, data science, and automation are highly valuable. This niche is only growing, and it pays accordingly.
How to Choose the Right Niche for You
Not sure where to start? Follow these steps:
Assess your current skills and interests.
Research demand and competition in each niche.
Explore platforms like Workflexi.com to see what freelance gigs are trending.
Test different niches through small projects to find the right fit.
The goal isn’t just to pick a niche—but to find one where you can thrive, grow, and charge premium rates.
Where to Find Freelance Gigs Online in 2025
There are several platforms to find freelance work, but not all are beginner-friendly or local-business focused. That’s where Workflexi.com stands out. Whether you’re just starting out or already have experience, Workflexi connects you with businesses looking for your specific skill set.
Benefits of using Workflexi:
Access to verified freelance gigs online
Opportunities for short-term and long-term projects
Flexibility to work on your own terms
A supportive community of fellow freelancers
If you’re serious about finding freelance work in a high-paying niche, Workflexi is the place to begin your journey.
Final Thoughts
2025 is the perfect time to launch or level up your freelance career. Whether you’re a developer, designer, writer, or strategist—there’s a niche out there that pays well and fits your goals.Don’t wait for clients to come knocking. Be proactive, build your profile, and start applying for freelance gigs online today. Choose a niche that aligns with your strengths, and make the most of platforms like Workflexi.com to find freelance work that sets you up for long-term success.
0 notes
Text
Unlocking the Power of Wix Forums: Your Guide to Building an Online Community in 2025
Online communities are thriving in 2025, and for website owners in the USA and UK, Wix forums offer a seamless way to connect with visitors, spark discussions, and boost engagement. Whether you’re a small business owner, a blogger, or a hobbyist, adding a Wix forum to your site can transform it into a lively hub where ideas flow freely. This guide dives into everything you need to know about Wix forums—from setup to customization—and how to leverage them effectively. Plus, we’ll explore platforms that enhance your forum experience and help you grow your audience.
Wix, known for its user-friendly website builder, includes a powerful forum app that’s perfect for fostering interaction. Curious about how to get started or why it’s worth your time? Let’s break it down with practical tips, platform insights, and a clear path to success.
Why Wix Forums Matter in 2025
In an era where engagement drives traffic, Wix forums stand out as a tool to keep visitors coming back. They’re not just discussion boards—they’re community builders. Here’s why they’re a game-changer:
Boost Engagement: Visitors who post or comment are invested in your site.
SEO Benefits: Fresh, user-generated content signals activity to Google, potentially lifting your rankings.
Community Loyalty: A space for like-minded people (e.g., gardeners sharing tips) fosters a sense of belonging.
For UK and USA users, where online interaction is a cultural staple—think Reddit’s popularity or the BBC’s comment sections—Wix forums tap into a ready audience. Whether you’re troubleshooting Velo code or debating the best luxury wallet, a forum fits any niche.
Getting Started with Wix Forums
Setting up a forum on Wix is straightforward, even if you’re new to web design. Here’s how to do it:
Add the Forum App In your Wix Editor, click “Add Apps” on the left, search for “Wix Forum,” and hit “Add to Site.” Instantly, two pages appear: the Forum Page (where posts live) and the Members Page (for community interaction).
Customize Categories From your dashboard, go to “Forum,” then “Categories.” Add topics like “General Chat” or “Tech Tips.” Customize headers with colors, images, and descriptions (max 65 characters) to reflect your brand.
Post Your First Thread Click “Create New Post” in the Forum settings. Write a welcoming message—say, “Join our Wix forums UK community!”—and pin it to the top for visibility.
Set Permissions Decide who can post: everyone, members only, or owners. Guests can read and like, members can comment, and you (the owner) can manage it all.
It’s that simple. Within minutes, your site has a buzzing forum ready to grow.
Top Tips for Running a Successful Wix Forum
1. Encourage Participation (Informational Intent)
Ask open-ended questions like “What’s your favorite Wix feature?” to spark replies. Share how-to guides—e.g., “How to use Wix forums for beginners”—to draw in curious users.
2. Customize for Appeal (Transactional Intent)
Tweak fonts, button colors, and layouts via the “Design” tab. A sleek look keeps users browsing longer—think a crisp blue banner for a UK tech forum or a bold red for a USA lifestyle one.
3. Monetize with Paid Categories (Commercial Intent)
Wix lets you lock premium content behind a paywall. Offer exclusive “Wix forum subscriptions” for tutorials or insider tips—perfect for entrepreneurs.
4. Moderate Smartly (Navigational Intent)
Pin key threads (e.g., “Wix forums login help”) and delete spam. Use the Wix mobile app to manage on the go—search “Wix app forum settings” in the App Store.
5. Leverage SEO (Informational Intent)
Sprinkle keywords like “best Wix forum tips” or “Wix forums USA guide” in posts and titles. User-generated content naturally boosts organic reach.
0 notes
Text
¿Quieres ganar dinero online, pero no sabes por dónde empezar? ¡No te preocupes! En este artículo, aprenderás cómo monetizar tu web y convertirla en una máquina de hacer dinero. Tus expectativas Antes de aprender a monetizar tu web, hay algunos factores que debes tener en cuenta. No existe el dinero instantáneo. Monetizar una web requiere tiempo y dedicación. Es posible que al principio no obtengas la cantidad de ganancias esperada, pero no permitas que esto te detenga. Para conseguir los resultados que deseas, hay un factor universal que todo dueño de sitios web debe tener: el tráfico. Sin tráfico web, no podrás obtener ganancias con tu sitio. Consulta nuestro artículo sobre cómo generar tráfico a tu sitio web para saber más. Ahora que conoces todos los factores que deberás tener bajo control, veamos cómo monetizar un sitio web. Cómo monetizar una web Una vez que tu sitio web genere suficiente tráfico, ¡es hora de monetizarlo! 1. Publicidad de pago por clic con Google AdSense PPC es un modelo de publicidad en línea donde los dueños de páginas web pueden obtener ingresos pasivos cada vez que un lector hace clic en un banner publicitario. La herramienta más popular para esto es Google AdSense. Ganar dinero con Google AdSense es una de las formas más fáciles, ya que no requiere mucho esfuerzo configurarlo. Otro aspecto importante es que puedes solicitar ser socio de Google AdSense incluso si tienes varios sitios. Debido al inmenso soporte de Google, los editores no tienen que preocuparse por la configuración de los anuncios. Los foros y tutoriales de clientes también están disponibles para que otros usuarios te ayuden a comenzar. Entonces, ¿cuánto vas a obtener? La mejor parte es que Google siempre te pagará a tiempo, generalmente entre el 21 y el 26 de cada mes. Cómo monetizar una página web con Google AdSense: Lee los términos y condiciones. Asegúrate de que tu sitio web cumpla con todos los criterios. Procede a registrarte en Google AdSense y espera la aprobación. Una vez que tu cuenta haya sido aprobada, simplemente inserta el código JavaScript en un widget. Coloca los anuncios en los lugares que prefieras de tu sitio web. Para leer un tutorial completo sobre esto, consulta nuestro artículo sobre cómo agregar AdSense a WordPress. 2. Vender espacio publicitario También vale la pena intentar vender espacios libres en tu sitio directamente a los anunciantes. Este método lleva más tiempo, pero maximiza los ingresos que recibirás al mostrar anuncios. Los espacios pueden ser un enlace en la parte inferior de la página, banners laterales o pequeñas ventanas emergentes. El precio de cada uno también puede variar: tendrás total control sobre las negociaciones y los precios. Sin embargo, para usar este método, debes tener una alta tasa de conversión y no solo tráfico. Esto se debe a que este método utiliza el modelo de pago por clic o pago por visitante. Los anunciantes te pagarán según la cantidad de personas que hagan clic en el anuncio o visiten el sitio. Entonces, ¿cómo informar a los anunciantes que estás vendiendo un espacio publicitario? Haz un kit de medios, un resumen que describa las estadísticas y los datos clave de tu sitio web. Envíalo a posibles anunciantes. Házles saber por qué deberían trabajar contigo. Cuando hayas conseguido un grupo de anunciantes, adminístralos con el Administrador de anuncios de Google. Puedes usar herramientas en línea como Clicky Web Analytics, Quantcast y Google Analytics para obtener información sobre tu sitio web. Si tienes un sitio de WordPress, agregar Google Analytics es realmente fácil. Encontrar a los anunciantes adecuados puede ser complicado. Pero, con la ayuda de Google Ads, LinkedIn y SellerCrowd, podrás hacerlo en poco tiempo. 3. Marketing de afiliados Si tienes talento para opinar sobre productos o promocionarlos, puedes probar el marketing de afiliación para monetizar tu página web.
A través de enlaces de afiliación, puedes ganar comisiones cuando los lectores compren los productos o servicios de las empresas con las que te afilies. El marketing de afiliados es uno de los métodos más sencillos para obtener ingresos pasivos. No necesitas tener tus propios productos para vender. Los sitios web como Wirecutter y Smart Passive Income han logrado su éxito a través del marketing de afiliados. Cómo monetizar una web a través del marketing de afiliación: Crea tu sitio web y haz que se centre en recomendar y promocionar productos o publica opiniones de artículos o servicios relacionados con tu contenido. Únete a buenos programas de afiliados como Hostinger y Amazon o busca redes de afiliados, como ShareASale y CJ Affiliate. Introduce de forma natural enlaces de afiliados en tu contenido. 4. Monetización basada en donaciones Si tu contenido es valioso y necesitas apoyo para hacer crecer tu sitio web, puedes solicitar cortésmente donaciones. No todos los lectores donarán, pero si tienes suficiente tráfico, puedes ganar lo necesario para operar tu sitio web. Puedes configurar botones de donación en tu sitio que permitan a los lectores contribuir directamente. Vincúlalos a procesadores de pago como PayPal, Stripe o Fundly. Agrega los botones como widgets y colócalos donde desees. Pero asegúrate de que los lectores puedan encontrarlos fácilmente. 5. Vender tus propios productos o servicios Si tienes los productos y las habilidades para venderlos pero no quieres lidiar con las molestias de abrir una tienda física, deberías considerar crear una tienda virtual. sitios web como Bellroy y Tattly han hecho fortuna en Internet ofreciendo excelentes productos y servicios a sus clientes. El proceso de hacer una tienda en línea es más que solo crear un sitio web simple. Pero tener una tienda de comercio electrónico construida en un día no es un mito. Entonces, cómo monetizar un sitio web a través de un eCommerce: Establece tu nicho. Elige un nombre de dominio y adquiere un servicio de hosting web. Puedes optar por una solución optimizada de eCommerce para un comienzo fácil. Instala WordPress. Configura WooCommerce o una plataforma de comercio electrónico similar. Diseña tu tienda navegando por los temas disponibles y personalizándolos. Lugares con los que puedes comenzar: la biblioteca de temas de WooCommerce y la biblioteca de temas de WordPress WooCommerce. Agrega tus productos navegando a Productos >> Agregar nuevo en la barra lateral. ¡Comienza a comercializarlos y obtén tu primera venta! Lleva tiempo, pero nada es imposible con impulso y dedicación. Para un tutorial a profundidad, visita nuestro artículo sobre cómo iniciar una tienda en línea. 6. Contenido patrocinado El contenido patrocinado es una colaboración entre tú como editor y las marcas con las que te estás asociando. Las empresas te pagan para crear contenido para ellos y publicarlo en tu sitio. El contenido puede ser en forma de anuncios de productos o ventas, ofertas, infografías o reseñas. Pueden ser escritos por ti o por la propia marca patrocinadora. Puedes cobrar una tarifa más alta si vas a escribir tú la publicación además de publicarla en tu sitio web. Para lograr publicar contenido patrocinado, debes considerar lo siguiente: Cuánta influencia tienes en línea. El número de publicaciones patrocinadas que escribirás cada mes. Cuánto tiempo pasarás creando el contenido. Valor de la marca (el contenido patrocinado frente a tu marca de blogs). BuzzFeed, por ejemplo, puede cobrar alrededor de $100,000 por una pieza de contenido patrocinado. Esto se debe a su alta influencia y valor de marca. Cómo monetizar un sitio web a través de publicaciones patrocinadas: Empieza de a poco; Kristy Ellington, una comercializadora de contenido y estratega, recomienda comenzar con marcas y compañías nacionales más pequeñas. Construye un portafolio. Asóciate con agencias de marketing y relaciones públicas.
Busca en los mercados de patrocinio como Tomoson, Cooperatize y PayPerPost. El contenido patrocinado es una forma viable de agregar ingresos a tu sitio web. Solo recuerda ser transparente con tus lectores y ser inteligente en el proceso. 7. Despídete de tu sitio web Este método es un poco diferente a los demás, ya que implica la venta de tu sitio. Puede ser rentable según el tipo de sitio que tengas. Para tener una idea más amplia de en cuánto puedes vender un sitio, puedes navegar a través de los listados de Empire Flippers. Los factores que influyen en el precio de venta de un sitio web son: La cantidad de tráfico que tiene. Cuanta ganancia genera. La estabilidad de ingresos. El crecimiento continúo. 8. sitios web de membresía Un sitio web de membresía es como una actualización del método de donaciones. Pero con este método les cobrarás a los lectores por acceder a contenido específico. Por ejemplo, International Living es una revista de viajes en línea muy bien hecha. Blue Apron no es solo un blog de recetas ordinario. Los lectores deben registrarse/suscribirse si desean acceder al contenido de estas páginas web. Si estás seguro de que vale la pena pagar por tu contenido, puedes intentar monetizar tu web de esta manera. Cómo monetizar un sitio web a través de membresías: Encuentra el modelo adecuado para tu sitio.Suscripción: los usuarios pagan mensualmente o anualmente para acceder al contenido y a los beneficios de un sitio.Transacción: venta por separado de contenidos individuales como videos tutoriales, descargas de audio o programas de capacitación.Medido: el contenido es gratuito hasta que los lectores lleguen a cierto punto de control. Tendrán que pagar una cierta cantidad si quieren seguir leyendo. Configura el método de pago. Si ya tienes un sitio de WordPress en funcionamiento, todo lo que tienes que hacer es pagar un plugin para sitios con miembros. Plugins recomendados que puedes usar para la restricción de contenido: Membership & Content Restriction: Restringe cualquier parte de tu contenido, establece planes de suscripción únicos y procesa los pagos de membresía. Simple Membership: crea niveles de membresía y restringe el contenido a niveles de membresía específicos. WP-Members: oculta partes de tu contenido y muestra teasers. También proporciona herramientas para configurar formularios de registro dedicados donde lo desees. 9. Cupones con enlaces de afiliados ¿A quién no le gustan los descuentos? El 97% de los consumidores buscan ofertas cuando compran. Otra forma de marketing de afiliación es ofreciendo cupones de socios afiliados. Rakuten es el líder cuando se trata de descuentos y cupones en línea. El sitio atrae a los clientes y los dirige a los comerciantes con los que se han asociado, ganando comisiones en el camino. Poner cupones en tu sitio es también una oportunidad para atraer más tráfico web. Así que, ¿cuáles son las opciones? Publica cupones de socios/programas afiliados a los que te hayas unido con tu sitio. Establece contacto con locales minoristas y nacionales para obtener ofertas que puedas promocionar en tu sitio web. Crea sitios web dedicados a ofrecer cupones. Puede ser general (como coupons.com) o específico (como Holidayers) 10. Ofrece cursos/coaching en línea Si tienes conocimientos valiosos que compartir, puedes monetizar un sitio web ofreciendo cursos en línea. Los cursos digitales vienen en diferentes formatos. Pueden ser simples descargas de PDF, audios grabados o videos bien producidos. Guitar Tricks, por ejemplo, tiene videos paso a paso, así como artículos de procedimientos. ¿Cómo monetizar un sitio web a través de cursos? Elige un tema/nicho. Crea un nuevo sitio web, o puedes integrar tu curso a un sitio existente (blog, sitio de comercio electrónico, sitio de membresía, etc.). Sube contenido y promociónalo. La creación de cursos en línea puede ser una buena
opción para rentabilizar una web, ya que tus ingresos sólo estarán limitados por el tráfico web. Conclusión Ganar dinero al administrar un sitio puede ser una experiencia emocionante. Sin embargo, monetizar un web requiere tiempo, dedicación y lo más importante: tráfico. Hemos visto diez formas diferentes de cómo monetizar una página web. Echemos un vistazo: Google AdSense: muestra anuncios mientras Google hace todo el trabajo. Venta de espacio publicitario: conéctate directamente con los anunciantes, gestiona tus propios anuncios y maximiza tus ganancias. Marketing de afiliados: únete a los programas de afiliados e ingresa al mercado de afiliados para ganar comisiones. Monetización basada en donaciones: solicita donaciones a tus lectores. Vende tus propios productos: cobra a las personas por bienes y servicios. Contenido patrocinado: colabora con empresas y recibe pagos. Despídete de tu sitio web: vende tu sitio. sitio web de membresía: los lectores pagarán para acceder a tu contenido. Cupones con enlaces de afiliados: ofrece cupones y descuentos de comerciantes asociados. Ofrece cursos/coaching en línea: comparte tus habilidades y conocimientos mientras ganas dinero al mismo tiempo. Deyi es una entusiasta del marketing digital, con experiencia en diseño de páginas web, creación de contenido, copywrite y SEO. Forma parte del equipo de SEO & Localization de Hostinger. En su tiempo libre, le gusta desarrollar proyectos, leer un libro o ver una buena película. Para individuos o grupo pequeño: ✔️Ordena logos muy pero muy económicos para tu empresa, o para revenderlos en otros sitios que compran logos a precios más caros, quedándote con la diferencia, Click Aquí. ✔️Si piensas hacer varios pedidos, elige ésta opción, enviando un mensaje pidiendo precio por cantidad, Click Aquí. Para empresas: ✔️Si quieres pedir top freelancers, Click Aquí. ✔️Si quieres sólo expertos certificados, Click Aquí. ✔️Si quieres que nos encarguemos de seleccionar rápidamente los expertos que necesitas, Click Here.
0 notes
Text
Essential Tools for Streamlining Your Client Onboarding Process

1. CRM Tools for Centralized Client Management
Customer Relationship Management (CRM) tools like HubSpot, Salesforce, and Zoho CRM are indispensable for managing client information effectively. These tools help:
Organize client contact details and communication history.
Set up automated follow-ups and reminders.
Track the status of onboarding tasks.
By using a CRM, your PPC services team in Pune can maintain a centralized system, ensuring that no client details are overlooked during onboarding.
2. Project Management Tools
Platforms like Trello, Asana, or Monday.com streamline task assignment and tracking. For a PPC agency, these tools can be used to:
Create detailed onboarding checklists.
Assign tasks to specific team members, such as account setup or keyword research.
Monitor progress in real time.
These tools ensure that all onboarding activities are completed promptly and systematically.
3. Proposal and Contract Management Software
Using tools like PandaDoc or DocuSign simplifies the creation and signing of contracts. Key features include:
Customizable templates for proposals and agreements.
E-signature capabilities for faster approvals.
Real-time tracking of document status.
With these tools, your PPC services team can reduce delays and ensure all formalities are completed efficiently.
4. Communication Platforms
Effective communication is the cornerstone of a smooth onboarding process. Tools like Slack, Microsoft Teams, or Zoom enable real-time collaboration by offering:
Instant messaging for quick queries.
Video conferencing for detailed discussions.
Channels dedicated to specific clients or projects.
These platforms keep communication transparent and ensure that clients feel involved from the start.
5. Data Collection and Reporting Tools
Collecting relevant data is critical during onboarding to create effective PPC campaigns. Tools like Google Forms, Typeform, or Jotform help gather:
Business goals and target audience details.
Budget preferences and campaign objectives.
Login credentials for ad platforms.
This ensures your PPC services in Pune are customized to meet each client’s unique requirements.
6. Advertising Platform Setup Guides
Onboarding often involves setting up or auditing ad accounts. Tools like Google Ads Editor or Facebook Business Suite streamline account setup and campaign management. They allow you to:
Verify proper account configurations.
Set up billing information.
Optimize ad account settings based on industry best practices.
Ensuring these setups are flawless minimizes errors and enhances campaign performance.
7. File Sharing and Collaboration Tools
Tools like Google Drive, Dropbox, or OneDrive make it easy to share important documents and creative assets with clients. Features include:
Secure storage for sensitive information.
Real-time editing and collaboration.
Easy access to files from any device.
These tools keep all parties on the same page, ensuring transparency and efficiency.
8. Analytics and Reporting Tools
To build trust with clients, offer clear insights into campaign performance from day one. Tools like Google Analytics, SEMrush, or Supermetrics provide:
Initial performance benchmarks.
Customized dashboards tailored to client needs.
Regular reporting to track campaign success.
Your PPC services in Pune can stand out by showcasing professionalism and data-driven decision-making during onboarding.
9. Training and Knowledge-Sharing Platforms
Educating clients about PPC strategies can foster collaboration. Tools like Loom or Thinkific help create and share:
Introductory videos explaining PPC concepts.
Tutorials on accessing reports and dashboards.
Guides for providing constructive feedback
These tools empower clients, making them feel more confident about their investment in your PPC services.
10. Automated Workflows
Automation tools like Zapier or Make (formerly Integromat) can connect various platforms, reducing manual effort. For example:
Automatically add client details from forms to your CRM.
Notify team members of new onboarding tasks.
Trigger follow-up emails to clients post-onboarding.
Automation saves time, allowing your team to focus on delivering exceptional PPC services in Pune.
Conclusion
An efficient onboarding process sets the tone for a successful partnership. By leveraging the right tools, you can ensure that your PPC services are delivered seamlessly, building trust and long-term client relationships. As a trusted provider of PPC services in Pune, Digital Rhetoric is dedicated to optimizing every aspect of the client experience. From onboarding to campaign execution, we use cutting-edge tools to deliver unparalleled results.
Ready to streamline your PPC campaigns? Visit our dedicated page: PPC Services in Pune and let’s take your business to new heights!
0 notes
Text
Convert YouTube Videos to MP3 with the Fastest YouTube Converter
In today’s digital age, converting YouTube videos into MP3 format has become a common need for music enthusiasts, podcasters, and content creators. Whether you’re compiling a playlist, saving tutorials for offline use, or creating custom soundtracks, having a reliable YouTube converter is essential. EzMP3, a cutting-edge tool in this space, offers users a seamless, ad-free experience to meet their audio conversion needs. Here’s everything you need to know about this fast and user-friendly platform.
Why Choose EzMP3 for Converting YouTube Videos?
EzMP3 stands out among competitors for its unique combination of speed, safety, and advanced features. Unlike other converters cluttered with intrusive ads and unnecessary delays, EzMP3 provides a streamlined experience from start to finish.
Here are some key benefits:
Ad-Free Experience
The platform ensures a clean interface, free of annoying pop-ups and distractions. This focus on user experience makes EzMP3 ideal for quick and hassle-free conversions.
High-Quality Audio
EzMP3 supports audio quality up to 320kbps, ensuring crisp and clear sound. Whether you’re converting a music video or a podcast, you’ll receive professional-grade audio quality every time.
Customizable Features
One standout feature is the ability to trim audio before downloading. This is particularly useful if you want to extract specific parts of a video, such as a favorite song section or a podcast highlight.
Safety and Security
With increasing concerns about malware and data breaches, EzMP3 prioritizes user safety. It’s a secure platform designed to protect your device and personal information.
How to Use EzMP3’s YouTube Converter
Converting a YouTube video to MP3 with EzMP3 is straightforward, even for those with minimal technical experience. Here’s a step-by-step guide:
Find Your Video
Go to YouTube and copy the URL of the video you want to convert.
Paste the Link
Open EzMP3 and paste the URL into the converter box on the homepage.
Customize (Optional)
If needed, trim the audio by setting start and end points using the built-in editor.
Choose Quality
Select your desired audio quality, ranging up to 320kbps.
Download
Click the download button, and your MP3 file will be ready within seconds.
Meeting Google’s Content Guidelines
EzMP3 aligns with Google’s helpful content updates by focusing on user intent and delivering value. Its intuitive design and robust features ensure that users can effortlessly achieve their goals without unnecessary complications. Additionally, EzMP3’s ad-free nature demonstrates a commitment to user satisfaction, a factor increasingly prioritized by search algorithms.
Legal Considerations
While using a YouTube converter is convenient, it’s essential to respect copyright laws. Always ensure you have the rights or permission to download and use the content you convert. EzMP3 encourages users to comply with legal requirements and promotes ethical usage of its services.
Final Thoughts
If you’re searching for a fast, secure, and efficient YouTube converter, EzMP3 is an excellent choice. Its advanced features, including audio trimming and high-quality downloads, cater to diverse needs, making it a versatile tool for both casual users and professionals. Say goodbye to ads and low-quality audio—experience the EzMP3 difference today.
0 notes