#procreate tips
Explore tagged Tumblr posts
Visit Tumblr Blog
Explore Tumblr blogs with no restrictions, modern design and the best experience.
Last Seen Tumblr Blogs


Fun Fact
Women make up for the other 50% of Tumblr’s audience.
Note
what are the brushes you used for your recent post and what program do you use....
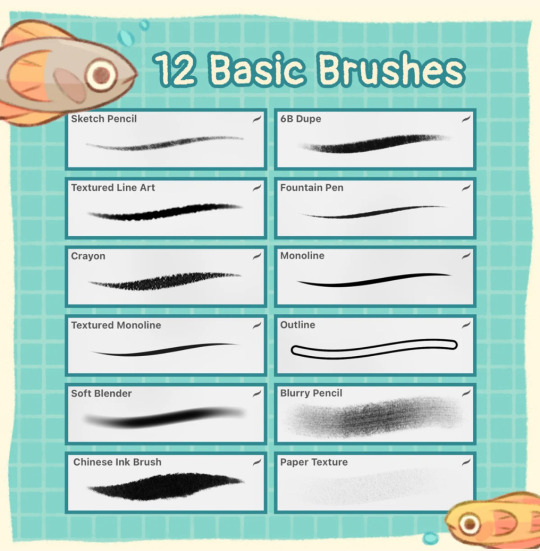
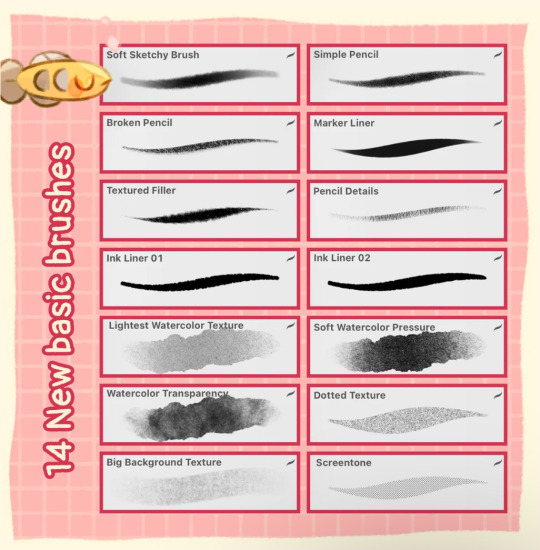
I use Procreate on my iPad! The lovely brush pack is by an artist named Olguioo. There are two volumes which I’ll link here and here.
The specific brushes I used were from Vol 2:

If you like the textured soft pencil look I definitely recommend
#all of procreates default pencil brushes are far to harsh for my taste#these and the prisma pencils are so nice#art tips#peachie asks
323 notes
·
View notes
Text

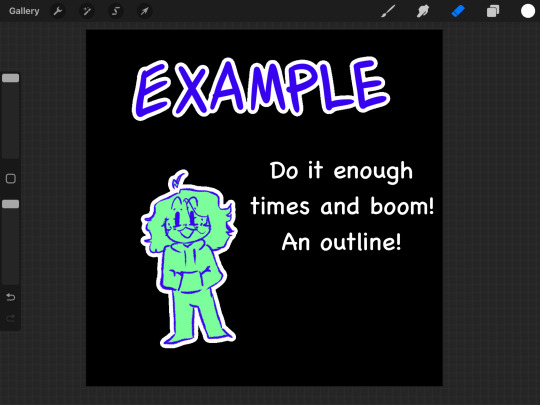
Leaving my procreate tips here.
137 notes
·
View notes
Text
I DONT KNOW HOW TO USE PROCREATE 😫💔💔
#artist in need#procreate#arcane#firelights#beginner digital artist#dontflipcanvasibegofu#digital art tips#procreate tips
106 notes
·
View notes
Note
Looking back at your aurora and sage besties comic (its one of my favorites, only being beaten by were amy and sonic being a Simp) and I've got to ask, HOW DID YOU DO SAGES GLITCHING SO FRANKEN WELL??? IT LOOKS AMAZING AND I PERSONALLY LOVE HOW THOSE GLITCHS TURN RED WHENEVER SHES ON NEFARIOUS TIMING ARVDGDBABA
YOU ARE MY FAVORITE SONIC ARTIST.
...just wanted to say and ask.
You are so kind, thank you! I'm so happy you like them!
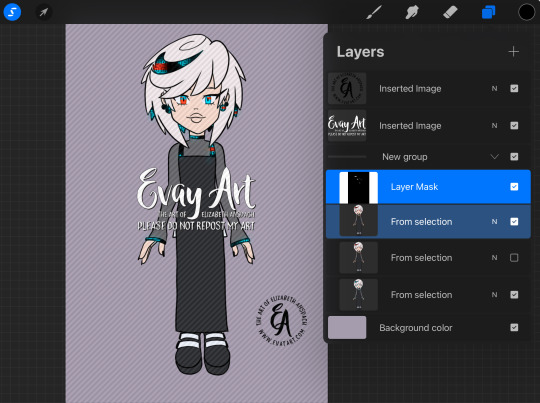
I do a lot of experimenting in Procreate until I find a technique I like. To achieve Sage's glitch, especially if she's doing something a little more wicked so her "red" side is showing, I'll start by drawing her in her blue version and her red version:

I'll select random rectangles from the red version and mask them/cut them out, so she's mostly blue but some red is showing:
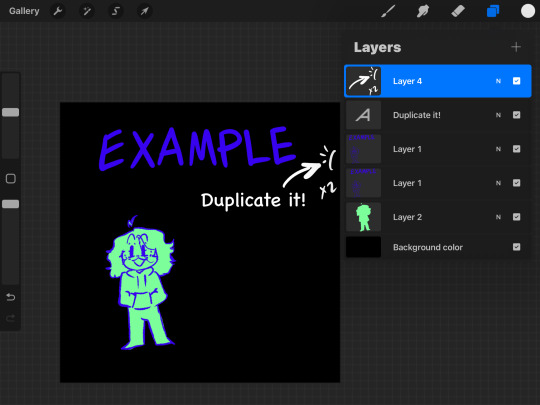
I'll duplicate this layer and keep a copy of the "clean version" and apply effects to the duplicate. In Procreate, I'll use the "Glitch" effect and use the “Artifact” setting and mess with it until it achieves a result I like:
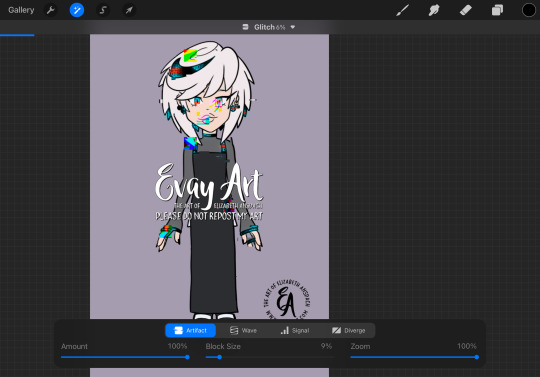
This may take several passes.
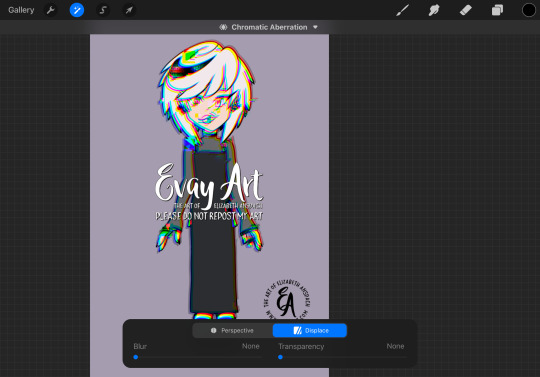
I duplicate the layers again, because again I always want to be able to go back if I don't like it. Then I'll play around with "chromatic aberration" under the “displacement” setting. She only needs a little for a subtle glitch effect, but if she's meant to look more menacing then I can go hardcore with it:
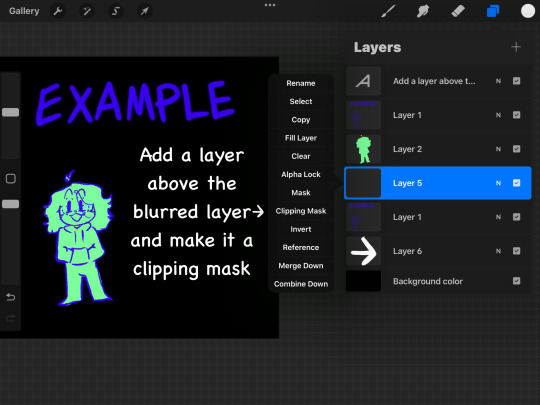
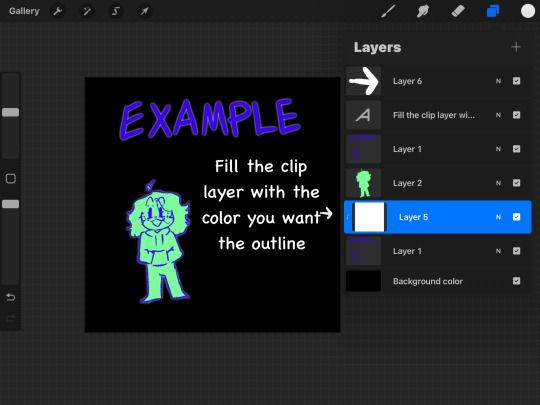
Then, I'll turn that original "clean" layer back on and I mask out the effect layer so only parts of it are coming through. When computers glitch, normally most of the image stays in tact and only some parts are scattered/messy so that's why I only have the effect in some areas.
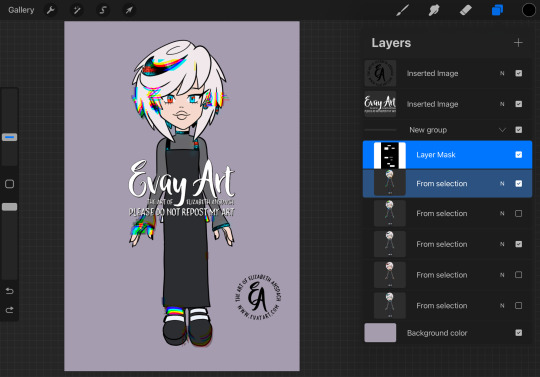
I might even slide bits of those rectangles to the left or right. It's just a matter of playing with it until I like how it looks.
I hope that explanation was easy enough to follow along!
Again, thank you so much! I'm really really happy you enjoy my art and stories 🥰 (and I'm delighted to hear you're a fan of Were!AmyXSimp!Sonic hehehe)
#ask me#evayQA#tutorial#procreate#procreate tips#sage the ai#sage robotnik#sonic trash#art tips#glitch effect
160 notes
·
View notes
Note
Hiii! :D
Hey, is it okay if you give me some tips on how to use Procreate? I'm most likely going to get an Ipad for Christmas, along with Procreate, and moving to another art program is hard 😅, plus, so I don't get confused on what to do lol
Ooh that’s awesome! 😍😍😍 I hope you get it! Procreate is AMAZING. Once you get used to it, it’s super easy to use. It’s not all that great with animation (just a bit glitchy when it comes to saving them), so I would still use a different app for that. But there are a bunch of really amazing brushes, so I definitely suggest playing around with them and figuring out which ones best fit your art style. 😁
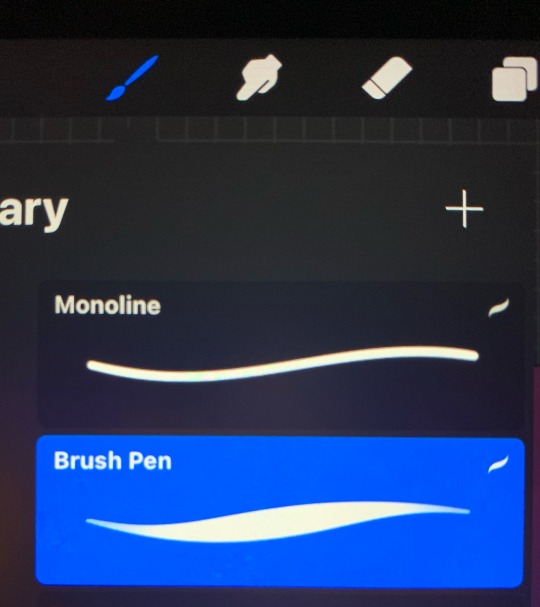
Here are some brushes I personally love using:
•The Monoline brush for inking and line art
•Round Brush for coloring in larger areas
•Brush Pen for lines that taper off at the end, like hair or facial features.
•Dove Lake for texturing things like plants and trees
•Currawong for texturing walls and buildings
•I use Twisted Tree with a super light opacity to texture anything made of wood, like tree trunks or rafters.
•Clay on a lower opacity is good for texturing anything made of stone
•Wildgrass on a lower capacity can be used to make some cool textured grass
•And of course, I love to use anything in the Luminance folder to make things SHINY AND SPARKLY 😜🤣
Those are just a few of my favorites. There are some really cool features in the top tabs, too. A Drawing Guide, blur features, liquifying tool. You can duplicate layers, or change their opacity; all sorts of things that I’m sure different drawing apps have, but they’re super easy to use on here! And so far, I haven’t discovered very many glitches with the app (one app I used to have would crash on the regular, and I would lose an entire drawing I spent hours on. But as many years as I have had Procreate, it has only crashed two or three times and my drawing was exactly as it was when I went back into it).
One tip I would tell you to use that I do all the time is quick erasing: Tap the screen with two fingers at once, and it will erase your last action. You can do it numerous times to erase however many of your previous actions that you want. You can also redo those deleted actions by tapping the screen with three fingers at once. Just something useful that took me a while to learn about. 😊
Oh, and when it comes to saving a drawing, I tend to save it as a PNG; better quality.
If you ever have any more questions about it, feel free to ask me! 💜
#q & a#artist q & a#artist questions#procreate#procreate app#procreate canvas#procreate brushes#procreate artist#procreate art#procreate tips#fanart artist
38 notes
·
View notes
Text
Drawing symmetrical shapes in Procreate
Short guide, also I’m assuming in this that you already know of and how to use the quick shape tool in procreate (draw shape -> hold -> quick shape)
For a perfect circle you draw an oval, hold to do the quick shape, and while holding tap on the screen and hold with 1 finger to snap to a perfect shape.

Make sure that you let the pen (or finger) that drew the initial shape leave the screen before the one snapped it to a perfect shape or else it’ll revert. You can do this to make perfectly symmetrical squares and triangles as well. When rotating them they’ll snap to a 15° rotation circle


This also works for the ellipse selection tool (but not the rectangle one)

Sorry for the low quality in the last two gifs, had to compress them
#somewhat art related#art hacks#procreate tips#procreate#procreate tutorial#art tips#id in alt text#alt text#alt text included#Id in alt#I kept the IDs brief for this one
25 notes
·
View notes
Text
youtube
HOW TO MAKE A COMIC IN PROCREATE + FREE RESOURCES ❤️
Hope it helps! Let me know if the resources are helpful! Links are in the video description!
Thanks for watching!
#tbbt#shamy#fanart#rgbcn#bigbangtheory#tutorial#how to make a comic in procreate#procreate tutorial#comic tutorial#free resources#free brushes#free tones#halftone hospital#dafont#free comic fonts#free fonts#how to make digital comic#procreate tips#procreate#procreate comic art#thebigbangtheory#sheldon cooper#amy farrah fowler#comic artist#youtube creator#youtube short#youtube tutorial#artists on tumblr#Youtube
29 notes
·
View notes
Note


(Keep in mind you have to duplicate and merge down this layer a good amount of times)
And that’s how I do it!
(Imma post a quick vid of me doing it in case this makes no sense :))
OMG.OMG.OMG!!!!! LETSS GOOO! Thank you so much purple :DDD this is wonderful! I know there’s a few different ways to do it but yours sounds easygoing ❤️💖🦇 thank you so much 😊 🥰💕🌸
177 notes
·
View notes
Note
Sorry if it was already asked but how do you get the funky texture in your drawings ∘ ∘ ∘ ( °ヮ° ) ?
this has not been asked, and i am happy to answer !! :-D
typically, i use brushes that already have some texture! i use cole's pencil pack for procreate!! it costs $5, but it's definitely worth the buy!!
for the noise textures in my backgrounds, i typically use the "Noise Brush" in the "Materials" section of the default procreate brushes!
and, for giving the whole drawing some extra texture, this is what i do:
Export the drawing as it is
Import the image at the very top layer
Staying on the same top layer, go to Adjustments>Gaussian Blur, do around %2
Adjustments>Noise, do around %10-20
(OPTIONAL) Adjustments>Saturation and crank the saturation up all the way
Lower the image's opacity anywhere from %10-25, and bam!! You have some textures and a nice, subtle bloom effect :-) you can tweak any of these steps to your liking. do whatever works for you!
these steps also may not work for other drawing applications! keep in mind i use procreate. if you use ibis paint x, clip studio, etc instead, then you may have to do things differently to get similar textures & effects for your drawing!
i hope this helps!! 💛🎨
#procreate#procreate tips#i think??#idk LMAO#drawing#digital art#art tips#i do nawt know what tags to add#bear with me#😭
33 notes
·
View notes
Note
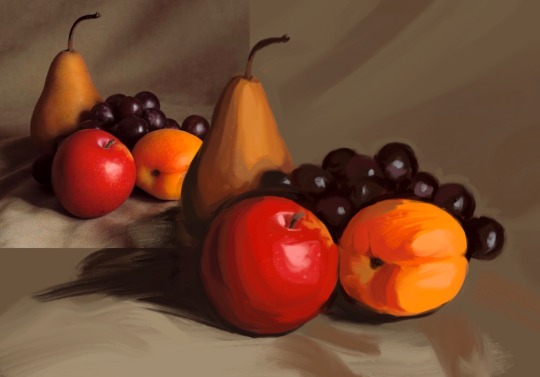
op congrats on the beautiful art style!! thanks for sharing your art with us. can i ask what kind of art program you use? the way you paint on it is sooooo lovely!!
GASP my first ask what an honor!!! thank you so much i appreciate it ^^
i use procreate with oil simulation brushes! i combined two small free packs but i cannot for the LIFE of me find the other one, luckily most free oil packs do the trick, as long as they have the color mixing wet setting on. link to the free pack: https://ittaimanero.gumroad.com/l/FREEThickPaint
i pretty much only use 3 on rotation (one for blocking one for general one for fine detail), and the flat brush from the free bundle is great for blocking out textured backgrounds:
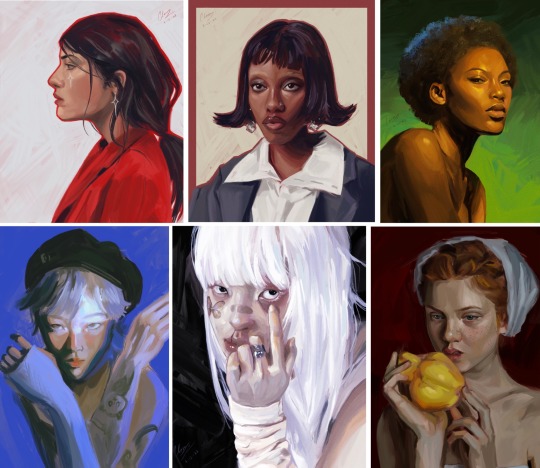
this is WAY more info than you asked for but i love these brushes lmao. theres a bit of a learning curve but it's so so worth it
i hope this helps!!! thank u again anon <3
#im p sure i took the other brushes from my friends dropbox#but theres a big chance theyre from manero's larger oil pack#ask#my art#procreate tips
22 notes
·
View notes
Note
I just downloaded procreate on my iPad (finally) and I’m so excited to start using it. You’re like the Timbern master in digital art and I know the cliche saying of “practice makes perfect” but do you have any tips for using procreate for beginners (i.e. best canvas size for sketching, best pencils/pens, how to do line art)
I can give some tips for sure!
The bigger the canvas the better, but keep in mind depending the size is the number of available layers you will have for your art, so just look at the way you make your art and ask yourself “Am I a multiple layer fiend or an all in one layer monster?” I do use multiple layers so my default canvas is 4000px X 2500px this gives me 63 layers to work with, I could go higher if wanted but I know myself, I do love my layers
Always remember RGB for online posting art CMYK for printing, regardless of digital or printing always go for 300DPI for better quality.
If you plan on using the time lapse option in procreate make sure it is set to 4k resolution and Lossless quality so it is crisp and beautiful.
Talking about video once you have saved the video on your device delete it from procreate to save storage.
Brushes is up to you friend, I would suggest try first the default brushes in procreate, there are many great ones, I personally use the brush Dry Ink for sketching and lineart myself. But there are also many free brushes online you can download. Try them out and once you are more comfortable with the app you can look into the brushes you have to pay for to use.
If you are just starting with lineart I suggest checking the brush settings and make sure it has some Stabilization, it will help you at first, I do think you should also practice without it, so you are not too reliant on it, this is one of those “practice makes perfect” kind of things.
Hope this helps!
105 notes
·
View notes
Text
Does anyone know a good tutorial or overall tips for Procreate? I find it hard adjusting to it especially with the feel of the pen, it feels kinda slippery(?) and I don't have a good sense of control over my drawing(maybe I just suck) Maybe I should just give it time, keep drawing on it until it feels right...
12 notes
·
View notes
Text
Omg I’m making a fursona, follow my new IG account if you like her ; w ; @alphi.the.racc
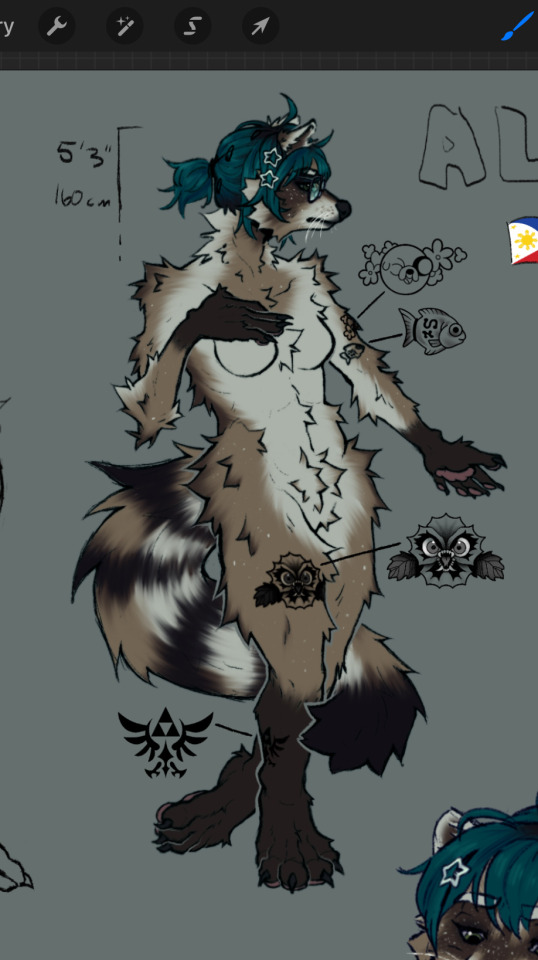
Reels link: https://www.instagram.com/reel/DJIJZFzBGbf/?igsh=MWUwdnlkcHJ4cHU2Zw==
instagram
#digital art#character design#art commisions#clip studio paint#procreate#furry art#furry commissions#sfw furry#commisions open#fursona#raccoon#raccoon girl#raccoon sona#ychfurry#anime art#procreate tips#Instagram
4 notes
·
View notes
Note
hey e-vay! so glad to have u back! in fact i literally got so so excited that you updated my gal i had to read it right away even though it was 3am! lol
anyway, here’s my question which isn’t too interesting: i’m pretty new to procreate and my dream is to post stuff online for my friends and share my interests with others! i was wondering if you could share a bit about your process with that. in fact, i’m struggling with making my drawings not look blurry and figuring out how to export them to be able to post 🥲 thanks in advance and, welcome back once more! <3
Thank you so much! I'm happy to be back and I'm so happy you enjoyed My Gal!
I'm relatively new to Procreate as well, but you'll get the hang of it in no time! The main thing you need to know is that Procreate is a raster-based program, not vector-based. I won't go into the nitty gritty of that; raster just means that once you start drawing, what you see is what you get. You won't be able to make it bigger or smaller without damaging the art.
So because of that, you need to get all your preferences set up before you start drawing. You want your canvas to be a large size and you may even want a higher resolution. You'll have to experiment, but I do most of my drawings at 2400x1500 in size and I draw in anywhere from 150 DPI to 300 DPI. You don't need 300 DPI if you're just making casual art for online use only :) Here's a video showing how to change these settings. And here's an image where you can find the canvas tools:

Now you can start drawing and it shouldn't be blurry!
When you're ready to share it, I recommend exporting it as a PNG. PNGs are much better at preserving the quality of your art instead of JPGs. Here's where you can find that:
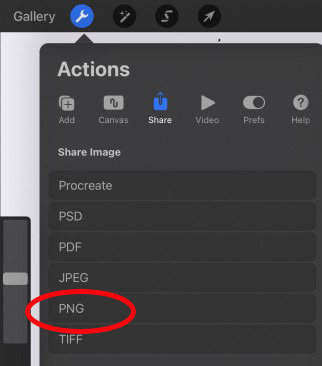
Don't feel discouraged. It took me years of practicing and experimenting and looking up tutorials when I first switched from traditional art to digital art. But these tips should help you significantly!
80 notes
·
View notes
Note
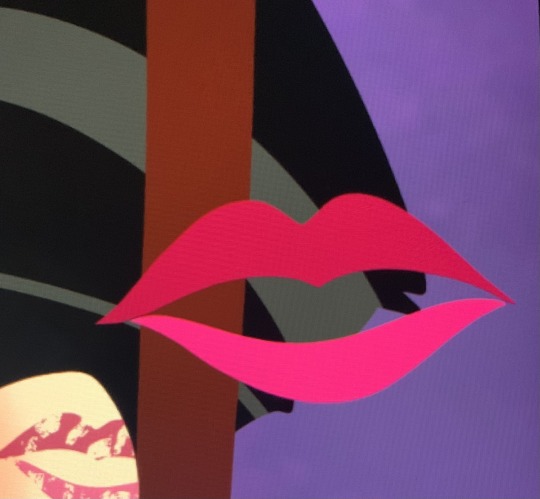
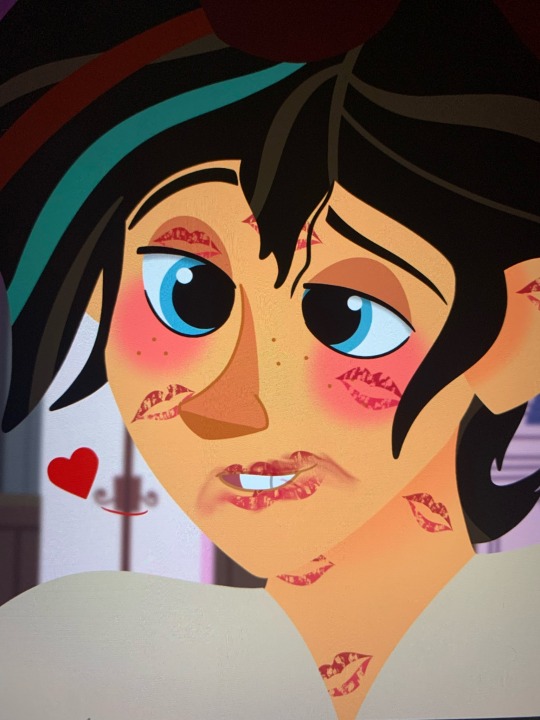
Is there any specific brush you used for that cassarian lipstick art? I love your art btw!!
Aww thank you so much! 🥹
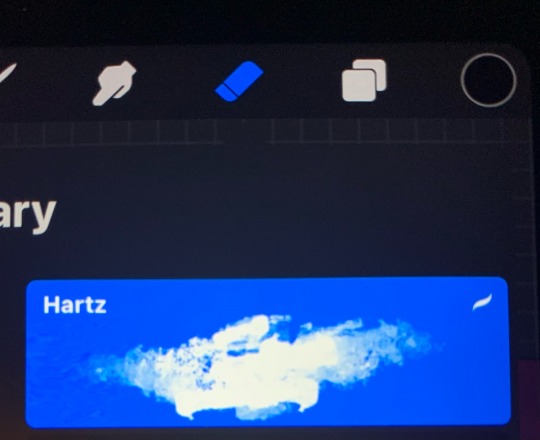
Do you mean what I used for the lipstick prints? First I drew the lip shape with the Brush Pen. Then used the eraser with Hartz, and lowered the opacity of the layer. 🥰
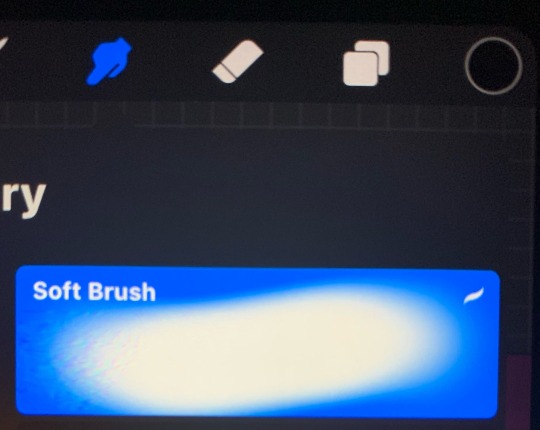
And for the smeared lipstick on his mouth, I used the smudge tool with the Soft Brush. 😉
#q & a#artist q & a#procreate#procreate app#procreate tips#procreate brushes#procreate artist#procreate art#tangled the series#rapunzels tangled adventure#tangled#tts#tangled the series fanart#tts fandom#tangled fanart#tangled the series varian#tts fanart#tangled the series cassandra#cassarian#vassandra
7 notes
·
View notes
Text
New thing that I learned you can do with masks in procreate. No idea what I’ll do with this info but it’s still pretty cool
Also if you’re wondering how I got the perfectly symmetrical circle shape at the beginning here’s a guide I just posted for how to do that
#somewhat art related#procreate tips#procreate#art hacks#local artist learns how the mask tool works#video#undescribed
17 notes
·
View notes