#rentryblr tutorial
Explore tagged Tumblr posts
Visit Tumblr Blog
Explore Tumblr blogs with no restrictions, modern design and the best experience.
Last Seen Tumblr Blogs


Fun Fact
There are dozens of funny blogs to kill time on Tumblr.
Text
Editing tutorial (graphics, layouts, etc) IN DETAIL. From the absolute beginning
You’re completely new to graphic making and editing? Don’t know where to start? Well now I’m here.. heh I’m the alpha. /j /silly I have a year of experience and plenty of past accounts that you probably seen or seen my creations on rentries. This for the most part will be a fully accessible post for anyone starting (which includes people using screenreaders, any and all images and videos will include an alt text and for videos specifically I’ll make a post separately explaining what’s happening in the video.)
I think honestly the first part people worry about is how do they even begin and I think we should really start with the absolute basics. Which are usually the FAQ (frequently asked questions) I see within the editblr community.
What program do I use? If you’re a phone/tablet user the best program will be ibispaint x. It’s simple when you learn the basics. When you download the app there will be an in-app pop-up tutorial if you’ve NEVER used or seen ibispaint x. BUT for pc/laptop users with no access to a mobile device photopea will be your best bet, and for the most part.. I have no idea how to like fully use photopea. Photopea is a free online editing software website. There’s many tutorials on YouTube that will include all the basic components to the app and how to use it. But they also have a discord server which I assume you can find help on anything you’re struggling with over there! (Also some tutorials on here aswell that explain photopea in an easy to understand manner.)
Whats a psd (PEE-ES-DEE)? a psd stands for Photoshop Document and it’s most commonly used in the editblr community for colouring their edits with unique colour combinations.
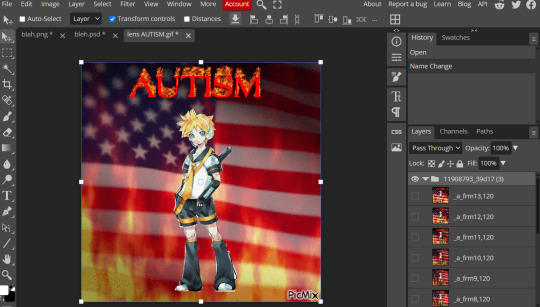
How do I use a psd (PEE-ES-DEE)? well the easiest way is to import the psd straight from your files after downloading into the photopea website, importing your edit afterwards, and then clicking on the psd at the top and you’ll see on the side of the screen it will show you all the layers and most of the time you’ll see a folder and that includes all the colouring layers. And if you’re using mobile just hold down on the layer/folder and drag it onto the edit you imported. (This explanation won’t make sense if I don’t include a video so I’m gonna include a link to a YouTube tutorial)
where can I find resources? the most common places would be Pinterest, discord servers, tumblr and rentries. You can find resources on Pinterest by searching up “rentry resources” and filtering it by boards so you can find boards full of PNGs and etc, or by posts if you want to find rentries. You can also search up like “aesthetic pngs” or “aesthetic frames” etc depending on what you wanna find. Discord servers are pretty hard to find in my opinion but you can probably find some by looking on your favourite editors posts or asking any editors you like if they know any. And as far as tumblr goes; there’s a bunch of editing blogs on tumblr so I will tag some below at the end of this post!
How do I find my editing style? it’s pretty simple but also complicated, see what represents YOU, do you wanna be known for bright colours or dull colours? Elegant minimalist graphics? Or cute maximalist graphics? You can always take inspo aswell but never try and directly copy people’s graphics! But honestly your style will come as time goes on. You’ll find yourself editing in a certain way and reaching for certain pngs that are always consistent in your edits, etc. and the best way to ensure you have your editing style is to edit everything you make how YOU would want it to look if you were to use it. Your editing style should be authentic and original to YOU. Looking at a bunch of editors for hours will not help anything. We all start somewhere and if you keep worrying about not making progress or not being good enough, you’ll only fall into a bigger slump. Have confidence in your work and once you have that; that what makes you an editor and worthy of posting. Many people with talent will hide their edits thinking it’s not good enough, they’ll keep working on it until it’s too late and they deactivated. Play around with colours and take some inspo, look through all the styles and see what speaks to you, or make your own :)
NOW as far as my own tutorial and tips go, my editing style is comprised of three components and before I explain it, it’ll sound weird.
1. Music. I’m a very big music nerd, but something for me personally; whenever I listen to certain genres or music while making graphics, it’ll help me visualize and design my graphics better because when I listen to music I can associate it with colours, styles, shapes and different designs. So the biggest component of MY editing is music. I will always have lyrics attached to my posts that I associate the edit or my layout to.
2. Filters. The biggest thing in my editing journey was ibispaint x filters. Whether it be colours, the stroke filter, the glow filter, glitch filters, etc. they can elevate your edits and give it that extra boost you know? This component might become a separate tutorial because I can’t really spend 20 minutes dedicating a whole section to this part, this is mostly to give you an idea of how my process works.
3. Pngs. It’s a big aspect to everyone’s editing if I’m being honest, but you wanna make sure you’re choosing PNGs that actually fit what you’re making. Like don’t add a random cake png if your edit isn’t associated with cakes or bakery themed, you know? Your PNGs should fit the edit and the style aswell. That’s how beginner editors always are unhappy with their edits.
Figure out what components are a big part of your editing and try to improve them as best as possible. It’ll help while you figure out your main style :3
While I can’t really TEACH you how to become the greatest editor of all time in just a short span of your time, I CAN provide you with tips and tricks that can help improve your edits if you’re in a rut, or unmotivated. Aswell as giving beginner editors tips for starting their blogs, and becoming the best version of themselves.
1st tip: Always take care of yourself first. People on here will constantly over apologize for not fulfilling someone’s request, or put their blog and their followers before themselves. You do NOT have to always be active and putting out edits, you do NOT have to climb to the top of editblr before relaxing. Especially as a beginner, you will die out so much quicker. Drink water, eat an adequate amount of meals, fuel your body, get enough sleep, and your body will thank you and so will your BRAIN. Your brain will be the main component other than your hands thats being used during your edits. And also everyday life. We do not want smooth brains guys 🥹
2nd tip: never send anon hate… I don’t need to explain this.. beginner editors are probably the main culprit of anon hate besides other evil people that might reside inside of editblr but anon hate will do nothing good for you. If you see a bigger editor doing better than you, it’s not because you’re worthless and it’s not because they’re better.
3rd tip: try and make your blog and edits as accessible as possible. It’s fine if not all your posts are accessible for everyone, nobody is perfect, but if a majority of your edits are: too bright, too many flashing gifs, too dull with no contrast (I’ll get into this part later), your text can’t be read by a screen reader, you can’t edit darker skinned characters because your colouring makes them too white.. girl say goodbye to the blog.
4th tip: contrast. if you like the dull aesthetic (as I do), make sure there is contrast with your edits. Contrast is what helps people be able to differentiate different parts of the graphic. So you need the light and the dark colours in your graphic. An example where this works really well is: black and neon pink, black and neon green, etc. those combinations always look so good because it’s contrasting the other and will give you a pretty design.
5th tip: as a beginner it is gonna be really hard to master the maximalist style so I recommend starting with things you can handle. A frame, a character and messing around with colours, filters and programs. And when you think you’re ready: implement new things into your style and see where it goes.
Now if you have made it this far into my post, I would like to suggest that anyone starting out, and needs additional help to send me asks of what I should include in my next tutorials. Because this post was more about how to get started and my own personal tips, but I get there’s people who struggle with dividers, layouts, graphics, etc individually. And I want to keep this going so if please let me know what you’d like to see next! And I hope this helps someone.
Tag list: @psychodellism @friliette @terrortowne @menhara @kuguri-domeki @frillissist @cuisinekuga @sancryi @apostlenoir @hwizou + anyone else who would like to reblog !
#࣪ ִֶָ☾. kiss me with your eyes closed.#rentry#rentry dividers#rentry graphics#rentry inspo#rentry decor#rentryblr#rentry stuff#rentry layout#rentry tutorial#tutorial#tumblr tutorial#edit tutorial#editblr tutorial#rentryblr tutorial#graphic tutorial#tumblr edits#editblr
145 notes
·
View notes
Note
https://www.tumblr.com/pupsec/777071487795478528/messing-around-with-layouts-and-shit?source=share HOW DID U DO THE COLORINGGGGGG I LOVE ITTT CAN U SHARE PLEASE AND TYY
320 notes guys chill 💗
hi! i am happy you liked it 💗💗😭😭
update, i actually idgaf take inspo from this style since its an old one
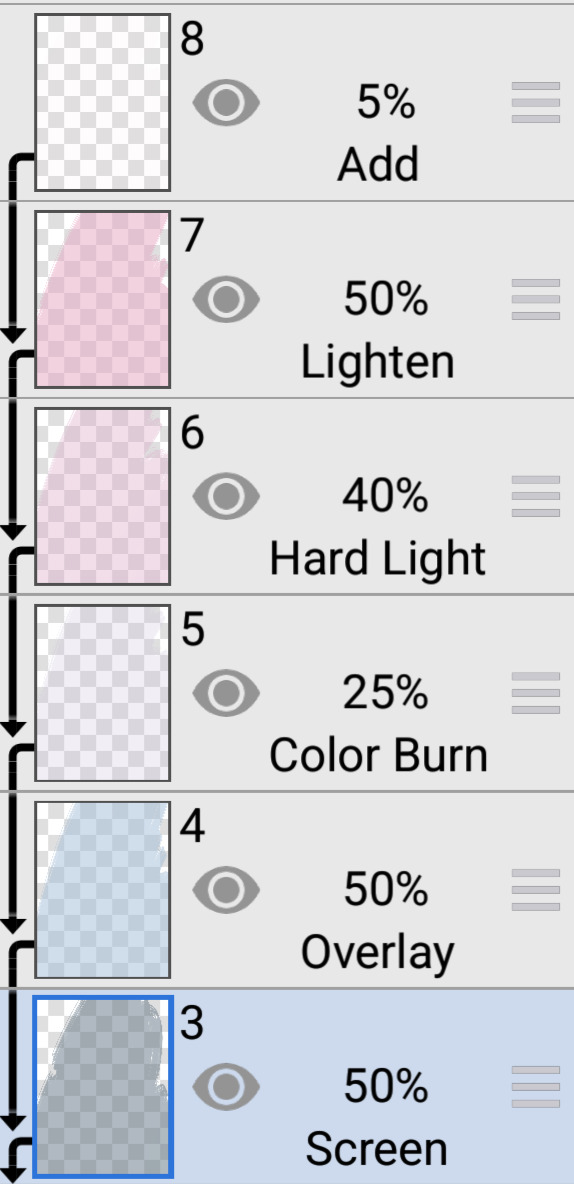
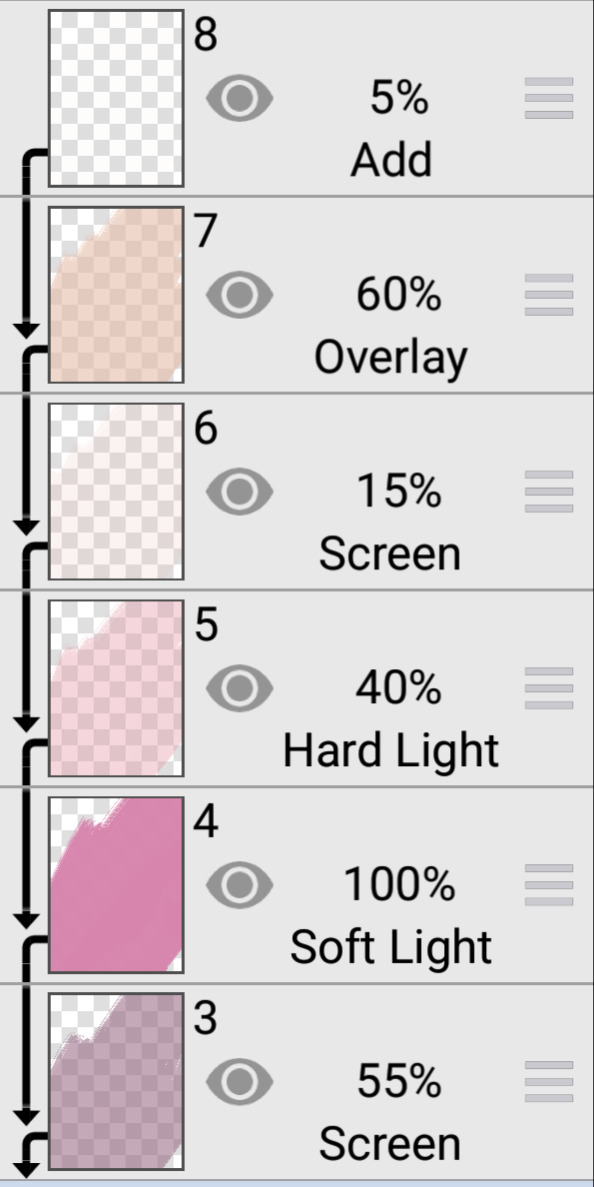
remember to grayscale all of them before you apply a blending mode! that's what i mostly do, no pressure.


example:

if you want a tutorial for how to use blending modes and stuff, and how to mess around with filters, do let me know!
#♡̵ ⠀⠀・ ⠀⠀pupsec ⠀⠀ᜑ⠀⠀💗꣒#♡̵ ⠀⠀・ ⠀⠀edits ⠀⠀ᜑ⠀⠀💗꣒#♡̵ ⠀⠀・ ⠀⠀requests ⠀⠀ᜑ⠀⠀💗꣒#♡̵ ⠀⠀・ ⠀⠀resources ⠀⠀ᜑ⠀⠀꣒#rentry#rentryblr#rentry resources#rentry stuff#rentry icons#rentry overlays#rentry overlay#overlay#overlays#editblr#editblr resources#editblr help#editblr stuff#editblr tutorial#tutorial#rentry tutorial#editing tutorial#hyacine#hsr#hsr hyacine
377 notes
·
View notes
Text
COMMON TERMS IN EDITBLR & THEIR MEANINGS. — guide by Aria.
* this post includes long texts.

KIN / ME TAGS
usually used by fictionkins who dont like doubles. "No Kin/Me tags" means you cant tag the character in the post as your kin, nor as "you", "irl you", or similar, usually due to the OP being uncomfortable with it. just respect it.
F/O TAGS
f/o (standing for fictional other; a character one selfships with, often romantic but can also be platonic, familial, or more) tags are essentially the same as the previous; OP probably is a self-shipper (also known as Yume, but could also be a Riako) of such character, and does not want other Yumes to tag the character as "their partner/wife/husband/love", or otherwise similar terms reflecting the user having a relationship with the character.
F2U or FTU
F2U, or FTU (standing for free to use) means... exactly what you think; usage of the creation posted is allowed to the public.
NF2U or NFTU
...the opposite. usage of the work is not allowed. the OP can sometimes also add "unless [user/name] afterwards, meaning only the one mentioned can use it.
CREDIT
pretty basic in every community. leave the OP's user somewhere visible; some have preferences of how they like to be given credit, such as; Linking, (linking their post or profile to a text, usually pinned post or your bio,) @'ing them, or just Adding their user somewhere visible (again, such as a bio or pinned post.)
REPOST & REBLOG
these two have a big difference. reblog is when you click the button on the app that looks like this -> 🔁, and repost is when you save the work and post it somewhere else. never repost someone's work unless they allow it, but reblogs are always nice.
PLAIN TEXT / TRANSLATION
tons of people here use typing quirks and/or fonts that some cant read, find difficult to read, or break screenreaders, which obviously bothers them a lot. plain texts/translations are versions of the same texts that are easier to read, having no typing quirks, fonts, symbols, or whatever was making it difficult/impossible to read and such.
PSD
stands for photoshop document. can be used on photopea or photoshop. when using these, it saves the project file and when opened has each layer, instead of the flat image. the term PSD is often used for colorings that alter the colors of your picture to custom ones with settings made by the creator, but it can be used for anything.
^^ NOTE: read this please ^__^ my wording came out wrong but this kind person explained. it better
USING AS BASE
commonly used for psds. this means you cannot grab the psd, and... use it as a base, adding your own layers to it and making it your own.
if any of these are incorrect shoot me an ask and i'l change it asap. thanks.

#tutorial.pdf#sorry for long text oops#i always feel the need to overexplain myself even if im bad at it#rentry resources#rentry help#rentry tutorial#rentryblr#editblr#editblr help#editblr terms#editblr guide
161 notes
·
View notes
Note
Gif colouring tips! Or what apps do you use!
Hi there! Personally, I use Photopea for all of my coloring.. But I understand it can be hard for beginners, so here’s a tutorial! Hope this helps.
#🧩 𝓓avid’s 𝓡esources ᛪ༙#rentry inspo#rentryblr#editblr#rentry decor#rentry graphics#rentry resources#rentry stuff#rentry gif#rentry coloring#rentry tutorial#rentry tuts
168 notes
·
View notes
Note
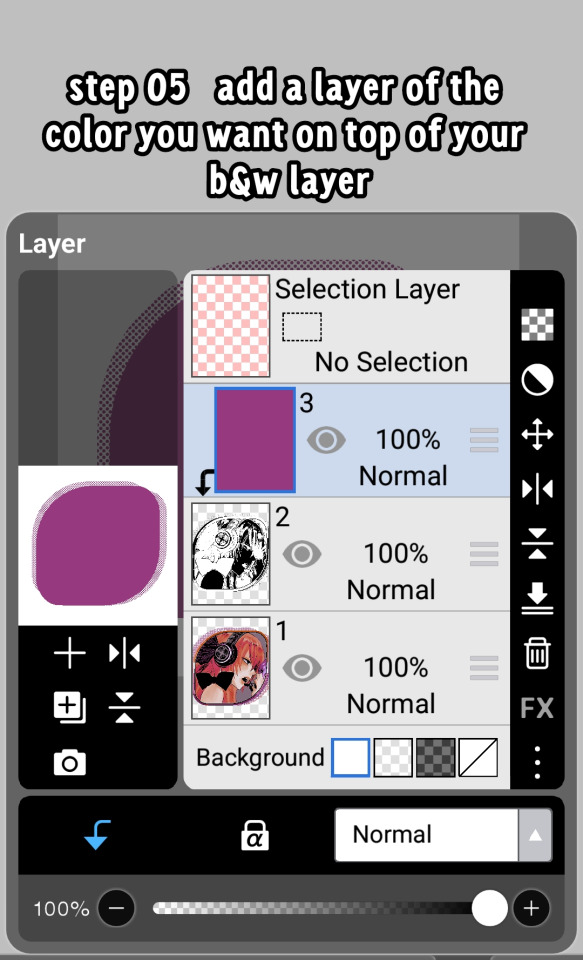
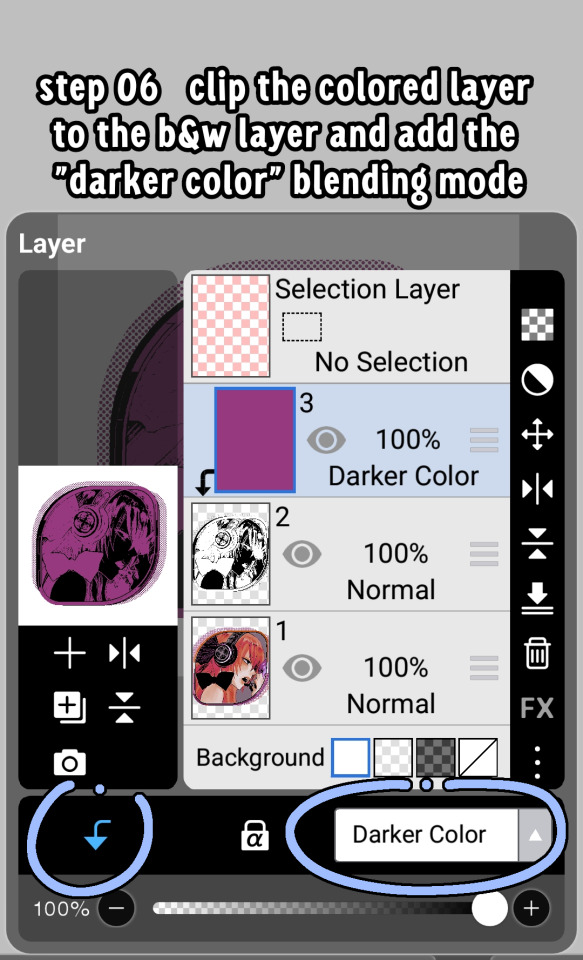
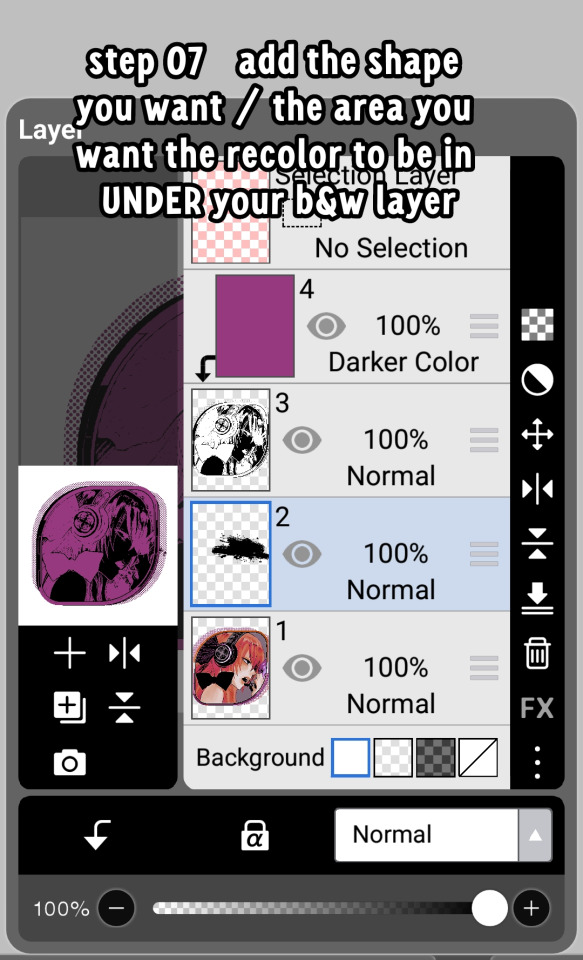
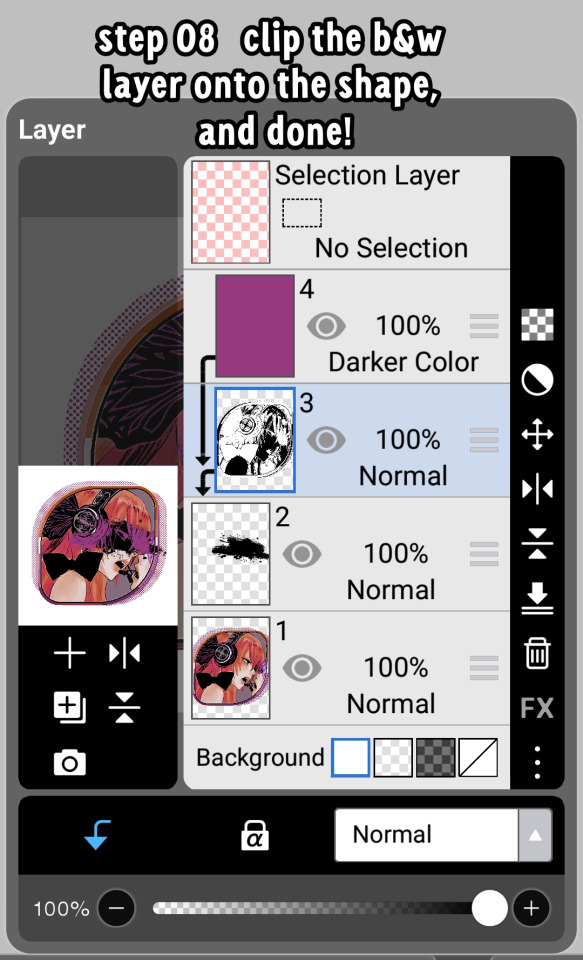
You've probably answered something like this before but could I ask how u do this... (the recoloring skin thingy ISK HOW TO EXPLAIN)
NO WORRIES im shit at explaining but ermmmm i tried!! i probably made this longer than it should be but WHATEVER!!! i promise its really easy.so.tutorial ujder cut

83 notes
·
View notes
Text


❥⠀⠀random colorings
f2u⠀𓈒⠀no creds needed⠀|⠀no id tags for toya
color palettes and tutorial below cut
transparent credits ; 01 02


#˚ ୨୧ ⋆ 。 ˚ ⋆⠀𓂃⠀𝓐⠀𝓑lessed⠀𝓖ift⠀⠀︵ ︵ ིྀ#rentry decor#rentry graphics#rentry inspo#rentry resources#rentry stuff#sntry decor#sntry frames#sntry graphics#sntry inspo#sntry resources#coloring#ibis paint x#ibis paint coloring#psd#rentry help#rentry#rentryblr#editblr#editing#colors#coloring tutorial#free coloring psd
99 notes
·
View notes
Note
ur blog looks so COOL im obsessed with the colours omg
if u dont mind, can u show how u make dividers? its alri if not ^^


ok so same with my graphics, i use the basic fx (outline, dropshadow, hue & saturation etc) and most of the assets are from the ibis gallery. i use these ones and you can find more by typing "lace" in the searchbar
also ty for the compliment hehe

#👾 ︵ asks#🌀 ︵ resources#rentry#rentry resources#editblr#rentryblr#rentry stuff#rentry inspo#rentry tutorial#tutorial
83 notes
·
View notes
Text
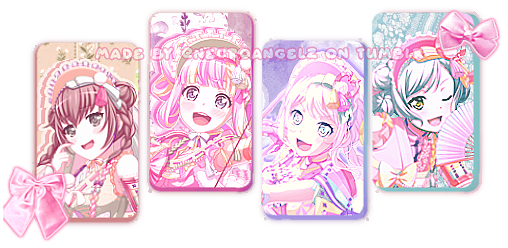
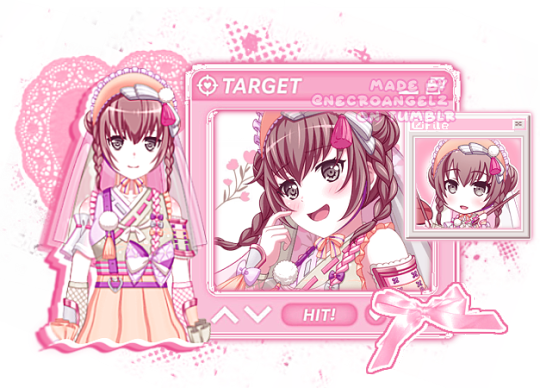
☆ ❛ STREAM ALERT !! ❜ NECROANGELZ is streaming ♡ ⁓⁓ Come watch ?
❛ make it! you’re unbeatable once you get started! ❜

❛ make up! headed for a gloriously shining future! ❜ —- MAKE IT!
♡ NOW WATCHING : Dreamy Colors Pastel Fan Road Graphics ☆ ⁓⁓ Enjoy the stream !!
—- requested by @slaayer
—- i think it's only dawning on me now just how many fucking graphics i edited. no wonder this shit took me 5 days even with my hyperfocus activated. thank god uu specifically asked me to exclude chu² otherwise this would've taken even longer
—- this might be the most graphics I've ever edited for a set
—- likes and reblogs are always appreciated. credits are mandatory. thank you for supporting the angelic streamer.
#🌠﹕ a wishing star 𝜗𝜚 ︵#👁️🗨️﹕ from the archives 𝜗𝜚 ︵#bandori#bandori garupa#bang dream#maya yamato#reona nyubara#pareo#eve wakamiya#rentry graphics#rentry resources#rentry decor#rentryblr#editblr#rentry#sntry#sntry graphics#sntry decor#bundlrs graphics#bundlrs decor#rentry tutorial#hina hikawa#bandori icons#bandori edits#bandori layouts
355 notes
·
View notes
Note
May we ask for the coloring on this? [Link]
hi! Sure
into the air ♡ (click 2 download)
[ POSSIBLE EYE STRAIN / BRIGHTNESS WARNING ]
Theres a brightness and contrast toggle there, you can turn it on if you want the image to look darker, i definitely reccomend removing one of the selective colour layers or adjusting them so it looks less eye straining, the psd turns dark skin lighter ( && if you toggle the brightness and contrast layer, it will look darker)
PREVIEW IMAGE UNDER CUT.


#★ — EDITS ^ ^#★ — PSDS ♡#editblr#rentryblr#rentry resources#carrd resources#carrd stuff#bundlrs#rp psds#psds#coloring psds#my psds#free psds#psd coloring#rp resources#coloring psd#photopea psd#blue psd#pink psd#black sapphire cookie#shizuku hinomori#mmj shizuku#pjsk shizuku#project sekai#project sekai colorful stage#prsk#colorful stage#hatsune miku colorful stage#photopeablr#photopea tutorial
11 notes
·
View notes
Text
HOW TO MAKE FADING GIFS. — tutorial by Aria.

like this ⬇️

STEP 01: have your frames—your frames are the images that will fade into each other. in this case i'll only use 2, but feel free to use as many as you'd like. ( note, do not save them like i did here ⬇️ lol, thats just to show my frames. )

STEP 02: open ezgif (linked to text). specifically the section labeled as "gif maker".
then, click choose files and pick your frames from your gallery.

STEP 03: after picking your files, it'll appear as [amount of files] files. scroll down and click on "Upload Files!".

STEP 04: wait a moment for your files to load. then, you'll get this screen. in the image i explained the basic stuff, but i'll explain it here too.;
Delay Time: how long each frame will last.
Crossfade frames: whether the frames fade into each other or just turn from one to another without transition. check the box if you want them to fade.
Don't stack frames: check this box if your frames have transparent background(s). if not checked, when frame 1 turns into frame 2, frame 1 will stay in the background—stacking the frames.
you can drag the files / frames to your desired order.

STEP 05: click "Make a GIF!". it may take a while to load, but then this will appear under. just click "Save" and wait for it to save to your device.

and finally, you're done!!! go fuck around with your gif sure orrrr something. anyways follow me i like notifications
#tutorial.pdf#rentry resources#rentry tutorial#rentry help#editing help#editing resources#editing tutorial#gif tutorial#tutorial#rentryblr#editblr#rentry
43 notes
·
View notes
Text
Hihi!! Im working on a strawpage and was wondering if any one could give me a video tutorial on how to make the character wobble like the example below???? Im a bit confused (graphic belongs to @pink-sugar !!)

5 notes
·
View notes
Note
hrhfhfh i was wondering how you achieved these effects on some of your edits ?? i hope you're okay with me asking
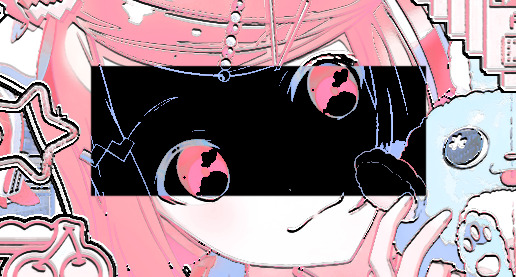
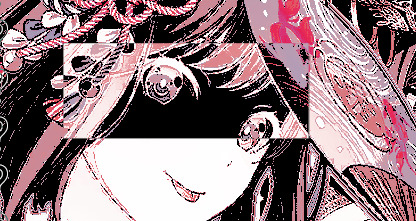
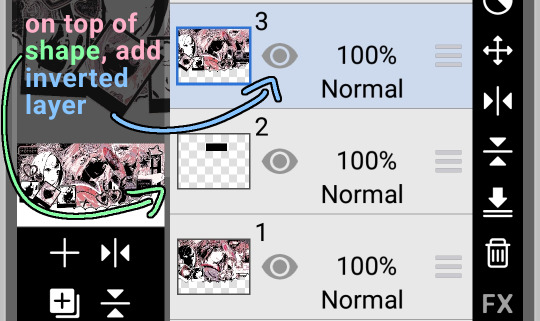
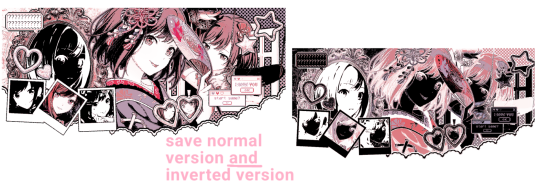
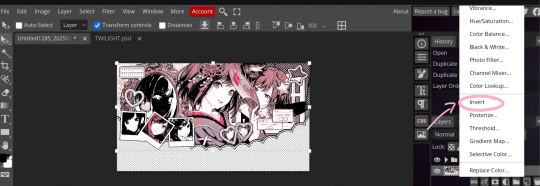
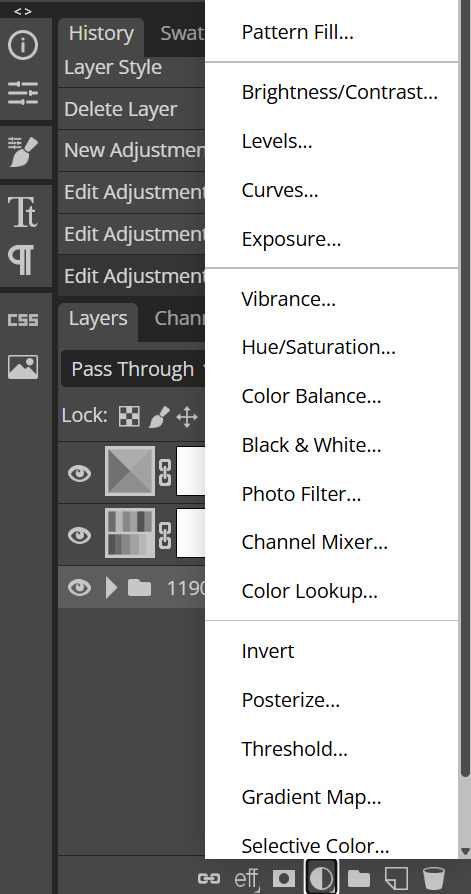
of course, of course! i just use the invert effect on photopea (although i suppose the ibis one also works), then i put the psd layer on top so the colors match
after that, i get a shape (in this case a rectangle), put it where i want the invert effect, then clip the inverted layer!
pictures / tutorial below cut
( psd is by nemuurin !!!! )
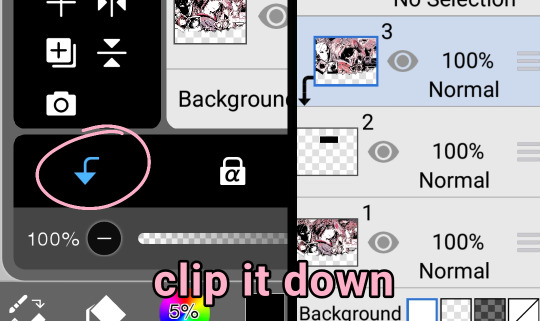


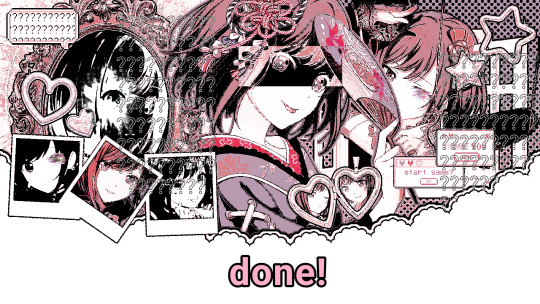
hope this clears it up :) feel free to ask any more questions, or ask me to explain in other way if you didnt understand
67 notes
·
View notes
Note
Hii!! Quick question, what do you use to edit your graphics, like put gifs in them and how do you recolor them? :3 you don’t have to answer I just wanted to know!!

Helloo! Personally, I use Photopea for everything gif and coloring related. For adding the gifs *to* the graphics, I leave a blank space in the graphic where I want to add the gif. Usually, I just make a lower layer, cover the area the gif will go with the pen tool, and make a mask for it. I suggest using this tutorial for gif masking! Hope this helps, if not.. Feel free to send me another ask!

6 notes
·
View notes
Note
how do you do your gif graphics im in so much awe./pos they're really pretty

thank you so much ! i use photopea to make all my graphics and most of my gifs are either official source media or from different gif dumps on here


when importing gifs i use " open from computer " and enable the folder toggle when moving the gif folder [ don't worry about turning on all the layers , it'll export as the full gif ]

explaining how masking works is a bit complicated to do solely through text so i hope you don't mind that i made a little speedpaint instead, but i'm sure someone else has made a way more detailed tutorial that you can find

#🍨 ︵ asks#🍓 ︵ resources#editblr#rentry#rentry resources#rentryblr#rentry graphics#rentry tutorial#tutorial#photopea
43 notes
·
View notes
Text
youtube
okay maybe this took us more than a few minutes. we attempted to make a visual tutorial for this advice. we're sorry for the bad quality!!! both production wise and definition wise..
the gradient website we used in the video -> :D!
we hope the tutorial is. comprehensible. we're not that great at making video tutorials so we tried our hardest, hope this helps @nemesisism 😭
transcript down here! \/ the text in asterisks is not transcript but small comments for context in the video
-Dirk Strider
(sorry for the bad quality, blame obs…)
Feel free to pause to read some things!
Today we’re gonna show you how to use this advice on rentry! *referring to the advice post*
First you have to get a rentry ready, or already have one ready
Copy this text (or retype it manually) *referring to the text in the advice post*
Paste down here into metadata!
We’re going to be replacing this placeholder text with the gradient image of your choice *referring to the line of text in the first line of the template, labelled CONTAINER_BORDER_IMAGE* This is the gradient site we use! *referring to the coolors create a gradient site*
Im just gonna make a random gradient for this video X2 speed!! *sped up footage of us making a gradient*
Pretty cool gradient *referring to the one we just made*
Time to download as an image!
Now find a place to upload this image temporarily, you’ll just need the link
We privately upload them to tumblr to get the link to the image
(realizes i forgot to crop out the bottom) *stupid realization, then goes to photopea to quickly crop it out, then crop that and repaste it into the tumblr post*
Okay thats better
Time to copy the link to the image!
Also you can close out the gradient maker tab at this point *closes the coolors gradient maker tab*
Now you can replace this placeholder text with your gradient image link (make sure you replace the brackets too) *i am now replacing the placeholder text with the image link*
*in the sped up footage i am typing “meow meow ; this is a test! :D ; brought to you by Dirk Strider!”*
Tadaa!! You should now have a awesome border! *while switching over to the view tab, the rentry now displays that the gradient image has been turned into a border*
You can also change the width and offset of it as well *i switched back into the metadata text tab and deleted the offset line, making all the sides of the border even*
Also, this tutorial can also be for just borders in general. It dosent have to be a gradient. But whenever you do use a gradient image for the border, it HAS to be set to ‘stretch’ or else it wont look right
*end of video*
psst, heres a little tip.
if you want a gradient themed border for your rentries, all you have to do is export the gradient you want as a image, and use metadata to import your image as the border.
heres what we use -
CONTAINER_BORDER_IMAGE = [gradient png image link] CONTAINER_BORDER_IMAGE_SLICE = 6 CONTAINER_BORDER_IMAGE_WIDTH = 4px CONTAINER_BORDER_IMAGE_OUTSET = 2px CONTAINER_BORDER_IMAGE_REPEAT = stretch
and then boom! now youve got a gradient border.
-Natasha/Angel and Syntax
#corporatewebdecor#rentry#rentry help#rentry resources#rentry border#rentry stuff#metadata#rentryblr#rentry metadata#tutorial#video tutorial#Youtube
359 notes
·
View notes
Note
huii :3 I’m so sorry to ask this and I probably look dumb, but how do you add gifs at the back of your graphics and recolor the gifs? ^_^


i fear this isnt friendly to mobile users yet again,,, but heres how i do add the gifs in my graphics and notes!! (i think thats what you mean,, sorry if its not)
using this amazing specimen as an example
first i go into photopea and open the gif (ctrl + o) so it shows the actual frames,,
once u open ur gif it should look smth like this!! if you dont have a folder w all the frames it wont work
now for the gifs i put at the end of my notes i usually i just put in whatever coloring i used for. the regular graphic but im feeling dumb so ill just throw in some hsl and selective color :3
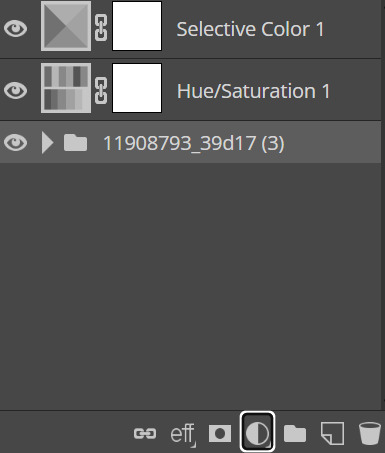
and BAM. that's how i recolor my gifs. this is rly basic but thats,, how you recolor things,, if you wanna learn how to like. recolor in depth and how to make things look good i suggest this tutorial and other psd or coloring tuts on tumblr. dont be afraid to look at tuts from gifmaking tumblr, stimboard tumblr, and the actual official site tho!! limiting urself to just rentryblr can make it hard to actually. find stuff. :3
for adding gifs to graphics, its a matter of duplicating the folder of the gif you opened into the project/graphic you want it on.

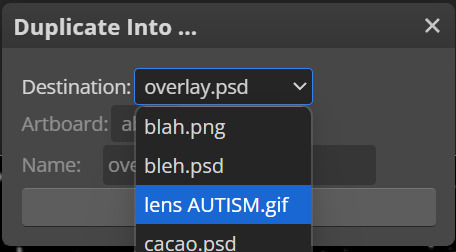
just select the name of the file you want and bam,,, its on ur graphic
12 notes
·
View notes