#top tutorials uk
Explore tagged Tumblr posts
Visit Tumblr Blog
Explore Tumblr blogs with no restrictions, modern design and the best experience.
Last Seen Tumblr Blogs


Fun Fact
70% of Tumblr users say the Dashboard is their favorite place to spend time online.
Text
Eiffel 65 - Blue (Da Ba Dee) 1998
"Blue (Da Ba Dee)" is a song by Italian music group Eiffel 65. It was first released in October 1998 in Italy and became internationally successful the following year. It is the lead single of the group's 1999 debut album, Europop.
The song initially found success in France, where it debuted in August 1999 and reached number one for three weeks. It then found success in other European countries, reaching the top spot on many charts in September the same year. It became one of the biggest-selling songs of 1999, reaching number one in at least 18 countries, charting at number three in Italy, and peaking at number six on the US Billboard Hot 100 in January 2000. It reached number one in Australia, New Zealand and Canada. In the UK, the song initially entered the top 40 purely on import sales; it was only the third single to do this. The song re-charted on 6 May 2013 at number 40 in the UK, following its inclusion in Iron Man 3.
The song received a Grammy Award nomination for Best Dance Recording at the 2001 Grammy Awards. "Blue (Da Ba Dee)" has also been heavily sampled and remixed in later years.
The accompanying music video for the song was released in 1999 by BlissCoMedia, a computer graphics division of Bliss Corporation, and featured computer-generated graphics that were done in 3ds Max. With very few resources, tutorials and books, and only one editing machine, the video was made between 1998 and 1999 in a garage in about two to three months.
"Blue (Da Ba Dee)" received a total of 75,2% yes votes!
youtube
3K notes
·
View notes
Text
Using NRaas Master Controller's Filters, Skill Stamps and Hot Keys - Part 2
Skill Stamps and Hot Keys
This is part 2 of my NRaas Master Controller tutorial on how I use filters, skill stamps and hot keys! (Tumblr wouldn't let me have my fun and use more than 30 images on one post, so 2 parts it is 🤨)
See also:
Using NRaas Master Controller's Filters, Skill Stamps and Hot Keys - Part 1: Filters
Tutorial under the header!

Mods needed for Filters, Skill Stamps and Hot Keys to show up:
Master Controller v.135
Master Controller Cheats v.134+
(9th Feb 2025 - desiree-uk correction: Additional mods needed for filters and door-locking system (my apologies! 😌) GoHere v.45 Tagger v.5
Skill Stamps:
I use skill stamps to add a whole bunch of skills to a single sim or sims in bulk!
When adding a newly created sim to your town, they may not have any skills yet until you play them, but a skill stamp can quickly add some skills to them as if they were already played for a while.
MC Cheats Interaction: Skill Stamp> Add New Stamp
Allows the user to define a skill set to apply during "Advanced \ Skill Stamp". Once added, selecting one from the listing will allow you to specify the levels for each skill.
I want some sims to be able to have some basic skills such as cooking.
Click on Town Hall/Computer>NRaas>Settings> Skill Stamp
Add New Stamp: name the skill stamp (e.g Basic Skills).


The skill stamp is listed. Click on it and set the cooking level to whatever you want it to be. I have both the regular cooking skill and the hidden child-skill level, just because. I don't know. 😄
I maxed out the child skill to 3 and set the regular skill to 1.

I've set other skill stamps such as ones for artistic sims (painting, photography, writing) and outdoor sims (athletic, waterskiing, gardening, scuba diving, snowboarding, diving, windsurfing)
I also set one for sims who I want to be able to drive! We now have the 'Sims Need Driving Lessons' mod by the awesome Phoebejaysims! All sims (except NPCS) can't drive until they've reached the maximum level of the driving skill.
Of course you'd want some sims to be able to drive in an already established town, right?
I want my adults and elders to at least have the driving skill, even if some don't have a car yet.
Set a skill stamp for driving:
Click on Town Hall/Computer>NRaas>Settings>Skill Stamp
Name the skill to something driving related, e.g Sims With Driving Licence.
Click on the 'Driving' skill.
Max it out to 3.


Adding skill stamps to a sim with no skills:

Click on a single sim: NRaas>MC>Advanced>Skill Stamp


You see the list of my skill stamps. When I click on each one, all the skills under the stamps will be added to the sim all at once (you'll see the notices that appear in the top right hand corner pop up notifying you the sims have the skills.)
Check their skill panel to see all their added skills. The driving skill is hidden, so it won't show on the panel, but you can check the sim has it by checking their skill levels in Sim>MC>Advanced>Skill Level. It should show 'Driving: 3'
To add the skill stamp to multiple adults and elders, I'll use the filter I made earlier in Part 1.
Click on Town Hall/Computer>Sim>Advanced>Skill Stamp
The filter 'AGE: Adults/Elders' is listed.


Click on it to see a list of all the adult and elder sims.
From the list you can select some of the sims who you want to be able to drive or scroll to the top and click 'All'.

The Skill Stamp list will pop up - choose the 'Sims with driving licence' skill stamp. The skill stamp will be applied. As stated before, you won't see the hidden skill in the sims panel, but they'll be able to drive. You can of course check their skill level via MC>Sims>Advanced>Skill Level.
While you're at it, you can edit some of the selected sims driving skill levels according to whether you want them to do a driving test, theory test or have their skill maxed out so they can drive straightaway when you give them a car...
PJsims mod interactions notes:
If they are level -1 or 0, sims can first do their theory test which will increase driving skill to level 1.
Once they are level 2 in driving, they can do their driving test which, if passed, will automatically max out their driving skill.
Now you can make and add as many skill stamps to any single sim or multiple sims in a filter.
~~~~~~~~~~~~~~~~~~~~~~~~~~~~~~~~~~~~~~~~~~~~~~~~~~~~~
Hot Keys:
MC Interaction: Hot Keys
Allows the user to specify which interactions are to be shown directly under the "NRaas" menu
You can add any MC interaction to the uppermost level of the NRaas menu when you click on a sim, household or terrain as short-cuts, especially your most often-used interactions.
I added the 'skill stamp' and other interactions as hot keys so I can easily edit a sim when I click on one.
Click on Town Hall/Computer>Settings>Hot Keys

I added:
* Change Autonomy
* Reset Sim
* Skill Level
* Skill Stamp
Make sure 'True' is next to the interactions you want to see in the NRaas menu:

Click on a sim or the terrain and you'll hopefully see all your created hot keys.
See my screenshot - all 4 are there!

With the skill interactions you can quickly and easily set a sims skill level or add a skill stamp to them when you click on the sim in less clicks than clicking on multiple dialog boxes.
The other two are self explanatory, turn on/off a sim's autonomy and reset a sim.
Note: The more hot keys you add, the slower the pie menu will take to pop up, so keep that in mind.
If you still don't want to click so many times in the menu to find your interactions, you can use Arro's UI Tweaks mod (currently in testing, soon to be released - it's an excellent mod, I highly recommend it! 👍🏾) You can search the menu by clicking on the magnifying glass icon on the menu or press the 'F' key and type the interaction you want, using a full or partial word!


That's it! That's how I use filters, skill stamps and hotkeys. It will become second nature the more you use them and they can be as easy or as complex as you want them.
If you use them already, how do you set them up and in what scenarios? Share in the comments or let me know if I can add or explain anything! :)
Click for part 1:
Using NRaas Master Controller's Filters, Skill Stamps and Hot Keys - Part 1: Filters
#ts3 mod info#ts3 test gameplay#ts3 gameplay#nraas#phoebejaysims#arro#ts3 tutorial#sims3#ts3#ts3 mod
159 notes
·
View notes
Text
batfamily as most recently viewed youtube videos
damian: theories on bill cypher, cybersecurity attack docuvideos
steph: mukbangs, karen karma compilations, and duct tape dress tutorials (don't ask, it was a long night)
duke: crash course chemistry, crash course US history, just...crash course. lots of crash course.
dick: diy bellbottom pants, tiktok trend breakdowns for old people, lots and lots of ABBA
barbara: rotten mangoes true crime, leeja miller, compilations of US politicians being bigots
tim: why was ABBA so popular?, live DJ sets, watchmojo.com, best investment apps for beginners
jason: scotty kilmer, binging with babish, compilations of crooked cops getting busted, motorcycle repair videos, top 10 batman fails
bruce: tiktok trend breakdowns for old people, breakdowns on the negative effects of social media
alfred: ww2 documentaries, 60s UK punk rock playlists
#mine#my post#jason todd#dick grayson#duke thomas#signal#red hood#robin#nightwing#tim drake#red robin#yummmmm#oracle#batgirl#stephanie brown#barbara gordon#bruce wayne#batman#batfamily headcanons#batfam headcanons#youtube#bill cypher#alfred pennyworth#ABBA#discowing never dies
146 notes
·
View notes
Text

Ok ok ok so despite being born on this accursed island, I consider myself Scottish, not British.
But if there is ONE THING that these THREE AND A BIT NATIONS IN A TRENCHCOAT got right is their plugs.
See the pin at the top? That's the Earth Pin. That's there to ground the electricity if things go wrong, something a lot of plugs (like the American Two Pin) doesn't have. Oh, also, it opens the doors to the lower (live) pins, meaning babies cannot stick their fingers in there and electrocute themselves! BUILT. IN. BABY GUARD.
The fuse is in the plug. Yes you heard. THE FUSE is in the plug. No more fusebox trips if you wanna fix your leccy, you fix the plug if the fuse goes.
Oh, and you can replace the plug yourself. You get taught how to wire them in high school and there's tutorials online. Something happens to the plug? YOU CAN REPLACE IT YOURSELF!
The UK are rightfully proud of our plugs because they are the BEST IN THE WORLD!
103 notes
·
View notes
Text
✷ Tonk's Art Resources ✷
Hi! No one asked but I wanted to make a big list of art resources I use because I like to try and help people be creative! Not everything I list is free (mostly the books & some PDFs), but I’ll try my best to keep a big portion of it unpaid.
I've also made a carrd with the same links and a set of software links + prices but I'll be updating this with more things I find that I think would be helpful. :)
Drawing
GES DRAW PARTY - Timed model videos
Drawing Tutorials Online - Figure drawing tutorials (& fun SVA student sketchbook videos)
Line of Action - Timed model Photos
3 tips to improve your PEOPLE SKETCHING (fast urban sketching techniques), Sketching Scottie
Creating Backgrounds, Tim Mcburnie
Drawabox
Reference Angle
Kaycem
Colour Theory
Why Color Studies Are So Powerful, Light Ponderings
Marco Bucci
Colour Tips and Tricks, Iniro (PDF)
This post
Animation
The Animator’s Survival Kit, Richard E. Williams (book) - I think this one is a pretty obvious must-have
How to Animate Night In The Woods [Scribble Kibble #103], Crowne Prince - Helped me get a grip on After Effects
Little Miss Hellraiser Toon Boom Harmony Rig, Edu Bruks - Free Toon Boom Harmony rig
Alex Grigg // Animation for Anyone
BaM Animation
Storyboarding
Exploring Storyboarding, Wendy Tumminello (book)
Storyboarding Essentials: SCAD Creative Essentials, David Harland Rousseau & Benjamin Reid Phillips (book)
Storyboard Pro Crash Course/Tips for beginners, OhJeeToriG
A Guide To Storyboards, MagicBunnyArt (PDF)
Character Design
Character Design Crash Course - A huge free course document with assignments you can work through
Delicious in Dungeon - Fundamentals of Character Design, lines in motion
Writing
Writing for Animation, Comics, and Games, Christy Marx (book)
Screenplay: The Foundations of Screenwriting, Syd Field (book) - I have the 1987 edition
Reedsy
How to Plot a Comic From Start to Finish!, McKay & Gray
Portfolio Tips
How to make a Character Design Portfolio, Jackie Droujko
Top Tips on How to Kickstart Your Storyboard Portfolio, Brown Bag Films
25 Tips to Create an Animation Demo Reel, Sir Wade Neistadt
Extras
PuccaNoodles’ Animation/Art Resource Sheet
My Study References Pinterest board
Motivation Station - Playlist of sketchbook videos and some speedpaints that I use to motivate & inspire me
The Illustrated Freelancer’s Guide, Heather Parry & Maria Stoian (PDF) - Really useful for freelancers in the UK
Software substitution chart
Adobe Suite substitute chart
Remember to check out the carrd, it might have a more updated list!
625 notes
·
View notes
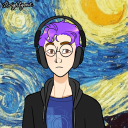
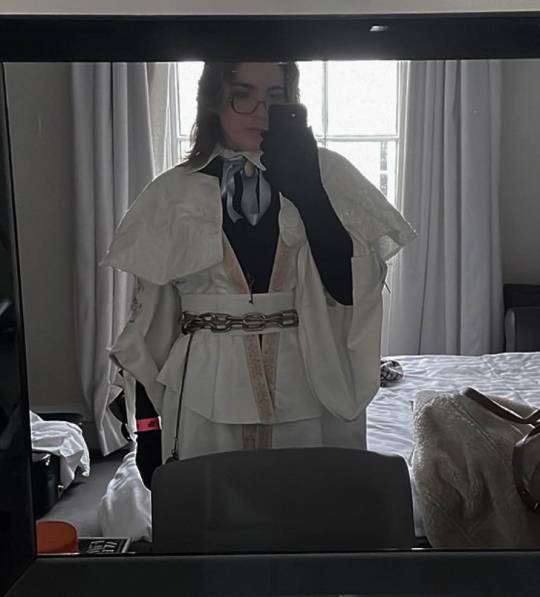
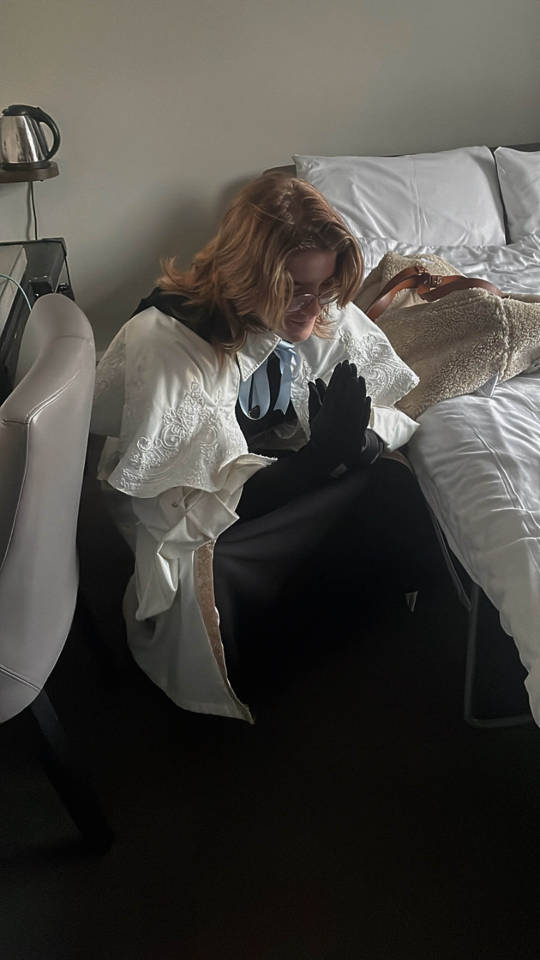
Text
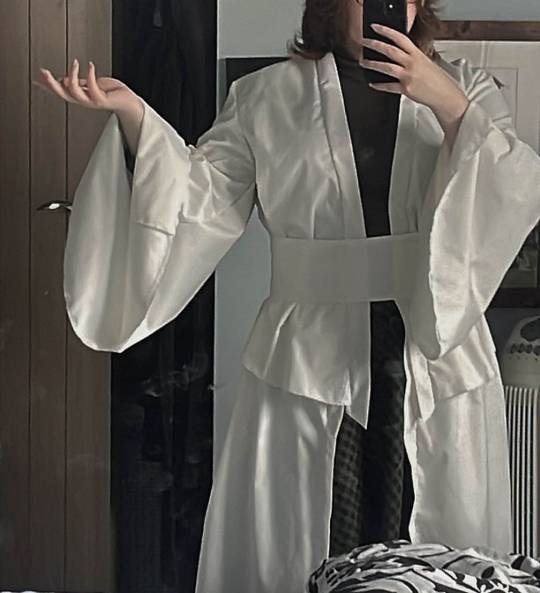
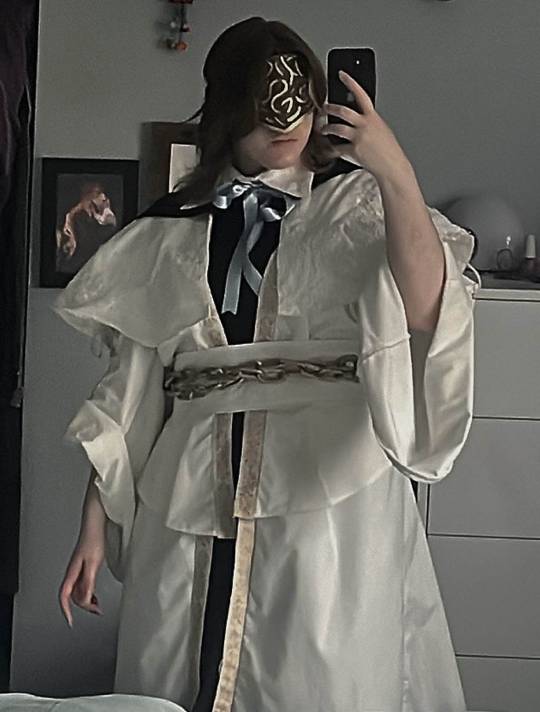
Hello!! breakdown of Choir Cosplay!! This is not really gonna be a step by step but a general vibe of what I did to make this cosplay :) To note: I haven’t sewn anything since I was in highschool which was 8 years ago, so a lot of this is like a ‘ya that works’ - make improvements where I could not :p Overall I wanted the cosplay to not be an exact copy of what is in game, personally I prefer more fitted clothing so I went close to my size with the pattern. Fabric: I used an ivory polycotton, ivory satin and black cotton. 1. I started hunting for a pattern that at least captured the vibe of the choir garb. I had split up the garment in my head into 3 separate parts: The base, the capelet, all the extra fancy bits. The big concern when picking fabric is I didn’t want the garment to be translucent, which is a problem for lighter coloured fabric. BUT!! I found that I didn’t have to make a lining and could instead flatline the fabric - where you cut double the piece and stitch them flat against each other - making it both thicker and opaque!
Flatlining tutorial:
https://www.youtube.com/watch?v=5N-qdP9tcc4&pp=ygUSZmxhdCBsaW5pbmcgc2V3aW5n
I found this pattern by Gunnar Deatherage on Etsy (as a beginner I loved this pattern, it’s very in depth and easy to follow)
https://www.etsy.com/uk/listing/1270370974/maxi-duster-wrap-pattern-instant?ga_order=most_relevant&ga_search_type=all&ga_view_type=gallery&ga_search_query=gunnar+deatherage&ref=sr_gallery-1-14&pro=1&sts=1&dd=1&content_source=95a164c411331c5aaff8fee029dee1e6377d3f92%253A1270370974&search_preloaded_img=1&organic_search_click=1
I did not use the sleeve pattern from it, instead I made my own to have the right fall and size.

Use the sleeve cap from the pattern so it can attach correctly to the bodice/back pieces - then where the sleeve starts to become longer draw out diagonally on both sides. For length I used the original pattern and went slightly longer! :) I used the same pattern for the peplum sorta top section and again for the skirt on the bottom. It creates a stitch line along the front but it’ll be covered by the belt!
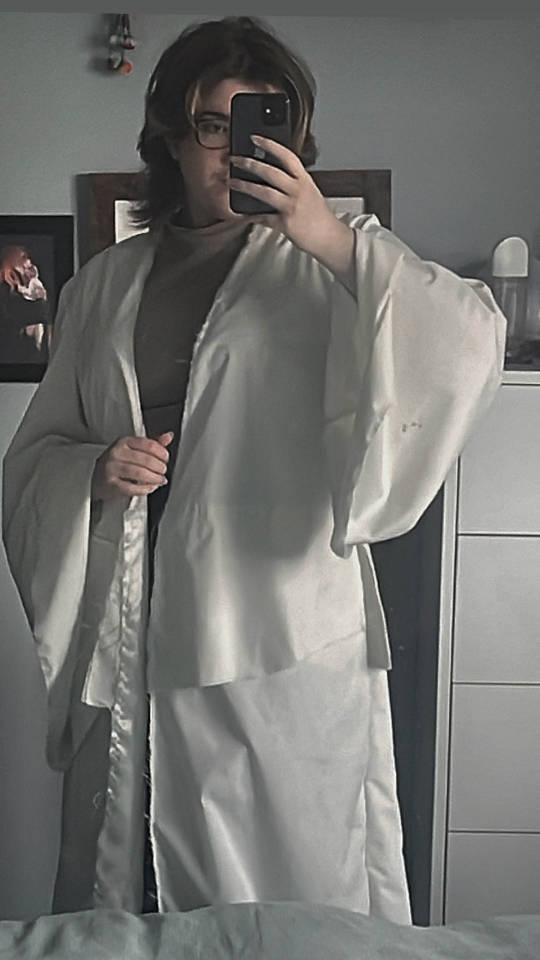
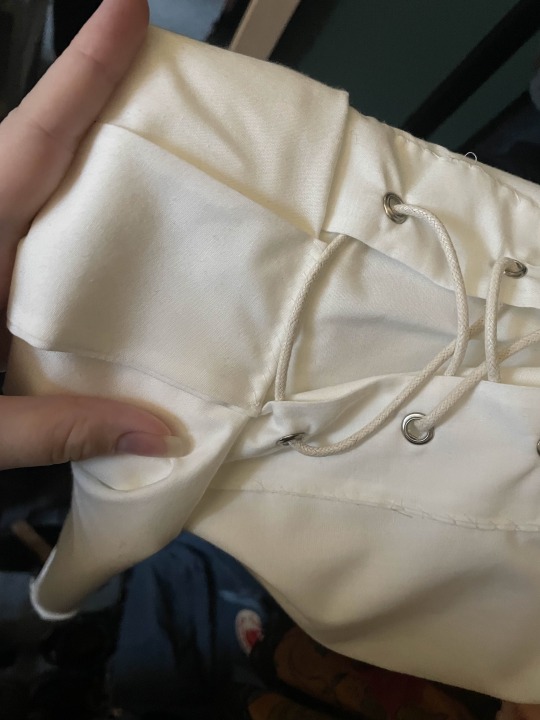
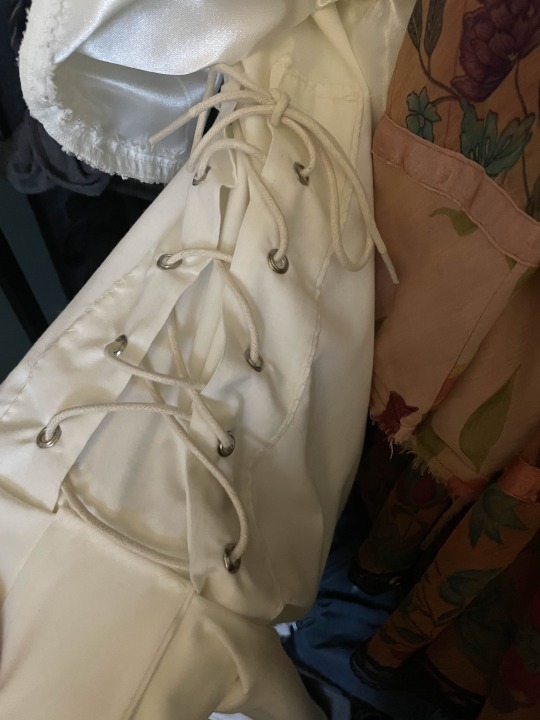
I bought this embroidered ribbon and attached it around the edges of the garment! https://www.etsy.com/uk/listing/840215852/35-mm-golden-victorian-jade-jacquard?click_key=2c042e9416627d9bf9d2f1e85385ba93e48ca464%3A840215852&click_sum=1fe453a7&ref=shop_home_active_1&sts=1 Corset/rolled sleeves: I did this last Corset pieces: Cut out 4 pieces (twice) - and attach them together leaving the end open to turn them inside out. Use a grommet tool and punch some holes through your fabric - make sure they line up. Roll the sleeves to roughly where your inner elbow is and attach another piece of fabric around the width of the roll - pin it in place. Hand sew the corset pieces on and the other piece of fabric so it is all secure :) Thread some similar coloured lacing to the fabric through the holes.
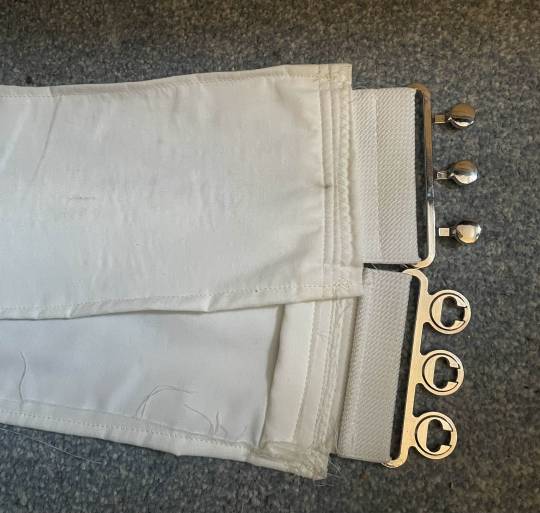
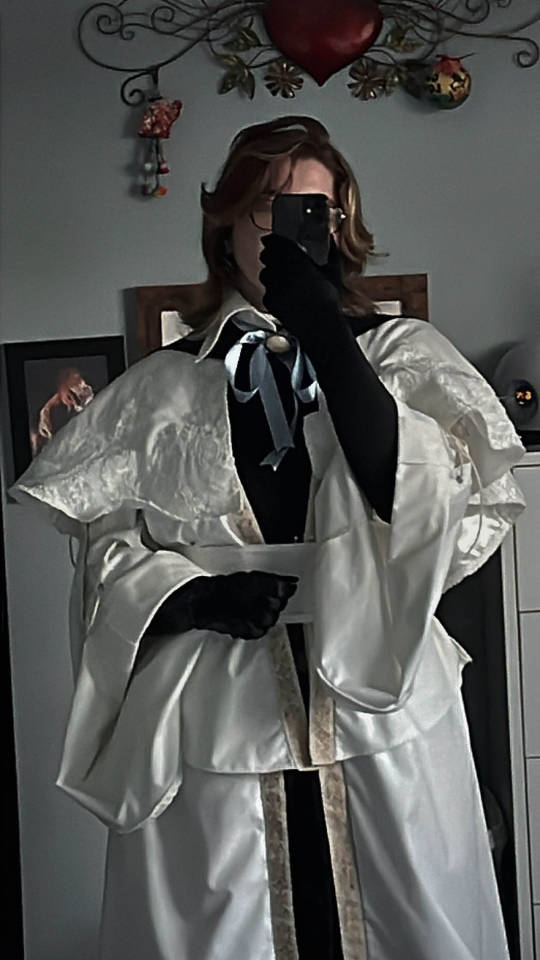
2. The belt! (My mum helped me a lot on this and was my voice of reason) Originally I had bought an elasticated belt with a clasp, but it didn't work at all and ruined the fall of the garment.
I chopped off the end of the belt, leaving me with some elasticated ‘fabric’ and the clasp. Measured my waist and cut out a thick piece of fabric twice and one piece of iron on interfacing. The measurement I did with the base on and added slightly more for both seam allowance and so there was breathing room for myself. Put the clasp piece on either end of the fabric and sew it all together! :) (marks are from the paint of the chain rubbing off onto the fabric :P)
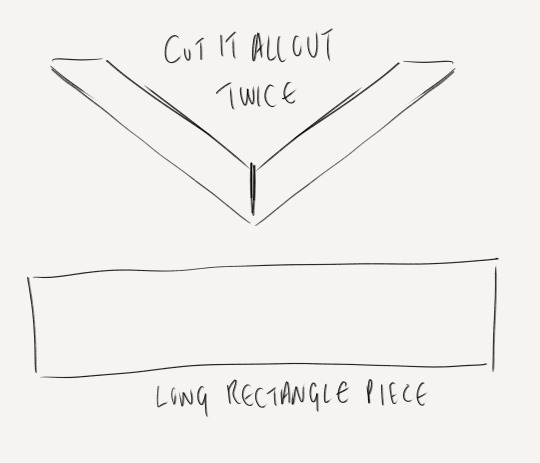
3. The caplet! For the capelet I used this tutorial Easy DIY Capelets | For Halloween, Thanksgiving & Christmas🎃🍂🎄 (The only issue with this is I couldn’t get my head around how to attach a non circle collar) Ivory polycotton + Ivory satin used. Doing the base of this is pretty straightforward with the tutorial - it’s just a circle skirt but for your neck. If you want to be evil to yourself, you can do what I did and hand sew bridal applique all around the garment. If you can machine sew it please do :p I went for a big swooping shaped applique in ivory - any gaps I had were filled with more applique ��https://www.etsy.com/uk/listing/628065500/beaded-sequinned-lace-flower-wedding?click_key=d8b4937d8079ab34b301cf2d4dc7fbd0d6ede960%3A628065500&click_sum=81fb49a9&ref=shop_home_recs_1 I used poppers on the base and the cape to attach them together - it kept choking me if i didn’t 4. The collar - made me want to cry ngl I could not figure out for the life of me how to attach a non circle collar to the capelet (which is how I wanted it). Instead we have a removable collar!! I copied the size of collar from one of my own shirts and followed these tutorials TWO PIECE COLLAR TUTORIAL | KIM DAVE How to Sew a Collar and Collar Stand Easily by Sew Sew Live 5. Graduation hood???? For some reason you can’t just buy these in the UK without paying £30, so I made my own Cut out double for the pieces around your neck and one for the ‘hood’ part Gather the ends of the rectangular piece and attach them to the other pieces!
6. The Fancy back panel piece Measure from mid shoulder blade to the bottom of the garment for the main rectangular piece. Cut out two other rectangles of the same width coming into an arrow shape. Sew them all together and start sketching on the design. The great thing here is you can make it up, because it’s too complicated and nobody is gonna look at it and be like ‘u did it wrong’ I used a fabric medium and gold metallic acrylic
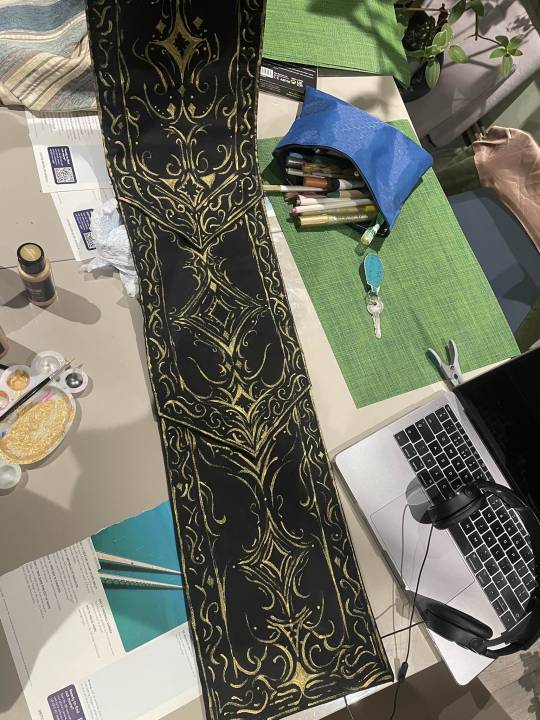
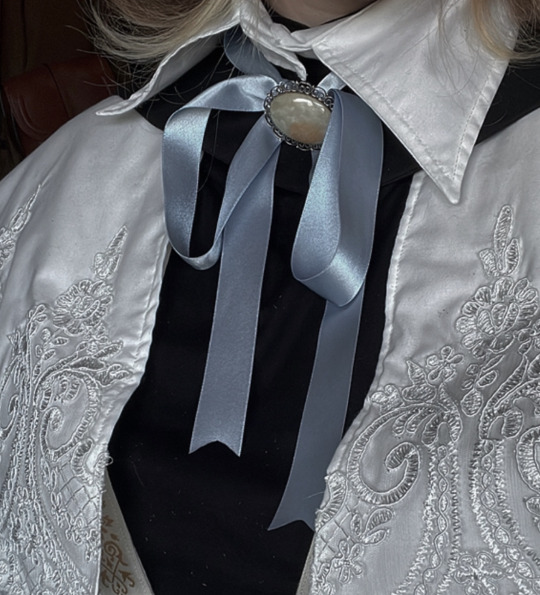
Once it’s all done, I machine sewed it to the back of the base garment because it’s hidden by the cape. 7. THE REST Chain: Me and the chain belt had a fight - Originally I used metal chain,, but I’m allergic to some metal and can’t deal with the smell,, I switched to a plastic chain with 2 D Ring clasps - had to sand it down but the gold spray paint loves to flake off. If I knew about it before, I’d use EVA foam chain :) Black pieces underneath: I bought a turtle neck and a long black skirt :P but you could make it as a dress or smth! Purchased long black velvet gloves, a pocket watch and a key necklace (I didn’t want to use a censer - and they are v expensive/idk how to make one) Ribbon + brooch: I bought chunky soft blue ribbon and found a vintage brooch on vinted
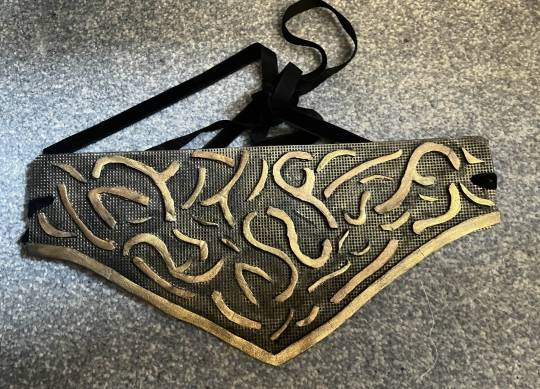
The mask: If you have contacts you’d probably be fine, but I don’t and this mask messed with my depth perception and balance so I had to take it off so I could wear my glasses :(
Use buckram plastic mesh - the thicker kind, used for fursuit eyes and in black! You can see out but nobody can see in. I made a mock up with paper but sorta looks like this shape :)

Eva foam pieces cut out into swirls and filigree like shapes, glue it onto the buckram I did a base coat in grey over the entire thing and painted it with black, gold and bronze acrylic! I hole punched and put the ribbon through it so the mask could be tied around my head.
If you’re making the mask and hat - I’d attach the mask to the hat so it’s one piece :) Where I went wrong/what I’d improve I wish I had been able to attach the collar to the rest of the garment. There is a gap that appears between the collar and the caplet/base at the back (mainly due to gravity and it moving) that can be annoying, since my hair is on the longer side it was covered but still I wish it wasn’t there. I’d also want a bigger collar! I’d not use satin as a lining for the skirt and capelet - it’s so annoying to use and it’s so slippery Maybe would not hand sew all that applique because it took me over a week :P BUT OVERALL for a first cosplay, it’s pretty good! I’m mostly happy with the outcome and it was one of my dream ones to do! :) I hope this helps, I didn’t take photos of all the steps unfortunately but hopefully it makes sense :)
#Choir cosplay breakdown as best as I could#with links and things to where I got my patterns and tutorials from#I hope it helps - if you wanna know more or see more photos feel free to dm and ask idm showing!!#bloodborne#bloodborne cosplay#choir cosplay#bloodborne art#bloodborne choir#cosplay#fanart#art#artist#fromsoft
55 notes
·
View notes
Text
TADC Jax Cosplay Process and Con Experience !

Hello !! Thought I'd post a little journal/process thing for a Jax cosplay I've done recently! I wouldn't call this a step-by-step tutorial as many of this was trial and error, along with much improvisation (I also didnt plan on doing this so there are few actual process images haha). This was a lot of fun and I hope someone can get something out of this !

MAKING THE OVERALLS
So as this was my first time sewing anything, a couple blunders were made. First I definitely shoulda bought this fabric a metre longer than i did. As a result after cutting it in half to create the two sides, I realised it was gonna be way too short going up the chest. So after sewing the two sides together I ended up with some oversized clown pants, that also happened to be super skinny in the legs as I may have eyballed cutting the inseam lol. Drop crotch realness was in full effect.
I followed this tutorial on how to make the base of my overalls, her very "eh, let's go for it" attitude was massively helpful in making this first sewing attempt less daunting
youtube
So...with limited fabric and with no immediate desire to buy another metre from Hobbycraft, I knew there was only one thing to do...

And that was slapping some leftover scrap on top lol. After that all I had to do was sew the straps on both sides and I had some (just about) wearable, non-adjustable overalls ! The colour is different as I had dyed it in Rit Dyemore super pink after sewing.

Now because I was adding this extra scrap on top after sewing the base, I wasnt able to do flat measurements to see if this scrap would actually go all the way around. Rather than taking more time to properly pin the two parts together and getting a proper look. My impatient brain said %$!# no and just pinned parts of it as i sewed, making it less finicky, but not realising that the scrap was too short. Luckily, pulling that empty space together and sewing it resulted in a fit that was almost perfect for my body, as i wanted it to be form fitting anyway. So remember kids, being impatient works out every time :)


The last details I had to do (other than hot glueing some yellow foam buttons to the straps) was add the chest patch and inside leg sleeves at the bottom. Using the original colour fabric was perfect for these two parts (I swear it looks pinker irl). For the chest patch I just folded some scrap together and top stiched around the edges, leaving the top edge open as convenient phone/card storage for Con. I didn't trust myself to not bind the back and front of the overalls together while sewing it on, so I just used hot glue and slapped in on there. The leg sleeves were even easier, sewing some more scrap around then binding the exposed edges with hot glue.

MAKING THE HEAD
So I had no idea how the head was gonna turn out, my only cosplay head experience prior was my first attempt at Jax last October of which I used painted foam card. Minecraft lookin ass

I knew going in that I wanted to do it fursuit head style, starting with a foam bucket helmet and hot glueing extra foam to the sides to create the skeleton of the head. Goated foam head tutorial by Skyehigh Studios was used for this
youtube
Attaching some half moon foam cut outs to each side of the head, doubling them up for stronger support, then adding some shorter half moons next to each eye hole, I was able to get the oval shape that jax has going on.

I measured around the head between the two half moon cuts on each side, then hot glued two pieces of fleece fabric on the front and back. For UK peeps I'd reccommend poundfabrics.co.uk, really affordable and arrived super quick, which was good since i left buying the fleece about a week before con (oops)
Now here's where I probably shoulda done more pre-measurements and sewed the top part of the fleece on with the side parts, so I could simply slip the thing on the foam skeleton like a beanie. Well, caveman brain got the better of me and just hot glued the underside of the fleece parts together. It was uneven, several holes remained and I burned my fingers, but gosh darn was that there three fleece patches glued together on them there.
Finally, at 2am the night before con I added the ears. I was initially concerned as I had underestimated how the weight of the foam would react to flopping around on the head, which made for some vry droopy ears. To make em more straight, but still keep the flop, I stuck some large cocktail sticks I had lying around about half way up the ears. This still allowed for flop behaviour, but stayed mostly upright while wearing them. After wrapping the fleece around and hotglueing them down in two gaps I had made, the head was officially done !

MAKING THE TOP
For my first time making a top, I followed this Youtube tutorial that went the most simple route I could find, taking one of my long sleeve tops, leaving about 1 cm seam allowance and cutting out two parts each for the top and sleeves.

So, as I was still getting used to using a sewing machine, I had managed to jam the needle multiple times when sewing together the base of the top, ruining almost all the spare needles I had. Upon viewing a tutorial on how not to jam your machine, I realised I had been doing the first three points she made, consistently lol. In the moment and since it was the last day, I didnt want to take risks and simply hotglued that bad boy down.

CON EXPERIENCE
So embarking to the first day of MCM London I immediately realised how awkward the overalls were gonna be to wear, I had to wear them as high and tight as i could otherwise it was gonna look like I had comically short legs. This meant that the thigh area was gonna be fairly uncomfortable when moving and would have to take the straps off and shift everything down if I wanted to sit. Aaaaaand about an hour into the first day, the enevitable rip occurred

Thankfully the rip was probably in the most inconspictuous place possible so i didn't really care lol. But any other fears of more rips, or the ears giving out in the wind were nonexistent with the great time I had meeting people. A big highlight was the very first person who came up to me who was actively looking for digital circus cosplays and HAD CUSTOM POKEMON CARDS THEY WERE GIVING OUT TO THEM.

So cute, made my day T_T, shoutouts to milskellyfox for the card. So yeah met a ton of cool people and everything held together for the whole 3 days, including the ears which I was most spooked about lol. Can't wait to start work on the next costumes for October's Comic-Con!
#tdac jax#jax#the amazing digital circus jax#tadc#cosplay#mcm comic con#mcm 2024#the amazing digital circus#jax cosplay
20 notes
·
View notes
Text
Hello everyone!
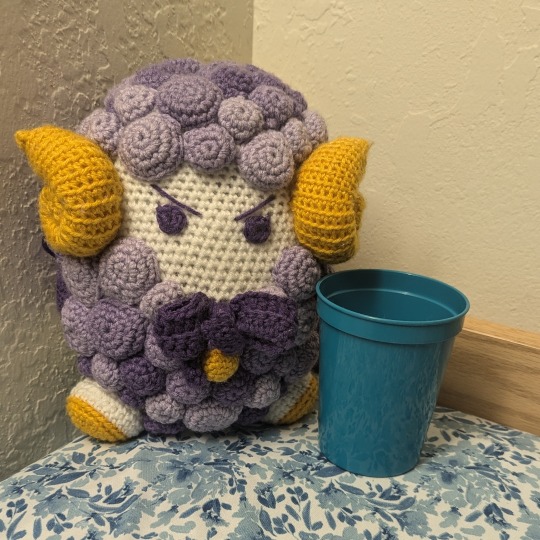
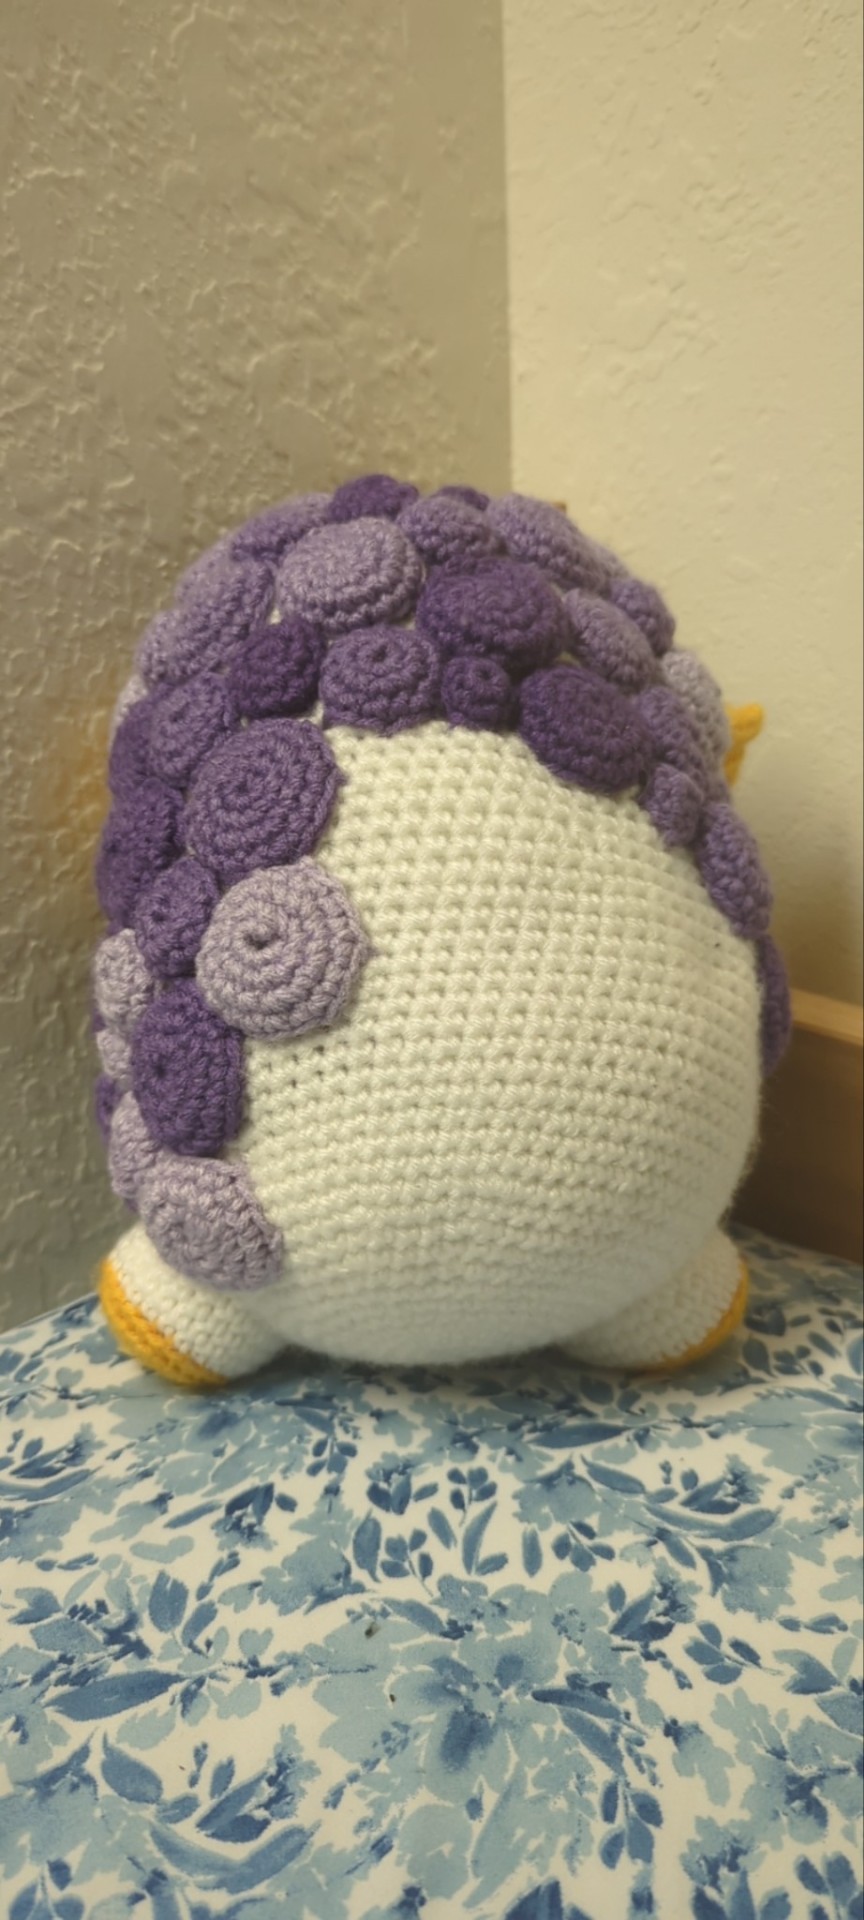
Here's sheep MC from Obey me in crochet form! ^.^
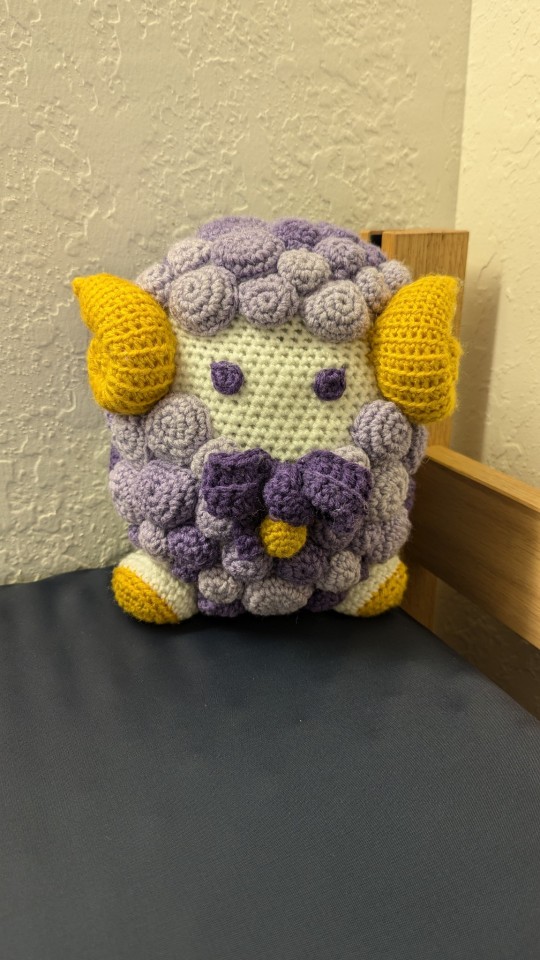
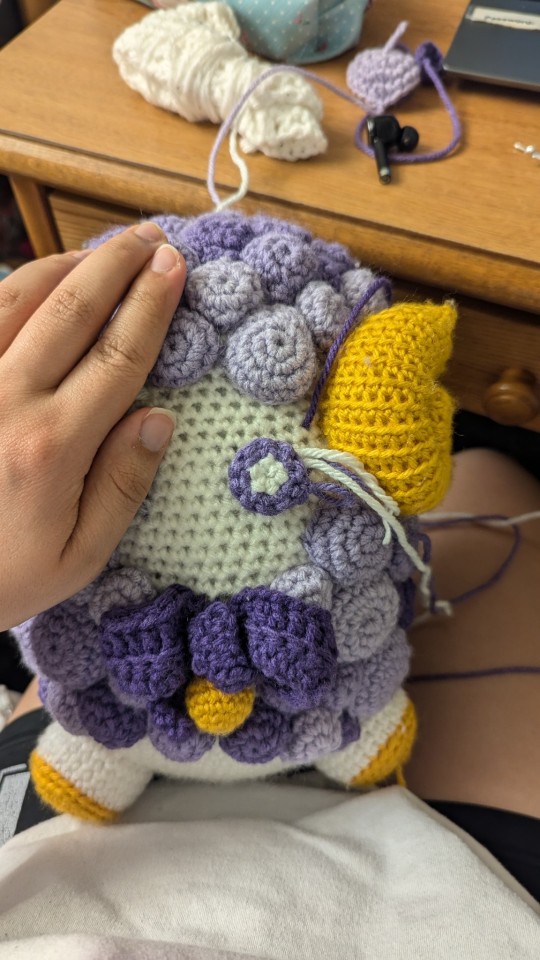
They're not fully done yet (their butt is bald) but here they are
Below is some information on how I made it though it's not perfect
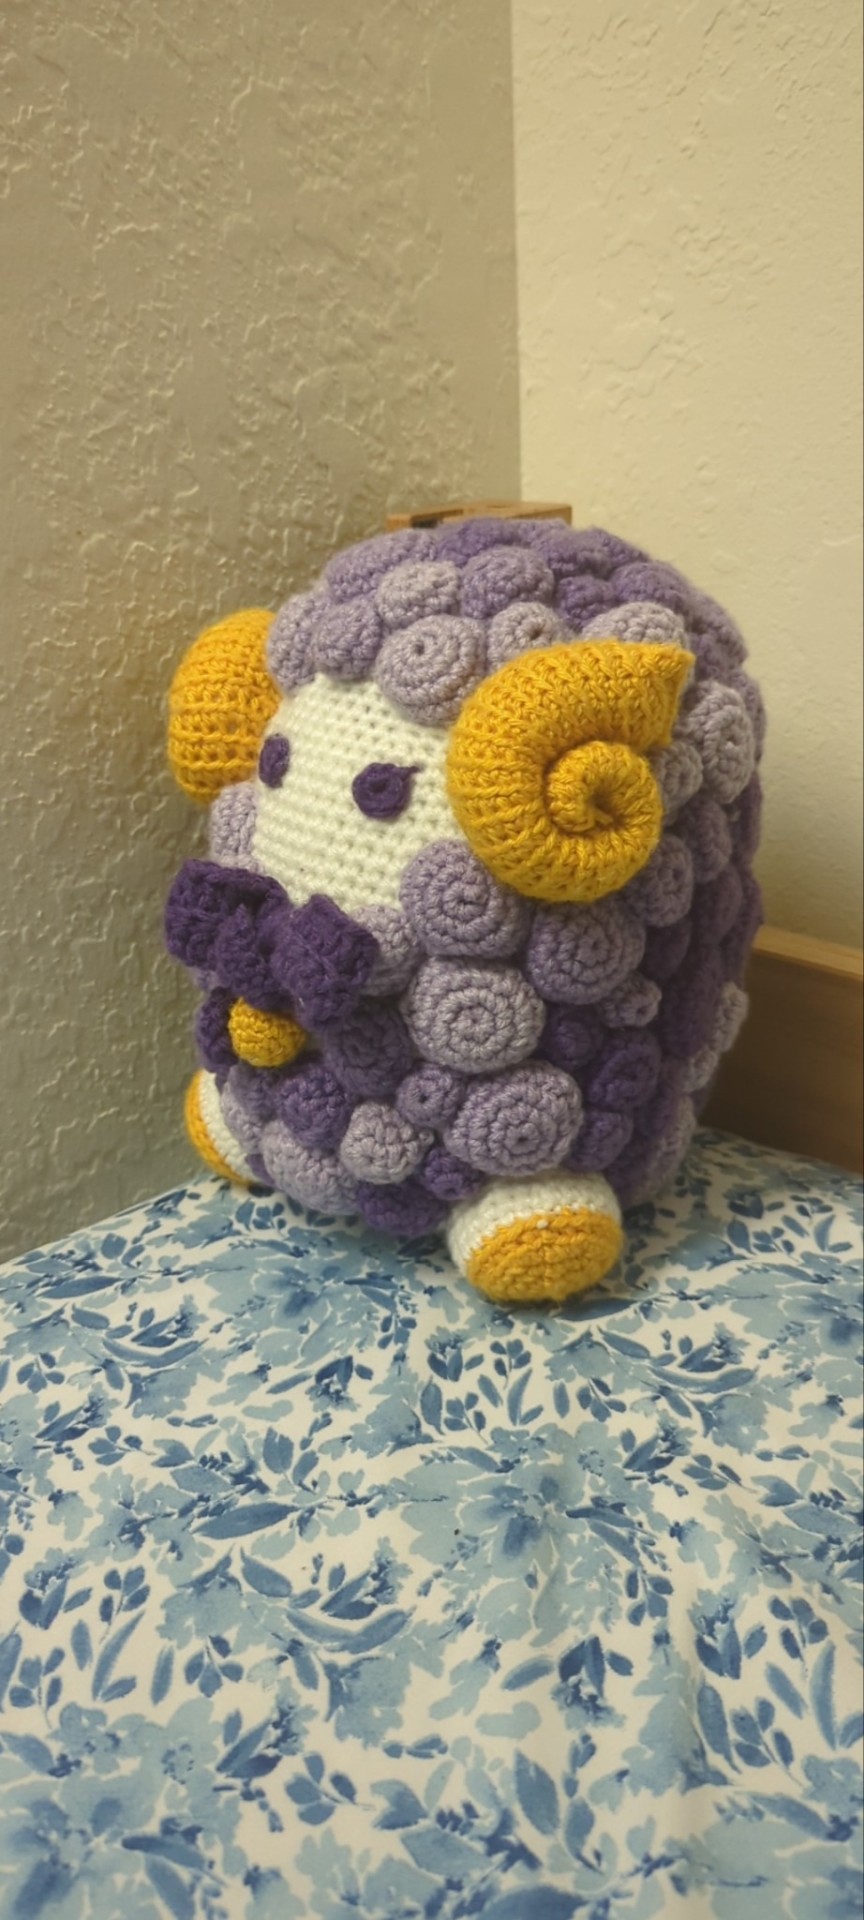
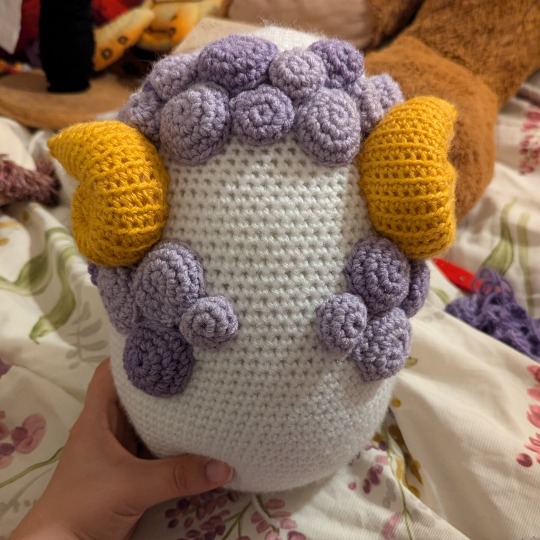
For the horns I used this tutorial (though I did slightly alter it so the horns would be a bit more curled.)
youtube
Here they are from the side so you can see the horns more
The base is just a oval but one that's larger at the bottom than the top. For mineI started from the bottom to the top and I did a few rows of the hexagon circle pattern - I don't know what it's actually called but it's basically
6sc[6],6inc[12], 6(1sc-1inc)[18], 6(2sc-1inc)[24], 6(3sc-1inc)[30], etc.
and then I crocheted a few rows the same length and decreased gradually until I liked the shape kind of like
6 rows of 90sc, 6(13sc-dec)[84], 6 rows of 84, 6(12sc-dec)[78], 6 rows of 78, etc
Though this will vary based on how you decide to make it
When you like the shape and want to finish it try to end on a multiple of 8 or just decrease in a way to get a multiple of 8 like if you have 60sc then decrease only 4 times to get 56 which is a multiple of 8, then to finish the head decrease in an octagonal pattern like
72sc, 8(7sc-dec)[64], 8(6sc-dec)[56], 8(5sc-dec)[48], 8(4sc-dec)[40], etc.
So that the head would be flatter and then easier to put the balls on top and shape the head a bit so they don't look entirely like an egg.
For the little wool balls I just made a bunch of half circles in a bunch of different sizes (I used 3 different sizes for variation) and sewed them on, though they are all stretched out beforehand since I didn't have much string and needed to get the most out of my current batch of urple. I also gave them long tails in the end to make it easier to sew them on.
And for the feet I just made a half circle and once I liked how long the hooves (the yellow part) was I single crocheted into the back loop (or whichever loop would be facing they inner part of the feet so that there is a line outside for you when your finished making the entire foot) and added my main color (white) and single crocheted until I liked the foot size
For the eyes I made a magic circle and crocheted 5 single crochets into it before slip stitching to close it and using that stitch kinda like the eyelashes they have in their in-game picture.
I made a few other eye variations but I didn't really like them
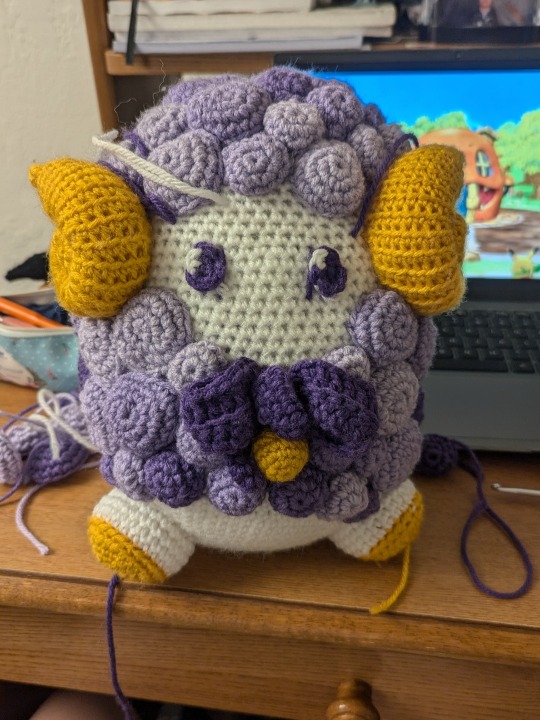
The bell is just a crochet oval (or a circle with more normal rows that are not increasing to decreasing in number of stitches within a row)
For the bow I used this tutorial and again I altered it slightly so that it would look good on MC to me.
youtube
And here they are basically as I was beginning to put the parts together
Hope y'all like em (also I'm using American crochet terms so my single crochets might be double crochets if you live in the UK, and it may be different in other parts of the world just to give y'all a heads up)
The main beginning stitch I used for everything (except the bow) were magic circles just to let you all know just in case you need to learn a new skill in order to make them
Besides the stitches in the videos I only used single crochets (back loop/front loop for feet details) and sewing everything on
Goodbye I hope this may help a little bit if you want your own personalized MC plushie and remember to hydrate or diedrate
(I also may be making personalized charms to represent some of the boys in the game but it depends if I can actually get their sin logo? appearance? symbol? correct since they are pretty detailed)
Also here's their bald butt and that I have not been able to finish yet lmao
#crochet#obey me#obey me mc#obey me: one master to rule them all#obmswd#Youtube#my art <3#took me way too long#my fingers are dying#my wrists are on a well needed vacation for 5 minutes#sorry I took a year lmao
19 notes
·
View notes
Note
sorry i couldn't find out how to ask on your other blog.
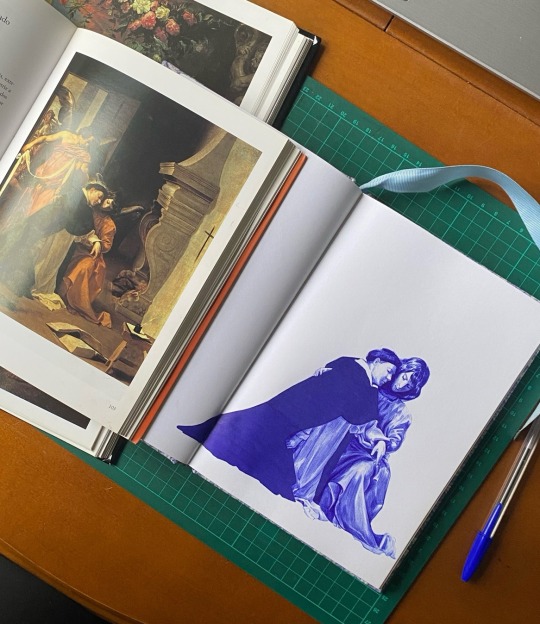
that book binding you posted is gorgeous btw !!
I noticed that in one of the photos you included the disclaimer that you also edited it. I just had a question about how you formatted the text.
one of my biggest gripes with AO3 is text formatting (i often feel like i'm reading a legal document vs a novel/story) . Did you change how it is formatted on AO3 compared to printed?
I feel like i'm in the 0.5% that hate AO3 formatting but i thought i might as well ask in case you have any tips for that. >,>
(also how do you decide on the page size, do you just choose a standard size for all your projects? or do you vary it depending on what you are binding?)
thanks so much for taking the time to answer and for sharing your projects :) !!!!!!!!!!!
hey anon! I have asks turned off for the sideblog, but happy to answer here. Thanks very much!
I'm taking this opportunity to info-dump and link a lot of resources. I think they're useful for people new to either typesetting or bookbinding, but not all are directly related to your queries. That said, hope this is of use!
one of my biggest gripes with AO3 is text formatting (i often feel like i'm reading a legal document vs a novel/story) . Did you change how it is formatted on AO3 compared to printed?
I do a fair bit of editing when I'm binding a fic; typesetting is often the longest part of the process. Your mileage will vary depending on your experience with using word processor software, particularly the paragraph style and page style settings. Another factor is how simple/complicated you want your typeset to look. Replicating a published novel in format is difficult but learnable for a complete beginner.
I'm not equipped to give a full tutorial on how to typeset, but I'll point you towards some useful resources for ficbinding then talk about my own process.
ArmouredSuperHeavy has a tutorial on how to make Ao3's HTML downloads into a printable book in Microsoft Word. I use LibreOffice Writer myself, so this adaptation of the same tutorial is what I follow. Both are very helpful to reference as you're learning the typesetting ropes.
Personally, I don't mess around with HTML. I find it easiest to start by doing a Ctrl+A copy of the Entire Work fic view on Ao3 then pasting that into my word processor. This video tutorial by Beautifully Bound runs through how to do this in Microsoft Word using an AO3 fic as an example, including the associated steps needed to make the fic look novel-like. This is probably the best tutorial to address your gripe with AO3 formatting. Other than that, I'd recommend looking into videos or tutorials about typesetting novels for print. Same idea, and you may get more hits than searching for fanbind/ficbind typesetting tutorials.
More under the cut! Once I start yapping, it's hard to shut me up 🤷♀️
As a point of comparison, here's one of my fics on Ao3 and the corresponding typeset side by side:


Beautifully Bound explains this in far better detail than I will, but off the top of my head, the steps involved:
making a new document and setting the default page size to whatever size I want the book's pages to be (A5 or A6 usually). You can also set the margins at this point, taking account of your printer settings.
CTRL+A and copying the entire work's text on AO3 then pasting it into the document.
removing all hyperlinks and AO3 frontmatter, things like the author tags, summary, notes, etc as well as any website text that got copied over alongside the fic.
(optional) running a spell check and ensuring grammar usage is consistent. For me that's substituting em dashes for hyphens between clauses, enforcing curly double quotation marks for dialogue, etc. LibreOffice Writer automates a lot of this with customisable settings, via Tools -> Auto-Correct. Here's also where to make sure character names are all spelled right, convert the text to or from US to UK English, etc.
picking out fonts for the body text, headers, page numbers, etc. This is where you'll want to use paragraph style settings. Page style settings also comes in clutch if, for example, you'd like different headers on alternating pages. I like having the author on the right, the fic title on the left.
setting the body text first line indent to whatever makes sense visually). This in particular helps make the fic feel more like a novel. You can also play around with line spacing and space between paragraphs at this stage. For this A6 typeset, I had a 0.75cm first line indent, 1.15 line spacing, and 0.15 spacing between paragraphs.
(optional) formatting the first line of the work to use small capitals and to add a drop caps to the first letter of the first word. Again, this is a convention in publishing which add a novel-like feeling to a printed fanwork.
Inserting page numbers, adding images, coming up with how I wanted the "copyright" page to look—optional for the most part, but these are details that make a fic appear more like a novel.
For multi-chapter works, there's extra work in formatting chapter titles as headings so that they're referenced correctly in the automatic table of contents word processors can generate.
Once you have a typeset you're happy with, and if you're considering printing and binding it as a book, then you'll need to look into how to create and print signatures. Personally, this is something I had to actually try (and mess up a bunch of times) before I got to grips with it. Understanding how both your printer and your PDF reader work, particularly printer margins and booklet print settings, is key.
I won't go into as much detail on this, but if it's something you have an interest in, I'd recommend starting with DAS Bookbinding's tutorial. DAS has tutorials for everything bookbinding related so when in doubt, check his channel! Plenty of other YouTubers also have good videos on making signatures.
This resource is extremely useful once you've got your head around how to print signatures manually, so here's a link for anyone in that space: GitHub Bookbinding Imposer. Essentially, this does the signature creation for you, removing the need for booklet print settings in your PDF reader.
also how do you decide on the page size, do you just choose a standard size for all your projects? or do you vary it depending on what you are binding?
I have access to both A4 and A5 sized paper and my printer can handle printing on either size. In bookbinding, normally two pages are printed per side of the paper (which are then folded in half as part of a signature). That is, when I print on A4 paper, it's to make an A5 sized book. Printing on A5 paper will yield an A6 sized book.
Before I begin typesetting, I'll usually know what paper I plan to use, so the typeset will be one size down from the paper. So far, I've made softcover pamphlets at A6 size and casebound books in A5. No real method of choice for me, it's whatever I feel most suits the project.
---
If you made it this far anon, thanks for reading! Here's links to a few general resources if bookbinding is something you'd like to explore more:
DAS Bookbinding (YouTube, bookbinding in all forms)
Sea Lemon DIY (YouTube, bookbinding and other crafts)
bitter melon bindery (YouTube, bookbinding, particularly beginner friendly!)
Jess Less (YouTube, demonstrations of fanbinding and re-binding existing novels)
Papercraft Panda (blog, lots of detailed tutorial on bookbinding)
Renegade Bookbinding Guild (collective and website, loads of fanbinding-specific resources from their members and they have a helpful Discord).
24 notes
·
View notes
Text
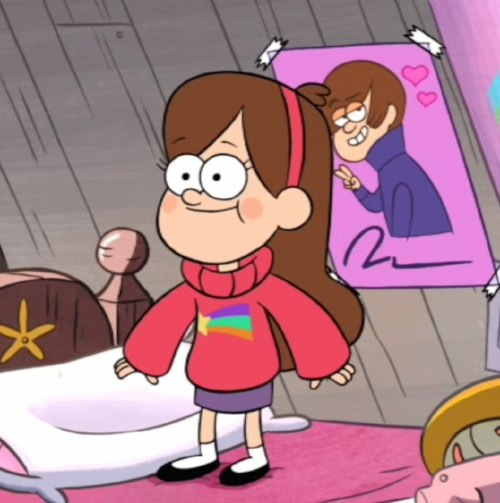
CROCHET MABEL COSPLAY INSPO POST
I actually planned to cosplay Mabel Pines for Halloween. I just officially started on the 1st of Sept.
What I will be crocheting:
- Mabel's shooting star sweater (artistic interpretation)
- Purple pants alteration
- Pink head band
- yellow star earrings (MAYBE. IF I HAVE TIME)
MORE INFO UNDERCUT
Mabel's Shooting Star Sweater (artistic interpretation)
I have to break it to you. I'm not making an actual sweater. It's more like a loose long sleeve crop top. I don't know how that girl does it, but I live in a tropical country. It's bloody hot. Yarn is hot. I made an actual sweater, and it has only seen the light of that TWICE. And that second time I had to take it out half-way because the weather got too hot. I'm trying not to overheat and also have my crochet apparel projects being able to see the light of day okay.

BOOM. Progress and the colour scheme. Oversaturated and I like it. I honestly have no pattern; I am just winging it. The width is 63 stitches, and I use a 5mm hook. I have used 2 and a half skeins so far. I need to go back to the store and get more pink honestly.
The shooting star is an applique and going to be sewn onto the pink base.
It will be a low cut, and I'll do the collar ribbing in a different colour. The sleeves are not going to be entirely pink. I want it to be flared mesh sleeves
Sleeve inspo:

the image is linked :)
PURPLE PANTS ALTERATION
Why not purple skirt?
I'm not comfortable wearing short skirts or shorts in public. Also, I want an excuse to alter the purple pants thrifted and that were too small :(

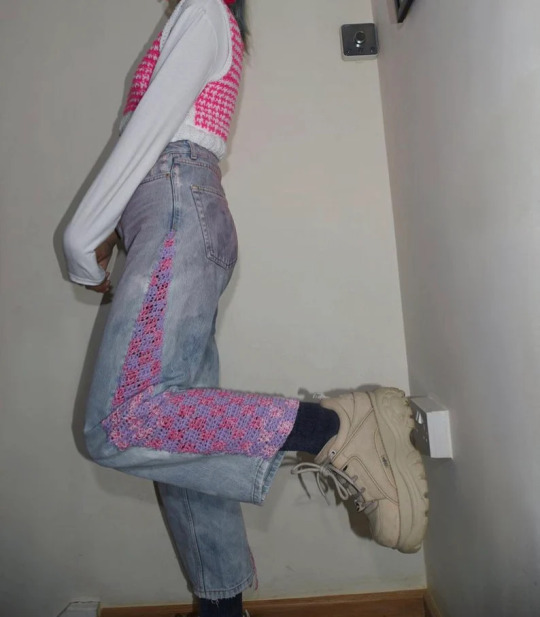
photos from Crochet Upcycled Jeans Pattern - Etsy UK
I don't know if I'm going to buy the pattern or not. I might just fuck it we ball (like the sweater LOL). I'm altering the waist band with a crochet checkered pattern at the side

the purple pants and the color scheme
HEADBAND IDEAS
ALL the youtube video are linked with the photos

this star headband is cute but is too chunky for my liking.

might just make a simple one honestly...
STAR EARRING

apparently, there is a tutorial vid on yt??? slay. Idk if I want to do it. The smallest hook size I own is 2mm. But it's possible....
18 notes
·
View notes
Note
Can you draw a tutorial for full bodies, similar to what you did for faces and heads?
I probably will, but not right away bc I feel like I’m still figuring out anatomy too😅😅 I’m working on it a lot though (the sketches on this blog are mainly so I can keep practicing more dynamic poses & draw more than just a face) & I’m jotting down a lot of tips that are helping me as I learn💓💓 once I have enough I’ll definitely do a write-up & share it with you guys though!! (And I’ll definitely do one for hands too bc I love drawing hands!)
Here are my tips in the meantime, that I’m doing right now (if you’re interested);
1) LOTS of figure drawing, I like to do exercises where I give myself 10 min to draw something, then 5, then 1, then 30 seconds (4 drawings total, I normally just split a page into fourths). Drawing from gifs helps a lot too bc the people are moving and not static.
2) study the masters!! I have huge art books full of gorgeous quality prints, of baroque art, Renaissance, Impressionism…(you can probably find some at the library). This also helps SO MUCH with clothing draping/folds etc. these artists already did the work figuring out how to exaggerate things to make them look as beautiful as possible and we can learn from them😇
3) do studies of your favorite artists on social media!! It helps you figure out WHAT you like about their art, and how you can incorporate it into your own style. (I don’t do this but I should jajajaja). Some of my inspirations on Instagram are: withapencilinhand (super nsfw, look at your own risk😅), hamletmachine, Paul Heaston, Tony DiTerlizzi, etc etc (I can do a full write-up of my fav artists but the list is sooooooo long)
3) focus on drawing rough lines of movement, and build on top of those with shapes. But always focus on getting fluid and natural looking poses 💓 (or just draw noodle limbs like I do) (don’t do that). If I get really lost I force people to take pictures of me and then copy from that 😅 but I know a lot of professional artists & every single one uses references. So don’t be afraid to use them or feel like you’re “cheating” for not being able to just draw something straight from your brain. Bodies are hard to draw! Perspective is hard! Shadows/lighting are hard!
4) think of the bodies you’re drawing as solid forms, and think about line weight & shadows. It helps a lot!!
5) @traceyc-uk shared an amazing article in the comments that explains everything a million times better than I ever could about adding life and movement to poses so they don’t look static🙏😇 I’m linking it here since you can’t click on links in comments🥲
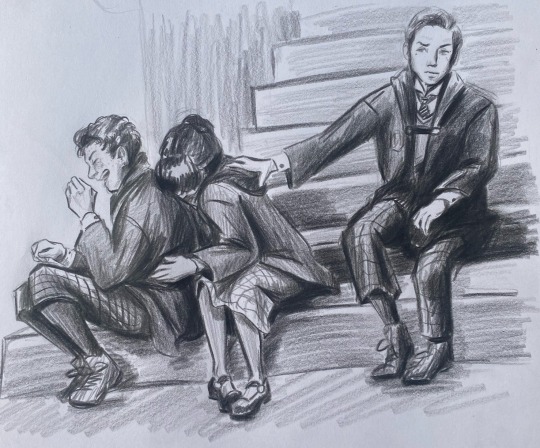
Some examples of what I mean:
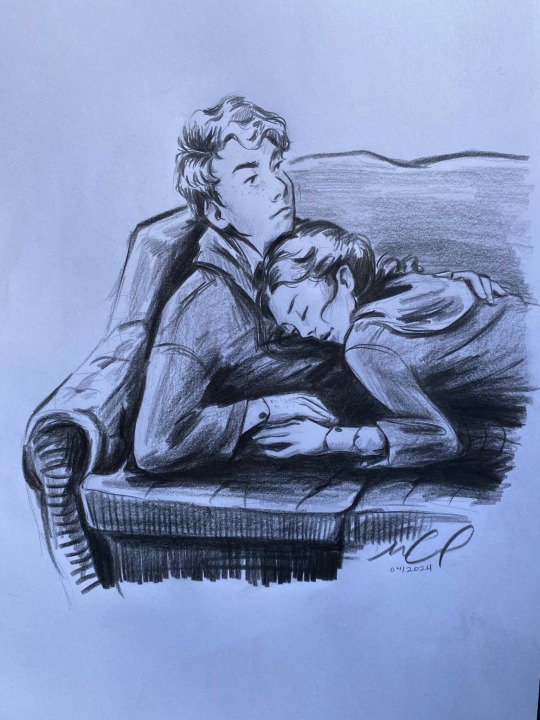
These ones are master studies, and I was focusing on line weight, line direction, shadows etc etc

Here are some of my under sketches so you can see how messy and confusing it is before I erase them all and start to go in with the black pencil😅
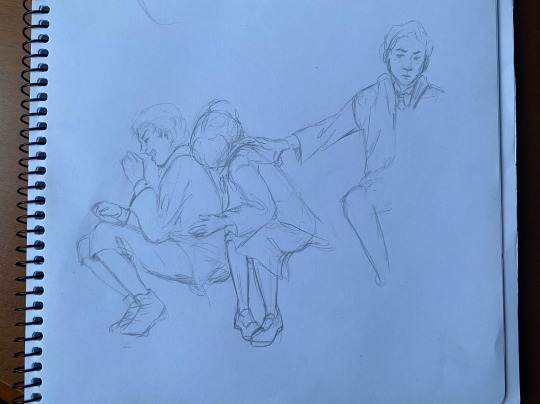
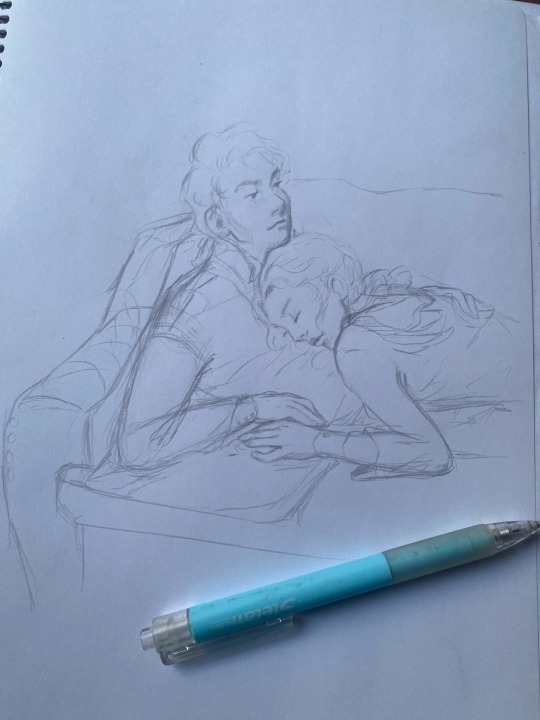
I hope this helps!!🫶🙏😙
I know I talk too much (it’s a problem that has Plagued me my whole life) and also I’m just typing this up on my phone as I have my coffee. So I hope it’s somewhat coherent & it helps!! & I’ll do a real “tutorial” at some point in the future😙😙😙
25 notes
·
View notes
Text
So you wanna sell your art on Redbubble but you don't know how?
(Or, I meant to write this months ago but better late than never lol)
OKAY okay. I have a bunch of friends as well as mutuals who have lovely lovely art and have considered selling it online (specifically on Redbubble lol that's what's being covered today anyways) but don't really have any clue how RB works, if it's right for them, or what to expect. SO I'M HERE TO GUIDE Y'ALL THROUGH ALL THE BASICS and hopefully, if I've done my job right, this tutorial will help you set up your RB shop and start selling your art online (or help you decide that RB isn't for you lol).
Table of Contents:
What the heck is RedBubble and should I use it?
How to make your account and set up payment
How to add a new work
Pricing? Markup?
Extra: Checking sales and payment history
Extra: Taxes and copyright, in case that scares you.
Extra: The Partner Program (or how to make "officially licensed" fanart)
What the heck is RedBubble and should I use it?
>> RedBubble is a site that allows you to upload your artwork and sell it on quite a variety of different products.
>> The main benefit of using RedBubble, aside from reach and visibility, is that RB handles *everything* when it comes to the manufacturing and shipment of your product. You are literally not responsible for anything other than making the art, uploading it, and deciding how you want it to look on different products. If there is any kind of problem with material quality or delivery (though in my experience they're pretty good with both of those things), it's not your responsibility to correct!
>> RedBubble does not charge you to sell on their site, but they do set a base price for all products to cover manufacturing and to ensure that they make some level of profit for each sale. We'll look into the specifics of this in a later section when discussing pricing and markup, but it would be considered pretty standard, for example, for an item to cost $20 and you to make $4-$5 upon making a sale.
>> At the end of the day, whether or not RB is right for you largely depends on whether or not you feel their pricing and payment is fair, and whether their available products correspond to what you wish to sell.
Okay, so how do I get started?
Well first you're gonna need an account!
>> Head over to the RedBubble main page and click "Sign Up"

>> Select "Artist Signup"
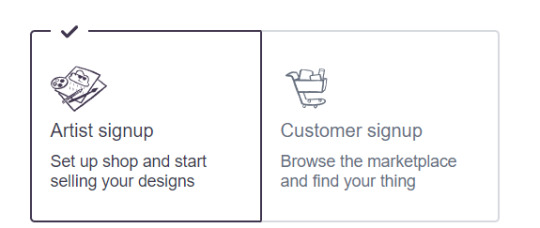
>> Fill in your email, shop name (this is your username also), and password
>> Click "Sign Up"
>> You will be brought to this dashboard page:
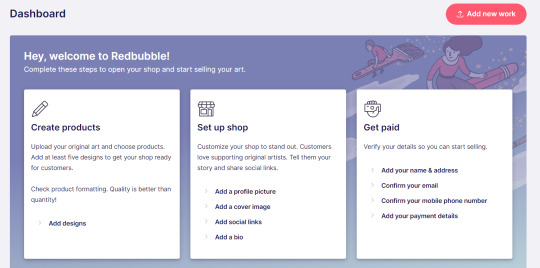
>> We will discuss creating products in the next section. Everything under "Set Up Shop" is optional and I'll let you explore that on your own so we can focus on the essentials. That just leaves... Getting paid!
>> First, check the email you used to confirm your email address. If you didn't receive an email to confirm your email address, don't worry, we can resend the form- keep going with the steps for now.
>> Then, under "Get Paid", click "Add your name & address". Note that all of the options in the "Get Paid" section actually lead to the same form, but selecting this option starts us near the top.
>> Fill out all the fields on this page. If you didn't receive the email to confirm your email address, click on this button:
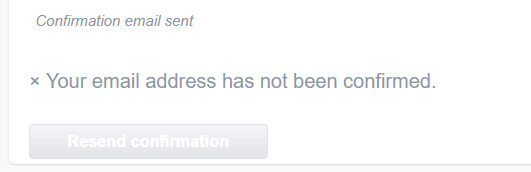
Then check your email again.
>> Note when choosing your payment method: if you are from Canada, like me, then paypal is your only option. Same for parts of Europe that aren't in the UK. Otherwise, you also have bank transfer options:
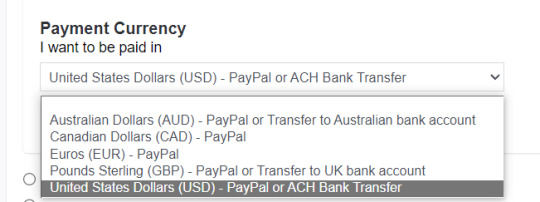
>> Once you've finished filling in everything on this page, click "Save Changes" at the bottom and... That's it! Now you can get paid :)
**Note: I believe RB still requires you to make a minimum amount of money before they do a transfer (for me in Canada I believe it's $20 CAD?), so do keep that in mind!
>> Payments are made to your account monthly, generally on the same day every month (assuming you've made profits!).
How to add a new work
So you've made your account, fantastic. Now you're ready to actually add your works to RB and make them available for purchase to the wider public! To demonstrate the process, we're gonna use our pal Nicky here (who was a gift from my lovely friend @llumimoon) and pretend that we want to upload him:
Ain't he a doll? Anyways, let's begin.
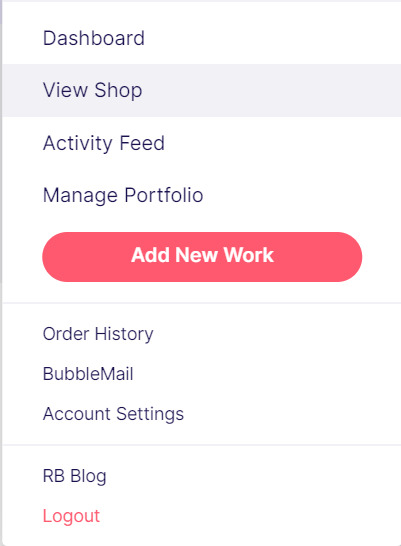
>> Hover your mouse over your pfp in the top right corner to make this drop down menu appear:
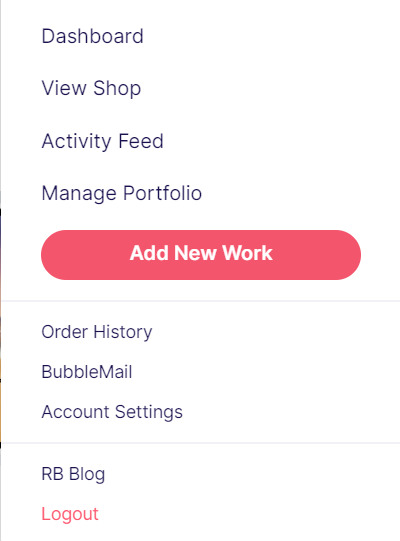
>> Click on "Add New Work"
**On a new account with nothing uploaded, this will look a bit different. instead choose "Sell Your Art" from this dropdown menu, then "Add New Work" from the top right corner of the same dashboard page from earlier.
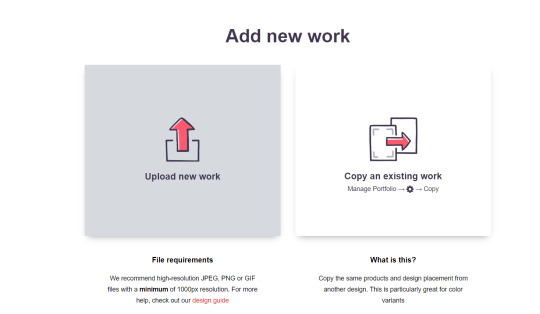
>> Click on "Upload New Work" (and note the file type and resolution requirements at the bottom. I always stick with PNGs, but in theory JPEG or GIF works as well.)
>> Select the file of the image you want to upload. In our case, that's Nicky.
>> Now write a title for your work, tags, and a description if you want. The tagging system is how people will actually find your work, it works a lot like Tumblr's! Try to choose things that are relevant to whatever your piece is. If you're uploading fandom-related art and aren't sure what tags are used for your fandom on RB, try looking some up and seeing what generates the most relevant results!

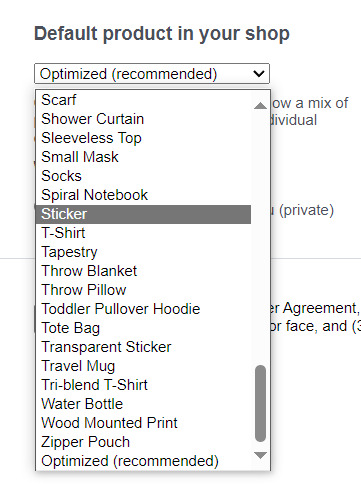
>> You may have noticed the "background color" section right below Nicky. This sets the default background color for your piece on different products. We're gonna keep this as the default white here, and I'll show you how to adjust this for individual products very soon.
>> Scroll down. This is where we decide what products we want this design to be available on and how we want Nicky to look on each thing we've enabled.
For example, if I were actually selling Nicky here (if that wasn't clear obviously I'm not actually selling my friend's art lol don't do that ofc) I would definitely want people to be able to buy him as a little sticker :]
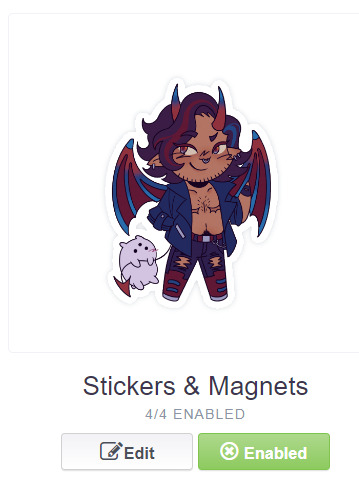
>> In this case, "Stickers & Magnets" have been enabled by default. If you wanted to disable them, you would simply click that little "Enabled" button. Similarly, if we want to enable a product type that is disabled, just click that same button (which will be grey rather than green and say "disabled").
>> If a product is disabled and you are being prevented from enabling it, that's because the dimensions of your image are too small for the product in question! You'll wanna resize your image (preferably in a manner that retains its resolution of course) and come back.
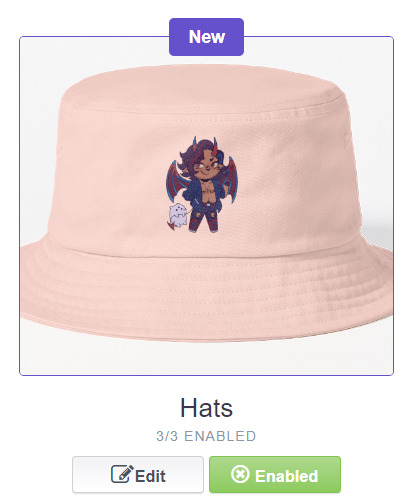
>> Hm. Let's use the hats here as an example of how we might make edits to the layout of a specific product.
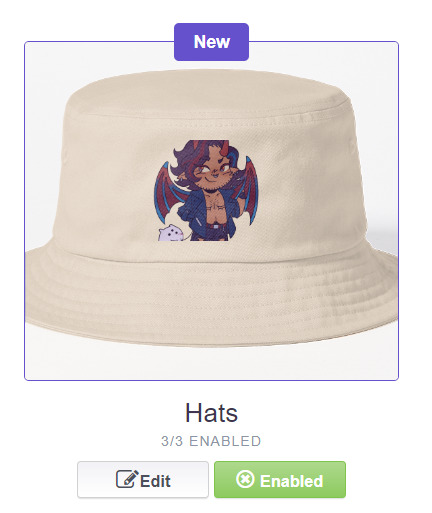
He's kind of cut off, as you can see actually that's pretty in-character, and I think I want this hat to be pink rather than this default beige-looking color.
>> Click on "Edit"
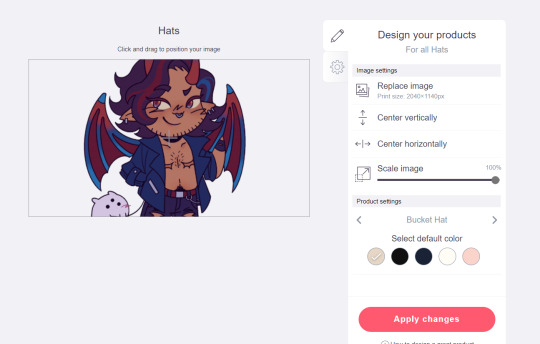
So, the first thing I'm gonna do here is use that "Scale Image" slider to scale him down a bit. I'm also gonna click the image and drag him up a bit to re-center him.
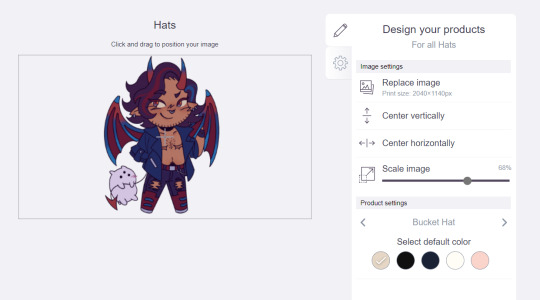
Next, I'm gonna pick from one of the default colors and choose the pink one.
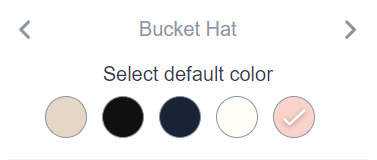
>> Notice the two arrows beside the words "Bucket Hat"? This lets me go through the different types of hats available and change the background/base color for each of those, like the dad hat:

>> Before we apply our changes, click that little gear icon right under the pencil icon
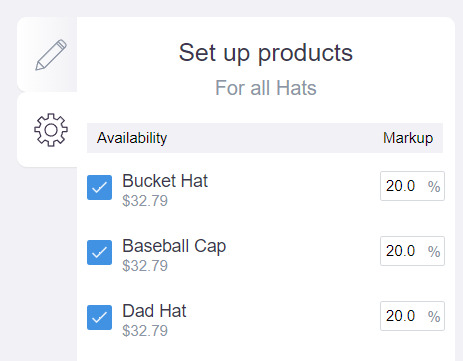
>> This lets us adjust the markup price for each individual hat. It is 20% by default. Changing the markup percentage affects how much you will make off of a sale, as well as how much your product will cost. More on that in the next section!
>> Click "Apply Changes"
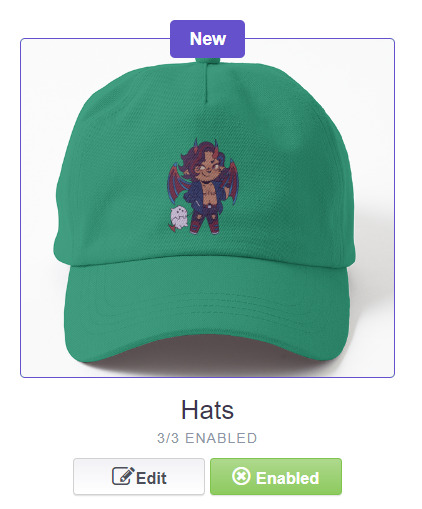
The "dad hat" was the last hat I had selected (when setting its color), so the display has changed to show that one in the preview. Here's our bucket hat from before:
Nice!
>> The specifics of how you can adjust your design will vary depending on the product. With pillows & totes, for example, the editing menu looks like this:
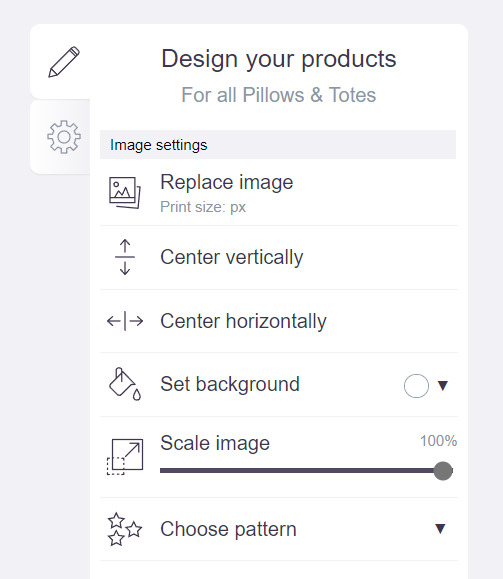
Using the "Choose pattern" option, I can make the Nicky image repeat as a pattern like so:
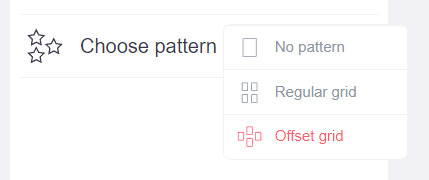

(note that I also scaled the image down a bit here too).
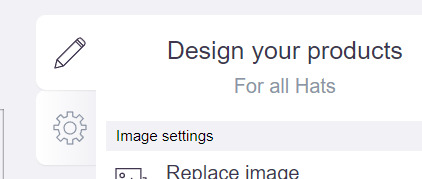
>> One last thing. See that "Replace Image" button near the top?
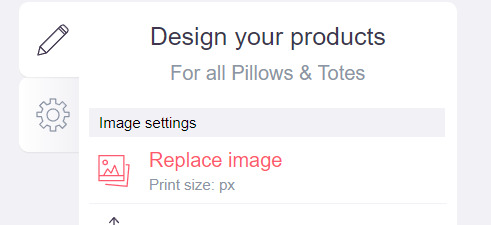
You can use this when you want to use a different version of your image altogether for a specific product.
>> That's the gist! Play around with the settings for each item as you see fit. You can always edit them again later.
>> Scroll down. Select up to 2 relevant media types.
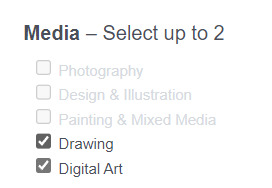
I'm pretty sure this affects search results when users choose specific filters, but tbh otherwise I don't think it's all too important.
>> Let's look at what remains.

>> I have the "Who can view this work?" section set to "Only You"- THIS IS SO I CAN FINISH THE STEPS HERE AND SAVE THE WORK WITHOUT ACTUALLY MAKING IT AVAILABLE TO THE PUBLIC. In practice, you'd only use this option if you wanted to buy your own work on something but didn't want other people to be able to see or buy it. Otherwise, you're always gonna choose "Anybody (public)".
>> Collections can be created to organize the pieces in your shop (for example, by fandom), but we won't cover the specifics of how to do that here.
>> Set whether or not your work contains "mature content".
>> If you want, you can set which product shows up in the preview for your work when people view your shop. If you think your piece looks especially nice on a mug, for example, you can make sure that's what people see first.
>> Finally, agree to RedBubble's User Agreement (read that little blurble, since that's basically all you generally need to care about when it comes to what you can and can't sell on RB, but more on that later).

>> Click "Save Work" and voila! Your piece is now available in your shop, and can be found in the search results of whatever tags you left on it (this may take a few minutes to take effect).
>> If you want to check out your design in your shop, navigate to your pfp and click "View shop"
>> Don't fret if the design doesn't appear in your shop right away! Again, this can take several minutes.
>> To edit your design again (and to view/purchase privately uploaded designs like Nicky here), click the "Manage Portfolio" option instead:
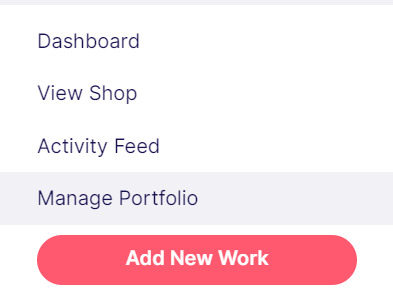
>> Here is Nicky as he appears in my portfolio (again, your portfolio and your shop are different things- Nicky will not appear in my shop at all because he is set to "private")

>> You can click that little gear icon to do a variety of things, like return to the editing menu from earlier. The three icons below Nicky refer to the amount of comments, sales, and likes your design has received in total.
>> Click on your design either from your shop page or your portfolio page. Wow! Your cool art is now available on all the products you enabled. Be sure to look through them and make sure that everything is to your liking!
Pricing? Markup? What's that about?
Well good tumblr user, RB handles everything regarding the production (and shipping) of your product, which means that they set a base (minimum) price for every kind of product to account for materials and production, and of course make some amount of profit themselves. The *markup* is a percentage that you the artist set (see the previous section on how to do so), and will determine how much you actually make off of a sale. Note that increasing the markup price means that your product will increase in price as well!
>> An Example (using hypothetical but more or less realistic numbers):
Let's say that the base price (0% markup, i.e. no profit for you) of a phone case on RB is $15. You set the markup to 30%. 30% of 15 is 4.5, so the public price is increased to $19.5, and if anyone purchases this phone case with your design on it, you will make $4.5.
And that's really the gist! Ultimately the markup price is up to you and what you feel is reasonable, though RB sets it to 20% by default.
Extra: Checking sales and payment history
Eheh, unfortunately I've reached the image limit for this post but:
To check your sales:
>> Click on your pfp
>> Click "Account Settings"
>> Under "Artist Tools" (on the left side), click "Sales History"
To check your payment history:
>> From the same "Artist Tools" menu (see above), click "Payment History"
Extra: Taxes and copyright, in case that scares you.
>> Do I need to report the income I make on RB when I do my taxes?
Yup! But dw, it isn't anything special. I mean, I'm not here to do your taxes for you, but money you make on Redbubble counts as "Self-Employment Income", same as if you sold your art just about anywhere else really!
>> So what am I actually allowed to sell on Redbubble? Is fanart okay?
Generally speaking... Yes! Obviously work should be your own, and it should not contain any company logos or names that you don't have the right to, nor photos of actual people unless you have their explicit permission.
>> Hm, okay, but what if I *do* accidentally sell something that isn't allowed?
In most cases, it'll just get taken down 👍. And no, you won't be asked to pay back any profits you made off the work in the meantime.
**A more extreme case: Story time. So, years ago a friend of mine uploaded some official Rick and Morty art that he forgot to set to "private". Overnight he made... Let's just say he made quite a bit of money. RB responded by taking down the work and banning his IP address, effectively preventing him from ever selling on the site again. But they still let him keep the money he made, and he didn't get into any actual trouble outside of that. What I'm saying is, even if you really fuck up, it'll be alright. And again, this was a pretty extreme scenario.
***Note: if your work falls under one of the brands in Redbubble's "Partner Program" (see the next section), it will be temporarily removed from the search results and your shop while it undergoes review. So don't panic if you see your fanart suddenly disappear from your shop!
Extra: The Partner Program (or how to make "officially licensed" fanart)
Very briefly, Redbubble has their partner program, which I won't explain in full detail here, but basically it means that if you upload a work and tag it as one of these brands, it will be inspected for review and, upon passing that brand's guidelines, will be considered "officially licensed" merch for that brand. Just felt worth mentioning!
So that's really the gist folks! There's certainly much more to play around with when it comes to RB, but that's all you need to know to get started! Hopefully this was useful? Hopefully lol. In any case, good luck out there!
#*breathes* OKAY#gee I sure do hope this is actually useful lol#artists on tumblr#redbubble#selling art#idk what to tag this as lmao#baba's tutorials#<- new tag ig lmao#if y'all have other questions (especially friends and mutuals and followers) feel free to reach out and I'll answer what I can!#so if you're wondering. yes I've sold on the site before. no you don't get to know what haha.#bought a lot from RB too- their shit's good quality!#but to be completely clear ofc I don't speak on their behalf haha this tutorial exists so that I can buy more of my friends' cool art lmao
33 notes
·
View notes
Text

Let’s talk about Nintendo’s Switch 2 and the price hike of 2025
After the OLED, which was £309.99 in the UK, I was expecting the price to go up as a progression of hardware improvements coupled with inflation, I didn’t expect it to be quite so high though.
This is my take on it all…
The bundle seems like fairly good value making Mario Kart only £34 which is close to the price tag games have been in the UK until now with exceptions like TOTK, etc.
However the new standard game price we’re expected to swallow goes from the average £40-£50 to £70/£80.
Doubling the price of physical or digital downloads is daylight robbery in a stunted economy with the back group of a growing trade war.
If we take the new Mario Kart as an example since this is the game being pushed as well as offered as the only bundle right now.
The digital version of the game costs £66.99. It’s another £8 on top of that for a physical cart
Or as already said, it’s £34 for a version bundled with the Switch 2 via digital download code, something which pushes the console price to £429.99.
That price gets even higher for US customers:
“These cartridges are exclusively made in Japan, which is a country that's just been hit with a 24% tariff from the US Government, and the threat of those tariffs may have impacted Nintendo's pricing decisions globally,” he said. In the US, Mario Kart World will be priced at $79.99, with the console selling for $449.99 (or $499.99 with Mario Kart bundled in). —According to industry expert Christopher Dring
Perhaps the most insulting price tag is asking gamers to pay out for a tutorial on how to use the console or pay for chat features when there are apps for that, that a free. Charging £50 for a camera when we already have that on our other devices.
Read the room Nintendo. You can’t relive the glory days of the Wii in 2025. This is not the same market or cash cow it was then.
From what I’ve seen some game upgrades are free making improvements for the new console frame rate but Nintendo are charging for many like Tears of the Kingdom enhancements. I have to hope this is more DLC than a simple frame rate upgrade.
I have heard that enhanced versions will be bundled at no extra cost if you have a Nintendo online account with the extra expansion pack add on, so really either way you need to cough up money to get it.
Whilst this console boasts 120fps on handheld that drops to 60fps when in TV mode, depending out the output receiver. 120fps isn’t guaranteed on HDMI output it all depends on your TV or screen capabilities. Which means your console effectively becomes a Switch 1 in terms of fps. Most of your existing games are expected to be downward compatible with exceptions of course.

Caption: Using the system transfer feature, you can easily transfer any digital games you've purchased on Nintendo Switch, along with save data, to Nintendo Switch 2.
Taking the chat feature, Nintendo are offering a GameChat Welcome Offer where until March 31st 2026, GameChat can be used for free. After that you will need a Nintendo Switch Online membership to keep using it.
I think the bundle version is worth getting and if you already have a catalogue of games to bring over with mostly free fps upgrades, then I think it will be cost effective for the improved experience. Otherwise, I would hold off until prices level out or the trade war goes away from all the push back that is inevitable from every other country outside the US.
Pre-orders are open 8th April directly through Nintendo or one of their approved partners (like Amazon, Very, etc).
There are many videos out there already by gamers discussing the price hike and generally Nintendo gamers are not happy at the price increases especially in the US.
#nintendo#switch#acnh#animal crossing#letters from avalon#stardew valley#concerned ape#nintendo switch#switch 2#Mario Kart#fps#donkey kong#GameChat#long reads#long post#long form content
5 notes
·
View notes
Text
Things that were nominated 2024
FOr people who won Shamash or the merely curious!
Anime/ation
legend of Vox Machina
Dear Brother
Ghost in the Shell: Stand Alone Complex
Bubblegum Crisis
Ranma 1/2 (2024)
Megalobox
Scavengers Reign
Higurashi When They Cry / Higurashi no Naku Koro ni
Revolutionary Girl Utena
Castlevania
Yataragasu: The Raven Does Not Choose Its Master
Moribito: Guardian of the Spirit (Japanese title: Seirei no Moribito)
Blue Eye Samurai
Bojack Horseman
Code Geass
Tokyo Godfathers
Sasameki Koto
Akiba Maid War / Akiba Meido Sensō
Death Note
Don't Hug Me, I'm Scared
Rose of Versailles
Kaiji: Ultimate Survivor
Monster
Paranoia Agent
The Promised Neverland
Akira
Live action:
Letterkenny
Kevin Can Fuck Himself
FROM
The Penguin
Santa Clarita Diet
Shogun (2023)
Deadloch
Severance
Godless (netflix)
Everything, Everywhere, All at Once
Max Headroom
Tipping the Velvet
The Batman (2022)
Schitt's Creek
Promised Land (2022)
The Twilight Zone (Original series)
MASH (TV Show)
Life on Mars (UK)
The Americans
Masterminds (2003)
Deadwood
Great British Bakeoff (Mel and Sue Era)
Fallout
Gentleman Jack
The Green Knight
The Only Murders in the Building
Doctor Who (Modern Era)
Yellowjackets
Justified
Hacks
Who Framed Roger Rabbit?
Vigil
Beef
The Last of Us
Picnic At Hanging Rock
WandaVision
Misc:
Jackbox Games
Cocktail ask hour--we all make a cocktail together (or I show you how) and then we answer asks!
Couples Therapist Holligay
Noted English Scholar Doc
Holligay History Moment -- 2-10 minute videos to teach us more about something in history
Bad Lesbian Advice: Anime Characters Editon (characters give the advice for the question)
Bakeoff-style technical challenge
Show Openings
If You Don't Like What God Gave You, Store Bought is Fine (tutorials on shapewear, wig-wearing, using makeup to sculpt, etc)
Doc Reviews Grocery Store Snacks or International Snacks
Make an Effort: Doc gives advice and guides on how to dress yourself and fashion
History of the American West Day
Who Wants to Be An Intellectual Shit (THis is what Mike did with me and the anime, only it's me as the host and him having to identify what classic literature is about)
Vetting Kids' Media for Beeb (as a children's story for children, specifically my child)
Cooking stream
Music day: whether it's you telling us about music you like, or us recommending music to you.
Holligay Loves Food/Cooking Advice
Redo Day:
ER
Deadwood
The Haunting of Hill House
Santa Clarita Diet
Daria
Sasameki Koto
Twin Peaks
Magical Girl Raising Project
Leverage
Motherland: Fort Salem
Picnic At Hanging Rock
The Legend of Calamity Jane
Sailor Moon day
Write between the episodes scenes
Live Blog Bandai-era Sera Myu
PGSM liveblog
Liveblog of your top Sailor Moon scenes (any incarnation)
Liveblog of the Sailor Moon Manga
Writeup of Michiru/Haruka and Lead Crow/Aluminum Siren double date
Write a fic of Toonmakers (nee Saban) Sailor Moon
Dressing the Senshi using clothing that exists in my closet
Liveblog of the Original Anime
Writing Day:
Fuck Marry Kill and other quick popcorn prompts
Doc writes about history
Odd Ones Out (specifically, prompts for stuff you don't normally write- something besides OW or Sailor Moon, characters like Hotaru or the OW cowboy, comedy genre)
Holligay Loves Food
Prompt Day
Fuck Marry Kill and other quick popcorn prompts
Doc writes about history
Odd Ones Out (specifically, prompts for stuff you don't normally write- something besides OW or Sailor Moon, characters like Hotaru or the OW cowboy, comedy genre)
Holligay Loves Food
Prompt Day
5 notes
·
View notes
Text
Why It’s Important to Learn from Top Forex Brokers Review for Choosing the Right Broker

In the vast world of Forex trading, selecting the right broker is a critical step that can significantly influence your trading success. With numerous brokers available, each with its own unique features, spreads, and platforms, making an informed decision can be daunting. This is where understanding top Forex brokers review becomes essential. In this article, we will explore why these reviews are crucial for your trading journey and how they can help you choose the right broker tailored to your needs.
Understanding the Role of Forex Brokers
Forex brokers serve as intermediaries between traders and the foreign exchange market. They facilitate currency trades, provide access to trading platforms, offer market insights, and assist with account management. A reputable broker ensures the safety of your funds, compliance with regulatory standards, and access to high-quality trading tools.
The Importance of Learning from Top Forex Brokers Reviews
1. Evaluating Credibility and Trustworthiness
When choosing a Forex broker, trust is paramount. Top Forex brokers review can help you assess a broker’s credibility through:
Regulatory Status: A regulated broker is overseen by financial authorities, ensuring adherence to strict guidelines. Reviews typically highlight whether brokers are regulated by entities such as the FCA (UK), ASIC (Australia), or NFA (U.S.). This oversight provides a level of safety for your funds.
User Feedback: Authentic experiences from other traders offer insights into a broker’s reliability. Positive reviews affirm a broker’s trustworthiness, while negative feedback can serve as a warning signal.
2. Understanding Trading Conditions
Different brokers offer varying trading conditions, which can greatly impact your profitability. By consulting top Forex brokers review, you can gather critical information about:
Spreads and Commissions: The costs associated with trading can vary widely. Reviews often provide comparisons of spreads and commissions, allowing you to identify brokers with competitive pricing.
Leverage Options: While leverage can amplify your trading potential, it also increases risk. Reviews clarify the leverage ratios different brokers offer, enabling you to choose one that aligns with your risk tolerance.
3. Assessing Customer Support
Having access to responsive customer support is vital in Forex trading. Issues can arise unexpectedly, and prompt assistance can make a difference. Reviews often cover:
Availability: Knowing whether a broker offers 24/5 or 24/7 customer support can help you select one that fits your trading schedule.
Quality of Service: Insights from user experiences can shed light on how quickly and effectively a broker resolves issues. Look for brokers with positive reviews regarding their customer service.
4. Examining Trading Platforms and Tools
The trading platform is your primary interface for executing trades and analyzing markets. A user-friendly platform can enhance your overall experience. Top Forex brokers review provide insights into:
Platform Usability: Reviews often discuss how intuitive and easy it is to navigate a broker’s platform. A smooth user experience can save you time and frustration.
Tools and Features: Different brokers offer various tools for technical analysis, charting, and automated trading. Understanding what features are available can help you choose a broker that meets your specific needs.
5. Identifying Educational Resources
For beginner traders, education is crucial. Many brokers provide educational resources to help traders develop their skills. Reviews typically highlight:
Quality of Educational Content: Look for brokers that offer comprehensive learning materials, including tutorials, webinars, and market analysis. Reviews can help you identify brokers that excel in educational support.
Access to Market Insights: Some brokers provide regular market updates and insights, which can be beneficial for traders at all levels. Reviews often highlight brokers that offer excellent analytical resources.
6. Understanding User Experience
User experience encompasses all aspects of dealing with a broker, from account setup to withdrawal processes. Reviews can reveal:
Ease of Account Setup: Many reviews detail how straightforward or complicated the account opening process is. A hassle-free setup can enhance your initial experience with a broker.
Withdrawal Processes: Timely and transparent withdrawals are critical. Reviews often highlight the experiences of other users regarding withdrawal times and any associated fees.
7. Avoiding Common Pitfalls
Not all brokers are transparent, and some may have hidden fees or unfavorable terms. Learning from top Forex brokers reviews allows you to:
Spot Red Flags: Frequent complaints about withdrawal issues, hidden charges, or poor customer service can signal potential problems with a broker.
Gain Insights from Others: Understanding the experiences of other traders can help you avoid common pitfalls and make more informed decisions.
How to Find Reliable Forex Broker Reviews
To maximize the benefits of top Forex brokers reviews, it’s essential to find trustworthy sources. Here are some tips:
Seek Established Review Platforms: Reputable financial websites often employ analysts who rigorously evaluate brokers, offering unbiased reviews.
Cross-Reference Information: Don’t rely solely on one review. Compare multiple sources to get a well-rounded view of a broker’s strengths and weaknesses.
Focus on Recent Reviews: The Forex landscape can change rapidly, so look for the most current reviews that reflect recent trading conditions.
The Top 10 Forex Brokers You Should Consider
Selecting the right Forex broker is a pivotal decision for anyone venturing into currency trading. With hundreds of brokers vying for your attention, each offering unique features, fees, and services, making an informed choice can be overwhelming. This comprehensive top Forex brokers review aims to simplify that process by presenting the top 10 Forex brokers, highlighting their strengths, trading conditions, and key features.
Why Choosing the Right Forex Broker Matters
1. Safety of Funds
A reliable broker ensures the safety of your capital. Brokers regulated by reputable authorities provide assurance that they adhere to stringent financial standards, protecting your investments.
2. Cost of Trading
Different brokers have varying spreads and commissions, which can significantly affect your overall profitability. Understanding these costs is vital for effective trading.
3. Access to Tools and Resources
The right broker provides tools, educational resources, and analytical data that can enhance your trading strategy and improve your skills.
4. Quality of Customer Support
When issues arise, having access to responsive customer support can make a significant difference in your trading experience.
Key Criteria for Evaluating Forex Brokers
To ensure a comprehensive review, we considered several important factors:
Regulation: Is the broker regulated by a reputable authority?
Trading Costs: What are the spreads, commissions, and other fees?
Trading Platforms: How user-friendly and feature-rich are the platforms offered?
Customer Support: What kind of support is available, and how responsive is it?
Educational Resources: Are there resources available to help traders improve their skills?
The Top 10 Forex Brokers
1. IG Group
Overview: IG Group is one of the oldest and most respected Forex brokers in the world, known for its robust trading platform and extensive market offerings.
Regulation: Regulated by FCA (UK) and ASIC (Australia).
Trading Costs: Spreads from 0.6 pips on major pairs.
Platform: Proprietary platform and MetaTrader 4.
Customer Support: 24/5 support via phone, email, and live chat.
Educational Resources: Offers webinars, trading guides, and market analysis.
2. Forex.com
Overview: Forex.com, a subsidiary of GAIN Capital, is well-known for its user-friendly platform and comprehensive trading services.
Regulation: Regulated by NFA and CFTC (U.S.).
Trading Costs: Spreads start from 0.2 pips.
Platform: Proprietary platform and MetaTrader 4.
Customer Support: 24/5 support through multiple channels.
Educational Resources: Extensive educational content, including videos and articles.
3. OANDA
Overview: OANDA is recognized for its transparent pricing and high-quality trading data, appealing to both beginners and experienced traders.
Regulation: Regulated by CFTC (U.S.) and FCA (UK).
Trading Costs: Spreads start at 1 pip, with no commission on standard accounts.
Platform: Proprietary platform and MetaTrader 4.
Customer Support: 24/5 customer support via phone and email.
Educational Resources: Offers a variety of educational materials and market insights.
4. eToro
Overview: eToro is a pioneer in social trading, allowing users to copy the trades of successful traders and engage with a vibrant community.
Regulation: Regulated by FCA (UK) and CySEC (Cyprus).
Trading Costs: Spread-based fees with no commissions on stock trading.
Platform: Unique social trading platform and mobile app.
Customer Support: 24/5 customer support.
Educational Resources: Provides trading guides, webinars, and community features.
5. XM Group
Overview: XM is known for its flexible trading conditions and a variety of account types tailored to different trading strategies.
Regulation: Regulated by ASIC (Australia) and CySEC (Cyprus).
Trading Costs: Spreads from 0.0 pips on certain accounts.
Platform: Supports MetaTrader 4 and 5.
Customer Support: Available 24/5 in multiple languages.
Educational Resources: Offers webinars, trading articles, and various tools for traders.
6. Pepperstone
Overview: Pepperstone is favored for its low-cost trading environment and exceptional customer service.
Regulation: Regulated by ASIC (Australia) and FCA (UK).
Trading Costs: Spreads as low as 0.0 pips on Razor accounts.
Platform: MetaTrader 4, MetaTrader 5, and cTrader.
Customer Support: 24/5 support via live chat, phone, and email.
Educational Resources: Extensive educational materials including articles and tutorials.
7. Saxo Bank
Overview: Saxo Bank caters to professional traders with its premium trading tools and a wide range of assets.
Regulation: Regulated by FCA (UK) and FSA (Denmark).
Trading Costs: Competitive pricing with low spreads for premium accounts.
Platform: SaxoTraderGO and SaxoTraderPRO.
Customer Support: 24/5 customer support via multiple channels.
Educational Resources: Provides in-depth market analysis and educational content.
8. FXTM (ForexTime)
Overview: FXTM is known for its flexible trading options and extensive educational resources for traders.
Regulation: Regulated by FCA (UK) and CySEC (Cyprus).
Trading Costs: Spreads from 0.1 pips on ECN accounts.
Platform: Supports MetaTrader 4 and 5.
Customer Support: Available 24/5 via phone and email.
Educational Resources: Offers webinars, seminars, and market analysis.
9. IC Markets
Overview: IC Markets is preferred by high-frequency traders for its low-cost trading environment and excellent liquidity.
Regulation: Regulated by ASIC (Australia).
Trading Costs: Spreads as low as 0.0 pips.
Platform: MetaTrader 4, MetaTrader 5, and cTrader.
Customer Support: 24/7 customer support available.
Educational Resources: A range of tutorials and market insights are provided.
10. Admiral Markets
Overview: Admiral Markets offers diverse account types and a wide range of trading instruments, catering to both beginners and experienced traders.
Regulation: Regulated by FCA (UK) and ASIC (Australia).
Trading Costs: Competitive spreads starting from 0.0 pips.
Platform: MetaTrader 4 and 5.
Customer Support: 24/5 support via live chat, phone, and email.
Educational Resources: Extensive educational materials and market analysis available.
In the competitive landscape of Forex trading, choosing the right broker is essential for your trading success. This top Forex brokers review highlights some of the best options available, each with unique features that cater to different trading styles and needs.
When making your choice, consider your trading goals, risk tolerance, and the specific features that are most important to you. Whether you prioritize low trading costs, advanced platforms, or robust educational resources, the brokers listed above provide excellent starting points for your trading journey.
Conclusion
In the fast-paced world of Forex trading, selecting the right broker is vital for your success. By utilizing top Forex brokers review, you can gain valuable insights into broker credibility, trading conditions, customer support, and overall user experience. This informed approach not only increases your chances of finding a suitable broker but also enhances your overall trading experience.
Investing time in researching and comparing brokers through reviews is a wise step that can lead to better trading outcomes and greater confidence in your trading decisions. By being well-informed, you can navigate the Forex market more effectively and work towards achieving your trading goals. Happy trading!
2 notes
·
View notes
Text
Styling a Jolyne Kujo wig
Following on from the debut of my handmade Jolyne cosplay (thank you all so much for the love btw, it's made me very emotional and soppy 🥹), I wanted to dive into some of the other aspects of the cosplay and today I'll be sharing how I styled her wig!
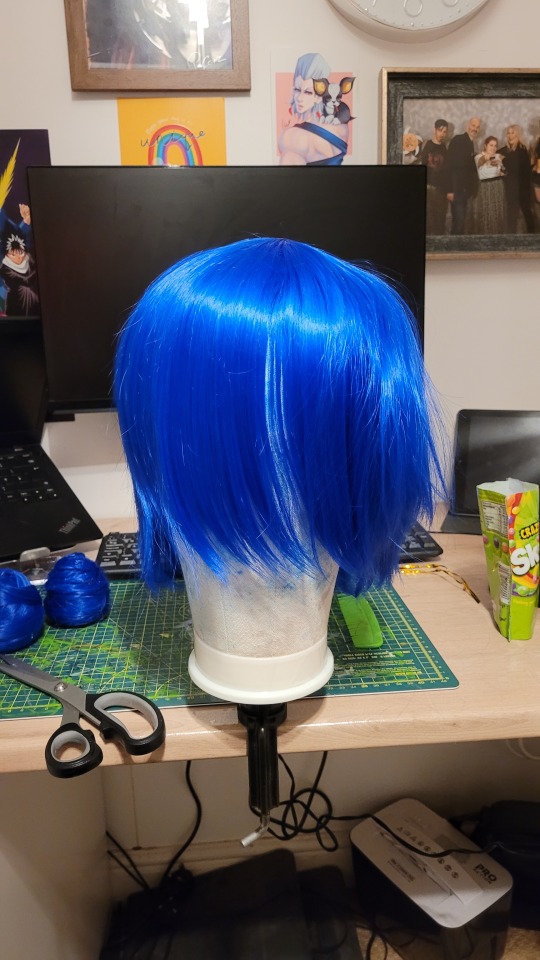
So to start with, I'll talk a little about the bases I used. All of my wig products came from Coscraft which is an absolute GOLDMINE of a website for any UK cosplayers! If I need to do a wig styling project, I always to go them and they also sell fabric, EVA foam and haberdashery stuff too which is very useful! I purchased the below for this particular project:
Lily Wig in Royal Blue
Skin Top Section in Lime Green
2 x Straight Wefts in Royal Blue & Lime Green
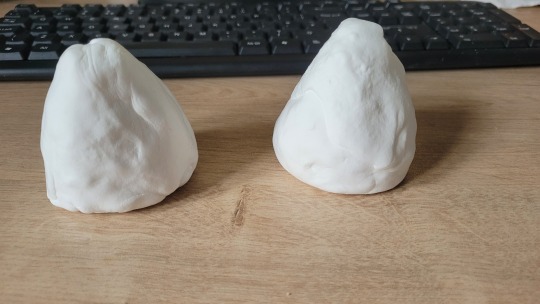
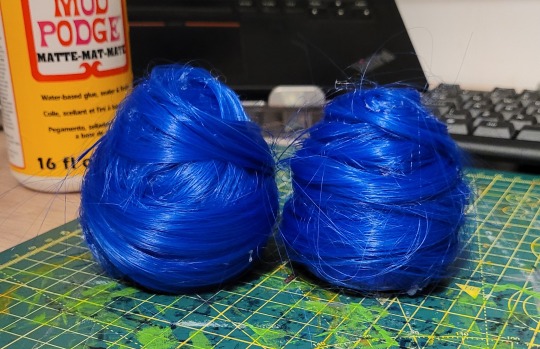
First thing I did was tackle her hair buns - I used foam clay to make the main base and I moulded a hole in the bottom to use as as anchor to secure to the base wig. I then painted them dark blue to blend with the hair better, then I took some Royal Blue wefts and wrapped them around the buns, securing them down with hot glue. I used hairspray to secure down some flyaways and any particular tough bits that stuck out I used some hair gel. Considering this was my first go at making buns, I don't think I did too badly on this!
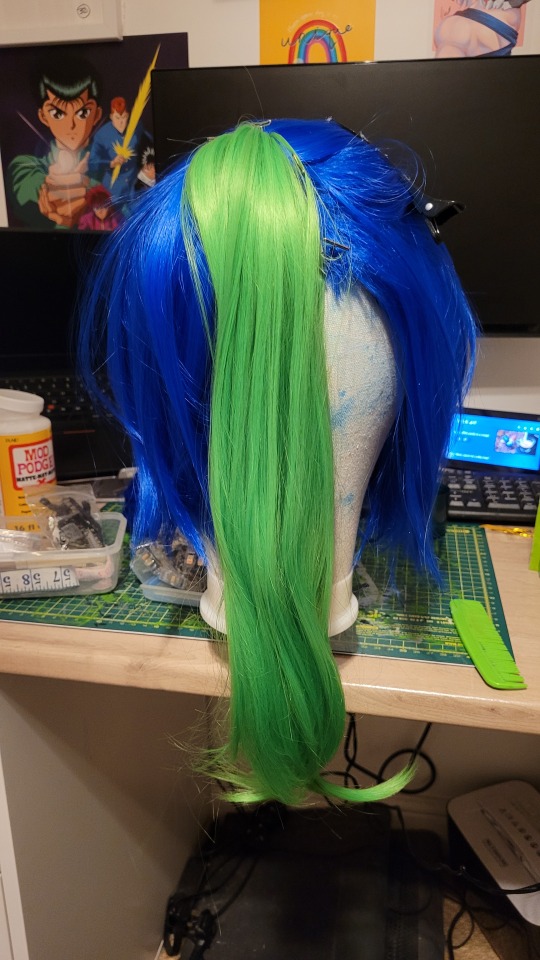
Next, I moved onto installing the skin section to act as a new fringe. I followed this tutorial from Coscraft and managed to install it very nicely! After I had parted it, I cut the fringe down and used some shearing scissors to make the blue hair underneath the green parting less thick - as when I first tried it on, it was far too much hair and the blue was poking through a lot.
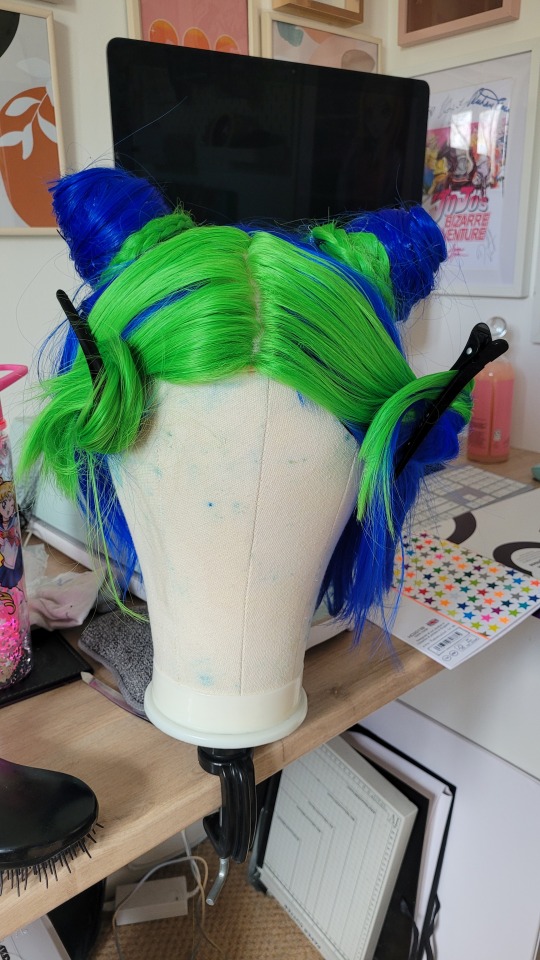
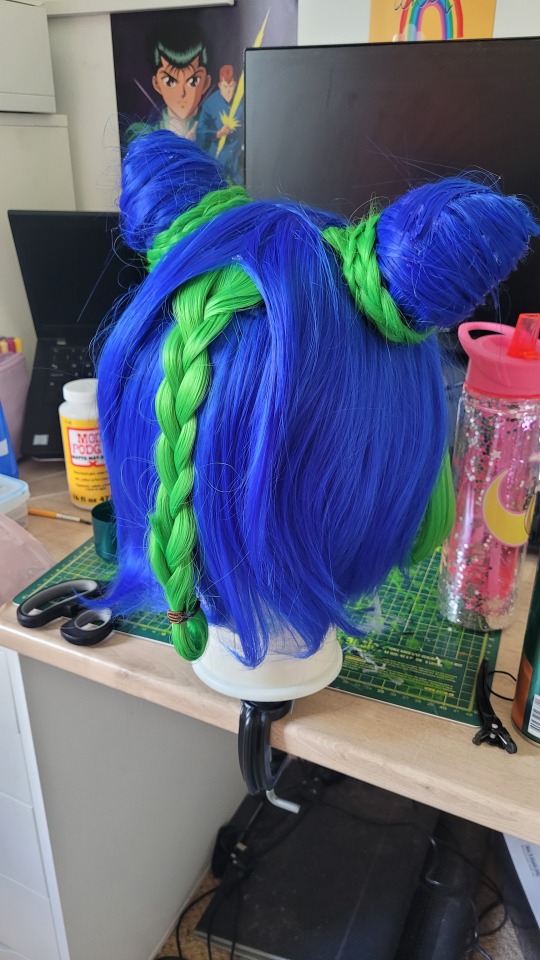
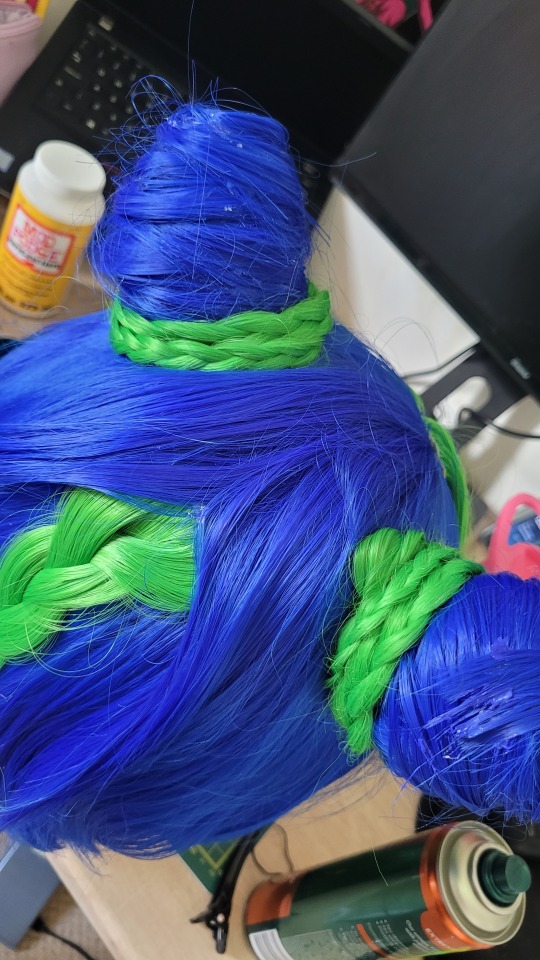
Finally, I curled the ends of the green fringe to sit better and then I got to doing the braids after glueing the buns down on top of the wig! I put a bit of cardboard on the bottom of the buns to give them something to anchor down on and used hot glue to secure them in place. I then took some of my Lime Green wefts and created braids, wrapping them around the buns and then glueing those in place. Lastly, I did the main braid at the back (although I may re-do this as it's a little bit too small) and then secured it with hot glue at the back.

And this is the final result of the wig build!!!! I'm super proud of this and extremely pleased with how it came out. It's also a really lightweight wig too and very easy to wear which will be great for future cons. I'm planning to share other aspects of cosplay building very soon so make sure you stay tuned for those 💙💚💙
#monsoon makes#welsh cosplayer#lgbt cosplayer#uk cosplayer#sweetmonsooncos#jolyne cujoh cosplay#cosplay wip#cosplay build#wig styling#jolyne kujo
6 notes
·
View notes