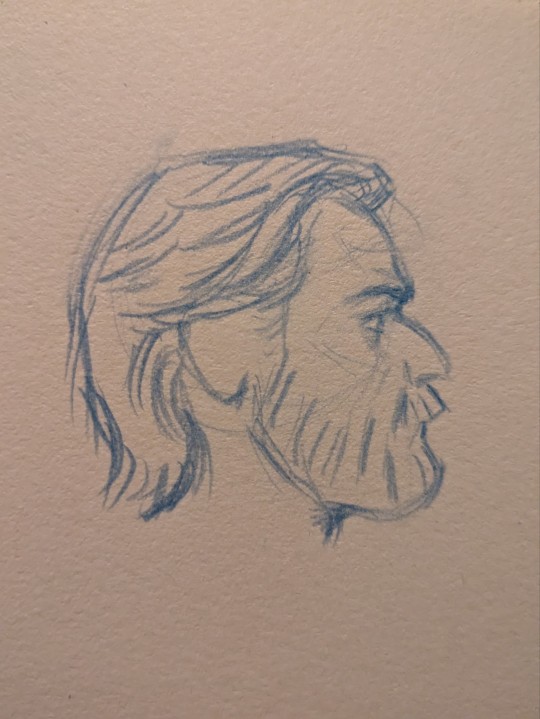
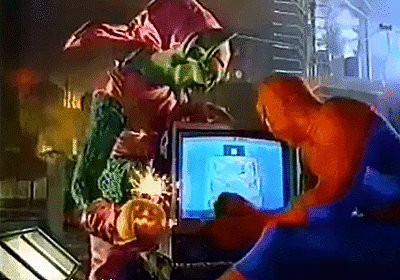
#traditional sketching is nice.. no undo button
Explore tagged Tumblr posts
Visit Tumblr Blog
Explore Tumblr blogs with no restrictions, modern design and the best experience.
Last Seen Tumblr Blogs


Fun Fact
28.6 is the average number of monthly visits per US mobile user.
Text
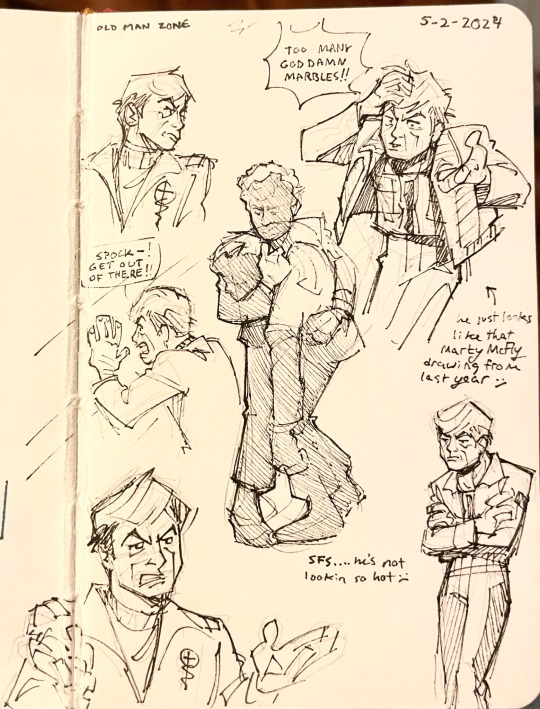
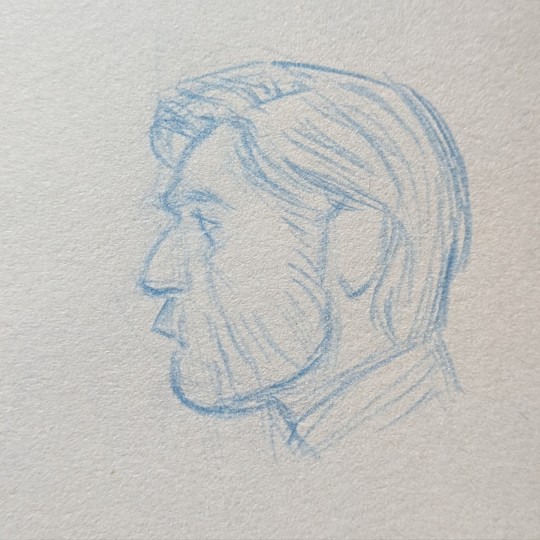
movie bones in the pocket sketchbook
#have not sketched in black pen in a long time 🤔#star trek tos#leonard bones mccoy#leonard mccoy#star trek tos fanart#traditional sketching is nice.. no undo button#forcing myself to just leave things be
800 notes
·
View notes
Text
I've tried to help friends who are digital artists numerous times with various technique things and I'm kinda finding out that the way we approach art is just... Very different. Due entirely to medium, not skill level. But I do have an opinion on line art specifically...
I feel like more digital artists need to practice line confidence. I keep trying to help people who are hyper focused on the perfection of their line art, and they zoom in super close trying to make sure every stroke is perfect, and they have the stabilizer set to max, and then don't understand why their line art looks stiff compared to the sketch. It's because you don't have the muscle built to make lines that flow more naturally and you're too focused on the perfection of it.
As a traditional artist I've had to concentrate on my line confidence because I don't get the undo button or the ability to touch things up easily. It absolutely is a skill that is deliberately practiced and improves over time. My line art isn't perfect, it's full of imperfections BUT imperfect does not equal bad. Imperfections add character and life to your drawings, and that's usually why sketches look more lively than complete line art. If you want nice line art you need to learn to commit to each stroke and draw with the confidence of a sketch.
How do you practice it? Draw from a reference and don't allow yourself to erase or undo. In traditional art we do this just by sketching with pen, in digital art I imagine you can just ignore your tools. It forces you to accept every single line you put down, and when a drawing comes out poorly, it forces you to consciously consider the placement of every line. Practice large strokes and small ones, practice making the lines as flowing and comfortable as possible, practice with the stabilizer at different levels, but force yourself to accept the imperfections. Over time you will get more and more accurate and precise, and your line art will improve tremendously.

I did this this morning with no pencil sketch underneath, straight gel pen and a reference. There are mistakes, and it's fine. But the big thing about this is 1) that I did it and 2) I could not do this 6 months ago. I could not draw with pen like this 6 months ago because I did not have the mental muscle built up. I didn't know where to begin when I first started doing this and so all my pen drawings were wonky and lop sided. But after a couple pages of bad drawings, it does get better and changes the way you approach your line art.
#i love line art and i see so many artists hating on it 😭#i want you to love line art too 🫶#art#line art#artists on tumblr#fanart
34 notes
·
View notes
Note

Alrighty @lightasthesun I'm here to answer your questions.
To premise this, there's a cap of 10 photos per post so I will have to split this into different reblogs.
Regarding digital vs traditional art: Given you have a stylus/pen and tablet that support pen pressure sensitivity and the delay between an input (aka the marks you make) is minimal, drawing digitally should be very similar to drawing traditionally. I, however, have a bit of a fucked set-up and can't afford to upgrade so I have to fight god every time I draw digitally. No, that's not an exaggeration. Many people prefer sketching traditionally over digitally because of the irreplicable tactile sensation of putting pencil to paper- really feeling your idea becoming tangible. Others prefer sketching digitally due to the flexibility it provides in that anything you do can easily be reversed and changed by virtue of layers, the undo button, the flip buttons, and lasso tool. It's personal preference. Digital art has nice luxuries but I draw more comfortably traditionally. I suspect this would remain true even if my digital art set up wasn't actively trying to murder me.
Moving onto HAIR!!!
One of the curses that happens to be a blessing hidden in plain sight is that Obi-Wan's live action hair is so ungodly inconsistent. In TPM his hair is the most consistent. I've actually never drawn Padawan Obi-Wan. However, move to AotC and it's a whole other story. There's the neatly tamed mullet with a side part, the fluffy mullet with a side part, the side part with bangs, the pushed back side part, drowned cat, and... during The Battle of Genosis he develops a middle part at one point. In RotS there's the messy bangs, bangs tamed and expertly pushed to the side and off the forehead, and differently floppy bangs. Kenobi show brings us Obi-Wan with greasy hair in several different configurations due to depression, action, and wind. All variations of bangs pushed back and flopping all over the place. Very happy about the TWO drowned cat cameos. He also thankfully takes a shower at some point and emerges with fluffy hair. In ANH there's Alec Guinness' hair which I ignore on account that his bangs are too short. I will elaborate on "why" later.
All that to say, due to the wide variety of canon situations his hair has gone through, you can live peacefully knowing that it's incredibly difficult to fuck it up as long as you nail down the key components: hairline & swoop.
I always start with the beard then move up to the sideburns where I mark in his hairline. The shape of Ewan McGregor's hairline is marked in red. (Ignore that his nose is too long and too pointy. I couldn't be bothered to fix it. We're talking hair.) Hairlines are most visible when the hair is pulled back flat to the head so if he's got some fluff to his hair and it's falling over itself the hairline will be less evident (or not even visible) and often rounder.

The bangs I give a shorter haired Obi-Wan are a mix of his TCW hair and his fluffier look from RotS. I like when it sluttily falls over his forehead. Once I map out the swoop of bangs, I do an outline of the whole hairstyle, followed by lines for the flow of strands of hair. I could make my lines neat instead of messy but I'm usually too lazy for that.
There are a few mullet configurations. I don't ever like how I execute the shorter bangs from the side (not pictured due to photo count constraint) so I either go for a longer swoop or a pushed back look.

The thing about mullets--and Obi-Wan's hair in general--is that there's a lot of layering going on. Continuous lines are used sparingly.

(continued in reblog)
Ok fine! You’ve convinced me! I’ll learn how to draw specifically so I can draw codywan kissing, you’ve spread your gospel successfully
…
How do you draw tho fr cuz I can doodle like, funky lookin birds but people is fully out of my depth send help
AAAA HELL YEAHHHH!!!!! LET'S GOOOO!!!!!
You've opened a can of worms asking me for art advice so *cracks knuckles* buckle up.
I sort of (only a little bit) use the Loomis method for easy head drawing. Here is a playlist of YouTube videos by Proko. Highly, highly recommend that channel for your art tutorial needs!
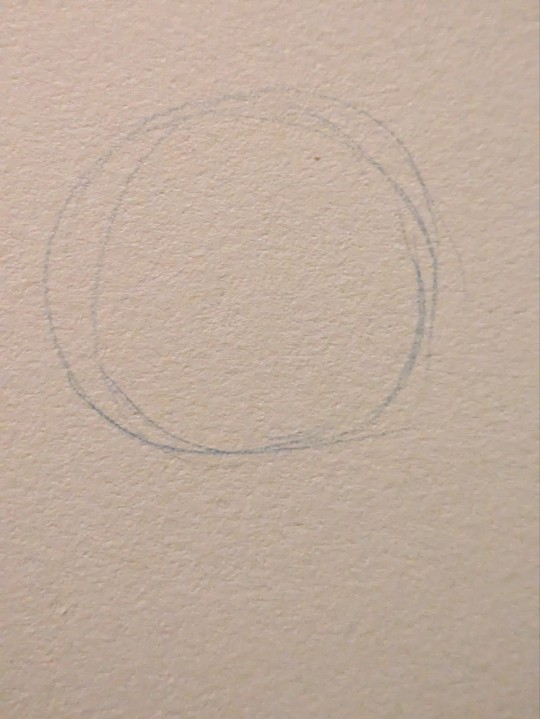
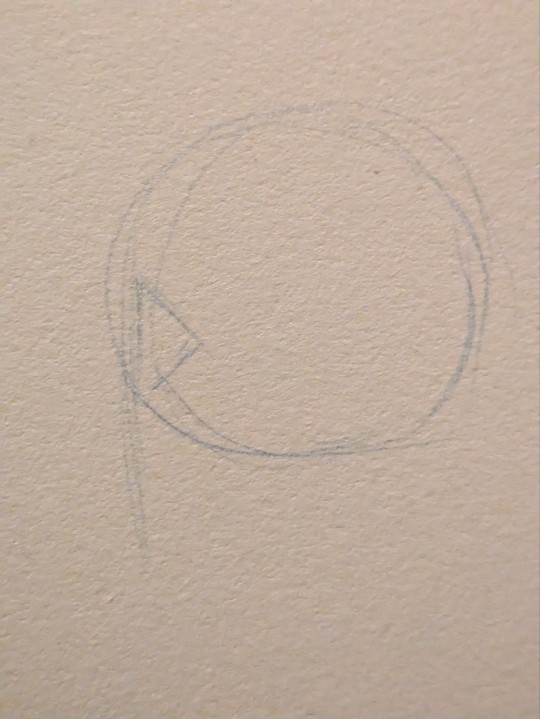
I start with a circle. For side profiles, I draw a line down the side of the circle to determine where the features will sit upon. I draw a triangular shape to mark where the orbital socket is. Around the middle point of the circle is where the jawline ends and the ear begins so draw a line there. There are proportion rules which are good guidelines when starting out in art but since I've been doing this my entire life, I have a feel for things and just wing it. That's to say, I put in a line implying the jaw based on vibes.
Next, I draw the eyebrows and brow ridge. Then the nose. I find I majorly base my proportions on this area so if anything is off, it throws the rest of the face off.
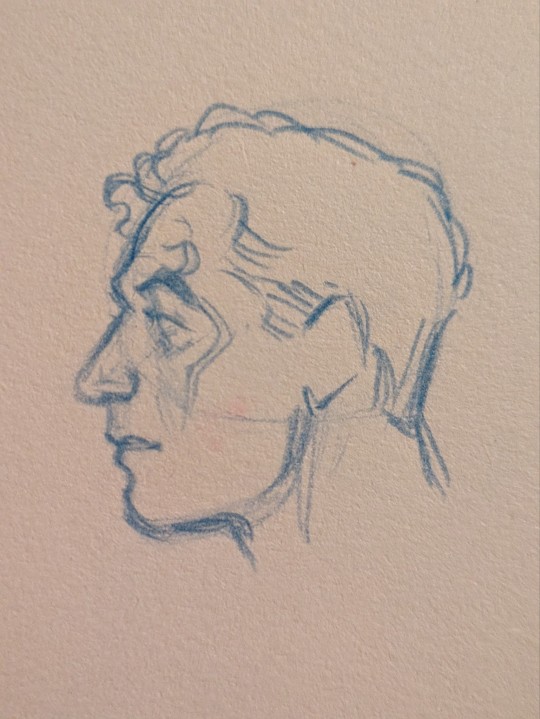
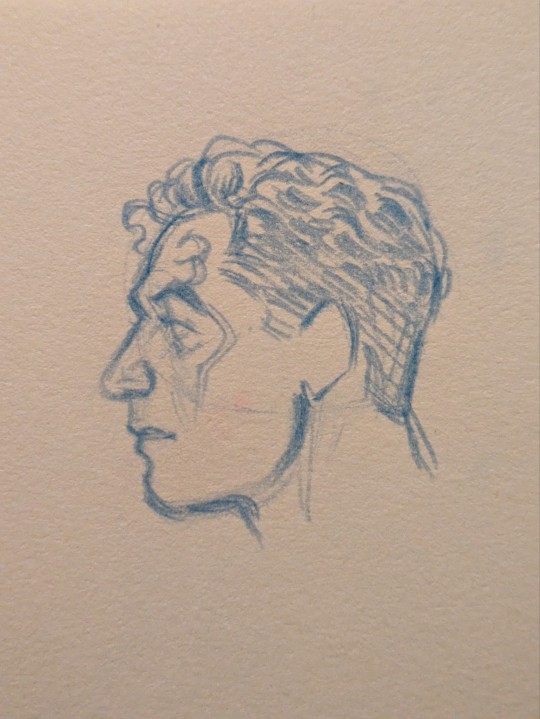
Then I draw the lips and chin... or in Obi-Wan's case, his beard. I will mark in his sideburns and hairline as well. Now, about ears: generally the top of the ear begins right around the top of the eyebrow and stops at the base of the nose. At this point I like to draw his eye, define the cheekbone, and refine the eyebrow. I'll finish scribbling in hair and that's it!
(Cody is much the same but I forgot to take useful progress pics 😂)
Extended Art Advice 👇
Tip #1: Draw lightly. Do not ever grip your pencil tight. This only leads to pain. You will notice I didn't erase at all. This is partly because I know what marks to make because I've done it a million times before and also because my lines are soft enough I can make lots of them and choose to deepen the ones that work.
Tip #2: Practice, practice, practice. Artistic skill is just loads and loads of accumulated knowledge and muscle memory from practice. This sounds boring but, in reality, you should make it fun.
Tip #3: Draw from observation/USE REFERENCE! The only reason I can get away without using reference when I'm feeling lazy is because I've drawn the same things over and over enough times it stuck. Aka I did lots of practice.
Now, to combine all these tips together, let's talk about how to use reference and how to make practice fun.
Reference is a huge aid when drawing at any point in your art journey. But I've found that in order to learn from what you're looking at, you need to think critically.
You obviously have something you want to draw. Reference helps you with that. You'll start out trying to draw what you see. Eventually you will run into an obstacle where you've messed up and things aren't looking good. This is to be expected. Every time this happens, think about what isn't working and find solutions with your reference. Analyze your subject to find your answers. Draw it again. Do not be afraid of failure. Each time you fail, you must look for a solution and this will lead you closer to your goal. This is how you grow as an artist.
I know, it sounds dreadfully boring and like a shit ton of work. It is a lot of work but you can make it fun! You love Obi-Wan and Cody so make Pinterest boards of Ewan McGregor and Temuera Morrison. Whatever you want to practice (may that be eyes, mouths, hands, hair, the face as a whole, etc) draw them. Ever hear tracing is bad? Fuck that. It's a perfectly valid tool to help you learn. If you're drawing digitally, pull up your reference in the art program of your choice, lower the opacity a little, make a new layer and trace what you see. I honestly find tracing to be very hard so when I've done this, I prefer to try to find shapes that will aid me when I'm actually drawing. If you're drawing traditionally, you can print out the photo and trace over it with a tracing paper or use a lightbox. You can also up the brightness on your computer screen and tape a piece of paper and trace that way.
Photos aren't the only references you can use! You can always look to your favorite artists' work and try to figure out how they do it. Often artists will break things down into more easily digestible shapes that will help you better understand how things work. Remember, if you ever copy or trace someone's art, it is for learning purposes only and you shouldn't post it. Feel free to take elements of people's art that you like and put your own spin on it though. For instance: I really love how this one artist draws men's tits so I studied a bunch of their art and now I'm much better at drawing them.
Oh and did you think you only get practice in while studying? Wrong! There's no reason you should shy away from trying to make the art you really want just because your skills aren't the most refined. Spoiler alert: you will grow the most when you push yourself out of your comfort zone. Draw codywan kissing. Draw it really enthusiastically and through profuse swearing and gritted teeth... but never a clenched hand. Don't hold back from the fun stuff just because it's hard. Aim high, land low, and shoot even higher next time.
In the beginning it will be especially frustrating. You'll feel like everything you make is a failure and nothing works out. You'll feel like you're not making any progress. Trust me, you are making progress and I believe in you.
If something really isn't working out and you find yourself growing distressed, take a break. It might last an hour or a week. Just take the break. Don't push it. Come back with fresh eyes and less stress. We all have days where nothing comes out right. Sometimes I can't even draw anything resembling a human face. It's okay. Whisper-yell expletives at your artwork and take the break. It will be okay.
With all that said, happy drawing and even happier codywan kissing!! 🧡💋🩵
164 notes
·
View notes
Note
What is your (digital) lineart process if you don’t mind me asking, bc it always looks so neat and idk how to line
aaa thank you Alma 😊 Art stuff is sometimes hard to explain but I'll try my best!
Most of my art experience is in traditional art (like 8 years solely traditional and now its still majority traditional with digital mixed in) so I think I have a pretty steady hand and know how to fix mistakes without redrawing lines a lot (I am new to the concept of an undo button). I actually think my lines are terrible when I'm using a non screen tablet because I've never gotten used to it.
Anyways, here's some actual process stuff.
For one, I often treat lineart like a second sketch layer. I work from very rough outlines underneath so I don't feel like I have to stick to any lines if I don't like how they're turning out.


(Shallan for examples)
Second, I work VERY zoomed in. Like, very.

(this could be my whole screen while doing lineart)
And I don't really take advantage of pressure sensitivity much, instead I go over the same line several times to make it thicker/smoother/cleaner. That's definitely left over from when I would ink traditionally. I do try as much as possible to use long sweeping lines rather than short ones but even then I will often go over certain parts.
Having a nice brush with some stabiliser but not too much is definitely important. Maybe try out some new brushes or adjust some settings if you aren't getting the kind of clean line you want.
Here's the time-lapse from the Shallan drawing aswell which should show some of how I work better than I can describe.
26 notes
·
View notes
Note
Hello!!!!
I love drawing and I always try to improve!! But I''ve been losing motivation lately because I try to draw stuff that might be pretty easy for other artists but I struggle with them A LOT.
I KNOW I shouldn't compare myself to others if it's gonna demotivate me but I just can't help it! I see other VERY talented people draw AMAZINGLY and feels so impossible to do and it makes me feel like I don't know how to draw at ALL
I also tried digital art but I don't get how people do it. Maybe it's because I don't have the best app? Most of the better digital art apps aren't free so I'm only limited to the free ones.
Plus I draw with my finger on my tablet.
And I installed a digital drawing app on my laptop but I suck at it. HOW DO PEOPLE DRAW ON A LAPTOP???
I just, need some motivation? And maybe some art tips?? I struggle THE MOST with fingers/hands and well drawing bodies. When I look at something and try to draw it exactly how it is I can do it! But drawing whatever I like (without it being a picture in front of me) is a HUGE challenge for me...
I'm really sorry to bother you... But you seem really nice so I felt like I could ask you that hehe
Have a great day!!
i totally feel you. im in the exact same boat! idk how other people perceive my skill level lol but i struggle A Lot! it takes me a lot of time and effort to get my art to a point that i feel okay about sharing it. even stuff that seems simple probably took me a while haha. and i know that feeling of looking at other really amazing artists and feeling kind of crushed that you can't be like them. it's really hard not to compare and get down on yourself. but since you're gonna be comparing anyway lol try to compare your work with your old work, to appreciate how far you've come! that helps me. i have some EXTREMELY cringey art still on my blog and you really don't have to go that far back in the tag to find it alskdfjaljsfd like stuff that im SUPER embarrassed about now but i can't bring myself to delete them bc it's kinda nice to be able to go back at say, "i was really proud of this drawing when i made it but wow, that is. Terrible. u know what u call that? ✨growth✨"
the truth is, there will always be people who are better than you at art, and that's ok! don't sweat it. art of various styles and skill levels can still be enjoyed. and you will only get better! my advice is to not put too much pressure on yourself. improvement will come naturally as you just keep drawing and try to have fun with it.
it's also helpful to keep in mind that you are not the only one who struggles or feels inadequate. i'd venture to say that most artists feel that way, even popular or highly skilled ones! recently an artist that i really admire and consider the biggest art goals told me that their finished drawings have many layers of sketches and corrections and experimentations underneath. art takes effort for everyone, even your art senpais! ofc, certain things will come easier as you get better, but good artists are always pushing for improvement and expanding their skills so you'll probably always feel a bit out of your comfort zone and it's good to try to develop a healthy mindset about growth/development now
hahaha i used to draw with my finger on my phone too before I got a drawing tablet. i prefer digital art because i totally abuse that undo button lol but it's fine if you prefer traditional art! i know some really amazing artists who do a lot of paper and pencil drawings—@tizzymcwizzy comes to mind!
Lol I also struggle with hands and bodies and I also have a super hard time drawing from my imagination! So I don’t 🤠 I use references for like every single thing I draw, and if you have to do that too, that’s ok! In fact, using refs is a good thing. Hopefully someday I won’t have to rely on them quite so heavily but using refs is always good practice! That’s how you learn what things look like and how to draw them lol.
Well as usual I am simply Rambling lol!! Hope at least something in that was helpful 😂 (can you see why I am not cut out for twitter 🙂 DHJSKS)
Best of luck, u got this! Be patient with yourself, keep drawing, and enjoy creating! You are awesome 😎👉👉
#anon#ask#art tips#drawing#are there big gaps bt the paras for everyone else too#idk what’s up with that lol#positivity
39 notes
·
View notes
Text
Pinky and the Brain: A Pinky And the Brain Christmas Review or I Just Think Schotzie’s Neat
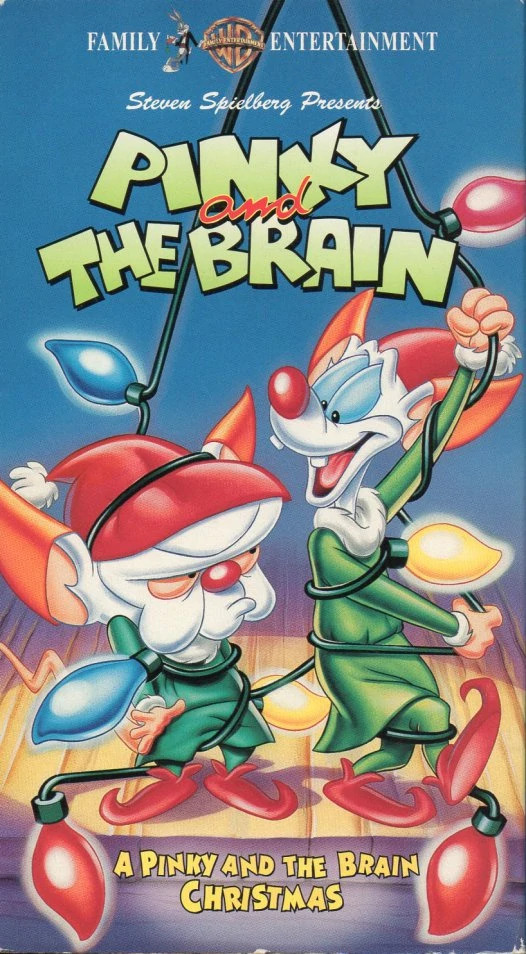
Christmas Continues on this blog... and getting away from one set of Christmas commissions and into another, I offered my friend Blahdiddy three commissions as a present. The other two we’ll get to eventually, but with Animaniacs on the brain, heh, due to the reboot, he selected two Pinky and the Brains and one Animaniacs for me to cover. And while I intended to cover this one sometime this month anyway, my friend’s recent and sad covid diagnosis meant i’m bumping this one all the way up to the front of the line so he has some christmas cheer during this rough time. So with that in mind let’s talk about pinky, pinky and the brain brain brain brain brain shall we? Of course we can’t really talk about pinky and the brain without talking about Animaniacs. I absolutely love the series, I grew up with it as a kid and reconnected with it as an adult when it ended up on netflix. It was smart, well animated and most importantly really fucking funny. I highly recommend checking both the original and reboot of it out some time if you have Hulu. Speaking of the reboot while I might go on in full about it at some point it’s pretty good, with some creatvie jokes, some nice updates, with Rita Anita Anrita being a great new addition to the warner side of things. It’s only real flaw is it gets a bit reptitious as for the most part there’s only really the warners and pinky and the brain with a few exceptions one of which DAMN well deserved at least two segments and we all know which one that is.
Bring.. this.. to series. The warners and pinky and the brain segments weren’t bad, but as is inevitible in a screwball comedy some just weren’t as good as others and those fell harder when you’ve already seen 2 or 3 better versions of this sort of skit in the season. They did really find their groove towards the end and if you like both Animaniacs and Pinky and the Brain, or even just one or the other, it’s worth checking out. But enough about the reboot let’s talk about those labratory mice whose genes have been spliced. Thanks to wikipedia, I now know the duo were based on Eddie Fitzgerald and Tom Minton, who worked with Tom Rutgeter on Tiny Toon adventures, with menton being the one who came up with Narf, even saying it in one episode of Tiny Tunes. During the creation of animaniacs, Bruce Timm, yes THE Bruce Timm, sketched the two, and Ruetger added mouse ears and the rest was history. Maurice LaMarche was the one who added the Orson Welles to the character, as LaMarche saw the Orson Welles in Brain, ran with it and got the part and a long and storied career in voice acting as a result. In a nice and fitting bit of contrast, Rob Paulsen got the part.. because he was already on the show. Not to downplay Paulsen’s clear talent, I just find it hilarious.
That’s about what I could dig up on the behind the scenes of the show. From what I can tell it was greenlit because Animaniacs was a massive it, and Pinky and the Brain was the most popular segment, so it just made sense. The show would likewise be a massive sucess with both adults and kids, and go on for three seasons and what should legally be considered a war crime.
For those of you blissfully unaware yeah, that happened, no no one people actually LIKED from Tiny Toons was in it. And yeah if you want me to talk about it commission it otherwise not going near this one. While I do need to tackle more bad animation... I’ve successfully avoided watching an episode of this show for 22 years next wedsday, I’m not breaking the streak for free.
But some.. things aside I remembered liking the series as a kid but just never got around to seeking it out as an adult. I had nothing against the animaniacs segments and I even still have a stuffed brain doll I got at a garage sale.. the pinky is sadly missing and persumed dead. I just wasn’t as bit into it as I was the slappy bits rewatching animaniacs and didin’t really see reason to watch the show. Watching this though made me realize I was wrong and I probably watch more of it in the future This special is damn good, i’m pleased ot review it and to revive and old childhood memory. So with all the exposition out of the way let’s talk Pinky, PInky and the brain brain brain brain christmas edition after the cut.
This was indeed a special: while it was presumably produced with season one of the show and is packaged with it both on DVD and on Hulu, where I watched it, the special was aired in prime time and even put on it’s own VHS.. which I found out and of course, like with my review of the Darkwing Duck Pilot, had to use as the art for old VHS’ tapes for cartoons.. was really fucking beautiful and it’s a nice break from my traditional screencaps. So we open with a clever Christmas rendition of the theme, frequently sprinkling in bits of other christmas stuff, utterly fantastic. The intro animation is less impressive as it’s literally just the regular intro but with a stock snow effect over everything. In case you thought Ducktales doing that was a new thing. I do not blame the team however, as apparently they only had a week to get the scripts out, so I highly doubt warner was forking out more cash for the animation than they had to. They still forked out enough to make it LOOK really good mind you, something I wish they’d do more often with their DTV Movies but do do with their animated shows still with certain exceptions so good on them, i’m just saying they clearly cared more about money than having a memorable christmas opening. Given a budget to actually make one, i’m sure the animators would’ve come up with something lovely, and i’m sure the same is true of Ducktales and other shows and like i’ve said, i’m highly in favor of shows actuallly doing unique openings for the holidays, especially since Holiday episodes tend to get reaired every year as long as the show is in circulation on the network. Sometimes even if it isn’t. So it’s fully worth the effort to fork out a little extra for this as while you’ll most likely only use it once, you’ll be using the special for years. You can afford to treat yourself networks come on. It’s...

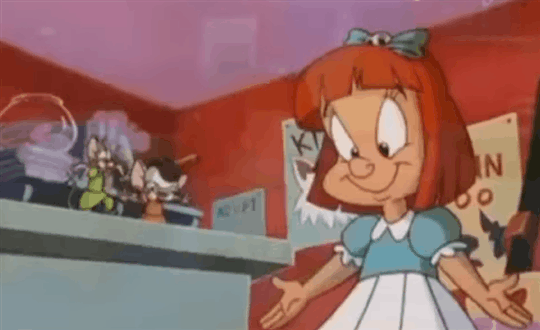
Just like Pinky, Elmyra and the Brain. But onto the episode itself after 80 years. We find Pinky writing his Christmas list to santa, complete with Narf, a gag I like. As usual for a comedy show, I will try to gloss over as much of the gags as possible, to avoid repetttion but yeah this episode is really damn funny and reminded me just how good these characters are. Maurice and Rob just have perfect chemistry. It’s like Tom and Jerry: It’s a very simple premise, that one being “Cat chases mouse and Mouse beats shit out of mouse”, and pinky and the brain of course being “Super genuis mouse and dimwitted but loveable sidekick try and takeover the world eveyr night”. But a simple premise can be used just about anywhere and adapated for anything. To me a cartoon’s premise only has to be as complicated as it needs to be to work. Sometimes you have a vast complex tapestry behind the world like She Ra, Steven Universe or Avatar with lots of planning and ins and outs and deep character stuff.. and sometimes you just have two mice who get into shenanigans because one is a would be dictator who sounds like orson welles and the other’s a loveable british weirdo/moron. Sometimes simple just works.
Anyways, Brain, noticing Pinky’s distracted and replaces himself with a horrifying poorly made doll of himself called Noodle Noggin, which is both an excellent name and not the only time they’d use the name either, as there was an animaniacs short about Brain making himself a fad to endear himself to the children of the future with the same name. It’s just an inherently funny set of words, but also shows Brain’s genius in a subtle and clever way as he never spells it out, but despite sounding kind of ridiculous for such a buttoned up intellectual like brain... he knows that’s the kind of name kids will eat up. His schemes may often fail, but he’s an objectively brilliant schemer and i’ts often either PInky’s incompetence or his own miscalculation of humanity, either over or underestimating them, that undoes Brain. Back to the plot, so Brain’s plan is to distribute noodle noggins around the world, make it the hot new toy, and as always, take over the world. Problem is naturally two Mice simply don’t have the resources to make the billions of dolls. But PInky stumbles upon the solution in the paper: a want ad for elves! Everything about that sentence except “pinky stumbles upon the solution” has not aged paticuarlly well, but point is they have a plan and we have our christmas special. This does bring me to my one problem with the special.. Brain’s weird inconsistency towards Santa. What I mean is he spends the portion doubting Santa can do anything he’s claimed to despite being proven frequently he can. That part is not all that annoying as it’s in character with him and while yes, he is a talking mouse, he’s also a man of science and reason and Santa is the opposite of that. That would be fine... IF it wasn’t for the fact that said magical bollocks weren’t constantly part of his plans. Despite Brain constantly throughought the special doubting Santa... his plans FREQUENTLY rely on everything we’ve heard about him being right. His initial plan here ENTIRELY runs on the fact Santa has a massive workforce to make the toys yet even if that’s true by Brain’s own logic, he wouldn’t be able to deliver them. Later when the boys need to escape, They hide with the Reindeer despite Brain just saying santa can’t be everywhere in one night.. which if he can’t then the odds are slim he’ll wind up at Acme Labs isn’t it? It would be fine if the special acknowledged any of this outside of one bit we’ll get to, but other than that one bit.. they don’t. IT���s just really frustrating and really sticks out since the rest of the special is perfection, so this one failing bit really grates. That being said, it dosen’t last long enough to really drag the episode down as a whole, just to annoy me a bit every so often. It speaks to the episodes quality that the bad part ONLY drags so much because everything else is so well put together. So our boys head to the north pole with the help of a kooky pilot and a santa dummy, this pilot is voiced by Tress MacNeile and is easily one of the best parts of the special. And naturally given their luck, she asks them to take the wheel so the plane instead jerks and causes them to fall out. Luckily they end up near Santa’s workshop and soon apply for temp work with local head of things and gruff type Shotzie, played by Jeff Bennett. And yes that is his name. I like Shotzie: he’s a goateed elf and Bennett just plays him well.. hard to explain honestly I may just like his name and Bennett’s voice for him, one he used before in animanaics for various bit parts and in shows after this, it’s just a voice i’ve always liked.
They get put to work in the mail room, which is the bit I mentioned: Brain earlier scoffed at Santa answering all the letters with Pinky simply suggesting that Santa had his elves go through all of them. Turns out Pinky was right... while he may be a BIT stupid, one intresting thing i’ve found about Pinky after watching the reboot that ironically the friend who comissioned this and I discussed is that he’s not ENTIRELY stupid, it’s just , much like Dan from Dan Vs his knowledge is just random.. he can not know how a lot of things work, but sometimes like in this instance Pinky generally just GETS something. It’s part of why he and Brain are such a good team despite their failures: Brain is all about planning and thought and research, Pinky is about intuition and gut instinct. He just does things and it often works out. This also makes their recently added backstories all the more brilliant as they explain this well: Pinky started life just being told to find the diffrence in cheeses and thus was taught form childhood to trust in himself and his weird brain. Brain was cruelly torturued with an experiment on learned behaviors via electroshock, and was taught to never give up control again, to always know what’s going on and to always control it. It perfectly sums up who the two are and why they are that way. Brain however quickly pivots, as the mail room ends up being the perfect location to start his plans. Since their job is to file away what each person wants Brain simply adds Noodle Noggin to it and plans to put his plans into the workshop. While Santa and Schotzie are suprised and baffled, Santa quickly adds it to the list. However things hit a snag when Schotzie gets supscious when the two try to sneak into the blueprint room to drop theirs off and he accidently yanks off their disguises leading to a REALLY fun chase scene, as the boys end up in a toy wherehouse and thus try out various toy cars: a barbie dream car that dosen’t have a working motor, a toy truck that dosen’t go very fast, and finally an rc car that while fast naturally just means Schotzie can grab it and capture them. It’s easily my faviorite scene of the episode just for how clever it is and as someone whow as a kid around the time this came out, I applaud the accuracy.. granted I didn’t have any of those personally but I had lots of friends so yeah.
So our heroes are interrogated.. and again Brain brilliantly pivots. Schotzie assumes since they have the blueprints their spies for the easter bunny or the tooth fairy or Herschel, the Hanukah Goblin. Why Herschel never got his own Hannukah special trying to stop Pinky and the Brain from using it to take over the world, I genuinely do not know and that’s something the reboot really needs to adress in the future. Seriously Hannukah needs a mascot and it’s either Herschel or the Hannukah Zombie. Kwanza already has Kwanzabot. I want to see more of Herschel the Hannukah Goblin dammit!. I love goblins. Especially this one.

And this one
And most of all this one
I likes goblins. It’s a thing. So anyway, point is Schotize has the blueprints taken in while our boys slip out and sucessfully make their way outside, though they have to find a way home to turn on the mind control device. They see Santa and brain being a dick refuses to let pinky hand in his letter.. but does as mentioned earlier have them pose as reindeer. So our heroes make their way home and in time to be able to activate the device once santa’s route’s finished!

And.. then land directly on the mind control device thing, meaning they now have to scramble to repair it. Oh and Pinky is inconsolable after realizing Santa didn’t get his letter and Brain is a HUGE dick about it. Easily the worst i’ve seen him just far more focused on his machine than his friend’s wel lbeing especially since ALL he needs from pinky is for him to throw one lousy switch.

But we then get easily the best part of the entire special. As Brain scrambles to rebuild his device while abusing his best friend we get a really nice tense sequence as Brain rebuilds while kids all over the world warmly receive noodle noggin. I mean.. it’s not the creepiest doll I’ve seen a kid enjoy.
Also Bill Clinton gets one because the series apparently really likes “Bill Clinton is stupid jokes” Oh you poor innocent dears who haven’t had to suffer through the president being revealed to be a sexual predator, the one after him being even dumber if not a predator, the one after that being easily one of the best people around, and the outgoing one being a waking nightmare whose both a preadator and dumb beyond all comprehension ina dangerous and soul crushing way.
But yeah onto the good part, Brain, for whatever reason, reads the letter.. and finds Pinky asked for nothing. He just wanted to give Brain the world at long last, recognizing his friend really and genuinely means well for it and that he’s worked hard to conquer it. And with that goal in reach, with the very thing he’s always wanted his... Brain instead uses the device to wish a merry christmas. He sees through his friend’s kindess and selflessness that he himself.. has been selfish once again turning something into a world destroying plot and being cruel to his best friend... when all his best friend wanted was to selflessly make sure he finally got what he wanted. It’s then that Brain, for all his cold and cynical logic and superiority complex, realized the true meaning of christmas, which i’ve said before and i’ll say again: it’s about giving, about giving someone something with your heart and soul just to be nice with no expectation of something in return. It’s about being selfless for once instead of selfish. I’ts about love. And Brain loves his friend too much to destroy his faviorite holiday. For once the world can wait.. and for once they all join in saying merry christmas to one another and in love and camradire. And I know not everyone celebrates christmas, there are other winter holidays and not everyone in the world would willingly do this. I know all that.. but the special has such a well meaning message, I really can’t be mad at that or get into the weeds too much> This isn’t some jackass making an entire movie, of which there have been several, saying “There’s a war on christmas” which instead equates to them just bitching about not everyone celebrating HIS holiday. It’s about a mouse for one moment truly being selfless and putting ihs loyal and faithful friend over his greatest want to give him a nice christmas and to do something nice for the world instead of trying to take it. And that.. that’s really damn heartmelting. So we end on the two exchanging presents, with it being a little extra heartwarming as Brain likely already got Pinky something meaning even before his big revelation, he really does care beneath all the dope slaps. Pinky got him a keychain of the world and rather than be frustrated like you’d think.. Brain just takes it in stride. It is christmas after all.. the world.. it can wait. For now it’s just the two of them having one moment in time, this merry christmas. Final Thoughts: If it wasn’t obvious, I loved this freaking special. It’s funny, clever and has one hell of an ending. There isn’t much more to say other than go watch it if you have Hulu.. you will not regret it and a sepcial thanks to Blah for comissioning this. it was an amazing time and is now a competitor for a spot on my best christmas special list. For now though it’s just really good and I say go check it out. Merry christmas, happy holidays and later days.
#animaniacs#pinky and the brain#warner brothers#pinky#the brain#santa claus#christmas#blahdiddy#christmas specials#reviews#animation#kids wb
28 notes
·
View notes
Note
u know i just saw someone leavin a nice ask, and it reminded me of how much i admire your art! have you been to art school? you have so much knowledge on like color pallettes and perspective and composition, all things that i understand but struggle to actually show in my art (i draw traditional). u truly are one of the most artistically advanced ppl in this fanbase i think
OH WOW that's very high praise you're giving there!! Thank you!! I've never been in any formal art training (lost hope on that future a long time ago) and all my skills are built from copying little stylistic choices and details that I like over the years
And trust me, for every skillfully executed drawing you see here there's probably 3 other ideas, compositions and whatnot thought up then stashed for another day and at least one whole paper full of faceless sketches and scribbles. In short, I try a lot and just save them all up, no idea is ever discarded
Going full traditional means you're not a slave of the undo button and mad respect for that fkjfjajfhks
And I believe there's far more advanced people in this fandom, whose art owns my uwus big time and they brightens my day whenever they post
#ask bedrock#oh this one got long#to buildheight#tdlr im just very good at cherrypicking what makes me like something and apply it to my own drawing
17 notes
·
View notes
Photo

Artist spotlight: Mariya!
Instagram ✿ Twitter
Header source: [X]
Introduce yourself Hi, I'm Mariya, I dabble in everything art & design! I work as a graphic designer but right now I'm going back to my roots and very into illustration. I love video games (sekiro, dark souls, Zelda, final fantasy) , doing new things, especially in NYC, and looking for purpose in life ._. ! When did you start drawing? Are you a digital or traditional artist? I didn't have interest in art until 16 Which mediums are your favorites? Did you try going digital? I use markers, watercolors, ink pen, and charcoal. I work digitally as well but haven't done it for a while

image source: [X] Why do you prefer traditional over digital? (or viceversa) There's a certain charm to have been created by hand that digital doesn't really replicate. I really want to get back into digital though, it's just I don't have an iPad or anything to draw on the go like I can with a paper pad. What do you think is the most challenging part about being a traditional/digital artist? Not having layers, lol. Harder to experiment but it's also nice to just throw yourself into the process even though you might screw it all up and not have an undo button. What inspires your pieces? A strong feeling might cause either an image to pop into my head or if not, I'll create dozens of compositions in my head, moving the elements around, until I capture that feeling or idea and can put it on paper.

image source: [X] Explain your "everyday" drawing process Right now, I try to not overthink it. I do a very rough sketch usually in pink pen, then place color down with markers, light to dark, blending and mixing. Then I use a black brush marker to do lines and dark areas. Finally, I add white details with a white gel pen if necessary. Nothing can be erased, only covered with a darker color, so it makes me approach each move with confidence and not waver. Do you have an artist you admire (or more than one)?
Amano's loose and beautiful compositions and anatomy, toriyama's unique style and approach to character design, even though I kind of dislike many of his characters' designs personally, lol. Is there an artwork you are most proud of? Why? https://www.artstation.com/artwork/oOzN4B I really like this right now bc I did it quickly on a short plane flight in as tiny sketchbook, after surgery, instead of fully focused at a desk or something, but it captured everything I wanted to capture. I work best with an element of chaos and this reinforces that, I think.
Do you listen to music (or tv shows/films/anything else) when drawing? Yes, usually either video game instrumentals (like https://m.youtube.com/watch?v=8Zzoh8lgsOg&t=1700s) or a playlist of The Weeknd and Lana Del Ray

image source: [X] What makes art interesting for you? Creating something that no one but me can make, an idea and execution that has never been done before. It's something that I think only creatives really are able to do. It brings me purpose and makes me feel less insignificant. What do you do when art block strikes? I just don't make art, unfortunately. If it's mandatory to start right then, I go out for an iced coffee, on the walk there i endlessly brainstorm various paths I could take my piece until I find one that flows into a good idea. What’s the most valuable art advice you’ve ever received?
During my first class in college from my 2d-design professor: you create better and more creative art when working within boundaries placed on your art, rather than full freedom. Embrace being bound.
2 notes
·
View notes
Photo

Working on a turn around for my little snake kobold Karra. Hopefully I'll be able to use it to construct a 3D model of her. It's taken me a minute, but I think I'm finally getting a hang of drawing on the Surface Pro. Going from graphite and paper to the slick glassy screen was the biggest hurtle. The rubber nub on the Surface pen helps a little with that, but it still feels like an allegory to an ice level in a video game. Also the palm rejection (I think that's what it's called) is fairly good. There's only a few times I'd accidentally bump the calendar or hit the "minimize all" button at the bottom right corner of the screen while drawing. However I'm still going to order some drawing gloves as I've discovered that after a while the Surface will get warm and cause my palm to stick to the screen. Not a big deal though, I've been meaning to order some gloves anyway to keep my hand oils from messing up graphite while doing traditional sketches. All in all I think drawing digital on the Surface is fine. I'm not an expert by any means, but it's great for roughing out ideas and getting your structure and foundation down before moving onto lining. There's also so many great tools in Clip Studio that make this beginning state of drawing more fun and quick. The front view of Karra above was done using a symmetry ruler. Which would copy what is drawn on one side of the ruler onto the other, making things like her arms and legs much easier. The proportion lines were done with a 1 point perspective ruler. Digital is just amazing here. Though with that said, I'll probably stick to inking things traditionally. CTRL + Z is nice, but after five attempts to draw a line just how I want, even with stabilizers set, it's annoying to still see little wobbles in a line, and long lines sometimes just feel impossible. Inking traditional also just has this finality to it. You draw the line, done, move on to the next. Doesn't feel perfect? Eh, it's okay, move on. There's no temptation to Undo and try, try, try, again and end up frustrating yourself. 'But this could just be me, and getting acquainted to the slipperiness of the screen is something that just may take time. Anyway, there's the rambling of a leeezard and her first time drawing digital. Rork!
5 notes
·
View notes
Video
youtube
Buy it on Amazon - http://ift.tt/2BMA5CU - Buy Wacom Intuos Draw CTL490DB Digital Drawing and Graphics Tablet - New Version -- Click the link to buy now or to read the 298 4 & 5 Star Reviews.Subscribe to our Channel: https://www.youtube.com/channel/UCltenxxnGk4FsUImEk5Y0RA?sub_confirmation=1 Like us on Facebook for videos, pictures, coupons, prizes and more - http://ift.tt/2wCDdi2 Buy Wacom Intuos Draw CTL490DB Digital Drawing and Graphics Tablet - New Version I never had done digital art before. I go to an art school as a traditional illustration major. I decided to get a cheap tablet to start off with since I knew nothing about digital art. I watched a lot of reviews and this tablet seemed the best for me. It is pretty small; the drawing space is about the size of my hand. This makes it very easy and lightweight to travel with, so I don't mind the size. I dont really use the buttons at the top besides to zoom in and out. I think the pen feels nice t... Reviewer : Victoria So, I'm not popular or anything like that, but I still do professional work. It'll last me until I can purchase an Intous Pro or Cintique. I chose this tablet as a replacement for my nine-year-old Graphire 4 (medium, pictured underneath). After spending a few hours on Amazon, I decided this would be my best option for my price range/needs. After spending a few hours with it, here are some notes: -This tablet is small. It fits within the active draw area of my old tablet. The active area for ... Reviewer : Sara king Click http://ift.tt/2BMA5CU to buy now on Amazon or to read more reviews. Replaces your mouse and turns your computer into a digital drawing canvas. Battery-free, pressure sensitive pen helps you to draw thicker and thinner lines depending on how hard you push on the pen Comes with a free Draw Pack including: Art Rage Lite sketching and drawing software, online tutorials, and a free 8x10 metal photo print Four customizable Express Keys that put your favorite shortcuts like undo or copy/paste at your fingertips Connects to Mac (10.8.5 and above) or PC (Windows 7 and above) via USB cable or wireless - wireless kit sold separately (B006MRAVFE) - and works with any software program. Okay first of all, let's get my specs out of the way first. I am running on an Intel i7-4790K @4.00 GHz quad core processor, An NVIDIIA GeForce GTX 560 GPU (I know, I really need a new one), 16GB DDR-3 RAM, and Windows 10 Professional 64-bit Operating System. That should give you some context. First, the good news Pros: 1. Cord length is about the same as my old Wacom Graphire (ET-0406-A-U model); however, it plugs into a micro USB port on the tablet itself and I am dubious as to how long t... Reviewer : Amber Rae Click http://ift.tt/2BMA5CU to buy now on Amazon or to read more reviews. ***Let Us Know What You Think… Comment Below!!*** Watch my other review Videos – https://www.youtube.com/channel/UCltenxxnGk4FsUImEk5Y0RA See other products on http://ift.tt/2xhK4Ru Subscribe to our Channel: https://www.youtube.com/channel/UCltenxxnGk4FsUImEk5Y0RA?sub_confirmation=1 Like us on Facebook for videos, pictures, coupons, prizes and more - http://ift.tt/2wCDdi2 #Wacom, Inc, #Wacom Intuos Draw CTL490DB Digital Drawing and Graphics Tablet - New Version This is a review video for : B010LHRFWW Manufacture : Wacom, Inc Thanks for watching! http://ift.tt/2xhK4Ru Related Videos in Channel
0 notes
Text
Digital Painting: Concept Art, Techniques, Tips, and Tutorials
Digital painting has a lot of nuances and challenges.
Now that tablets are more common, there are now a ton of options for digital painting apps and tools.
These developments have made it a lot easier to learn how to create a digital painting.
There are so many options out there to help you out and allow you to express yourself artistically, many of them things that haven’t been seen before.
Even if you haven’t picked up a pencil or a brush before, you can learn the digital painting process.
Of course, as with all artistic endeavors, digital painting techniques take time and practice to master. The first thing you need to do is select your digital painting software. It can be a program on a computer or a tablet app.
A quick search on the Apple or Google App store shows that there are a ton of apps available. Take a look at the features, the user reviews, and the screenshots. Different apps have different setups which may or may not work for you.
Some offer more elaborate brush sets or extensive customer support. If you want to record your digital painting process, pick an app that supports that capability. Be careful if you choose to spend money, as there are a lot of good free apps out there. Please note that many free apps sell extra brush sets and other options.
For the desktop, you may want to learn to create a digital painting in Photoshop. Photoshop has been the go to for desktop digital painting. Its controls are very simple to learn and there are a lot of digital painting tutorials online for it. You can also find a lot free plugins and fonts for Photoshop very easily.
Photoshop is a good choice to invest in if you’re looking to start doing digital painting on a regular basis. It’s been around so long that there are nearly limitless options for digital painting with Photoshop.
With your digital painting software selected, it’s time to figure out how to use it. We’ve prepared a guide to digital painting. Whether you want to try your hand at digital painting concept art, or are just looking for a way to express yourself, these digital painting tips should help you out.
The Usefulness of a Pen Tablet
It’s going to be much easier to create a digital painting if you have a pen tablet, even if you are using Photoshop on a computer. What a pen tablet (or a tablet app with a stylus) does is allow you to draw and/or paint as if you were using a brush or pen on a piece of paper or canvas. This ia much easier than using a mouse or using your finger.
If you’re doing your digital painting on Photoshop, there will be some unique features with using a pen tablet. You’ll be able to access additional settings in the Brush Panel if you connect your pen tablet to Photoshop. Even if the pen tablet is designed to work with Photoshop, it will not be the most intuitive, cooperative, or easiest thing to use. You will get frustrated.
There are a lot of options for different pen tablets. They vary pretty widely in size and cost. Whatever one you choose, make sure it has Pen Pressure, as that will make it much easier to use.
There are just as many options for styluses if you opt to use a regular tablet. The Apple Pencil is designed to work with the IPad, but there are a lot of other Bluetooth compatible styluses and even some that don’t require any connection. Check reviews and see if you can try them out to see how they feel.
Using Brushes
You’ll quickly find that there are a lot of brushes you can use when creating a digital painting. Figuring out these brushes is perhaps the most important of the digital painting basics. You should learn which brush you want to use for what effect, the size and settings you will need, and what sort of pressure to use.
There’s no brush or brush setting that will make your painting better if you do not know how to use them correctly. No brush will guarantee a particular look, regardless of its title or the title of the brush set. The only way to get better digital paintings is to practice.
Brushes can be used for a variety of things. Some of these include:
Sketching
Painting
Filling in large areas with color, like the well-known Paint Bucket Tool
Creating gradients of transitioning colors
Doing general shading with dark tones, highlights, and mid tones
Adding realistic textures
Painting in patterns quickly
Fine-tuning details
Throughout the course of digital painting, you will probably use a brush for all these things. The wide variety of brushes means that you can typically find the right one for the job. If you can’t, good digital painting software will allow you to modify existing brushes. Sometimes you can change the whole look of the brush by tweaking these settings.
Brushes are really, really great for adding realistic and interesting textures to your digital painting. Photo texture brushes are easy to find. It’s hard to convey a texture like denim with a normal brush and consumes a lot of time.
Use texture brushes to make your digital painting look like a real photo. If you want a texture brush you can’t find, look online for digital painting classes that teach how to make these brushes yourself.
The most common brush used is the Standard Round Brush. If you hear someone tell you they use the ‘round brush’, they mean this brush. By tweaking this brush’s settings and size, you can achieve a lot of different effects and textures.
Even by doing something as simple as changing the Hardness of the brush from 0% to 100% creates noticeable differences.
Hardness, Size, and Opacity
You hear these terms a lot when looking at various digital painting classes and tutorials. They are the simplest settings to change and also the ones that make the best difference. For a soft feel, go for a soft brush, while crisp edges are best done with harder brush setting.
Play with the settings if you feel stuck or frustrated. If you stay with only one brush setting, your digital painting will probably look very boring and one dimensional. You should be changing your brush settings often as you progress through the digital painting process.
Specialty and Texture Brushes
Texture and specialty brushes can make your life easier. Instead of requiring you to paint fur or fabric textures out by hand, you can just find a brush to paint the pattern in for you, achieving the effect you want in seconds. Trying to do it by hand might take you hours, if you can pull it off at all.
As tempting as it might be to use this kinds of brushes at all times on your digital paintings, try not to rely on them too much. It can reduce the variety and visual interest of your work.
The Eraser Brush
In many respects, the eraser tool is just another brush. Don’t think of it just as way of getting rid of mistakes. It can also be used to do a lot of other things on your digital painting.
Erasers can be used to create highlights, much in the same way they are used to create highlights on charcoal or pencil artwork. What’s amazing about the eraser in digital painting software is that it can have its opacity, size, softness, and shape changed much like any other brush. You can use it to create all sorts of effects. It can be used to clean up edges or overspills of color, but it can also be used to soften edges. All you have to do is play with the settings to see what effect you get.
Layers
Layers are one of the key elements of digital painting. You can create an outline of your painting on one layers, then color it in freely on a layer below that. This will make sure you can consistently see your guidelines throughout the digital painting process. Background details can be their own layer so you can make adjustments to the foreground without having to everything else.
Layers not only make it easier to organize and edit your artwork, but also allow you a chance to try out different looks. Want to see which colors or which different shades of one color work better? Make a layer with each one. You can switch the visibility of each layer on and off so you can see what each one looks like.
The Undo Button
The undo button is a great feature in digital painting. You should not rely on it too much, and it does have its limits, but it can help you out. If your hands slips and ruins a brushstroke, you can just get rid of it with a click.
As you learn how to create digital paintings, don’t let the undo button’s easiness turn you into a perfectionist. For one thing, the undo button will only go back so far. Second, you might be surprised how well something that isn’t quite perfect turns out.
Sketching
Sketching is a great exercise to improve your skills as a digital artist. It allows you to learn the different brushes and get a feel for how to create different weights of lines with your pen tablet or stylus. It’s also a great way to try out ideas for different digital paintings. You can use your sketch as the base for a new painting.
When sketching, you should avoid soft edges. You don’t want a blurry sketch. Here are some fo the best brush settings for sketching:
Brush Hardness: 100%
Spacing: under 30%
Brush Size: smaller size brushes make for cleaner sketches; 5-10 pixels is a nice size range
Shape Dynamics: Put Size Control to Pen Pressure for tapered ends
Transfer: Put Opacity Control to Pen Pressure.
These settings make for some nice clean line art. Shape Dynamics will also make your sketches look more traditional, but don’t start thinking of it as a necessity.
Colors in digital paintings
Learning how to color a digital painting can be a lot of fun.
First start out filling in the base colors of the digital painting, then move onto carving out shadows, highlight, and mid tones. Your goal is to get the paint on canvas, so don’t worry if the different colors are a bit too hard against each other or a bit sloppier than you like.
Here’s some brush settings to help you out with this basic coloring stage:
Brush Hardness: Will vary based on the effect. Soft brushes will makes realistic shadows. Hard brushes will help to sculpt. Stick to 30-50% in most cases.
Brush Size: Bigger works better for quick application.
Shape Dynamics: Make sure you turn the Pen Pressure Off after you finish sketching. If you leave it on, the brush strokes will be tapered and difficult to apply.
As rough as the end result of this stage may appear, you will be smoothing it out when you begin blending.
A Recommendation when drawing digital paintings
It’s tempting to start painting in vivid colors, especially because the digital color palette offers such a vast range of colors to choose from with a click or tap. However, this can make your digital painting look like a cartoon or painful to look at. Bright, vivid colors work very well for a few styles, but anything more realistic than certain styles of cartoon will not look great in those unnatural colors.
Instead, paint with more natural tones. Take color samples (easy to do on almost any digital painting software) from photos to get a good naturalistic color palette. Using these kinds of colors will make a big difference in the realism of even the most fantastic digital painting concept art.
If you want to paint people, look at natural color palettes for skin tones. Skin is more complex in color than you might think. Realistic depiction of skin tone requires more than using varying shades of brown.
Blending
Blending is when you start using your soft brushes. Hard brushes are very hard to use for blending. Gauge how useful your brush settings are by setting them at the lowest level of Hardness. If that doesn’t work, steadily increase it until it works perfectly for your digital painting. Your chosen style will determine which brush settings are best, but here are some digital painting brush guidelines to help you get started on blending:
Brush Hardness: Begin with 0% and increase after you start experimenting
Brush Size: Large brushes cover more area’ you will rarely use very tiny brush sizes
Shape Dynamics: Keep Pen Pressure off during the blending phase
Detailing a digital painting
Detailing becomes more important with higher resolutions. Overall, painting will be much easier when working at high resolutions, but the detailing typically becomes harder. The larger file size simply creates more brush lag (especially on Photoshop). Be patient and keep working through the brush lag for best results.
Some brush setting guidelines to help you out:
Brush Hardness: Keep the settings between 60-100% for the most crisp details
Brush Size: Will depends on your painting resolution. In general, it’s best to use smaller brushes to help you get into the nooks and crannies of the digital painting for the best details
As always, feel free to experiment and see what works best for your piece. You may end up using very different brush settings from those described here.
Using Photo Textures in digital paintings
The addition of photo textures can add an extra layer of realism to your digital painting. What we mean by photo textures is taking parts of photographs that you manipulate to blend into your digital painting. It’s a good digital painting technique to use to get perfect textures for all sorts of things from clothes and skin to a general gritty texture. It’s a technique that takes a bit of experimentation and practice to get to work right, but it can be great for those times when you can’t find a brush for the texture you want to use.
Applying Ambient Occlusion
Ambient Occlusion is a shading technique used to figure how exposed each point in a painting would be to ambient lighting. For grayscale painting, using it breaks down quite simply: One grayscale base + colors set to different blend modes = a nearly completed digital painting.
Getting your lighting right can turn an okay digital painting into something amazing. Photoshop’s Ambient Occlusion capability will apply a universal lighting scenario to your image. This will save you a lot of time and effort. By painting in grayscale, using Ambient Occlusion, then converting your grayscale image to color, you are nearly done with your artwork. You don’t have tweak and fix the digital painting until it drives you insane with frustration.
Painting Additional Light Sources
One of the most important elements in any composition is the lighting. Understanding lighting is one of the most important things you can do for digital painting or any other kind of visual artwork. Lighting effects so many elements of the image, including mood, color, and the poses you will use for figures.
The best way to learn about lighting is to study photos, since they capture the way real light works. A quick internet search can yield up a lot of different photos showcasing a lot of different lighting effects. Some good lighting terms to look up and study are:
Ambient Lighting
Rim Lighting
Back Lighting
Different Combinations of Lighting
Adding Noise Filters
If you aren’t going to use different brushes in your digital painting, you can fix the sense of visual dullness quickly by using a Noise Filter.
It’s very simple to apply a Noise Filter. Add a new layer to your digital painting and fill it in with some shade of gray. Go to your digital painting software’s filter settings and Add Noise. Set the Amount to 1%. Set the Opacity level to 30%.
This will add a sense of grit and texture to the image in a handful of seconds. Don’t add too much noise, however. It can easily ruin the entire digital painting, obscuring the outlines of the images you’ve painted. You need to make sure that the Noise Filter adds a bit of interest to the brush strokes, but does not obscure them.
Common Mistakes and How to Fix Them
Digital painting might seem quite simple now that you’ve read out guide, but it’s all too easy to get into bad habits. It can be frustrating to see your digital paintings turn out badly time after time and not be able to figure out what is going wrong.
Digital painting software gives you the illusion that everything is simpler than it is. The various tools and filters make fixes to problems seem easy. If you want a particular effect, there’s a brush out there that can make it happen. The Undo button seems like it can simply make problems go away.
The thing is that relying on all these tools can essentially allow Photoshop or whatever program you are using to paint for you. It makes a digital painting look better than you would normally be able to pull off on your own. You can create lots of images fairly quickly at decent quality without ever realizing that you have a lot of elements to improve on.
Professional digital painters use digital painting effects in a different way than amateurs do, and it does produce higher quality images. These pros imagine their effects before they start, then they get the program to produce that effect. Most amateur digital artists toy with the program until they see an effect they like.
This mindset creates a lot of the problems we discuss below. Changing it is going to take time and work. As with any new skill, especially artistic ones, be patient with yourself and continue to make effort to improve, even when it seems like you can’t make progression fixing a problem.
Please note that what seem like mistakes in one style of digital painting might be a desirable effect in another style. If it isn’t a mistake, but rather a planned effect, don’t fix it. It doesn’t need it.
1. Using the Wrong Canvas Size
It’s so easy to start a new digital painting. All it takes it creating new file, which is so simple hat most desktop programs have a keyboard shortcut and most mobile apps have a simple button to tap. However, this can lead to a problem with three aspects.
The Canvas is Too Small
All digital paintings are made of pixels, and measured that way, too—200×200, 400×1000, 9999×9999, etc.
It’s a typical beginner mistake to use a canvas that is smaller than your screen resolution. The problem with doing this is that you don’t know what resolution the people who view your digital painting will use.
More resolution means more pixels. In a smaller resolution, an image might take 20 pixels to depict, but in higher resolution it can easily be ten times that all on its own. This means you can include a lot of interesting details in the larger area.
If you paint a smaller detail in a larger resolution, you’ll find that—no matter how rough or sloppy it seems up close—it will look better from a distance. If often looks like an intentional detail and will probably add more visual interest to the digital painting.
The Canvas is Too Big
The opposite problem of a canvas that is too small occurs, too. Sometimes a canvas that is too big causes its own kind of issues.
With a bigger resolution, your brushstrokes will have more pixels. More pixels in the stroke means it’s harder for the computer to process it. Pressure levels with variable Flow have a particular problem. To use larger resolutions, you’ll need a more powerful computer.
Larger resolutions are meant to be used for very detailed artwork. Not every digital painting requires this level of detail. There are a lot styles that don’t work with more detail. Even very realistic digital paintings don’t need those sort of details. It can easily turn the image too busy and too hard to look at.
Using a larger resolution canvas size than you need, you might be tempting to add a lot more detail than you should because it’s so much easier to do. You can’t really switch it back, either. For faster, more painterly results, you shouldn’t be spending hours on details in only portion of the digital painting.
The Final Size is Too Big
You may choose the perfect resolution of your digital painting but still end up with canvas size issues. The resolution you originally chose was your working size. You might have wanted more pixels to get higher levels of detail, but the finalized version of that detail will be visible from further out.
Before you save your digital file painting for its final review, you should resize it. There’s no set optimal resolution. More detailed artwork is best presented in a larger resolution. Sketchier, less detailed pieces will look fine as smaller files (which will also load faster when emailed or as a part of a webpage). Make sure you check to see which resample algorithm works best. Some will sharpen the image, which may not be something you want.
Take a look at the works of your favorite artists and see what resolutions they use. This can be a great way to learn more about how to adjust your finalized file size.
2. Starting Off With a White Background
A lot people envision a blank canvas as a white background, perfect for starting a new digital painting. The neutral color helps you see your colors and shapes really well, right? It’s just like a sheet of paper!
The truth of the matter is that there is no such thing as a neutral color. A transparent is as close as you can get, but it’s also impossible to paint. A color is a color is a color. Where any combination of colors meet, their relationship appears and affects how your eye sees things.
Against white, every other color looks dark. Even if you want to paint something bright, it won’t look right, because you’ve started with the brightest possible background.
Traditional painting is done on white backgrounds for several reasons. For one, that’s just eh color of paper and canvas. For another, it is easier to put dark colors on a white background than the other way around. Digital painting does not have these limitations. It’s possible to paint bright colors on black backgrounds perfectly well.
That does not make a black background a better choice than a white one. It has the opposite effect of a white background, making all colors appear bright. The most neutral color you can find for your digital painting background is going to be 50% bright gray (#808080).
Background colors change the way you understand the other colors of the digital painting. You want colors to appear neither too bright (as they do on black backgrounds) or too dark (as they do on white backgrounds).
Black backgrounds will also make darker colors seem too dark, while white backgrounds will make brighter colors look too bright. Any attempt at contrast will be hobbled once you try to add some other background.
More practiced artists can work with any background color and get some pretty good results. Years or even decades of practice with color theory allow these artists to understand how to use the background color to their best advantage.
Unless you are very confident in your understanding of color theory, stick with a neutral background that is neither too bright nor too dark for a while.
3. Avoiding The Use of Strong Contrast
A poor quality screen can cause issues of your perception of bright and dark. Anyone who has sued a laptop has probably noted that the contrast changes depending on the angle of your screen; a lot of us use it to our advantage when reading or viewing certain things.
With digital painting, it can be hard to figure out how to use contrast properly for every viewer, regardless of the kind of screen they are using.
Even on good screens, focusing on a picture for while throws off your perception. If you are going to change shades slightly with as your progress, the contrast might seem better because it’s better than it was a few moments ago. It might not actually be that way, however.
Photoshop in particular has a tool that can help with this issue. This tool is called Levels. It’s a histogram and can show you how much of each shade there is in an image. Other digital painting programs also have a similar feature, thought it tends to go by different names.
4. Using Complex Brushes Too Often
Digital painting brushes are not like physical ones. Physical brushes allow for a finally limited number of kinds of strokes, while the ones you use in digital painting programs can be much more complex. Some of them are small bits of artwork unto themselves.
Every time you use that sort of very complex brush, you’re giving up a bit of control over your own digital painting. Simpler strokes are considered more professional because they allow you to show off your own skills much better. Complex brushes should be used to support the simpler ones. Using them too often will make you lazy and slow (or even stop) the development of your own artistic skills.
It’s easy to look for ways to get the effect you desire in the easiest, quickest way possible, especially when you are just starting to create digital paintings. You’ll get results immediately with some of the complicated brushes, after all. This can be useful, of course, nut they should not replace your own skills. Sometimes the complex brushes might not be as good at creating an effect as you would be with simple strokes. For things like fur or hair, the brush may not be able to communicate the way movement or lighting effects them quite right.
Spend some time pretending these sorts of brushes don’t exist. Learn how to create textures and effect with more simple brushes instead. This will not only make you a batter artist, but may also look better as well. Your digital painting will often have a more handcrafted feel, and the details will be more accurate for the environment and lighting.
5. Using Too Many Colors
You don’t need to mix paint with digital painting, unlike with traditional painting. You just select the color you think you need from a gradient or grid. This is much, much easier, but it is also a hindrance to developing a proper understanding of color theory.
Color theory is not something people know intuitively. Studying it can help an artist’s work immensely. Colors can’t just be what they were before you started doing digital painting. You need to understand them through the concepts of Hue, Saturation, Brightness, and Value.
Colors exist not only on their own, but also in their relations to other colors. Background and adjacent colors can change the way a color is perceived, making it bright or darker. Every aspect of color can change due to its surroundings. Warm colors can even look cool depending on the colors around them. Professional artists understand these complex relationships and know how to manipulate them to get the results they want. It’s well worth your time to look into and will make you better.
6. Choosing Colors Directly from References
The Eyedropper Tool is a tempting cheat. It means you can get the right color for skin or hair, right? Yes, but it’s also not as useful as you might think. The hue and saturation of your digital painting will change the effect of those colors, as will the light source.
Picking your colors from references is also little better than tracing. You can’t claim credit for those color choices. It doesn’t help you develop your understanding of color theory. You don’t progress by doing this. Understanding why certain colors work is more worthwhile than using the same ones directly.
7. Using Dodge and Burn Tools For Shading
The Dodge tool does not add light to image and the Bun tool does not add shadow. It’s a fairly rudimentary way to add shading and highlights. The tools are fine in themselves, but using them this way is not effective, either visually or for your one artistic understanding.
Shadows are more complex than a mere darkening of the base color. That sort of thinking works very simple styles, like cartoons and cell-shading, though it is a kind of cheap shortcut even there. For more complex styles, this sort of shading flattens the objects and no amount of added texture can really help.
Using Dodge and Burn like this is another shortcut that stops you from progressing. Shading is much more complex than that. Actually take the time to study the way shadow and light play on objects. You will steadily be able to learn how o bring those nuances to your own digital painting.
8. Blending with a Soft Brush
Blending with a soft brush is a very quick way to do your color blending. If you use larger strokes, you will quickly find you have flattened the object and made it unnaturally smooth. This is another one that adding textures will not make better. This digital painting technique can be useful for starting the painting. For a nicer, more subtle kind of texture, use a harder brush setting with Pen Pressure controlling the Flow.
Digital art examples
The games digital art that people can get today are all truly impressive. There was a time in which games rarely produced anything that could truly be considered art.
The graphics were very crude. Stills from games were not going to be interesting to look at, and they certainly couldn’t rival the other visual arts of the day. This games digital art is both breathtaking and powerful, and these are the sorts of games illustrations that would inspire anyone to get involved with expanding the art form.
These games illustrations depict dramatic military scenes. The scenes are quite realistic. From a slight distance, people might easily mistake them for photographs. However, there’s enough exaggeration in the color scheme that their artistic aspects become that much more apparent to anyone that is really paying attention when it comes to the work.
The color saturation is strong enough that these military scenes almost seem more real than actual military photographs, as if they better match the mind’s idea of what these kinds of military actions really are, in terms of the emotional effect.
Some of these games digital art feature more stylized images of people fighting back in action scenes that feature women and demonstrate female power in only one brief image.
The triumph of these characters over the vaguely futuristic soldiers has a certain power to it in its own right. Juxtaposed against many of the more modern military scenes, this image and images like it seem to make an even more powerful statement.
League Of Legends – Zed
DOTA 2 – Mirana
VI
Imperius – Storm Of Light
WoW Fanart – Illidan
Diablo 3 Monk
Illidan
Retribution
Headhunter Caitlyn Splash
Mordekaiser
STRIFE – Rook
Samus Tribute
Thief
Demon Hunter
Barbarian
Lunar Revel Diana
Val, Queen Of Thieves
Ending thoughts on digital painting
Digital painting may seem simple, but doing it well is more complex. Use your tools wisely.
They’re there to help you improve your skills and add details, but not to replace your own skills. Be patient, apply your digital painting basics, and you will find yourself steadily improving.
If you liked this article filled with digital paintings and useful info, you should check out these as well:
The Best Drawing Tutorials: Learn How To Draw
How to draw anime: learn to do anime drawings
How To Draw Chibi: 33 Drawing Tutorials
Inspiration and tuts on Pinterest
The post Digital Painting: Concept Art, Techniques, Tips, and Tutorials appeared first on Design your way.
from Web Development & Designing http://www.designyourway.net/blog/inspiration/digital-painting/
0 notes