#tutorial with pictures
Explore tagged Tumblr posts
Visit Tumblr Blog
Explore Tumblr blogs with no restrictions, modern design and the best experience.
Last Seen Tumblr Blogs


Fun Fact
Forty percent of Tumblr users are between the ages of 18 to 25.
Text
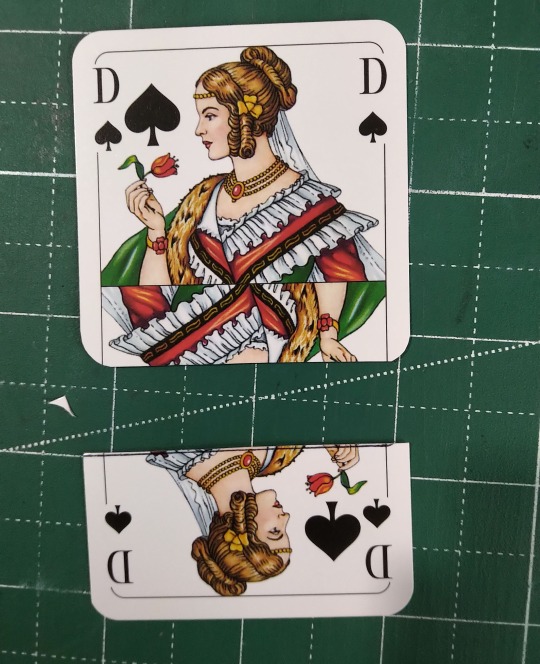
How to make tablets for tablet weaving
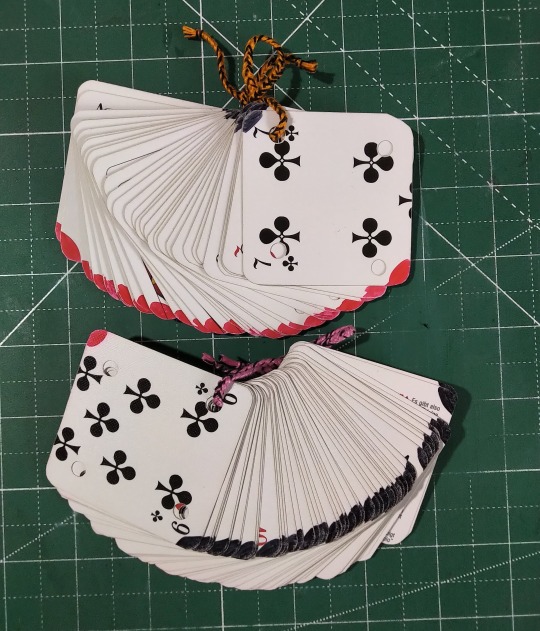
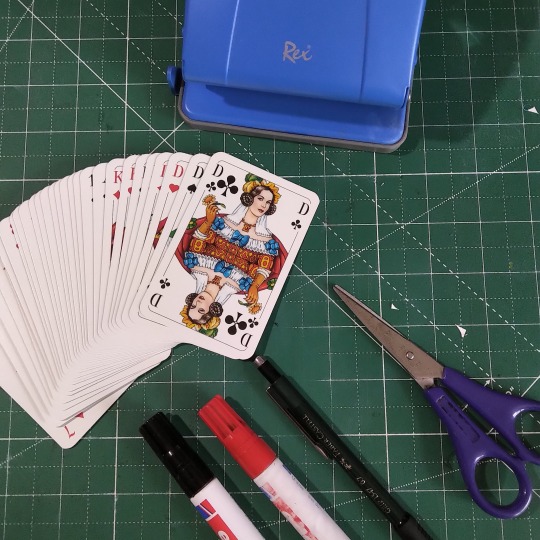
You'll need: Playing cards, scissors, punch, pencil, permanent marker in 2 different colours.
Why playing cards specifically? Because they are made to be handled. Their edges don't fray, even the cheapest ones. These were like 2€ for 32, the rest was stuff I already had lying around, making it a very cheap project. Also they make it very easy to divide a pattern into groups of 4.
Step 1: Square your cards by laying another one on top perpendicularly and mark with a pencil (pen used for visibiliy).
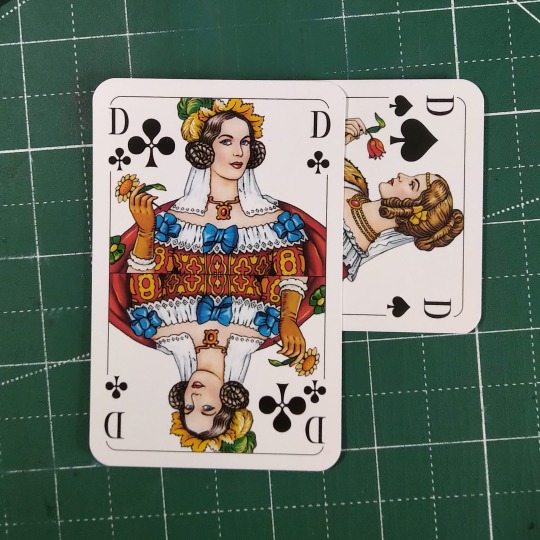
Step 2: Cut and round the edges (it's fine, these people are royalty). I cut a little inside the line here because the pen drew a smidge to the side.
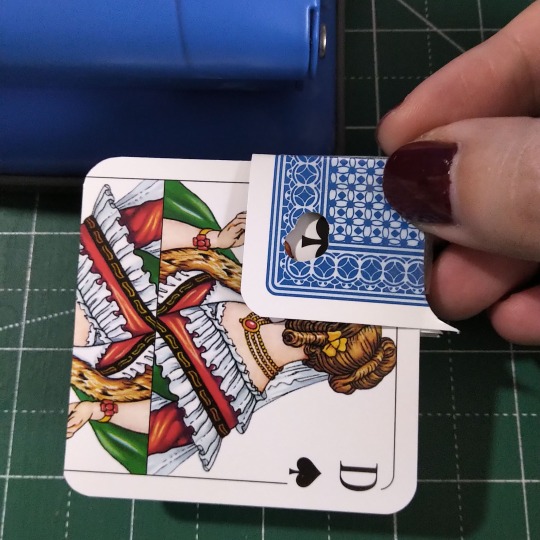
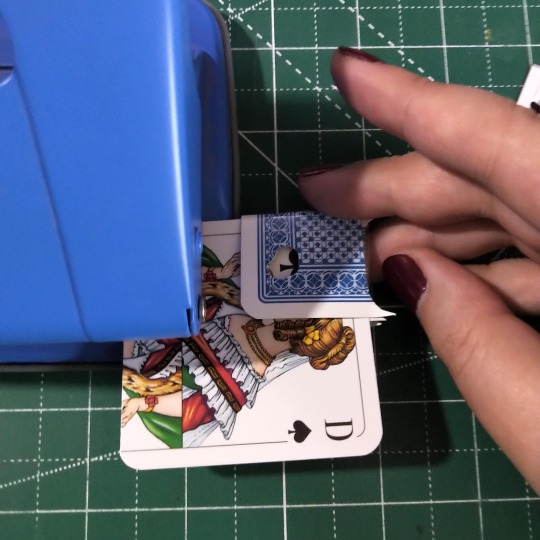
Step 3: Punch holes in the corners. First try on a spare piece of paper to figure out how far you have to hold it in to get the hole where you need it to be. It doesn't have to be 100% accurate, but close enough. I built myself a little jig to hold the card out of the cut off bit. When the thingy touches the punch I know the hole is gonna be where I want it.
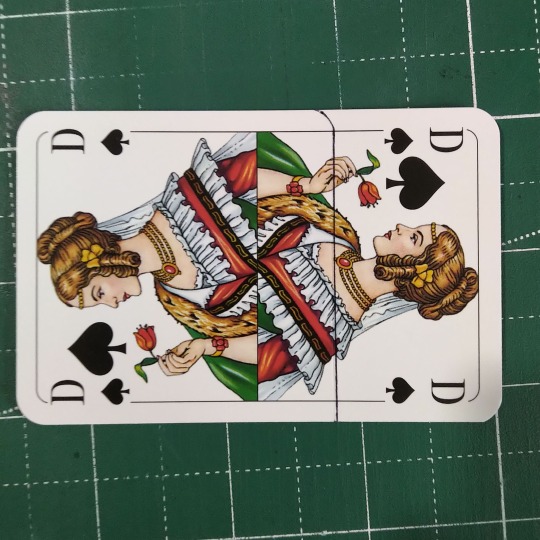
Step 4: Mark two opposite corners with permanent marker on both sides. This is technically not necessary, but very useful. Also mark the same corners on all the cards for aesthetic.
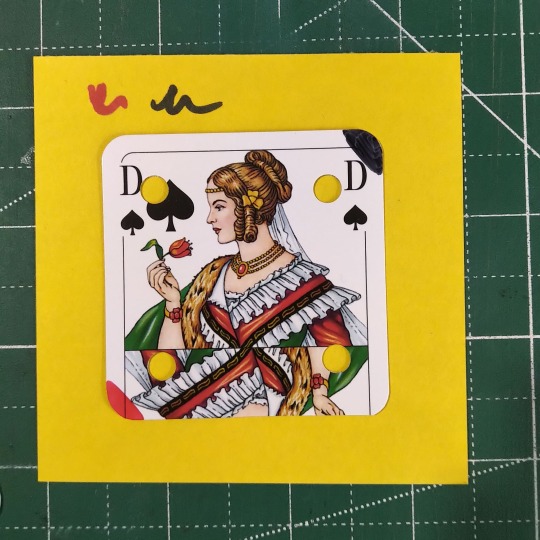
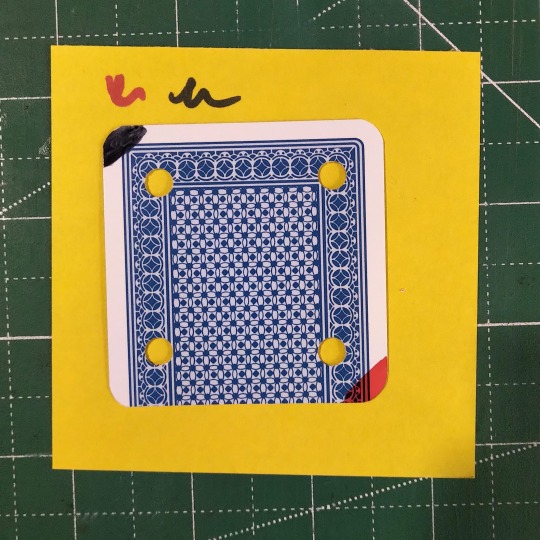
Congratulations, you have tablets now! How many do you need? 32 is enough for most patterns you'll find on pinterest, but there are patterns with over 90. So make a couple more!
#tablet weaving#hand weaving#hand crafted#tutorial#tutorial with pictures#weaving tools#crafting#historical crafting#crafting tutorial
11 notes
·
View notes
Text


the shirt i just made out of pillowcases and bits of quilting cotton is the coolest thing on this earth perhaps
#em makes stuff#fiber arts#no pattern just vibes#(with a bit of influence from vincent briggs' 18thc shirt tutorial and mark francis's sailor shirt pattern)#will make a more accurate version of the mark francis one eventually when I. get around to buying the pattern#and not just squinting at pictures of the shirt on his website#also! all of the the materials here are stuff I already had#the red spotted fabric is from a middle school halloween costume. the ferns I've had for maybe a decade.#the wave pattern is from a thirdhand stash of quilt bits I got from a friend.#the sails are scraps from a kit for making a life sized stuffed turkey...
348 notes
·
View notes
Text
Dear person on the bus this morning with the Dracula quote tattoo whose phone was open to my youtube channel, sorry I pretended not to notice and also was too shy to say hello
#what does one say??? 'oh! I happened to glance at your phone and I see my youtube thumbnails!'?#also I'm SO SO CLOSE to finishing the shirt video I swear it's coming soon!!#I need to finish adding the music and pictures and also do the written version of the tutorial that I've been neglecting#alas I can't post the video until I finish the blog posts because I say in the video that I have a full written tutorial#actually the tattoo Might not have been for Dracula quote reasons because it was 'Denn die Todten reiten schnell' but idk
408 notes
·
View notes
Text
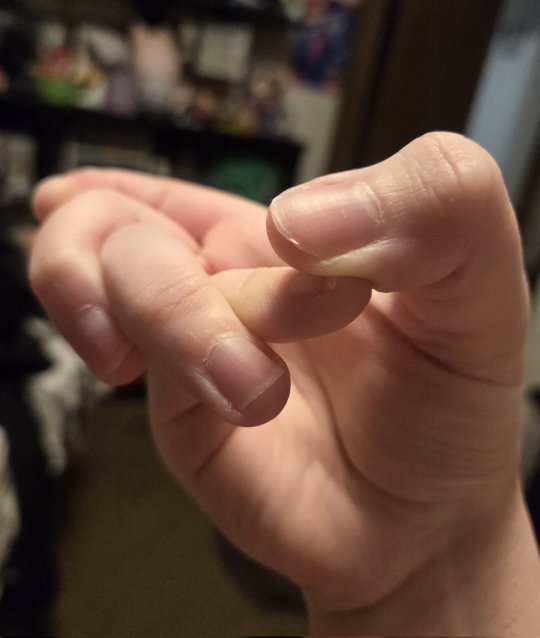
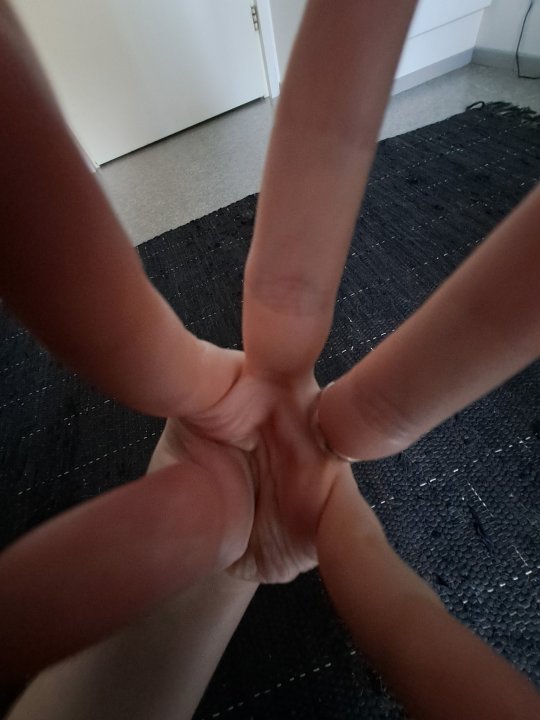
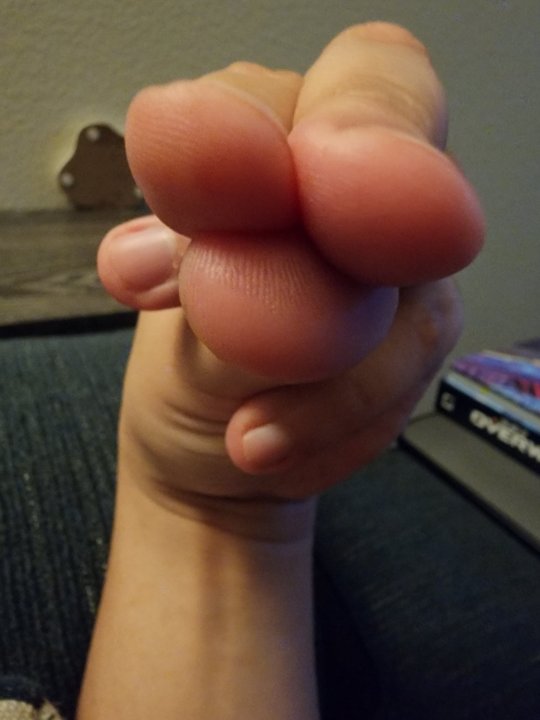
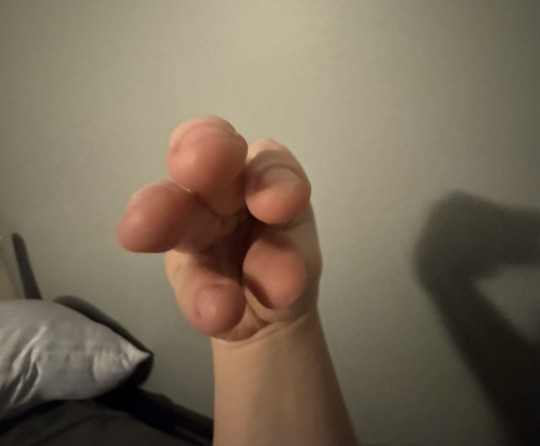
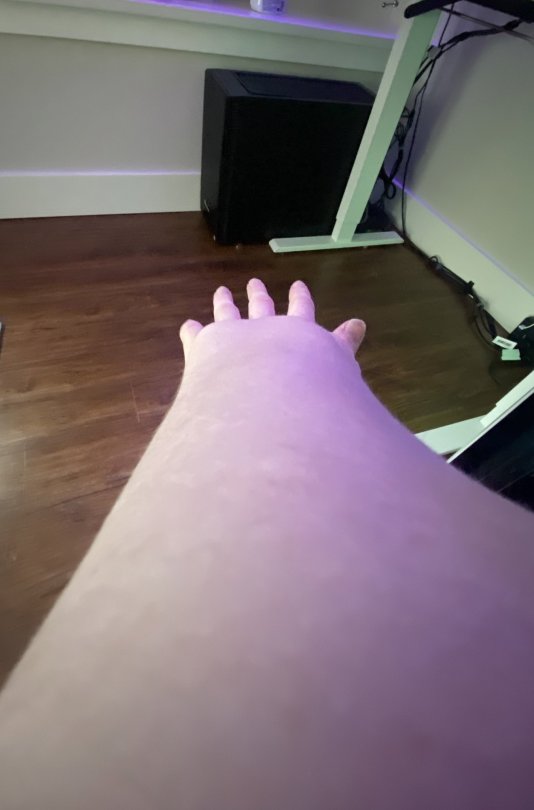
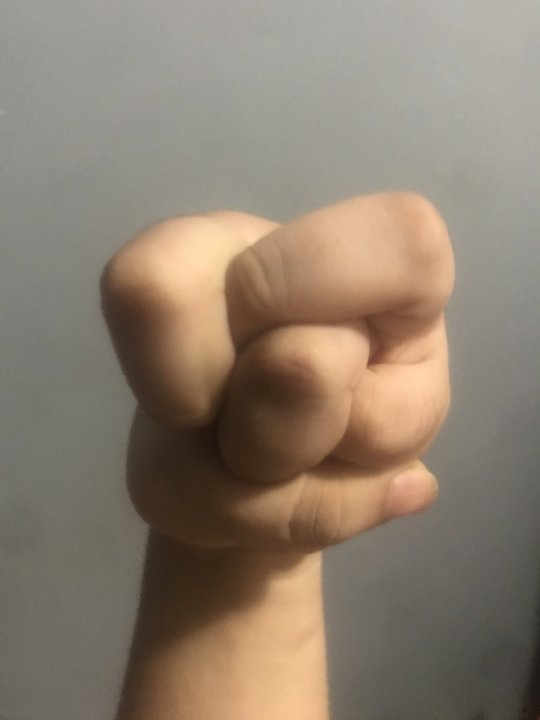
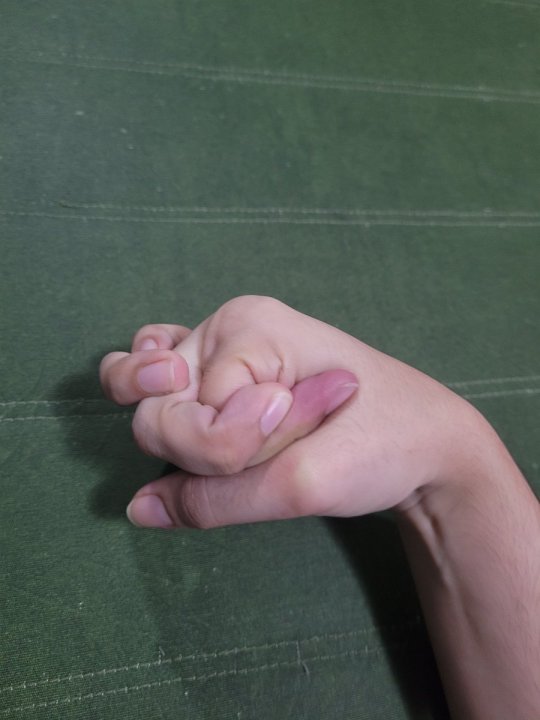
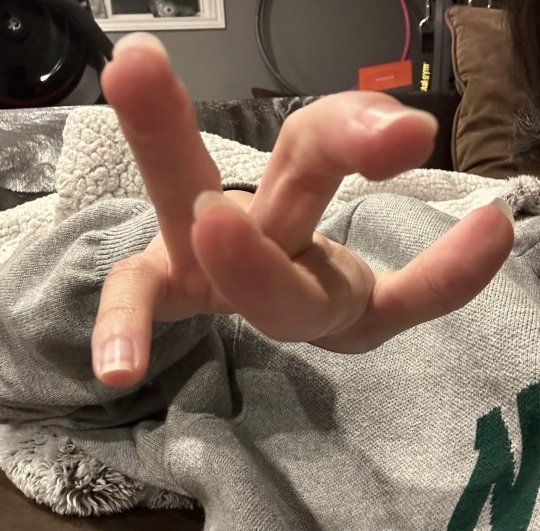
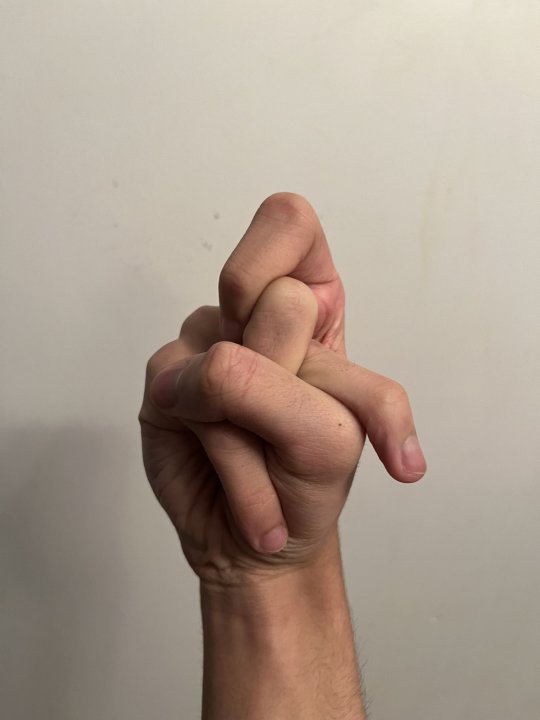
some hand references i found on xwitter. feel free to practice
#artists on tumblr#hands art#hand reference#reference#tutorials & references#art reference#hands#reference photos#reference pictures#укртумбочка#український tumblr#укр тумбочка#украрт#арткозацтво
377 notes
·
View notes
Text

#how am i supposed to act normal when this picture exists????? HOW#SOMEONE SEND ME A TUTORIAL#daniel ricciardo#marc marquez
164 notes
·
View notes
Text
Diy sticker tutorial. You're gonna need:

• Printer paper (aka 'normal' paper)
• Pencils/pens/something to draw with (or a printer)
• Scissors
• Self-adhesive vinyl sheet*
* if you don't have that you can use parchment paper and clear tape instead
1. Draw or print your design (go smaller scale, if it's too big the result will be wonkier)

2. Cut it (don't leave white edges)

3. Stick the 'good' side of the drawing to the sticky part of the sheet


4. Place it on the 'good' side of another vinyl sheet


an air bubble will be created around the paper

Optional: rub it with your fingers or something hard (like the handle of the scissors) to flatten it and make it stick better, it may lessen the air bubble
5. Cut the edges BUT leave enough space or it won't hold (you're gonna have to cut even further from the air bubble)

6. Congrats 🎉🎉 now you have stickers
*with clear tape and parchment paper
3*. Stick some of the tape to some parchment paper (put enough so that your design fits completely within the taped area and then some)
4*. Stick the 'good' side of the drawing to the sticky part of the tape
5*. Place it on top of this
6*. Cut the edges + leave space
#sorry for no pictures of the tape way. it's really easy. Basically the same but with worse results#is this the worst tutorial or what#it's 3 in the morning I'm going to sleep#enjoy#art#traditional art#original art#fish#stickers#sticker#diy#diy stickers#diy sticker tutorial#diy tutorial#what do i even tag this as#the first picture is like I took it at night (which I did) and the last like it's from the middle of the day (it's not)#I hope someone finds this helpful#arts n crafts
31 notes
·
View notes
Text
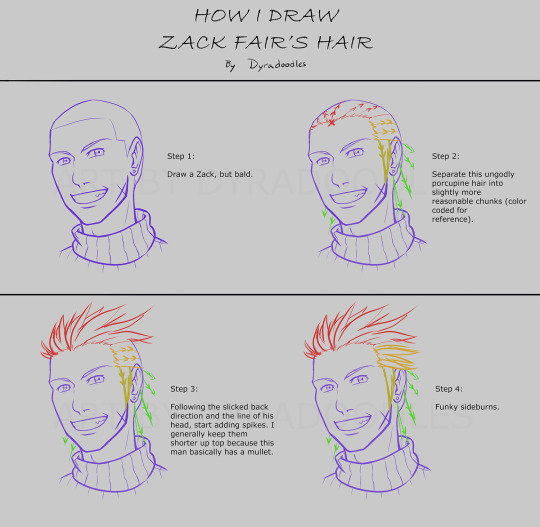
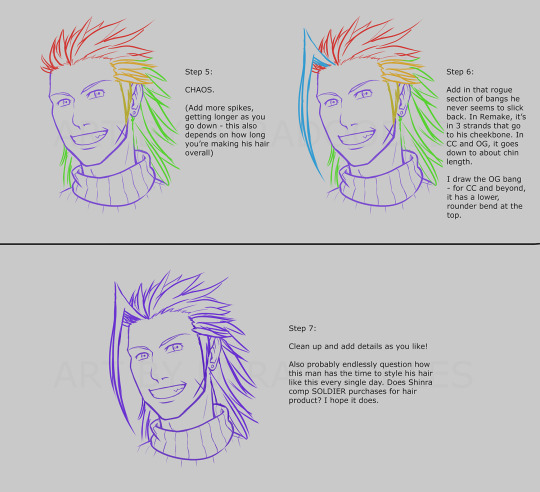
I have made another character hair tutorial, this time for Zack! Which really just reminded me once again that his hair is an absolute pain in the ass lmao
#zack fair#ff7#final fantasy 7#tutorial#my art#not pictured: the many times I erased and redrew spikes because the spikes were not spiking enough for my liking
27 notes
·
View notes
Text
I'm going to make a cosplay of Jia's ceremonial robe from GxK: The New Empire!

This might be a little difficult, but I have a hand-sewing experiences back from my elementary and high school subject. With little expenses I have, maybe I will start on summer time. Plus, drawings as well.
If you have any suggestions of the designs, you should ask me. I'm all free to answer it.
@gorillageek27 @lionpatriot13 @amethyst-raptor06 @gojigojigojira @geminanvaju @jadewolf-writes @miss-couch-potato @godzillajuniorreborn @kia-ko @mossizi @astraerystarr
#probably it's a little difficult to make#but i watch some tutorials on how to make capes and robes in a hand sewn style#i will try my best#godzilla#jia andrews#kaylee hottle#cosplay#design#costume design#monsterverse#kaiju#godzilla x kong: the new empire#gxk#gxk: the new empire#legendary pictures
24 notes
·
View notes
Text
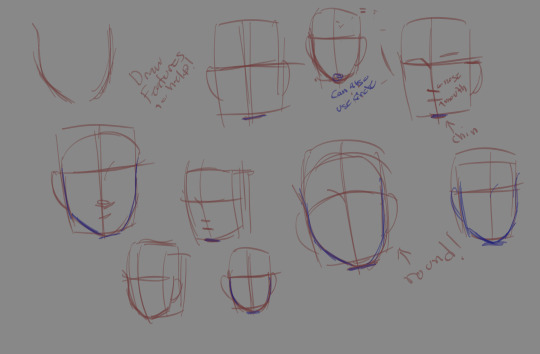
heads/face tut
Note:im not a professional
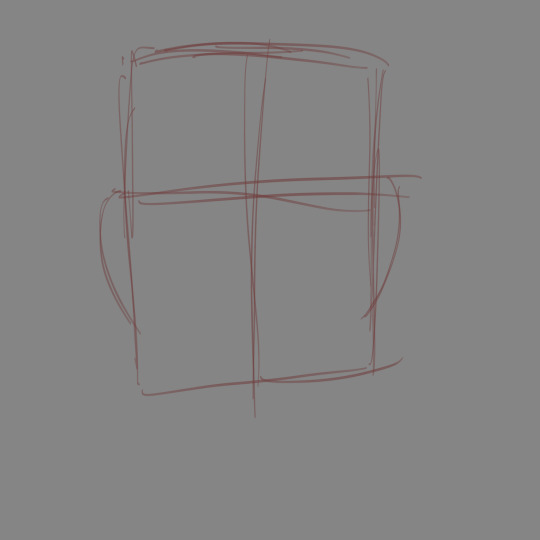
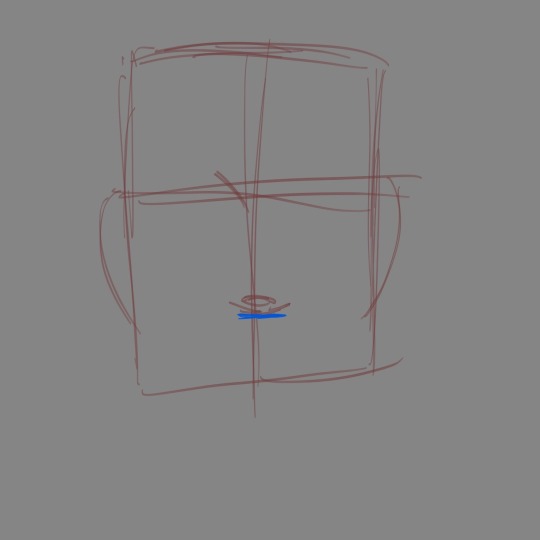
First we start with the shape. I use squares to draw my heads. Ever since I discovered this method it’s been a lot easier for me to draw the head. Here are some examples:
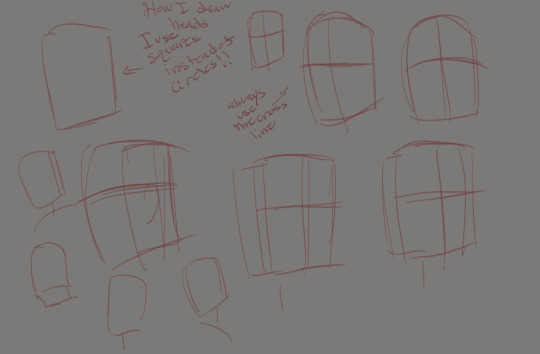
Add on the cross lines so u can determine where u want your features to be!
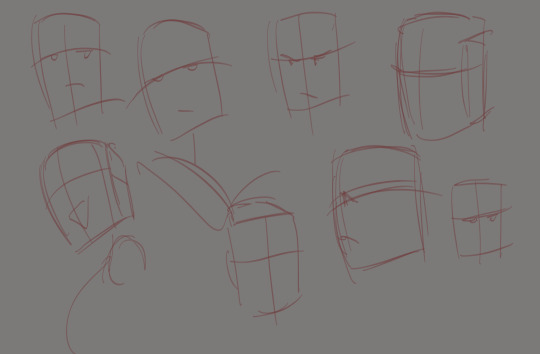
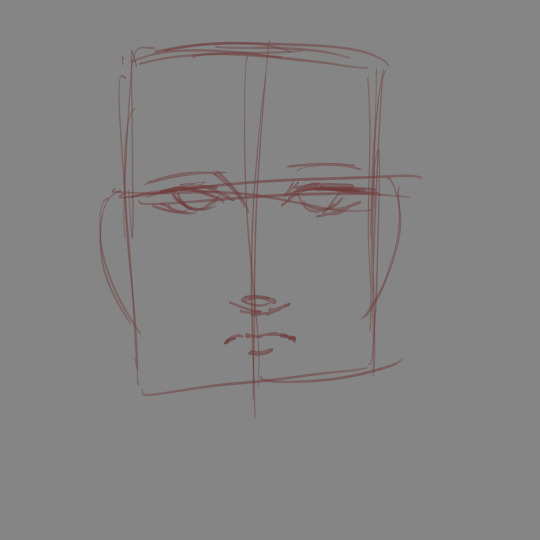
Let’s use the square to draw the face! Also Add the ears one the side. The top of the ear should be touching the horizontal line!
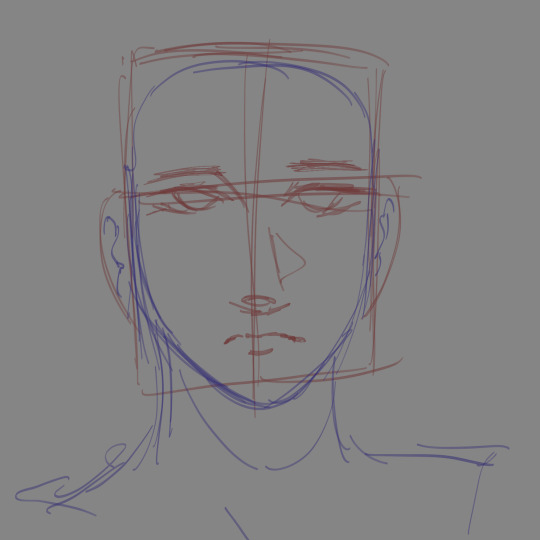
Let’s add the nose! I use circles as a guideline. My noses are very simplified but it’s easy to tell the features of a real nose. Here are some examples of my noses
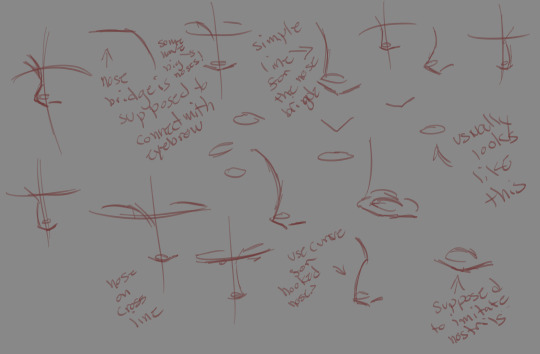
Remember to look at real life pictures of noses! Let’s add the nose! I’ve marked where it should be!
Next the mouth and eyes! I usually make a simple line for the mouth and I sometimes color the top lip during sketching.(I have no reason for it)
Here are some examples
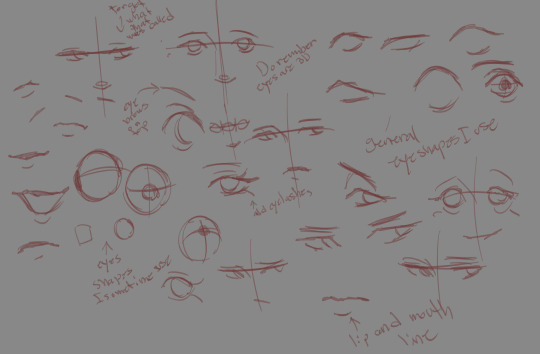
Now I put the top eye line directly on the horizontal . It should line up with the top of the ears!
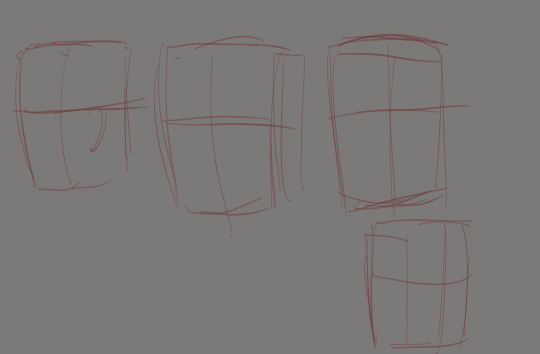
U can also make circles and even add another horizontal line to help u draw the eyes.
Now for shaping the face. I make curve lines on the side of the box. Both curves should meet at the middle of the vertical line to make the chin
Here is an example and the final product.
Add obvious details like the lining of the ear. Use references or refer to studying other artist work to see what methods they use. That’s how u build skills and your own style. But always rely on real life for a more accurate example.
(This was supposed to be posted before the coloring one but oh well.
#drawing#digital art#black clover#artwork#my art#fanart#black clover oc#ocs#oc artwork#black clover art#art tutorial#art tutorials#tutorial#drawing tutorial#face drawing#head drawing#low budget#lmao I can’t post as many pictures as I want too.#black clover fandom#art help
42 notes
·
View notes
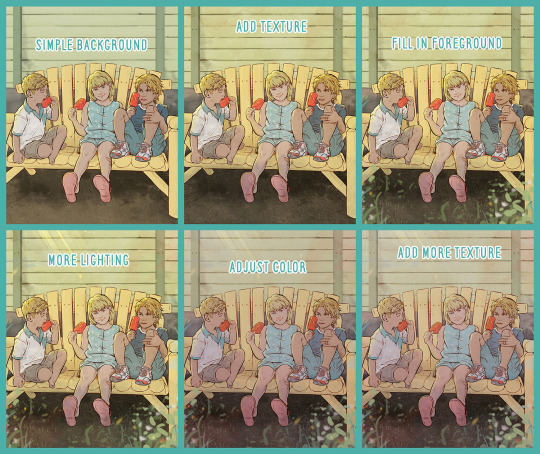
Text
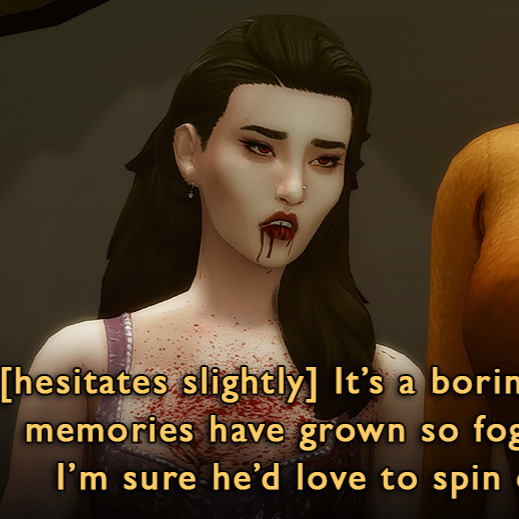
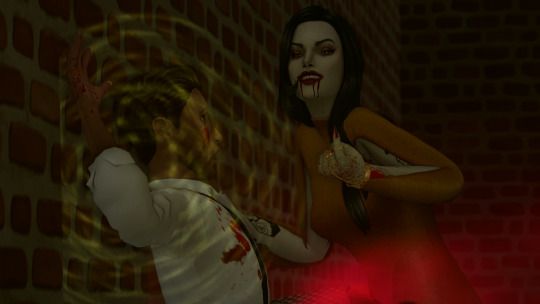
I thought it might be fun to do a little behind the scenes for the last story post! You guys might be surprised how little actual editing was involved. I mainly just crop, add brightness and saturation, clean up any small bits of clipping or weirdness that bother me, and then add captions! Do you want to know what actually took me the longest?
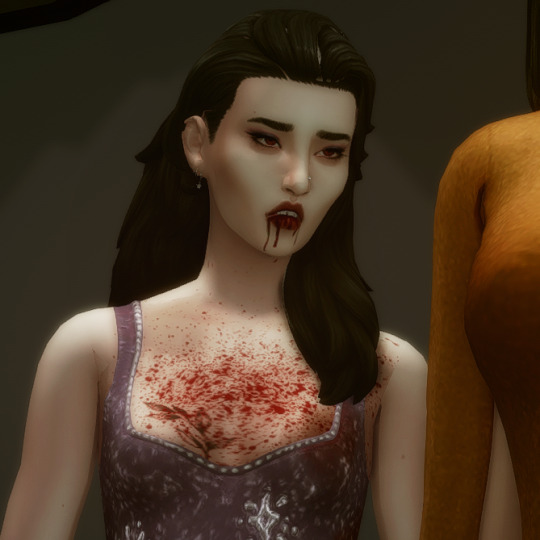
This hair had some problem areas that showed up in live mode but not CAS. It's such a tiny thing, but it annoyed me, so I had to touch it up in nearly every screenshot. Luckily, the darkness of her hair means I didn't have to do a perfect job.
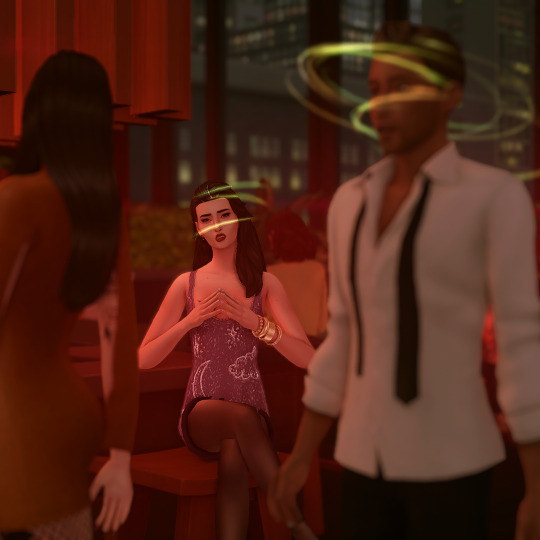
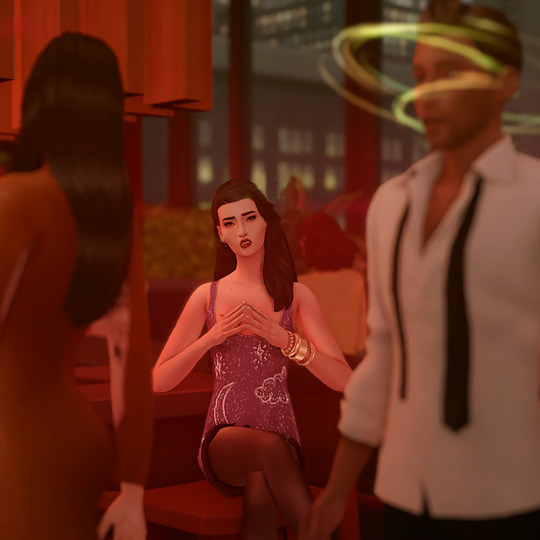
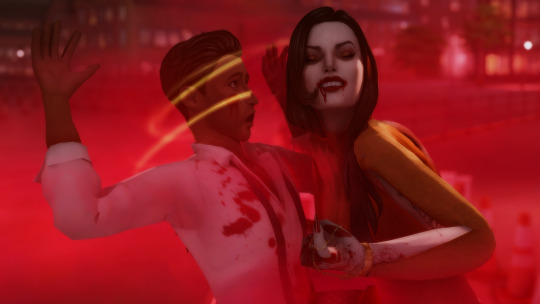
The effects were all done in-game. Lilith has the alluring visage vampire perk, which creates the red haze and mind control spiral. Unfortunately, Helena crossed her path too closely, and rather than set the shot up again I used the clone brush in Photoshop to edit out the effects around her head (vampires who can successfully do mind control on other vampires are exceedingly rare). By the way, I later figured out a quick and dirty method for dispelling unwanted visual effects on a Sim is to remove buffs in MCCC.
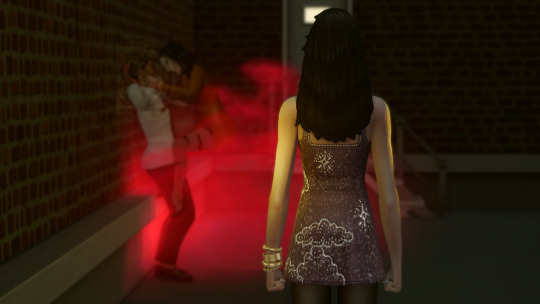
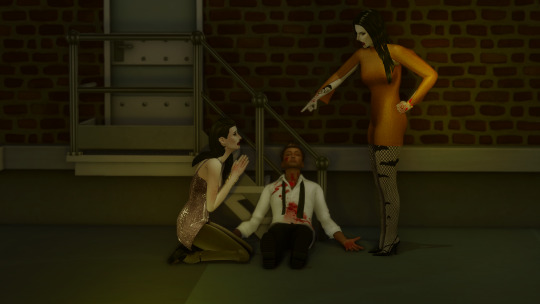
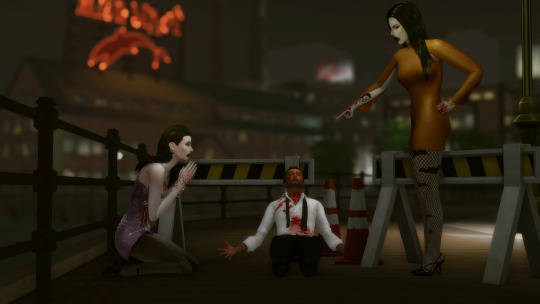
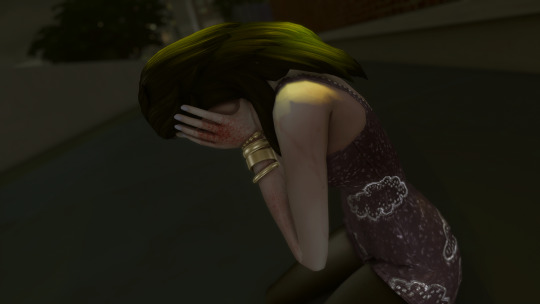
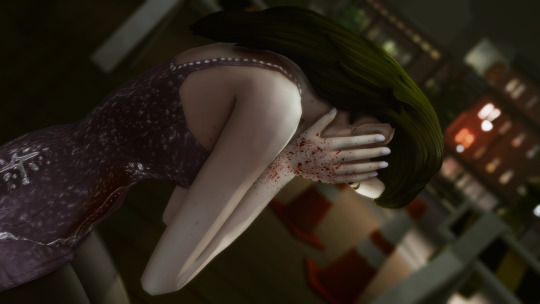
As I've mentioned, I had to shoot the attack scene twice. The first attempt was too dark, the location wasn't very visually interesting, I was in an area of San My where I had less camera control, and I used the Effects Player, which ended up being less eye-catching (hey, sometimes vanilla is the best option!). They would have worked to get the point across, but I think you can really see how I learned and improved upon my vision!
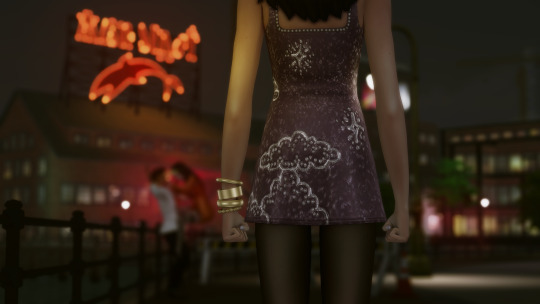
These comparison shots are all uncropped and unedited, by the way. Reshade/Relight truly does the heavy lifting. I've also gotten better at finding an angle I like and sticking with it, even if that's only because I don't want to adjust Relight all over again, lol! Speaking of angles, that last shot was done using the Dutch angle trick I learned in this tutorial by @surely-sims! First-person camera is actually super useful for storytelling. If you don't already know about this head-turning trick, it'll change your life. It comes in clutch for changing the eye line of a posed Sim since I'm not always great at getting that right in Blender.
Anyway, I don't know if anyone will find this super helpful or interesting, but I'm always open to questions about taking and editing screenshots, even though I feel like most of what I know has just been absorbed through osmosis and trial and error!
#ts4#sims 4#the zhaoverse#long post#i didn't even talk about the gifs but they were as simple as simple gets lol#i just saved the camera position in tab mode (ctrl + 5-9)#took two pictures from that angle#and then faded one shot into the other#all you need is the most basic gif making tutorial you can find#i use photoshop but i'm sure there are easier ways to do it#blood tw#*tbw
64 notes
·
View notes
Text

slowly I'm recovering the beauty of discovery
(creature by half•alive)
(textless + timelapse below cut)

#yellowart#subnautica#i feel like the timelapse is kinda long but also this did take a long time to make#anyways. let me yap about the meanings of all the panels <3#'i am creation' -> the ocean being the source of life and where shit evolved from also a good way to sort of 'set the scene' for subnautica#'both haunted' -> GHOST leviathan; in the BONE fields#'and holy' -> this one was a bit trickier. debated about using the emperor but i knew i wanted to use her elsewhere#also debated hoverfish because its cute and well liked so i thought that would be funny for 'and holy'#also something something jesus walking on water also makes it fitting. in the end though i decided on a peeper with the enzyme trail#and i *tried* to make it loop over its head like a halo but idk how well that imagery came through. still mentioned it in the alt text tho.#'made in glory' -> was REALLY torn about this one. on the one hand i wanted to have like a picture of the code because something something#divine machine and it being made out of code making it inherently holy or something; but i wasnt sure if that would be too#'immersion breaking' since most of the stuff in this is like in game stuff i wasnt sure if acknowledging that it was a game would be#too much. my other idea was to draw a couple of creature eggs like a stalker egg and a spadefish egg or something; but in the end i just#went with the one that i personally thought was cooler so if you think it does feel out of place uhhhh sorry i guess lmao.#also yes that is code from the game. idk shit about programming i just think code shit is cool so i poked though a modding tutorial til i#found what it is they use to look at that shit and started poking around. its pretty cool tbh. anyways the specific part i chose for the#drawing was something under the peepers; i think its the bit that tells the enzyme peepers to do the enzyme stuff like the trail obviously#but also some other stuff. not 100% sure though like i said idk shit about this sort of thing but everything in there seems pretty well#labeled its kinda impressive. and very helpful for navigating even if you dont know shit lol.#anyways. 'even the depths of the night cannot blind me' -> blood kelp trench is i think one of the darkest biomes in the game#possibly THE darkest so i thought it would be fitting. probably my least favorite panel though i dont think i did a very good job#representing the area or representing the bloodvines :/#'when you guide me' -> sea emperor but more specifically her messages to the player telling you to 'come here'#'creature only' -> not sure how well i can articulate this but basically the idea of humans beig animals with animal needs to eat and drink#and the idea of being a part of the ecosystem. modern life tends to make us forget that sort of thing but id imagine for ryley being on the#planet would violently remind him of this with things trying to eat him while he has to try to eat things as well. being part of the food#web. 'creature only' because he is only a creature not non-essential systems maintenance chief; but a creature living in an environment and#trying to survive. or something like that. does that make any fucking sense to anyone besides me? whatever.#anyways yapping over 👍
20 notes
·
View notes
Text
Just a collection of work-in-progress tutorials from my artworks over the years 🙆♀️ For 'educational purposes' only ;))))))
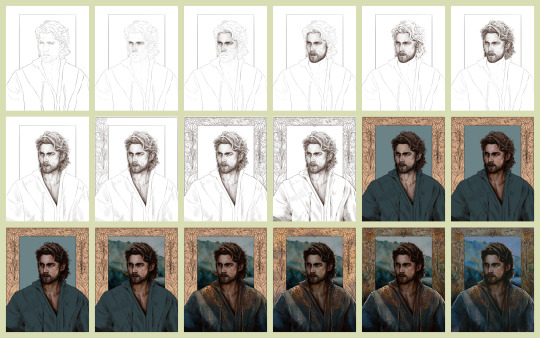

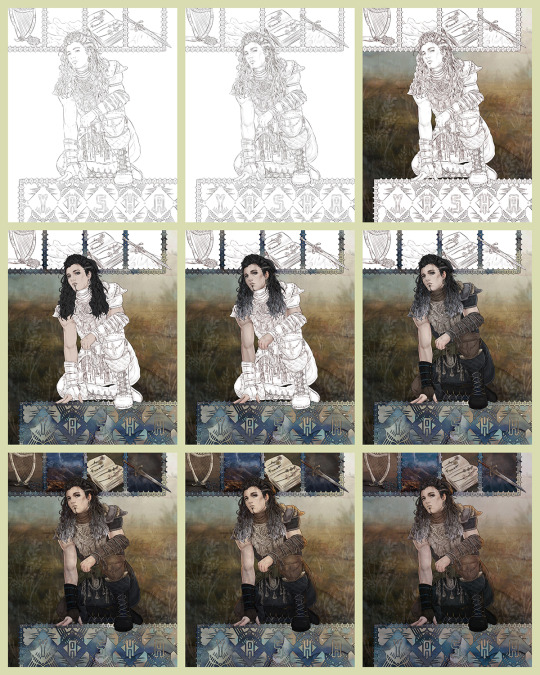
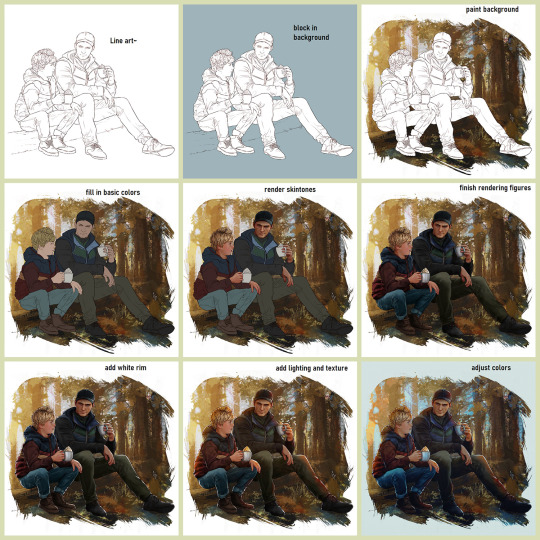
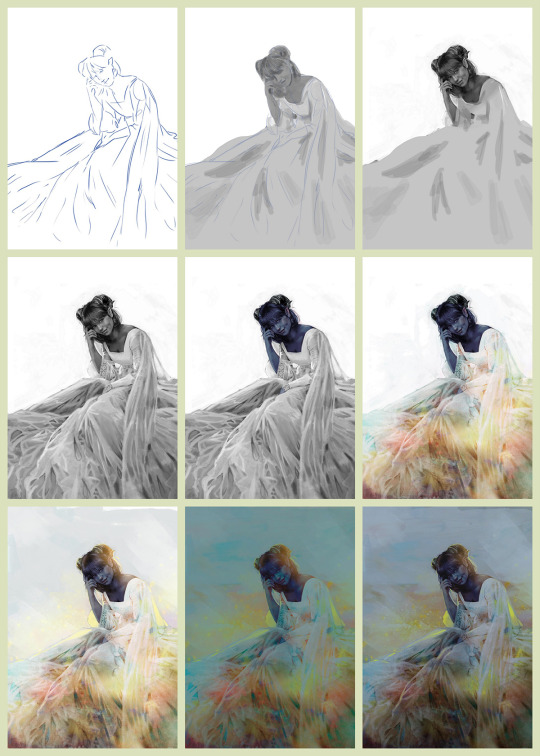
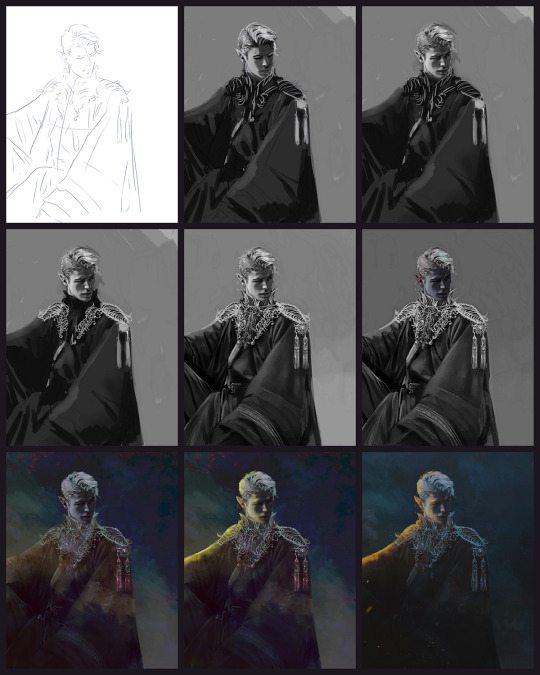
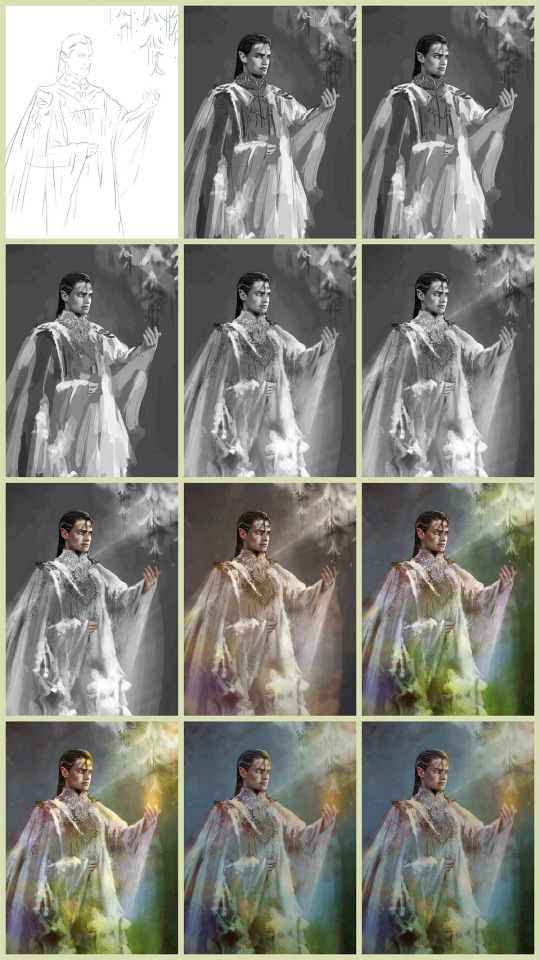
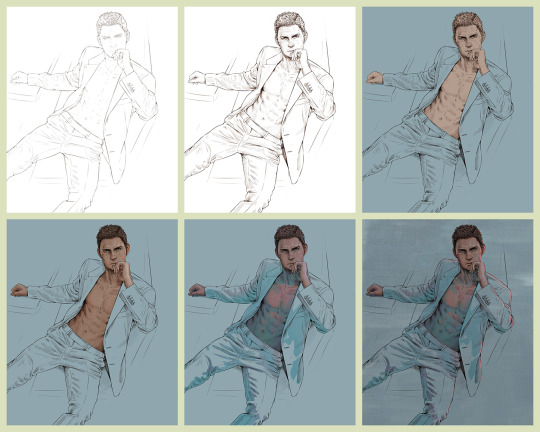
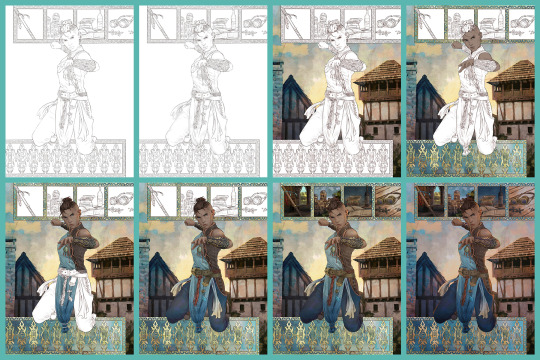
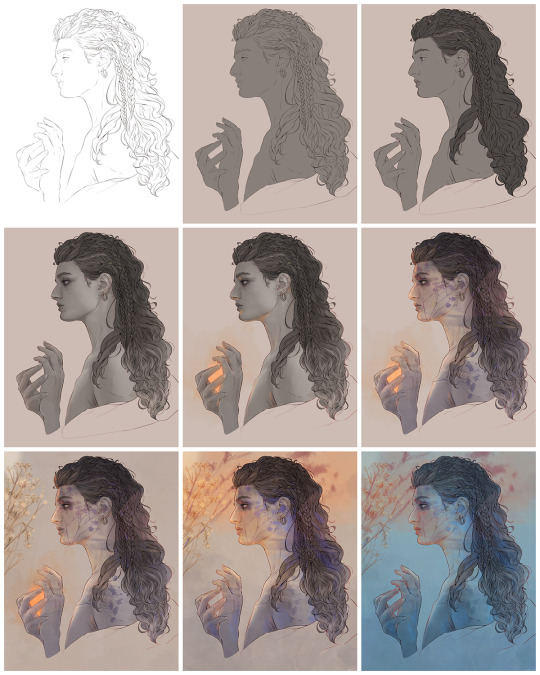
Hope that cleared a few things up 💁♀️💁♀️💁♀️
#tutorials#this is for the juvenile delinquents in the back 🔊🔊#because I know you can't read--I made this picture book for you~
129 notes
·
View notes
Text
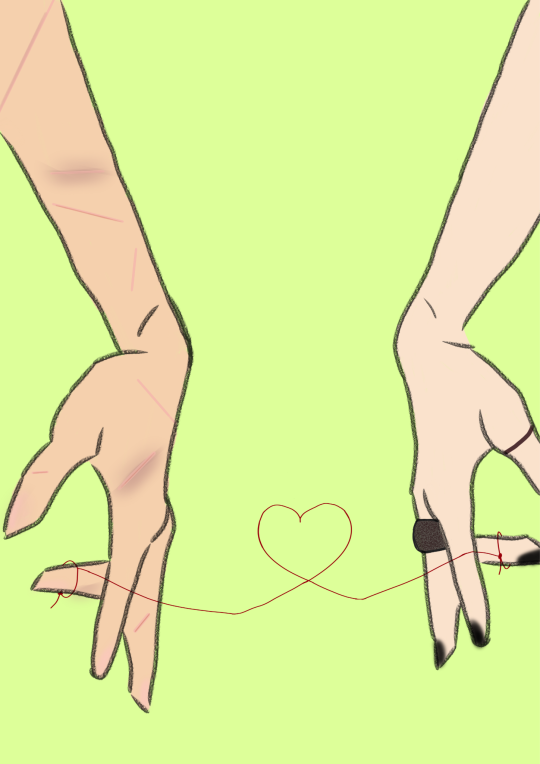
"For the Japanese, who know so much and intuit more, human relations are predestined by a red string that the gods tie to the pinky fingers of those who find each other in life. Legend has it that the two people connected by this thread will have an important story, regardless of the time, place or circumstances."
#disclaimer#i had this idea for a while#and didn't see anyone do it#So I looked for tutorials to draw hands and drew this in someone else's style#It was a tutorial on Google that I found in the pictures#I unfortunately wasn't able to find it again tho#so just note that#that aside#I thought this was so wolfstar coded#marauders#remus lupin#remus x sirius#sirius black#wolfstar#the marauders#james potter#peter pettigrew#fanart#wolfstar art#love#I'm no artist btw#this is my first attempt at making anything#I'm so anxious about posting it too#lol
23 notes
·
View notes
Text
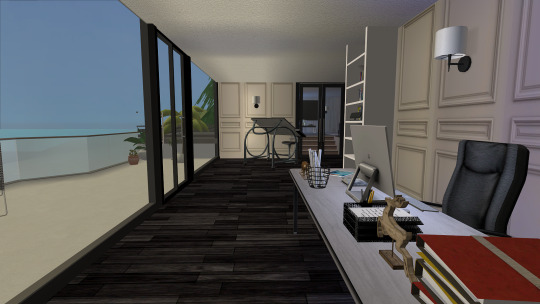
#s2cc#simblr#sims 2#sims 2 art#sims 2 download#sims 2 gameplay#sims 2 lot#sims 2 pictures#sims 2 screenshots#sims 2 simblr#sims story#the sims 2#my sims#sims 2 decor#sims 2 apartment#sims 2 photos#sims 2 pleasantview#sims 2 build#the sims 2 simblr#sims 2 storytelling#sims 2 cc#sims 2 tutorial#ts2 art#ts2 build#ts2 interior#ts2 cc#ts2 pictures#ts2#ts2 screenshots#ts2 scenery
15 notes
·
View notes
Text
god knew i'd be too powerful if i knew how to gif...
#i already had ideas for lottie-armand gifsets but now with the clip of simone in the trailer with her fur coat all smug?!?!#maybe i should just watch a youtube tutorial with my 0 knowledge of picture/video editing and see what happens!!
18 notes
·
View notes
Note
Do you have any tips for taking photos of physical objects? I like making things, but taking photos of them is the worst :(
Sure! I also struggle with taking pictures of stuff, but I can give you two big suggestions (and I'll try to keep my explanation brief for now, but you are always welcome to come back and ask for clarification!). As always, these suggestions are not rules, so if it goes against what you know or have been taught or what works best for you, feel free to disregard it lol.
Lighting, and set-up (which I will roll camera angle into).
You don't need anything big and fancy to take nice pictures of what you make. You don't need a big DSLR camera or box lights or a crazy image processing program. You can take great pictures of your stuff right at home with things you already have. I know a lot of potters who take decent pictures of their work in a corner of their living room with a simple paper sweep (poster board), one directional light (one guy I know even uses just a lamp and points it towards his pots), and something to take pictures with whether that's your phone or a little point and shoot.
Lighting. A good rule of thumb is to not back-light your work as your primary light source*. Make sure your primary light source is in front and pointing at the thing you're trying to photograph. You can even kick it off to the side for a nice three-quarters effect! You CAN have some back-lighting as long as is is acting as your fill (secondary light source) OR if you're shooting outdoors. If you want to go for natural lighting, gray days are actually quite nice as they offer even lighting (though if you want that bright sun, go for it!). *That is not to say back-lit things are bad, just that they aren't necessarily going to show off your work unless it's designed to be that way.
Set-up. This can be as simple or as complex as you want it to be! Figure out how you want to shoot your work, and then figure out how to light the space. If you want something clean, create a light box. Use a box with a white/light gray sheet draped inside to make a contained space, or pick a corner of a room and either drape a sheet or use some poster board to make a little box you can easily put up and take down. If you want something that's more set up, I have actually used my work space as my backdrop. Show the tools you are using, maybe some material, and build a composition around your piece! That takes a little more effort but can be quite nice.
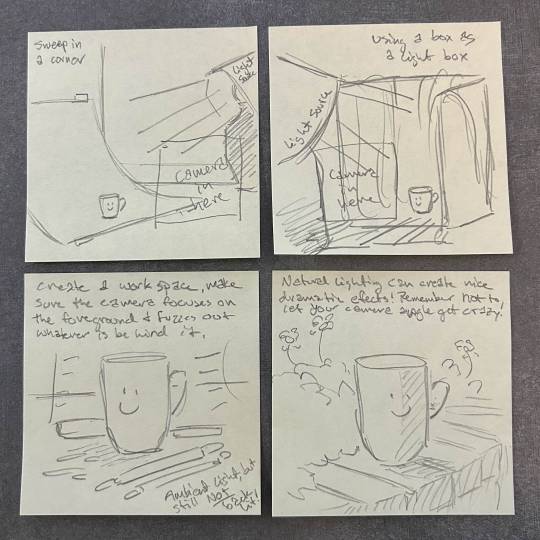
As for taking the actual picture, I have found that I personally like to have it slightly up at a shallow angle so it's not straight on or too high looking down on the piece. You can easily create an unflattering angle, but there are little nuances to taking pictures of those more extreme angles. It's just not what I'm interested in lol. Have your piece nice and centered at the angle you like, and make sure the camera is focusing on your work as much as possible and not the surrounding environment (I won't get into depth of field and all that, but that's worth keeping in mind). You can do that with some simple settings our technology has these days! (Also side note: if you are using your phone, clean the camera lens on your shirt first. It's crazy how easily that little thing can get dirty and give you smudgy looking photos lol)
I'll stop myself there, but hopefully these suggestions can help you feel more confident in taking pictures of your work! As always, feel free to ask more questions if you have any.
#ask me stuff!#arting#yes this was my brief explanation im sorry lmao#photography#i do a lot of product photography at work so i have a lot of practice#so like#take lots of pictures#try different things#look up tutorials on youtube and stuff#ive taken a LOT of bad pictures to get to where i am lol so dont be afraid to take those bad shots#i am very against gate keeping skills so like#please feel free to ask questions#and if i dont know the answer ill try to point you in the right direction
23 notes
·
View notes