#typed js plugin
Explore tagged Tumblr posts
Visit Tumblr Blog
Explore Tumblr blogs with no restrictions, modern design and the best experience.
Last Seen Tumblr Blogs


Fun Fact
Tumblr’s website traffic is steadily declining.
Text

How to use Typed.js in HTML
#typed js tutorial#typed js plugin#javascript#typing text animation#typing text effect#plugins#javascript plugins#jquery plugins#animaion#text effects#code#learn to code#divinector
0 notes
Text

Animated Typing Effects
#animated typing text animation#text animation#plugins#frontenddevelopment#html css#codenewbies#typing text animation#jquery plugins tutorial#typed js
1 note
·
View note
Text
Which Is A Better Website Development Option – WordPress Or HTML/CSS/JS?
When you want a web design UAE, then you must know the best platform on which to base your website on. The choice becomes difficult when you know practically nothing, which means you are a novice here. Someone suggests WordPress website design and someone suggests HTML/CSS/JS and now you are totally confused.
But relax there will be no confusion once the air is cleared and you know the differences and pros and cons about the two. So gear up now for it.

What Is WordPress?
WordPress is just about one of the easiest ways to design a website on. It gives the users the benefit of creating, managing and modifying any website content from the post of an admin. It means there is easy access. It is created and designed so that it is very user-friendly. You need no knowledge of coding to get going on it.
This is the reason why more than 30% of all websites designed and hosted on the internet are done so using WordPress. But here you must take note that there are two types of WordPress website development. They are:
WordPress.org — It is an open source content management system wherein you can download the software to avail of the numerous themes and plugins that come free. If you are innovative and creative, then this is the one for you.
WordPress.com — This is a self-hosted edition of WordPress. It is very easy to use but you have to make do with some limitations. If you have no objections here, then you can go ahead with it.
The Pros Of WordPress
There are many pros here that could lead you to it. They are:
WordPress website development is one of the easiest and smoothest ways that you can begin with while web development Dubai. Here you need no technical knowledge or ideas. It is so convenient that a website can be designed in just 5 minutes which is very little and inexpensive at all. You can easily manage your daily routine tasks of maintaining your website. Here you can create, update pages and contents, customize the appearance and manage and improvise the SEO.
You can easily customize by adding various free plugins and themes that already exist. The plugins are very strong and numerous in number. There is a lot to choose from. You can increase the efficiency of your site by using the plugins.
It is continually evolving because of its open source nature. Any person can mend issues that are troubling it. Another liberty you get here is that you can make your own personal plugins. The website can be designed very quickly.
This may be one reason why some Web Development Dubai Companies, prefer to use WordPress.
What Is HTML/CSS/JS?
HTML is the shortened version of Hyper-Text Markup Language where tags are employed to classify various components on a website. And HTML is never used alone. It is used in a combination with CSS and JS or JavaScript. HTML gives the fundamental structure of the website and the enhancement is done by CSS and JS.
CSS gives an appealing look to the website and takes control of the layout of the content. It is formatted before showcasing to consumers.
JavaScript makes the website synergistic. It also controls the behavioural pattern of the content components when used by users.
But remember that HTML and CSS are programming languages, rather they speak about the structure of the content and gives information on its style. But JavaScript is a programming language that is based on logic.
The Pros Of HTML/CSS/JS
There are many pros associated with this way of developing a website which again is used as a way of Web Development in Dubai. They are:
HTML is a static site and thus requires very little backup. You only need a backup when you make certain changes to your site. You even do need many updates. So less time can be invested for these.
You are the commanding authority when using HTML. Access and modifications to your website are easier than WordPress in fact. So it becomes more flexible when you want to incorporate certain new features or extras ones.
Very few resources are tapped while using HTML. It easily runs on cheap servers, unlike WordPress.
How To Choose The Optimum Way Of Designing Websites?
Now that you know a little about both the methods and their pros, you are in a much better position to choose your own way of web development Dubai.
When you do not need to regularly update or change your site or add up additional content, then HTML/CSS/JS is the better option. But for the growth of a business website where regular alterations and additions are required, then WordPress is the choice.
WordPress has very little expenditure as it can be maintained by you without technical skills. So it is low on maintenance also. You can always keep on creating different content and extra pages whenever the need arises. So it all depends on what your purpose is and what method you want to apply while creating a website.
WordPress is very fast and more secure than HTML. And since no coding language is required by WordPress, it becomes a more preferred choice by millions of consumers who are always more comfortable with cheap and low maintenance products. This is one reason why Web Design in UAE is mostly being done by WordPress.
Conclusion
But again you must mind the limitations of both the methods of designing websites. WordPress is perfect for light and personal information sharing. But if you want a business website designed, then it is always advisable to use HTML/CSS/JS to get the job done properly. Then you also you should get in touch with professionals for the job.
2 notes
·
View notes
Text
What Is Web Development?
In the era of the digital marketplace, it takes more than just an online presence to lure in and retain customers. It requires a visually appealing, immersive and user-friendly website to build trust with visitors and keep them coming back for more.
Companies need to update and optimize their websites constantly to meet this standard. This makes the need for professionals who understand both web design and web development incredibly crucial.
If a company’s site looks outdated or is difficult to navigate, it risks losing potential sales and damaging its brand image. This puts the need for front-end, back-end and full-stack developers at an all-time high. You can choose Web Development Company UK.

While there are many ways to become a developer, there are a few basic steps that you should take if you’re interested in embarking on this exciting career path.
The first step is to find an educational program that fits your learning style and provides the resources, support, and education you need to thrive. This may include an in-person or remote coding boot camp or full-stack web development courses that offer mentor and tutor support.
Web development is typically broken down into two parts: the front end and the back end. Front-end devs focus on what is seen and used by a website’s visitors, including the layout, drop-down menus and text.
This type of developer uses programming languages like HTML, CSS and JavaScript to create the visual elements that form a website.
Back-end devs engineer what’s going on behind the scenes, including the server that hosts the site, the application that runs it and the database that contains the data. They use computer programs to ensure these three components are all running smoothly together.
There are different types of Web development:-
Django Web Development:- Using models, views, and templates to manage data, display dynamic content, and create web pages. Models are Python objects that represent data. Many companies provide Django Web Development Services.
It’s best practice to write well-documented code. This helps keep your code organized and makes it easier to collaborate with other developers.
PHP Development:- Ensure they have a good work portfolio and have worked on projects similar to yours. Also, examine their expertise and technical proficiency in PHP & the appropriate frameworks.
Look for a full-cycle PHP Development company that delivers effective solutions and strategic support based on structured processes, healthy communication, and client-satisfying results. Examples include Urban Insight and Digital Echidna.
WordPress Web Design London:- A great website is vital for attracting new customers. With a wide array of plugins that facilitate SEO, lead capture and analytics, WordPress experts equip your business site to perform at its best. Mont Digital offers WordPress Web Design London.
This one-page interior design agency website artfully demonstrates WordPress's captivating blend of style and functionality. Their simple, sleek aesthetic perfectly complements their extensive portfolio.
Vue Js Development:- Vue is a progressive JavaScript framework that can be incrementally adopted and avoids the baked-in fallacies of monolithic frameworks like React and Angular.
It uses a component model that represents encapsulated elements of your interface. This makes code easier to read, maintain and fix. You can choose Vue js development company.
Interactive Web Design:- As a small business, you want customers to interact with your content. It builds customer satisfaction and provides valuable feedback.
Interactive web design makes this interaction possible. It can range from simple animations to dynamic content to engaging feedback tools.
#Web Development#Webdevelopmentcompanyuk#Web Development Company#Web Development Services#Web Development Agency#web design#website design#website#web
1 note
·
View note
Text
The Future of Mobile Applications: How Technology is Transforming the Way We Interact
Every e-commerce person needs to know how to build pages with WP bakery page builder. This theme provides support for the Visual Composer plugin as well as a custom-made plugin named “Visual Composer Extension” for our customers. The Visual Composer plugin and extension adds a range of drag-and-drop plugins to your dashboard, allowing you to create your site quickly and easily. This theme provides support for the Visual Composer plugin as well as a custom-built plugin named “Visual Composer Extension” for our customers.
The Visual Composer plugin and extension adds a plethora of drag-and-drop plugins to your dashboard, allowing you to create your site quickly and easily. Creating pages for your WordPress platform is also as simple as a few clicks and drag-and-drop operations with WPBakery Page Builder‘s elaborate but intuitive front-end and back-end editors. I’ll teach you how to add WPBakery Page Builder to your WordPress installation and walk you through all of the key features in this Visual Composer guide.
Requirements for WP Bakery Page Builder
You’ll need the following items to follow along with this WPBakery Page Builder tutorial:
WordPress 5.0 or higher is essential.
a subscription to Envato
In addition, I recommend reading the following article to better understand how to use Visual Composer and why you should use WPBakery Page Builder instead of any of the other page-builder plugins available today:
WPBakery Page Builder Installation
WPBakery Page Builder is a WordPress premium plugin. It’s available on Code Canyon, so sign up with your Envato account and buy a license. It’s still commonly is in reference as Visual Composer. Once you’ve paid for it, you’ll be able to download a ZIP file containing various plugin data.
Look for a file called js composer.zip after extracting the ZIP file. This is a WordPress plugin archive file that you must add to your server. So, go to Plugins > Add New in your WordPress admin line. Then pick js composer.zip from the Upload Plugin drop-down menu. To begin the update, click the Install Now button. When the installation is over, click the Enable Plugin button. You’ll be guided to the WPBakery Page Builder welcoming screen as soon as you do so.
Make Sure WPBakery Page Builder Plugin Is Installed & Active
Make sure the WPBakery Page Builder plugin is turned on. Since this plugin is not included with the theme (for good reason), it must be installed and allowed as described in the “Installing Recommended Plugins” guide. You should have been asked to install the recommended plugins after downloading the theme. Now is the time to install the Visual Composer if you haven’t already.
Configuring the WP Bakery Page Builder Plugin
It’s easy to learn how to use WPBakery Page Builder. The plugin is highly customizable, with hundreds of configuration choices to tailor it to your specific needs. To see them, press the Settings button on the welcome pad.
WP Bakery Page Builder with general settings
The plugin comes with a well-thought-out default setup that will suffice for the majority of use cases. For example, you can see that it supports responsive design right out of the box in the General Settings tab. The plugin also attempts to add different optimizations so that the pages you generate with it load quickly. For example, it defaults to using only the Latin script subset of Google fonts. All you have to do is change the Google fonts subsets option to accept other scripts.
You’ll note that this plugin is only available for your WordPress site’s pages in the Role Manager tab. Select Custom in the Post styles list and allow the post feature if you want it to be eligible for your posts as well.
Configuring post types:
Scroll down and press the Save Changes button once you’ve made the changes.
Finally, go to the Template Options tab and search the Use custom design area if you want to configure the look and feel of WPBakery Page Builder’s content elements. You’ll be able to adjust the plugin’s pre-set colors, margins, and widths after you’ve done so.
Define Main Settings for WP Bakery Page Builder
To configure the plugin, go to Settings > WPBakery Page Builder. The most crucial step is to turn on the composer for the post forms you choose to use it for. This is achieved through the “Role Manager” tab and the “Post Types” options. You can make the page builder accessible based on the user function, but you’ll really just want to change the “Administrator” settings.
Using the WP Bakery Page Builder Plugin
The Visual Composer is really simple and doesn’t need much explanation; for a short guide, see the screenshots below (you can also check out this more detailed Visual Composer guide). To begin, choose if you want to use the Backend or Frontend editor and press the appropriate button.
The Visual Composer Backend Editor
In this Visual Composer tutorial, this is a crucial step. There are two powerful editors included with WPBakery Page Builder: a back-end editor and a front-end editor. They can only be accessed from inside a website or a tweet. As a result, I recommend that you make a new page by heading to Pages > Add New for the time being. You can select which editor you want to use in the page construction GUI. To open the backend editor, first press the Backend Editor button.
You can conveniently connect a number of widely used elements to the website using this editor. Simple elements including text blocks, pictures, and separators are available in WPBakery Page Builder. Advanced features include Facebook “Like” icons, Google Maps, charts, and animated carousels. The components are grouped into four groups for easy access: text, social, structure, and WordPress widgets.
The elements that are available are listed below:
Content elements, as the name implies, are elements that are often used to construct the contents of a blog or an article. Social features, on the other hand, are ones that make it simple for people to share your profile on social media sites. Structure components, on the other hand, are intended for more experienced users who are familiar with writing code. They allow you to add raw HTML and JavaScript to your website directly.
To add an element, simply click the Add Element button and choose the desired element. Alternatively, you should use the Add Text Block button to add text to the website directly.
Text editor
If you don’t like the way an aspect looks by default, you can always change its styles by going to the Design Options page. Once you’ve added a few items, you’ll find that each one has a toolbar with a few buttons associated with it. These buttons show intuitive icons and enable you to perform essential operations like dragging and dropping an entity to alter its position, duplicating, removing, or editing its contents.
Keep in mind to save your page once you’ve finished adding components.
The Visual Composer Frontend Editor
The frontend Visual Composer has the same page building choices as the backend Visual Composer. The main distinction is that instead of position holders, you will see the individual page elements when you insert theme.
Using the WYSIWYG Front-End Editor
The back-end editor is perfect for pages with a number of elements that are lengthy and complicated. You get to deal on the final presentation of your website right from the start if you use the WYSIWYG front-end editor instead. You can swap between editors at any time, so scroll up and click the Frontend Editor button to launch the latest one.
Frontend Editor
Only when you mouse over a feature in this editor can you see the toolbars associated with it. Toolbars and the features they provide are somewhat close to those provided by the back-end editor in frontend editors demo options. You will now see how the website appears on different screen sizes using the front-end editor. You can also continue editing the page in whatever screen size you choose.
Using Templates
Using models is another critical part of learning how to use WPBakery Page Builder. Any page or post you make with WPBakery Page Builder can be turned into a prototype. You will reduce the amount of tedious work you do when making pages for your WordPress site by using this feature.
Open the Templates dialogue, assign the template a tag, and click the Save Template button to save the new layout of your page as a template.
Save the template in the Save Template dialogue box
Working with your own models isn’t the only choice. This plugin has a huge template library that is maintained on a daily basis. Switch to the Template Library tab and hit the Access Library button to access the library. In the template library, you’ll find that the library has a large number of high-quality layout models. You will do any of them for free. However, before you can use them, you must first unlock your WPBakery Page Builder certificate.
0 notes
Text
프론트엔드 모노레포 빌드에 대한 소고
개인적인 취향이 상당부분 반영되어 있지만 평소 모노레포 빌드/태스크에 대해 가지고 있던 생각을 정리해보았습니다.
1. 프론트엔드 모노레포 빌드/태스크 구조
빌드나 각종 명령어 실행에 있어서 3가지 정도로 나뉠 수 있을 것 같다.
작업 종속성: 분리할 수 있는 작업은 분리하여 실행하거나 병렬적으로 실행한다
작업목적의 차이: 라이브러리냐, 앱이냐? 빌드냐 테스트냐 등에 따라 달라짐
실행환경의 차이: 로컬에서는 빠르게 여러번 실행하고, 서버에서는 최대한 많은 검증을 한다.
작업종속성

패키지 종속성: 패키지만 설치되면 검증 가능한 작업들
타입 종속성: 타입이 빌드되야 검증 가능한 작업들
빌드 종속성: 빌드가 되어야 검증 가능한 작업들
패키지만 설치되면 검증 가능한 작업들로는 패키지 매니저의 lockfile, peerDeps 검증, prettier/eslint와 같은 포매팅과 린팅 작업이 있다.
의외로 타입 검증 작업은 빌드 작업과 별개로 가능하다. 다만 typescript-eslint와 같이 타입이 빌드되야 린트 검증이 가능한 가능한 경우가 있다.
모노레포에서 테스트는 의존한 패키지의 빌드가 되어있어야 실행가능하다.
작업목적의 차이
패키지 목적: 라이브러리 / 앱 / 환경설정 / 테스트
번들러 목적: 빌드 / 개발서버 / 테스트
작업목적에 따라 실행해야할 작업들이 상이하다. 예를 들어 라이브러리는 ESM/CJS 빌드, 타입 빌드 모두가 필요하다. 앱은 빌드 결과물 1개와 타입체크, 환경설정용/테스용은 타입 ���크 정도만 필요하다.
또한 똑같이 번들러 작업이 필요하다고 해도, 빌드, 개발서버, 테스트등 작업 따라 필요한 플러그인이 다르다.
실행환경의 차이

로컬에서 개발하며 실행
리모트에서 검증
개발 환경은 모든 환경을 고려하기보다는 빠르게 실행되어 코딩-빌드-테스트 이터레이션을 여러번 돌릴 수 있게 만드는게 합리적이다. 따라서 특히 개발서버는 ESM 환경에서 실행하는 vite, 마찬가지로 vitest 또한 ESM Native를 사용하는 등 가능하면 ESM Only를 전제하고 패키지를 설정해야 한다.


반대로 리모트(PR 시)는 최대한 많은 것을 검증함이 좋다. 위에서 언급된 작업 종속성에 따라 나누고, 모든 검증 태스크를 돌리자. 다만 리모트 작업에서도 검증과 릴리즈는 달라질 수 있다.
예를 들어 라이브러리같은 경우 검증단계에서는 타입 빌드와 JS 빌드가 각각 나뉘어 실행될 수 있지만, 릴리즈시에는 통합적으로 일어나야 한다.
2. 패키지 매니저
프론트엔드 모노레포에서 첫번째로 생각나는 것은 무엇인가? 난 패키지매니저를 뽑고싶다.
여러종류의 패키지를 운영하며, 각 패키지마다 의존성들을 설치하고 관리하는 기능이 필수적으로 들어가기 때문이다.
그 중에서 yarn을 가장 좋아하는 편이다. 다음 글에 나온대로 잘 설계된 아키텍처와 정확성, 성능이 마음에 든다.
패키지 매니저의 과거, 토스의 선택, 그리고 미래

우선 패키지 매니져로서 기본기는 훌륭하다.
안정적인 lockfile 업데이트
lockfile과 pnp.cjs의 conflict 자동해결
간편한 패키지 패치
NPM script를 위한 휴대용 shell 내장과 스크립트 공유
이외에 각종 검증기능이 달려있다.
Hardened Mode: resolution 체크등으로 install시 보안공격 보호
락파일/캐시 변경 감지
Constraints: 패키지와 필드에 대한 검증
Constraints에서는 대체 어떤게 가능한가?
패키지 금지: 쓰지 말아야 할 패키지를 정할 수 있다
동일한 패키지 버전: 모노레포에서 사용할 패키지 버전을 일관적으로 유지 가능
패키지 버전 범위 통제: 패키지의 버전이 특정 범위에 속하는지 제약을 줄 수 있다
워크스페이스 페키지 강제: 워크스페이스에 있는 패키지는 고정버전이 아니라 워크스페이스 프로토콜을 쓰도록 강제가 가능
피어 디펜던시 누락 검증 및 자동추가: 피어 디펜던시가 누락되었는지 체크하고, 에러를 발생시키거나 자동적으로 devDeps/Deps에 누락된 패키지를 추가
package.json의 필드 제약: 예를 들어 패키지 이름에 prefix가 붙어있어야 하는지 검증가능
이 중에서 일부는 PNPM이나 Syncpack을 사용해야 가능하다는 기능을 잠금해제한다. [yarn berry 공식 설정 / yarn-constraints-rules] 예를 들어 동일한 패키지 버전 + 패키지 버전 범위 통제가 가능하고 (물론 yarn-plugin-catalogs라는 플러그인도 존재한다) 피어 디펜던시 설치도 조금의 노력만 들이면 가능하다.
그럼 PNPM에서 가지는 특징적인 기능적 장점은 SideEffect 캐시정도이다. 이것도 아마 플러그인을 만든다면 해결 가능한 이슈로 보인다.
이외에 앞으로 도입될 auto install, yarn run 오버헤드 감소 등의 로드맵도 기대가 된다.
이와 별개로 타입스크립트를 잘 사용하기 위해서는 project reference를 잘 설정하는게 필수인데
에디터 통합: project reference가 잘 설정되어 있어야 workspace root를 에디터로 열어도 패키지의 타입 추론이 가능해진다
적절한 타입추론: App.tsx와 vite.config.ts처럼 환경에 따른 적절한 타입추론을 위해서는 project reference 설정이 필요하다
성능: tsc --build를 통해 빌드하면 토폴로지컬한 증분빌드가 가능하다.
문제는 제대로 설정하기나, 자동으로 설정하기가 어렵다. root, local, package 참조에 따라 모두 설정해줘야 하기 때문이다. 다행히 저도 약간 기여한 @monorepo-utils/workspaces-to-typescript-project-references를 사용하면 해결이 가능합니다. (yarn과 npm만 가능)
현재 남아있는 가장 큰 불만은 Changeset에서 제대로 작동하지 않다는점이다. yarn pack을 먼저 실행하고 publish 하는 방법으로 우회가 가능하긴 하지만..
3. 린트 / 포매팅
파이썬을 사용했을때가 가끔 그리웠던 것 중 하나는 ruff이다. prettier/eslint 분리를 생각할 필요가 없고 에디터에서 거의 즉시 린트와 포매팅이 가능했기 때문이다.
그러한 면에서 Biome가 동일하게 기대된다.

다만 완전히 대체가 가능할지 미지수다. Prettier는 확실히 가능하겠지만, ESLint의 풍부한 플러그인/설정 생태계에 비할바는 아니다.
예를 들어 typescript와 통합에 있어 projectService와 같은 기능이라거나 yaml과 같은 추가적인 lint 기능들이 존재하지 않는다.
따라서 현재로선 lint는 eslint로, formatter는 biome와 함께 쓰는 방향이 합리적이라 생각한다. formatter의 경우도 vue, mdx, yaml, toml과 같은 파일등도 함께 지원해야 한다면 prettier에서 못넘어가지 않을까
4. 빌드
Biome와 동일한 맥락으로 Rolldown이 미래이며, vite에서도 실험적으로는 적용중이지만 안정화에는 1년은 걸리지 않을까?

CSS 후처리 역시 Lighting CSS와의 통합으로 매우 빠른 성능을 달성할 수 있다.
역시 문제는 빌드시 성능 병목인 타입 빌드다. 지금도 일반 빌드는 10초면 끝나지만 타입 빌드는 vite-plugin-dts를 사용하면 1분 넘게 걸린다.
미래에 Typescript Native(Typescript 7.0)가 사용되면 좀 빨라지겠지만 근본적으로 플러그인이 비효율적으로 설계되어 느리다는 생각은 버릴수가 없다.
때문에 vite-plugin-dts-build라는 vite 플러그인을 만들었다. (Type rollup 기능을 제공할 생각�� 없어 vite-plugin-tsc-build라고 붙이고 싶었는데 이미 있더라ㅠㅠ)
tsc --build 처럼 증분빌드
분리된 워커에서 병렬 실행
vite의 library mode에서 여러 format이 실행될때 중복으로 실행되지 않음
3번은 직관적으로 이해가 가지 않을 것이다. 부연 설명을 하자면 CommonJS와 ESM을 동시에 지원하려면 각각을 대응하는 package.json export가 필요하며 따라서 각각의 mjs, cjs를 빌드해야 한다. 이때 plugin은 2번씩 실행된다.
타입도 그에 맞추어 ESM버전과 ModuleKind.CommonJS 및 ModuleResolutionKind.Node10를 사용해야 한다. 그래서 dts 세팅을 2번해줘야 문제없도록 export를 할 수 있다.
문제는 위와 같이 세팅이 된 경우 총 4번이 실행이 되기 때문에 락을 걸어 각 dts 플러그인 설정은 한번씩만 실행되도록 보장했다.
추가) Are the types wrong?을 사용하면 타입이 잘 export되었는지 체크가 가능하다.


예를 들어 vite-plugin-dts는 👺 Masquerading as ESM 문제가 있다. (근데 위 문제를 제대로 처리하는 라이브러리들이 생각보다 적은것 같다...)
이외에 TypeScript 빌드를 더 빠르게 만들 방법도 있는데 일반적이지는 않다.
assumeChangesOnlyAffectDirectDependencies: 영향을 받은 파일들은 재검사/재빌드 하지않고, 변경된 파일과 직접 import한 파일만 재검사/재빌드되므로 정확도가 내려간다
isolatedDeclarations: 병렬적으로 타입을 빌드하거나 검사할때 도움이 되지만, 명시적으로 각 타입들을 코드 단위에서 변경하는게 요구된다
5. 태스크 러너
현재 가장 빈공간이 많은 툴이라 느껴진다.
Yarn의 휴대용 shell + Vercel의 Turborepo의 설정이 정말 간결해서 편하다.
Root와 워크스페이스의 NPM script 공유
Turbo Repo의 증분/병렬실행과 Remote caching

복잡한 스크립트가 필요한 경우는 단순히 NPM script에 쓰이는 스크립트가 아니라 JavaScript (혹은 TypeScript)로 쓰인 태스크 매니저를 원하게 될 것이다.
이를테면 Grunt나 Gulp 같은 것들 말이다.

이 중에는 Gulp의 Task 사용법이 가장 합리적이라 여겨진다.
Gulp의 문제라 한다면, Turborepo와 같은 토폴로지/증분/병렬 실행 기능이 부족하기 때문이다. 패키지 단위의 위상적 실행은 원래 지원하지 않았고, 증분에서는 lastRun이라는 함수가 있지만, 프로세스가 꺼지면 정보가 사라진다. 병렬에서는 parallel이라는 함수가 있지만, 내부에서 사용되는 now-and-later라는 패키지의 코드를 읽어보면 실제 병렬이라기보다는 동시성 기능에 가깝다.
Turborepo의 JavaScript interface를 사용할 수 있다면 참 좋겠지만, 불행하게도 Node와의 인터페이스는 존재하지 않으므로 만약 제작하게 된다면 Microsoft의 Rush(lib)를 사용하는게 현실적이지 않을까? Turborepo의 편안한 인터페이스는 빌리더라도 말이다.
모든 워크스페이스의 태스크, vitest와 같은 것들까지 최적의 실행시간을 보장하려면 위임하여 처리할 수 있는 글로벌 워커 풀 / 프로미스 풀이 구현되는 것도 필요하지 않나 싶다.
이 정도가 Frontend Monorepo에서 당장 생각나는 요구사항들 같다. 만약 다른 언어까지 포함된 backend까지 합쳐진 형태라면 bazel 쓰는게..ㅋㅋ
0 notes
Text
Why Rapid URL Indexer Outperforms Speed Links for Fast Google Indexing
Getting your URLs indexed quickly can make or break your SEO strategy. After extensive testing and analysis, Rapid URL Indexer has proven to be significantly more effective than Speed Links across all key metrics. Here's our detailed comparison to help you make an informed decision for your indexing needs.
Superior Indexing Rate & Timeframe
Rapid URL Indexer delivers an impressive 91% average indexing rate, with results visible in just 4-14 days. This transparency in performance metrics gives users confidence in the service's effectiveness.
By contrast, Speed Links doesn't publicly disclose their indexing success rate and typically takes 20-30 days to show results. Their FAQ explicitly states, "There is no any guarantee that yours links will be indexed." In the fast-paced digital world, this additional 1-2 week delay can significantly impact time-sensitive content performance.
Cost-Effective Pricing Model
Rapid URL Indexer operates on a pay-as-you-go credit system that offers several advantages:
No subscription trap or recurring payments
Flexible scaling based on current needs
Credits don't expire, eliminating pressure to use them immediately
100% credit auto-refunds for any URLs not indexed within 14 days
This means you only pay for actual results, not just attempts. Speed Links, however, uses a subscription-based model that charges a flat rate regardless of indexing success, potentially resulting in payment for unused capacity or unsuccessful indexing.
Safe Indexing Methods
Rapid URL Indexer prioritizes safety through:
White hat techniques approved by search engines
Avoidance of spammy links or questionable practices
Multi-processing approach that respects search engine guidelines
Interestingly, Speed Links warns users that "large number of links indexed in short time can be harmfull for Your website," suggesting potential risks with their own service. They advise using only 10-500 links per domain monthly to avoid issues, indicating concerns about their own indexing methods.
User-Friendly Features
Rapid URL Indexer offers a comprehensive suite of features designed to enhance user experience:
Intuitive project creation process
Clear visualization of indexing progress
Detailed visual reports and charts
Free WordPress plugin for automatic submission
CSV data export capabilities
No Google Search Console requirement
Comprehensive RESTful API
Speed Links provides a more basic interface with limited reporting capabilities and no WordPress integration, making it less convenient for regular use and client reporting.
Versatility for Different Website Types
E-commerce Sites
Rapid URL Indexer helps e-commerce sites thrive by quickly indexing:
New product pages for immediate search visibility
Updated inventory information
Seasonal collections before peak shopping periods
Category and subcategory pages
Time-sensitive deal and promotion pages
This rapid indexing reduces the lag between product updates and search engine visibility, potentially increasing sales and improving customer experience.
Content-Heavy Websites
For blogs, news sites, and media platforms, Rapid URL Indexer excels at:
Processing large volumes of URLs
Ensuring new articles are quickly discoverable
Indexing archive pages that might otherwise be overlooked
Handling media libraries and galleries
Processing user-generated content promptly
SEO Agencies and Consultants
Professional SEO practitioners benefit from:
Quick indexing for new client websites
Campaign tracking capabilities
Backlink indexing confirmation
Detailed reporting for client demonstrations
Scalability for multiple client projects
API access for white-label solutions
Advanced Capabilities
Rapid URL Indexer demonstrates sophisticated handling of complex page types:
JavaScript rendering for JS-heavy pages
Dynamic content indexing
Single Page Applications (SPAs)
AJAX-loaded content
Speed Links doesn't provide specific information about its capabilities with these complex page types, suggesting potential limitations.
Integration with Other SEO Tools
Rapid URL Indexer complements existing SEO workflows:
Works alongside Google Search Console without requiring access
Provides complementary data for comprehensive site visibility
Offers prioritization capabilities for critical pages
Features a well-documented API for custom integrations
Best Practices for Optimal Results
To maximize success with Rapid URL Indexer:
Prioritize high-quality, unique content for submission
Ensure proper on-page SEO before indexing
Stagger submissions for natural indexing patterns
Use the WordPress plugin for automatic submission of new content
Regularly monitor indexing reports to refine your strategy
Focus on mobile-friendly pages to align with Google's mobile-first indexing
Ensure submitted URLs aren't blocked by robots.txt or noindex tags
By following these practices and avoiding common mistakes like submitting low-quality URLs or neglecting site speed, you'll achieve optimal results and maximize your ROI.
The Clear Winner
After comprehensive analysis, Rapid URL Indexer emerges as the superior choice for URL indexing. Its combination of higher indexing rates, faster results, cost-effective pricing, safe methods, and user-friendly features makes it the optimal tool for enhancing search visibility and driving organic traffic growth.
Whether you're managing an e-commerce site, content-heavy platform, or client websites, Rapid URL Indexer provides the performance, transparency, and value needed for successful SEO outcomes.
Why pay for attempts when you can pay for results?
https://rapidurlindexer.com/speed-links-alternative/
0 notes
Text
trying to figure out how to skip selecting skill type in rpg maker.
can't find any plugins for this, and i'm struggling with the .js files. have yet to make a change that doesn't just crash.
1 note
·
View note
Text
Conversion Tracking Pro for WooCommerce nulled plugin 1.0.6

Boost Your Store's Performance with Conversion Tracking Pro for WooCommerce Nulled Plugin If you're looking to supercharge your WooCommerce store's sales performance without breaking the bank, the Conversion Tracking Pro for WooCommerce nulled plugin is your golden ticket. This powerful tool helps you track every click, conversion, and customer action—essential for crafting data-driven strategies that truly work. Best of all, you can download it for free from nulled club and start leveraging its capabilities immediately. What Is Conversion Tracking Pro for WooCommerce Nulled Plugin? The Conversion Tracking Pro for WooCommerce nulled plugin is a premium tracking solution designed to help WooCommerce store owners monitor and analyze user behavior on their websites. Whether you're running targeted ad campaigns or simply want to know how visitors interact with your site, this plugin offers deep insights that can transform your marketing efforts. Rather than spending a fortune on similar analytics tools, this nulled version brings enterprise-level functionality to your fingertips—completely free of charge. It integrates seamlessly with WooCommerce and supports platforms like Google Ads, Facebook Pixel, Twitter Ads, and more. Technical Specifications Plugin Version: Latest stable release Compatibility: WordPress 5.5+ and WooCommerce 4.0+ File Type: PHP, JS, CSS Dependencies: Requires WooCommerce plugin License: GPL – Open Source Top Features and Benefits Multi-Platform Integration: Set up conversion tracking across Google Ads, Facebook, Twitter, and more. Custom Event Tracking: Easily track custom events such as Add to Cart, Checkout, Purchase, and more. No Coding Required: The user-friendly dashboard makes it easy for anyone to configure without technical knowledge. Enhanced Reporting: Access detailed analytics to understand which campaigns drive the most value. Optimized for Speed: Lightweight code ensures your store’s performance is never compromised. Ideal Use Cases The Conversion Tracking Pro for WooCommerce nulled plugin is perfect for: eCommerce store owners who want deeper insights into user behavior Digital marketers running ad campaigns across multiple platforms Entrepreneurs aiming to increase ROI through smart data analysis Developers building custom WooCommerce solutions for clients How to Install the Plugin Download the plugin from nulled themes. Log into your WordPress dashboard. Navigate to Plugins > Add New > Upload Plugin. Select the plugin ZIP file and click Install Now. Activate the plugin and configure the tracking settings from the dashboard. FAQs – Everything You Need to Know Is the Conversion Tracking Pro for WooCommerce nulled plugin safe to use? Yes. This plugin is GPL-licensed, meaning it's legally distributable and safe when downloaded from trusted sources like nulled club. Will this plugin work with my theme? Absolutely. The plugin is built to integrate with all WooCommerce-compatible themes. It's been tested with popular options including avada nulled. Can I track conversions from multiple ad platforms? Yes, you can track data from Google Ads, Facebook Pixel, Twitter Ads, LinkedIn, and more—all within the same dashboard. Do I need coding skills to use it? Not at all. Its intuitive interface is designed for users of all technical backgrounds, from beginners to pros. Final Thoughts Take control of your WooCommerce store's performance today with the Conversion Tracking Pro for WooCommerce . With its robust features and free access via trusted sources, there’s no reason to hold back. Whether you’re just starting or scaling up, this plugin empowers you with the insights you need to succeed—without the premium price tag.
0 notes
Text
AI Auto React Native Development,
Outline
H1: Introduction
H2: Understanding AI Auto Development
H2: Why React Native is Perfect for AI Integration
H2: Key Advantages of AI-Driven React Native Development
H3: Speed and Efficiency
H3: Lower Development Costs
H3: Improved Code Quality
H3: Real-Time Assistance
H2: Top AI Tools for Auto React Native Development
H3: GitHub Copilot
H3: CodiumAI
H3: OpenAI Codex
H3: Tabnine
H3: Debuild
H2: AI in UI/UX Design for React Native
H2: Natural Language to Code: How AI Translates Ideas into Apps
H2: AI for Code Review and Bug Fixing
H2: Automated Testing with AI
H2: AI-Enhanced Backend Integration
H2: Best Practices for Implementing AI in React Native
H2: Challenges to Be Aware Of
H2: The Future of AI Auto Development in React Native
H2: Real-World Use Cases and Success Stories
H2: Conclusion
H2: FAQs
Introduction
Mobile app development is changing—and fast. Gone are the days of spending weeks building basic features. Thanks to AI auto development tools and React Native, developers are creating smarter, faster, and more scalable mobile apps in record time.
If you’re wondering how AI fits into the world of cross-platform app development, or how React Native benefits from automation—this article breaks it all down for you.
Understanding AI Auto Development
AI auto development is the process of using artificial intelligence to automate various parts of software development—from writing code and fixing bugs to testing and optimizing performance.
Instead of manually writing boilerplate code, developers can describe what they want in natural language, and AI tools generate the code automatically. Think of it as having a tireless digital assistant that codes alongside you.
Why React Native is Perfect for AI Integration
React Native is already loved for its ability to let developers write once and deploy everywhere—both iOS and Android. But when you mix in AI, things get even more exciting.
JavaScript is widely supported by AI code tools.
Component-based architecture is ideal for modular AI-generated code.
Large community and libraries mean AI has lots of training data to work with.
Key Advantages of AI-Driven React Native Development
Speed and Efficiency
AI helps automate routine tasks like form validation, API integration, and even screen generation. This means faster release cycles and quicker MVPs.
Lower Development Costs
Fewer developer hours are needed when AI takes care of the repetitive stuff. That means lower cost per feature.
Improved Code Quality
AI tools enforce consistent code patterns, follow best practices, and reduce human errors.
Real-Time Assistance
AI-powered IDE plugins suggest code as you type—similar to autocomplete but way smarter.
Top AI Tools for Auto React Native Development
GitHub Copilot
Trained on billions of lines of code, Copilot writes React Native components, hooks, styles, and even logic snippets for you. It integrates directly into your code editor.
CodiumAI
CodiumAI generates automated test cases and gives intelligent feedback as you code. Think of it as an AI code reviewer working beside you.
OpenAI Codex
Codex understands natural language and converts it to working code. It’s great for generating complex logic like navigation or form submissions.
Tabnine
This AI autocompleter supports JS/TS syntax and is great for large teams. It learns your coding style and tailors suggestions accordingly.
Debuild
Turn a sentence like “Create a login form with email and password” into actual JSX code. Debuild is amazing for fast prototyping.
AI in UI/UX Design for React Native
AI can automatically convert Figma files or simple sketches into fully responsive React Native components. This saves hours of front-end work and speeds up design iterations.
AI also helps predict user behavior, allowing designers to refine user journeys in real time.
Natural Language to Code: How AI Translates Ideas into Apps
You don’t need to write code to build an app anymore. Just tell the AI:
“Create a task management app with a to-do list and calendar view.”
The AI will scaffold the project, generate the screens, add buttons and hooks—and even wire up navigation.
That’s not the future. That’s happening now.
AI for Code Review and Bug Fixing
AI tools like DeepCode or Snyk review your codebase for errors, security vulnerabilities, and deprecated functions. They even explain the problems in plain English and offer fixes you can apply instantly.
Automated Testing with AI
Testing is no longer a bottleneck. AI creates test cases, monitors UI behavior, and flags unstable parts of your app automatically.
This leads to:
Better test coverage
Fewer regressions
Happier users
AI-Enhanced Backend Integration
Don’t want to manually wire up your backend APIs? AI can:
Auto-generate API calls
Map JSON responses to your UI
Suggest error handling logic
Whether you’re using Firebase, Supabase, or a custom backend, AI makes integration smoother.
Best Practices for Implementing AI in React Native
Use AI for repetitive tasks, not core business logic.
Review generated code for quality and security.
Combine AI with manual testing for best results.
Stay updated on AI tool improvements and new releases.
Challenges to Be Aware Of
Over-reliance on AI can reduce developer skill growth.
Inaccurate suggestions might cause unexpected bugs.
Security and compliance risks if code is auto-generated without review.
Licensing concerns for AI-generated content may apply in certain industries.
The Future of AI Auto Development in React Native
Imagine AI systems building entire React Native apps from voice commands. We’re not far off.
Expect:
Smarter AI code generators
End-to-end no-code AI solutions
Real-time collaboration with AI copilots
AI that understands product goals and suggests features
It’s not just about faster code—it’s about smarter apps, made easier.
Real-World Use Cases and Success Stories
Startups are building MVPs in days, not months.
Agencies are delivering more apps with smaller teams.
Enterprises are reducing bugs and increasing consistency.
From food delivery apps to finance dashboards, AI + React Native is delivering real business value today.
Conclusion
AI auto React Native development isn’t just a buzzword—it’s the next evolution in mobile app development. With the right tools and approach, developers can work faster, deliver better apps, and free up time for creative innovation.
React Native provides the perfect framework, and AI is the co-pilot every dev team needs. If you're building mobile apps in 2025 and beyond, it's time to get AI on your side.
FAQs
1. Is AI reliable for building production-ready apps? Yes, but always review and test AI-generated code before release.
2. Which AI tool is best for React Native beginners? GitHub Copilot is a great starting point due to its seamless VS Code integration.
3. Can AI help with React Native performance optimization? Absolutely. Some tools offer suggestions to improve memory usage, rendering, and responsiveness.
4. Does AI replace the need for developers? Not at all. AI enhances a developer’s workflow—it doesn’t replace creativity or deep logic.
5. What skills should I learn alongside AI tools? Still focus on JS/TS fundamentals, React Native ecosystem, and debugging. AI is a tool, not a substitute for expertise.
0 notes
Text
Search Engine Optimization (SEO) for Websites

In a world where billions of websites compete for attention, Search Engine Optimization (SEO) is essential for making your website visible to your target audience. Whether you're a blogger, business owner, or developer, understanding and applying SEO principles can drive more organic traffic to your site.
What is SEO?
SEO (Search Engine Optimization) is the process of optimizing your website so that it ranks higher in search engine results pages (SERPs) like Google or Bing. A well-optimized site is more likely to appear when users search for related content, increasing visibility and traffic.
Types of SEO
On-Page SEO: Optimization within your website content (keywords, HTML tags, etc.).
Off-Page SEO: External efforts like backlinks and social sharing.
Technical SEO: Behind-the-scenes optimizations like site speed, mobile-friendliness, and schema markup.
On-Page SEO Best Practices
Keyword Research: Identify and use relevant keywords your audience is searching for.
Title Tags & Meta Descriptions: Include keywords and keep them concise and clear.
Heading Tags (H1, H2, etc.): Structure your content for readability and relevance.
Alt Text for Images: Improve accessibility and help search engines understand image content.
URL Structure: Use short, keyword-rich URLs.
Internal Linking: Connect pages to help both users and search engines navigate your site.
Technical SEO Essentials
Mobile Optimization: Ensure your site is responsive and user-friendly on all devices.
Site Speed: Optimize images, use caching, and minimize CSS/JS to improve load times.
Secure Website (HTTPS): Install an SSL certificate to gain user trust and search engine preference.
XML Sitemap: Helps search engines crawl and index your site effectively.
Robots.txt: Manage which pages should or shouldn’t be indexed.
Off-Page SEO Techniques
Backlink Building: Gain links from reputable sites to boost your domain authority.
Social Media Promotion: Drive traffic and awareness by sharing your content online.
Guest Blogging: Write on other blogs to earn links and increase exposure.
Tools to Improve SEO
Google Search Console: Monitor site performance and get indexing reports.
Google Analytics: Track user behavior and traffic sources.
Yoast SEO (WordPress): Plugin for easy on-page SEO management.
SEMRush, Ahrefs, Moz: Comprehensive SEO analysis and keyword tracking tools.
GTmetrix, PageSpeed Insights: Analyze and improve page loading speeds.
Content is King
High-quality, original content is the most critical component of SEO. Focus on solving problems, answering questions, and providing value. Use your keywords naturally and avoid keyword stuffing. Regularly update your content to stay relevant.
Common SEO Mistakes to Avoid
Ignoring mobile optimization.
Overusing keywords (keyword stuffing).
Duplicate content.
Neglecting image alt tags.
Slow website speed.
Conclusion
SEO is an ongoing process that requires consistent effort, testing, and updating. By understanding and implementing SEO best practices, you can enhance your site’s visibility, attract more visitors, and achieve your online goals.
0 notes
Text
How Ext JS Enhances UI Design for Seamless User Interaction

The Power of Ext JS for UI Design
Comprehensive Component Library
Ext JS Offers offers a huge collection of JavaScript components, including grids, charts, forms, and menus, which make life easier when it comes to building really cool, interactive, and responsive interfaces. It allows you to concentrate on doing stuff while still looking awesome. These components are best used with Ext JS 7 and earlier models like
The dynamic capabilities of the library were kept expanding in terms of appended features and improvements. Whether the case may be work on an Ext JS dashboard or building mobile-friendly sites, pre-built components of this library are there for use in streamline development.
Themes and Customization
Ext JS is one among the plethora of features that supports the themes. For example, the developers have provided several themes for Ext JS which include Ext JS 7 themes download, and even if needed, these coders could always be referred to buying specialized themes by searching for “Buy Ext JS themes.” The theme is used for immediate organizing or aligning the appearance of your application around the brand identity.
Along with that, Ext JS offers the customization of themes. However, Sencha Ext JS framework specifically allows you to tweak with colors, layouts, and styles so that every one of your UI elements could have a unified professional appearance.
Seamless User Interaction
Interactivity is that modern Web applications need, and that is what the Ext JS examples demonstrate. Real-time data binding and advanced grid features provide intuitive, responsive applications for developers.
With drag-and-drop support, custom tooltips, and animations, Ext JS provides a very friendly user experience. So if you leverage Ext JS components, you will be delivering a unified experience that will bring users back.
Why Ext JS is a Leading JavaScript Framework
Robust Features
Ext JS represents the perfect combination of JavaScript UI framework and the JavaScript component library that brings it up at the height of popularity among the JavaScript frameworks. As a tool for developers, it offers so much: premade widgets, adaptive layouts, and cross-browser compatibility.
Scalability and Performance
Ext JS scales itself quite fine, whether you are building applications for a small business or an enterprise. The architecture of Ext JS allows applications to remain responsive and fast, even as complexity increases. You are always on the frontier of having the newest tools because you can use the latest, no matter which of the Ext JS 7 versions you are working with.
Extensive Documentation and Support
On top of that, the Ext JS comes with an abundance of resources, from demos like the Ext JS desktop demo to plugins for extending its functionality. In addition, the forums, tutorials, and updates from the Sencha community make sure that developers have every support they may need.
Versatility Across Industries
Ext JS is that flexible, as it suits various types of businesses-from enterprise dashboards to retail applications. The entire range of JavaScript UI components enables developers to create solutions specifically to their requirements. For example, grids and forms are perfect for data-intensive applications, while charts and themes are designed with the visually driven platforms in mind.
How ExtNuke Leverages Ext JS
As a brand that prioritizes innovation, ExtNuke harnesses the power of Ext JS to deliver advanced ExtJs Themes . By incorporating the Ext JS latest version, we ensure that our clients benefit from the newest features and best practices in UI design. Whether it’s creating Ext JS dashboards, utilizing Ext JS plugins, or customizing Ext JS themes, ExtNuke provides aesthetic and visually appealing Ext Js themes that enhance user experiences.
Conclusion
Sencha’s Ext JS proves to be one of the most preferred JavaScript UI frameworks. With its great toolset, customizable themes, and emphasis on interactivity, it’s not surprising that it is considered one of the most well-rounded JavaScript frameworks. Ext JS allows developers to create user interfaces that provide smooth experiences.
Get ready to jumpstart your awesome UI designs — discover ExtNuke and Ext JS today!
Originally published at https://www.extnuke.com on December 2, 2024.
0 notes
Text
Best Tools and Frameworks for Blockchain Development in 2025
Blockchain technology continues to evolve in 2025, with developers seeking robust tools and frameworks to streamline the creation of decentralized applications (DApps), smart contracts, and other blockchain solutions. As the demand for scalable, secure, and efficient blockchain solutions grows, leveraging the right tools has become essential for success. Here are the top tools and frameworks for blockchain development in 2025.

1. Solidity
Solidity remains the cornerstone for blockchain developers working on Ethereum-based projects. It is a statically typed programming language specifically designed for writing smart contracts. With extensive community support and comprehensive documentation, Solidity allows developers to create secure and reliable DApps. Updates in 2025 have improved its debugging capabilities and compatibility with Ethereum Layer 2 solutions.
Key Features:
Extensive libraries for contract development.
Strong community support.
Optimized for Ethereum and EVM-compatible chains.
2. Hardhat
Hardhat is a versatile Ethereum development environment, essential for testing, deploying, and debugging smart contracts. It supports Solidity and integrates seamlessly with popular tools like Ethers.js. Hardhat’s debugging features and customizability have made it a go-to framework for developers in 2025.
Key Features:
Rich plugin ecosystem.
Advanced error reporting for Solidity.
Local blockchain network for testing.
3. Truffle Suite
Truffle Suite offers a complete development environment for blockchain applications, including testing, debugging, and deployment. The suite includes:
Truffle: A development framework.
Ganache: A personal blockchain for testing.
Drizzle: Front-end libraries for DApp interaction.
In 2025, Truffle’s integration with Layer 2 solutions and multi-chain compatibility have further strengthened its position as a leading blockchain tool.
Key Features:
Simplified contract lifecycle management.
Strong testing tools.
Integrated developer workflow.
4. Remix IDE
Remix is an open-source web-based IDE for Ethereum smart contract development. It is especially popular among beginners due to its user-friendly interface. Remix now supports advanced debugging features, plugin extensions, and deployment on multiple Ethereum testnets.
Key Features:
Browser-based accessibility.
Supports Solidity and Vyper.
Comprehensive debugging tools.
5. Hyperledger Fabric
Hyperledger Fabric is the top choice for enterprise blockchain solutions. It provides a modular architecture, making it suitable for industries like finance, healthcare, and supply chain. Fabric’s private blockchain network capabilities and scalability enhancements in 2025 have positioned it as a leader in permissioned blockchain frameworks.
Key Features:
Modular and customizable architecture.
High transaction throughput.
Strong privacy and security measures.

Explore AICERT’s wide range of AI and Blockchain certifications, and don’t forget to use the code NEWUSERS25 for a 25% discount on all courses. Click here to start your journey into AI and Blockchain today!
“Have questions or are ready to take the next step in your AI certification journey? Reach out to us at AI CERTs — our team is here to guide you every step of the way!”
6. Web3.js and Ether.js
Both Web3.js and Ethers.js are JavaScript libraries that facilitate interaction with Ethereum networks. Developers use these tools to build front-end interfaces for blockchain applications. In 2025, their support for multi-chain networks and integration with DeFi protocols has made them indispensable.
Key Features:
Simplified DApp development.
Support for various Ethereum-based protocols.
Comprehensive documentation.
7. Polkadot.js
Polkadot.js is a suite of tools for interacting with the Polkadot ecosystem. It includes libraries and UI interfaces for developing and managing parachains. With Polkadot gaining traction in 2025, this toolset is essential for developers building interoperable blockchain solutions.
Key Features:
Comprehensive support for Polkadot’s ecosystem.
API for blockchain interaction.
Lightweight and efficient.
8. Substrate
Substrate powers Polkadot’s ecosystem and enables developers to build custom blockchains. Its flexibility, along with updated features like enhanced scalability and cross-chain compatibility in 2025, makes it a top choice for blockchain developers.
Key Features:
Framework for building interoperable blockchains.
Pre-built modules for easy customization.
Strong community and documentation.
9. Alchemy
Alchemy is a blockchain infrastructure provider that simplifies DApp development with powerful APIs and tools. In 2025, Alchemy’s services have expanded to include advanced analytics and debugging for multiple blockchain networks.
Key Features:
Real-time analytics and monitoring.
Scalable API services.
Multi-chain compatibility.
10. IPFS (InterPlanetary File System)
IPFS is a distributed file system that enables decentralized data storage and sharing, a critical component of many blockchain applications. In 2025, IPFS’s advancements in performance and security have made it even more appealing for developers.
Key Features:
Peer-to-peer file sharing.
Efficient and secure data storage.
Interoperability with blockchain networks.

Conclusion
As blockchain development matures in 2025, these tools and frameworks empower developers to build innovative, scalable, and secure blockchain solutions. From Solidity for smart contracts to Substrate for custom blockchains, each tool offers unique benefits tailored to specific use cases. By leveraging the right combination of these tools, developers can stay ahead in the competitive blockchain landscape.
Optimize Your Blockchain Projects Today! Choose the best tools and frameworks to streamline your development process and achieve your blockchain goals in 2025.
0 notes
Text
Worldblog WordPress Blog and Magazine Theme

The Worldblog WordPress Blog and Magazine Theme will get buyer eyeballs on your site. LIVE PREVIEWBUY FOR $19


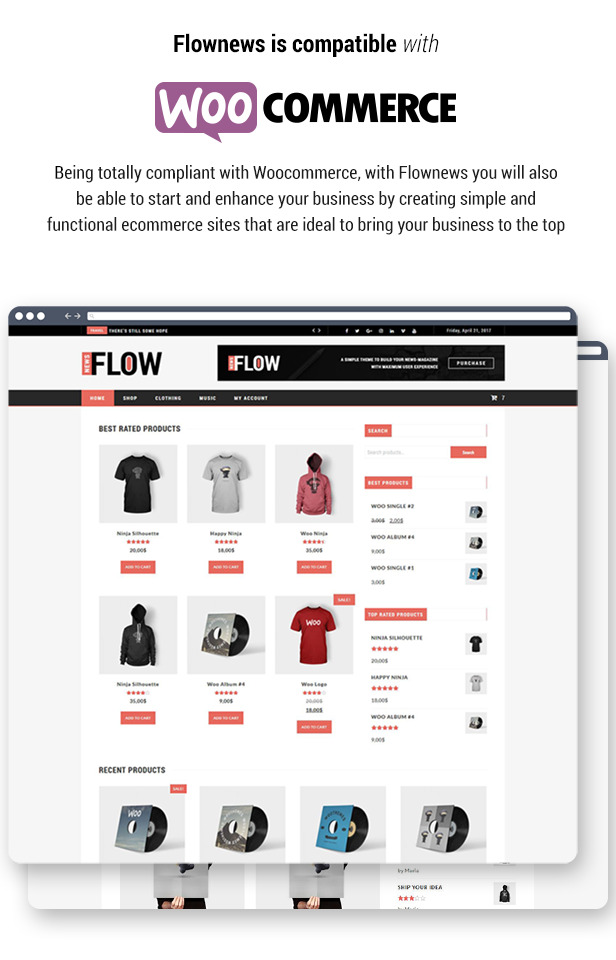


WorldBlog is the best blog and magazine theme for WordPress. Build your blog or magazine theme has never been easy. You can choose one from all our demos available. All demos are imported in one click. Flownews included 5 premium plugins: - WPBakery: Page Builder for WordPress - Fast Gallery for WPBakery Wordpress Plugin - Fast Media Gallery For WPBakery – Wordpress Plugin - Fast Gallery – Premium Wordpress Plugin - Fast Carousel – Wordpress Premium Plugin Save off 102$.
10+ demos available
News - Default - Food - Fashion - Travel - Photography - Wedding - Architecture - Fitness - Pet - Cakes - Interiordesign
Key Features
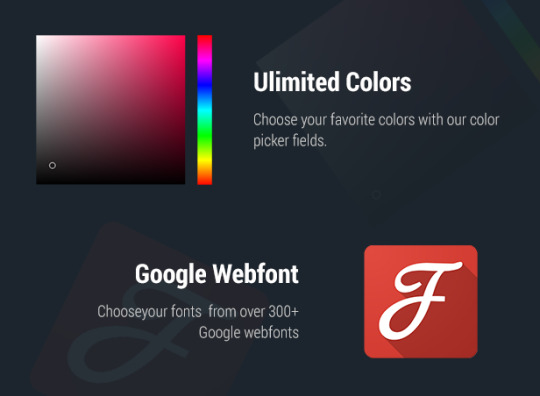
- Import each demo in one click - Category - 7 Different Layout Styles: Layout 1, Layout 2, Layout 3, Layout 4, Layout 5 Layout 6 Layout 7 - 2 Different Layout Types: Grid, Masonry - Up to 3 Columns: 1 Column, 2 Columns, 3 Columns - Sidebar: None, Right, Left - Blog - 7 Different Layout Styles: Style 1, Style 2, Style 3, Style 4, Style 5, Style 6, Style 7, - 2 Different Layout Types: Grid, Masonry - Up to 3 Columns: 1 Column, 2 Columns, 3 Columns - Sidebar: None, Right, Left - Pagination: Numeric, Normal, With load more - 6 Different Top content layout - Post - Standard / Image - Video - Audio - Comments layout - AMP - Sidebar: Left, Right, None - 11 Custom Widgets: Mega Posts, Social, Instagram, Advertisement, Slider Posts, Tab, Archive, Categories, Author, Contact, Tags - Unlimited custom sidebar - Grid/Masonry - 3 WPBakery Addons with 14 different styles - Mega Menu - Different Header layout easy to use. You can order header block with drag and drop - Footer customizable - Layout: Boxed, Full Width - WPBakery Included (save 34$) - WPBakery Custom Elements with 20+ different layouts - Headers - Blog Display - Posts Carousel - Fast Gallery for WPBakery included (save 14$) - Fast Media Gallery for WPBakery included (save 18$) - Fast Gallery included (save 18$) - Fast Carousel (save 18$) - compatible with Woocommerce. - compatible with bbPress. - compatible with BuddyPress. - compatible with WPML. - compatible with Polylang. - AMP. - Mailchimp supported using MailChimp for WordPress Plugin - RLT support. - Lazy load images option - CSS/JS Minify option - Unlimited Custom Colors - Google Fonts - Child themes support - Child theme included - Responsive. Flownews is perfectly responsive with all devices - Free Lifetime Updates - Content variable.(1200px, 1400px, 1600px) - Elite Support Source Read the full article
0 notes
Text
Universal Video Player WordPress Plugin v3.8.3
https://themesfores.com/product/universal-video-player-plugin-4383/ Universal Video Player WordPress Plugin v3.8.3 Universal Video Player plugin for WordPress supports YouTube, Vimeo, and Self-Hosted videos. It is a top-notch responsive HTML5 plugin compatible with all major browsers and mobile devices. It is the only plugin that you need to have for all your responsive video needs. Universal Video Player WordPress Plugin FEATURES: YouTube, Vimeo and Self-Hosted support: It plays YouTube, Vimeo and Self-Hosted video files. For YouTube and Vimeo, all you need to use is the video ID. The videos need to be public, not private or unlisted. Responsive Design: The plugin can be used in websites which are responsive. Optional parameter to disable responsive behavior in order to integrate it in non-responsive websites. Mobile Compatible: It is compatible with IOS and Android operating systems. Google Analytics: Option to activate Google Analytics tracking. You’ll be able to see how many times each video was played. Customizable Color Scheme: Any color scheme possible, customizable from parameters, so you can integrate this audio player in any design. Option To Automatically Obtain the Video Thumbnail, Title and Description From YouTube Servers All you need to use is the YouTube video ID and the plugin will get these information from YouTube server. Parameters to use your own information. Because Google has imposed data quota restrictions for YouTube API keys you’ll have to generate your own YouTube API key (which is free) and replace the existing YouTube API key. Playlist With 3 Versions: You can show the playlist thumb, title & description or hide one of them. Also parameters for playlist size and color. Playlist Search: You have the option to search the playlist. The results will be displayed as you type the search term. Categories: The playlist items can be structured in categories. A video can belong to multiple categories. Two Skins: You can choose from the 2 skins available: back & white. Also, from parameters you can create any color scheme, having the possibility to integrate it in any design. Download Option: Available button (on desktop) to download the current playing file (only for self-hosted videos). You have the option to hide the download button. Share: You can share your video player on Facebook and Twitter. Parameters to customize the share title and description. Show/Hide Playlist: Button to show or hide the playlist. Also option to load the player with the playlist hidden. Shuffle: Option to shuffle the playlist Logo/Watermark: You can define a logo in the top & left corner. Also, option to set the link and target_self or _blank. Multiple Parameters: Autoplay, loop (entire playlist), colors, dimensions etc. Over 85 parameters from where you can customize the player. Lightweight: The JS file has around 55KB Free Updates: Once you’ve bought the product, you can download for free, from your account, all the updated versions. Note for IOS/Android (restrictions imposed by Apple/Google) and other browsers: – it autoplays on IOS/Android only if the video is muted. When you set auto Play On Mobile :true, the video will mute automatically for mobile devices. – volume controls will not work on IOS/Android. You’ll have to adjust the volume with physical buttons of the mobile device. Note for Safari, Chrome & Firefox (restrictions imposed by Apple & Google): – Starting with Safari 11, Firefox 66 and Chrome 66 the autoplay will not work because Apple & Google disabled autoplay feature and it can’t be controlled from JS. It autoplays only if the video is muted – Starting with the version 66 of Firefox, autoplay was blocked, You can revert to the old behavior from browser settings, when autoplay was allowed. https://themesfores.com/product/universal-video-player-plugin-4383/ #ToolsPlugin #WordpressPlugins
0 notes
Text
A Comprehensive Comparison of Vue.js and Angular

Introduction
When it comes to building dynamic, high-performing web applications, selecting the right framework is crucial. Two popular choices in the world of JavaScript are Vue.js and Angular. Both frameworks offer unique features and benefits, making them suitable for different types of projects. In this blog, we will dive into a detailed comparison of Vue JS vs Angular, exploring their key features, differences, and use cases to help you decide which framework might be the best fit for your next project.
Exploring what is Vue JS and Angular JS
Vue.js, created by Evan You and released in 2014, is a progressive JavaScript framework designed for building user interfaces. It is known for its simplicity and ease of integration. Vue.js allows developers to incrementally adopt its features, making it highly flexible and adaptable for various types of projects. Moreover, Vue.js follows a component-based architecture where each UI element is encapsulated into reusable components. This modular approach simplifies development and maintenance. It uses a reactive data binding system that keeps the user interface in sync with the underlying data model. When the data changes, the UI updates automatically, which enhances development efficiency.
On the other hand, Angular, developed and maintained by Google, is a robust, full-featured framework released in 2010. It is designed for building complex, large-scale web applications. Angular provides a comprehensive solution with built-in tools and features, making it suitable for enterprise-level projects. Furthermore, angular follows the Model-View-Controller (MVC) architecture, which separates the application into three interconnected components. This separation helps in managing and scaling complex applications efficiently.
Key Differences Between Vue.js and Angular
Vue.js has a gentler learning curve compared to Angular. Vue’s straightforward syntax and detailed documentation make it easier for newcomers to grasp. Angular, with its comprehensive set of features and concepts, can be more challenging to learn, especially for beginners. Besides, Vue.js offers more flexibility and is often seen as less opinionated. This allows developers to integrate it with other libraries or existing projects with ease. Angular, on the other hand, is more opinionated and comes with a set of built-in tools and features, providing a more structured approach.
Both frameworks offer strong performance, but they approach it differently. Vue.js’s virtual DOM allows for efficient updates, making it highly performant for most scenarios. Angular’s performance is also strong, but its complex feature set and larger bundle sizes can impact performance, especially in larger applications. Angular, backed by Google, has a larger community and a well-established ecosystem. It offers extensive support and a wide range of tools and libraries. Vue.js, though younger, has a vibrant and growing community with a rich ecosystem of plugins and extensions, supported by a passionate group of developers.
Conclusion
In conclusion, both Vue.js and Angular are powerful frameworks with their own strengths and ideal use cases. Vue.js stands out for its simplicity, ease of integration, and flexibility, making it a great choice for developers who prefer a gentle learning curve and modular design. Its reactive data binding and component-based architecture facilitate efficient development and maintenance, especially for small to medium-sized projects. On the other hand, Angular provides a comprehensive, structured solution with its MVC architecture and built-in tools, making it suitable for large-scale, enterprise-level applications where a more robust framework is required.
Angular’s extensive ecosystem and community support add to its appeal for complex projects with high demands.
Pattem Digital a leading Vue JS development company offers expert consulting services to help businesses evaluate their project requirements and choose the most suitable framework, whether it’s Vue.js or Angular, ensuring optimal performance and scalability for their web applications.
0 notes