#unity ui tutorial 2020
Explore tagged Tumblr posts
Visit Tumblr Blog
Explore Tumblr blogs with no restrictions, modern design and the best experience.
Last Seen Tumblr Blogs


Fun Fact
Tumblr’s website traffic is steadily declining.
Link
Start menu in Unity - unity ui
C#,unity,script menu unity,unity ui tutorial 2020,créer un menu unity 2d,option menu unity,unity button start,unity ui builder,menu system unity,unity pause menu,
#c#unityscript menu unity#unity ui tutorial 2020#créer un menu unity 2d#option menu unity#unity button start#unity ui builder#menu system unity#unity pause menu
1 note
·
View note
Text
Kerbal Space Program 2 coming in 2020!
Kerbal Space Program 2 is the sequel to the acclaimed space flight simulation game Kerbal Space Program from Star Theory and Private Division.
The original Kerbal Space Program is one of the most beloved games of all time and, years after its release, it's bigger than ever before. Its sequel, Kerbal Space Program 2, has been fully redesigned from the ground up to meet the demands of modern and next-generation space exploration, all while maintaining the monumental foundations of the first game. Build a space program, construct powerful spacecraft, establish colonies, and take on many other challenges to explore new cosmic mysteries. A plethora of exciting new features will captivate veteran and returning players, as well as usher in a whole new wave of Kerbonauts to the ingenious and comedic world that has entertained millions.
VIDEO
Official Kerbal Space Program 2 Cinematic Announce Trailer
youtube
Kerbal Space Program 2 Developer Story Trailer
youtube
Get more info on everything KSP 2 here:
https://www.kerbalspaceprogram.com/game/kerbal-space-program-2/
Don't miss another KSP launch!
https://www.kerbalspaceprogram.com/
https://www.facebook.com/kerbalspaceprogram/
https://www.instagram.com/kerbalspacep/
https://twitter.com/KerbalSpaceP
https://www.youtube.com/user/KerbalSPOfficial
Follow Star Theory Games for more updates from their team.
https://startheory.com
https://www.facebook.com/startheorygames
https://www.instagram.com/star_theory_games
Follow Private Division for more updates and learn more about our other games
https://www.privatedivision.com
https://www.facebook.com/PrivateDivision
https://twitter.com/PrivateDivision
https://www.youtube.com/PrivateDivision
A note on Kerbal Space Program 2 from Squad
Read the note from Squad here.
Follow Squad for more updates from their team.
https://twitter.com/SquadDevs
https://www.instagram.com/squaddevs/
Fact Sheet
For more information on Kerbal Space Program 2 please visit our website here
FREQUENTLY ASKED QUESTIONS
Kerbal Space Program 2 Release Related Questions
Q: Where will Kerbal Space Program 2 be available? A: Kerbal Space Program 2 will be available on PC and Console (Xbox One, PS4) in 2020.
Q: Will it be released on all digital distribution store platforms? A: Kerbal Space Program 2 will be released on Steam and other digital storefronts, as well as Xbox Games Store and PlayStation Store.
Q: How much will Kerbal Space Program 2 cost? A: $59.99 USD
Q: When will the game be released on Console? A: Kerbal Space Program 2 will be released for Console after the PC release, which is in 2020.
Q: Why is the game coming to consoles after PC? A: We would like to take additional time to make sure the console version feels great for players on all platforms. Instead of holding back our launch for PC fans we plan to release separately.
Kerbal Space Program 2 Game Related Questions
Q: What features can we expect? A: Star Theory Games have added several brand-new features to Kerbal Space Program 2. A plethora of exciting new features will captivate veteran and returning players, as well as usher in a whole new generation of Kerbonauts to this ingenious and comedic world that has entertained millions.
Key Features
● Improved On-boarding: Kerbal Space Program 2 will create a whole new generation of spaceflight experts who will find themselves accidentally learning rocket science. New animated tutorials, improved UI, and fully revamped assembly and flight interfaces allow both experienced and novice players to quickly put their creativity to the test without sacrificing any of the challenge from the original game.
● Next-Generation Technology: In Kerbal Space Program 2, the astoundingly inventive creations that KSP is known for will be taken to a whole new level. Players will be delighted and challenged by next-generation engines, parts, fuel, and much more. This new tech will enable new feats of space exploration within and beyond the original Kerbolar System.
● Colonies: Players can now build colonies in Kerbal Space Program 2. These colonies not only pose their own physics challenges to build, but also require players gather resources to build structures, space stations, habitations, and generate unique fuel types. Eventually, these colonies become advanced enough for vehicle construction, propelling deep space and beyond.
● Interstellar Travel: Next-gen tech, colonies, and resource collection work together to enable a new kind of exploration: interstellar travel. In Kerbal Space Program 2, these interstellar technologies pave the way to a host of new celestial bodies, each comprising new challenges and harboring new secret treasures.
● Multiplayer/Modding: An all-new architecture underlies Kerbal Space Program 2, enabling increased moddability and the long-awaited arrival of multiplayer. We look forward to revealing more about the ways you'll share your Kerbal journey with friends at a later time.
Q: Will mods be as supported in KSP2 A: Kerbal Space Program 2 has undergone a deep structural overhaul that has enabled us to give modders unprecedented access to systems they could not touch in the original KSP. We can't wait to reveal more details about mod support at a later time.
Q: What engine will KSP2 run on? A: Kerbal Space Program 2 is developed using Unity.
Q: Will I be able to transfer my saves/account to KSP2? (backwards compatibility) A: Saves from Kerbal Space Program 1 will not be compatible with Kerbal Space Program 2.
Q: Will existing mods will be supported? A: Existing Mods will not be compatible on Kerbal Space Program 2.
Q: What can we expect from the expanded universe in Kerbal Space Program 2? A: Kerbal Space Program 2 allows players to explore beyond the Kerbolar system for the first time into new and uncharted territories. Interstellar technologies pave the way to a host of new celestial bodies, each comprising new challenges and harboring new secrets. Among them: Ovin, a ringed super-Earth with relentless gravity; Rask and Rusk, a binary pair locked in a dance of death; and many more to reward exploration.
Q: What type of physics can players expect? Advanced, realistic, etc? A: Realistic vehicle physics and orbital mechanics continue to be at the center of the Kerbal experience. We've focused on optimizing vehicle physics to allow for the smooth simulation of larger structures on a wider variety of PCs.
Development Team Related Questions
Q: What will happen to Squad? A: Squad will continue supporting the current game, so you can expect new content and updates being released for Kerbal Space Program 1. Some members of the team will be assisting Star Theory in various capacities to make the best possible sequel.
Q: How can I learn more about Star Theory Games? A: The Star Theory Games team are designing a sequel we believe the entire Kerbal Space Program community will thoroughly enjoy. If you’re curious about what went into creating Kerbal Space Program 2 dive into the Developer Story video.
Q: How do we know if Star Theory Games has the capability of developing a worthy successor to our favorite game? A: The team behind Star Theory Games are skilled video game developers as well as lifelong fans of Kerbal Space Program, with multiple members of having played 2000+ hours of the original KSP. The principal engineer even has a background in the aerospace industry. Their skill set in combination with a deep understanding of what makes this game great has led to the creation of an amazing sequel we know you’ll love to challenge yourself with! If you’d like to learn more about the amazing team behind Kerbal Space Program 2 be sure to watch the Developer Story video.
178 notes
·
View notes
Text
Week 5
17/08/2020 Monday
Starting Assessment 1
We started working on the 40% assessment as it is due next week, we are collaborating as a group for project outline, team members, time management, and evidence of making. This leaves us too individually write the individual contribution, and the evidence of research headings as specified on the Assessment 1 PDF.
Research
I started my individual research finding some good references to read over later. These references look relevant as they discuss the positives for augmented reality, and how using it for teaching students is proving to be more fruitful in today's social climate. I also looked into some popular augmented reality apps to model our projects functionality off of, the most popular apps that I will be looking into are: - Pokemon Go - Wizards unite - Ingress Prime
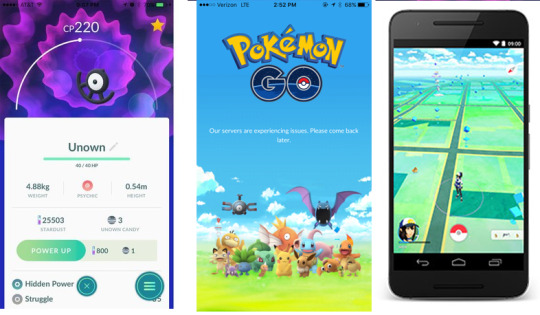
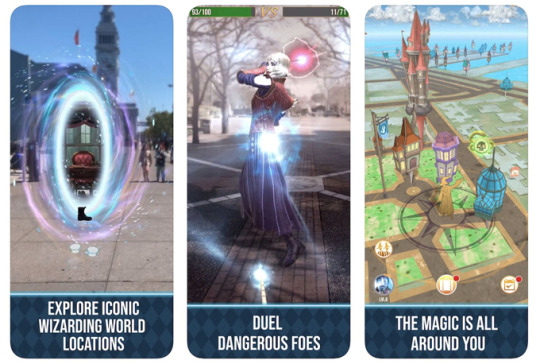
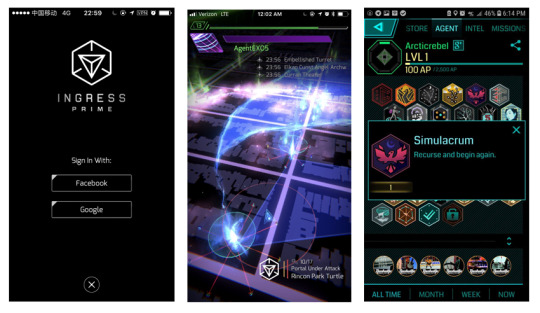
Due to these all being games I also think it’ll be good to look into some mapping based applications not specific to AR as they would be good to use as a reference.
Setup AR project
Lastly I set up a unity collaboration project, Since Matt and I have been working separately our progress was difficult to track. I set up a shared project like last semester allowing for Matt, Ashton, and I to all add to the project through unity collaborate. Only the three of us can work inside the project as only three people can have access to a unity collaborate project (without paying for extras). it will mainly be Matt and I working in unity since Ashton and Hannah are working on the visual design for the application.

18/08/2020 Tuesday
Assessment discussion
The group had a brief discussion about the assessment going over the headings that weren’t required to be written individually. Since we have a shorter amount of time to work together than other days we then decided to just go into our own individual researching.
Individual research
I look further into the references I’d previously found, they described how AR can be used for teaching, and what software they used to create the AR applications. Since I'm primarily based in the coding/technical side of the project these kinds of references are good for showing how what I’ve looked into is influencing the project. One specific reference goes into quite a lot of detail about the asset that they used within Unity. The asset is called Vuforia and is the same one we have been using, this is great as it gives backing to why we chose to use this asset and also possibly can help us with creating the project as they've gone into quite a lot of detail. I've also been recording the YouTube tutorials I've been following as they are also useful for the researching section.
19/08/2020 Wednesday
Prototyping
Today we decided to create some more prototypes for the crit sessions. We haven't decided on how the AR application would function so we went off individually to make prototypes for how the application would look and it's many different stages. Ashton and Hannah used Adobe XD to create some visual prototypes while Matt also drew up some visuals, so I decided to create a prototype within the collaboration project. I did this by looking at my previous unity projects that I've made and following a YouTube tutorial that shows how to navigate between scenes. Scenes are basically where one aspect of the project is contained for example a menu screen, while another scene can contain the actual game, projects are separated into scenes in order to combat lag. In the end I created four scenes: Menu, Icon, Info, and Map shown bellow in the Gif.
Unity has built in UI objects these allow for easy transitions scenes such as the buttons in the GIF. Fortunately because of how unity is built these should run smoothly on a phone using touch controls. I will test this out later.
GIF showing lofi-prototype of app functionality:
Crit sessions
The session went well, and we got a lot of positive feedback for our project idea. We didn't use what I'd created in unity as what Ashton and Hannah had made in Adobe XD portrayed the project nicely. what I had made is not in vain as it will be used when making the application in unity. With the feedback for the crit session A lot of it was on previous ideas and concerns we'd already addressed as a group allowing us to easily discuss the alternatives to some problems. For example, one such problem is the idea of people posting negative/inappropriate content on the AR application. The possible solutions for this problem we’d thought of were adding an ability for the participants of the app to dislike certain content. If certain content got enough dislikes it could be deleted we also could have moderators or a program that removes the negative content.
iPhone test
I tested building the project that I had created with the four scenes to an iPhone. It was unable to do so as the Mac I used did not have the software update required. Ashton’s mac also does not have the update required to build to newer iPhones so hopefully we'll be able to use the university mac’s when lock down ends.
21/08/2020 Friday
Testing project
Today I got my camera that I had ordered from Pb-tech so now I can properly test the unity project. Unity can test out an AR project through a computers laptop so now that I have one I set up a testing scene. I did this by following the video that Matt had use for his test and got it working. When setting up this test I had to create a database on the Vuforia website this database holds images I've taken of real world objects, that I then download back to the unity project and set up so that when the camera sees the object come into frame a function will happen. For testing I made it so that a cube will appear. This is all I did Friday as it is a shorter day for me due to having a different class on. GIF showing working AR project:

1 note
·
View note
Text
Update 1.1 + Code reset
Hello everyone; I'm gonna be honest, I forgot that I had this blog, sorry 😅.
I'm here to say that two things happend: 1.1 update of Marieta and that I restarted Marieta's development from scratch.
First of all, the new update, 1.1 is not a feature heavy update; it's just bug fixing, code optimization and little QoL (Quality of life) improvements.
Here's the list:
Support for browser builds. You can play Marieta online in my Itchio or Gamejolt pages. Links are at the end of the post.
Now the game is playable in all kinds of resolutions; the UI no longer messes up (with some menu exceptions).
FPS counter when playing. I doubt if it really shows the real FPS that the game is running at, but at least it's something.
Bugfixed the Warp Menu Cursor misbehaviour in the Help Menu.
Removed the weird frames that could appear sometimes of older versions of the menu.
Now for the last (and most important thing): the code reset.
I started developing this version of Marieta (that I internally name as "r2") in mid-November 2019. By that time, my knowledge about Unity was null. I followed a line of Spanish Unity tutorials by Alva Majo ("Unity para retrasados"), and I developed the first version of Marieta (0.9.2.12; 3rd January 2020) using content from those tutorials.
I expanded my knowledge with more tutorials, seeing "behind the scenes" videos and a lot of StackExchange questions. Though this time, I've remaded parts from several scripts several times but some scripts where becoming to chaotic to work on.
Mainly, the MarietaMoves one, originally only intended for Marieta's moves but now controlls the items, the gamemodes, the pause menu, the speed and part of the score system.
Now that I'm taking a Unity online course, I decided to restart development of Marieta (under the internal name of "r3") to recode it's mechanics.
Things like different gamemodes, touch screen inputs and other small animations were not possible in the old version (or at least, not possible without major changes).
This reset should allow me to add this features and others that may come in future updates.
I don't want to promise anything about for when I'll have this new version ready. I'm currently aiming for mid-September, but I'll have to see how it's going...
Here are the links of the game pages:
Itchio: xavizard-knight.itch.io/marieta
GameJolt: gamejolt.com/games/marieta/438542
1 note
·
View note
Text
Day 11 - Project Setup and Naninovel
So, as my post said before, I'm back! With new energy, took a long break during the Covid era and learned a lot. This time, I'll be attempting to use Naninovel to throw in a script we've been working on (something also from all that time ago). It's a project related to companion, but with a much smaller scope! The first thing I did, was clean up my version control. It's been a while, and my PC has not been upgraded all this time, so things are a little rocky. Version control is extra important to me, for both personal work and in my day job.
I talked about version control briefly, all the while back in 2020.
Gitignore file
Another important thing, I forgot about was my gitignore file. Github desktop has a limit of 100mb files, unless you're using Git LFS. Other than that, your project has a lot of files that are unnecessary to share with others. Nobody needs to redownload all your unity settings! There's a handy .gitignore file available on github, and on the unity site. This should cut bloat. My repository changes went from 26k+ to about 1,000 when after adding a .gitignore file to my project. Webhooks Once I made my project, I set up webhooks to our private discord channel and pushed it to see if things were all OK there. Back in Unity, I downloaded and installed the naninovel package from the Package manager.
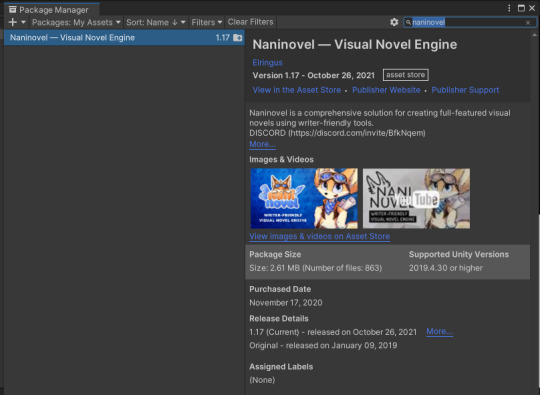
Exciting! Immediately, I was able to create a naninovel script asset, to get started on testing our small idea.
I've chosen to do my script writing in VScode. The first thing I wanted to know how to do in Naninovel was to have 'comments statements'. Sections of your code that are ignored by the engine, and thus 'commented out'. Usually, comments are a #. A format I use in my writing often.
However, in Naninovel, comments are represented by " ; " and "#" are used for jump labels. In my first test/write-through, this will be especially useful for me to comment out parts of code and directions I want to add later or give myself direction.
The other thing I wanted to set up, was the VSCode extension to make my life a little easier, but apparently, I already had it installed! The Naninovel DEev, Elringus, has a good tutorial on this.
That's about as far as I got in my exciting journey. The rest of the time, it was fairly easy to implement character/actor records, and start adding dialogue. I anticipate what will be tricky is designing UI for multiple sizes in Unity, rather than the more visual novel side of things.
0 notes
Text
Mobile Game Development II Reflection
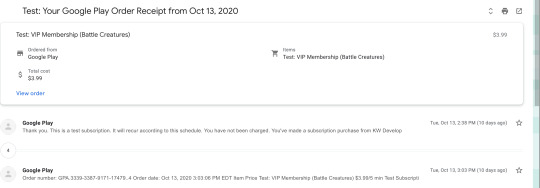
This class was all about continued development of my capstone, Battle Creatures. I completed milestones 4-6. These milestones were focused on setting up the in-game store. I watched a couple of Youtube tutorials on how to create an in-game store and connect it to Google Play Billing through Unity IAP. Connecting Unity IAP to Google Play was easier than I thought. After getting everything setup, I conducted a test utilizing Google Play’s internal IAP testing console to see if it was functioning properly. Once a player powers by purchasing gems or a wisdom potion, a notification about the power up is sent to the other player via text chat. I also introduced use of another Android hardware component, the camera. Players are now able to take photos with their devices and send them to each other across a PHP server. Players can also press the emoji icon buttons that are attached to the chat panels and send emojis to each other across the same PHP server. The IAP includes in-game VIP membership, in which a list of other VIP members are displayed that are in range of your IP address; extra security features, cheating prevention, and daily rewards. The extra security is hashing of important player data and insertion of that data to a file on your device. Hashing provides better security than encryption. Encrypted messages can be easily decrypted and hashed messages cannot be translated. The cheating prevention limits speed hacking which modifies the game’s perception of time to either slow down or speed up the game. This can be done to fast-forward through lengthy sequences or slow down targets so they are easier to attack. A game program’s concept of time is based on calls to the clock functions offered by the operating system. Through the use of general-purpose hacking tricks, it is possible to hijack these calls, thus modifying the game’s concept of time (e.g., by making the value of Time.delta time larger or smaller by some factor). Once a speed hack is detected, the server will be automatically shutdown.
Milestone 4 video link: https://www.youtube.com/watch?v=6AtnYbDUdEQ
Milestone 5 video link: https://www.youtube.com/watch?v=4FbgDlgFaY8&t=3s
Milestone 6 video link: https://www.youtube.com/watch?v=VUHXZf1UHMc
Google Play Billing Test Receipt
I conducted a CPU profiler assessment for Unity 3D. This is a study of Battle Creature’s processor consumption throughout its lifecycle. Improving the CPU performance of the game code may increase memory usage or offload work to the GPU. When loops are nested, inefficiencies occur often. Inefficiencies can add up if they are in a loop that runs very frequently, such as in an Update function (Unity Technologies, 2020). I don’t have many loops within my code. The loops that I have aren’t included in Update functions. I don’t have the Update function included in many of my game scripts. Find() and related functions require Unity to iterate over every GameObject and Component in memory (Unity Technologies, 2020). This means that as the complexity of a project grows, more CPU power is utilized. I reduce the use of Find() in my code by setting references to objects using the Inspector panel where possible, or creating scripts that manage references to things that are commonly searched for.
CPU Activity Screenshots


During a user test, the issue of users connecting beyond LAN came up. Since the user test; I’ve done research on MMO games and implementing non-LAN playing with TCP, Unity 3D’s UNET, etc. I’m currently following a tutorial on implementing non-LAN playing with Unity 3D’s UNET. Once I have completed the non-LAN programming and UI setup, I will do another user test to ensure that it is functioning properly.
Product Backlog

References
Unity Technologies. (2020, May 25). Fixing Performance Problems. Retrieved from https://learn.unity.com/tutorial/fixing-performance-problems#
0 notes
Link
Learning Android app development may seem like a daunting task, but it can open up a huge world of possibilities. You could create the next “hit app” that changes the way we work or interact with each other. Maybe you’ll develop a tool that you can use yourself to improve your workflow. Or perhaps you’ll just gain a new skill that lands you a great job!
Also read: Making an app with no programming experience: What are your options?
Whatever the case, learning Android app development might not be as tough as you think, as long as you understand what all the different moving parts are for, and have a roadmap to guide you through. This post is that road map!
Step 1: Downloading the tools you need for Android app development
First, you need to create your development environment so that your desktop is ready to support your Android development goals. For that, you will need Android Studio and the Android SDK. Thankfully, these both come packaged together in a single download that you can find here.
Android Studio is an IDE. That stands for “integrated development environment,” which is essentially an interface where you can enter your code (primarily Java or Kotlin) and access all the different tools necessary for development. Android Studio allows you to access libraries and APIs from the Android SDK, thereby giving you access to native functions of the operating system. You’ll also be able to build your app into an APK using Gradle, test it via a “virtual device” (emulator), and debug your code while it runs.
With all that said, keep in mind that there are other options available for your Android app development. For example, Unity is a very powerful tool for cross-platform game development that also supports Android. Likewise, Visual Studio with Xamarin is an excellent combination for creating cross-platform apps in C#.
We have handy guides to getting started with each of these options:
How to create non-game apps in Unity
An introduction to Xamarin for cross platform Android development
Android Studio is the best place for most people to start (with Android game development being an exception), particularly as it provides all these additional tools and resources in a single place.
Fortunately, set up is very simple and you only need to follow along with the instructions on the screen.
Get set up with Android Studio by following our handy guides:
Android Studio tutorial for beginners
How to install the Android SDK
Step 2: Start a new project
Once you have Android Studio on your machine, the next step is to start a new project. This is a straightforward process, but you’ll need to make a few decisions that will impact on your Android app development going forward.
Go to File > New > New Project. You will now be asked to select a “Project Template.” This defines the code and UI elements that will be included in your new app when it loads.
The word “Activity” refers to a “screen” in your app. Thus, a project with “No Activity” will be completely empty, apart from the basic file structure. A “Basic Activity” on the other hand will create a starting screen for your app and will add a button in the bottom and a hamburger menu at the top. These are common elements in many Android apps, so this can save you some time.
That said, it can also risk making things more complicated when you’re first getting to grips with development. For that reason, we’re going to choose the “Empty Activity.” This will create an activity and some files for us, but it won’t add a lot of additional code.
Choose a name and “package name” for your new app. The name is what your audience will see when the app is installed on their device. The package name is an internal reference used by Android to differentiate it from other apps. This should be composed using your top level domain (e.g. .com), domain name, and app name.
For example: com.androidauthority.sampleapp.
If you don’t have a domain or a company, just use “com” followed by something that appeals to you!
You’ll also need to decide where you want the files to be saved and what language you’re going to code in: Java or Kotlin.
Java vs Kotlin for Android app development
One of the biggest decisions you’ll need to make as an Android developer is whether you’re going to learn Kotlin or Java. Both languages are officially supported by Google and Android Studio, but they have some distinct differences.
Java has been supported by Google the longest and is what developers have been using to craft Android apps for years. Java is also one of the most in-demand programming languages in the world, which makes it a great choice for those who want to begin a career in development. As the oldest Android programming language, there is also slightly more support for Java vs Kotlin, although it’s not by much.
Kotlin on the other hand has become Google’s preferred choice for Android development. This is the default when starting a new app, and it is likely to become more common going forward. Kotlin is also significantly easier to get to grips with if you’re a complete beginner.
For these reasons, Kotlin is probably the language of choice for Android developers that are learning for fun, or that have no aspirations to develop for other platforms. However, Java makes more sense if you’re interested in becoming a professional developer.
You can learn more about the two options here:
Kotlin vs Java for Android: key differences
Minimum SDK
Finally, you also need to consider your Minimum SDK. This is the lowest version of Android that you want your app to support.
The lower you make this number, the broader your potential audience will be. Keep in mind that there is a relatively low adoption rate for the latest versions of Android, so sticking with the latest update will prevent a lot of users from trying your creation. If we leave the version as the default (Android 10), then we only support 8.2% of devices!
Google: do better.
However, you will only be able to access the latest features of Android if you target a more recent version. If you like the sound of supporting chat bubbles, then you’ll want to stick with the most recent version.
Step 3: Familiarize yourself with the files
I remember the first time I tried Android app development. I loaded up Android Studio and was immediately baffled by what I saw. There are just so many different files, multiple types of code, folders, and more! This was worlds away from the single blank file I was used to working with in Python or even QBasic (anyone remember QBasic??).
This can be rather daunting, but here’s what you need to know.
The file that is open is MainActivity.java or MainActivity.kt. This is the main logic file for the activity that is going to define how your app behaves. Look on the left, and you’ll see that this file is found in: MyApplication > app > src > main > java > com > companyname > myapplication.
The folders used are important for Android app development, as they help Android Studio and Gradle to find everything and build it correctly (more on Gradle in a moment). Suffice to say, you can’t just rename these as you please!
You’ll notice that there is already some code on the main page. This is what we call “boilerplate code,” meaning that it is code that is almost identical across different app projects and that is needed to make basic functions work. Boilerplate code is what you’ll find yourself typing out over and over again! One of the benefits of Kotlin is that it requires less boilerplate, meaning that you’ll have less code on your screen if that is what you chose.
Introducing layout files
The role of this code is to tell Android where the associated layout file is. A layout file is slightly different from a Kotlin/Java file. This defines the way that an activity looks, and lets you add things like buttons, text, and browser windows.
You’ll find this file in: MyApplication > app > src > res > layout.
It will be called activity_main.xml. Note that files stored in the resources folder can’t use capitals; they need to use the underscore symbol to distinguish different words. Double click on this file and it will open in the main window where you edit your code. Notice that you can switch between the open files using tabs along the top.
You can view this file via the “Code” view, the “Design” view, or a split view that shows these windows side-by-side. There are buttons to switch mode in the top right.
In the design view, you can actually drag and drop different widgets onto the screen. The code view shows you a load of XML script. When you add new widgets via the Design view, this script will update. Likewise, you can tweak properties of the widgets (called “views”) in here and see them reflected in real-time via the Code view.
In the vast majority of apps, you’ll need to create a new Java/Kotlin file and a corresponding XML file, each time you want a new activity. And for those that were wondering: yes, that means you have to learn either Kotlin or Java and XML. This is a bit of a headache, but it actually simplifies the process in the long run.
For an introduction to using XML, check out this guide:
An introduction to XML for new Android developers – the powerful markup language
To get to grips with the different views and what they do:
Building your Android UI: Everything you need to know about Views
The other files and folders
There are lots more files and folders here though, so what do they all do?
In truth, you don’t need to know what everything here is. But some things that are useful to know about:
The Android Manifest: This is an XML file in the res folder that defines important features of your app. That includes the orientation of the app, the activities that you want to be included in it, the version, etc.
For more, read:
xml: everything you need to know
Drawable: This folder is found in res. This is where you will put things like images that you want to reference later.
Values: This resource folder is a useful place to store values that will be used globally across your app. For example, this can include color codes (making it easy for you to change the look of your entire app) or strings (words). You’ll define these values in individual XML files, such as colors.xml.
Gradle: Gradle is the tool that takes all your files and bundles them into a workable APK for testing. It is also useful for generating previews etc. You won’t need to worry about the files in here often, but if you want to add a “dependency,” this is where you will do it. Dependencies are external libraries that let you access additional functionality from within your own code.
Learn more about Gradle and how it works here:
Introducing Gradle for new Android developers – The master builder
Step 4: Test your app
The first thing that you are supposed to do when familiarizing yourself with any new programming language, is to create an app that says “Hello World.” Thankfully, this is very easy in this case seeing as that’s what the code that’s already here does! If you look at the XML, it includes a small label that just says: Hello World!
If you look at the controls along the top, you’ll see there’s a little green play arrow. On the left of this is a drop-down menu, with a phone name in it. When you installed Android Studio, this should also have installed an Android system image along with the Virtual Device Manager. In other words, you should already have an Android emulator set up and ready to go! By clicking on this green arrow, you’ll be able to launch that and test your app! Notice that this will also let you use the emulated phone as though it were a real device.
You can change the settings for your virtual device – such as screen size, Android version, space etc. – by going to Tools > AVD Manager. You can also download new system images here. Make sure that your virtual device meets or exceeds the minimum SDK you set at the start.
Alternatively, you can try plugging a physical device into your computer and using this to test your new app. You’ll need to turn on Developer Options though, and enable USB Debugging.
How to enable Developer Options on your Android Device
Step 5: Make a thing!
The best way to learn Android app development is by doing! That means you should have a stab at editing the code in front of you, to see if you can make it do something new.
Changing the message that displays is as simple as going into your XML and changing the line that says “Hello World!” into “Howdy World!”
But what if you want to add some kind of interactive element to your creation? In that case, you might decide to let the user click the button to change the text.
First, you’ll need to place this line inside the TextView tag in your activity_main.xml:
android:id="@+id/helloButton" android:onClick="onHelloButtonClick"
This will give the text label the name “helloButton” and will state that the method “onHelloButtonClick” will reference this view. We’re going to add that to our code in a moment.
Now you can add the following code to your MainActivity. If you see any text appear red as you are typing it, that means you need to “import” that code from the Android SDK. Click on the red text then press Alt + Enter and Android Studio will do this for you automatically. In short, this tells Android that you are referencing a library that is a part of the Android SDK.
(The following example is written in Java.)
public class MainActivity extends AppCompatActivity { TextView helloButton; @Override protected void onCreate(Bundle savedInstanceState) { super.onCreate(savedInstanceState); setContentView(R.layout.activity_main); helloButton = (TextView) findViewById(R.id.helloButton); } public void onHelloButtonClick (View v) { helloButton.setText("Howdy World!"); } }
In this code example, we first create an “object” in the code called “helloButton.” Inside our “onCreate” method (everything within the curly brackets) we then tell Android that this object represents the button in our layout file. The code you place here is what will run first when you launch an app.
Next, we create the method that runs when someone clicks on the button. Once that happens, we can then change the text on said button. Notice that once again, Kotlin requires significantly fewer lines to achieve the same thing!
Run the app and you should now see that when you click the button, the text changes!
This is a very simple app, but it demonstrates the basics of how Android app development works. Generally, you will be creating new on screen elements in the layout file, then defining how they behave in the associated Java or Kotlin file.
As you get more advanced, you’ll need to start manipulating and storing data. To do this, you’ll use variables which contain numbers and strings (words).
We have Java tutorials that will help you get started:
Java tutorial for beginners: write a simple app with no previous experience
Once you’ve read through that, you’ll have a basic idea of how Java works, and all that is left is to learn how you can apply these skills to Android app development. To that end, a great strategy is to pick a project and then work on that.
And wouldn’t you know it: we have a ton of great projects to try out! Here are just a few:
An easy first project for Android app development noobs: math game
Let’s make a simple Star Wars quiz!
How to write your first Android game in Java
The key is not to try and learn “all of Android app development” but to set your sights on a realistic first project. You’ll keep learning as you add new features and want to do new things, and having a goal will keep your learning fun and structured. Before you know it, you’ll be a pro!
source https://www.androidauthority.com/android-app-development-1128595/
0 notes
Text
[KR] 4/3/2020 - KR Test Patch Notes Summary
Source: http://heroes.nexon.com/news/update/view?postno=919
[Current problems:] - You're not able to see the [Battle Appearance] button in the inventory. : Please note that the above problem doesn't occur on LIVE server. : This issue will be resolved in the next test server update.

[Battles] [Season 4 Episode 2] - New 4-player RAID battle: [The Brotherhood of Darkness] : Accessible from [Kelsina Mountain] area of [To Taratha] map. : Raid Boss: [Nyle]. : The battle is limited to 1 successful battle per day. (10 for Test Server, 12 if you have VVIP/PC CafГ© Buff) : The battle consumes 24% of [Fatigue] gauge. : [Nyle] Known Stats: > Critical: 200 > Crit Resistance: 151 > Counterforce Resistance: 60 : [Quick Battle] Requirements: > Combat Power: 55 100 > Technique: 246 > Counterforce: 138 [Story] - Season 4 Episode 2 story will become available with the official server update. - Added a new quest [About Battles], followed by a tutorial for the [Battles] window. : Obtainable after completing the [Friendship Sword] story. : Players can use [Battles] UI even if they haven't completed the above quest. - Modified the story [Quick Battle] to appear after completing the [Rupture] story (Season 3 Chapter 2 Episode 3). : Players can still use [Quick Battle] feature as long as they meet the prerequisite level. - Fixed an issue where the [Story Progress] button was missing in the following story quests: : [Hoo-man Hunter]; : [New King of Erinn]. [Battle Balance Changes] - The following normal battle bosses will have adjusted battle patterns and balance. : [Ben Chenner Entrance] - Wood Elf Captain, Enkidus, Valus; : [Ben Chenner Trailhead] - Wood Elf Ranger, Barchadus; : [Ben Chenner Summit] - Wood Elf Warlock, Thantanus, Ancient Werewolf; : [Lochlann Plains] - Epidemius, Eochaid; > [Eochaid] boss will now move back to his nest only once. > Increased the range at which the character can use [Chain Hooks] to separate [Eochaid] from parasite. : [Berbhe Downtown] - Manus, Orlaith, Odhran the Maniac, Captain Baethan, Judge Jamiroff, Hagan, Lorgrach, Hexad; : [Donegal] - Conall Cernach, Abadok, Eviscerator, Erkanbald, Duvanak, Johanus; : [Aiden Fortress] - Conall Coldheart, Lubash the Usurper, Striker Antinoff, Trainer Ruffman, Guardian Rashanad, Holy Warrior Amos, Cold Shaban. - The following BOSS monsters will have adjusted battle patterns and balance: : [Dullahan] (Absence of the Soul) > Reduced the number of times required to separate Dullahan's soul from Dullahan using Soul Separation Stone. > Dullahan's soul doesn't fuse with Dullahan when approaching him. The fusion process will happen after automatically after a certain period of time. > You're no longer able to interrupt Dullahan's enhanced soul attack; > Dullahan will use the Enchanted Soul attack once per battle; > Modified the Bonus Goal "Separate the soul from Dullahan 3 times" to "Separate the soul from Dullahan 1 time". : [Aes Sidhe] (Price of Failure) > Lowered overall difficulty; > Reduced the number of times Aes Sidhe can perform summon attacks to 2 times per battle. : [Arcana] (Iron Grip) > Lowered difficulty of certain attack patterns; > Reduced the number of times Arcana can lock the character in her Torture Chamber to 1 time per battle; > Reduced HP of Arcana's Torture Chamber; > Reduced the number of kicks required to break free from Arcana's Gunplay Mode. : [Rupacitus] (Distorted Truth) > Significantly reduced the number of javelins required to flush out Rupacitus; > Javelins now deal significant damage to Rupacitus. : [Macha] (Red Stigma) > Player characters will no longer become incapacitated when Macha's HP is under a certain amount during the 1st phase of the battle, even if not all tower seals were destroyed; > Macha won't enter enraged state upon proceeding to the 2nd phase of the battle without breaking the tower seals. : [Lugh Lamhfada] (Brilliant Lugh) > Modified the light to be more visible when the character absorbs 3 Tathlum Orbs. : [Marject] (Underground Laboratory) > Lowered overall difficulty. - If the party leader leaves and reenters the battle, all party members will resume the battle in a post-revival state; - Fixed an issue where [Evie] characters could repeatedly supress [Heath Knight Caesar] using the [Werewolf Paw]; - Fixed an issue where player characters couldn't leave the party during the boss fight; - Fixed an issue where camera would shake abnormally after completing the battle; - Fixed an issue where the game wouldn't return to the normal speed after completing the battle.

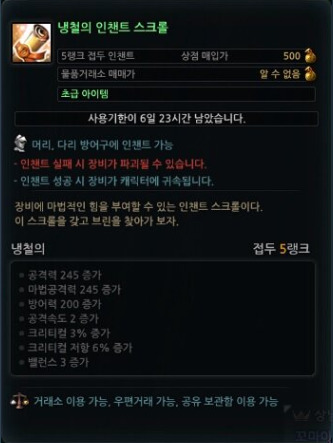
[Items] {New Rank 5 enchant scroll} - [Cold-Blooded Enchant Scroll] : Rank 5 Prefix, for Head and Leg Armor; : Stats: > ATT +245 > M.ATT +245 > DEF +200 > Attack Speed +2 > Critical +3% > Critical Resistance +6% > Balance +3 : Can be obtained from battle [Siege of Rocheste].
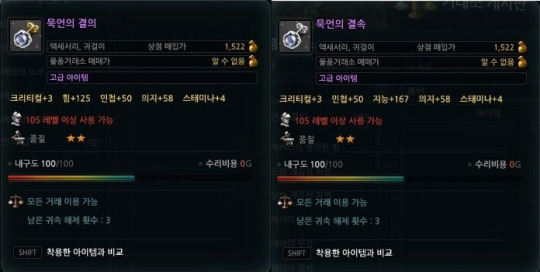
{New Lv 105 Earrings Accessories} [Silent Determination] & [Silent Unity] : Critical +3, STR +125/INT +167, AGI +50, WIL +58, Stamina +4; : Craft Materials: [Nyle's Essence x1] [Smooth Legendary Fragment x2] [Solid Legendary Fragment x1] [New Era Orb x20] [New Era Leather x20] [New Era Ore x40];
- Modified the [Rare Treasure Chest] properties to be discardable or sellable to the NPC; - Fixed an issue where a character could use [Server Megaphone] and [Channel Megaphone] despite level restrictions on said items; - Fixed an issue where using [Season 1 Episode 1 Completion Draught (Main + Sub)], which could've been obtained by opening the [Definite Growth Draught Pouch] sold in 2017, results in the player character not receiving the [Season 1 Episode 2 Completion Draught (Main + Sub)]; [Comrades] - When the player character enters [Crimson Ship Graveyard] while having a shared comrade, the character will be notified about comrades receiving a [DAILY bonus]. [PvP] - Increased the amount of [Seals of Triumph] awarded to characters: : [Blind Rivals! Tournament]: 10 Seals of Triumph per round; : [Deathmatch]: 10 Seals of Triumph for winning, 8 Seals of Triumph for losing and draw; : [Siege Match]: 20 Seals of Triumph for winning, 16 Seals of Triumph for losing and draw; - Reduced the battle time limit after joining the PvP match from 20 to 15 minutes.
[Character Friendship Content]
- Improved the environment of the [Mercenary Lounge] : NPC [Captain Crimson] is now more visible; : Fixed an issue where player characters could pass by while they were talking to the comrade NPC just before camera switching; : Fixed an issue of unintentional bumping into the [comrade standing in front of the bookshelf] while heading to the sofa; : Fixed an issue of unintentional bumping into [Captain Crimson] NPC while heading to the [Mission Board]; - Modified the story so that it won't appear quickly when starting a comrade story while holding the CTRL key; : This fixes an issue where conversation with a comrade wouldn't skip the beginning of the story; : Pressing CTRL key once more will enable [Fast Scroll] [UI] - Modified the Navigation UI buttons (Shortcut key G) to be disabled according to certain conditions (level, battles, etc);
- Fixed an issue where UI windows wouldn't close via mouse click or ESC key during certain situations;
- Fixed an issue where titles obtained via [Custom Title Coupon (30 Days)] were counting towards the ranking score;
- Fixed an issue where Season 4 story-related icons would display incorrect colors on the [Town Mini-map];
- Fixed an issue where the active effect remained when switching Quickslots under certain circumstances;
- Fixed an issue where subtitles wouldn't disappear during some cutscenes;
- When enhancing accessories, modified the Inventory UI to show items available for enhancement;
- Modified the [Enchant] UI to notify whether the [Enchant Rune] is used or not via the pop-up message;
- Modified the [Status UI] to show status effects to a single character only when [Premium PC Cafe Benefits], [Home VIP Benefits], [Home VVIP Benefits] status effects are applied.
- Modified the [Battle Promotion Chat] UI so the text color couldn't be changed when promoting the party. <---------------------------------------------------------------------------------------------->
[Miscellaneous]
- Fixed an issue where male characters looked abnormal when wearing [Special Moonshot Shirt] and [Rocheste Agent Pants];
- Fixed an issue where [Hurk]'s waist looked abnormal when wearing [Special Brilliant Lugh Mail] and different pants;
- Fixed an issue where female characters' upper body looked abnormal when wearing [Flamenco Top] with [Sexy Animal Inner Armor];
- Fixed an issue where lower parts looked abnormal during the sitting animation when wearing the [Special Double Volume Up+ Bunny Babe Outfit Set];
- Fixed an issue where wearing [Volume Up+ Bunny Babe Bottom] and [Special Butterfly Shoes] will show abnormal feet;
- Fixed an issue where nails were misaligned when wearing [Special Battlefield Elite Band];
- Fixed an issue where characters using [Sunbed] or [Shower Booth] were presented wearing equipment or outfits to other characters;
- Fixed an issue where male characters would see abnormal polygons on the belt when entering [Beauty Shop] while wearing the [Milletian Mail];
- Fixed an issue where part of the [Sylas]'s waist was visible when entering [Beauty Shop] while wearing [Milletian Mail];
- Fixed an issue where [Evie]'s staff model looked abnormal when having [Milletian Staff] equipped;
- Fixed an issue where part of [Kai]'s bow has been penetrating the arrow quiver when having [Milletian Bow] equipped;
- Fixed the sounds of village dogs when talking to NPCs in [Colhen];
0 notes
Photo
Fun and games with JavaScript
#484 — April 17, 2020
Unsubscribe : Read on the Web
🕹 If you're bored this weekend at all, consider joining the latest Ludum Dare — it's an online game jam that's been taking place for 18 years and more JavaScript entries are appreciated against all the Unity crowd 😂
JavaScript Weekly
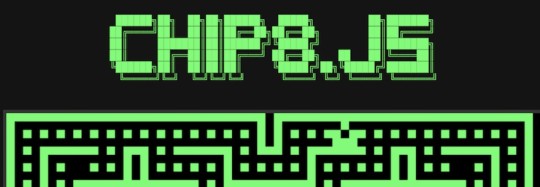
Writing an 'Emulator' in JavaScript (and Interfacing with Multiple UIs) — This is really neat. Tania built a Chip-8 interpreter in JavaScript and has gone into quite a bit of detail about what was involved here. Lots of neat bits and pieces to pick up from this.
Tania Rascia
jQuery 3.5.0 Released — I know many of you will groan, but I’m delighted when I see a new jQuery release. It’s still so heavily used. No headline features though, this is a security fix for a cross-site scripting vulnerability, plus some tweaks and fixes in preparation for jQuery 4.0 (yes!)
Timmy Willison (jQuery Foundation)
Build a Game of Battleship with TypeScript & Java. Free Course — Join over 2000 developers creating a game of Battleship with TypeScript, Spring Cloud Stream (Java), and PubSub+. This free 30-minute course is a great way to learn the basics of messaging and event-driven architecture with the Aurelia framework.
Solace sponsor
Profiling React.js Performance — Goes into detail on aspects of the React Profiler API, React’s new experimental Interaction Tracing API, and measuring custom metrics using the User Timing API.
Addy Osmani
Userscripts are Fun and Still Very Much Relevant — ‘Userscripts’ are basically JavaScript programs that run in the context of other Web pages so you can add your own features. They were really popular for a while but still exist and are still a neat use case for using JavaScript to improve your Web experience.
Eldad Bercovici
Another Look at What's New in ECMAScript 2020 — We linked to Dr Axel’s roundup recently, but here’s another take, looking at dynamic imports, nullish coalescing, optional chaining, BigInt, and more.
Ianis T.
⚡️ Quick Releases
Node 13.13.0 — File system API tweaks, and more.
jQuery 3.5 — So classic we had to link it twice.
Cypress 4.4.0 — Testing framework. Now supports TypeScript without plugins.
Discord.js 12.2 — Interact with Discord from Node.
💻 Jobs
JavaScript Developer at X-Team (Remote) — Join the most energizing community for developers. Work from anywhere with the world's leading brands.
X-Team
Senior JavaScript Developer (Warsaw, Relocation Package) — Open source rich text editor used by millions of users around the world. Strong focus on code quality. Join us.
CKEditor
Find a Job Through Vettery — Vettery specializes in tech roles and is completely free for job seekers. Create a profile to get started.
Vettery
📚 Tutorials
How To Create a Particle Trail Animation in JavaScript — Particle animations are particularly (sorry) striking.. and in this article, Anna Prenzel shows how to easily create your own such effects with Anime.js.
Smashing Magazine
Strategies for Migrating to TypeScript — A quick overview of some strategies for migrating code bases from JavaScript over to TypeScript.
Dr. Axel Rauschmayer
Developing in a Monorepo While Still Using Webpack — Second part in a series discussing things the team at Etsy learned during the migration of a home-grown, Require.js-based build system to webpack, which took over a year.
Salem Hilal
A More Productive Way to Build Your JavaScript Apps — Write better code, debug it, and test it – all in one place. Try WebStorm. No configuration required.
WebStorm sponsor
▶ Let's Build a Digital Circuit Simulator in JavaScript — A special episode of the Low Level JavaScript series takes us on a brief journey into the world of digital logic.
Low Level JavaScript
How To Set Up an Express API Backend Project with PostgreSQL — A pretty extensive walkthrough of creating an HTTP API using Express with Node.js and Postgres on the backend, then deploying it all on Heroku.
Chidi Orji
Speed Up Your Angular App: 14 Optimization Tips — Tips on how to make your Angular app smaller, faster, and more responsive.
Marcelo Ricardo de Oliveira
Class-Related Types in TypeScript
Dr. Axel Rauschmayer
📅▶ A Fireside Chat on the State of Microservices on April 21 — We recently helped The Software House with a developer survey (thanks to those who took it!) and now they’re doing a live chat on the state of microservices next Tuesday featuring Yan Cui, Alessando Vozza, and others.
The Software House
🔧 Code & Tools

Puppeteer 3.0: It Now Supports Firefox — Best known for as a way to headlessly control Chrome from Node, Puppeteer has recently seen some competition in the form of the cross-browser Playwright recently. But, no fear, Puppeteer is stepping up and can now work cross-browser too. We also learn Puppeteer is migrating to TypeScript.
Mathias Bynens
Open-Source Serverless CMS Powered by React, Node.js and GraphQL API — Build dynamic websites and apps with Webiny. 100% powered by JavaScript. Deploy your sites to AWS Lambda.
Webiny Serverless CMS sponsor
Rome: An Experimental JavaScript Toolchain — A compiler, linter, formatter, bundler, testing framework and more. Started by Sebastian McKenzie (of Babel and Yarn fame), Rome is now a project from the React Native team at Facebook. Related repo.
Facebook
Vime: A New, Modern Media / Video Player for the Web — Aims to be a ‘modern alternative to Video.js and Plyr’: “The idea behind Vime is we want you to control the player, not the other way around.” Modular, tree-shakable, and with potential for a plugin ecosystem. GitHub repo.
Rahim Alwer
Vuln Cost: An Open Source Security Scanner for VS Code — Free Snyk-powered VS Code extension that finds security vulnerabilities in npm packages, providing feedback in-line with your code, such as how many vulnerabilities a package has.
snyk
ip-num: A Library to Work with ASN, IPv4, and IPv6 Numbers — Happy in both Node and the browser.
dadepo

Flip: Animated Flip Counter Plugin to Add a Countdown to a Website — Adds an animated dynamic countdown timer to a page. No dependencies, responsive and mobile friendly, and fits any language, locale, or time zone.
Rik Schennink
The Perfect Partner to MongoDB Atlas. Try It for Free
Studio 3T sponsor
A JavaScript API for Controlling 'Simpsons: Hit & Run' — Including this as a bit of fun if you fancy noodling on something odd. Remote controlling games from JS seems neat, although I suspect just getting this running would take a while..
Tavis Ormandy
by via JavaScript Weekly https://ift.tt/3aeahRr
0 notes
Photo

Learn iOS Development FOR FREE - Best courses and tutorials http://ehelpdesk.tk/wp-content/uploads/2020/02/logo-header.png [ad_1] Challenge: Start 100 days of Swi... #androiddevelopment #angular #appdevelopment #appstore #c #css #dataanalysis #datascience #deeplearning #design #dev #developer #development #docker #ios #ios13 #ios13beta #ios13beta7 #ios13features #iosappdevelopment #iosbootcamp #iosdeveloper #iosdevelopment #iosinternship #iossdk #iphone #iphonex #iphonexr #java #javascript #learniosdevelopment #machinelearning #node.js #prototyping #python #react #responsive #restapi #sketch #swift #swiftdevelopers #swiftdevelopment #swiftdevelopmentforbeginners #ui #uidesign #uiuxdesign #uiux #unity #ux #uxdesign #webdevelopment #xcode #xcode11
0 notes
Text
KSP Loading... The KSP franchise expands

Welcome to our official newsletter, KSP Loading…! If you want to learn about all the current developments of the KSP franchise, then this is the place to be!
Kerbal Space Program 2
Last week at the opening night of Gamescom we announced the forthcoming sequel and newest addition to our franchise, Kerbal Space Program 2! This sequel will be expanding upon what makes Kerbal Space Program great and will bring space exploration to the next generation with exciting new features that will delight veteran and new players alike.
We’re excited to introduce you to Star Theory Games, the developer studio behind Kerbal Space Program 2!
Learn about the new development team joining the franchise by watching the Developer Story Trailer. Watch our Cinematic Trailer below to see what we’ll be bringing to KSP2!
youtube
youtube
So what can you expect in 2020, when Kerbal Space Program 2 comes out of the VAB? These are just some of the features, you’ll be able to enjoy:

Improved Onboarding
Rocket science can be a bit overwhelming sometimes and one of the things that Star Theory has set their minds towards is helping facilitate newcomers on their journey to become space explorers. With new animated tutorials, improved UI, and fully revamped assembly and flight instructions, it will be easier than ever to put your creativity to the test, all without sacrificing any of the challenge from the original game.

Next Generation Technology
Kerbal technology is taking major steps forward in Kerbal Space Program 2. With next-generation engines, parts, fuel, and much more, prepare to venture farther within and beyond the original star system!


Colonies
Long term colonization of celestial bodies has become a priority for Kerbalkind. Gather resources to construct buildings, space stations, and habitations, as well as find and process unique fuel types. Eventually, these colonies become advanced enough for vehicle construction, propelling them towards deep space and beyond. It’s time for Kerbals to become a type 2 civilization!

Interstellar Travel
With their next-gen tech, colonies, and resource gathering, Kerbals will reach new levels of exploration: interstellar travel. That’s right, in Kerbal Space Program 2, you’ll be able to discover extrasolar systems with whole new celestial bodies to explore. Among them: Charr, a heat-blasted world of iron; Ovin, a ringed super-Earth with relentless gravity; Rask and Rusk, a binary pair locked in a dance of death; and many more to reward exploration. What mysteries await in these alien worlds? It will be up to you to find out!


Multiplayer/Modding
Modding has always been an essential part of KSP and with Kerbal Space Program 2 it will continue to be so. The technological developments made to the foundations of Kerbal Space Program 2 will build on the beloved modding capabilities of the original game, as well as deliver on the long-requested addition of multiplayer. Soon players will be able to share the challenges of deep space exploration. We’ll reveal more details on these and more features at a later time, so stay tuned!

Click here to see these and more screenshots in high-res.
PAX West 2019
Want to see the behind-closed-doors presentation of KSP 2 gameplay? Come by booth 1909 during normal show hours to chat with the developers, take a photo with the Jeb statue, see the presentation, and grab a PAX West exclusive KSP Flag! If you take a photo there be sure to tag @KerbalSpaceP and use #BuildFlyDream.
Kerbal Space Program Update 1.8
We are all very excited for what’s coming in 2020, but until then, there is still plenty of KSP for everyone to enjoy! Squad will continue to support the current game, and as some of you may have seen, there is some really cool stuff coming in the next update for the game Click here to read Squad’s statement in regard to the KSP 2 announcement.
Squad’s goal will always be to provide the best experience for all KSP players. The gameplay experience will be improved even further for KSP 1 with the 1.8 update. Here are some more details of what you can look forward to in this latest update.
Celestial Body Visual Improvements
If you’ve been following KSP on social media, you might have already learned that new high-quality texture maps & graphic shaders are being implemented for various celestial bodies. In update 1.8 you’ll find high quality texture maps for Mun, Duna and a few other Celestial Bodies that will be revealed along the way.
If there are any concerns that the update might hinder the game’s performance on your computers, rest easy knowing you’ll be able to select the celestial bodies’ shader quality in the settings to low (legacy), medium or high. Even for the legacy option, you can expect texture stretching errors to be vastly improved. With the high-quality option, pixel density will be maintained regardless of camera distance to the celestial body, as well as a lack of tiling problems. All in all, celestial bodies will look sharper and more realistic. Take a look for yourself:
youtube
Unity Upgrade
Update 1.8 brings an improvement that Squad has wanted to introduce for some time now - an upgrade to the underlying engine of the game to Unity 2019.2
With this upgrade there are some long-desired performance and graphic improvements, some of which come out of the box, and some which will allow further enhancements down the road.
These include:
KSP will now run under DX11 on the Windows platform (DX9 will no longer be supported) which allows many graphical improvements, such as those on the planetary textures.
A new PhysX version with the associated performance and precision improvements.
GPU instancing to improve rendering performance.
Incremental garbage collection to reduce frame rate stutters, particularly in modded installs.
And many others.
While this version will have a larger impact on many mods, more than 1.6 or 1.7, the process has been tested and is relatively fast. Still, there will be several changes, due to the introduction of the Roslyn compiler, which brings full C#7 support and moving to full .NET 4.x API (.NET 3.5 support is deprecated). There will be continued efforts to reduce significant impact for Modders, but the belief is this time around the benefits of this upgrade far outweigh the drawbacks.
New Parts for Breaking Ground
Update 1.8 will also include some exclusive treats for owners of the Breaking Ground Expansion. A new set of fan blades and shrouds will continue to push the creativity of KSP players even further. By combining these fan blades with small electrical rotors and the new shrouds, you’ll be able to increase the performance and thrust of your propellers. Use them to create drones, ducted fan jets, or anything you can imagine.

Improvements are also being made to robotic part resource consumption, with better info on consumption and new improved options for power-out situations.
Remember, you can share and download crafts and missions on Curse, KerbalX, the KSP Forum and the KSP Steam Workshop.
That’s it for this edition. Be sure to join us on our official forums, and don’t forget to follow us on Twitter, Instagram and Facebook. Stay tuned for more exciting and upcoming news and development updates!
Happy launchings!
#Kerbal Space Program#Kerbal Space Program 2#dev diary#ksp#KSP Loading...#KSP Loading#ksp weekly#dailykerbal
38 notes
·
View notes
Text
Week 7
02/08/2020 Wednesday:
Group catchup
The day started with the us having a discussion on what's required to complete the project, we do this each week to get a gauge on our progression and to plan out our next steps. We're making good time but need to better communicate our progression between the split teams of visual and technical. So Matt and I went through what we've been working on with Ashton, showing him our functioning prototypes. After catching up we then planned out what we each need to do next, Specifically for Matt and I we need to get the Mapbox asset working as without it we won't have a functioning map.
Mapbox asset
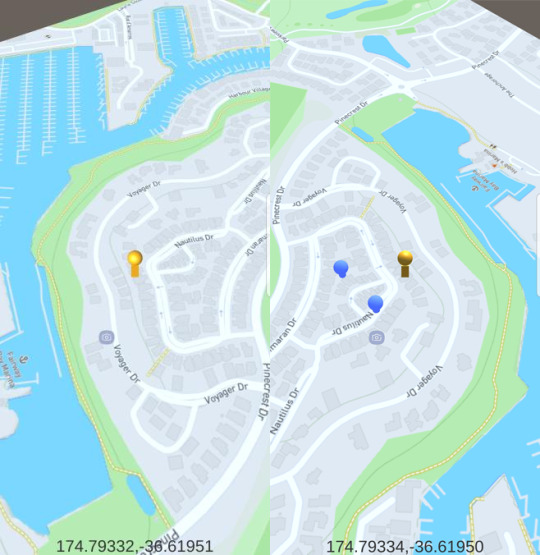
Matt and I then went into working on the Mapbox asset while Ashton worked on some 3D models in blender. We've been having an issue where the location provided by the asset is in America and not our current location while testing the project, since we are using the Mapbox asset primarily to get a working map for our application this is a big deal. I spent my time looking through a youtubers channel called Mapbox (this is a link) as he has many tutorial series on setting up the Mapbox asset within Unity, while also looking through the assets base code to find out how its location system works. eventually after enough videos I found that the asset used different location methods based on the system running the project. For example, in unity they give the base location of somewhere in America, while on mobile they use the location provided from the device. Matt and I had considered this possibility but since we knew little about the asset we still thought it was best to research into it. After this I also found out how to change the base location for the unity project, allowing me to set it to my street location to see how accurate the map is. We are using this asset so that we do not need to code a location-based system from scratch, meaning we really need to set up the premade asset and integrate it into our core project. Since we could not build Unity projects to iPhones Matt volunteered to use his Android for testing. This was good as we could test the Mapbox asset to make sure it works. After tinkering with the settings of the project for a while he got it working on his phone, the project showed his location which is great for us as it means our applications map has the basic functionality down.
Images taken from Matt’s phone showing his location, the image on the right has added points of interest:
Lofi icon prototype
While Matt was testing the project, I went back to working on the Vuforia asset. Around this time Ashton had finished a prototype of the 3D pin model we will be using for the project. I imported the model into Unity and started working on the AR functionality. To put it simply by this I mean getting a 3D model of a pin to appear when the camera recognizes a certain object, from there attaching an interactable button that once clicked will load a text describing some story for the project. At this point I had the 3D object loading and intractable buttons working separately but had yet to incorporate them together. I spent my time making the 3D pin model and UI button load when a can of Vaseline lip balm was recognized by the camera. I coded it so that when clicking the button a placeholder image will appear. This wasn't difficult to do as I had the pieces working individually the only problem was that as the day progressed the lighting changed which impacted how my camera recognize the Vaseline lip balm. This is because the Vuforia software only recognizes the object under certain lighting which makes it harder for the camera to recognize that object later in the day. This could become a potential issue when trying to showcase the project. so my group thought of some work arounds, we could have lighting dedicated to keeping each object at a certain light level and/or We could try uploading multiple images of the object throughout the day, both of these options would do well in negating this issue. I also animated the icon to give it an active feel.
Gif showing pin animation and working buttons:

0 notes
Photo

Sound and Image - Part Five
This post was originally published on January 14th, 2020.
Sound is one of the most crucial elements of this project – I began by tackling some of the basic sounds using online libraries. I really wanted to get some of the sounds in the UI and some of the harder scripts out of the way so that it would be easier to just implement the models into Unity and go. I’ve already done a lot of basics with sound in Unity and used sound in scripts before – like playing sounds on interaction, collision, etc. I knew my project was going to be washed with a VHS look, so I began looking for some sounds like VHS’ being inserted, computer sounds, beeps, synth-y sounds and bitcrushed noises like I said I wanted to in my research phase of the project.
I wanted a kind of “cinematic” opening, but rather than editing a bunch of audios I found together to get the effect I wanted, I made a script that turned the sounds I wanted on and off at certain intervals so that it could coincide with what was going on on the screen. I thought it would be easier to do it this way rather than animate on time with the sound or try to create one timeline. It also meant that I could re-use the original sound assets later without having to edit one long string of audio – so I just thought it would be more efficient. So I created a UI segment where the screen begins black, turns on and then turns off at a certain interval and had the audio sync to this.
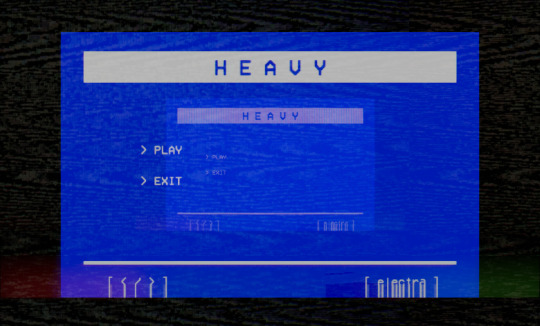
In the next scene, I had my menu. I didn’t want the menu to seem repetitive in terms of sound and wanted to test out the idea of having a playlist/randomized sounds – so I threw together some background effects and noises like white noise and drone-y/humming noises for a base effect and then created a short script that takes sounds from an array and plays them randomly. I used an online tutorial that was really helpful and game me the exact effect I wanted. In the future, I would love to make it more customizable as I found I was a little bit limited by what was in the inspector. This is something I would like to work on in the future.
I also wanted to make the menu feel a bit more responsive, so when the player hovers over one of the option, it glows a bright yellow (falling in-line with the aesthetic) and then I created a script that creates a sound when the user hovers over. The interesting thing when I tested the script is that the sound “glitches” and gets “jammed” at the start of the clip and repeats, creating a heavy noise as it repeatedly restarts. It only plays the clip correctly when the player removes the mouse from the object. I actually liked the way this sounded – it kind of felt like a “roll-off”. So despite the fact it was unintentional, I decided to keep it in as I thought it would be interesting. It works with the aesthetic of the menu. To save myself sometime, I also repeated the sounds in the level select menu.
I created a small opening for the main scene which is a repeated version of the actual opening scene, but with a few of the sounds removed. I wanted it to feel more like a loading screen rather than an opening, so I removed the sound of the VHS being loaded in so that it felt like more of a progression from one section of a VHS to another, rather than putting in a new one.
In the main scene, there were a lot of things I wanted to do with sound – and a few of these I needed to record and create myself. My lecturer wanted at least one looped sound in the project, so with the help of a friend I created a song for the main scene. I’m not actually a huge fan of it (it’s the first song I’ve ever had any hand in making), but I needed at least one loop and I thought it would probably be easier to just stick to what I made rather than find someone else’s work and loop it. I also wanted to put a couple of pieces of voice work into the project, so we sat and recorded some vocals and bitcrushed them. I wasn’t a fan of my voice and the way in sounded in the end, so before I put them into the game files I pitched them down a little bit so it didn’t feel so jarringly me. I don’t mind them, but I don’t always feel like I’m a fan of the way I sound. Oh well. During this time, I also took the time to create some whispered ad-libs that I wanted to use during the main scene. It was mostly whatever came to mind at the time – it didn’t matter as it was inaudible. The whisper is played throughout the scene as a subtle solution to allowing for more to go on in the scene. My last vocal was made when we were messing around with the settings and playing around with the intensities and styles of the bitcrushing and downsampling. We found a really deep and distorted effect. I decided to recite some more of Whitman’s poetry as fast as I could speak and this was then used as a kind of “jumpscare” when the player interacts with the pinboard on the desk. I really loved the effect here.
All the other effects were found effects, perhaps edited in different ways in the Unity inspector. Most of the scene is activated by sound on click. I also use sound at a specific time interval again with a lightning/thunder effect I use. I just wanted to add a bit more animation to the scene as I felt as though a lot of the work was in the post-processing.
At the end of the scene, I added a game-kill. I didn’t really know how to finish the scene, so after about a minute and a half of exploring the scene the player is booted from the scene and given a kill screen. I kind of liked this idea, because I feel like it because the scene represents my mental space I wouldn’t want people “overstaying their welcome”. When this happens, the screen goes blue with a message and all the sounds in the scene stop. I liked this idea because I thought it perhaps felt like a representation of brain fog/noise – sometimes you just want everything to stop. Akira Yamaoka, the composer for the original Silent Hill’s said it best when he said silence was just as important a sound as any other. Sometimes I just want to feel the silence.
0 notes
Text
Program
Unity or Luastg
Unity Advantages: A variety of shader effects can be achieved with a high degree of freedom. Can make many unexpected bullets. There are also more complete tutorials for UI production. Disadvantages: Because there are few authors who develop stg games on Unity. Its related plugins are very rare. If you want to use Unity to build, it will take a lot of time to build the main program from scratch.
youtube
Luastg Advantages: The relevant interfaces are rich, and the main program has been built. Basically only consider the problem of bullet logic, the workload is relatively small. Disadvantages: It is difficult to make surprising effects in this game engine. There are few related tutorials. ui has a low degree of freedom and needs to be studied from scratch.
Youtube. 2020. How To Convert After Effects Animations Into A Spritesheet For Unity (Free And Quick). [online] Available at: <https://www.youtube.com/watch?v=KTBOahrXTBE&feature=youtu.be> [Accessed 5 May 2020].
0 notes
Text
March 20, 2020 at 10:00PM - 2017 Master Game Development Bundle (pay what you want) Ashraf
2017 Master Game Development Bundle (pay what you want) Hurry Offer Only Last For HoursSometime. Don't ever forget to share this post on Your Social media to be the first to tell your firends. This is not a fake stuff its real.
If you’ve ever had a great idea for a game but didn’t know how to build it, then this is the course for you. This jam-packed course will give you all the instruction you need to build your own game worlds in Unity 3D, the industry standard game engine. Soon you’ll be building and playing your very own games as an accomplished game developer.
Access 44 lectures & 5 hours of content 24/7
Navigate the Unity interface & 3D views
Work w/ & modify game objects like characters & obstacles
Import game assets such as meshes, textures & audio files
Learn how to program game mechanics & create game logic & gameplay
Design levels using Unity’s many tools options
Use snapping to create modular level designs
You can use the Unity game engine for a wide range of platforms, but one of the most common is Android. In this course, you’ll learn the fundamentals to building games for the world’s most popular mobile platform, opening doors to an enormous market. Best of all, you don’t need any prior experience, just a willingness to learn!
Access 73 lectures & 14 hours of content 24/7
Learn the basic concepts & tools you need to build fully functional Android games in Unity
Install Unity, the Java Development Kit, & Android SDK
Create example Android games from scratch
Discover how to design game art
Understand how to monetize your game & make a living in game development
Use included course quizzes to verify your knowledge
Real-time capabilities make sites like Facebook, Twitter, and most news sites a fully interactive, immersive experience for users, and keep them coming back for more. Over this course, you’ll learn how you, too, can make impressive web apps with real-time capabilities using Meteor.js, a full-stack JavaScript framework designed to drastically simplify development time and complexity. Before you know it, you’ll be building reactive user interfaces and allowing users to interact with your apps in real time.
Access 70 lectures & 6 hours of content 24/7
Create highly interactive, real-time Meteor web apps
Store, retrieve, & manipulate data w/ MongoDB
Understand user sign up, authentication, & proper data validation
Learn how to structure the folders & files in your projects
Give your apps extended powers w/ external community packages
Style your apps w/ Bootstrap 3
Integrate w/ the Phaser game engine to create real-time games
Mastering Phaser will enable you to build interactive, online multi-player games – the likes of which are considered some of the best games in the world. Over this project-based course, you’ll learn how to build comprehensive games in Phaser that use Firebase to join front end and back end development. By course’s end you’ll have emulations of Fruit Ninja and Bomberman to add to your portfolio.
Access 52 lectures & 5 hours of content 24/7
Build online multi-player games, real-time multi-player games, online leaderboards, & more
Understand backend integration using Firebase
Explore path-finding, basic enemy AI, & swipe touch detection
Create game stores w/ item upgrades
Use Priority Queues in strategy games
Create Phaser plugins
Unreal Engine 4 is one of the industry-leading 3D game design softwares, and this beginner course will get you up to speed on developing games using this cutting edge software. Used to develop games like Borderlands, Gears of War, and Mass Effect, the Unreal Engine can give you a serious edge on the game development competition. Who knows, by the end of this course, you may have created the next hit!
Access 63 lectures & 8 hours of content 24/7
Learn the basic concepts of game development using the Unreal Engine
Script logic for your games so you can define game rules & behaviors
Understand collisions & damage, key concepts for any action game
Create user interfaces using the UMG Editor to add menus, load screens, HUDs, & more
Discover how audio works within the Unreal Engine
It seems like everybody these days has at least one game obsession on their iPhone. In this course, you’ll learn how to build the next one by mastering SpriteKit and Swift 3, the primary game development tools for iOS. Starting from absolute scratch, you’ll learn Swift programming and the powerful 2D game engine, SpriteKit by building real, fully functional games.
Access 109 lectures & 18 hours of content 24/7
Explore Swift programming
Import & organize assets into SpriteKit
Learn how to create & animate Sprites
Understand how to use SpriteKit’s physics system
Save game data using NSKeyedArchiver & NSKeyedUnarchiver
Discover the basics behind sound in SpriteKit
This course will teach you the essentials of crafting engaging games for Apple TV that pit player against player. You’ll learn to configure multi-player gameplay modes, external controllers, the physics of your game world, and more, rounding out your game development skill set to create games certain to engross players again and again.
Develop player vs player tvOS games w/ 6 hours of content
Master the fundamentals of tvOS app development
Add 1-Player & 2-Player gameplay modes
Configure external controllers w/ tvOS
Detect physics collisions, create a bullet class, animate explosions, etc.
Build out your game development skill set
One of the most common ways mobile games make money is with in-app purchases, and if you want to make it as an independent game developer, you had better learn how to incorporate them into your work! In this project-based course, you’ll create and publish a complete IAP-featured game using the Unity Game Engine.
Access 68 lectures & 10 hours of content 24/7
Use Soomla IAP to support multi-scened games w/ in-app purchases
Create an in-app store
Build monetization solutions like ad unlocking, music purchases, virtual currency, & more
Understand Soomla storage & user preferences
Design a response UI
Construct 2 is a simple game creator that allows you to develop and build exciting, comprehensive 2D games without having to write a single line of code. This course will give you a step by step tutorial along the various stages of building a “run and gun,” platformer style game. By the end of the course you’ll have covered all the fundamental concepts necessary to build custom HTML5 games in Construct 2.
Access 35 lectures & 3 hours of content 24/7
Learn how to implement craft gameplay & game rules
Import Non Player Characters, sound effects, music & more
Configure multiple frame based animations, backgrounds & sprites
Create game logic & game mechanics without programming
The applications of Java are seemingly endless, but one the most popular uses is in game development. Considering that gaming is a billion dollar industry, there’s massive incentive to learn Java game development fundamentals. In this course, you’ll use important Java tools and discuss core game development concepts as you create your very own clone of the hit mobile game, Flappy Bird.
Access 29 lectures & 2 hours of content 24/7
Learn Java & game development by creating a Flappy Bird clone
Customize your game & build a framework for more games
Improve your knowledge of Object Oriented Programming
Grasp the fundamental concepts of game programming
from Active Sales – SharewareOnSale https://ift.tt/37TpXIH https://ift.tt/eA8V8J via Blogger https://ift.tt/3dgVwQp #blogger #bloggingtips #bloggerlife #bloggersgetsocial #ontheblog #writersofinstagram #writingprompt #instapoetry #writerscommunity #writersofig #writersblock #writerlife #writtenword #instawriters #spilledink #wordgasm #creativewriting #poetsofinstagram #blackoutpoetry #poetsofig
0 notes
Link
Learn to make an Augmented Reality Furniture placement app & get the template for an AR Photo app like Google stickers.
What you’ll learn
Learn what ARFoundation is and how it works with ARCore and ARKit
Learn how to make dynamic Menus that work with AR and non AR projects
Learn to place AR objects onto a surface using a tap.
Learn to place AR objects onto a surface using an automatic placement technique
Learn where to and how to add free high quality models to your project.
Learn how to add animations to those models
Learn to link the Model to the AR world and have animations change based on position.
Learn how to integrate a UI into your project
Requirements
You’ll need a basic understanding of Unity and be at least a beginner at using it.
You need to know what Augmented reality is.
You’ll need a computer that can run AR, you’ll also need a phone that can run Augmented Reality too.
Description
This is the first AR course of its kind, there are 2 Key parts to this course… 1) First I’m going to teach you how to create a very simple furniture placement app, but thats not all!
2) I’ll also give you the full template code for an actual AR Photo Camera app and teach you how to edit the template and add your own Gameobjects aswell. You can even download a developed app built from that template NOW from the android store, just search “AR Photo Tutorial Satwant” on the Google Play Store.
You’ll be coding in Unity and using Unity’s official ARFoundation package, so the code you write will work on Android & IOS AR devices.
More details: The first part is a simple AR furniture placement course.
1) Create a menu that will display the objects people can place.
2) Learn to automatically place those Gameobjects on the ground.
3) Learn where you can download different Gameobjects for free.
4) Have those Gameobjects automatically rotate towards the camera
5) Additional Videos like hiding the ARPlane and Adding light estimation.
The second part involves editing the template for an actual AR Photo app. The template allows for
1) Changing the icons and Gameobjects to be anything you want.
2) Rotating objects using fingers.
3) Simple scaling objects with two fingers.
4) Taking a photo of the Augmented Reality image with environment.
5) Adding sound and animating the gameobjects.
Without the ability to drop items to your games, how is the user meant to interact? I’ll make sure you get this fundamental skill under your belt.
So who is this course for? Well, if you have basic knowledge in unity and would like to add AR to your skills whether its developing for AR on Android or IOS, this course is for you. If you do NOT know the basics of unity, and don’t know how to build or install unity, this course isn’t for you.
The best way to know if this course is right for you, is try out the first few free videos, if you get stuck drop me a line too, I’d be happy to help. If you learn from them and enjoy them, this course is for you! You will need an AR compatible phone, iPhone or android, I’ve designed the course on an android but the code works for both and I even show you it working on an IOS device. I’ve even designed some parts of the course to work if you DONT have an AR phone aswell so you can still learn and work in the unity editor. Try out those tutorials for free too 🙂
ITS IMPORTANT TO NOTE ARFOUNDATION IS VERY NEW. Unity might decide to change it which is out of my control. If you’ve done programming before then you’re aware of version changes, but I thought I should still warn you, nothing in coding is perfect! 🙂
Who this course is for:
A beginner or intermediate Unity developer who would like to learn how to create AR apps.
Someone who wants to understand how to create an essential menu they can use for all AR projects going forward.
Created by Satwant Kenth Last updated 3/2019 English English [Auto-generated]
Size: 8.23 GB
Download Now
https://ift.tt/2GxmDbb.
The post Create ARFoundation app & TEMPLATE for AR Photo app. appeared first on Free Course Lab.
0 notes