#variable neutral density filters
Explore tagged Tumblr posts
Visit Tumblr Blog
Explore Tumblr blogs with no restrictions, modern design and the best experience.
Last Seen Tumblr Blogs


Fun Fact
69% of Tumblr users are millennials.
Text


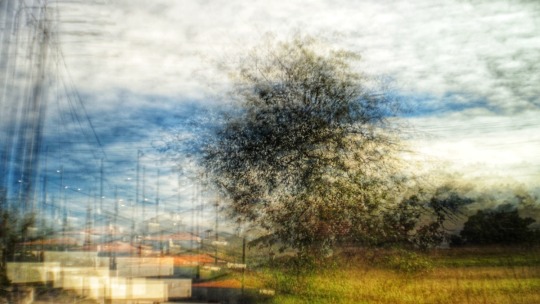
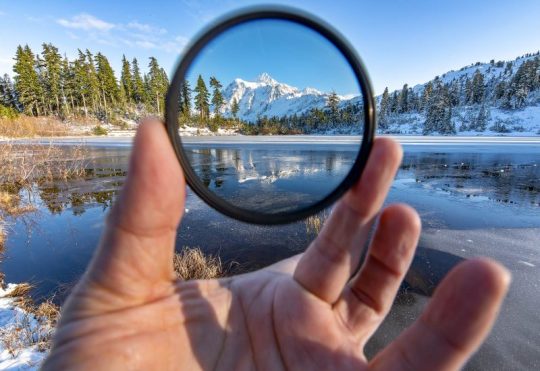
The joy of an 8 mm lens topped with a 9-stop variable neutral density filter…
May 2025
0 notes
Text
Price: [price_with_discount] (as of [price_update_date] - Details) [ad_1] Product Description 【Shoot Like A Pro DSLR】This clip-on filter kit from K&F Concept includes a K&F Concept Nano-K series variable ND2-ND400 neutral density filter and a clip for phone, it is fit for travel shots, street photography, outdoor landscape, and time-lapse photography, Instagram, weddings, vacations, and other fun shooting, etc. 【K&F Concept 52mm Nano-K Series Variable ND2-ND400 Filter 】Made of top optical glass and aluminum alloy frame, adopt 18 layer MRC coating, with 1 to 9 stops of adjustable light reduction and 360-degree rotation for precise dimming settings, this filter is perfect for diverse scenarios. (Note: High stops may cause a cross-pattern effect, commonly known as an "X black cross." This phenomenon is natural and temporary, occurring due to the adjustable ND filter's interaction with certain lenses and focal lengths.) 【Light Reduction】The variable ND2-ND400 filter helps reduce the amount of light reaching the lens without affecting the color. Applies slow shutter speed under strong sunlight exposure. 【Widely Compatibility】The clip can be clamped on most smartphones to take pictures like a professional SLR camera. The 52mm VND filter can also work with the DSLR cameras with ø 52mm lens thread. 【Quick Install & Easy Operation】Simply screw the variable ND filter on the phone clip, then clamp it on your phone, rotate the filter to a desired stop according to the light condition and start taking photos. During a photo shoot, easily rotate the filter to adjust light exposure for different effects [ad_2]
0 notes
Text
NEEWER Variable ND2-ND32 & ND64-ND512 Kit Compatible with DJI Osmo Pocket 3 Creator Combo Accessories, Limited Stops Neutral Density Filters, 2 Screen Protectors, Action Camera Accessories
Price: (as of – Details) From the brand NEEWER – A passionate team that is dedicated to bringing you new and cool photographic equipment. We have a common understanding of the fine details and practicality of quality products and always support every product we make. Given the trend of social media, NEEWER aims to provide cost-effective video and audio enhancement equipment for all customers,…
0 notes
Text
Solving Polar Pro ND Filter Challenges
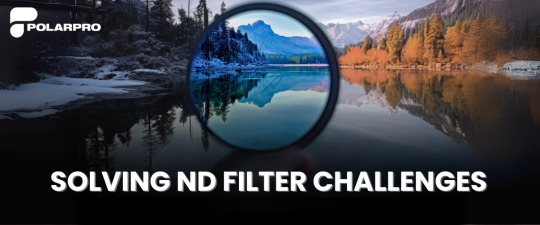
Neutral Density (ND) filters are indispensable tools for photographers and videographers, allowing for greater control over exposure, depth of field, and motion blur. At AWPRO in Dubai, we offer a wide range of ND filters, including high-quality options from renowned brands like PolarPro. However, using ND filters can come with its challenges. In this blog post, we’ll explore common problems associated with ND filters, provide practical solutions, and highlight why AWPRO is the best place to purchase your ND filters.
Common Problems with ND Filters
Cross Polarization Effects
One of the most frustrating issues with variable ND filters is the occurrence of cross polarization, which can create a noticeable black "X" pattern in your images. This typically happens when the filter is rotated to its extremes.
Solution:
To mitigate this issue, opt for variable ND filters that feature hard stops at both ends of the adjustment range. These designs help prevent reaching problematic settings that cause cross polarization. The latest models, such as the PolarPro Peter McKinnon Chroma variable ND filter, have been developed specifically to address this issue effectively.
Vignetting
Vignetting occurs when the corners of your images appear darker than the center, particularly when using wide-angle lenses with thicker variable ND filters.
Solution:
Choose low-profile ND filters designed to minimize vignetting. Additionally, avoid stacking multiple filters whenever possible, as this can exacerbate the problem. Our selection at AWPRO includes filters that are optimized for wide-angle lenses.
Size Compatibility Issues
Many variable ND filters are larger in diameter than the lens thread size, preventing the use of lens hoods or caps. This can leave your lens exposed to potential damage.
Solution:
Select ND filters that fit snugly on your lens without excessive protrusion. If you need to use a hood, consider using step-up rings to maintain compatibility while protecting your lens.
Color Casts and Image Quality Degradation
Some users report color casts or reduced image quality due to reflections within the filter glass. This can lead to inaccuracies in color reproduction and sharpness.
Solution:
Invest in high-quality ND filters with multi-coatings designed to minimize glare and enhance light transmission. Shooting in RAW format can also help correct color issues during post-processing.
Focus Issues with Drones
Drone operators often experience focusing problems when using ND filters, leading to blurred images despite correct settings.
Solution:
Before flying, test your setup without the filter under similar lighting conditions to identify if the filter is causing focus issues. If problems persist, consider switching to solid ND filters for better optical performance.
Why AWPRO is the Best Place to Buy ND Filters in Dubai
AWPRO offers a wide selection of high-quality ND filters, including fixed and variable options from top brands like PolarPro, ensuring you find the perfect fit for your photography and videography needs. Our expert staff provides personalized guidance, and we prioritize quality by sourcing from reputable manufacturers for optimal clarity and color accuracy. With competitive pricing, regular promotions, and a convenient location in Dubai alongside a user-friendly online store, AWPRO makes it easy to access the best gear. Customer satisfaction is our priority, so explore our ND filters today and grow your creative projects!
Conclusion
Using ND filters can enhance your photography and videography by providing greater control over exposure and creative effects. However, being aware of potential issues and knowing how to address them is crucial for achieving optimal results. At AWPRO Dubai, we are committed to helping you find the perfect ND filter while providing expert guidance and exceptional customer service.
Explore our extensive range of high-quality ND filters today at AWPRO and grow your creative projects! Whether you're shooting landscapes or capturing fast-moving subjects, we have the right tools to help you succeed.
0 notes
Text

🌄Travel photography made easy! Get your hands on our RevoRing Filtre Series now and capture stunning images with ease. Don't miss out, limited time offer!💰Extra 15% OFF🛒
0 notes
Text
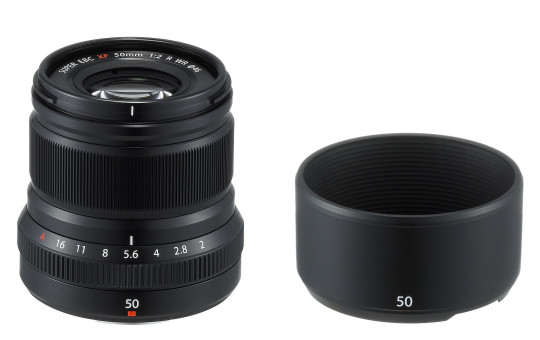
Haoge is Making Great-Looking, Bayonet-Mounted Protective Metal Lens Hoods for a Range of Fujifilm Fujinon XF Lenses
Haoge is Making Great-Looking, Bayonet-Mounted Protective Metal Lens Hoods for a Range of Fujifilm Fujinon XF Lenses
View On WordPress
#Breakthrough Photography#Breakthrough Photography X4 UV#fixed neutral density filters#Fujifilm#Fujifilm X Series#Fujinon#Haoge#lens accessories#lens hoods#lens shades#neutral density filters#protection filters#UV protection filters#variable neutral density filters#XF lenses
0 notes
Text
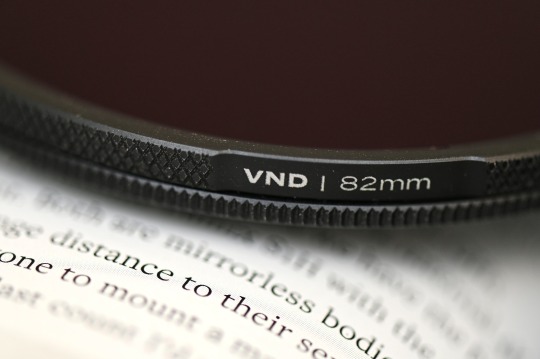
Near Perfect Results in a Quality Filter: Lee Elements VND 2-5 Review
You're going to like this one!
What’s easier to do: carry around a handful of ND filters of different strengths, or carry a 4-in-1 solution that offers the same quality in a smaller, more convenient package? If you’re worried that the latter might result in awful X-patterns or heavy vignetting, then Lee Filters has the solution for you. They’ve just launched their Elements series of Variable ND filters that come in 67mm, 72mm,…
View On WordPress
#filter kit#filters#Lee Elements#LEE Filter#Long Exposure Filter#long exposures#ND#ND variable#neutral density#screw on filter#Variable ND Filter#Variable Neutral Density#variable neutral density filter#VND filter
0 notes
Text
NiSi True Color ND-Vario variable ND reviewed by a square filter guy
NiSi True Color ND-Vario variable ND reviewed by a square filter guy
By Chris Ewen Crosby (Chris is an official NiSi USA Ambassador and reseller)
A few weeks ago I was approached by NiSi to review their new True Color ND-Vario Variable ND Filter. For those that have worked with me you might be cringing now. For those that haven’t, I’m not the biggest fan of Variable ND filters. There I said it. My past experiences with Variable ND filters have been disappointing to say the least. So when NiSi approached me to test and review their new True Color ND-Vario you can imagine that was a little bit hesitant and somewhat skeptical. Nevertheless, I accepted the opportunity to put my money where my mouth was. I’ve been recommending to my students that they stay away from variable ND Filters and it was time to test if this was still sound advice. So, do you think I can change my ways? Well, let’s find out as I share my thoughts and sample images from the test.
Ladies and Gentleman, Full Disclosure
Before we begin I must first disclose that I’m now an Official NiSi Optics USA Ambassador and Reseller. So, yes, my opinions could come with some bias, but I only stand behind product I believe in. I wasn’t forced to NiSi products, I simply went with a superior product that turned into a great relationship with NiSi. If you are interested in hearing why I switched to NiSi please check out my blog where I’ve reviewed and compared NiSi vs other products I’ve used. So without further ado, let’s talk about the NiSi True Color ND-VARIO Pro.
Common issues that variable ND’S have
So as I eluded to in my introduction, I’m not the biggest fan of variable ND filters. My past experience with them have made me stay away from them. On of the most common things you find with Variable ND filters is vignetting as you rotate the filter to add or subtract darkness. Typically the extremes of the filters capability would produce the vignetting or what is commonly called the “X” effect where you see a dark “X” appear in the middle of your frame. They performed decently in the middle of the capability of the filter, but not at the extremes.
One of the other issues found with Variable ND filters is color cast. Often times it is a blue cast, but can also be a magenta, green, or yellow cast of color. This is something you never want in any ND filter as a photographer. You want to have the same color performance with your filters that you would have if you didn’t have them on. They should only darken your exposure and do nothing else to the image quality.
Frist Impressions
As I unboxed the ND-VARIO I was pleasantly surprised by a few things right away. The filter comes with a lens cap and a pouch in addition to a foam cushioned plastic case. That’s 3 forms of protection for your investment. I definitely didn’t get any of these 3 with my past variable ND purchases. I was lucky to get a plastic case, but most of the time you were on your own to protect and transport the filter. The lens cap is a real bonus. It can be used to cover the filter while walking between shots, or just storing the camera in your bag. No need to take off the filter and put it back on to protect the filter from scratching. This is very convenient in the field and will save you time during your workflow.
Another notable mention is the quality of the build. The filter ring is made from high quality aluminum, making it feel very strong, yet be very light in weight. The Knurled ring makes for easy gripping of the filter as your attach and detach the filter from your lens. The filter rotated very easily, but not easily enough that it would spin in a gust of wind or a slight nudge. The friction was just right.
Upon rotation I discovered another win. The ND-VARIO has hard stops at 1 & 5 Stops (Other models available for 5-9 Stops). This means that the filter does not rotate 360 degrees and there are marks on the filter ring to show you where each stop is. While the exact darkening does vary with your focal length and aperture, I found the indicated stop numbers on the ring to be with 1/3 of a stop of accuracy and spot on for most.
Bring on the images already!
OK, OK! I know by now you are ready to see some sample images. So without further ado…here they come. The first set of images were taken late afternoon in Death Valley. I thought this area would a perfect proving ground for the color and detail of the filter. Luck was also on my side due to the clouds that came into frame just before the test. Clouds are a great tool to use for testing the white balance performance of the filter. They are a neutral area during the middle of the day. For this test I used a fixed white balance of Shade so that there would be no variation in the white balance from photo to photo and we could see any color shifts that were taking place. The photos have only been sharpened, noise reduced and profile corrected. You may find a slight difference in exposure from photo to photo. Take a peak at the photos below.
After the first test in Death Valley I found that there was very little color shift. The only color shift I noticed was a extremely light shift to the yellow/red side. So little that it is hardly noticeable. Overall, I would say that the color performance was extremely good from the filter. I didn’t notice any vignetting and I was testing the 82mm version of the filter on my wide angle lens. I did notice a slight polarizing effect in the sky on the picture take at 1 stop, but it wasn’t something I was very worried about. The detail from photo to photo is perfect even at 100% zoom. To be honest, I liked the look of the badlands after putting the filter on, it did provide a very light polarization and controlled the color of the highlighted areas of the badlands.
Test #2
For a second test, to be sure that I was being fair, I went to a local location in the Port of Los Angeles next to the Vincent Thomas Bridge and took some shots during the blue hour. Not only did I think this would be a good test of the white balance, but also a better area for you to see the difference in shutter speeds and the effect it will provide. The water around the bridge was perfect for just that. Again, the white balance for test 2 was shot at a constant “shade” setting in camera to preserve the white balance integrity. See the images below.
As you can see the results of the 2nd test were equally impressive as it relates to white balance and color cast. Virtually no change in color through the photos. I will mention that both situations had changing light. The death valley scene had passing clouds changing the light and the Vincent Thomas scene was shot during blue hour so the colors were changing as was the light. Even in these difficult lighting situations the filter performed very well.
Fun Facts: Both sets of images were taken on a Canon 5D Mark IV & Canon 16-35mm F2.8ii. White balance was set to constant. No white balance adjustments were done to any photos. Very light sharpening, noise reduction, and some light exposure adjustments were made for constancy due to the changing light.
Summary of Wins for the True Color ND-VARIO Pro Variable ND
Great presentation of packaging and protection of of the filter by having a canvas case, plastic case, and lens cap for the filter
No Color Cast
Great Build with Knurled ring, aluminum frame and hard stops at 1 and 5 stops
No Vignetting during rotation and due tot he larger front threading, no vignetting even at 16mm on my 82mm lens ring
Overall, I was pretty surprised by the results of the test. I went into the test thinking that there was going to be an issue with vignetting and color as most variable ND filters have. I am very impressed by the build, color performance, and the presentation.
So, the question that some of you have probably is, “is this filter worth buying?”. My answer is yes, if you prefer circular filters over square systems, or if you are a videographer or portrait photographer. Variable ND filters are very handy for video and portrait because it allows you to adjust quickly in changing light when you are using a shallow depth of field. For those that prefer circular filters this is also a highly recommend as it performed very well. I would recommend this filter to anyone who fits those 3 categories.
Variable ND filters are something that everyone looks into when they first get into ND filters as they combine many filters into one. Traditionally that savings doesn’t mean great performance, but in this case, the NiSi True Color ND-VARIO Pro provides fantastic performance for a great value.
If you are interested in learning more and NiSi Filters, I offer free consultations, yes free. Schedule one below and let me tell you about the NiSi system and help you find exactly what you need for your camera and lenses.
Have a question about the True Color ND-VARIO Variable ND? Drop a comment below and I’ll answer it for you as quick as possible.
#Review#Chris Ewen Crosby#Filters#Filter holder#NiSi Optics USA#NiSi#Square Filters#Ambassador#Product Review#NiSi Ambassador#Photography#equipment#landscape#landscape photography#Neutral Density Filters#ND Filters#True Color ND-VARIO PRO ND#Variable ND Fitler#1-5 Stops#Test Shots#Before and after
0 notes
Text
A little experimentation with image stacking, 10 November 2022
A little experimentation with image stacking, 10 November 2022
It was a lovely day, and perfect weather to take out the ‘broken’ Olympus Pen mirrorless camera and the Lomography Experimental Lens Kit and try a little image stacking. Since I had last been out I bought a variable neutral density filter and made an adaptor to fit this to the front of the standard lens. With the setting at ‘8’ I could get a nice exposure with about 10 exposures per frame. In…
View On WordPress
#abstract#abstractart#abstractphoto#abstractphotography#experimentalphotography#imagestacking#lomography#multipleexposure#photography
4 notes
·
View notes
Text
Price: [price_with_discount] (as of [price_update_date] - Details) [ad_1] Product Description 【Shoot Like A Pro DSLR】This clip-on filter kit from K&F Concept includes a K&F Concept Nano-K series variable ND2-ND400 neutral density filter and a clip for phone, it is fit for travel shots, street photography, outdoor landscape, and time-lapse photography, Instagram, weddings, vacations, and other fun shooting, etc. 【K&F Concept 52mm Nano-K Series Variable ND2-ND400 Filter 】Made of top optical glass and aluminum alloy frame, adopt 18 layer MRC coating, with 1 to 9 stops of adjustable light reduction and 360-degree rotation for precise dimming settings, this filter is perfect for diverse scenarios. (Note: High stops may cause a cross-pattern effect, commonly known as an "X black cross." This phenomenon is natural and temporary, occurring due to the adjustable ND filter's interaction with certain lenses and focal lengths.) 【Light Reduction】The variable ND2-ND400 filter helps reduce the amount of light reaching the lens without affecting the color. Applies slow shutter speed under strong sunlight exposure. 【Widely Compatibility】The clip can be clamped on most smartphones to take pictures like a professional SLR camera. The 52mm VND filter can also work with the DSLR cameras with ø 52mm lens thread. 【Quick Install & Easy Operation】Simply screw the variable ND filter on the phone clip, then clamp it on your phone, rotate the filter to a desired stop according to the light condition and start taking photos. During a photo shoot, easily rotate the filter to adjust light exposure for different effects [ad_2]
0 notes
Text
Lost and Found-Research
Shooting with long shutter speeds
As part of my location shot, I want to research more on using longer shutter speeds, particularly when running water is involved. So I decided to do some digging online to put together a sort of guide for myself and onto my Tumblr.
Shutter speed is the name given to the process of how long the camera shutter is open, exposing light onto the camera sensor. It’s how long your camera spends taking a photo, the process has a few important effects on how your images will appear.
The first big effect is motion blur. If your shutter speed is long, moving subjects in your photo will appear blurred along the direction of motion. Such an effect is used quite often in advertisements of cars and motorbikes when a sense of speed and motion is communicated to the viewer by intentionally blurring the moving wheels. Below is an example of motion blur when a long shutter speed is used.

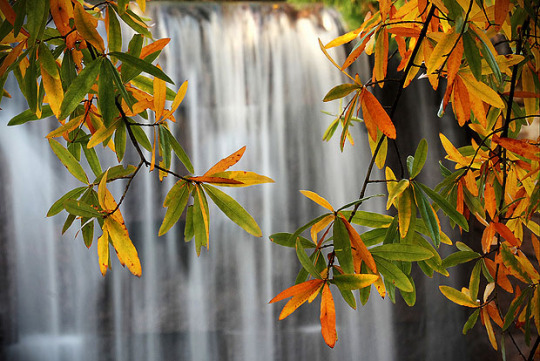
A slow shutter speed is to photograph the Milky Way or other objects at night, or in dim environments with a tripod. Landscape photographers may intentionally use long shutter speeds to create a sense of motion on rivers and waterfalls while keeping everything else completely sharp.
Shutter speed can also be used to do the opposite-freeze motion. If you use an especially fast shutter speed, you can eliminate motion even from fast-moving objects, like birds in flight, or cars driving past. If you use a fast shutter speed while taking pictures of water, each droplet will hang in the air completely sharp, which might not even be visible to our own eyes.
Another important effect of shutter speed is on exposure, which relates to the brightness of an image. If you use a long shutter speed, your camera sensor gathers a lot of light, and the resulting photo will be quite bright. By using a quick shutter speed, your camera sensor is only exposed to a small fraction of light, resulting in a darker photo.

Shutter speed is not the only variable that affects the brightness of an image. There is also aperture and ISO, along with the actual brightness of the scene in front of you. So, you have some flexibility when you’re deciding on a shutter speed, but you need to pick your other settings carefully.
Shutter speed can be a vital tool to capture a photo of the proper brightness. On a sunny day, you may need to use a fast shutter speed so that your photo isn’t overexposed. Or, if it is dark out, a long shutter speed may be necessary to avoid a photo that is too dark, which, in turn, could require a tripod, due to motion blur from handholding the camera. For many people, this is the main reason to adjust shutter speed: to make sure your photos are the proper brightness. Still, motion blur concerns are also very important, and should not be overlooked.
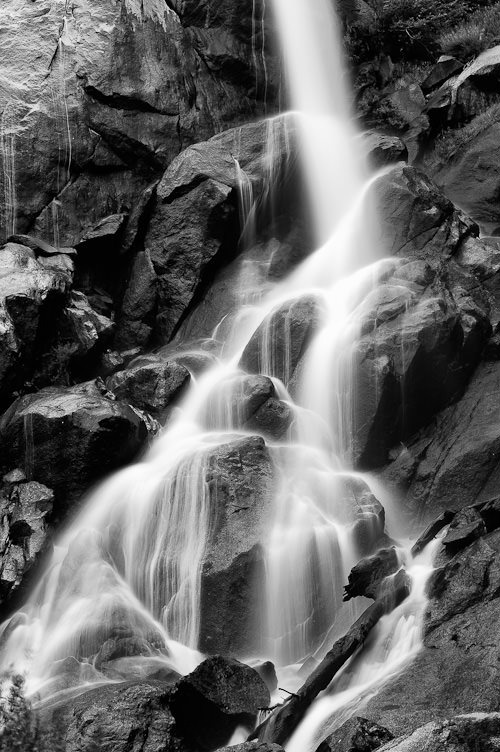
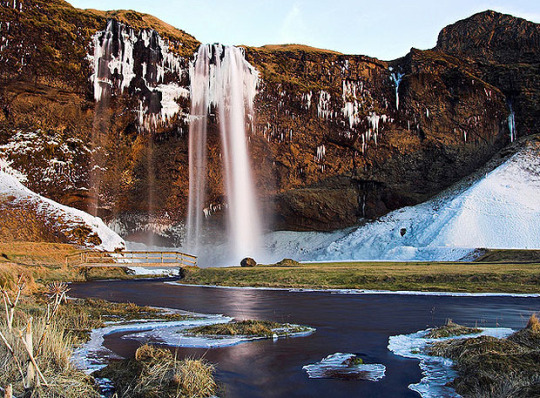
Waterfalls and shutter speed
Motion is a key aspect of waterfalls, so be sure to include it in your photos.
To precisely capture this movement, the key is choosing the best camera settings before you start shooting.
Shutter Speed: every waterfall is different, and there's no single correct shutter speed to use, but if you want to capture movement in the water you'll need to use a slow shutter speed-often somewhere from 0.3 seconds up to several seconds.
A good rule is to start with a speed of 1 second and take a test shot. Review it on your camera's LCD screen and adjust until you get the correct level of blurring.
Tripod: with such a low shutter speed you won't be able to hand-hold your camera, so a sturdy tripod is an essential accessory here.
ISO: set your ISO as low as it will go (100). This reduces your camera's sensitivity, allowing you to use slower shutter speeds without overexposing the scene. It also has the added benefit of reducing the amount of digital noise in your photos.
Aperture: using your lens's narrowest aperture will again let you use a longer exposure time. It will also give you the maximum depth of field, keeping as much of your scene in focus as possible.
Filters: if you still can't get your camera to go slow enough you'll need to use some filters to reduce the amount of light that's being let in. Professional nature photographers swear by neutral density (ND) filters, which reduce the light without affecting the colours in the scene.
Shoot at the Right Time of Day: bright sunlight can easily ruin a waterfall photograph. The intense light casts strong shadows across the scene, making it difficult to get your exposure right. It also causes hundreds of reflections in the water and wet scenery, which will show up as tiny white dots in your shot.
2 notes
·
View notes
Text
Filter Task
Circular Polariser
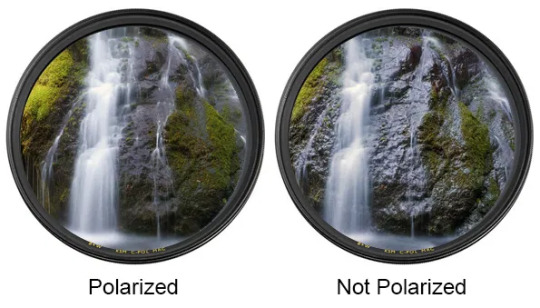
A circular polariser cuts out certain types of light in ways that will benifit your image. It is often used to reduce unwanted glare and reflections in Landscape photography.
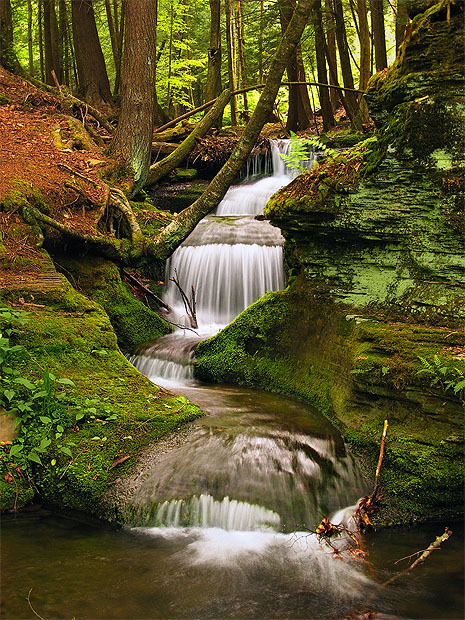
Neutral Density (ND)
A neutral density filter comes in various different stops, the most common ones are 10, 12 and 16. You can also get a variable ND filter that has a range of stops on it. The main purpose of an ND filter is to limit the amount of light entering the lens. This is most commonly used during the day by landscape photographers that want to do mulitple minute long exposures. Photographers want to do this to create still and smooth water and clouds. I’ve used this in the past at beaches and waterfalls and the results are brilliant. With an ND filter, you still get complete control over aperture and ISO, but you have the option to do really long exposures without the picture being to overexposed.


5 notes
·
View notes
Text
This Is What Quality VNDs Look Like: Lee Elements VND 6-9 Review
Variable Neutral Density Filters should be, well, neutral.
Neutral density filters open up possibilities for shooting slow shutter speeds in the middle of the day or wide-open apertures with flash and bright sunlight. Yet, many of them leave color casts and vignetting in their wake — or at least, that’s the case with the cheap choices. Priced at $340, the Lee Elements VND 6-9 stop filter certainly doesn’t fit the word cheap. Offering enough light…

View On WordPress
#filters#Lee Elements#LEE Filter#Long Exposure Filter#long exposures#Photography#Variable ND Filter#variable neutral density filter#VND
0 notes
Text
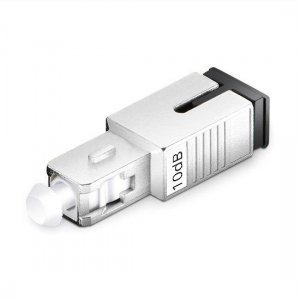
How to Choose Fiber Optic Attenuators
Need of Fiber Optic Attenuators-
In fiber-optic technology, beginners are often confused with why it is necessary to use optic attenuators to reduce light intensity. To increase the signal power level we generally use amplifiers?
The truth behind it is too much light can overload a fiber optic receiver and fiber adapter. When a transmitter delivers too much light optical fiber attenuators are required, such as when a transmitter is very close to the receiver.
Working of a Fiber Attenuator –
By absorbing light such as a neutral density thin-film filter attenuator usually works and even it works by scattering the light such as an air gap. They should not reflect the light as it may cause unwanted back reflection in the fiber system.
There is another type of attenuator that utilizes a length of high-loss optical fiber and it operates upon its input optical signal power level in such a way that its output signal power level is less than the input level.
Reduction in power is done by means such as diffusion, absorption, scattering, scattering, dispersion, deflection, and diffraction, etc. You can buy optical circulator online.
Important Feature a Fiber Attenuator Should Have-
For an attenuator, the most important spec is its attenuation versus wavelength curve. On all wavelengths used in the fiber system or at least on all flat attenuators should have the same effect.
Types of Attenuators-
Generally, there are two functional types of fiber attenuators: plug style (including bulkhead) and in-line.
A plug style attenuator is employed as a male-female connector where attenuation takes place inside the device i.e. on the light path from one ferrule to another. These include SC attenuator, FC fiber optic attenuator, LC attenuator, ST attenuator, and more.
By splicing its two pigtails, an in-line attenuator is connected to a transmission fiber.
As these attenuators use various phenomena to decrease the power of the propagating light, the principle of operation of optical attenuator becomes different.

There is also the availability of Variable fiber optic attenuators, but they usually are precision instruments used in making measurements.
Follow our Facebook and Twitter for more information about our product.
3 notes
·
View notes
Text
Pre-Production Research (19/10/20)
In this class we discussed a variety of things, from lens quality to white balance and were asked to look deeper into these topics, I’ll include my research below:
White Balance
White balance is an in-camera setting which allows the user to correct the colour temperature of an image, removing any unnatural colour cast. This allows items which are white to the eye, appear so on the screen. Factors which can alter the temperature are as follows:
Time Of Day
Time of year
Location
Atmosphere
Physical Temperature
To combat these variables you’ll have to dial in your white balance accordingly, these presets are assigned a value in Kelvins depending on how warm or cold the light source is. For example, Candle light is an incredibly warm light source at around 1000K, as opposed to Blue-Sky shade which has a value of 10,000K.

Filters
We’d discussed different kinds of filters and their uses in class today. Filters ranging from ND and Polarising which are still used widely and unaffected by the development of digital photography, such as the colour filters are.
Before I explore filters in depth, here are some reasons a photographer may put a filter in front of their lens:
To reduce atmospheric contamination
Remove unwanted reflections
Restrict Spectral Response
Correct Colour Balance or Temp (mainly used for analogue)
Create proportionate Neutral density
We then discussed a few types of filters and their specific applications:
UV Filter
UV filters were originally introduced to block unwanted UV light from making contact with the film on analogue cameras. In addition to this, the filters have some minor de-hazing effects for atmospheric conditions.
However, in the age of the DSLR UV filters are just used for lens protection as it’s cheaper than replacing a lens.

Polarising Filter
Polarising Filters or Polarisers, are put in front of the lens to reduce reflections, cut through atmospheric haze and increase colour saturation. This makes the filter very popular amongst landscape, cityscape and architecture photographers, however It can be found in all the genres.
Neutral density filter
An ND filter is a darkened glass which is set to lower the exposure by a certain number of f stops. Using an ND filter allows the photographer to either shoot wide open, or longer exposures in bright conditions without running the risk of blowing out their highlights, or even over exposing. These can often be stacked until the creative effect is achieved.

Lens quality
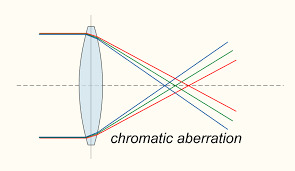
We had briefly discussed quality of lenses at the end of the lesson, in addition to the abnormalities which come with lesser quality glass. There can be issues of chromatic aberration with a cheaper lens, the quality of glass not allowing the colours to stack on top of each other at the same point. This causes a distortion in colour. There can also be issues of: Blurriness, Lack of Contrast,Vignetting and fall off of light.

1 note
·
View note