#widows rdp
Explore tagged Tumblr posts
Visit Tumblr Blog
Explore Tumblr blogs with no restrictions, modern design and the best experience.
Last Seen Tumblr Blogs


Fun Fact
Tumblr.com is the 103rd most visited website in the world.
Text
Securing Success: Why RDPExtra's Reliable Solutions are Essential for Business Growth

Regarding server management and remote access, the choice between Linux and Windows RDP is pivotal. Linux, known for its stability, security, and flexibility, is a popular choice for hosting servers. Ubuntu Server, a leading Linux distribution, offers a robust platform for running critical applications and services. RDPExtra recognizes the importance of Linux-based solutions and offers seamless integration with Ubuntu Server, ensuring unparalleled performance and reliability for businesses of all sizes.
Deploying the Ubuntu Server on RDPExtra’s platform is straightforward, thanks to the provider’s intuitive interface and comprehensive documentation. Whether you’re a seasoned IT professional or a novice user, RDPExtra’s user-friendly setup ensures a hassle-free experience. With just a few clicks, businesses can buy RDP instances pre-configured with Ubuntu Server, eliminating the need to manually install the Ubuntu server on RDP.
Security is paramount in today’s digital landscape, with cyber threats becoming increasingly sophisticated. With RDPExtra’s Linux-based solutions, businesses can rest assured knowing their data and infrastructure are fortified against potential security breaches. Ubuntu Server, renowned for its robust security features and proactive community support, provides a solid foundation for safeguarding sensitive information and mitigating cyber risks. By leveraging RDPExtra’s secure infrastructure, businesses can fortify their defenses and protect against evolving threats.

Furthermore, RDPExtra’s commitment to innovation extends beyond conventional remote access solutions. With the rising popularity of containerization and virtualization technologies, businesses are increasingly adopting Docker and Kubernetes for orchestrating scalable and resilient applications. RDPExtra’s Linux-based infrastructure seamlessly integrates with these technologies, empowering businesses to deploy and manage containerized workloads with ease. By harnessing the power of Ubuntu Server and RDPExtra’s robust platform, businesses can embrace the future of cloud-native computing and stay ahead of the curve.
Scalability is another crucial factor for businesses seeking long-term growth and expansion. With RDPExtra’s Linux-based solutions, businesses can scale their infrastructure effortlessly to meet evolving demands. Whether you’re a small startup or a multinational corporation, RDPExtra offers flexible pricing plans and customizable configurations to accommodate your specific requirements. By leveraging Ubuntu Server on RDPExtra’s platform, businesses can scale their operations seamlessly without the hassle of downtime or infrastructure overhaul.
In conclusion, RDPExtra’s reliable solutions, powered by Ubuntu Server and Linux, are indispensable for businesses seeking success in today’s competitive landscape. From robust security and unparalleled performance to scalability and innovation, RDPExtra delivers comprehensive solutions tailored to the unique needs of modern enterprises. By choosing RDPExtra as your trusted partner, you can unlock the full potential of remote access technology and propel your business towards sustained growth and prosperity. Experience the difference with RDPExtra and elevate your business to new heights.
0 notes
Text
California tax brackets 2021

#California tax brackets 2021 plus
#California tax brackets 2021 plus
$121,579.83 plus 12.3% of the amount over $1,250,738.įor other the California Income Tax Rate for other filing status visit the Franchise Tax Board site. $60,789.92 plus 12.3% of the amount over $625,369.Ĭalifornia Tax Brackets for Married/Registered Domestic Partner (RDP) Filing Jointly Taxpayers (and Qualifying Widowers) Tax rate That’s hardly enough income to call yourself “ rich.” Your federal taxes are paid to the IRS, while your California taxes are paid to the Franchise Tax … SOPA IMAGES/LIGHTROCKET VIA GETTY IMAGESĬapital Gains Taxes in California are sky-high. LOS ANGELES TIMES VIA GETTY IMAGESĬalifornia state tax rates and tax brackets California Tax Brackets for Single Taxpayers I am putting quotes around high because you get hit with a 9.3% capital gains tax at just $61,215 of income if you are single. Employing tax-saving strategies are imperative for a resident of California with “high” incomes. I am a huge fan of tax planning and tax loss harvesting. This is often a surprise to the tech millionaires working at companies like Tesla TSLA -1% TSLA -1%, Apple AAPL +0.2% AAPL +0.2%, Airbnb, or even SpaceX with substantial stock options. With California not giving any tax breaks for capital gains, you could find yourself getting hit with a total state tax rate of 13.3% on your capital gains. Your state tax-filing status and the overall amount of income you earned for the year determine at which rate you will be taxed. This is a Mental Health Services surtax that isn’t included in the marginal tax rate schedule. Being a progressive state with a progressive income tax system, there is an additional 1% tax on incomes above $625,370, if you file as single. The tax brackets in California range from a low of just 1% to a high of 12.3%. Determining Your 2021 California Income Tax RatesĬalifornia taxpayers are subject to nice progress marginal tax rate brackets. How California taxes capital gains make it imperative that your work with a fabulous financial planner to do proactive tax planning. This means your capital gains taxes will run between 1% up to 13.3%, depending on your overall income and corresponding California tax bracket. It does not recognize the distinction between short-term and long-term capital gains. Simply put, California taxes all capital gains as regular income. Understanding California capital gains tax rate obligations can help you make proactive money moves to minimize your taxes owed to the Franchise Tax Board. It has been my experience as a Los Angeles financial planner many people ignore state capital gains taxes when doing their tax planning (that is, assuming they are doing any tax planning at all). Capital gains tax rates range from zero-percent up to 37%, depending on the type of capital gains being taxed. In contrast, the Federal Government will differentiate between long-term capital gains and short-term capital gains for tax purposes. This means you could get hit with surprisingly large tax bills on your investment accounts if you live in California. The more taxes you pay, the harder it will be for you to build wealth.Ĭalifornia taxes all capital gains as regular income. Taxation of capital gains in California is no less well taxing on investors’ budgets. California has one of the highest costs of living in the US and is one of the highest income tax states. The hurdles to be financially successful in this state are high. With more than 40 million people officially living in California, the great weather and beautiful beaches, mountains, Palm Springs must be doing something right. By David Rae Certified Financial Planner™, Accredited Investment Fiduciary™ Whether you are in Palm Springs, West Hollywood or even San Francisco you will likely owe … GETTY IMAGES FOR LAND ROVER Keep reading to find out how much California will be taxing your investment gains. As a long-time Los Angeles Financial advisor, who does a ton of tax planning for my clients, I’d be willing to bet most people in CA have no idea what the California capital gains rates are.
0 notes
Text
Life is like a game of chess..we’re all being played

(https://qph.fs.quoracdn.net/main-qimg-b92fbf5eaf429820ef9f381223243e75-c)
Positionality is the notion that personal values, views, and location in time and space influence how one understands the world. In this context, gender, race, class, and other aspects of identities are indicators of social and spatial positions and are not fixed, given qualities.(sk.sagepub.com). This is evident that there are numerous factors that influence a person’s positionality,I would like to suggests that a person’s positionality can change from time to time in their lifetime giving the notion that in life we are being played by factors such as our government,media,laws,upbringing even the careers that we find ourselves in. A significant change in one of these factors can automatically cause a change in one’s position,just like a game of chess your opponents move will always impact the position(move) you make all in the quest to “win in life” but very few people understand that life isn’t just about winning but about learning.Changing your position in life can bring about a new perspective even a strategy to greater impact your society or even to understand it a bit more.This what I will be delving into this post..shall we.
Now I’ve turned the magnifying glass onto myself to really see what factors have created my current positionality.First of all I am able bodied and this has afforded me certain privileges in society and I am largely free from any form of discrimination in society.Looking through the media lense I am at a greater privilege to have more variety in terms of clothing,activities,careers all because of my weight and size(petite). There are certain stereotypes(model figure,more attractive to the opposite sex,”popular girl”) that put me at the top of the social hierarchy because of my size and height, but if I were to bring it into the South African context even globally my race does exclude me from certain activities and puts me in a position where I can be discriminated against because of the colour of my skin as a result of the history of racism that has happened globally and Apartheid that has happened in South Africa.This speaks into the factor of ethnicity and how that further impacts my positionality, I come from a Zulu culture and IsiZulu is my mother tongue this affords me the privilege to communicate with the majority population in South Africa. The Zulu culture is one of South Africa’s most authentic cultures and adds to the diversity of the country,but if you were to ask me it’s one of the most respected cultures within the country.
Patriarchy states that because I am a woman I am obligated to become submissive but through the years this has been challenged by feminists suggesting equality of all genders.This has influenced my positionality because I do agree with the case to some extent because I do follow what my religion says about gender roles.My religion is Christianity and my position is greatly influenced by it, my outlook on life is governed by the values and rituals of my religion. My educational level is also a factor that influences my positionality.I am in my 4th year of occupational therapy,they say knowledge is power and I am mindful of the power whether real or perceived that stems from my education.This degree puts me at a level to impact people’s lives who find themselves experiencing occupational imbalance.I come from a family where my mother is a widow taking care of myself and my younger brother.This family structure does not fall under the nuclear family structure but it is nothing short of unconditional love and support.With a female heading the household this challenges the patriarchal structure and feeds more into the driving forces of feminism this also further impacts my positionality in the world.
I live in Durban which is the heart of South Africa’s harbour trade having the largest habour in the country.This city is booming with many job opportunities and has it’s own cultural significance.This city is historic in South Africa and is home to many of the liberation fighters.This impacts my positionality in the sense that I look at the country from the historic lenses of my city. They call Durban” The boiling pot of cultural diversity” because of the many cultures that are found here.This gives me a diverse outlook on life.I live in suburban residential area where all basic needs are met,there is effective service delivery and there are infrastructure that promote growth and sustainability within my community.I come from a working class and it has been engraved within me that in order to get what I want I need to work hard for it.These factors impact my positionality in the sense that my approach towards achieving anything in life has to be hard work and determination,when I do start my own family I would like to be in an area that is safe, economically empowered, opportunistic and where all service deliveries are met
Positionality is something that is usually spoken about when one is about to embark on a research topic.The importance of this is to ensure that the researcher is not found to be biased or having their positionality influence the method and direction of their research.In the case of the community that I am in being Inanda it is always wise to put aside my positionality as this may cloud my judgement when it comes to assessing conditions of the community and its members;creating programmes for the people of the community as well as working in the community. My positionality of the environment that a child should be raised in which is having two parents if not at least one and in a household that provides unconditional love and support;the parents of the children need to be financially stable to care for the child’s needs.Now when it comes to planning interventions for the community and its members(Inanda) I need to constantly take into consideration how their socio-economic position is different from mine therefore I cannot assume that every child comes from a home that my positionality supports/is influenced by.Many children from this community come from households where there is no financial freedom,broken family dynamics where the main caregiver is the grandparents and the parents are nowhere to be found or even the children are heading that houdsehold.These factors have an impact on intervention and which programs I need to focus on/introduce to the community ensuring that I provide real life therapy and not just one that would fulfil my positional thoughts.The factors mentioned above also speak to the patriarchal state of my positionality in that women are generally the breadwinners and have to go to work,that alone has to be considered when planning a program for children who have learning or physical disabilities considering that the mother may not have time to carry out these activities and I would have to work my way around that situation to ensure the child still gets the therapy they need.
Living conditions of the Inanda community is very informal most households do not have running water or electricity and the community is largely populated with RDP houses and shacks.All the conditions that come with this type of living such as inadequate sanitation,lack of recreational space,lack of privacy,increased crime have to be assessed when working with the community in terms of planning programmes that bring about optimal performance despite the living conditions that they are in.The Inanda Wilderness Park allows for these opportunities by being centred in the heart of the community to allow for therapeutic engagement with nature.
The socio-economic-legislative and cultural influence of South Africa as a whole impacts different communities in different ways.We may all be facing the same challenges but to some the impact is far greater than others.All of this impacts one’s positionality of which has to be guided when working in a space that is outside the walls of your positionality.This community block has challenged me to think outside the walls of my positionality and either find the differences or similarities that I may come across in the community of Inanda.Doing this will result in a greater relation to the people of the community meaning that I will beable to work with them at the same level of their understanding,I will be able to assess conditions of the community better and ultimately create programmes that are specific to them and that are beneficial.This will ensure effective therapeutic outcomes and opening the university to the streets-Gada Kadoda
0 notes
Photo


Added the ByteStars networking instructions for the ByteStars preconfigured raspberry pi. Boots out of the box to the 3.5in touch screen monitor. Then connect to it via remote desktop...neat. See here: https://www.ebay.com/itm/202585866726
Start the Terminal program: >_
then type:
sudo raspi-config
Press return and select change “User Password” use a strong password if you’re going to be accessing your raspberry pi remotely - see the Network/Internet Connectivity section. Enable SSH and VNC. The default user name is: pi and password is: raspberry.
NETWORK/INTERNET CONNECTIVITY/Remote Desktop/SSH and VNC
Network connection with Ethernet: The raspberry pi Ethernet and Wi-Fi port is set to auto: Connect your wired Ethernet network cable to the raspberry pi's Ethernet port or connect to your Wi-Fi. You should now have an internet connection.
Once connected to your network with either the Ethernet or Wi-Fi connection; and you know the IP address that was assigned to the raspberry pi by your equipment: mouse over the network icons or type "ifconfig" in the terminal program to learn your IP address.
For a Remote Desktop Connection (Graphical) There are 2 ways. VNC and Remote Desktop (RDP) Some Differences/Considerations RDP is a security concern if using from outside of your network. Only use on your local network. VNC uses encryption and is more secure. VNC can be used to access your raspberry pi from outside your local network. For example, from office to home. Download the VNC client from https://www.realvnc.com/en/connect/download/viewer/: RDP can display the raspberry pi at better resolutions and creates a non mirrored screen of the 3.5 or other built-in screen. VNC displays the raspberry pi at the built-in display resolution and is mirrored to the built-in screen. VNC can do file transfers with built-in on screen controls.
On Windows/PC, use the built-in program: Remote Desktop Connection From the Windows start button: Start / Accessories / Remote Desktop Connection. the Remote Desktop Connection program will start. Type the IP address of the raspberry pi and click OK. A raspberry pi login screen will then display. Login with your User Name and Password. Neat, your desktop computer now displays your raspberry pi and so does the 3.5 display. VNC connection.
Run the VNC program and start a new connection using the raspberry pi IP address. Connect and login.
To connect to your new raspberry pi device with SSH.
Secure Shell (SSH) is a cryptographic network protocol for operating network services securely over an unsecured network. Typical applications include remote command-line login and remote command execution, but any network service can be secured with SSH. Basically, it will allow a secure remote computer a command prompt connection to the raspberry pi. For windows download the program Putty at https://www.putty.org/ Install the free and very small 2.8mb program. Run Putty. Enter the raspberry pi IP address. A command prompt will display. Login with your User Name and Password. Neat, your desktop computer now displays a command prompt that affects the raspberry pi.
Troubleshooting connection tip. Make sure both the raspberry pi and the desktop/laptop computer are on the same network. On widows desktop, open cmd (command line terminal) and type ipconfig to see your network assigned ip address. On MAC/Linux, run the terminal program and type ifconfig. Both the computer IP address should (for example look like this: 192.168.?.?, or 10.10.?.?. The 1st ? should be the same, 2nd ? should be unique.
For outside connections, for example, from your office computer to the raspberry pi at home. You will need to configure your router for port forwarding - Another topic.
3.5 display setup (need internet connection)
// Run in terminal. 1 at a time. Or automate with a batch file.
sudo rm -rf LCD-show
git clone https://github.com/goodtft/LCD-show.git
chmod -R 755 LCD-show
cd LCD-show/
sudo ./LCD35-show
reboot //
// If you want revert back to the HDMI port. Open the terminal and type commands 1at a time to get back.
chmod -R 755 LCD-show
cd LCD-show/
sudo ./LCD-hdmi
reboot
#bytestars#raspberry pi#raspberry pi remote desktop#preconfigured raspberry pi#stem#education#retro pi
0 notes
Text
Embracing the Remote Work Revolution with RDPExtra: Navigating the Future of Work

Remote Desktop Protocol (RDP) has emerged as a cornerstone technology for remote work, enabling seamless access to desktops and applications from any location. RDPExtra takes this functionality to the next level by providing a comprehensive suite of features tailored to the evolving needs of modern businesses. Whether it’s accessing Windows Server environments or managing Linux-based systems, RDPExtra offers a unified platform for efficient remote collaboration and productivity.
One of the key advantages of RDPExtra is its compatibility with both Linux and Windows Server environments. This versatility allows businesses to leverage their existing infrastructure while seamlessly integrating remote work capabilities. Whether you’re running a Linux-based development environment or a Windows Server deployment, RDPExtra provides a unified solution for remote access and management. This flexibility is especially valuable in today’s hybrid IT landscape, where organizations are increasingly adopting multi-platform environments to meet diverse business needs.
For businesses looking to buy RDP solutions, RDPExtra offers a cost-effective and scalable option. By providing a comprehensive set of features at competitive pricing, RDPExtra enables organizations of all sizes to embrace the remote work revolution without breaking the bank. With flexible licensing options and transparent pricing models, RDPExtra ensures that businesses can scale their remote work infrastructure according to their evolving needs, without being locked into rigid contracts or costly commitments.
Security is a top priority in any remote work environment, and RDPExtra takes this aspect seriously. With robust encryption protocols and advanced security features, RDPExtra ensures that sensitive data remains protected during remote access sessions. From encrypted communications to multi-factor authentication, RDPExtra provides multiple layers of defense against cyber threats, safeguarding businesses from potential security breaches and unauthorized access. Additionally, RDPExtra offers the ability to change passwords in RDP sessions seamlessly, enhancing security posture and compliance with industry regulations.
Beyond security, RDPExtra prioritizes user experience, ensuring that remote work remains efficient and seamless. With a user-friendly interface and intuitive controls, RDPExtra makes it easy for employees to access their desktops and applications from any device, without compromising productivity. Whether you’re working from a laptop, tablet, or smartphone, RDPExtra provides a consistent and responsive experience, enabling employees to stay connected and productive, no matter where they are.
In conclusion, RDPExtra is at the forefront of the remote work revolution, empowering businesses to navigate the future of work with confidence. By harnessing the power of Linux and Windows Server, coupled with the convenience of Windows RDP, RDPExtra offers a comprehensive solution for remote access and management. Whether you’re looking to buy RDP solutions or enhance the security of your remote work infrastructure, RDPExtra has you covered. With its flexible licensing options, advanced security features, and intuitive user experience, RDPExtra is the ultimate ally for businesses seeking to thrive in the era of remote work.
0 notes
Text
Mastering Hadoop Installation on Ubuntu Server: A Step-by-Step Guide
Are you ready to dive into big data processing with Hadoop on Ubuntu Server? Look no further! In this comprehensive guide, we’ll walk you through the installation process step-by-step, ensuring you have everything you need to get started. Whether you’re a Linux aficionado or a Windows RDP enthusiast looking to buy RDP and install Ubuntu on RDP, this guide has you covered.
Understanding Ubuntu Server: Before we delve into the installation process, let’s take a moment to understand Ubuntu Server. Ubuntu is one of the most popular Linux distributions, known for its stability, security, and ease of use. Ubuntu Server is specifically designed for server environments, making it an ideal choice for hosting Hadoop clusters.

2. Setting Up Your Environment: If you’re using Ubuntu Server on a physical machine or a virtual environment like VMware or VirtualBox, ensure that it meets the minimum system requirements for running Hadoop. This includes having sufficient RAM, disk space, and processing power. Alternatively, if you’re considering using Windows RDP, you can buy RDP and install Ubuntu on it, providing a flexible and scalable environment for Hadoop deployment.
3. Installing Ubuntu Server: Begin by downloading the latest version of Ubuntu Server from the official website. Once downloaded, follow the on-screen instructions to create a bootable USB drive or DVD. Boot your system from the installation media and follow the prompts to install Ubuntu Server. Make sure to allocate disk space for the operating system and any additional storage required for Hadoop data.
4. Configuring Network Settings: After installing Ubuntu Server, configure the network settings to ensure connectivity within your environment. This includes assigning a static IP address, configuring DNS servers, and setting up network interfaces. Proper network configuration is essential for communication between Hadoop nodes in a distributed environment.
5. Updating System Packages: Before installing Hadoop, it’s essential to update the system packages to ensure you have the latest security patches and software updates. Use the following commands to update the package repository and upgrade installed packages:bashCopy codesudo apt update sudo apt upgrade
6. Installing Java Development Kit (JDK): Hadoop is built on Java, so you must install the Java Development Kit (JDK) to run Hadoop applications. Ubuntu repositories provide OpenJDK, an open-source implementation of the Java Platform. Install OpenJDK using the following command:bashCopy codesudo apt install openjdk-11-jdk
7. Downloading and Installing Hadoop: Next, download the latest stable release of Hadoop from the official Apache Hadoop website. Once downloaded, extract the Hadoop archive to a directory of your choice. For example, you can use the following commands to download and extract Hadoop:bashCopy codewget https://www.apache.org/dist/hadoop/common/hadoop-3.3.1/hadoop-3.3.1.tar.gz tar -xvf hadoop-3.3.1.tar.gz
8. Configuring Hadoop Environment: After installing Hadoop, you’ll need to configure its environment variables to specify the Java runtime environment and other settings. Edit the hadoop-env.sh file located in the etc/hadoop directory and set the JAVA_HOME variable to the path of your JDK installation:bashCopy codeexport JAVA_HOME=/usr/lib/jvm/java-11-openjdk-amd64
9. Setting Up Hadoop Cluster: Once Hadoop is installed and configured on your Ubuntu Server, you can proceed to set up a Hadoop cluster. This involves configuring Hadoop’s core-site.xml, hdfs-site.xml, and mapred-site.xml configuration files and starting the Hadoop daemons on each node in the cluster.
10. Testing Hadoop Installation: To ensure that Hadoop is installed and configured correctly, you can run some basic tests. Start by formatting the Hadoop Distributed File System (HDFS) using the following command:bashCopy codehdfs namenode -format
Then, start the Hadoop daemons and verify their status using the following commands:bashCopy codestart-dfs.sh start-yarn.sh
Finally, run a sample MapReduce job to confirm that Hadoop is functioning correctly:bashCopy codehadoop jar $HADOOP_HOME/share/hadoop/mapreduce/hadoop-mapreduce-examples-3.3.1.jar pi 16 10000
Congratulations! You’ve successfully installed Hadoop on the Ubuntu Server, ready to tackle big data processing tasks with ease.
In conclusion, setting up Hadoop on the Ubuntu Server is a straightforward process that anyone can accomplish with the right guidance. Whether you’re a Linux enthusiast or prefer the flexibility of Windows RDP, you can buy RDP and install Ubuntu on it to create a robust Hadoop environment. With Hadoop up and running, you’re well-equipped to handle the challenges of big data processing and analysis.
0 notes
Text
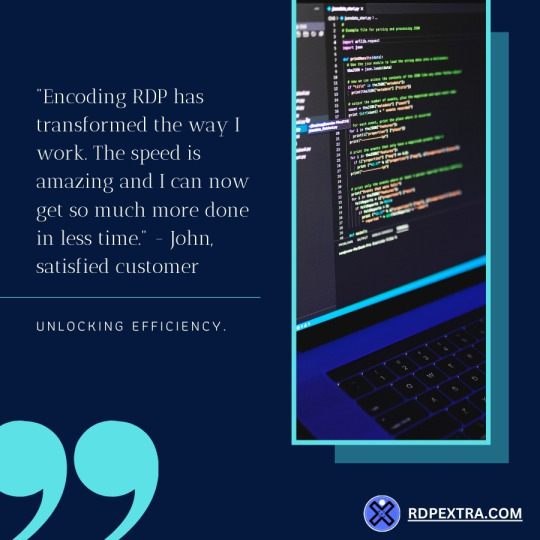
Unlocking Efficiency: 30% Off for Encoding RDP Users!

Linux: Elevating Productivity with Encoding RDP
Linux users are no strangers to the power and flexibility this operating system offers. However, remote desktop access can sometimes pose challenges. With Encoding RDP, accessing your Linux environment becomes a breeze. Whether you’re managing servers, developing software, or handling data analysis tasks, our RDP solutions ensure smooth navigation and efficient performance. Take advantage of the 30% discount to streamline your workflow and maximize productivity effortlessly.
Windows Server: Unleashing Potential with Encoding RDP
For businesses relying on Windows Server environments, optimizing remote access is crucial for maintaining operations and fostering collaboration. Our Encoding RDP solutions offer a seamless bridge to your Windows Server setup, enabling you to connect securely from anywhere, anytime. Whether you’re managing user accounts, deploying applications, or configuring network settings, our RDP services ensure a hassle-free experience. Don’t miss out on the opportunity to buy RDP at a discounted rate and enhance your Windows Server workflow today.
Windows RDP: Empowering Remote Work with Encoding RDP
In today’s distributed work landscape, remote access solutions like Widows RDP play a pivotal role in enabling seamless collaboration and productivity. With Encoding RDP, you can take your remote work experience to the next level. Our RDP solutions offer robust security features, intuitive user interfaces, and lightning-fast performance, empowering you to work efficiently from any location. Whether you’re accessing corporate resources, attending virtual meetings, or collaborating with team members, our RDP services ensure a smooth and reliable experience. Take advantage of the 30% discount to invest in your remote work setup and unlock unparalleled efficiency.
Change Password in RDP: Strengthening Security with Encoding RDP
Security is paramount when it comes to remote desktop access. With Encoding RDP, you can rest assured that your data and systems are protected against unauthorized access and cyber threats. One essential security practice is regularly changing passwords to prevent potential breaches. Our RDP solutions make it easy to change passwords securely, ensuring that your accounts remain protected at all times. By incorporating robust encryption protocols and multi-factor authentication, we prioritize the security of your remote access environment. Invest in Encoding RDP today and strengthen your security posture while enjoying the benefits of seamless remote access.
In conclusion, optimizing remote desktop access is essential for modern businesses and professionals alike. Whether you’re a Linux aficionado, a Windows Server user, or rely on Widows RDP for your daily tasks, Encoding RDP offers tailored solutions to meet your needs. With our exclusive offer of 30% off for Encoding RDP users, now is the perfect time to invest in enhanced remote access capabilities. Don’t miss out on this opportunity to streamline your workflow, maximize productivity, and strengthen security. Get started with Encoding RDP today and unlock the full potential of remote desktop access.
0 notes
Text
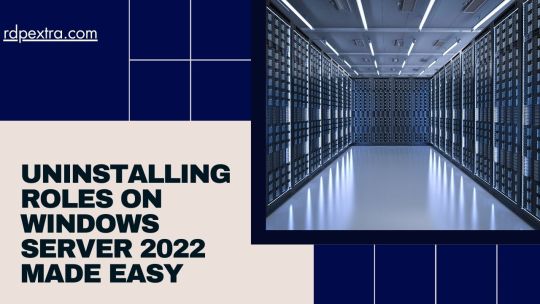
Streamlining Server Management: Uninstalling Roles on Windows Server 2022.
In the realm of server management, efficiency is key. Whether you're a seasoned IT professional or just diving into the world of server administration, knowing how to uninstall server roles from Windows Server 2022 is an essential skill. In this guide, we'll walk you through the process step by step, ensuring a smooth transition and optimal performance for your server. Additionally, we'll explore the benefits of integrating Ubuntu Server, Linux, and Windows RDP, and even how to buy RDP for enhanced functionality.

When it comes to optimizing your server's performance, it's essential to understand which roles are necessary and which may be surplus to requirements. Windows Server 2022 offers a wide range of roles to cater to various needs, from file servers to web servers and everything in between. However, as your server evolves, so too might your requirements change. This is where knowing how to uninstall unnecessary roles becomes invaluable.
To begin the uninstallation process, log in to your Windows Server 2022 instance using Windows Remote Desktop Protocol (RDP). RDP provides a convenient and secure method of remotely accessing your server, allowing you to manage it from any location with an internet connection. If you don't already have RDP set up, you can easily buy RDP services from reputable providers to streamline your server management experience.
Once logged in, navigate to the Server Manager dashboard. Here, you'll find a list of installed server roles under the "Manage" menu. Select the "Remove roles and features" option to initiate the uninstallation wizard. From here, you can choose the specific roles you wish to uninstall, ensuring that only the necessary components remain on your server.
As you streamline your Windows Server 2022 environment, consider the benefits of integrating Ubuntu Server and Linux-based solutions. Ubuntu Server offers a lightweight and versatile operating system that is well-suited for a wide range of server applications. By installing Ubuntu on your RDP-enabled Windows Server instance, you can leverage the power of Linux alongside familiar Windows tools and environments.
To install Ubuntu on your RDP-enabled Windows Server instance, begin by downloading the Ubuntu Server ISO image from the official website. Next, create a new virtual machine within your RDP environment and mount the Ubuntu ISO as a virtual CD drive. Follow the on-screen prompts to install Ubuntu, ensuring that you allocate sufficient resources to support your desired workload.
Once Ubuntu is installed, you can access it directly from your Windows Server instance using RDP. This seamless integration allows you to take advantage of both Windows and Linux environments within the same server environment, providing unparalleled flexibility and scalability for your infrastructure needs.
In addition to optimizing your server environment, it's essential to prioritize security throughout the uninstallation process. Windows Server 2022 includes robust security features to help safeguard your data and infrastructure against potential threats. By regularly updating your server and implementing best practices for access control and encryption, you can minimize the risk of unauthorized access and data breaches.
As you fine-tune your server environment, consider the specific requirements of your organization and workload. Whether you're hosting a website, managing databases, or supporting internal applications, tailoring your server roles to meet your needs is essential for optimal performance and efficiency. By leveraging the power of Windows Server 2022 alongside Ubuntu Server and Linux-based solutions, you can create a dynamic and resilient infrastructure that meets the demands of your business.
In conclusion, uninstalling server roles from Windows Server 2022 is a straightforward process that can help optimize performance and streamline server management. By leveraging tools such as Windows RDP and Ubuntu Server, you can create a flexible and scalable environment that meets the needs of your organization. Whether you're removing unnecessary roles or integrating new solutions, prioritizing security and efficiency will ensure that your server environment remains robust and resilient in the face of evolving challenges.
0 notes
Text
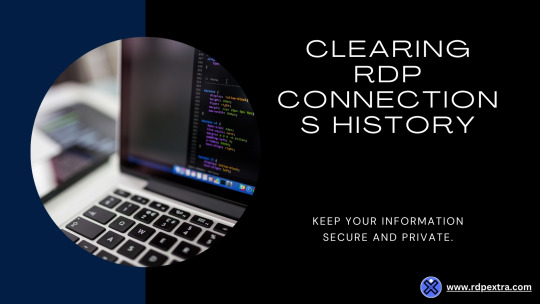
Clearing RDP Connections History in Windows: A Step-by-Step Guide
In today's interconnected world, remote desktop protocol (RDP) has become an indispensable tool for managing servers, accessing workstations remotely, or simply connecting to a computer from a different location. Whether you're using Windows RDP to access your Ubuntu Server or any other Linux system, managing your connection history is crucial for security and privacy reasons. In this guide, we'll delve into the process of clearing RDP connection history in Windows, ensuring your sensitive information remains protected. Additionally, we'll explore the benefits of using Ubuntu Server on RDP and how to install it.
Understanding the Importance of Clearing RDP Connections History
Windows RDP maintains a history of all connections made to remote computers, including usernames, IP addresses, and other pertinent details. While this feature can enhance convenience by allowing users to quickly reconnect to previous sessions, it also poses potential security risks. Unauthorized access to this information could compromise sensitive data or lead to malicious activities. Hence, regularly clearing your RDP connections history is essential for maintaining a secure computing environment.
Step 1: Accessing the Remote Desktop Connection Manager
To begin the process, navigate to the Remote Desktop Connection Manager in Windows. You can do this by typing "Remote Desktop Connection Manager" in the search bar or accessing it through the Start menu. Once opened, you'll find a list of all saved RDP connections.
Step 2: Deleting Individual Connection Entries
Scroll through the list to locate the connections you wish to remove. Right-click on each entry and select "Delete" from the context menu. Confirm the deletion when prompted. Repeat this process for all connections you want to remove from the history.
Step 3: Clearing the Entire Connection History
If you prefer to clear the entire RDP connections history at once, you can do so by clicking on the "Edit" menu at the top of the Remote Desktop Connection Manager window. From the dropdown menu, select "Clear Recent Connection History." Confirm the action when prompted, and all connection entries will be removed.
Step 4: Ensuring Secure Remote Access with Ubuntu Server
While Windows RDP offers a convenient solution for remote access, many users opt for Ubuntu Server on RDP for enhanced security and flexibility. Ubuntu Server, a popular Linux distribution, provides robust features for server management and administration. By leveraging RDP to access Ubuntu Server, users can enjoy a secure and reliable remote computing experience.
Step 5: Installing Ubuntu on RDP
To install Ubuntu on RDP, you'll need to first ensure that your RDP client supports Linux-based operating systems. Fortunately, many modern RDP clients offer compatibility with Ubuntu and other Linux distributions. Once you've verified compatibility, follow these steps:
Download the Ubuntu Server ISO file from the official website.
Launch your RDP client and create a new connection.
Specify the IP address or hostname of the Ubuntu Server you wish to connect to.
Enter your credentials and establish the connection.
Follow the on-screen prompts to complete the Ubuntu Server installation process.
Step 6: Configuring Ubuntu Server for Remote Management
After installing Ubuntu Server on RDP, you may need to configure certain settings to enable remote management. This may include setting up SSH access, configuring firewall rules, and installing remote administration tools. By ensuring proper configuration, you can streamline remote management tasks and enhance the security of your Ubuntu Server environment.
Conclusion
Clearing RDP connection history in Windows is a simple yet essential task for maintaining a secure computing environment. By regularly removing outdated or unnecessary entries, you can mitigate potential security risks and safeguard sensitive information. Additionally, leveraging Ubuntu Server on RDP offers a robust solution for remote server management, combining the flexibility of Linux with the convenience of remote desktop access. By following the steps outlined in this guide, you can ensure secure and efficient remote computing experiences.
0 notes
Text
A Step-by-Step Guide on Changing User Password in Windows Server
Are you managing a Windows Server environment but find yourself occasionally needing to reset user passwords? Whether you're a seasoned IT professional or just starting out, understanding how to change user passwords efficiently is crucial for maintaining security and productivity within your organization. In this guide, we'll walk you through the process step-by-step, ensuring you're equipped with the knowledge to handle this task seamlessly. While Linux systems offer their own methods, let's focus on the Windows Server environment, particularly in the context of Windows Remote Desktop Protocol (RDP), a common method for accessing Windows servers remotely.
Accessing the Windows Server: First, ensure you have access to the Windows Server environment. This could be through a physical server or via Windows RDP if you're managing the server remotely. If you haven't already, buy RDP credentials from a reliable provider. Once logged in, navigate to the Control Panel.

Navigating to User Accounts: In the Control Panel, locate the "User Accounts" option. Depending on your Windows Server version, this may be under "User Accounts" or "User Accounts and Family Safety." Click on it to proceed to the user management section.
Selecting the User Account: Within the User Accounts section, you'll see a list of user profiles configured on the server. Identify the user account for which you need to change the password and click on it to select it.
Changing the Password: After selecting the user account, look for the option to change the password. This is typically labeled as "Change the password" or "Change your password." Click on this option to initiate the password change process.
Entering New Password Details: You'll be prompted to enter the new password for the user account. Ensure the password meets the server's password policy requirements, including minimum length, complexity, and any other specified criteria.
Confirming the Password Change: Once you've entered the new password, you'll be asked to confirm it by typing it again. This step helps prevent accidental typos and ensures the password is correctly set.
Completing the Process: After confirming the new password, click on the "Change password" or "Submit" button to finalize the process. You should receive a confirmation message indicating that the password change was successful.
Testing the New Password: To ensure everything is functioning as expected, log out of the user account (if applicable) and log back in using the new password. This step verifies that the password change has been implemented successfully and that the user can access their account without any issues.
Documentation and Communication: Finally, it's good practice to document the password change for record-keeping purposes. Additionally, if the password change was initiated due to security reasons or organizational policies, communicate this change to the user to ensure they are aware of the update.
In conclusion, changing user passwords in a Windows Server environment, particularly when utilizing Windows RDP for remote management, is a straightforward process that can be completed efficiently with the right knowledge and tools. By following the step-by-step guide outlined above, you can ensure that user accounts remain secure and accessible, contributing to the overall integrity of your server environment. Remember to always adhere to the best password management and security practices to mitigate potential risks.
0 notes
Text
Streamlining Server Management: How to Uninstall Server Roles from Windows Server 2022
Are you grappling with a cluttered Windows Server environment, overloaded with unnecessary server roles? Well, fret not! Just as you can install server roles to enhance the functionality of your Windows Server 2022, you can also efficiently uninstall them when they are no longer needed. Whether you're migrating workloads to Linux or Ubuntu Server or optimizing your Windows RDP environment, mastering the art of uninstalling server roles is key. Let's dive into the step-by-step process to declutter your server and streamline its performance.

Firstly, it's crucial to understand the significance of periodically removing unnecessary server roles. Just like tidying up a workspace boosts productivity, decluttering your Windows Server enhances performance and reduces potential security risks. Whether you're transitioning to Linux or Ubuntu Server or optimizing your Windows RDP setup, maintaining a lean server environment is essential. Now, let's explore the process of uninstalling server roles from Windows Server 2022.
To initiate the uninstallation process, you'll need administrative access to the Windows Server. Access the Server Manager by clicking on the Start button and selecting "Server Manager" from the menu. Alternatively, you can launch Server Manager by typing "Server Manager" in the Windows search bar. Once Server Manager is open, navigate to the "Manage" menu and select "Remove Roles and Features."
Now, you'll be presented with the "Remove Roles and Features Wizard." This wizard simplifies the process of uninstalling server roles and features from your Windows Server 2022. Follow the on-screen prompts to proceed with the removal process. Here's where your decision-making skills come into play. Evaluate the server roles and features installed on your system, and identify the ones you no longer require. Whether you're preparing to buy RDP or install Ubuntu on RDP, decluttering your Windows Server is a crucial step in optimizing your environment.
Once you've selected the roles and features you wish to uninstall, the wizard will display a summary of your selections. Take a moment to review your choices before proceeding. Confirm your selections and click on the "Remove" button to initiate the uninstallation process. Sit back and relax as the wizard seamlessly removes the chosen server roles and features from your Windows Server 2024.

As the uninstallation progresses, it's essential to remain patient and allow the wizard to complete the process uninterrupted. Depending on the number of roles and features selected for removal, the process may take some time. However, rest assured that your Windows Server will emerge lighter and more optimized once the uninstallation is complete.
Upon successful completion of the uninstallation process, the wizard will display a confirmation message. Take a moment to review the details and ensure that all selected server roles and features have been successfully removed. Once confirmed, you can close the wizard and restart your Windows Server to apply the changes fully.
Congratulations! You've successfully decluttered your Windows Server 2024 by uninstalling unnecessary server roles and features. Whether you're transitioning workloads to Linux or Ubuntu Server or optimizing your Windows RDP environment, maintaining a lean server infrastructure is key to maximizing performance and security.
In conclusion, mastering the art of uninstalling server roles from Windows Server 2024 is a crucial skill for any IT professional. Whether you're preparing to buy RDP or install Ubuntu on RDP, streamlining your server environment ensures optimal performance and security. By following the step-by-step process outlined above, you can effectively declutter your Windows Server and pave the way for a more efficient and productive computing experience.
0 notes
Text
Navigating Linux: Creating and Viewing Text Files on Ubuntu Server
In the realm of server management, Linux, particularly Ubuntu Server, stands as a cornerstone for its reliability, security, and versatility. Whether you're a seasoned Linux enthusiast or a newcomer delving into server administration, understanding how to create and view text files is a fundamental skill. In this guide, we'll explore the essential commands and techniques for managing text files on Ubuntu Server, all from the comfort of your Windows RDP or any environment where you've installed Ubuntu on RDP.

Linux's command-line interface (CLI) is the gateway to its powerful capabilities. When working with text files, the terminal becomes your best friend. With Ubuntu Server, accessing the terminal is as simple as connecting via SSH or utilizing the built-in console. Once connected, the 'nano' or 'vi' text editors are your go-to tools for creating and modifying text files.
Installing Ubuntu on RDP opens up a world of possibilities for managing your server environment. Whether you're running a small business website or a large-scale enterprise application, having Ubuntu readily accessible through Windows RDP streamlines the management process. With Ubuntu on RDP, you can seamlessly switch between your Windows environment and the Linux server, making creating and viewing text files a breeze.
To create a new text file in Ubuntu Server, open your terminal and navigate to the directory where you want the file to reside. You can use the 'cd' command to change directories and 'ls' to list the contents of a directory. Once in the desired location, use the 'touch' command followed by the name of the file to create it. For example:
bashCopy code
touch example.txt
This command creates a new text file named 'example.txt' in the current directory. If you prefer using a text editor to create and edit files, you can launch 'nano' or 'vi' by simply typing their respective names followed by the filename. For instance:
bashCopy code
nano example.txt
This command opens the 'nano' text editor, allowing you to start typing and editing the content of the 'example.txt' file.
Viewing the contents of a text file is equally straightforward on Ubuntu Server. Utilizing commands like 'cat' or 'less' provides you with various options for displaying text file contents. For instance, the 'cat' command outputs the entire contents of a file to the terminal:
bashCopy code
cat example.txt
Similarly, the 'less' command allows you to scroll through the contents of a file interactively:

bashCopy code
less example.txt
By incorporating Ubuntu Server into your Windows RDP environment, you gain the flexibility to manage your server infrastructure seamlessly. Whether you need to create, edit, or view text files, Ubuntu on RDP empowers you to perform these tasks efficiently, all while leveraging the familiarity of the Windows operating system.
Managing text files on Ubuntu Server isn't limited to the command line. Tools like WinSCP provide a graphical interface for transferring files between your Windows machine and the Ubuntu server. This versatility ensures that you can work with text files in a way that best suits your workflow, whether you prefer the command line or a graphical interface.
With the rise of remote work and distributed teams, having a reliable server management solution is more important than ever. Ubuntu Server, coupled with Windows RDP or any environment where you've installed Ubuntu on RDP, offers a robust platform for hosting your applications and services. By mastering the basics of creating and viewing text files, you lay the foundation for effective server administration, empowering you to take full control of your infrastructure.
In conclusion, Linux, particularly Ubuntu Server, remains a powerhouse in the realm of server management. With the ability to seamlessly integrate Ubuntu into your Windows RDP environment, tasks like creating and viewing text files become effortless. Whether you're a seasoned sysadmin or a newcomer to server administration, mastering these fundamental skills will serve you well in your journey toward becoming a proficient Linux user.
0 notes
Text
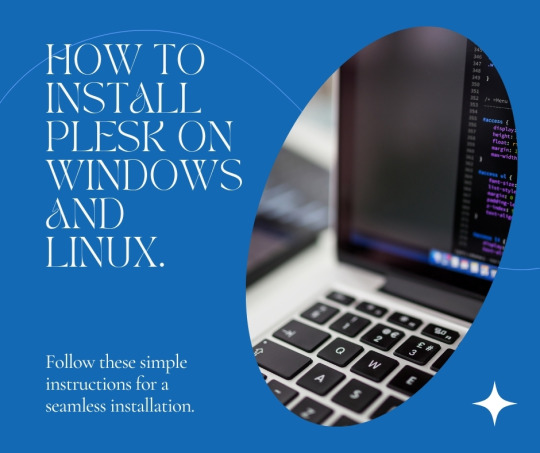
Simplified Installation: Plesk on Windows and Linux - A Comprehensive Guide
Are you looking to streamline your server management process? Whether you're operating on Linux, specifically Ubuntu Server, or Windows RDP, Plesk offers an intuitive solution for managing your web hosting environment. In this guide, we'll walk you through the step-by-step process of installing Plesk on both Linux and Windows servers. Plus, we'll address common questions like where to buy RDP and how to install Ubuntu on RDP. Let's dive in!
Installing Plesk on Linux (Ubuntu Server)
Preparation: Before diving into the installation process, ensure your Ubuntu Server is up to date by running:sqlCopy codesudo apt update && sudo apt upgrade
Download Plesk: Access the official Plesk repository and download the installer script using the following command:arduinoCopy codewget https://installer.plesk.com/plesk-installer
Run Installer: Execute the installer script with the superuser privileges:Copy codesudo sh plesk-installer
Follow On-screen Prompts: The installer will guide you through the installation process. Follow the prompts, including accepting the license agreement and setting up your administrator password.
Access Plesk: Once the installation is complete, access Plesk by navigating to your server's IP address or domain followed by ":8443" in your web browser.
Final Configuration: Complete the initial setup by configuring your server settings and adding domains as needed through the Plesk interface.
Installing Plesk on Windows RDP
Preparation: Ensure your Windows RDP server is updated and ready for the installation process.
Download Plesk Installer: Access the official Plesk website and download the Windows installer package.
Run Installer: Double-click the downloaded installer package to start the installation process.
Follow Installation Wizard: The installation wizard will guide you through the process. Follow the on-screen prompts, including accepting the license agreement and choosing the installation directory.
Configure Plesk: Once the installation is complete, launch Plesk from the Start menu. Follow the initial setup instructions to configure your server settings and administrator account.
Access Plesk: After configuration, access Plesk by opening your web browser and navigating.
Additional Tips and Considerations
Where to Buy RDP: If you need a Windows RDP server, various hosting providers offer RDP services. Ensure you choose a reputable provider that meets your requirements in terms of performance, reliability, and support.
Installing Ubuntu on RDP: While Ubuntu Server is typically installed on dedicated hardware or virtual machines, you can also set up Ubuntu on an RDP server using virtualization software such as VMware or VirtualBox. Simply create a new virtual machine and follow the Ubuntu Server installation process within the virtual environment.
Regular Maintenance: Once Plesk is installed, it's essential to perform regular maintenance tasks such as updating software packages, monitoring server performance, and implementing security measures to keep your server environment optimized and secure.
By following this step-by-step guide, you can easily install Plesk on both Linux (specifically Ubuntu Server) and Windows RDP servers. Whether you're managing a single website or multiple domains, Plesk provides a user-friendly interface and powerful features to simplify server management tasks.
0 notes
Text
Unlocking Efficiency: Mastering Process Management with the Linux ps aux Command
In the realm of server administration, whether you're navigating a Linux-based Ubuntu Server or managing processes on a Windows RDP (Remote Desktop Protocol), efficient process management is crucial. The ability to monitor and control running processes can significantly impact system performance, resource allocation, and overall stability. In this blog, we'll delve into the powerful tool known as ps aux in Linux, exploring how it can streamline your workflow and enhance your server management experience.

Understanding the Basics: What is ps aux?
ps aux is a command-line utility in Linux used to display information about currently running processes. It stands for "process status" and provides a detailed snapshot of active processes on the system. The aux flags specify that it should display information for all users (a), along with processes not associated with an active terminal (x). This comprehensive view enables administrators to gain insights into the entire spectrum of processes running on their system.
Efficient Process Management on Linux Servers
Linux servers, particularly those running Ubuntu Server, are renowned for their stability, scalability, and robustness. However, managing processes effectively is key to maintaining optimal performance. Here's how the ps aux the command can elevate your process management game on a Linux server:
Identifying Resource Hogs: By executing ps aux, administrators can quickly identify processes consuming an excessive amount of CPU or memory resources. This insight allows for timely intervention, such as terminating or prioritizing resource-intensive tasks to prevent performance degradation.
Troubleshooting Performance Issues: When confronted with sluggish system performance or unexpected bottlenecks, ps aux becomes invaluable. Administrators can analyze the output to pinpoint potential culprits, whether it's a runaway process monopolizing system resources or a misconfigured application causing undue strain.
Monitoring User Activity: With the ability to display processes associated with all users (a flag), ps aux enables administrators to monitor user activity comprehensively. This functionality is particularly useful in multi-user environments or shared server setups, where tracking resource utilization on a per-user basis is essential for fair allocation and security purposes.
Optimizing Windows RDP with ps aux
While ps aux is native to Linux systems, its principles can be adapted to enhance process management on Windows RDP instances. Here's how you can leverage similar techniques to streamline your Windows-based server administration:
Utilizing Task Manager: On Windows RDP, Task Manager serves as the counterpart to ps aux, offering real-time insights into running processes, resource usage, and system performance. By regularly monitoring Task Manager, administrators can detect anomalies, identify resource-intensive tasks, and take appropriate actions to maintain system stability.
Analyzing Process Details: Just like ps aux provides detailed information about Linux processes, Task Manager offers comprehensive data on Windows processes. Administrators can delve into process properties, CPU/memory usage, and associated user accounts to gain a holistic understanding of system activity.
Optimizing Resource Allocation: Whether you're buying RDP services or managing existing Windows RDP instances, optimizing resource allocation is paramount. By leveraging Task Manager's insights, administrators can allocate CPU, memory, and disk resources judiciously, ensuring optimal performance for critical workloads.
Installing Ubuntu on RDP: A Seamless Transition
For those accustomed to Linux environments, the prospect of installing Ubuntu on an RDP instance may seem daunting. However, with the right approach, it can be a seamless transition. Here's a brief guide to installing Ubuntu on RDP:
Choose a Reliable RDP Provider: Before diving into the installation process, select a reputable RDP provider that offers compatibility with Ubuntu. Look for providers offering customizable configurations, reliable performance, and robust security features.
Accessing the RDP Instance: Once you've subscribed to an RDP service, access your instance using the provided credentials and RDP client software. Ensure that your client supports Ubuntu installations and offers sufficient connectivity for seamless operation.
Installing Ubuntu: With access to your RDP instance, initiate the Ubuntu installation process following standard procedures. Depending on your provider's setup, you may need to configure virtual machine settings, allocate resources, and define storage options before proceeding with the installation.
By following these steps, you can harness the power of Ubuntu Server within your RDP environment, leveraging familiar tools and workflows to drive efficiency and productivity.
Conclusion
In the ever-evolving landscape of server administration, mastering process management is a prerequisite for success. Whether you're navigating a Linux-based Ubuntu Server or managing processes on a Windows RDP instance, the ps aux command (or its equivalents) empowers administrators with unparalleled insights and control.
By understanding the fundamentals of process management and leveraging the capabilities of tools like ps aux, administrators can optimize system performance, troubleshoot issues effectively, and ensure a seamless user experience. Whether you're monitoring resource utilization, analyzing user activity, or fine-tuning resource allocation, ps aux remains a cornerstone of efficient server management across diverse environments.
So, whether you're administering a Linux server or orchestrating processes on a Windows RDP instance, embrace the power of process management and elevate your server administration game with ps aux and its counterparts.
0 notes
Text
Streamline Your DevOps: The Top CI/CD Tools for 2024
In the ever-evolving landscape of software development, Continuous Integration/Continuous Deployment (CI/CD) has become a cornerstone of efficient DevOps workflows. As organizations strive to deliver high-quality software at scale, the right CI/CD tools can make all the difference. In this blog post, we'll explore some of the best CI/CD tools in 2024, empowering teams to optimize their development pipelines and accelerate their release cycles.

Linux enthusiasts and Ubuntu Server aficionados rejoice as the first tool on our list caters perfectly to your preferences. Jenkins remains a powerhouse in the CI/CD realm, offering robust automation capabilities and extensive plugin support. With Jenkins, teams can easily configure pipelines to build, test, and deploy applications across Linux, Ubuntu Server, and even Windows RDP environments. Its versatility and flexibility make it a top choice for organizations looking to streamline their DevOps workflows.
For those seeking a more cloud-native approach, GitLab CI/CD emerges as a compelling option. Integrated seamlessly with GitLab's version control platform, GitLab CI/CD simplifies the process of managing code, tests, and deployments within a single interface. Leveraging runners on Linux, Ubuntu Server, and Windows RDP, teams can execute CI/CD pipelines efficiently, regardless of their preferred environment. With features like auto DevOps and Kubernetes integration, GitLab CI/CD empowers teams to embrace modern DevOps practices with ease.
DevOps teams operating in heterogeneous environments may find solace in CircleCI, our next featured tool. CircleCI offers a cloud-native CI/CD platform that supports a wide range of operating systems, including Linux, Ubuntu Server, and Windows RDP. Its intuitive configuration syntax and fast execution times make it a favorite among developers seeking rapid feedback loops. With advanced features like Workflows and Orbs, CircleCI enables teams to orchestrate complex pipelines and automate repetitive tasks effortlessly.
Another notable mention in the CI/CD landscape is Travis CI, renowned for its simplicity and ease of use. Supporting Linux, Ubuntu Server, and Windows RDP environments, Travis CI empowers developers to focus on writing code without worrying about the intricacies of deployment. Its tight integration with GitHub makes it a natural choice for open-source projects, facilitating seamless collaboration and continuous delivery. Whether you're a solo developer or part of a large team, Travis CI simplifies the CI/CD process and accelerates time to market.
As DevOps teams navigate the complexities of modern software development, they often seek tools that offer scalability and reliability. Harnessing the power of Kubernetes, Tekton Pipelines emerges as a promising solution for CI/CD in Kubernetes-native environments. Built on open standards and interoperable with a variety of CI/CD tools, Tekton Pipelines enables teams to define their pipelines as code and execute them within Kubernetes clusters. With support for Linux, Ubuntu Server, and Windows RDP workloads, Tekton Pipelines provides a flexible and extensible platform for modern DevOps workflows.
In conclusion, the landscape of CI/CD tools continues to evolve in 2024, offering a plethora of options for organizations to optimize their DevOps workflows. Whether you're a fan of Linux, Ubuntu Server, or Windows RDP environments, there's a CI/CD tool tailored to your needs. From Jenkins and GitLab CI/CD to CircleCI and Travis CI, the choices are vast and varied. By embracing these tools and integrating them seamlessly into your development pipelines, you can unlock new levels of efficiency and accelerate your software delivery cycles. So why wait? Start exploring these CI/CD tools today and revolutionize your DevOps practices.
Linux, Ubuntu Server, and Windows RDP - these keywords echo throughout the realm of DevOps, highlighting the diversity of environments and the flexibility of modern CI/CD tools. Whether you're deploying applications on a Linux server, managing containers in a Kubernetes cluster, or leveraging Windows RDP for remote development, these tools have you covered. So don't hesitate to buy RDP, install Ubuntu on RDP, and embark on your journey towards CI/CD nirvana.
0 notes
Text
Unleash Limitless Search: Installing Elasticsearch on the Ubuntu Server
In today's digital landscape, the ability to swiftly retrieve and analyze vast amounts of data is paramount. Whether you're managing a growing business or simply seeking efficient data organization, having a robust search solution is crucial. Enter Elasticsearch – an open-source search and analytics engine that empowers users to explore, analyze, and visualize data in real-time. In this guide, we'll delve into the process of installing Elasticsearch on Ubuntu Server, enabling you to harness its power for limitless search capabilities.
Why Ubuntu Server?
Ubuntu Server stands out as a top choice for hosting Elasticsearch due to its reliability, security features, and ease of use. With a strong community and regular updates, Ubuntu ensures a stable environment for running Elasticsearch, guaranteeing optimal performance and scalability.
Setting Up Elasticsearch on Ubuntu Server
Prepare Your Ubuntu Server: Before diving into the installation process, ensure that your Ubuntu Server is up to date. You can achieve this by running the following commands in the terminal:sqlCopy codesudo apt update sudo apt upgrade
Install Java Development Kit (JDK): Elasticsearch requires Java to operate. Install the appropriate JDK version by executing the following command:arduinoCopy codesudo apt install default-jdk
Download and Install Elasticsearch: Now, let's proceed with downloading and installing Elasticsearch. Follow these steps:
Download the Elasticsearch Debian package using wget:rustCopy codewget -qO - https://artifacts.elastic.co/GPG-KEY-elasticsearch | sudo apt-key add - sudo sh -c 'echo "deb https://artifacts.elastic.co/packages/7.x/apt stable main" > /etc/apt/sources.list.d/elastic-7.x.list' sudo apt update sudo apt install elasticsearch
After installation, start Elasticsearch and enable it to launch on boot:bashCopy codesudo systemctl start elasticsearch sudo systemctl enable elasticsearch
Configure Elasticsearch: Elasticsearch's configuration file is located at /etc/elasticsearch/elasticsearch.yml. You can adjust settings such as cluster name, node name, network host, and more to tailor Elasticsearch to your specific needs.
Verify Installation: To confirm that Elasticsearch is running successfully, use the following command:sqlCopy codecurl -X GET "localhost:9200/"
Harnessing Elasticsearch for Limitless Search
Now that Elasticsearch is up and running on your Ubuntu Server, it's time to leverage its capabilities for seamless and powerful search experiences. Whether you're managing vast datasets, conducting real-time analytics, or implementing advanced search functionalities, Elasticsearch empowers you to do so effortlessly.
Windows RDP and Ubuntu Server: A Seamless Integration
For those operating in a mixed environment or seeking to utilize Ubuntu Server alongside Windows systems, Remote Desktop Protocol (RDP) offers a convenient solution. By configuring Ubuntu Server for RDP access, you can seamlessly access and manage your Elasticsearch deployment from Windows environments, enhancing collaboration and workflow efficiency.
Buy RDP: Streamlining Remote Access

In scenarios where RDP access is not readily available or requires additional resources, purchasing RDP services from reputable providers can offer a cost-effective and hassle-free solution. By opting for a reliable RDP provider, you gain access to secure, high-performance remote desktop environments, ensuring uninterrupted connectivity to your Ubuntu Server and Elasticsearch instance.
Install Ubuntu on RDP: Extending Ubuntu's Reach
Expanding Ubuntu Server's reach to RDP environments opens up a world of possibilities for users seeking flexibility and compatibility across diverse platforms. With the ability to install Ubuntu on RDP instances, you can harness the power of Elasticsearch seamlessly within your existing infrastructure, maximizing productivity and simplifying management tasks.
Conclusion
In conclusion, installing Elasticsearch on the Ubuntu Server lays the foundation for unlocking limitless search capabilities within your infrastructure. By following the outlined steps, you can seamlessly deploy Elasticsearch, empowering your organization with real-time data exploration, analytics, and visualization. Additionally, integrating Ubuntu Server with Windows RDP, leveraging RDP services, and installing Ubuntu on RDP instances further enhances accessibility and compatibility, ensuring a seamless user experience across diverse environments. Embrace the power of Elasticsearch on Ubuntu Server today and revolutionize the way you search, analyze, and extract insights from your data.
0 notes