#workflow mapping tool
Explore tagged Tumblr posts
Visit Tumblr Blog
Explore Tumblr blogs with no restrictions, modern design and the best experience.
Last Seen Tumblr Blogs


Fun Fact
Tumblr.com is the 103rd most visited website in the world.
Text
A workflow mapping tool simplifies the visualization of processes by creating clear, step-by-step diagrams. It helps teams streamline operations, identify inefficiencies, and improve productivity. Ideal for project planning, task delegation, and process optimization, these tools provide an intuitive interface for crafting detailed workflows that enhance clarity and collaboration across teams.
#workflow mapping tool#online process mapping tool#process mapping#workflow diagram#process diagram#process flow diagram#b2b saas#saas technology#saas development company
0 notes
Text
Networking and overcoming introversion led to a key business discovery: the power of systems and processes. Learn how mapping workflows can streamline operations, reduce bottlenecks, and optimize your business for success.
#auditing workflows#automating small business tasks#business bottlenecks#business productivity tools#business workflows#client onboarding processes#creating business systems#effective processes for small business#entrepreneur networking#improving business systems#LucidChart for businesses#mapping workflows#onboarding workflows#process automation#Process Street workflow#reducing bottlenecks in business#sales workflow audit#small business optimization#small business systems#systemizing business operations#systems and processes#visual roadmap for business#workflow audit tips#workflow mapping tools#workflow optimization
0 notes
Text
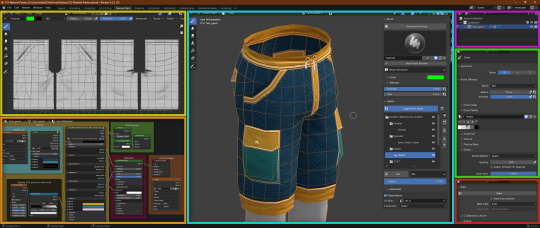
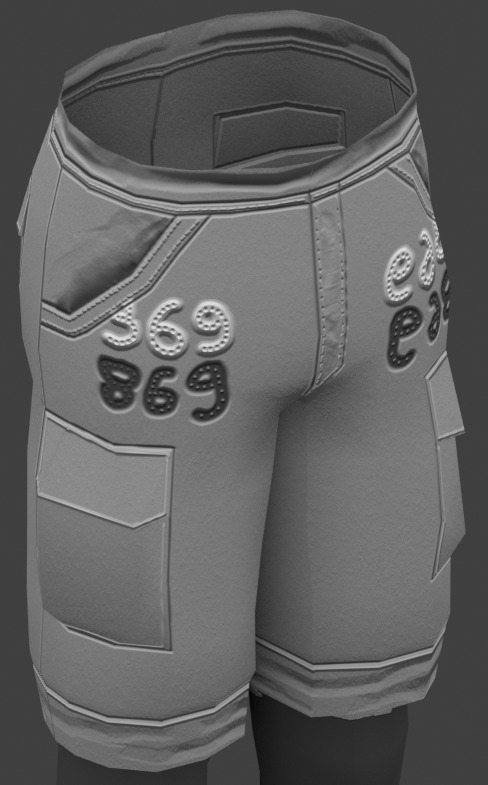
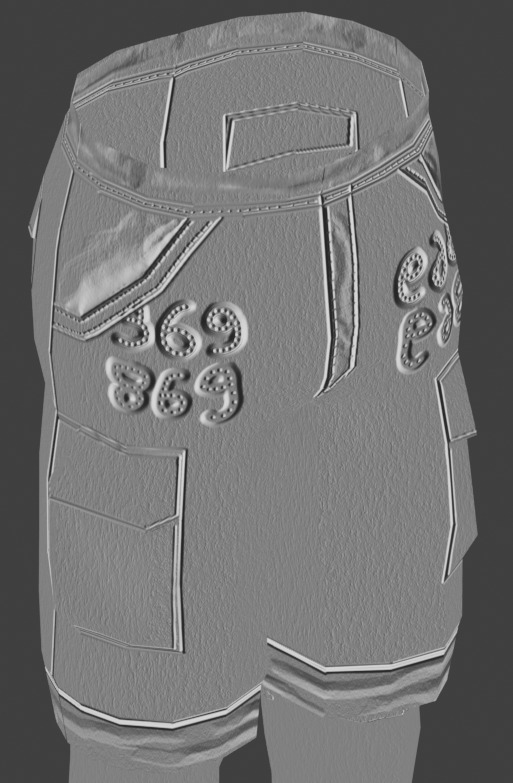
The Sims 3 Material Painter Final Version
UPDATE
I've updated the painter, and with it, included some new things as well as a fully interactive tutorial on how to use it.
NEEDED Prerequisites:
Blender 4.2+
Blender Paint System Addon - HERE (you can donate to the original creator, or get it for free, great little plugin!)
THE TUTORIAL
The tutorial is extensive, done in numbered steps, and is UI and workflow oriented, allowing you to click on any relevant UI element to learn more about it, and how it relates to the complete workflow. There's an additional, advanced chapter, for people who are interested in learning more about blender texture painter's functionality and techniques.
PAINTER ADDITIONS
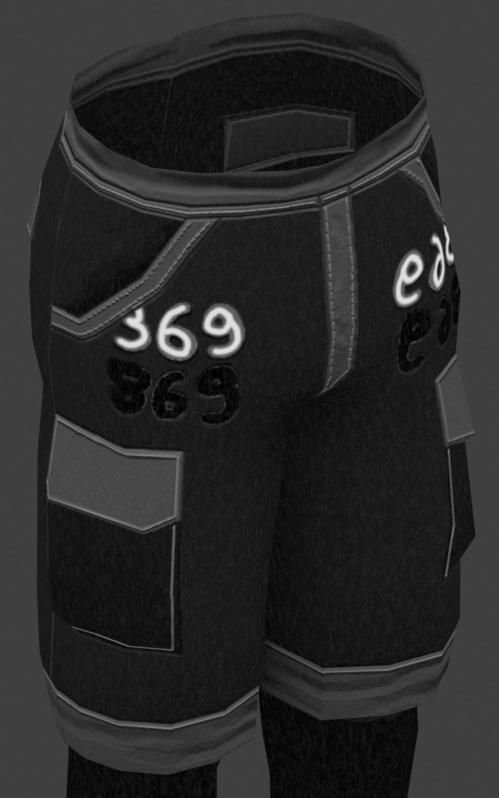
The Painter has been slightly fixed, with multiplier's lines and depth shading being shifted to the correct depth, and with AO being more pronounced. This will make multiplier output even more accurate. Added some new minor tweaks to UI and Color Palettes to accommodate for the tutorial.
DOWNLOAD
Get updated templates with new files HERE!
If you only want to access the tutorial, you can do it HERE.
You can access the original post below:
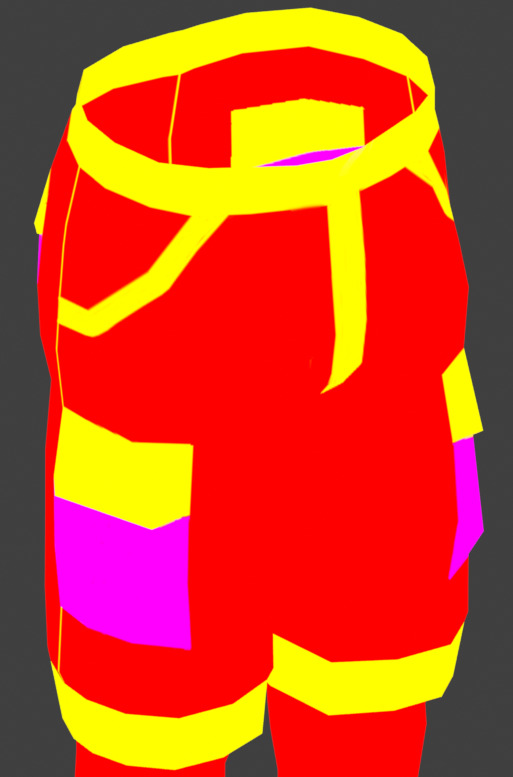
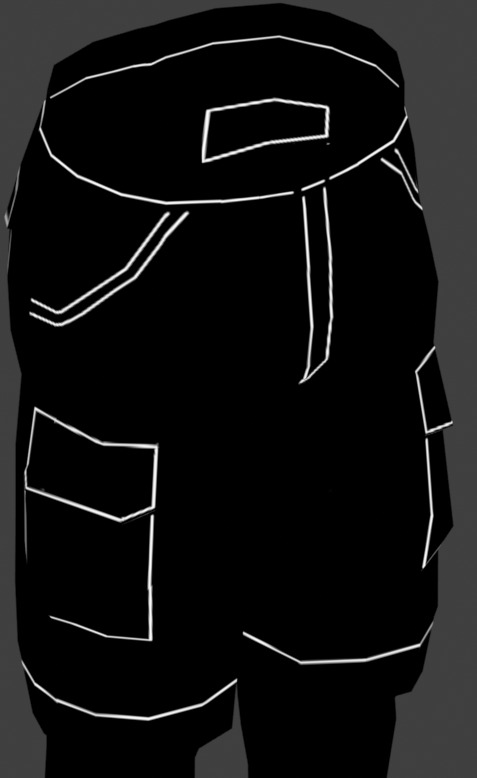
Been working on a tool that easily creates The Sims 3 material maps based only on a few texture layers, most of it derived from height data. This was done long time ago, but very sloppily, and it was not at all approachable.
Discovering THIS free blender add-on that lets you plaint layers in it, made me return to this project and finalize it for release.
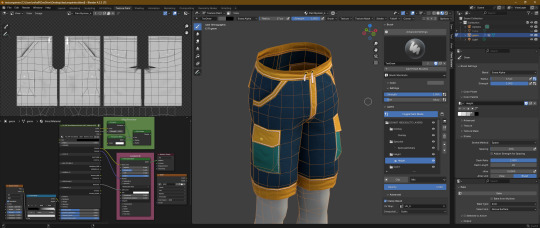
The tool can export:
- Multiplier, RGB+A
- Normal Map, RGB+A
- CAST Map, RGB+A
- Specular Map
- Overlay, RGB+A


OLD VERSION BELOW!
//~~Get it HERE, and please, make sure to get THIS blender plugin, it's NEEDED for this to work. Blender 4.2+ is also needed for these to work together.~~//
#thesims3#thesims#sims3#thesims3cc#the sims 3#sims3mods#ts3#sims 3#sims3tools#thesimstools#simsc#simscreation#sims creator#blender#blender3d
206 notes
·
View notes
Text
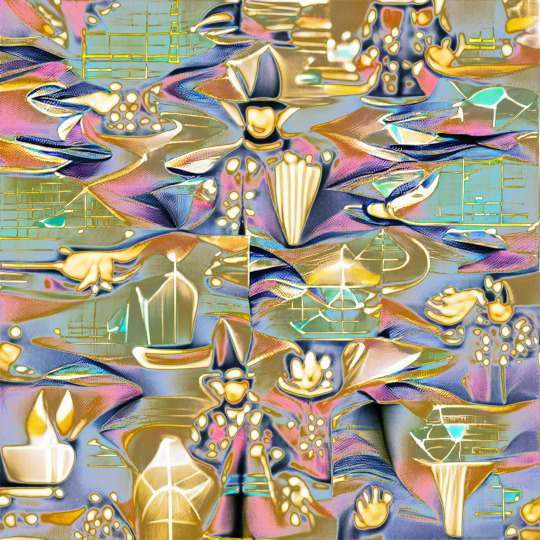
since this discussion got brought back somewhat i feel like i should clarify a bit exactly where and how in my process i will consider using ai generated images. i think i've talked about it in passing before but i think it's been maybe even multiple years since that point. the thing i think ai is extremely, uniquely good at is making textures.
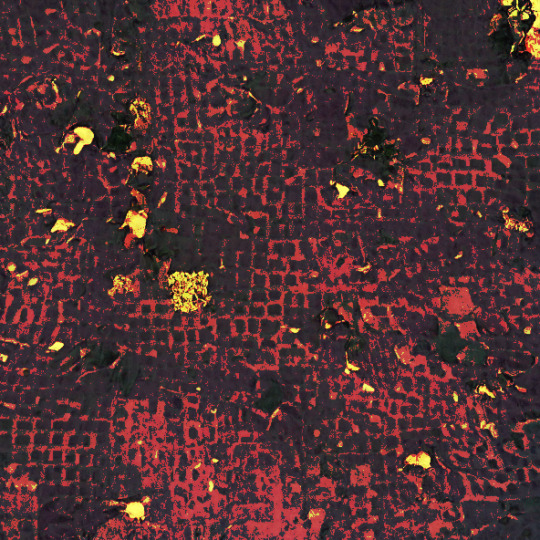
here are some images i've generated with the VQGAN+CLIP generator through google colab. i believe i was using the imagenet_16384 model because that's the default and I was mostly just fucking around with no particular end goal to these images

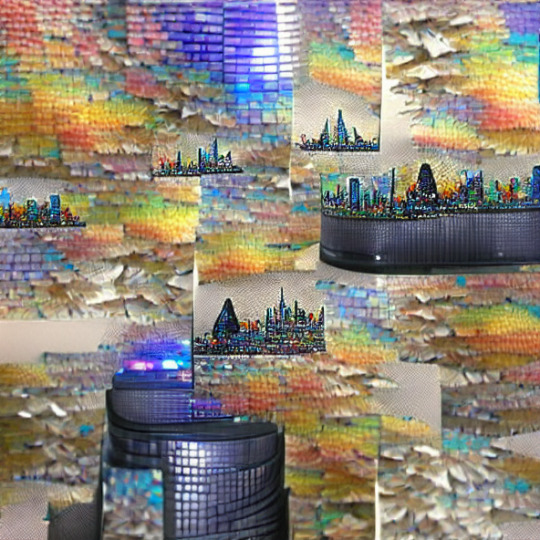
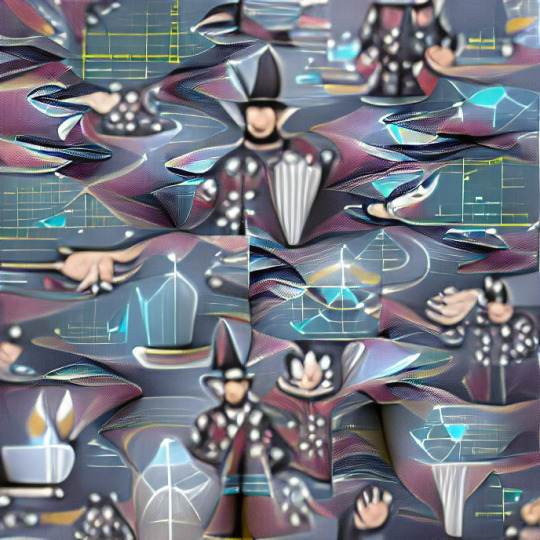
from there i'll take them into photoshop and tweak them to make them more useful for overlaying. This just involves adjusting color and value but some get more involved filtering if the mood strikes me.


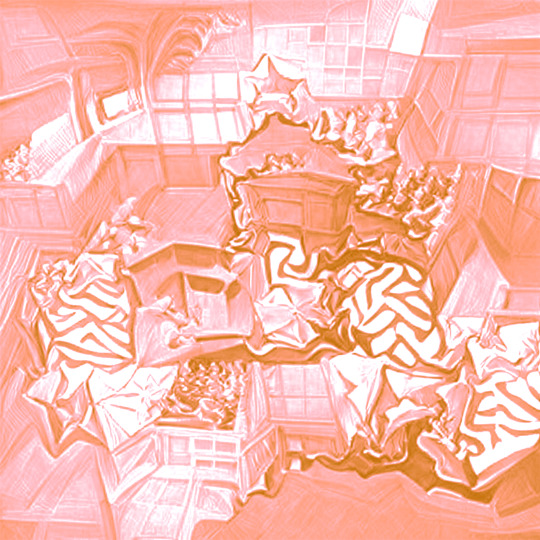
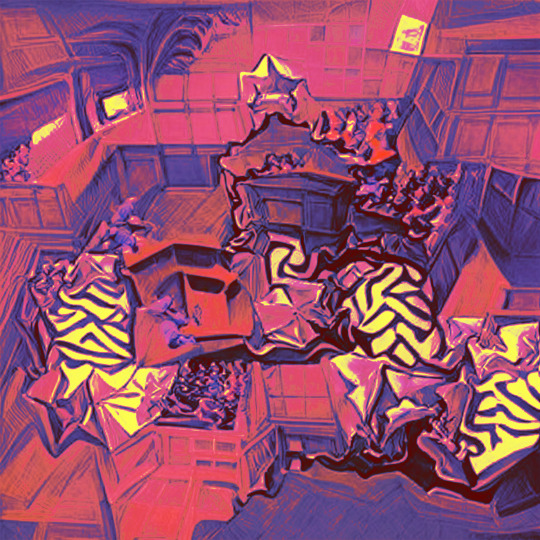

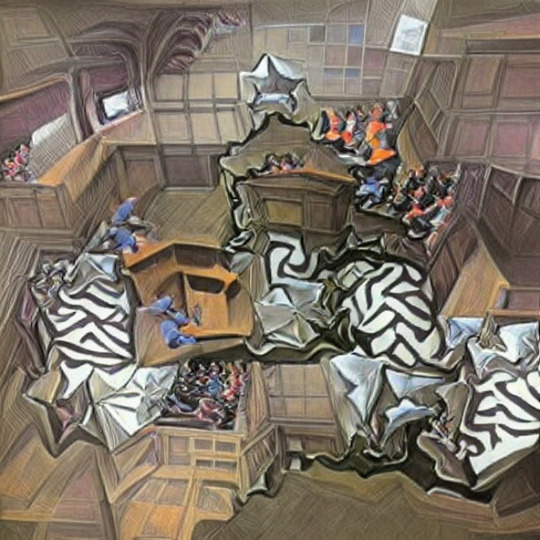
Here's a few drawings that have used these textures. Left is a map of where each texture is being used, center and right are the final image and the image without any of the ai generated textures respectively, so you can toggle between them and compare.


This first one has the most going on texture-wise because I was working on it in tandem with generating the images, and I wanted to try out as many of them as i could.


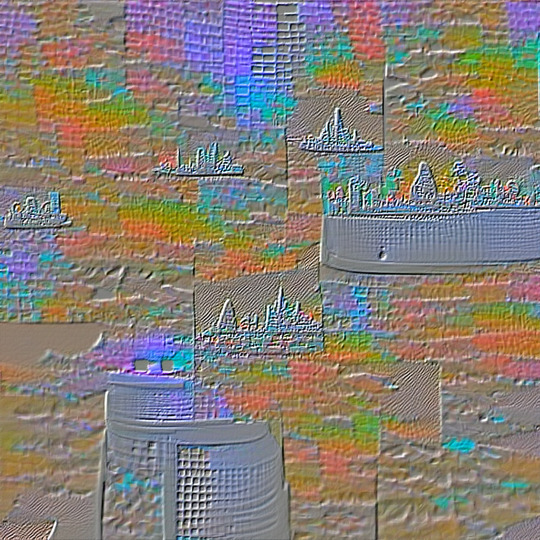
These next two are a bit more restrained in the texture department.
That's more or less it really. I might have used these textures on a couple of other images but I'm not sure if they've made their way into any other finished illustrations, mostly because i haven't been finishing things lately. i don't have any kind of conclusion or point to be made here, i just thought some people might find this interesting and it might clear some stuff up about what I personally mean when I talk about using generative AI as a tool in your workflow. although this hardly represents the be-and-end-all of what i think is possible or acceptable in that area.
edit: oops, accidentally uploaded a version of that second illustration where i had removed an entire folder of lighting and color adjustments that had nothing to do with the texturing. fixed now.
75 notes
·
View notes
Text
Self-use Sims 3 CC Tutorials List
Here is a list of tutorials from which I learn to convert/create sims 3 cc in a few months (and as a poor English speaker). I think it might help someone who also wants to try making things for sims 3 but doesn't know where to start, though it's been 15 years from the game release and even Inzoi is coming hahah.
The list covers objects, clothes, hairs and eyes. I know there're lots of tutorials not listed here, that's because I haven't tried them in my projects by hand. But The list will be updated with new things I learn. Most tutorials are in English. Thanks to all these creators for sharing their precious knowledge!
Sorry for the miserable format, cuz I wrote them in Patreon and paste here. You can also read it there, free of course.
Where I find tutorials
sims 3 tutorial hub
ts3 creators cave and its discord
Mod the sims tutorial wiki and the forum
pis3update tutorials tag
General
CC basic concepts by nightosphere (for clothes, most knowledge is shared with objects)
Tools
TSRW guide by apple (for objects, most knowledge is shared with clothes)
Blender
shortcut by Blender Guru
beginner tutorial for version 2.5, 2.8, 3.0, 4.0
3.5入门教程 (youtube / bilibili)
设置切换语言快捷键 change language shortcut settings
图片取色器网站
Mesh ToolKit with Seam Fixer for all ages
Topaz gigapixel AI guide / higher quality texture
Texture
Nicer bake / bake in blender 2.78
Bake in blender 2.93
Make normal map
small size blank texture
Reasons for black blocks on baked image
Adjust texture color without losing quality
Object
clone obejcts with S3OC
4t3
Functional Objects
Functional bed
TSRW setting
Combining Textures for Objects with Multiple Textures
Add normal map to objects
Introduction to slot categories
Add slots in TSRW
Edit in-door shadow or occluders in TSRW / Talks about 3 kinds of in-game shadow by Pocci
Clothes
4t3 by nightosphere
Reduce polycount / fix seams, holes, shadows or normals
Bone reference rule
Avoid milkshape workflow / adjust bone assignment and morphs in blender
Manually fix bone in blender
Convert between ages/body meshes
TSRW check list
Fix long clothes clip with body
Fix holes on morphs (easier in blender)
Extrude collars
Create texture in PS
Avoid TSRW workflow / CTU tutorial
Hairs
Avoid milkshape and TSRW workflow / delete backfaces / handmade morphs / DABOOBS guide
Keys pointing to in-game blank textures to save file size (for DABOOBS not TSRW)
Reduce polycount
4t3
Fix weird seam lines on hairs from s4s
Fix pigtail issue
Eyes
Convert contacts to default eyes
244 notes
·
View notes
Text
Top 5 Writing Applications for Worldbuilding and Complex Story Planning
In the realm of creative writing, particularly when it comes to worldbuilding and complex story planning, having the right tools can make a significant difference. Writers often find themselves juggling multiple characters, intricate plots, and expansive settings. To manage these elements effectively, specialized writing applications have been developed to assist in organizing thoughts, tracking details, and fostering creativity. In this article, we will explore the top five writing applications that are indispensable for worldbuilding and complex story planning.
-_-_-_-_-_-_-_-_-_-_-_-_-_-_-_-_-_-_-_-_-_-_-_-_-_-_-_-_-_-_-_-_-_-_-
1. Obsidian: The Ultimate Tool for Writers
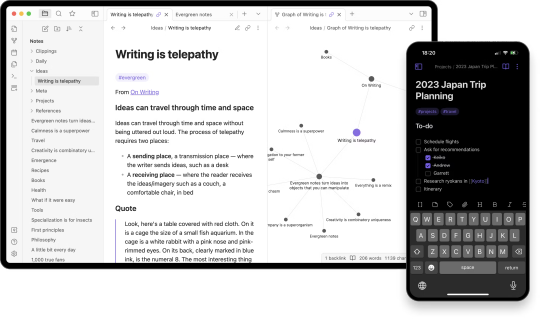
Obsidian is a robust note-taking and knowledge management application that has gained immense popularity among writers for its flexibility and powerful features. Whether you are working on a novel, a series of interconnected stories, or an entire fictional universe, Obsidian provides the tools you need to keep everything organized and easily accessible.
Key Features of Obsidian
Markdown Support: Obsidian uses Markdown, a lightweight markup language, which allows writers to format their notes with ease. This feature is particularly useful for creating structured documents and linking related notes.
Bidirectional Linking: One of Obsidian's standout features is its bidirectional linking capability. This allows writers to create connections between different notes, making it easy to navigate through complex storylines and character relationships.
Graph View: The Graph View in Obsidian provides a visual representation of how your notes are interconnected. This feature is invaluable for worldbuilding, as it helps writers see the big picture and understand how different elements of their story fit together.
Plugins and Customization: Obsidian offers a wide range of plugins that can enhance its functionality. Writers can customize the app to suit their specific needs, whether it's adding a calendar for tracking writing progress or integrating with other tools like Google Drive.
Cross-Platform Sync: With Obsidian, you can sync your notes across multiple devices, ensuring that you have access to your work wherever you go. This is particularly useful for writers who like to jot down ideas on their phone and then expand on them later on their desktop.
Pricing
Personal Use: Free
Commercial Use: $50 per user per year
Add-ons:
Sync: $4 per user per month, billed annually
Publish: $8 per site per month, billed annually
Catalyst: $25+ one-time payment for early access and VIP features
How Obsidian Enhances Worldbuilding and Story Planning
Obsidian's features are designed to support the intricate process of worldbuilding and story planning. The ability to create detailed notes for each character, location, and plot point, and then link them together, allows writers to build a comprehensive and cohesive narrative. The Graph View provides a visual map of the story, making it easier to identify connections and ensure consistency. Additionally, the customization options and plugins available in Obsidian mean that writers can tailor the app to their specific workflow, making it an indispensable tool for any serious writer.
-_-_-_-_-_-_-_-_-_-_-_-_-_-_-_-_-_-_-_-_-_-_-_-_-_-_-_-_-_-_-_-_-_-_-
2. Scrivener: The Writer's Swiss Army Knife

Scrivener is a well-known writing application that has been a favorite among writers for years. It offers a wide range of features designed to help writers organize their work, from drafting to final edits. Scrivener is particularly useful for long-form writing projects, such as novels and screenplays, where managing large amounts of text and research is essential.
Key Features of Scrivener
Project Management: Scrivener allows writers to break their projects into manageable sections, such as chapters or scenes. This makes it easy to navigate through the manuscript and make changes as needed.
Research Integration: Writers can import research materials, such as PDFs, images, and web pages, directly into Scrivener. This keeps all relevant information in one place, making it easy to reference while writing.
Corkboard and Outliner: Scrivener's Corkboard and Outliner views provide visual ways to organize and rearrange sections of the manuscript. This is particularly useful for plotting and structuring complex stories.
Customizable Templates: Scrivener offers a variety of templates for different types of writing projects, from novels to screenplays. Writers can also create their own templates to suit their specific needs.
Export Options: Scrivener supports a wide range of export formats, including Word, PDF, and ePub. This makes it easy to share your work with others or prepare it for publication.
Pricing
macOS: $49
Windows: $45
iOS: $19.99
Bundle (macOS + Windows): $80
How Scrivener Enhances Worldbuilding and Story Planning
Scrivener's project management features are ideal for worldbuilding and story planning. Writers can create separate sections for different aspects of their world, such as characters, settings, and plot points, and then easily navigate between them. The ability to import research materials directly into the project ensures that all relevant information is readily accessible. The Corkboard and Outliner views provide visual ways to organize and rearrange the story, making it easier to see the big picture and ensure consistency. Overall, Scrivener is a powerful tool that can help writers manage the complexities of worldbuilding and story planning.
-_-_-_-_-_-_-_-_-_-_-_-_-_-_-_-_-_-_-_-_-_-_-_-_-_-_-_-_-_-_-_-_-_-_-
3. Campfire: A Comprehensive Worldbuilding Tool
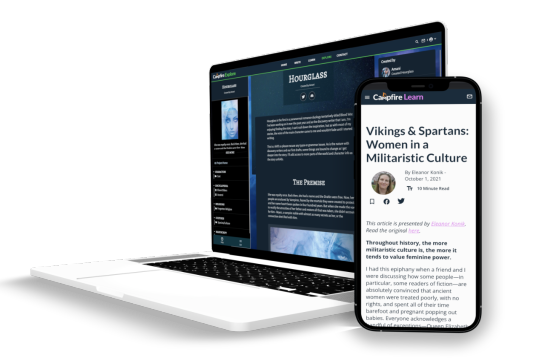
Campfire is a writing application specifically designed for worldbuilding and story planning. It offers a wide range of features that allow writers to create detailed and immersive worlds, from character profiles to interactive maps. Campfire is particularly useful for writers who are working on large-scale projects, such as epic fantasy series or intricate science fiction universes.
Key Features of Campfire
Character Profiles: Campfire allows writers to create detailed profiles for each character, including information on their appearance, personality, and backstory. This helps ensure that characters are well-developed and consistent throughout the story.
Worldbuilding Tools: Campfire offers a variety of tools for worldbuilding, such as interactive maps, timelines, and relationship webs. These features allow writers to create a comprehensive and cohesive world for their story.
Plotting Tools: Campfire's plotting tools help writers outline their story and track the progression of the plot. This is particularly useful for complex stories with multiple plotlines and subplots.
Collaboration Features: Campfire allows writers to collaborate with others on their projects. This is particularly useful for co-authors or writing teams who need to share information and work together on the story.
Customizable Templates: Campfire offers a variety of templates for different aspects of worldbuilding and story planning. Writers can also create their own templates to suit their specific needs.
Pricing
Free Plan: Limited features
Standard Plan: $19 per month or $160 per year
Custom Plan: Prices start at $0.50 per month per module
How Campfire Enhances Worldbuilding and Story Planning
Campfire's features are specifically designed to support the process of worldbuilding and story planning. The ability to create detailed character profiles and interactive maps allows writers to build a rich and immersive world for their story. The plotting tools help writers outline their story and track the progression of the plot, ensuring that all elements of the story are well-organized and consistent. The collaboration features make it easy for co-authors or writing teams to work together on the project. Overall, Campfire is a comprehensive tool that can help writers manage the complexities of worldbuilding and story planning.
-_-_-_-_-_-_-_-_-_-_-_-_-_-_-_-_-_-_-_-_-_-_-_-_-_-_-_-_-_-_-_-_-_-_-
4. Aeon Timeline: A Visual Timeline Tool for Writers
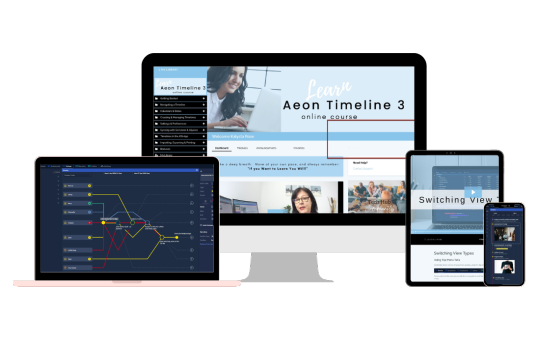
Aeon Timeline is a visual timeline tool that helps writers organize their stories and track the progression of events. It is particularly useful for complex stories with multiple plotlines and characters, as it allows writers to see the big picture and ensure consistency.
Key Features of Aeon Timeline
Visual Timelines: Aeon Timeline allows writers to create visual timelines for their stories, making it easy to see the progression of events and track the relationships between different plotlines.
Character and Event Tracking: Writers can create detailed profiles for each character and event, including information on their relationships and interactions. This helps ensure that all elements of the story are well-organized and consistent.
Customizable Templates: Aeon Timeline offers a variety of templates for different types of writing projects, from novels to screenplays. Writers can also create their own templates to suit their specific needs.
Integration with Other Tools: Aeon Timeline integrates with other writing tools, such as Scrivener and Ulysses, making it easy to import and export information between different applications.
Collaboration Features: Aeon Timeline allows writers to collaborate with others on their projects. This is particularly useful for co-authors or writing teams who need to share information and work together on the story.
Pricing
One-time Purchase: $65 (includes 1 year of free updates)
Additional Year of Updates: $35 per year
How Aeon Timeline Enhances Worldbuilding and Story Planning
Aeon Timeline's visual timeline feature is particularly useful for worldbuilding and story planning. Writers can create detailed timelines for their stories, making it easy to see the progression of events and track the relationships between different plotlines. The character and event tracking features help ensure that all elements of the story are well-organized and consistent. The integration with other writing tools makes it easy to import and export information between different applications, ensuring that all relevant information is readily accessible. Overall, Aeon Timeline is a powerful tool that can help
-_-_-_-_-_-_-_-_-_-_-_-_-_-_-_-_-_-_-_-_-_-_-_-_-_-_-_-_-_-_-_-_-_-_-
5. Plottr: Visual Story Planning Made Simple
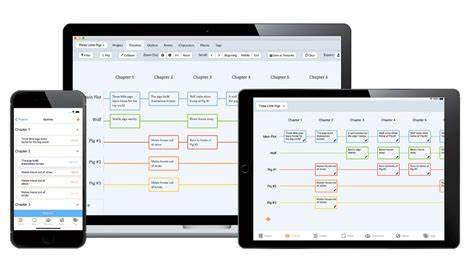
Plottr is a visual story planning tool that helps writers outline their stories in a clear and organized manner. It is particularly useful for writers who prefer a visual approach to planning and want to see their story structure at a glance. Plottr's intuitive interface and powerful features make it an excellent choice for both novice and experienced writers.
Key Features of Plottr
Timeline View: Plottr's Timeline View allows writers to create a visual timeline of their story, making it easy to see the sequence of events and how they fit together. This is particularly useful for complex stories with multiple plotlines.
Character and Plot Templates: Plottr offers a variety of templates for character development and plot structure. Writers can use these templates to ensure that their characters are well-rounded and their plots are cohesive.
Drag-and-Drop Interface: Plottr's drag-and-drop interface makes it easy to rearrange scenes and chapters. This allows writers to experiment with different story structures and find the one that works best for their narrative.
Filtering and Tagging: Writers can use tags and filters to organize their scenes, characters, and plot points. This makes it easy to find specific elements of the story and keep track of important details.
Export Options: Plottr allows writers to export their outlines to other writing applications, such as Scrivener and Word. This makes it easy to move from planning to drafting without losing any important information.
Pricing
Annual Plan: $25 per year
Lifetime Plan: $99 one-time payment
How Plottr Enhances Worldbuilding and Story Planning
Plottr's visual approach to story planning makes it an invaluable tool for worldbuilding and complex story planning. The Timeline View allows writers to see the big picture and ensure that their story flows smoothly. The character and plot templates help writers develop well-rounded characters and cohesive plots. The drag-and-drop interface and filtering options make it easy to organize and rearrange story elements, ensuring that nothing gets lost in the process. Overall, Plottr is a powerful and user-friendly tool that can help writers bring their stories to life.
-_-_-_-_-_-_-_-_-_-_-_-_-_-_-_-_-_-_-_-_-_-_-_-_-_-_-_-_-_-_-_-_-_-_-
Each of the applications we’ve explored - Obsidian, Scrivener, Campfire, World Anvil, and Plottr - offers unique features that cater to different aspects of writing. By integrating these tools into your workflow, you can unlock new levels of creativity and efficiency.
Are you ready to take your writing to the next level? Dive into these applications and discover which one resonates with your creative process. And don’t forget to follow us for more insights, tips, and recommendations on the best tools and practices for writers. Your next great story is just a click away!
#writing#writerscommunity#female writers#writers and poets#worldbuilding#writers on tumblr#ao3 writer#amwriting#creative writing#writers on writing#writers#writblr#learn to write#writing community#writing inspiration#writing prompt#writing advice#writing ideas#writing tips#tips and advice
151 notes
·
View notes
Note
how would u recommend a beginner get into blender? Ima 2D art student but want to fill out my portfolio and it looks super fun and cool!
Yay I'm so glad you want to learn Blender!
Since you're studying 2D, you probably have a lot to learn and practice already. So I'll try to answer in a way that could benefit you the most in both practices.
You probably already heard Blender has a tool called "grease pencil" - it's a 3d object, but they also built it so that if you want to do regular 2D illustration or animation, you can do that too.
Learning grease pencil first could be a good way to familiarize yourself with Blender's interface. And because a lot of the toolsets share how they operate (for instance, adding modifiers to the stack is the same no matter if you're using a grease pencil object, curve, or 3D mesh), you can more easily move to different parts of the program later, like poly modeling or sculpting.
One really great tutorial for 2D Blender is this one by Kevandram - https://www.youtube.com/watch?v=nZyB30-xZFs
From there you can move into tutorials that combine 3D and 2D - or just start with this if you're really excited to learn 3D modeling. Again Kevandram has a really great tutorial for that - https://www.youtube.com/watch?v=ftBFjGy5z08
Something you'll wanna watch out for with Blender tutorials is the version they're using. If your version of Blender is newer, then maybe a button or menu a tutorial tells you to use might have moved. Or some functionality may have changed. Luckily since Blender is open source, they make all versions available to you here: https://download.blender.org/release/
Once you get more familiar with Blender, jumping between versions is easier. But for the sake of learning, if you find a really great tutorial that's using an older version, you can just use that version. You can have multiple Blender versions installed - right now I have 4.4, 4.1, 4.0, and 2.79. So for instance in Kevandram's Bakery Shop tutorial, he's using Blender 3.0 which you can get here - https://download.blender.org/release/Blender3.0/
If you're not interested in grease pencil, or just want to jump straight to 3d, this is a great beginner modeling tutorial from SouthernShotty - https://www.youtube.com/watch?v=C1CFWDWTamo
It mostly sticks to modeling and then gets into basic material stuff. A simplified order to learn things in 3d would be:
Poly/mesh modeling
Modeling with curves
Adding materials/using the shader editor
Unwrapping 3d objects / learning the UV Editor
Texture painting / Painting texture maps (using that unwrapped map from 4) in Blender or some other program (Krita if you want to paint on the 2d map itself. Procreate if you want to paint directly on the model although that'll require a tablet).
A lot of beginner tutorials will take you through steps 1-3 usually, and maybe throw in some basic animation, camera setup, lighting, and rendering. More intermediate/advanced topics would be rigging, animating rigged models, physics simulations, and geometry nodes.
To bring it back to how this could benefit you the most as a 2d artist - something I see a lot of people do is prototype in 3d, and use that 3d render as a base to paint over. Some people strictly use grey boxes, and some people actually model/texture/light certain things and then render that out in layers to use in their painting program later. You can use as much or as little 3d as you want to help 2d painting.
Here's a couple videos showcasing that type of workflow: https://www.youtube.com/watch?v=CHIZtZ2JU3A https://www.youtube.com/watch?v=W5GSyytbABo https://www.youtube.com/watch?v=r5ZyW7K_yP8
Those use Blender's cameras and lights, which you'll pick up as you do modeling/texturing tutorials. Later you can get more advanced with those as well as the different rendering engines within Blender.
This was a lot, but I hope it helps clarify where you can start, and ultimately what you could get out of using 3d!
31 notes
·
View notes
Note
Hello! Sorry to bother but do you have any digital art tips? I’m quite new to it and any tips, tricks or advice would be helpful! Your coloring style is very beautiful and I love it a lot!
thank you! 💚💚💚 sorry this is a bit late, hopefully there's still something helpful in it!
(also, it got pretty long, sorry!)
I think the biggest thing is to just take things slow -- digital art feels different than drawing traditionally, and it's SUPER easy to get overwhelmed by the billions of cool features that the digital world offers. (I say, as someone who spends a lot of time downloading cool brushes and textures...and then never using them ever.) there is a ton of really cool stuff you can do digitally, but because there's so much, I think it's really important to take time to figure out what is and isn't working for you. spend some time doodling without any intent to do a finished piece, figure out how you like to hold (or not hold) your tablet, what keyboard shortcuts you end up using a lot (and therefore might want to map to your pen/tablet buttons for quicker use)...that kind of thing!
everyone's workflow and preferred program and style are different, so it's hard to give hard-and-fast general advice. but the things that I think of as the essentials for learning digital art programs, and what I think of as a good order to focus on learning them in (although YMMV, especially depending on what kind of art you're doing):
brush customization (e.g. flow, opacity, softness)
layers and layer masks
selections and transformations (e.g. scale, rotate, flip horizontal/vertical, skew) (skew is underrated and I will die on that hill)
blending modes (e.g. multiply, screen)
adjustments/adjustment layers (e.g. hue/saturation, curves)
and I think most stuff after that is gravy! often very good gravy though! but yeah, as overall advice I recommend just taking things one little bit at a time, spending some time just drawing and messing around with each feature and what you can do with it. whether or not you end up incorporating any of it into your workflow, it's always good to try things out and just see how they feel! :D
and just so there is at least a little more concrete helpfulness in here, here's a few more specific things that I think are super important to keep in mind!
use! your! tablet/pen buttons! I mentioned this earlier, but they are extremely useful for keyboard shortcuts that you use often! most programs will also let you create new shortcuts for other things -- personally, I use the magic wand tool to fill in big color blocks a lot, so I made shortcuts for 'expand selection' and 'fill' and then mapped them to my tablet buttons.
flop your work horizontally often! when you're working on something, you get used to the way it looks, so seeing it mirrored is a quick way to see it with fresh eyes! in my experience, it often feels like this:
(a common thing is to find that everything is sort of 'leaning' too much one way, which is where skew really comes in handy!) (seriously, I love skew, it is my savior)

if you're working with color, keep a hue/saturation adjustment layer (or a layer filled with black or white and set to Color) on top and toggle it on occasionally to check your values! a lot of people who know a lot more about color than me (and are better at putting it into words) have written about why values are so important, so all I'll say is that the rule of thumb is that your image should still be readable in greyscale:

there are some exceptions and grey areas (do ho ho), but it's a good general rule to keep in mind! (some programs also have a colorblind mode, so you can check to see how your work will look to someone with colorblindness!)
and finally, here's some digital art programs I recommend, if you're still looking for a good one!
free: krita, FireAlpaca
paid: ClipStudio, Procreate (iOS/iPad only)
#art#...sort of#horizontally flipped mal isn't my favorite drawing i've ever done of him#but it's up there#anyway i do personally use photoshop#but i absolutely do not recommend it when there are better and free-er art programs out there#it is the equivalent of texting with a giant 90s-block phone that has been jury-rigged to somehow install whatsapp#because i don't NEED a new phone i KNOW how to use this one it's FINE#(oh god i've become my dad)#someday i will have to actually switch to clipstudio and learn new keyboard shortcuts :(
410 notes
·
View notes
Text
5 Days of Helping You Outline Your Next Novel

Day 5: Obsidian for Outlining
Find all 5 installments of the mini series: helping you outline your next novel
*I have added a layer of “static” over my screenshots so they are distinctive enough to stand apart from the surrounding text
did you miss this series? here you can find all posts here: [day 1] [day 2] [day 3] [day 4]

Do you use Obsidian?
What is Obsidian?
A note-taking and knowledge management tool that allows you to create and connect notes seamlessly.

Uses a local-first approach, meaning your data is stored on your computer, not the cloud (unless you choose to sync).
Features bidirectional linking, which helps create a non-linear, networked way of organizing ideas—great for brainstorming and outlining.
Why should you use Obsidian?
Flexible & Customizable – Unlike rigid writing apps, you can design your own workflow.
Distraction-Free Writing – Markdown keeps the focus on text without extra formatting distractions.
Ideal for Outlining & Organization – Connect story ideas, characters, and settings effortlessly.
Obsidian for Writing
Outlining
Creating a One Pager
Create a single markdown note for a high-level novel summary.
Use headings and bullet points for clarity.
Link to related notes (e.g., character pages, theme exploration).
Here’s an example of an outline I’m currently using. This is what my website will have on it (and what goals I hope to achieve w my website)

Using the Native Canvas Tool
Use Obsidian’s native Canvas tool to visually outline your novel. (Best on PC)
Create a board with columns for Acts, Chapters, or Story Beats.
Drag and drop cards as the story evolves.
Writing
Why Write Directly in Obsidian?
Minimalist interface reduces distractions.
Markdown-based formatting keeps the focus on words.
No auto-formatting issues (compared to Word or Google Docs).
Why is Obsidian Great for Writing?
Customizable workspace (plugins for word count, timers, and focus mode).
Easy to link notes (e.g., instantly reference past chapters or research).
Dark mode & themes for an optimal writing environment.
Organization in Obsidian
Outlining, Tags, Links
Each chapter, character, important item, and setting can have its own linked note.
Below, for example, you can see the purple text is a linked page directly in my outline.

Use bidirectional linking to create relationships between (story) elements. Clicking these links will automatically open the next page.
Tags can be used for important characters, items, places, or events that happen in your writing. Especially useful for tracking.
Folders for Efficient Storage
Organize notes into folders for Acts, Characters, Worldbuilding, and Drafts.
Use tags and backlinks for quick navigation.
Creating a separate folder for the actual writing and linking next (chapter) and previous (chapter) at the bottom for smooth navigation.
You can also create and reuse your own internal templates!
Spiderweb Map Feature (Graph View)
Visualize connections between characters, plot points, and themes. Below you’ll see the basic mapping of my website development project.

This view can help you spot disconnected (floating) ideas and create bridges to them.
Exporting
Why Export?
Ready to format in another program (Scrivener, Word, Docs, Vellum, etc).
Need a clean version (removing tags, notes, etc) for beta readers or editors.
Creating a backup copy of your work.
When should you export?
Personally, I like to export every 5 chapters or so and update my live version on Google Docs. This allows my family, friends, and beta readers to access my edited work.
After finishing a draft or major revision.
Before sending to an editor or formatting for publication.
Where should you export?
Personally I copy and paste my content from each chapter into a google doc for editing. You may also want to make note of the following export options:
Markdown to Word (.docx) – For editing or submitting.
Markdown to PDF – For quick sharing
Markdown to Scrivener – For those who format in Scrivener.
To Conclude
Obsidian is an invaluable tool for novelists who want a flexible, organized, and distraction-free writing process.
Try setting up your own Obsidian vault for your next novel! Comment below and let me know if this was helpful for you 🫶🏻

your reblogs help me help more ppl 💕
follow along for writing prompts, vocabulary lists, and helpful content like this! <333
✨ #blissfullyunawaresoriginals ✨
#writeblr#writers on tumblr#creative writing#writerscommunity#fiction#character development#writing prompt#dialogue prompt#female writers#writer blog#blissfullyunawaresoriginals#blissfullyunawares#writing life#fiction writing#writers#writer life#tumblr writers#writing inspiration#writing#writerslife#writer stuff#writing community#writer#obsidian for writing#obsidian#writers life#writing tool#writing tips#writer moots#tumblr moots
20 notes
·
View notes
Text
0 notes
Text
So this is part 2 of this post, if yall wanna give it a read for context.
In this post, I’ll be talking about how Color’s physical disability of having only one eye would influence how he interacts with his special interests in photography and travel.
As well as how his PTSD, autism, chronic fatigue, and separation anxiety from Killer could also affect things.
With one eye, Color might have reduced depth perception, which could make it challenging to gauge distances accurately. He might rely more on autofocus features, practice to enhance his spatial awareness, or use techniques like focus stacking for precise shots.
He might prefer using cameras with electronic viewfinders (EVF) or live view screens rather than optical viewfinders, which could be more challenging to use with one eye. Adjusting camera settings and composing shots via a larger display would be easier.
He might develop unique framing and composition techniques, leveraging his perspective creatively. Color could take extra time to ensure his shots are well-composed, possibly using grid overlays or other aids to help with alignment.
Customizing camera gear to suit his needs, such as using tripods, stabilizers, or remote controls, to help steady the camera and compose shots more comfortably.
He might spend additional time in post-processing to correct any minor misalignments or issues that arise from the reduced depth perception during the shooting process.
For travel, navigating unfamiliar places might require more caution, especially in crowded or complex environments. He might use mobility aids, rely on GPS and mapping apps, or travel with companions to ensure safety.
Color could engage in meticulous planning to minimize unexpected challenges, such as researching accessible routes, accommodations, and transportation options.
Color might use his experiences and perspective to connect with others, sharing how his disability influences his travel and photography, fostering understanding and empathy.
Developing strategies to cope with the physical demands of travel, such as pacing himself, taking regular breaks, and prioritizing destinations or activities that are less physically demanding.
His unique perspective could inspire him to create compelling stories or advocacy pieces about accessibility in travel and photography, raising awareness and inspiring others with disabilities.
Embracing his distinct view of the world, his photography could offer unique perspectives that stand out, turning his perceived limitation into an artistic advantage.
He might become involved in communities focused on accessible travel and photography, sharing tips, experiences, and inspiring others with similar challenges.
Autism and chronic fatigue would likely significantly impact Color’s ability to engage with his special interests in photography and travel.
In photography, chronic fatigue would necessitate careful energy management. Color might plan shorter, more focused photography sessions and prioritize rest to avoid burnout.
Streamlining his workflow, from setting up equipment to post-processing, to conserve energy. This could include using presets in editing software or organizing his gear for easy access.
He could chose photography locations that are easily accessible and require minimal physical exertion. He might also prefer locations close to home or base to reduce travel time and energy expenditure.
He would likely use ightweight equipment to reduce physical strain, possibly investing in high-quality but compact cameras and lenses. He might also use monopods or lightweight tripods for additional support.
Autism can come with sensory sensitivities. Color might choose quieter, less crowded locations for photography and use noise-canceling headphones or other tools to manage sensory overload.
With travel, he’d have to pace himself. Planning travel with built-in downtime to rest and recharge. He might avoid overly ambitious itineraries and allow for flexible scheduling to accommodate his energy levels.
He’d probably chose ccommodations that are comfortable, quiet, and accessible, ensuring he has a safe space to retreat to when needed.
He’d prefer modes of transportation that offer comfort and minimal stress, such as direct flights, train travel, or driving. He might also opt for private or semi-private tours to control the pace and environment.
Keeping up with healthcare needs, including regular check-ups, medication management, and any necessary accommodations. He might also carry a travel health kit tailored to his specific needs.
He’d combine photography with travel in a way that maximizes enjoyment and minimizes strain. For example, he might focus on travel photography during the golden hours (early morning and late afternoon) when conditions are optimal, and the rest of the day can be used for rest.
Creating content that reflects his experiences with autism and chronic fatigue, such as blogs, vlogs, or social media posts. This can help raise awareness and provide valuable insights to others with similar challenges.
Engaging with communities of autistic travelers and photographers to share experiences, tips, and support. This can provide a sense of camaraderie and practical advice tailored to his needs.
Establishing routines that provide predictability and reduce stress. This might include having a consistent photography and travel routine, preparing for trips well in advance, and creating checklists.
Practicing mindfulness or relaxation techniques to manage stress and sensory overload. This can help maintain focus and calm, particularly in challenging environments.
Utilizing assistive technologies, such as apps for energy tracking, sensory-friendly gear, or digital tools that aid in planning and organization.
Color’s PTSD from solitary confinement and isolation in the Void, combined with his separation anxiety towards Killer, can create a complex situation that both challenges and shapes his engagement in traveling and photography.
Color’s need to stay on the move due to PTSD makes traveling appealing, as it provides a sense of freedom and escape from confinement. However, this constant movement could also become exhausting and anxiety-inducing if it lacks purpose or stability.
His separation anxiety towards Killer might lead him to seek Killer’s company while traveling. Traveling with Killer could provide a sense of security and reduce his anxiety, but it also means his travel plans would need to align with Killer’s availability and willingness to join him.
Color might need to carefully plan his travels to ensure he has safe and familiar places to stay, reducing the unpredictability that could trigger his PTSD. Having a structured itinerary could help him feel more in control and less anxious.
Traveling to new and unfamiliar places might sometimes trigger memories of his isolation, especially if he encounters situations that remind him of the Void. He would need to find a balance between exploring new places and ensuring his mental well-being.
Photography could serve as a therapeutic outlet, allowing Color to process and express his emotions through capturing images. It might help him make sense of his experiences and provide a way to externalize his trauma.
Color might be drawn to photographing subjects that reflect his internal state or provide a sense of solace. He could focus on themes like freedom, movement, and connection, finding meaning and healing in his work.
Having Killer around while engaging in photography could provide comfort and reduce his anxiety. Killer might even become a frequent subject in Color’s photos, symbolizing their bond and mutual support.
Color might need to develop strategies to manage his anxiety while photographing, such as taking breaks, grounding exercises, or having a trusted companion like Killer present. This would help him stay focused and engaged in his special interest.
The mutual separation anxiety between Color and Killer could strengthen their bond, as they rely on each other for emotional support. This bond could provide Color with the stability he needs to engage in his interests.
Color would need to balance his need for movement and exploration with Killer’s needs and limitations. They might develop a mutual understanding and compromise, ensuring both their well-being while pursuing their interests.
Color might prefer traveling to places where he can easily find comfort and familiarity, such as visiting friends or known locations. This reduces the stress of the unknown and helps him stay grounded.
Establishing routines or rituals while traveling and photographing can provide a sense of stability. For example, always starting the day with a specific activity or having regular check-ins with Killer can help Color manage his anxiety.
They might have frequent phone calls if Killer ever can’t join Color on his travels, at particular times of the day.
I can see Color sticking to this routine at the exact time and getting anxious and worried if Killer doesn’t call or pick up, which is likely to happen at some point simply because he has memory issues and sticking to routine is hard for him. But Color, at least for a bit, is likely to assume the worse.
Color might also keep a photograph of him and all his friends close by on his person. (I also like to think that Delta made his camera, he keeps some of Beta’s drawings with him, and also he’s memorized the recipe for Epic’s chocolate cookies.)
If he and Killer have already had their wedding by this point, he’d likely keep his ring close and near. Perhaps kissing it before bed, and fidgeting with it becomes a new comforting stim.
Over time, engaging in his special interests despite his PTSD and anxiety can help Color build resilience. Each successful trip or photography session can boost his confidence and reinforce his ability to cope with challenges.
Color might find deeper meaning in his travels and photography by using them as tools for healing and connection. Documenting his journey and sharing it with others can create a sense of purpose and community.
#utmv headcanons#color spectrum duo#colorkiller#color sans#colour sans#color!sans#killer sans#utmv#sans au#sans aus#killer!sans#killertale#othertale#othertale sans#other sans#undertale#autistic headcanon#utmv hc#undertale au#undertale aus#undertale multiverse#epic sanses#bad sanses#bad sans gang#< for reach#killercolor#undertale something new#epic!sans#delta!sans#cross!sans
39 notes
·
View notes
Text
i love gradient maps but i also want to start using them as a jumping off point to like.... study how to create the same effect manually 🤔 bc like, one of their main functions in my workflow is just as a shortcut/quick finishing tool, it's a good way to work in greyscale and then slap on a quick coat of color without having to spend too long on it, but i also really love the way it adds unexpected hues to value shifts/gradations, and it would be really nice to have, like, more CONTROL over that and be able to do it quickly + confidently myself rather than it being something i just sort of eventually land on via trial and error and a bunch of fiddling w layer blending modes/opacity/etc
nothing wrong w something being a shortcut obv but lately i def find myself bumping into walls where i'm like... it's nice that the program/filter can do this for me, it's nice that it's a Fast way to pump up my colors + make them look sexy, but i would like to be able to more readily take the sexy into my own hands. u know?
#sometimes if i have something specific in mind#what was a shortcut in some contexts actually feels like it's slowing me down in others#[the guy from golden boy voice] study.... study.....
69 notes
·
View notes
Text
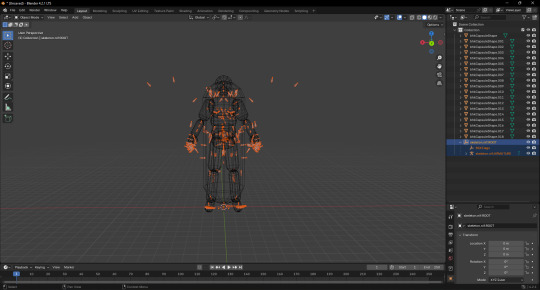
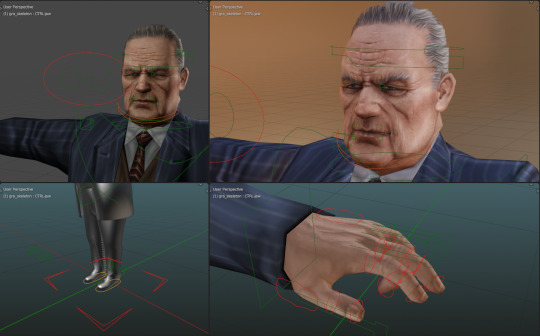
Day 2 - Deeper into the boneyard...
The second day of modding was a shorter one because of other irl duties that needed taken care of, but we still got a lot done in terms of exploring custom skeletons and movement! The goal was to mainly fix his knees, palm, and fingers.
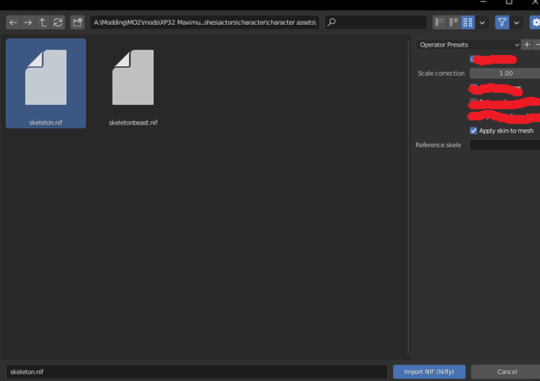
The first struggle was learning how to use PyNifly, a nifty and sleek tool for importing and exporting .nifs in Skyrim and FO4. (For context, I am using Blender version 4.2 and the latest version of this plugin!)
BadDogSkyrim/PyNifly: Export/Import tools between Blender and the Nif format, using Bodyslide/Outfit Studio's Nifly layer. Supports Skyrim LE, Skyrim SE, Fallout 4, Fallout New Vegas, Fallout 76, and Fallout 3.
The instructions on the wiki made it seem pretty easy, and I have used this tool in the past for doing small edits to meshes, but I still was left in the dark about how to import and export a skeleton without it turning out wrong. I ran into a couple issues.
The common issue I found myself in was that, when I exported the skeleton, the nif file would turn out blank. Turns out this happened because I selected the "export animations and collisions" options on import, when I should have set this to false. I selected the bounding boxes for collisions alongside the armature that contained the skeleton on export, resulting in an empty file. When I ignored the bounding boxes and only selected the armature, I was able to export the file without it turning empty.
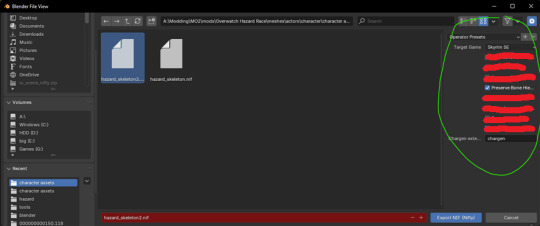
Sometimes, after I would export the skeleton, the bones would be all over the place or not there at all. I solved this problem by ticking and disabling a few settings. On import, I disabled all the settings except the skin to mesh setting, then on export, I disabled all the settings, but ticked "preserve bone hierarchy," which was the golden ticket I needed to finally import a skeleton through blender then export a skeleton through blender without it doing anything wrong!
The last issue was moving the bones, but not seeing the changes in game. You would think that it would be as simple as moving the finger bones where Hazard's finger joints are, right? Unfortunately not. Skyrim's animations will snap the skeleton back into place if you move the vanilla bones. That's why, in spite of moving the bones in Blender, Hazard's body would shrink like a soda can! What you need to do is make a parent to node on the bones you wanna move and scoot that around instead. So you take the skeleton in nifskope, select the bones you would like to move, right click it, add a parent node, then select NiNode. Then you move the NEW bone you had just created in order to move the vanilla bone, not moving the vanilla bone directly.
Importing properly:
Exporting properly:
This here was an instance of me trying to experiment with moving the bones, but I realized that it wasn't working right because the skeleton I was editing and the reference skeleton that was inside Hazard's mesh was different. Hazard's reference skeleton had the actual vanilla bones moved when they weren't supposed to, and the skeleton that was used in the mod esp was moved into position with the parented bones, causing this strange mess...

With all of these issues answered between the hours, I finally came up with a proper workflow for how to handle humanoid skeleton editing for custom models. I described the process I've made with Hazard so far in particular.
Import Hazard's Overwatch model using Overtools (You can get the tool by going to their Discord here.) in Blender, and scale it to the size of Skyrim's skeleton. Don't worry about it being too perfect because we'll be fitting our own skeleton later.
Create a jointmap.cfg that maps each of Hazard's bones to Skyrim's bone naming conventions. (i.e bone_0066=NPC L Thigh [LThgh] or something for a whole group of bones from 0066-006F.) Have outfit studio on the side so you can import the FBX and see what custom bone highlights where. So for instance, if you saw bone_08B3 highlight somewhere on Hazard's nose, you should probably put that bone under the NPC Head [Head] category in the cfg. This is the most time-consuming part, but will save you a lot of headaches of having to weight paint manually, especially if you find yourself in the position where you must reimport the entire fbx again...
After you have a jointmap.cfg that's the way you want it to be (you'll know you're there when, not only is everything mapped, but they're mapped to the proper group without any oddities), the model probably won't be moving correctly at all because the reference skeleton in outfit studio is set to the basic skeleton by default. This is when we make our custom skeleton. Take a skeleton and parent all the nodes you want to move. I had a friend of mine with a skeleton that had most of all the bones I wanted to move parented already, so I didn't have to do too much work here. But it might take a little bit of time.
Import the skeleton into Blender where your model is, and make sure you don't have an armature selected. (Pynifly might do something funky, idk.) Select the armature of the skeleton you just imported, then in pose mode select the parented bone. That's the bone that's going to look like "NPC R Clavicle [RClv]:225". It's going to have a number next to it, move that one! It's very important you make sure you're moving that one, and NONE of the vanilla bones.
When it looks right to you, go into the settings of outfit studio and set that skeleton as your reference skeleton. Create a new outfit with no reference mesh and import your FBX. If you go to the left and turn on the visibility of bones, you should see your bones in the spots you moved them. Pose your mesh around and make sure it moves the way you expect. If not, tweak the movement then repeat this step until it's correct.
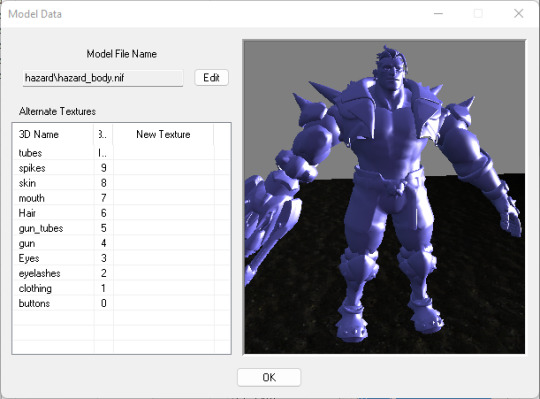
Go into your mod esp in creation kit and make sure your custom skeleton is being used instead of the default skeleton. Now with the skeleton on your nif being the same skeleton used in-game, Hazard should be moving the way you expect him to. If not, repeat step 4-6 until he does, as you will have to update the mesh again. (This is why it was useful for us to have that output file made from the fbx renaming machine!)
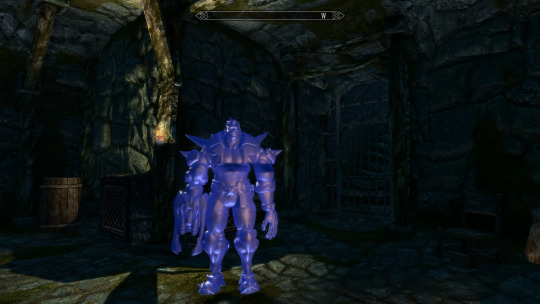
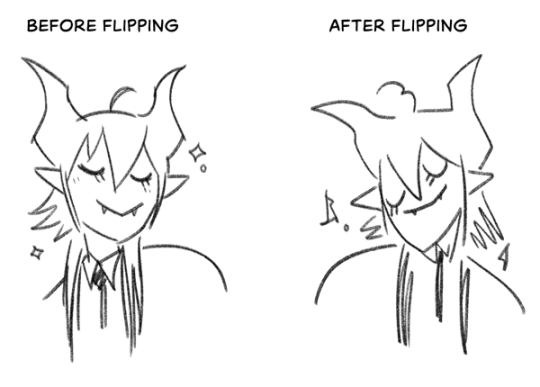
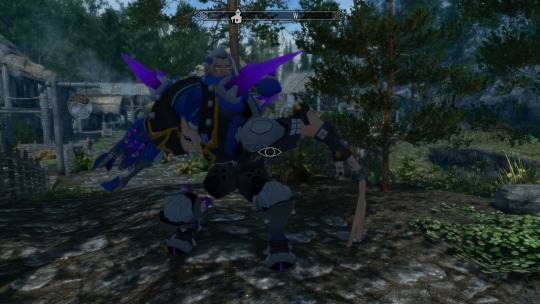
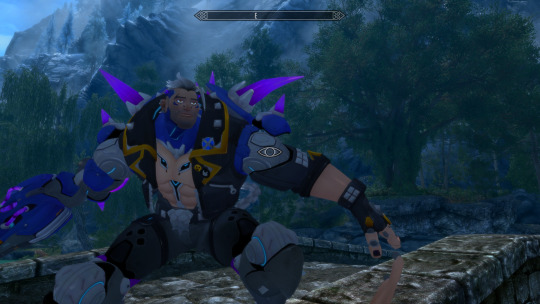
For now, this was the result of all my hard work. Don't mind the fact he's blue! I just didn't feel like putting his textures on. I still need to do adjustments on his hand, though. But they should be simple tweaks. I also want to make his fingers connected, as for right now, they seem to all be disconnected for some reason. I also want to fix how his chains on his butt look, too.
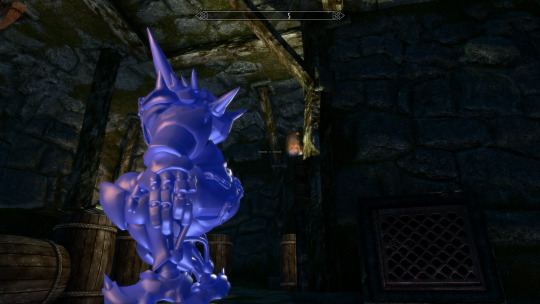
After the tweaks on his bones, my next plan is either to begin rigging his face, or fixing his textures to look better. I think it would be best to tackle the more demanding task of doing facial animation first to get it out of the way. And besides, I'm getting really tired of looking at Hazard's sleepy, bored expression! Time to liven him up a little!
===========================
Welcome to the chicken scratch section! This is where you'll see the raw notes I write down for modding before I write it in an organized way for the dev blog. I figured the chicken scratch of raw information might help someone, and I just think it's neat, so here you go! You'll know it's the chicken scratch section by the equal sign divide and the🐔 emoji.
Chicken Scratch 🐔:
In pynifly, I think what I'm supposed to do is import the bones without renaming anything, without importing the animations, and export without renaming things... and things seem to be okay.
parent the bones with empty nodes.
move the bones with the numbers next to them in blender
export the skeleton, preserve the bone heiarchy.
use that same skeleton as a reference skeleton in outfit studio. dont import a reference mesh.
select the fbx that was outputted by the renaming fbx machine
delete the custom bones from the project or it'll crash
edit the skeleton in blender and repeat to tweak
7 notes
·
View notes
Note
Yo your rigging skills are immaculate! Where did you learn such dark magics, I'm still learning modeling as a baseline. But I figured I might aswell ask then post it for others!
Helloo! Thanks for your compliment 🥹 I'm glad the stuff I do looks cool enough to make you say that.
Part 1st - The Inception
When it comes to 3D I still consider myself more on the hobbyist side than the professional one.
I have a weird past in self-taught 3D modeling and game development at the same time so the logic for topology, weights, constraints and such seems to have a dedicated core in my brain that developed through sheer trial, error, tutorials and some actual studying. But I don't think I can exactly pinpoint a linear path that has taught me all of this.
Part 2nd - The Ruse
On the other hand, low poly models are much more manageable than modern high fidelity stuff. That certainly works in favour of hiding my weak spots hahaha.
Part 3rd - The Rigs
When it comes to the rigs I use in my videos, I've been testing different approaches. Thankfully, the extraction tools do preserve the original weights for the most part, but I have had to do weight necromancy to recover missing information sometimes, I made a script to recover missing weights whenever that happens.
My older MGS animations use just some basic IKs and Drivers on top of the deform bones (I should get fined for those crimes) because they were a ton of characters, I wanted to save time and the extraction workflow was pretty new to me and I didn't know what to expect next.
For the newer ones, I started adding more complex control rigs until I hit a limit where it was not scalable.

To speed things up, I now have a custom set of tools to quickly name bones and then I map them to a Rigify uh... rig. That's how I rigged The Boss for a recent video.
Part 4th - The Craftpersonship
I do continue to make new rigs for original characters from scratch because I like to learn and improve in that front rather than just rely on tools to make them for me whenever I have the time for that.
55 notes
·
View notes
Text
Future-Proof Your Brand: Why a Holistic Digital Marketing Strategy Matters in 2025
An in-depth guide by Digitalized Era
In the post-cookie, AI-driven landscape of 2025, piecemeal tactics are no longer enough to keep a brand visible, relevant, and profitable. Whether you run a local bakery in Jacksonville or a SaaS start-up in London, you need a holistic digital marketing strategy that ties every channel—SEO, social, paid ads, content, email, and web development—into one cohesive growth machine.
1. The Shift From “Channel Thinking” to “Customer Journey Thinking”
Old model
“We need Facebook posts.”
“Let’s run a Google Ads campaign this quarter.”
New model
“Sarah discovers us on TikTok, reads a blog we rank for on Google, joins our email list, and finally converts through a retargeting ad.”
This journey mindset forces you to optimise touchpoints together rather than in silos—exactly what Digitalized Era’s 360-degree process delivers:
Site Audit & UX checks
Deep market + keyword research
On-page & technical SEO
Cross-channel content mapping
Unified paid + organic reporting
Continuous CRO (Conversion Rate Optimisation)
2. Data Privacy & First-Party Data: The 2025 Reality
By the end of 2024, Chrome will have deprecated third-party cookies. Brands that fail to build first-party data pipelines will pay up to 35 % more for the same ad results. Digitalized Era helps you:
Capture consent with value-driven lead magnets
Segment subscribers in GDPR/CCPA-compliant workflows
Deploy personalised email drips that nurture, upsell, and retain
Result: lower acquisition costs, higher lifetime value.
3. AI Is Only as Good as Your Strategy
Tools like ChatGPT, Midjourney, and Google Gemini can accelerate content production—but they can’t replace:
Brand voice & POV
Strategic keyword selection
Human-centred storytelling
Our content marketing team blends AI efficiency with senior-level editorial oversight to create assets that rank and convert. Expect:
Long-form pillar pages
Social micro-content repurposed from cornerstone blogs
Data-rich infographics coded for fast mobile load times
4. Local, National, or Global: SEO Tactics That Scale
Local SEO – GMB optimisation, NAP consistency, hyper-local schema
E-commerce SEO – faceted navigation fixes, Shopify/Woo Commerce technical audits
International SEO – hreflang mapping, currency/region-specific content
Digitalized Era’s proprietary reporting dashboard shows real-time rank shifts across markets so you can allocate budget where ROI is highest.
5. Paid Media Is No Longer “Set & Forget”
Average CPCs rose 19 % last year in the US. To stay profitable you need:
Intent-driven keyword clusters, not vanity terms
AI-augmented bid strategies with human QA
Cross-channel attribution (PPC + organic + email)
Our PPC specialists iterate weekly, pausing under-performers and reallocating spend to winning ad sets—so every rupee, dollar, or pound works harder.
6. UX-Focused Web Design: Your New Sales Rep
A 0.1-second improvement in load time can boost conversions by 8 %. Digitalized Era’s design & dev squad builds:
Mobile-first, Core Web Vitals-optimized sites
Shopify, WordPress & Wix builds that integrate seamlessly with CRM and marketing automation
Accessibility-compliant interfaces (WCAG 2.2)
Beautiful and built to rank.
7. Measuring What Matters
Vanity metrics (likes, impressions) don’t pay the bills. We align on KPIs tied directly to revenue:
Qualified leads generated
Customer acquisition cost (CAC)
Average order value (AOV)
Customer lifetime value (CLV)
Return on ad spend (ROAS)
Our live dashboards deliver clarity, not confusion.
8. Success Stories
Leather Made In Italy moved from zero top-100 keywords to page-one dominance. Prevail Clothing scaled organic traffic 3× in six months. Cozyts saw Instagram engagement jump 220 % after a visual revamp.
Your brand could be next.
9. The Digitalized Era Advantage
✔ End-to-end expertise under one roof ✔ 24/7 support via phone (+91 674 357 6892) or email ([email protected]) ✔ Transparent, package-based pricing for SMEs and start-ups ✔ Offices in the US, UK, and India for truly global coverage
Ready to Transform Your Business?
Turn every click into a customer. Schedule a free 30-minute strategy call today:
📞 +91 674 357 6892 📧 [email protected]
Digitalized Era—your gateway to digital excellence. Let’s make 2025 your breakout year.
2 notes
·
View notes
Text
The Evolution of DJ Controllers: From Analog Beginnings to Intelligent Performance Systems
The DJ controller has undergone a remarkable transformation—what began as a basic interface for beat matching has now evolved into a powerful centerpiece of live performance technology. Over the years, the convergence of hardware precision, software intelligence, and real-time connectivity has redefined how DJs mix, manipulate, and present music to audiences.
For professional audio engineers and system designers, understanding this technological evolution is more than a history lesson—it's essential knowledge that informs how modern DJ systems are integrated into complex live environments. From early MIDI-based setups to today's AI-driven, all-in-one ecosystems, this blog explores the innovations that have shaped DJ controllers into the versatile tools they are today.

The Analog Foundation: Where It All Began
The roots of DJing lie in vinyl turntables and analog mixers. These setups emphasized feel, timing, and technique. There were no screens, no sync buttons—just rotary EQs, crossfaders, and the unmistakable tactile response of a needle on wax.
For audio engineers, these analog rigs meant clean signal paths and minimal processing latency. However, flexibility was limited, and transporting crates of vinyl to every gig was logistically demanding.
The Rise of MIDI and Digital Integration
The early 2000s brought the integration of MIDI controllers into DJ performance, marking a shift toward digital workflows. Devices like the Vestax VCI-100 and Hercules DJ Console enabled control over software like Traktor, Serato, and VirtualDJ. This introduced features such as beat syncing, cue points, and FX without losing physical interaction.
From an engineering perspective, this era introduced complexities such as USB data latency, audio driver configurations, and software-to-hardware mapping. However, it also opened the door to more compact, modular systems with immense creative potential.
Controllerism and Creative Freedom
Between 2010 and 2015, the concept of controllerism took hold. DJs began customizing their setups with multiple MIDI controllers, pad grids, FX units, and audio interfaces to create dynamic, live remix environments. Brands like Native Instruments, Akai, and Novation responded with feature-rich units that merged performance hardware with production workflows.
Technical advancements during this period included:
High-resolution jog wheels and pitch faders
Multi-deck software integration
RGB velocity-sensitive pads
Onboard audio interfaces with 24-bit output
HID protocol for tighter software-hardware response
These tools enabled a new breed of DJs to blur the lines between DJing, live production, and performance art—all requiring more advanced routing, monitoring, and latency optimization from audio engineers.
All-in-One Systems: Power Without the Laptop
As processors became more compact and efficient, DJ controllers began to include embedded CPUs, allowing them to function independently from computers. Products like the Pioneer XDJ-RX, Denon Prime 4, and RANE ONE revolutionized the scene by delivering laptop-free performance with powerful internal architecture.
Key engineering features included:
Multi-core processing with low-latency audio paths
High-definition touch displays with waveform visualization
Dual USB and SD card support for redundancy
Built-in Wi-Fi and Ethernet for music streaming and cloud sync
Zone routing and balanced outputs for advanced venue integration
For engineers managing live venues or touring rigs, these systems offered fewer points of failure, reduced setup times, and greater reliability under high-demand conditions.

Embedded AI and Real-Time Stem Control
One of the most significant breakthroughs in recent years has been the integration of AI-driven tools. Systems now offer real-time stem separation, powered by machine learning models that can isolate vocals, drums, bass, or instruments on the fly. Solutions like Serato Stems and Engine DJ OS have embedded this functionality directly into hardware workflows.
This allows DJs to perform spontaneous remixes and mashups without needing pre-processed tracks. From a technical standpoint, it demands powerful onboard DSP or GPU acceleration and raises the bar for system bandwidth and real-time processing.
For engineers, this means preparing systems that can handle complex source isolation and downstream processing without signal degradation or sync loss.
Cloud Connectivity & Software Ecosystem Maturity
Today’s DJ controllers are not just performance tools—they are part of a broader ecosystem that includes cloud storage, mobile app control, and wireless synchronization. Platforms like rekordbox Cloud, Dropbox Sync, and Engine Cloud allow DJs to manage libraries remotely and update sets across devices instantly.
This shift benefits engineers and production teams in several ways:
Faster changeovers between performers using synced metadata
Simplified backline configurations with minimal drive swapping
Streamlined updates, firmware management, and analytics
Improved troubleshooting through centralized data logging
The era of USB sticks and manual track loading is giving way to seamless, cloud-based workflows that reduce risk and increase efficiency in high-pressure environments.
Hybrid & Modular Workflows: The Return of Customization
While all-in-one units dominate, many professional DJs are returning to hybrid setups—custom configurations that blend traditional turntables, modular FX units, MIDI controllers, and DAW integration. This modularity supports a more performance-oriented approach, especially in experimental and genre-pushing environments.
These setups often require:
MIDI-to-CV converters for synth and modular gear integration
Advanced routing and clock sync using tools like Ableton Link
OSC (Open Sound Control) communication for custom mapping
Expanded monitoring and cueing flexibility
This renewed complexity places greater demands on engineers, who must design systems that are flexible, fail-safe, and capable of supporting unconventional performance styles.
Looking Ahead: AI Mixing, Haptics & Gesture Control
As we look to the future, the next phase of DJ controllers is already taking shape. Innovations on the horizon include:
AI-assisted mixing that adapts in real time to crowd energy
Haptic feedback jog wheels that provide dynamic tactile response
Gesture-based FX triggering via infrared or wearable sensors
Augmented reality interfaces for 3D waveform manipulation
Deeper integration with lighting and visual systems through DMX and timecode sync
For engineers, this means staying ahead of emerging protocols and preparing venues for more immersive, synchronized, and responsive performances.
Final Thoughts
The modern DJ controller is no longer just a mixing tool—it's a self-contained creative engine, central to the live music experience. Understanding its capabilities and the technology driving it is critical for audio engineers who are expected to deliver seamless, high-impact performances in every environment.
Whether you’re building a club system, managing a tour rig, or outfitting a studio, choosing the right gear is key. Sourcing equipment from a trusted professional audio retailer—online or in-store—ensures not only access to cutting-edge products but also expert guidance, technical support, and long-term reliability.
As DJ technology continues to evolve, so too must the systems that support it. The future is fast, intelligent, and immersive—and it’s powered by the gear we choose today.
2 notes
·
View notes