
Don't wanna be here? Send us removal request.
Statistics
We looked inside some of the posts by 2dgames-jc and here's what we found interesting.
Average Info
Notes Per Post
0
Likes Per Post
0
Reblog Per Post
0
Reply Per Post
0
Time Between Posts
1 day
Number of Posts By Type
Text
17
Last Seen Tumblr Blogs


Fun Fact
Tumblr has 4 main sources of revenue.
Text
Games that have inspired me:
Mega Man Network Transmission:
youtube

One thing that inspires me about this game is the background details such as circuitry and cooling fans. This would come in handy as My game is set inside a computer.
Super Mario Bros:
youtube

The reason as to why I found this game inspiring is because of the game mechanics. For example, if you jump onto an enemy it will kill them. I would like to add a similar mechanic to my own game.
Astro's playroom:
youtube

The reason as to why this game inspired me was because of it being set inside of a computer (in this case, a PS5). I like how it explores different areas and components of a computer. It gives me the idea to have different levels in my game, set in different areas of my computer.
0 notes
Text
Changing the game icon:
In order to change the icon for my game I had to convert a 256x256 'png' that I made into an 'ico'. Once I did that, I went into the project settings and onto 'Windows' to select a new image.

Icon:

0 notes
Text
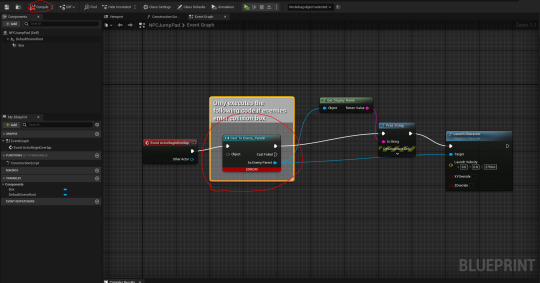
Making a death box for when you fall off the level map:
Firstly, I made an actor blueprint and named it "DeathBox".

In the screenshot below, I have set the code up to send the player to the lose screen if they fall off the map.
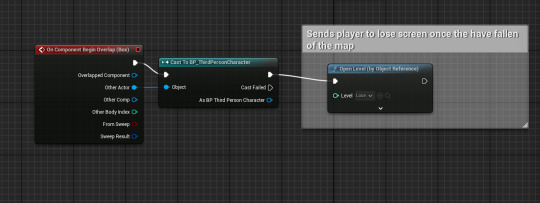
Meanwhile, I had resized the collision box in the level. I also extended the background tile map out.

0 notes
Text
Adjusting power-up duration:
Here, I changed the duration from 30 seconds to 15.

0 notes
Text
Enemy death animation:
I had intended to make the animation simple and have it look like the enemy is getting scrambled and jumbled up.
GIF:


0 notes
Text
Fixing projectiles and pick-ups:
I had remade the projectile and added made it so that it ignores the 'Vehicle' collision channel.

Next, I had changed the collision channel of the player and the pick-ups to the 'Vehicle' channel.


In order to simplify and make the health pick-ups easier to maintain, I created and array that has the different health pick-up sprites. I used this to randomly select the health pick-up sprites. This is better than having to individually edit 6 pick-ups. After I made these changes, I had removed the current pick-ups from the level and re-added the improved pick-up, 'HealthPickUp1'.

0 notes
Text
Improving enemies:
I added a Boolean variable 'Jump' to the patrol point blueprint. I then made it public so that I could use it in the 'Enemy_Parent' event graph.

Here, I added a branch that checks if the patrol point that the enemy has walked to, wants it to jump.

If I wanted to make a specific control point to make an enemy jump, I can just tick the box that says "Jump".

In the 'Enemy_Parent' viewport, I renamed the two boxes to help destinguish between each other. I also resized the boxes.
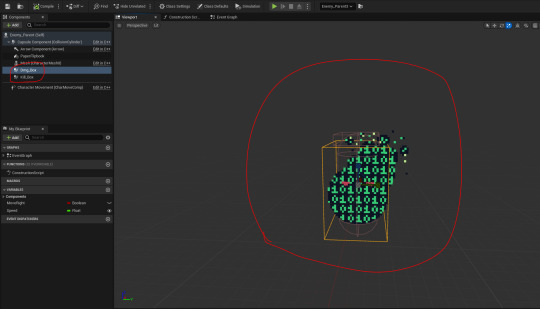
Here, I added another enemy and added patrol points that allow it to jump.

Finally, I did the last fix that I would have time for. I had implemented an enemy death animation. I added this custom event shown below to play the flipbook animation.

Next, I edited a piece of code to feature the 'Set Flipbook' event box instead of having one 'Destroy Actor' box.
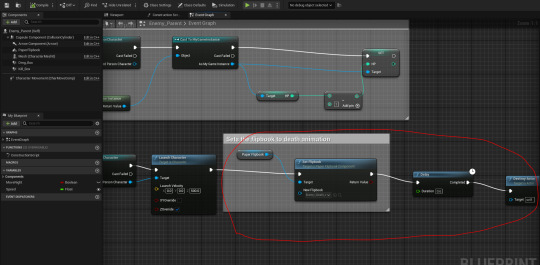
In the 'PlayerProj' event graph, I also edited the code like I did with the code shown above.

0 notes
Text
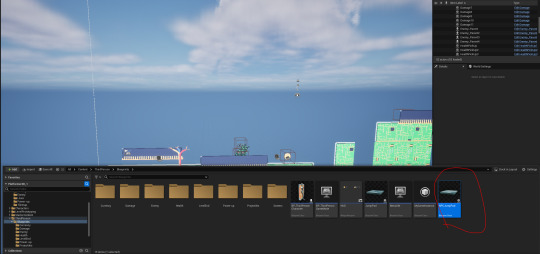
Building the game:
Here, I opened up the project settings and selected the 'Game Default Map' to 'Start'. Towards the bottom of the screenshot I had typed the maps that I want to get packaged into the game once I've packaged it.

Next, I clicked on 'Packaging' and changed the build configuration to 'Shipping'. This is to make sure that my game gets built with optimizations and excludes debug data. I also ticked the two boxes below.

After that, I deleted the print string boxes that were used for debugging. In the code below, I deleted a print string box and connected the 'Cast' and 'Set' box back together as they were connected to the print string box.

Here, I selected a target platform for the game to play on.

Next, I selected the different textures that I've used and changed their render settings to 'Nearest Neighbor' so they don't appear blurry once the game gets built.

I then had to build the lighting by clicking on 'Build', then 'Build Lighting Only'.

Next, I changed the 'Thumbnail' and 'Project Displayed Title'.

At last, I went to package my project.

The game was successfully packaged. However the name did not change from "Platformer2D_1" to "Chippy's Number Crunching Adventure". Before I package it again, I changed the 'Project Name' box to "Chippy's Number Crunching Adventure".

Even this didn't work. I then changed the name of the project file. The problem was that the name was so long that it risked not saving. However, this did the trick.
0 notes
Text
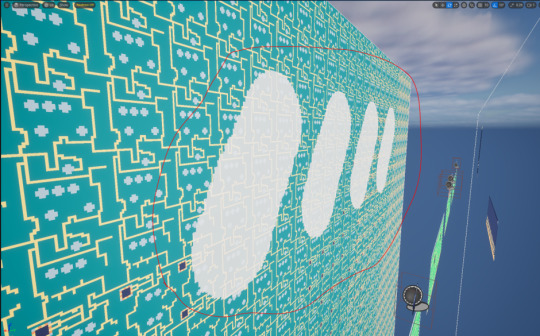
Getting rid of the white lines appearing in the tile maps:
In order to get rid of the strange and off putting lines was to condition the tile sets.

0 notes
Text
Noticing another enemy not moving:
Once again, I had forgot to set the speed of an enemy. I had then set it to 50.

0 notes
Text
Adjusting when levels start:
In the map 'Win', I opened the level blueprint and changed the 'Open Level' box from 'Level2' to 'Start'. I did this so that it takes the player back to the start screen.

0 notes
Text
Allowing the player to quit the game by assigning the Escape key:
In the 'BP_ThirdPersonCharacter' event graph, I added the code shown below to assign the escape key.

For the title screen, I moved the "Press Any Key" text box up and added a new text box saying "Press 'Esc' to Quit'.

0 notes
Text
Background Design
Mood board:

Firstly, I drew the shape of the fan's case. When I made a new layer, I moved it below. Here, I set the opacity of the pencil tool for the bottom layer to 50%.

After I added another layer, I drew light effects to suggest that the light is getting reflected by the fast moving fan blades. After that I made a GIF and imported the sprite sheet into Unreal Engine 5.
GIF:


Tile map:
Here, I couldn't add translucent tiles into the tile map without it being opaque.

Instead I extracted the sprites from the sprite sheet and placed it into the level. I rotated and resized these sprites. I added these sprites to create the effect of light shining through the air vents of the computer.
At this point I had added the fan flipbook. The only issue was that the fan blade blur effect was not translucent.

Here, I changed the box next to 'Element 0' to 'TranslucentUnlitSpriteMaterial'. At this point, I noticed a problem. The translucent black fan blur was nearly invisble.
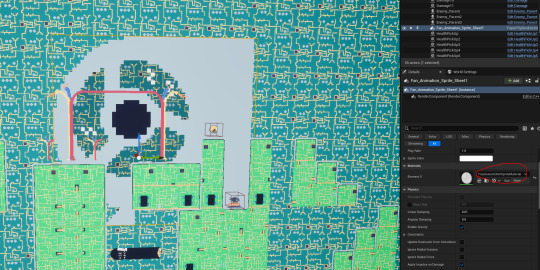
I then remade the animation so that the blur was more visible. For example the opacity was set to 85% instead of 50%. I also decided to make the layer translucent rather than drawing the black in with 50% opacity.
GIF V2:


I found this to be an improvement. Meanwhile, I experimented with it further and added some blades. This is to make it look more realistic. For example, when you look at a spinning blade or fan, it creates a circular blur effect. You can also see more solid lines from the blades in contrast to the less opaque blur.
GIF V3:


To make the fan most visible to the player. I resized the fan from a scale of 40 to 30.

0 notes
Text
What are sprite sheets?
A sprite sheet is an image with all the frames of an animation placed together.
Mega Man:

Super Mario:

0 notes
Text
Changing projectile into a 2D sprite:
Firstly, I had drawn a projectile ball to replace the 3D sphere that was currently being used.

Here, I duplicated the projectile blueprint in case I had messed the code up beyond saving it as the code was connected to the sphere.

Next, I deleted the sphere and replaced it with a 2D sprite. Usually I had to rotate the sprite in order for it to be visible, so I rotated it by 90 degrees.

The only piece of code that was effected by deleting the sphere was the 'On Component Begin Overlap' box. I deleted it and added it back in. When it was added back in, it no longer had said "Sphere" in the brackets and instead said "PaperSprite".

Meanwhile, I had to go to the 'BP_ThirdPersonCharacter' event graph and changed the box from 'Projectile_01' to 'Projectile_02'.

When I tested it, I couldn't see the sprite. I then decided to rotate the sprite 90 degrees back again in order to make it visible.

0 notes
Text
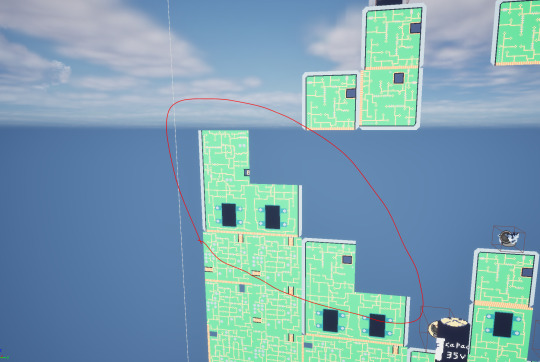
Adding more enemies:
Here, I added a second enemy to my level. I also had to add patrol points.

In the picture below, I added a third enemy and more patrol points.

There was an issue with the new enemies. They didn't appear to move. I fixed this by setting their speed to 50 individually. This had fixed the movement issue.

However, the was another issue. This issue was that the enemies couldn't jump.

Here, I duplicated the jump pad blueprint and called it 'NPCJumpPad'.
Next, I deleted the 3D cube.

Once I changed around the event boxes in the event graph, there was a compilation error. I found out that making the enemies jump requires using more advanced AI. I then deleted the blueprint.
Here, I deleted the enemy that needed to jump and the patrol points that I placed for it.
0 notes