
Don't wanna be here? Send us removal request.
Statistics
We looked inside some of the posts by actfact2-blog and here's what we found interesting.
Average Info
Notes Per Post
0
Likes Per Post
0
Reblog Per Post
0
Reply Per Post
0
Time Between Posts
3 days
Number of Posts By Type
Text
17
Last Seen Tumblr Blogs


Fun Fact
1,644 Tumblr posts in 1 second.
Text
Is Fresh Yeast Best?
Yeast—living, single-celled fungi—is one of the main reasons bread is so complex and special. These microbes behave like miniscule factories that specialize in the production of bubbles and booze by way of a process called fermentation. In addition to leavening dough, fermentation makes important contributions to the aroma, flavor, and texture of bread.
The yeast used to create bread can be commercially derived, or it can be cultivated from the environment around us in the form of a levain. Using a levain is considered to be the very definition of fermentation by some bakers who dismiss commercial yeast (also known as baker’s yeast) as not producing “real” fermentation. We reject that view; fermentation is fermentation, whether it involves levains or commercial yeast. One method is not more legitimate than the other. The fermentation method you choose depends heavily on your schedule, ability to plan ahead, and yeast preference.
Commercial Yeast
When it comes to commercial yeast, there’s an ongoing debate as to which type of yeast is best for baking bread: active dry, instant, or fresh. The main issue doesn’t seem to be about the “power” of the yeast but rather an unspoken stigma that persists for each kind. You might have heard that “fresh is best,” but in truth, yeast is yeast is yeast—Saccharomyces cerevisiae to be specific.
S. cerevisiae is a fermentation superstar—the species is used by bakers, brewers, and vinters, although the strains that they work with differ. Strains are often isolated, grown, and stored in tightly controlled conditions so that they are best adapted for particular situations, such as making a sourdough, a French bread, an ale, or a champagne. That means that you probably won’t get great results if you try to make bread using a strain developed for brewing beer or winemaking.
At this point you might still be wondering what type of commercial baker’s yeast you should use. If a baker uses the right techniques, there is no reason to use fresh yeast over instant yeast—in a lineup of baked loaves, you’d be hard-pressed to distinguish one from the other in terms of the yeast used. We like working with instant yeast rather than fresh yeast or active dry yeast. After you read our explanations of the differences between the three forms, you will be better equipped to make your own choices.
Fresh Yeast
Developed in the mid-19th century, fresh yeast is the oldest commercial form of yeast. It was originally sold as a cream of yeast mixed with a mash, which served as a growth medium. Fresh yeast is more commonly sold today in blocks of cake or compressed yeast that resemble crumbly, cream-colored modeling clay. Fresh yeast must be dissolved into a liquid but easily does so, dispersing efficiently throughout the dough, which is a plus.
Each gram of compressed yeast contains roughly six billion active yeast cells. Fresh yeast has the highest moisture content of any form of baker’s yeast, but also the shortest shelf life. Blocks require refrigeration and last for only 2–3 weeks after opening. Fresh yeast is highly perishable, a considerable drawback that can cause issues in bakeries as well as home kitchens. At the bakeshop, fresh yeast is likely to sit on the bakers’ worktable for hours while they mix many doughs. The warmth of the bakery will activate the yeast, and it will eventually die because it has nothing to eat. The home baker who buys a pound of fresh yeast must bake frequently to use it all up before it dies. The challenges that come with fresh yeast eventually sparked the next wave of yeast innovation: dried yeast.
Active Dry Yeast
Dried yeast was developed during the Second World War by Fleischmann Laboratories so that United States field infantrymen could bake fresh bread in their camps. The new active dry yeast was not as perishable as fresh yeast and therefore did not require refrigeration and had a longer shelf-life.
Dried yeast is an inert substance when you purchase it, but it becomes a living, thriving colony of microorganisms with the addition of some water and food. During the production process, water is removed from the yeast cells, reducing the moisture content from around 82% to 8% in the case of active dry yeast. The desiccation sends the cells into a state of dormancy. Particles of dormant yeast are coated with a protective layer of dead yeast cells to form tiny granules, which are then packaged for sale. Unlike fresh yeast, unopened packages of dormant, active dry yeast can be frozen for months.
Active dry yeast is more convenient than fresh yeast, but it still requires some additional work and comes with its own set of drawbacks. The dormant cells must be reactivated before use, which can be done by stirring the granules in lukewarm (40–43 °C / 104–109 °F) water. Active dry yeast is temperature sensitive—water that is too hot or too cold can damage or kill the cells, reducing the fermentation power of the yeast.
Around 25% of the yeast cells are killed during the production process, which means that active yeast has, ironically, the lowest amount of active yeast (by weight) of either fresh or dry varieties. Thus, more of it must be added to a recipe than other types of yeast. Dead yeast cells also leach a self-produced chemical called glutathione that relaxes dough. Small quantities of glutathione can be beneficial, depending on the dough, but it can quickly make dough become so relaxed that it’s difficult to handle. Active dry yeast is slower to ferment than both instant and fresh yeast. It needs to proof longer to achieve the same results as the other forms of commercial yeast; the time required will depend on the environment and amount of yeast in the dough. Still, smaller quantities of active dry yeast are often the only option available at supermarkets, which is likely why it’s still commonly used in home baking.
Instant Yeast
Instant yeast, also called quick yeast, was developed in the 1970s by French manufacturer Lesaffre. Like active dry yeast, instant yeast is sold as desiccated granules; it is even drier than active yeast, having a moisture content of just 5% or so. The difference is that instant yeast ferments faster, does not require activation, and is less sensitive to water temperature.
So why do we prefer instant yeast over all other forms of commercial yeast? For starters, instant yeast is truly instant—it does not need to be activated; although we prefer to bloom it, you can add it directly to your dough—and, as soon as it comes into contact with moisture, it will begin the fermentation process.
Instant yeast is made with a fast-acting strain of S. cerevisiae, and the noodle-shaped granules are finer than those of active dry yeast. The surface layer of dead cells is more porous than that of active dry yeast, which allows the granules to rehydrate more rapidly. During production, instant yeast is quick-dried, a process that produces significantly more living yeast cells. As a result its leavening power more closely resembles that of fresh yeast. Manufacturers add salts of fatty acids to the yeast to control rehydration and boost the yeast’s gassing power. The moisture content is lower, which increases the shelf life to 2 years in its vacuum pouch, or even longer when refrigerated. Once the package is opened and exposed to oxygen, instant yeast remains active for 1 year if it’s refrigerated after being opened—it’s the trade-off of the more porous surface. Compared with the active dry form, the instant variety produces more gas during fermentation.
Instant yeast is also available in a number of forms; the one you choose will depend on the type of dough you make. For example, enriched doughs with larger proportions of sugar require osmotolerant yeast; osmotolerant instant yeast requires less water than the instant yeast used in lean doughs. So instant yeast offers options you don’t have with active dry yeast, along with added convenience.
You’re likely to encounter an occasional bump in the road in the road when your local grocery store or purveyor only has one type of yeast on hand. Accidents happen and it’s all too easy to get the wrong package of yeast in a rush. Fortunately, this is one bread-making problem that’s easy to fix. By giving the yeast proper care and employing some basic math, you can use any form of yeast successfully. You’ll find our own conversion table on page 10 (volume 3) of Modernist Bread.
Visit modernistbread.com to learn more about yeast and bread-making.
Source: https://modernistcuisine.com/2018/07/is-fresh-yeast-best/
0 notes
Text
Favorite All-Purpose Pie Dough Recipe Video + 5 Pies and Tarts I Use it For
<![CDATA[ .tasty-recipes-quick-links text-align:center; .tasty-recipes-quick-links a padding: 0.5rem; ]]>
Friends, Thanksgiving is one week away. Let’s review:
Dough Making, Pie Baking
No matter which pie dough recipe you use, the principles of making it will be the same: keep the ingredients cold, cold, cold. Purists will say that making a pie dough in the food processor is a no-no, but I find it works very well—so does Martha Stewart!—and if you are making a lot of dough, using a processor will save you a lot of time. Here are a few things to keep in mind:
• To start the pie-dough making process, cut your butter into smallish slices or cubes, place them on a plate (or some other vessel) and stick them in the freezer. Fill a large liquid measuring cup with ice and water. Set aside.
• If you want to make several batches of dough, rather than multiply the recipe and load up your food processor, make separate batches consecutively. For example, when I triple the pie dough recipe below, I’ll start by cutting up the butter and placing each portion on a separate plate in the freezer. Then I’ll fill up a large liquid measure with ice and water. Then I’ll line up three big mixing bowls and fill each with 320g flour, 2 T. sugar, and 1/2 tsp salt. Then I make one batch at a time using the food processor, wrapping each batch in a tea towel or plastic wrap before proceeding with the next batch. No need to clean the processor in between batches.
• When I make the dough and plan on using it shortly thereafter, I prefer rolling it out immediately, fitting it into the pie plate, then chilling the dough-fitted pie plate. I find this easier than chilling the dough round, then rolling it out once it has chilled and firmed up.
• When you are rolling out your dough, try to keep tools and ingredients cold — my aunt uses a marble rolling pin that she keeps in the freezer. (I never remember to freeze my rolling pins, but it’s something to keep in mind.)
• As Martha Stewart says: “Make it cold; bake it hot.” A good rule of thumb is to bake your pie on the lowest rack of the oven at a high temperature to start (around 425ºF for 20 minutes or so), and then to reduce the heat to a lower temperature (350ºF or so) for the remaining baking time, anywhere from 30 to 60 minutes longer. Every oven is different, of course, so adjust temperature and timing as needed.
Here’s a step-by-step guide to making the dough: After pulsing together the flour, sugar and salt, add the cold butter.
Pulse 10 times. You don’t want to over-process the dough—it should look like the photo below and come together when you pinch it with your fingers. When you dump out the dough onto a sheet of plastic wrap or a tea towel or whatever you are using to store the dough, it will look like a pile of crumbs, not a cohesive ball. It will come together into a cohesive ball when you pack it into a round.
Wouldn’t it be nice to head into the holiday season with a freezer full of pie dough? Remember: it’s just as much work to dirty your food processor for one batch of pie dough as it is for 5.
Print
<![CDATA[ .tasty-recipes-image float: right; .tasty-recipes-print-button background-color: #666677; display: inline-block; padding-left: 1em; padding-right: 1em; padding-top: 0.5em; padding-bottom: 0.5em; text-decoration: none; a.tasty-recipes-print-button color: #fff; a.tasty-recipes-print-button:hover color: #fff; .tasty-recipes-rating.tasty-recipes-clip-10 -webkit-clip-path: polygon(0 0, 10% 0%, 10% 100%, 0% 100%); clip-path: polygon(0 0, 10% 0%, 10% 100%, 0% 100%); .tasty-recipes-rating.tasty-recipes-clip-20 -webkit-clip-path: polygon(0 0, 20% 0%, 20% 100%, 0% 100%); clip-path: polygon(0 0, 20% 0%, 20% 100%, 0% 100%); .tasty-recipes-rating.tasty-recipes-clip-30 -webkit-clip-path: polygon(0 0, 30% 0%, 30% 100%, 0% 100%); clip-path: polygon(0 0, 30% 0%, 30% 100%, 0% 100%); .tasty-recipes-rating.tasty-recipes-clip-40 -webkit-clip-path: polygon(0 0, 40% 0%, 40% 100%, 0% 100%); clip-path: polygon(0 0, 40% 0%, 40% 100%, 0% 100%); .tasty-recipes-rating.tasty-recipes-clip-50 -webkit-clip-path: polygon(0 0, 50% 0%, 50% 100%, 0% 100%); clip-path: polygon(0 0, 50% 0%, 50% 100%, 0% 100%); .tasty-recipes-rating.tasty-recipes-clip-60 -webkit-clip-path: polygon(0 0, 60% 0%, 60% 100%, 0% 100%); clip-path: polygon(0 0, 60% 0%, 60% 100%, 0% 100%); .tasty-recipes-rating.tasty-recipes-clip-70 -webkit-clip-path: polygon(0 0, 70% 0%, 70% 100%, 0% 100%); clip-path: polygon(0 0, 70% 0%, 70% 100%, 0% 100%); .tasty-recipes-rating.tasty-recipes-clip-80 -webkit-clip-path: polygon(0 0, 80% 0%, 80% 100%, 0% 100%); clip-path: polygon(0 0, 80% 0%, 80% 100%, 0% 100%); .tasty-recipes-rating.tasty-recipes-clip-90 -webkit-clip-path: polygon(0 0, 90% 0%, 90% 100%, 0% 100%); clip-path: polygon(0 0, 90% 0%, 90% 100%, 0% 100%); .tasty-recipes-nutrition ul list-style-type: none; margin: 0; padding: 0; .tasty-recipes-nutrition ul:after display: block; content: ' '; clear: both; .tasty-recipes-nutrition li float: left; margin-right: 1em; .tasty-recipes-plug text-align: center; margin-bottom: 1em; display: -ms-flexbox; display: flex; -ms-flex-align: center; align-items: center; -ms-flex-pack: center; justify-content: center; .tasty-recipes-plug a text-decoration: none; box-shadow: none; .tasty-recipes-plug a img width: 150px; height: auto; margin: 5px 0 0 8px; display: inline-block; @media print .tasty-recipes-no-print, .tasty-recipes-no-print * display: none !important; .tasty-recipes border: 5px solid #666677; margin-top: 6em; margin-bottom: 4em; .tasty-recipes.tasty-recipes-has-plug margin-bottom: 1em; .tasty-recipes-plug margin-bottom: 4em; .tasty-recipes-print-button display: none; .tasty-recipes-image-shim height: 69.5px; clear: both; .tasty-recipes-entry-header background-color: #666677; color: #FFF; text-align: center; padding-top: 35px; padding-bottom: 1.5em; padding-left: 2.5em; padding-right: 2.5em; .tasty-recipes-entry-header.tasty-recipes-has-image padding-top: 0px; .tasty-recipes-entry-header .tasty-recipes-image float: none; text-align: center; transform: translateY(-115px); margin-bottom: 1em; /* Decide if we need this */ .tasty-recipes-entry-header .tasty-recipes-image img -webkit-border-radius: 50%; -moz-border-radius: 50%; border-radius: 50%; border: 5px solid #666677; height: 150px; width: 150px; display: inline-block; .tasty-recipes-entry-header h2 font-size: 2em; font-weight: 400; text-transform: lowercase; margin-bottom: 0; text-align: center; color: #FFF; margin-top: 0; padding-top: 0; padding-bottom: 0; .tasty-recipes-has-image .tasty-recipes-entry-header h2 margin-top: -115px; .tasty-recipes-entry-header hr border: 1px solid #B7BBC6; background-color: #B7BBC6; margin-bottom: 1em; margin-top: 1em; .tasty-recipes-entry-header div.tasty-recipes-rating text-decoration: none; border: none; .tasty-recipes-entry-header .tasty-recipes-rating:hover text-decoration: none; .tasty-recipes-entry-header div.tasty-recipes-rating font-size: 1.375em; display: block; .tasty-recipes-entry-header .tasty-recipes-rating p margin-bottom: 0; .tasty-recipes-entry-header span.tasty-recipes-rating margin-left: .25em; margin-right: .25em; color: #FFF; .tasty-recipes-entry-header .rating-label font-style: italic; color: #B7BBC6; font-size: .6875em; display: block; .tasty-recipes-entry-header .tasty-recipes-details margin-top: 1em; .tasty-recipes-entry-header .tasty-recipes-details ul list-style-type: none; margin: 0; .tasty-recipes-entry-header .tasty-recipes-details ul li display: inline-block; margin-left: .5em; margin-right: .5em; font-size: 1em; line-height: 2.5em; color: #fff; @media only screen and (max-width: 520px) .tasty-recipes-entry-header .tasty-recipes-details .detail-icon height: .8em; margin-top: .4em; .tasty-recipes-entry-header .tasty-recipes-details ul li font-size: .875em; line-height: 1.75em; @media only screen and (min-width: 520px) .tasty-recipes-entry-header .tasty-recipes-details .detail-icon height: 1em; margin-top: .6em; .tasty-recipes-entry-header .tasty-recipes-details ul li font-size: 1em; line-height: 2.5em; .tasty-recipes-entry-header .tasty-recipes-details .tasty-recipes-label font-style: italic; color: #B7BBC6; margin-right: .125em; .tasty-recipes-entry-header .tasty-recipes-details .detail-icon vertical-align: top; margin-right: .2em; display: inline-block; .tasty-recipes-entry-content padding-top: 1.25em; .tasty-recipes-entry-content .tasty-recipes-buttons margin-bottom: 1.25em; margin-left: 1.25em; margin-right: 1.25em; .tasty-recipes-entry-content .tasty-recipes-buttons:after content: " "; display: block; clear: both; .tasty-recipes-entry-content .tasty-recipes-button-wrap width: 50%; display: inline-block; float: left; box-sizing: border-box; .tasty-recipes-entry-content .tasty-recipes-buttons a text-transform: uppercase; text-align: center; display: block; color: #FFF; background-color: #666677; font-size: 1em; line-height: 1.375em; padding-top: 1em; padding-bottom: 1em; font-weight: bold; margin-top: 0; border: none; border-radius: 0; text-decoration: none; .tasty-recipes-entry-content a img box-shadow: none; -webkit-box-shadow: none; .tasty-recipes-entry-content .tasty-recipes-buttons a:hover background-color: #979599; text-decoration: none; .tasty-recipes-entry-content .tasty-recipes-buttons img vertical-align: top; .tasty-recipes-entry-content .tasty-recipes-buttons img.svg-print, .tasty-recipes-entry-content .tasty-recipes-buttons img.svg-pinterest height: 1.25em; margin-right: .375em; margin-bottom: 0; background: none; display: inline-block; @media only screen and (min-width: 520px) .tasty-recipes-entry-content .tasty-recipes-button-wrap:first-child padding-right: .625em; .tasty-recipes-entry-content .tasty-recipes-button-wrap:last-child padding-left: .625em; @media only screen and (max-width: 520px) .tasty-recipes-entry-content .tasty-recipes-button-wrap width: 100%; .tasty-recipes-entry-content .tasty-recipes-button-wrap:nth-child(2) padding-top: 1em; .tasty-recipes-entry-content h3 text-transform: uppercase; font-size: .75em; color: #979599; margin-bottom: 1.5em; .tasty-recipes-entry-content h4 font-size: 1em; padding-top: 0; margin-bottom: 1.5em; margin-top: 1.5em; .tasty-recipes-entry-content hr background-color: #EAE9EB; border: 1px solid #EAE9EB; margin-top: 1em; margin-bottom: 1em; .tasty-recipes-entry-content .tasty-recipes-description, .tasty-recipes-entry-content .tasty-recipes-ingredients, .tasty-recipes-entry-content .tasty-recipes-instructions, .tasty-recipes-entry-content .tasty-recipes-keywords padding-left: 1.25em; padding-right: 1.25em; .tasty-recipes-entry-content .tasty-recipes-description p margin-bottom: 1em; .tasty-recipes-entry-content .tasty-recipes-ingredients ul, .tasty-recipes-entry-content .tasty-recipes-instructions ul list-style-type: none; margin-left: 0; margin-bottom: 1.5em; padding: 0; .tasty-recipes-entry-content .tasty-recipes-ingredients ul li, .tasty-recipes-entry-content .tasty-recipes-instructions ul li margin-bottom: .625em; list-style-type: none; position: relative; margin-left: 2.5em; line-height: 1.46; .tasty-recipes-entry-content .tasty-recipes-ingredients ul li:before, .tasty-recipes-entry-content .tasty-recipes-instructions ul li:before background-color: #666677; -webkit-border-radius: 50%; -moz-border-radius: 50%; border-radius: 50%; height: .5em; width: .5em; display: block; content: " "; left: -1.25em; top: .375em; position: absolute; .tasty-recipes-entry-content .tasty-recipes-ingredients ol, .tasty-recipes-entry-content .tasty-recipes-instructions ol counter-reset:li; margin-left: 0; padding: 0; .tasty-recipes-entry-content .tasty-recipes-ingredients ol li, .tasty-recipes-entry-content .tasty-recipes-instructions ol li list-style-type: none; position: relative; margin-bottom: 1em; margin-left: 2.5em; line-height: 1.46; .tasty-recipes-entry-content .tasty-recipes-ingredients ol li:before, .tasty-recipes-entry-content .tasty-recipes-instructions ol li:before content:counter(li); counter-increment: li; position: absolute; background-color: #666677; -webkit-border-radius: 50%; -moz-border-radius: 50%; border-radius: 50%; height: 1.45em; width: 1.45em; color: #FFF; left: -1.25em; transform: translateX(-50%); line-height: 1.5em; font-size: .6875em; text-align: center; top: .1875em; @media only screen and (max-width: 520px) .tasty-recipes-entry-content .tasty-recipes-ingredients ol, .tasty-recipes-entry-content .tasty-recipes-instructions ol margin-left: 0; .tasty-recipes-entry-content .tasty-recipes-notes padding: 1.25em; background-color: #EDF0F2; .tasty-recipes-entry-content .tasty-recipes-notes ol counter-reset:li; margin-left: 0; padding: 0; .tasty-recipes-entry-content .tasty-recipes-notes ul margin-left: 0; padding: 0; .tasty-recipes-entry-content .tasty-recipes-notes p, .tasty-recipes-entry-content .tasty-recipes-notes ul li, .tasty-recipes-entry-content .tasty-recipes-notes ol li background-color: #FFF; padding-left: 1.5625em; padding-right: 1.5625em; padding-top: 1.25em; padding-bottom: 1.25em; position: relative; -webkit-clip-path: polygon(20px 0, 100% 0, 100% 100%, 0 100%, 0 20px); clip-path: polygon(20px 0, 100% 0, 100% 100%, 0 100%, 0 20px); margin-bottom: 1.5em; @media only screen and (min-width: 520px) .tasty-recipes-entry-content .tasty-recipes-notes p, .tasty-recipes-entry-content .tasty-recipes-notes ul li, .tasty-recipes-entry-content .tasty-recipes-notes ol li padding-left: 2.5em; .tasty-recipes-entry-content .tasty-recipes-notes p:before, .tasty-recipes-entry-content .tasty-recipes-notes ul li:before content: "i"; display: block; background-color: #666677; -webkit-border-radius: 50%; -moz-border-radius: 50%; border-radius: 50%; height: 1.3em; width: 1.3em; font-size: .75em; line-height: 1.3em; text-align: center; color: #FFF; position: absolute; left: 1.167em; top: 1.9em; .tasty-recipes-entry-content .tasty-recipes-notes ol li:before content:counter(li); counter-increment: li; position: absolute; background-color: #666677; -webkit-border-radius: 50%; -moz-border-radius: 50%; border-radius: 50%; height: 1.45em; width: 1.45em; color: #FFF; left: 2em; transform: translateX(-50%); line-height: 1.5em; font-size: .6875em; text-align: center; top: 2em; .tasty-recipes-entry-content .tasty-recipes-notes p:last-child margin-bottom: 0; .tasty-recipes-entry-content .tasty-recipes-keywords background-color: #EDF0F2; padding-bottom: 1em; padding-top: 1em; .tasty-recipes-entry-content .tasty-recipes-keywords p font-size: 0.7em; font-style: italic; color: #979599; margin-bottom: 0; .tasty-recipes-entry-content .tasty-recipes-keywords p span font-weight: bold; .tasty-recipes-nutrifox text-align: center; margin: 0; .nutrifox-label background-color: #EDF0F2; .tasty-recipes-nutrifox iframe width: 100%; display: block; margin: 0; .tasty-recipes-entry-content .tasty-recipes-nutrition padding: 1.25em; color: #666677; .tasty-recipes-nutrition .tasty-recipes-label font-style: italic; color: #B7BBC6; margin-right: .125em; font-weight: 400; .tasty-recipes-nutrition ul text-align: center; .tasty-recipes-nutrition li float: none; display: inline-block; line-height: 2em; .tasty-recipes-entry-footer background-color: #666677; padding-top: 1.5625em; padding-bottom: 1.25em; padding-left: 2.5em; padding-right: 2.5em; text-align: center; .tasty-recipes-entry-footer .tasty-recipes-footer-content display: inline-block; .tasty-recipes-entry-footer img width: 65px; .tasty-recipes-entry-footer h3 color: #B7BBC6; font-size: 1.25em; line-height: 2.25em; margin-top: .5em; margin-bottom: .125em; padding: 0; line-height: 1em; .tasty-recipes-entry-footer p margin-bottom: 0; color: #FFF; font-size: .75em; .tasty-recipes-entry-footer p a color: #FFF; text-decoration: underline; box-shadow: none; border-bottom: none; .tasty-recipes-entry-footer:after content: " "; display: block; clear:both; @media only screen and (max-width: 520px) .tasty-recipes-entry-footer h3 margin-top: .5em; margin-bottom: .5em; .tasty-recipes-entry-footer text-align: center; @media only screen and (min-width: 520px) .tasty-recipes-entry-footer img float: left; .tasty-recipes-entry-footer h3, .tasty-recipes-entry-footer p margin-left: 90px; clear: none; text-align: left; /* Print view styles */ .tasty-recipes-print-view font-size: 11px; background-color: #fff; .tasty-recipes-print-view .tasty-recipes-print-button display: inline-block; .tasty-recipes-print padding:0; font-size: 11px; .tasty-recipes-print-view .tasty-recipes margin-top: 1em; .tasty-recipes-print .tasty-recipes-entry-header background-color: inherit; color: inherit; padding-bottom: 0; padding-left: 1em; padding-right: 1em; padding-top: 1em; .tasty-recipes-print .tasty-recipes-entry-header .tasty-recipes-image float: right; transform: none; .tasty-recipes-print.tasty-recipes-has-image .tasty-recipes-entry-header h2 margin-top: 0; .tasty-recipes-print .tasty-recipes-entry-header h2 color: inherit; margin-bottom: .5em; .tasty-recipes-print .tasty-recipes-entry-header hr display: none; .tasty-recipes-print .tasty-recipes-entry-header span.tasty-recipes-rating color: #000; .tasty-recipes-print .tasty-recipes-entry-header .tasty-recipes-details ul padding: 0; clear: none; .tasty-recipes-print .tasty-recipes-entry-header .tasty-recipes-details ul li line-height: 1.5em; color: #000; .tasty-recipes-print .tasty-recipes-entry-header .tasty-recipes-details .detail-icon display: none; .tasty-recipes-print .tasty-recipes-entry-content img max-width: 50%; height: auto; .tasty-recipes-print .tasty-recipes-entry-content .tasty-recipes-ingredients ul li, .tasty-recipes-print .tasty-recipes-entry-content .tasty-recipes-ingredients ol li margin-bottom: 0.25em; line-height: 1.1; .tasty-recipes-print .tasty-recipes-entry-content .tasty-recipes-instructions ul li, .tasty-recipes-print .tasty-recipes-entry-content .tasty-recipes-instructions ol li margin-bottom: 0.5em; line-height: 1.1; .tasty-recipes-print .tasty-recipes-entry-content .tasty-recipes-ingredients ul li:before, .tasty-recipes-print .tasty-recipes-entry-content .tasty-recipes-instructions ul li:before top: 0.3em; .tasty-recipes-print .tasty-recipes-entry-content .tasty-recipes-ingredients ol li:before, .tasty-recipes-print .tasty-recipes-entry-content .tasty-recipes-instructions ol li:before top: 0; .tasty-recipes-print .tasty-recipes-entry-content .tasty-recipes-notes p, .tasty-recipes-print .tasty-recipes-entry-content .tasty-recipes-notes ul li, .tasty-recipes-print .tasty-recipes-entry-content .tasty-recipes-notes ol li padding-top: 0; padding-bottom: 0; background-color: #EDF0F2; clip-path: none; .tasty-recipes-print .tasty-recipes-entry-content .tasty-recipes-notes p:before, .tasty-recipes-print .tasty-recipes-entry-content .tasty-recipes-notes ul li:before top: 0; clip-path: none; margin-bottom: 0.5em; @media print .tasty-recipes-print .tasty-recipes-entry-footer img display: none; .tasty-recipes-print .tasty-recipes-source-link text-align: center; ]]>
Description
This is the pie dough I use for everything: galettes, tarts, etc. Dough can be made up to a week in advance and stored in the fridge or made weeks in advance and stored in the freezer.
Ingredients
2½ cups (11.25 oz | 320g) all-purpose flour
2 T. sugar
½ tsp. table salt
16 T. (8 oz | 227g) unsalted butter
½ C. + 2 T. (4 oz | 114 g + 1 oz | 28g) ice water
Instructions
In a large bowl, whisk flour, sugar and salt together (or pulse in food processor). Cut butter into flour and using the back of a fork or a pastry cutter, incorporate butter into flour mixture until butter is in small pieces. (If using food processor, pulse at 1-second intervals until butter is the size of peas.) Add ice water and continue to stir with fork until mixture comes together to form a mass. Add more ice water if necessary, one tablespoon at a time. Gently form mass into a ball, divide in half, flatten each half into a disk and wrap each disk in plastic wrap. Chill until ready to use.
Here are a few pies and tarts I use this dough for:
Bourbon Pecan Pie (No Corn Syrup)
Ronnie Hollingsworth’s Most Excellent Squash Pie
Apple-Frangipane Galette
Basic Apple Pie
Rhubarb Galette
Posted By: alexandra · In: Baking
Source: https://alexandracooks.com/2018/11/13/favorite-all-purpose-pie-dough-recipe-all-the-pies-i-use-it-with/

0 notes
Text
Food News: The Unusual Pizza Topping Dividing the Internet Right Now
Plus: Netflix is boosting yogurt sales, an ABBA-themed restaurant is opening in London, and the new food words that were just added to the dictionary.
Mustard on pizza? The internet doesn’t know what to make of this unusual topping. [Thrillist]
Netflix Hit To All the Boys I’ve Loved Before has caused a boom in Yakult yogurt sales. [Bloomberg]
Mamma Mia! An interactive ABBA-themed restaurant is opening in London in 2019. [Extra Crispy]
Merriam-Webster just added a bunch of new food words, including “guac.” [Food & Wine]
Starbucks opens a Mexico City café that is staffed entirely by senior citizens. [TODAY.com]
The internet was a little confused this week when a woman was captured dunking her chicken tenders into her soda at the U.S. Open. [Delish]

Source: https://blog.williams-sonoma.com/food-news-unusual-pizza-topping-dividing-internet-right-now/
0 notes
Text
Vegan School Lunches (and work lunches) with Tips & Recipes! (oil-free, nut-free)
Note Find more vegan school lunch recipes in Plant-Powered Families, plus an entire chapter on packing lunches section. Flip to page 233… and breathe easy!
Does the thought of packing school lunches again make you cringe? Or work lunches?
It can be frustrating to plan and pack vegan school lunches, especially now that most schools require nut-free lunches. I’m here to help relieve some of that stress!
I’ve been packing lunches for our girls (and my hubby) for about ten years now, so I’ve learned some tricks and definitely have a school-year system.
One of my tricks is to rely on key recipes for vegan school lunches. Ones that are easy, quick, that my kids love, and that pack well for school lunches.
Today I’m sharing my top 11 recipes for vegan school lunches, along with tips!
Ready to take notes?
Class begins, now!
1. Chickpea Nibbles
I would be lost without our Chickpea Nibbles. For years I made Tamari Roasted Chickpeas (from ed&bv), and then I needed a recipe even easier. Enter Chickpea Nibbles from PPF.
I make double and triple batches of these. Seriously, my kiddos eat one batch in one sitting – easily. Sometimes I hide away extra for lunches in the fridge, just so they won’t eat them all straight away.
Chickpea Nibbles
Your kids will love nibbling on these tasty chickpeas warm out of the oven, or cooled for lunches and snacks.
Ingredients
2 14 / 15 oz cans chickpeas rinsed and drained
2 tbsp balsamic vinegar
1 1/2 tbsp tamari
1 - 1 1/2 tsp pure maple syrup
Instructions
Preheat oven to 400°F (205°C). Toss all ingredients together and place on baking sheet lined with parchment paper. Bake for 20-25 minutes, tossing chickpeas once or twice during baking, until marinade is absorbed but chickpeas are still a little moist (not dried out).
What to do with them beyond snacking? Add them as a side snack in lunches, or mix into pasta, or rice/quinoa. Mash into a sandwich with your kiddos’ fave condiments. FYI, other kids may also want them. I’ve had requests. 🙂
2. Hummus #hummusisafoodgroup
Hummus must be in your arsenal of vegan school lunch recipes!
Now that the hummus food group movement has officially begun, get started with my Hummus 101 from Plant-Powered Families (page 84)! If you don’t have PPF, try one of these recipes.
And, you know you can FREEZE hummus, right?
Yes, double or triple batch, then freeze in about 2-cup portions. It thaws beautifully, take it out the night before and pop in the fridge.
How to use in vegan school lunches? In sandwiches, slathered in wraps, as a dip for veg and rice crackers or pitas, on pizzas, as a spread for bagels or on pizzas, thinned out and mixed into pasta!
3. Easy, Nut-Free Baked Goods
It’s difficult to choose just one vegan school lunch recipe here! Some of my favorites are Best Banana Bread, Oatmeal Banana Bites, Apple Hemp Muffins, and Pumpkin Snackles. You can find most of those recipes here. Put 4-5 recipes in rotation, double-batch and freeze some if needed.
4. Simple Tofu Recipes
Vegans don’t have to eat tofu. But, yes, vegans often do enjoy tofu! For back-to-school recipes, keep your tofu recipes very easy and with a versatile seasoning.
For years I made my “Lemon Herb Tofu” (from Vive le Vegan). Then our girls went through a phase where they were fussy about the herbs. I created my Simplest Marinated Tofu for PPF, and that has since become my staple recipe.
5. Smoothies
Either before school or after school, they are a brilliant way to nourish and sustain your kiddos in a nutrient-dense drink.
Don’t just fill them up with fruit, balance with some greens and veggies if you can, and also add nutrient-rich hemp seeds, chia seeds, goji berries, or nut butters.
Need tricks for balancing the grassy tones in green smoothies? You can get the full green smoothie tutorial here.
6. Energy Balls
These Cocoa Cookie Dough Balls are sweet enough to be in the cookie category (see 10). Still, I think Energy Balls or squares need their own category.
These are so nutrient-dense and pack a nice burst of energy while sneaking in good stuff like seeds, dried fruit, and oats. A win-win for us and the kids!
The recipe for these Cocoa Cookie Dough Balls follows, but also see the squares linked above and the Protein Power Balls in PPF.
image credit: www.ucdintegrativemedicine.com
Cocoa Cookie Dough Balls
Psst, these are really health. No need to tell the kids, or anyone else, for that matter; just eat them up knowing they are filled with almonds (nut-free option included) and oats, and sweetened only with dates and raisins!
Ingredients
1/2 cup raw almonds see note for nut-free option
1/2 cup + 2 tbsp rolled oats
A few pinches of sea salt about a scant 1/8 tsp
1 cup pitted dates
1/4 cup raisins or more dates
1/4 cup unsweetened cocoa powder
1 tsp pure vanilla extract
2 tbsp nondairy chocolate chips or cocoa nibs optional
A few teaspoons of unsweetened cocoa powder unrefined sugar, or a combination of both, for dusting/rolling (optional)
Instructions
In a food processor, process the almods until fine and crumbly. Then add remaining ingredients and (except the optional chocolate chips) pulse or process. Once the mixture starts to become crumbly, process fully for a minute or two. It will appear as if nothing is happening at first, that the mixture is just whirring around in crumbs, but soon it will start to become sticky. When you see it start to become a little sticky, add the chocolate chips and process again. Continue to process until it forms a ball on the blade. Stop the machine and remove the dough. Take small coops of the dough (1 to 1 1/2 tablespoons in size) and roll in your hand. Repeat until you have rolled all of the dough. Toss or roll the balls in the coating, if using,, and refrigerate. Eat and repeat often.
Recipe Notes
Allergy-Free or Bust!: For a nut-free version, replace the almonds with just 1/4 cup of raw pumkin seeds, and add another 1/4 cup of rolled oats.
If This Apron Could Talk: Make a double batch and freeze half. They thaw very well.
Kid-Friendly: These are excellent to pack in school lunches, with a nut-free option for you if nuts aren’t permitted in your school. For a nut-free version, replace the almonds with just 1⁄4 cup of raw pumpkin seeds, and add another 1⁄4 cup of rolled oats.
Savvy Subs and Adds: Replace vanilla with 1/2 teaspoon almond extract or orange oil.
7. Nutritious Soups
Admittedly, soups don’t top my personal list of back-to-school recipes. But I know that so many of you love to pack nutritious, hearty soups so I must include a few.
Sniffle Soup (below) is one of our girls’ favorites, and I hear it’s popular with your families too! Make it for dinner one evening (keep on thicker side), and send it to school in a thermos for the kiddos another day.
Some other soups my girls love include this Sweet Potato Bisque, Tomato Lentil Soup, and this Smoky Bean Chili.
8. Cheesy Sprinkle
This unassuming little recipe with nutritional yeast transforms many of our school lunches from drab to fab. I add it to pasta, and “ta-dah!”, kiddos love it.
Sometimes I’ll use a basic marinara sauce, but more often I’ll do a simple slurry of apple cider vinegar, tamari, and maple syrup (just a touch) – mix it up to taste, toss into pasta, then mix in the cheesy sprinkle. Kids LOVE this for lunch. Add in some veg or beans (there’s those tamari roasted chickpeas again!), cubed tofu or tempeh, and it’s a very satisfying lunch.
I also sprinkle it into wraps for the girls, with things like cubed potatoes and hummus, and into quinoa bowls. Many possibilities! Note that the original version is nut-based, but I offer a nut-free alternative in the recipe. This is the one I use for school lunches, and the girls really haven’t noticed the difference.
9. Healthy Puddings
This may not be something you pack into vegan school lunches – though you certainly could, they are both nut-free.
If not packed, prep for after school. These puddings give a great boost of omega 3’s with chia seeds, and are delicious.
have Chocolate and Pumpkin Chia Chia Puddings posted, and a few more puddings.
10. Chickpea Salad
This chickpea salad mixture has become very popular with all of you. The recipe is in PPF, but you can also find it posted here.
Play around with the add-ins, using raisins instead of apples, omitting the celery or capers, and adding other chopped veg. It’s very versatile – and very delicious!
11. Cookies
With the school year comes school parties. Halloween, Christmas, birthdays… someone lost a tooth, someone has a new baby sister, it’s “party day”!
Yeah, I’m exaggerating a little. Still, school treats flow freely, and we need to have our cookie recipes at the ready for vegan school lunches.
My Homestyle Chocolate Chip Cookies are a classic. Also try my oil-free chippers from PPF (in this post), and the ever-popular nicer krispie squares!
Other Tips for Vegan School Lunches
– Pack lunches the day before. There is already enough chaos in the morning, so pack the lunches during lunch the day before, or the evening before.
– Also fill water bottles! Have them ready in the fridge ready to tote.
– Cook things in batches through the week and weekend. Hummus, tamari roasted chickpeas, muffins, as mentioned above. But also batch-cook potatoes, sweet potatoes, rice, quinoa, beans, etc. All those staples can be used in wraps, sandwiches, added to soups, pastas, and more.
– Pack plenty of fresh fruit and make it EASY for them to eat. Yes, it feels a nuisance sometimes to peel those mandarins or cut oranges into bite-size pieces and pop into a container. Why not just pack the whole fruit? Because kids have very little time to eat in school, that’s why. So, make it easy for them to eat that fruit. Peel or slice or cut into small pieces and pack in a container along with a fork. They are far more likely to eat it.
– Pack occasional treats – seaweed snacks, baked chips, cookies, a few vegan gummy worms. They have very healthy lunches, let them find a treat once in a while!
– Have stock of different size containers (scroll down to ‘kitchen gear for kids and lunches). I have an entire cupboard with different sizes of containers. Some are ziploc, others are reused containers from nondairy yogurt or store-bought dips, etc. The smaller ones are great for fruit and snacky items, the larger ones for pasta, sandwiches, etc. One day I may reveal my crazy cupboard of containers and lids! If you prefer a bento box, this Planetbox gets top reviews.
– We all need shortcuts. You may not always get to making marinated tofu, making soup, or baking muffins. Get some Amy’s burgers or other veg burgers that you can easily heat and put in a sandwich, and pick up healthier granola bars or snack cookies. Try Amy’s baked beans in a wrap with rice (I always add about 1 cup or more of black or kidney beans to stretch it out) or Amy’s alphabet soup – amp up the nutritional profile by adding beans, cubed potatoes or sweet potatoes, or cubed tofu. Try a pre-marinated tofu which simply needs to be sliced or lightly heated. Keep some quick fixes on hand to avoid mama (or papa) food-prep burnout!
What recipes do you rely on regularly? And, what are your go-to snacks and meals to pack into lunches. Any terrific quick-fixes to share?
Other posts you may enjoy:
<![CDATA[.yuzo_related_post imgwidth:160px !important; height:160px !important; .yuzo_related_post .relatedthumbline-height:15px;background: !important;color:!important; .yuzo_related_post .relatedthumb:hoverbackground:#fcfcf4 !important; -webkit-transition: background 0.2s linear; -moz-transition: background 0.2s linear; -o-transition: background 0.2s linear; transition: background 0.2s linear;;color:!important; .yuzo_related_post .relatedthumb acolor:!important; .yuzo_related_post .relatedthumb a:hover color:!important; .yuzo_related_post .relatedthumb:hover a color:!important; .yuzo_related_post .relatedthumb:hover .yuzo__text--title color:!important; .yuzo_related_post .yuzo_text, .yuzo_related_post .yuzo_views_post color:!important; .yuzo_related_post .relatedthumb:hover .yuzo_text, .yuzo_related_post:hover .yuzo_views_post color:!important; .yuzo_related_post .relatedthumb margin: 0px 0px 0px 0px; padding: 5px 5px 5px 5px; ]]> Source: https://dreenaburton.com/top-10-recipes-back-to-school/
0 notes
Text
Clark’s Oyster Bar – Austin, TX
You can’t win them all, can you? It’s a little bit funny but before this trip, I don’t think I quite realized what a huge difference service can make in a restaurant experience. Perhaps it is because the majority of service is relatively neutral and not memorable, or perhaps it is because I had experiences to such opposite extremes during my time in Austin. Whatever the case may be, the service at Clark’s is a stellar example of how NOT to provide hospitality.
The place is cute as can be and the food was good overall, but all of that was eclipsed by the sullen disinterested waitstaff. From the moment we sat down, I had the impression that we were somehow imposing on them by being there. Honestly, the service was so bad that now in hindsight, it makes me laugh every single time I think of it. When Mike Pence introduced RFRA legislation here in Indiana to help legalize discrimination, businesses in Indy countered with signs saying, “We like you here.” I keep thinking Clark’s needs the opposite sign: “We do not like you here.”
While I don’t aim to provide negative reviews, I do want to be honest. I think I’m a reasonable customer who is relatively easy to please. That said, Clark’s Oyster Bar doesn’t deserve a dime of your money or a second of your time if they can’t provide even decent hospitality to their clientele. Spend your money elsewhere.
Source: https://everydayannie.com/travel/clarks-oyster-bar-austin-tx/
0 notes
Text
Gluten-Free Lemon Loaf Cake with Turmeric Collagen Drizzle
Confession: this gluten-free lemon loaf cake didn’t last 24 hours in my kitchen.
If you’ve taken my wellness personality quiz (and if you haven’t, go do it!) then you know that I’ve often observed through my course clients that people approach health habits very differently.
I’m a Healthy Hedonist (duh), which means that restriction makes me feel anxious. I’m not an all or nothing kind of gal. Most of the time, I am pretty good at moderation. But the slippery slope of trying to swing both ways is that sometimes I end up sliding too far in one direction. And that is certainly the case whenever I bring baked goods into the house.
Moderation is easier said than done, especially when indulgences involve addictive substances like sugar that can fuel cravings.
I can handle one piece of chocolate a night after dinner without a problem. But if there is a lemon loaf cake sitting on the counter, I am not able to have just one slice. Or just one half. Or if there are multiple, just one whole thing.
Perhaps this is due to my gluten-free scarcity mindset. Maybe it’s the blood sugar rollercoaster. Either way, it’s not a good scene, especially when I’m trying to ease into doing a mini vice detox with you in a few days!
Since one of my tenets of healthy hedonism is to set yourself up for success at home so you can find more flexibility out in the world, that means I don’t bake very often. When I am eating sugar, I find my sweet fixes in other ways, like dark chocolate. Or I go out to a favorite bakery where I will have to spend $5 on a cookie, and therefore only purchase one.
But here’s the other thing: I love creating healthy gluten-free treats for you. Solution? When testing gluten-free lemon loaf cake recipes, I force the other half of my loaf upon my neighbor.
Force, you say? Who wouldn’t want the gift of a fresh, delicious baked good?
Well, a neighbor who has just told you that she is not eating carbs or sugar at the moment, and you insist that she accept the “gift” anyway. Sorry Christine!
You see, friends. Self-control can sometimes be selfish.
Luckily for us both though (because don’t you worry, I ate the other half by myself in one sitting), this lemon loaf cake is far less sinful than what I usually walk away with at my local bakery. It’s sweetened naturally with a modest amount of maple syrup and coconut sugar. It’s topped with a little anti-inflammatory turmeric coconut butter glaze–no powdered sugar here. And for a cake, it’s fairly high in protein thanks to the plentiful eggs, almond meal, and collagen powder, which boosts both the batter and the drizzle.
As I mentioned earlier this summer, I’ve been on a mission post-SIBO to get as much Great Lakes Gelatin Collagen as possible into my meals. Not only do my nails and hair feel stronger when I’m getting a regular dose, but it’s helping to rebuild my gut lining behind the scenes.
So in this case, I don’t feel so bad about having my lemon loaf cake, and making my neighbor eat half of it too.
Read on for the delicious, easy recipe for this gluten-free lemon cake. And if you lack both the will to moderate your portions and a neighbor to take some of them off your hands, rest assured that this loaf also freezes well!
With health and hedonism,
Phoebe
This lemon loaf cake recipe is made gluten-free with a mixture of AP gluten-free flour (I used Cup4Cup) and almond meal. The turmeric icing is adapted from the Sweet Laurel Cookbook from the donut chapter, with the addition of collagen for extra protein. You can omit if you’re vegetarian. One thing to note is that the collagen will make the batter extra giggly and dense – don’t sweat it. I promise it will turn out fluffy!
Instructions
Make the cake: Preheat the oven to 350°. Grease and flour a 9-by-5-inch loaf pan or line with two piece of parchment paper. In a small mixing bowl, combine the flour, almond meal, baking powder, xanthan gum and poppy seeds. Whisk with a fork until well mixed.
In a medium mixing bowl, stir together the olive oil, maple syrup, coconut sugar and vanilla. Add the eggs one at a time, mixing well between additions until smooth. Stir in the lemon zest and juice. Add the dry ingredients to the egg mixture in two additions, mixing until just combined. Stir in the Great Lakes Gelatin Collagen Hydrolysate.
Transfer the batter to the prepared pan and bake in the middle of the oven until the top is golden brown and a toothpick inserted in the center comes out clean, about 50 minutes. Let the bread cool completely in the pan, then transfer it to a rack.
Meanwhile, make the glaze: in a small saucepan over low heat, combine the coconut butter, lemon juice, maple syrup, vanilla, turmeric, water and Great Lakes Gelatin Collagen Hydrolysate. Whisk until smooth and silky.
Drizzle the lemon loaf cake with the turmeric-lemon glaze and allow to set. Cut into slices and enjoy.
This gluten-free lemon loaf cake recipe is brought to you in partnership with my friends at Great Lakes Gelatin. All opinions are my own (obviously). Thank you for supporting the brands that make this site (and my gut healing) possible!
Source: https://feedmephoebe.com/gluten-free-lemon-loaf-cake-recipe/
0 notes
Text
Cute-tea! Hojicha Madeleines
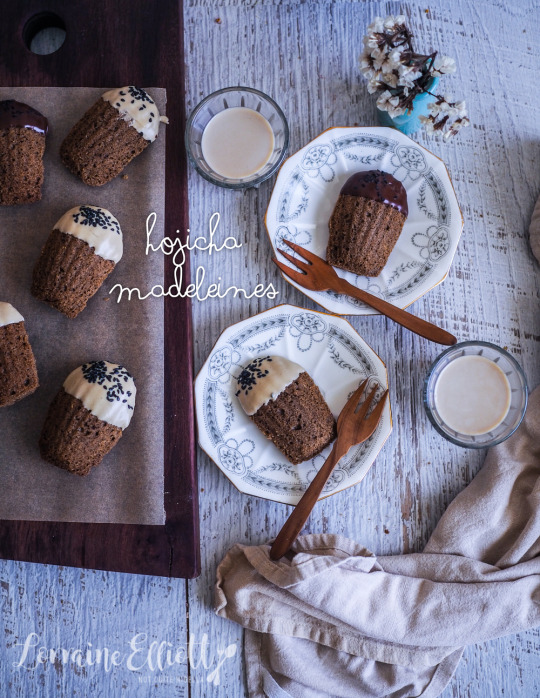
Dear Reader, have you heard of hojicha? It's like a cousin to green tea or matcha but even more delicious (in my humble opinion). With a nutty flavour courtesy of roasting the green tea leaves at 200C/400F, the flavour of hojicha is easily baked into cakes or just made into a hojicha latte!
While most people have now tried matcha, they may be less familiar with hojicha or houjicha. It has some advantages over matcha-it's low in caffeine so you can drink it late in the day. It is less expensive because it is made using bancha leaves which is a lower grade of green tea.
Matcha is made only leaves while hojicha is made using tea leaves, stems, stalks or twigs. Hojicha is roasted at 200C/400F over charcoal giving it a warm, smoky, toasty, caramelised flavour which also decaffeinates it somewhat (although it isn't caffeine free). It is also less "grassy" or vegetal than matcha. It does have less Vitamin C which affects its antioxidant levels compared to matcha but it's still good for you.
Hojicha is one of the easier and most forgiving teas to brew compared to matcha and you can have it as either tea leaves or as a powder. The powder is the easiest way to use it in baking because you only need to add a tablespoon or two to give it the hojicha flavour. And while my first instinct might be a hojicha chiffon cake, I decided to make madeleines as I had to make some edible gifts.
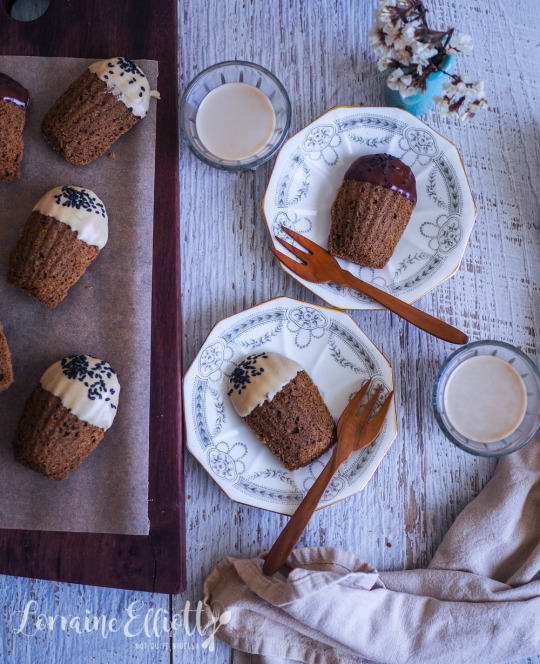
Madeleines, like financiers, are best eaten on the day of baking and definitely within 24 hours and ideally not long out of the oven. There was a thing in Melbourne where you could order freshly baked madeleines at Cumulus Inc. and while this may seem an extravagance or something fiddly, once you have the dough, it can keep for 24 hours in the fridge or in the freezer.

My first batch of madeleines weren't quite as good as my second one. You see I had overfilled my tins but not to worry, you can easily trim the edges with a sharp knife.
I was recently talking to a friend about timing. She was telling me about her relationship woes. She had a friend who she had known for years whose wife left. They had reconnected and there was a new attraction between them. Because they were good friends, she felt like they had a strong foundation for a relationship but was wary of the timing with his recent broken heart.
My advice comes not from a place of knowledge or wisdom but with the background of food. I told her that she shouldn't be the first relationship after the breakup.
"It's like the first pancake - it's a trial run, you discard it or eat it but you don't serve it up," I explained because food analogies are the only way I can describe things. As I said, I'm sure my advice is probably 99% cuckoo and based on my own life and that of my friends but my friend who also loves food understood it immediately. I may not speak relationship, but I speak food!
So tell me Dear Reader, have you ever tried hojicha before and what do you think of it? What do you think about the timing of the relationship and the pancake theory?

Hojicha Madeleines
An Original Recipe by Lorraine Elliott
Preparation time: 30 minutes plus 2 hours or overnight resting time
Cooking time: 13 minutes
115g/1 stick butter plus 1 tablespoon extra to butter the mold
2/3 cup superfine or caster sugar
1 cup cake flour plus a bit extra to flour the mold
Pinch salt
2 tablespoons hojicha powder
2 eggs, at room temperature
1 tablespoon milk
For chocolate dip
150g/5ozs. white or dark chocolate
1 teaspoon coconut oil
2 tablespoons black sesame seeds
You will need hojicha powder, not fresh leaves to get the desired flavour for this. You can find it at larger Asian grocery stores or you can easily buy the powder online.
Step 1 - Heat the butter in a saucepan on medium to high heat until it smells nutty and becomes foamy. Remove from heat and measure out 115g of butter and cool (I place it in the fridge for 15 minutes).

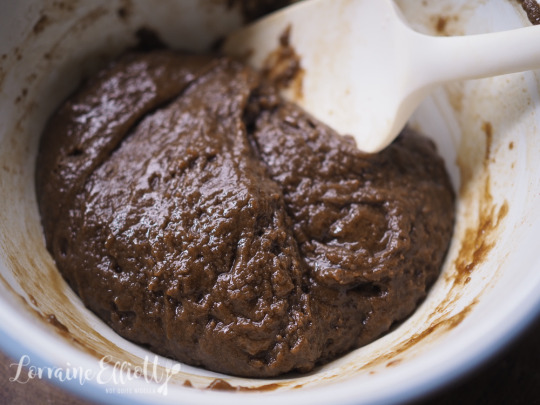
Step 2 - Whisk the sugar, flour, salt and hojicha powder together until there are no white streaks. Then whisk the eggs and milk and add this to the dry mix along with half of the cooled butter. Add the remaining butter and mix until combined. It will become a stiffish dough. Cover and refrigerate for 2 hours or preferably overnight. You can use the mixture after 1 hour but it may not develop the desirable "bump" in the typical madeleine.
Step 3 - While it is cooling brush the extra butter in the madeleine mold (this makes enough for 18 madeleines so you can grease two trays if you have them). Refrigerate the mold for a few minutes and then re-brush again with more butter. Then lightly sieve a bit of flour over the butter and then tap away any excess flour (you don't want flour showing in the madeleine pattern). Keep the greased tray in the fridge until you need it.

Step 4 - Take out tablespoons of dough-it will be stiff and won't naturally fill the pan but that's ok, just spread it with your fingers. Bake for 11-13 minutes. Cool in the tin for 5 minutes and then gently slide out of the tin.

You can perhaps see how stiff the batter is here

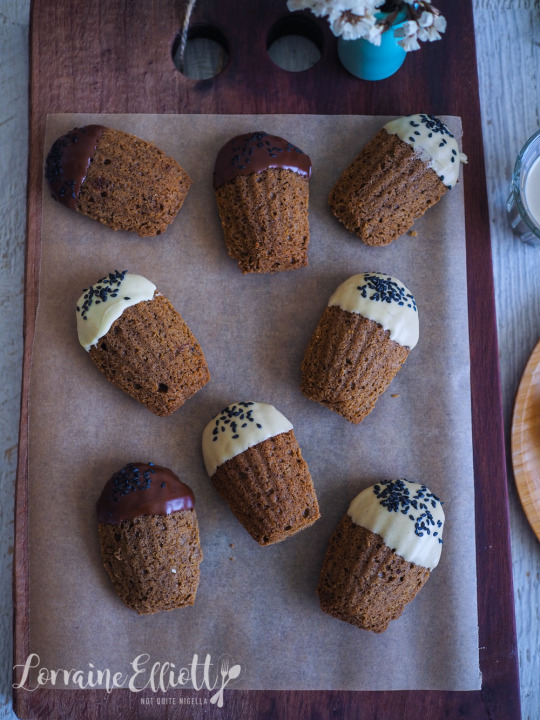
Step 5 - Have a parchment line tray ready. Melt the white chocolate with the coconut oil and mix with the hojicha until well blended. Spoon the chocolate mixture over the madeleine and lay down on the tray. Sprinkle with sesame seeds while the chocolate isn't quite set.


Hojicha Latte
1/4 cup boiling water
2 teaspoons hojicha powder
3/4 cup steamed milk
Sugar to taste
Sugar to taste
Step 1 - Mix the water and the hojicha powder together until hojicha is dissolved and there are no lumps. Add the milk and then add sugar to taste (start with 1 teaspoon and taste).

Source: https://www.notquitenigella.com/2019/03/07/hojicha-latte-hojicha-madeleines/
0 notes
Text
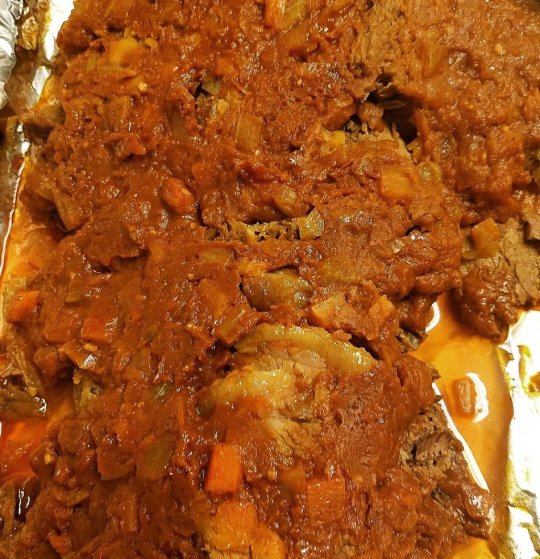
High Holidays Apple Barbecue Sauce
Ok…Shanah Tovah y’all!
I was going to do a chicken and apples recipe but naw….Joan Nathan got that down.
I wanted to make a brisket for the holiday but I wanted it to be unique. Yes to green salad, roasted fall veggies, peach kugel (secret ingredient frosted flakes), matzoh ball soup. I’m exhausted so I gotta make this work. I was thinking of something I haven’t done Koshersoul style….high holidays apple barbecue sauce.
APPLE BARBECUE SAUCE.
put it on chicken or salmon or sliced pot roast or lamb, brisket or eat it with spicy roasted vegetables…
Sauté together in a large saucepan:
1/2 cup of chopped Vidalia onion or any sweet onion
1/4 cup of minced celery
1/4 cup of minced carrot
1 tablespoon of minced garlic
1 teaspoon of crushed minced ginger.
Let’s put it in a teaspoon or so of kosher or sea salt.
2 tablespoons of the pareve oil of your choice…
Sauté over medium-low heat until onion and celery are translucent. Be attentive! Don’t let it burn.
Add to saucepan:
3/4 cup of tomato paste mixed with 1/2 cup of apple juice or apple cider
1/2 cup of grated Granny Smith or Honeycrisp apple or 1/2 cup of applesauce (unpretty apples are great for this!)

1/2 cup of apple butter
1/2 cup of apple cider vinegar
1/4 cup of low sodium soy sauce
1/4 cup of brown mustard
1/2 cup of light brown sugar
1 teaspoon of kitchen pepper (see my book)
1 teaspoon of sweet paprika
1 teaspoon of small coarse Black pepper
1 teaspoon of seasoned salt of your choice
Stir and stir and bring to a quick boil. Please lower heat and cover. Stir every 5 minutes for 45 minutes.
Adjust to taste.
May you be inscribed for a good year and a long prosperous year filled with happiness and joy and mitzvot!
Source: https://afroculinaria.com/2018/09/12/high-holidays-apple-barbecue-sauce/

0 notes
Text
These are the top allergy-friendly chain restaurants in America, ranked
If you have a food allergy, eating out at restaurants can be difficult — and in some cases genuinely risky. Some restaurants are accommodating and equipped to adjust their meals to their customers' needs. Other restaurants might struggle to provide allergy-friendly options. The number of people with food allergies is increasing by the day. Every year, AllergyEats scours the reviews and feedback they receive from customers and ranks the 10 most allergy-friendly chains in America. These chains are ranked from 1 to 5 on how well they are able to accommodate visitors with food allergies.
The Top Allergy-Friendly Chain Restaurants in America
“For the over 15 million Americans with food allergies, it’s incredibly important to know which restaurants are the best at creating allergy-friendly meals so these individuals can more comfortably dine out,” said Paul Antico, founder and CEO of AllergyEats, in an emialed press release announcing this year’s list. Food allergies can be extremely dangerous — while many restaurants are accustomed to dealing with some of the most common food allergies, these restaurants went above and beyond.
“The restaurant chains on this 2019 list have differentiated themselves with exceptional food allergy protocols, education, and training, according to peer reviews from AllergyEats users,” Antico explained.
AllergyEats separated the chains into two groups: small chains and large chains. Large chains included restaurants with over 50 locations. Small chains had fewer than 50 locations.
Many of the same chains make the list every year. But this year, four new chains have made the list. One of them earned the title of the smallest chain to ever earn a spot on the ranking. Find out which restaurants made the list in the complete ranking of large and small chain restaurants.
Source: https://www.thedailymeal.com/healthy-eating/top-allergy-friendly-restaurants-america
0 notes
Text
Vegan yakisoba
Happy Wednesday, guys! Hope your week is peachy? I’m overjoyed that it is finally a couple of degrees warmer and the sun is more of a permanent fixture. It is still a far cry from summer weather, but I feel like we are finally getting there. All I need to do is to find my hammock ropes somewhere in my house move mess and I will be a happy bunny indeed, sunken into this genius invention, an espresso freddo and a book in hand. I cannot wait.
Today’s recipe is another quick midweek meal. It’s easy to make and one of our firm favourites. During my London days, I used to east it very often at Wagamama, but I haven’t realised how easy it is to make until fairly recently. The trickiest thing is the sauce, as traditional yakisoba sauce often contains seafood in the form of oyster or Asian Worcester sauce. If you are lucky enough to have vegan equivalents of these in your cupboard then you are all set. I’ve been looking for either of these in quite a few Bristol stores, including a really well stocked Asian grocer and all I was able to find was a mushroom soy sauce, but coupled with some other umami-rich ingredients: garlic, nutritional yeast and seaweed powder, I have managed to get a sauce that I am happy with.
Once you have got the sauce, the rest is child’s play. As with all stir-fries, the key to success is making sure that your wok and oil are piping hot before you start adding all the ingredients. For this reason, you want to use a high-smoke point frying oil, like rice bran, peanut or soybean oil and exercise a little patience before you crack on. This and keeping to the timings will ensure that your veggies are perfectly sealed on the outside, yet retain a pleasant crunch.
Speaking of veggies, I’ve gone to town here and managed to cram my 5 a day in one dish. You don’t have to go as mad as I did and you can of course swap any veggies out for what you happen to have in the fridge instead. Kale would be a perfect replacement for broccoli and cabbage, for example. And green beans would work just as well as baby corns. Just remember that sturdy veggies need to go in first and things that we tend to eat raw anyway, like peppers or carrots only need a minimal amount of cooking. That’s all there is to it and I hope you’ll enjoy this midweek concoction as much as we do.
PS: If you make my vegan yakisoba, don’t forget to tag me on Instagram as @lazycatkitchen and use the #lazycatkitchen hashtag. I love seeing your takes on my recipes!
serves: 2
prep: 15 min
cooking: 10 min
Ingredients
YAKISOBA SAUCE
REMAINING INGREDIENTS
4 dried shiitake mushrooms (optional – feel free to skip if using mushroom soy sauce)
180 g / 13 oz soba noodles (use 100% buckwheat for GF version)
2 tbsp high smoke point oil (I use rice bran)
200 g / 7 oz broccoli, sliced thinly
2 white cabbage leaves, sliced thinly
4 baby corns, halved
½ bell pepper, sliced thinly
1 small carrot, sliced thinly
favourite marinated tofu (I used Japanese-style tofu filets by Taifun), cubed (optional)
4 spring onions / scallions, thickly sliced
a large handful of bean sprouts
1 tbsp toasted and crushed sesame seeds, to garnish
shop-bought shredded and pickled ginger (if you don’t have any, grate some fresh ginger into the sauce)
Method
Pour boiling water over rinsed dried shiitake, set aside to infuse for as long as you can.
In a small bowl, combine all the sauce ingredients plus 3 tbsp of water. If skipping mushroom soy sauce, add 2½ tbsp of shittake infused water instead of water and an extra 2 tsp of soy sauce (or tamari). Set aside.
Cook your noodles just a couple of minutes less than you would normally. Refresh under a cold tap and set aside.
Slice the softened mushrooms.
Heat up a wok on a medium heat. Add the oil and allow it to get really hot – until it starts shimmering and smoking a little (that’s very important).
Add in broccoli and cabbage – stand back as the oil might splash when you add the veggies in. Stir-fry for 2 minutes on a high-medium heat.
Next add in baby corn, pepper, carrot, tofu, spring onions and sliced shiitake (if using). Stir-fry for another minute.
Push all the veggies to the side of the wok and add in the sauce to the bottom of the wok, making sure you give it a good stir before adding to the work or else the cornstarch will be left at the bottom of the bowl.
Allow the sauce to bubble for 15-30 seconds and then add the noodles.
Mix the noodles into the sauce. Then add sprouts and incorporate the noodles into the veggies and tofu.
Divide between two bowls. Serve topped with toasted sesame seeds and pickled ginger.
Notes
*If you don’t have any, use shiitake infused water – see method.
**You can buy this, but I you could also simply make your own by grinding nori sheets in a spice grinder. The shop-bought anori is more vibrant in colour as it is made of untoasted nori sheets.
If you want more info on some of the ingredients that we use in our recipes, check out our glossary.
Join our mailing list
and get a sweet e-book

Source: https://www.lazycatkitchen.com/vegan-yakisoba/
0 notes
Text
Easy Gluten-Free Blueberry Cobbler
This gluten-free blueberry cobbler the easiest dessert for summer entertaining. Vanilla-stewed blueberries with buttery oat and almond flour biscuits dropped on top. These flavorful cobbler biscuits bake up with brown crispy tops with soft fluffy dumplings underneath. Best served with vanilla ice cream!
This post is sponsored by Bob’s Red Mill, a year-long partner of Snixy Kitchen
A few Sundays ago, Zoella (age 3) woke up asking if she could bake a berry pie. I wanted to test this gluten-free blueberry cobbler again anyway, so I obliged and kept referring to this cobbler as “pie” to satisfy her wish. It’s definitely not pie, but we’ll get to that later.
When it came time to bake the “pie”, Zoella said she was “busy doing a project” (with a toilet paper roll and pipe cleaners) and refused to help me. I think she tricked me into making this blueberry cobbler for her – what she really wanted was to eat a pie, not bake a pie.
We had our neighbors over for dinner that night and Zoella’s announced that she made a pie! I feel like I’m living a gluten-free re-enactment of The Little Red Hen. I’m the hen. Except nicer because I still shared the cobbler.
Gluten-Free Blueberry Cobbler
When I admitted to Zoella and the neighbors that I’d actually made a gluten-free cobbler, we wound up in an intense dinner table conversation about what defines a cobbler. We all had strong and varied beliefs.
One neighbor and my Texan husband argued cobbler has a lattice pie pastry crust, making it not all that different from a pie. No cobbler I ever saw growing up in California looked like that! One person thought a cobbler had a crust on the bottom, while someone else vehemently did not. So it seems there are many variations even within the very definition of cobbler. We all agreed though, this cobbler certainly was not pie. (Sorry, Zoella. I tricked you too.)
This homemade gluten-free blueberry cobbler fourth recipe in a year-long partnership with Bob’s Red Mill. So far this year, I’ve made gluten-free pop tarts with strawberry jam, gluten-free matcha crepe cake, and gluten-free almond flour pasta. Now I’m making a gluten-free blueberry cobbler with easy oat and almond flour biscuits – perfect for quick summer entertaining!
What to put on top of a cobbler?
While everyone agrees that cobbler has loads of baked seasonal fruit at its core, three are many variations for what kind of pastry to put on top of the stewed fruit. You can top it with a pourable batter that bakes up almost like cake, cookie dough, pie pastry crust, or some kind of biscuit.
Those biscuits can be rolled out and cut or shaped into rounds, or made from a moist dough dropped from a spoon on top of the fruit.
I’m using the spoon drop biscuit method here to cobble together this gluten-free cobbler (ha…ha…).
Almond Flour Biscuits
I’ve topped this gluten-free blueberry cobbler with almond flour biscuits made with a combination of three easily accessible Bob’s Red Mill flours: almond flour, oat flour, and sweet rice flour. Together these flours create a flavorful soft biscuit that has whole grain and sweet nutty notes.
These gluten-free almond flour biscuits bake up as a crisp browned buttery biscuit cobbler topping. As the dough bakes, it expands to cover the berry compote, baking into soft fluffy biscuits partially submerged in the bubbling fruit. The top half is brown, crispy, and almost cookie-like, while the bottom half is soft and fluffy like steamed dumplings.
The three flours used for these biscuits are three of my most used gluten-free flours. If you’re new to gluten-free baking but plan to do more of it, you’ll likely use these three flours regularly. If you stock up on a bag of each, you can find a list of recipes that use all three in my recipe index!
How to make a gluten-free blueberry cobbler
As a rustic dessert, blueberry cobbler is one of the easiest desserts to make. The ingredients are simple and it requires very little hands-on time. Toss berries with sugar and cornstarch, adding a little vanilla bean or extract if you desire. Dump it in a 2-quart baking dish to give the blueberries a short headstart.
Meanwhile, mix cold butter into the dry ingredients with your hands until crumbly and whisk in milk just to combine. Then drop the moist buttery almond flour biscuit dough over the warm fruit with a spoon. Don’t worry about making them look pretty or well-shaped, the beauty of a cobbler lies in its cozy rough edges. With a brush of milk and a sprinkle of coarse sugar, they head into a high-heat oven to bake up brown and crispy.
Serve with an obligatory scoop of vanilla ice cream…or two!
If you can’t get your hands on fresh blueberries, you can turn it into a gluten-free berry cobbler! I’ve made this with a mix of strawberries, blackberries, and blueberries as well and I’ve also included a note in the recipe for using frozen blueberries.
What makes a cobbler different from a pie?
While you make both cobblers and pies with lots of fresh fruit bubbling with dough, what makes something a pie versus a cobbler? The major difference between a pie and a cobbler is that a pie always has a bottom pastry crust, where a cobbler usually does not. A cobbler always has some kind of topping, usually baked pastry, dough, or batter.
Note: While a cobbler typically does not have a crust on the bottom, some variations double up the crust on top and bottom, which muddies the definition between pie and cobbler. For now, let’s assume most cobblers stick with a single top layer of pastry or dough.
Is a Crumble, Crisp, Brown Betty, Grunt, Slump, Pandowdy, or Buckle the same as Cobbler?
Bubbling warm fruit mixed with dough can make a whole host of desserts. Here’s a quick and dirty breakdown of the various rustic fruit desserts. Plus some inspiration recipes of what to bake next!
Crumbles and crisps: deep-dish baked fruit cooked desserts usually topped with some kind of crumbly streusel-like topping. I’ve written about the difference between the two on my gluten-free peach crumble recipe. In short, there are conflicting sources about the difference between crisps and crumbles. Some say one has oats while the other doesn’t, but experts can’t agree on which is which. The Kitchn suggests that distinction is passé and crumble and crisp are used interchangeably now.
Brown Betty: A deep-dish baked fruit dessert similar to a crumble or a crisp, but using finer crumbs that also incorporate breadcrumbs into the topping.
Grunts and Slumps: Most similar to a cobbler, grunts and slumps use a biscuit dough, but are cooked on the stovetop covered or uncovered (respectively) until the biscuits steam into little dumplings in the bubbling fruit. Admittedly, I’ve never made one of these because I prefer the crisp browned crust of a cobbler.
Pandowdy: Almost like a cross between a pie and cobbler, a pandowdy is another deep-dish baked fruit dessert that’s topped with a pastry pie crust. Instead of a neat lattice or whole sheet pie crust, the pandowdy is a little messier. Traditionally, the fruit is topped with a sheet of pastry then partially baked before being broken up with a spoon or fork so the fruit bubbles up and creates a pudding-like consistency. Modern pandowdies tend to use shapes or cut up squares of pie dough layered more neatly on top of the fruit so it’s sturdy enough that it won’t disappear into the fruit when baked.
Buckle: a fruit dessert that is most similar to a cake. Fruit is dropped over or pressed into cake batter and it sinks as the cake buckles around the fruit in the oven. Sometimes people top the cake with more crumble before baking, but usually, this dessert can be easily sliced.
More Gluten-Free Cobbler Recipes
As fate would have it, both Alanna and I were simultaneously working on recipes for gluten-free blueberry cobbler. She’s infused her cobbler with a hint of lavender and lemon, then topped the compote with earthy oat biscuits.
If you’re looking for a small-batch cobbler, try Dessert for Two’s blueberry cobbler and sub in 3 tablespoons each oat flour and sweet rice flour for the all-purpose flour to make it gluten-free!
Note: Zoella has since spontaneously announced to three different people that she made a blueberry pie. It’s neither a pie nor did she make it.

Yield: 6-8 servings
Prep Time: 10 minutes
Cook Time: 40 minutes
Total Time: 50 minutes
This gluten-free blueberry cobbler the easiest dessert for summer entertaining. Vanilla-stewed blueberries with buttery oat and almond flour biscuits dropped on top. These flavorful cobbler biscuits bake up with brown crispy tops with soft fluffy dumplings underneath. Best served with vanilla ice cream!
Ingredients
For the blueberries
8 cups fresh blueberries (4 pints) (*see note, if you'd like to use frozen)
1/4 cup sugar
1/4 cup Bob's Red Mill corn starch
Optional: 1 teaspoon vanilla bean paste or extract
For the Almond Flour Biscuits
Instructions
Preheat oven to 375°F and prepare a 2 to 3-quart baking dish by placing it on a large baking sheet lined with parchment paper to catch any spills. I've used a 10x8 baking pan with 2-inch sides here, but another 2-quart baking pan, a 10-inch deep dish pie pan will work too.
Place the blueberries in a large mixing bowl. In a small bowl, whisk together the corn starch and sugar until combined then mix it into the blueberries. Mix in the vanilla bean paste or extract, if using. Mixing them together in advance will prevent the corn starch from clumping. Pour the blueberries into the prepared baking dish and bake for 10 minutes.
Meanwhile, in a large bowl, whisk together almond flour, sweet rice flour, oat flour, cane sugar, baking powder, salt, and baking soda.
Add cold butter and either with a pastry cutter or your hands, quickly work the butter into the flour until the largest pieces of butter are no larger than a pea and the dough is crumbly. Add milk and whisk until just combined (do not over whisk).
Pull the blueberries out of the oven and increase the heat to 400°F. Use a large spoon to drop the dough evenly over the top of the blueberries in as many biscuits as you like. Brush the biscuits lightly with milk and sprinkle with coarse sugar.
Return the cobbler to the oven and bake until the biscuits are evenly golden brown, 30-35 minutes. If you find some of the biscuits browning faster than others, cover that part of the cobbler with a piece of foil.
Remove from heat and let cool at least 15 minutes before serving with scoops of vanilla ice cream. The fruit will thicken up as it cools. (**See note about making in advance)
Notes
*If using frozen blueberries, do not defrost them and skip the 10 minute pre-bake.If you can't get your hands on fresh blueberries, you can turn it into a gluten-free berry cobbler. I've made this with a mix of strawberries, blackberries, and blueberries as well.
**Cobbler is best served the day of, but if you're making it a few hours in advance, serve room temperature or warm it in the microwave or in a 350°F oven to serve!

Source: https://www.snixykitchen.com/gluten-free-blueberry-cobbler/
0 notes
Text
Roasted Fioretto Recipe

It’s not often that you come across a new vegetable. The first time I saw Fioretto at a market in Chinatown I thought it must be some kind of weird overgrown cauliflower. It turns out it’s a relatively new hybrid that combines the best of broccoli and cauliflower. In addition to Fioretto, it’s also called stick cauliflower, flowering cauliflower, Chinese cauliflower and kaurifurore. It has thinner sweeter tops than cauliflower, and stems similar to broccoli which are sometimes white and other times pale green. The stems deepen in color when cooked.

The hybrid was developed in Japan in 2012 by a seed company and I started noticing it the past year or so but couldn’t find much information about it. Once I tried cooking it, I became a fan. Because it’s less dense, it’s easy to cook and lends itself well to raw, steamed or stir fried recipes. One of the ways I particularly like preparing it is by roasting it with olive oil, salt and garlic. Like traditional cauliflower it develops a very appealing sweet flavor when cooked. It’s a great side dish, but also good tossed with pasta or in a roasted vegetable salad served either warm or at room temperature.
I’ve seen Fioretto at both farmer’s markets and frequently in Asian produce markets and it’s also distributed by Melissa’s and Specialty Produce. Like other brassicas it’s high in vitamin C, dietary fiber and potassium. If you’ve tried it, let me know in the comments.
Roasted Fioretto
Serves 4
Ingredients
1 head of Fioretto broken into small pieces, about 4 cups when sliced
2 Tablespoons extra virgin olive oil
2 cloves garlic, minced
Pinch of kosher salt
Instructions
Preheat oven to 400 degrees. Break the vegetable into bite sized florets and toss in a bowl with olive oil, garlic and salt. Place on a foil lined rimmed baking sheet and bake for 20 minutes or until tender and brown in spots.
Enjoy!

Source: http://cookingwithamy.blogspot.com/2018/06/roasted-fioretto-recipe.html
0 notes
Text
A Super-Savory Salad Reveals the Sweet(er) Side of Bitter Greens
[Photographs: Vicky Wasik]
"Salad" means different things to different people.
For some, salad is an obligation, a kind of alimentary gesture toward healthy living. For others, it's the thing you eat with ranch, because ranch dressing is undeniably delicious, and vegetables, well, yuck.
Still for others, salad is a joy, and I fall squarely into this camp. Although I have no issues at all with people who think ranch is delicious—it is!—I do believe all vegetables have their tasty place on any table, and I'd say about 50 percent of the meals I'm most excited about eating are salad.
For example, for last year's Serious Eats holiday party, we all went to the newly reopened Una Pizza Napoletana, where Anthony Mangieri puts out pies that, in Ed's opinion, are some of the best in New York City. But while everyone was focused on the pizza, which is undeniably good, I couldn't stop eating the salad we'd ordered for the table. It was a mix of, I think, Trevisano (a variety of radicchio), Belgian endive, and fennel, strewn with bread crumbs so crunchy they cut the roof of your mouth if you bit down at the wrong angle. In the mix was some shaved cheese and some fancy, flaky salt, and at the bottom of the bowl was an emulsified dressing into which the cooks had blitzed what seemed like a fistful of anchovy fillets. My side of the table ended up ordering two more, mostly because I kept shoveling the stuff in my mouth.
In the days and weeks after that dinner, I kept thinking about the salad, and one day I decided I'd try to make it or something like it. There were a couple elements about it I found interesting, and they had to do with the way the salad was constructed.
When it arrived at the table, the first thing that jumped out at me was how the pretty mix of purplish red and pale yellow chicories was made more vivid by the juxtaposition with the paler curls of shaved cheese, a testament to the inherent beauty of this specific family of leafy "greens." But what struck me next was the line of creamy emulsified dressing that ringed the serving bowl, not along the rim, but lower down, a kind of visual cue that there was something more interesting going on below.
Picking through the pile, it became clear that what looked like one salad was in fact two—the lower one coated in a heavier anchovy vinaigrette and the upper one dressed more more lightly with oil—all of it layered with a generous sprinkling of toasted bread crumbs, cheese, and crunchy salt.
Finally, the salad was salty, but not in an off-putting way. Something about the combination of the cheese, the salt, the anchovy dressing, and the bitter Trevisano and endive made that bitterness seem more tame, and when combined with bites of fennel, a natural sweetness came to the fore.
I should note that Anthony Mangieri opened the rebooted Una Pizza Napoletana with Jeremiah Stone and Fabian von Hauske Valtierra, and the thoughtfulness of the salad's construction is typical of the food those chefs serve at Contra and Wildair, their other restaurants. And while it is a very "cheffy" salad, there isn't anything particularly difficult or pricey about it. There's no reason we all can't enjoy a similarly delicious salad at home. It's just a matter of getting a few small details right.
I decided to make one using radicchio, Belgian endive, fennel, celery, and parsley, but I want to emphasize all the salad components as well as their quantities in the recipe are merely suggestions; this is more a salad idea than a salad recipe.
You can use different types of radicchio (like Trevisano) if you have a variety available to you; you could also use frisée instead of the endive; you could use a mix of all of them. Same goes for the salad in the bottom of the bowl: You could use fennel and celery, as I do, or you can use other crisp and watery vegetables (or even a fruit, like apple, as Sasha suggested to me when we were testing this salad). Broccoli stems work well, too. You don't have to use the parsley at all, or you could double up on the quantity of parsley leaves if you want to heighten the herbal and bitter flavors. In the same parsley-leaf vein, celery leaves would be a nice addition.
And you can, of course, do whatever you want about the quantity of the anchovies in the dressing. If you don't like anchovies, you can just use a single fillet or none at all, I suppose. But when riffing on this salad, I urge you to keep in mind that the original's allure stemmed from how it pushed the envelope in terms of saltiness and the savory funk of the anchovies. That's kind of the magic of it, really—the vegetables in the salad bring both bitterness and a certain amount of wateriness that gets released as you chew them, which can make a lot of more basic vinaigrettes taste weak. But with a more assertive dressing, one that plays its bright and briny notes louder than one might think is prudent, you can keep those bitter greens in check.
In testing this recipe out, I found that I could add a seemingly absurd amount of anchovy fillets to the dressing without the resulting salad tasting anything less than delicious (one might argue that the more anchovies I added, the more delicious it got). Of course, not all anchovies are the same when it comes to salinity and funkiness, so you may want to start conservatively and then add more to taste. I use an immersion blender to pull it all together into a smooth and creamy sauce, so it's easy enough to drop additional fillets in as you go. This thicker dressing goes on the crisp vegetables (like fennel and celery), which make up the lower portion of the salad.
The upper leafy part of the salad, on the other hand, is lightly dressed with lemon juice and olive oil. By constructing it in this specific way (with the thicker anchovy dressing on the bottom portion and the lightly dressed leafy greens on top), the overall effect is a more interesting and delicious combination of textures and tastes, one that is far more complex than if the vegetables had all been tossed in the same dressing.
Part of why this construction works so well is that, by keeping the heavier anchovy dressing off the leafy greens, they remain more delicate and light, not gloppy and weighed down. But it also plays into the overall strategy, which is to push the anchovy flavor forward without the salad tasting like it came out of a tin of salt-cured fish, by reserving the anchovy one for what amounts to only half the salad. There's enough of it to get on all the other parts as you eat it, even tempting you to slide the radicchio and other greens through any excess sauce in the bottom, but not so much that it becomes overwhelming.
For the bread crumbs, meanwhile, I use panko, since it's what I tend to have on hand, but you could easily use homemade bread crumbs; just keep in mind the bread crumbs need to provide crunch, so they can't have too fine a texture, like some of the bread dust that's sold in grocery stores.
Constructing the salad goes like this: First, I add sliced fennel and celery to the bottom of a serving bowl and then add the anchovy dressing to that. In a nod to that nice visual cue in the original salad, I spoon the dressing along the sides of the bowl, but this is entirely optional. I toss the celery and fennel in the dressing to ensure they're thoroughly coated. They will look overdressed, but that is what you want.
Then I put down a layer of the dressed greens, over which I scatter the bread crumbs, flaky salt, and shaved Parmigiano cheese. I repeat the layering of greens, bread crumbs, salt, and cheese once more, and that's it.
One final note about the number of layers and serving size, which are related: The salad suffers if you create any more than two layers of dressed leaves. Ideally, a forkful of the salad will have bread crumbs and cheese and flaky salt sandwiched between two layers of lightly dressed bitter greens along with a few bits of crisp, overdressed fennel and celery. The combination is carefully calibrated, so you want to avoid adding any extra layers.
Keeping that in mind you'll want to adjust the way you construct the salad based on the way you plan to serve it. No matter how you serve it—whether it's in a large, shallow serving bowl, in bowls that fit two or more servings, or in individual bowls or on individual plates—you'll want to retain a similar structure: crisp vegetables heavily dressed with anchovy vinaigrette on the bottom and two layers of lightly dressed bitter greens, with a generous amount of bread crumbs, shaved cheese, and flaky salt scattered between the layers and on top.
This post may contain links to Amazon or other partners; your purchases via these links can benefit Serious Eats. Read more about our affiliate linking policy.
Source: https://www.seriouseats.com/2019/02/a-super-savory-salad-reveals-the-sweeter-side-of-bitter-greens.html
0 notes
Text
Roasted Asparagus with Garlic
posted by Kalyn Denny on April 22, 2019
Roasted Asparagus with Garlic is an amazing and easy way to cook my favorite spring vegetable! When big fat spears of asparagus appear in the spring, it’s time to try roasting them with garlic. Use Asparagus Recipes for more tasty ideas for cooking asparagus.
Click here to PIN Roasted Asparagus with Garlic!

If you’ve had roasted garlic, you can understand the appeal of this Roasted Asparagus with Garlic. There’s something very special about the flavor of garlic cloves that are quickly roasted with fresh asparagus, and in this recipe the asparagus marinates a couple of hours with the garlic and some olive oil to add a slight taste of garlic to the asparagus as well. We used a lot of garlic, so this may not be suitable for a romantic dinner; use the amount of garlic you prefer.
This favorite way to cook asparagus is similar to the recipes for Roasted Broccoli with Garlic and Roasted Cauliflower with Garlic that so many Kalyn’s Kitchen readers have tried and loved. I used the big pre-peeled garlic cloves that come in a bag at Costco, but if I had to stand there and peel them, I might have used less. Maybe not though, because garlic is one of the World’s Healthiest Foods, and has many health benefits. This is perfect to make with thicker asparagus spears, and if you like asparagus and garlic I predict this is something you’ll want to make over and over!
(This is just a summary of the steps. See the complete recipe below to make Roasted Asparagus with Garlic.) Snap off the end of one piece of asparagus and then trim all the pieces to that size. Then cut asparagus in half again; I like to cut on the diagonal, but that’s up to you. Measure whole garlic cloves, using large cloves as much as possible, and cut the garlic cloves in half.
Put the asparagus pieces and garlic cloves into a Ziploc bag with olive oil and let the asparagus marinate with the garlic for about 2 hours. When it’s time to cook, preheat the oven to 450F/230C. Then quickly drain the asparagus and garlic, letting some olive oil remain for roasting.
Place asparagus and garlic on a large baking sheet. Roast about 15 minutes, or until asparagus is starting to slightly soften and garlic is barely starting to get some browned edges.
Season with salt and fresh-ground black pepper and serve hot.
Make it a Meal:
For a tasty low-carb meal you could serve Roasted Asparagus with Garlic with Greek Lemon Chicken (that cooks at the same temperature) or with something like Air Fryer Chicken Thighs or Grilled Lamb Chops.
More Amazing Asparagus Recipes to Try:
Chicken with Asparagus and Three Cheeses ~ Kalyn’s Kitchen Roasted Asparagus with Manchego Cheese ~ The Perfect Pantry Pan-Fried Asparagus Tips with Lemon Juice and Lemon Zest ~ Kalyn’s Kitchen Oven-Roasted Asparagus with Basalmic Browned Butter ~ The Food Charlatan Barely-Cooked Asparagus with Lemon-Mustard Vinaigrette ~ Kalyn’s Kitchen Asparagus Mushroom Swiss Egg Bake ~ The Thirsty Feast Easy Low-Carb Air Fryer Asparagus with Lemon and Parmesan ~ Kalyn’s Kitchen
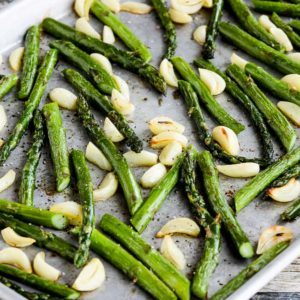
Roasted Asparagus with Garlic
Yield: 4 servings
Total Time: 25 minutes, plus marinating time
Prep Time: 10 minutes, plus marinating time
Cook Time: 15 minutes
If you like asparagus and garlic, this recipe for Roasted Asparagus with Garlic brings out the delicious flavors in both these ingredients!
Ingredients:
1 lb. thick asparagus spears
1/2 cup large whole peeled garlic cloves (use more or less garlic to taste)
3 T olive oil
salt and fresh-ground black pepper to taste
Directions:
Snap off the end of one piece of asparagus by holding in one half and bending until it snaps (to see where the woody part of the stem starts.) Then trim all the pieces of asparagus to that size.
Then cut trimmed asparagus pieces in half again; I like to cut on the diagonal.
Measure desired amount of whole garlic cloves, using large cloves as much as possible, and cut the garlic cloves in half. (If some garlic cloves are a lot smaller keep them whole so that all the pieces of garlic are roughly the same size.
Put the asparagus pieces and garlic cloves into a Ziploc bag with the olive oil and let the asparagus marinate with the garlic for about 2 hours. (Marinating longer than that is fine too.)
When it’s time to cook, preheat the oven to 450F/230C.
Quickly drain the asparagus and garlic, letting some olive oil remain for roasting.
Place asparagus and garlic on a large baking sheet, arranging so the ingredients are in a single layer as much as possible.
Roast about 15 minutes, or until asparagus is starting to slightly soften and garlic is barely starting to get some browned edges. (Don’t let the garlic get too brown or it will start to taste bitter.)
Season with salt and fresh-ground black pepper and serve hot.
Low-Carb Diet / Low-Glycemic Diet / South Beach Diet Suggestions: Roasted Asparagus with Garlic is a great dish for low-carb diet plans, and for any phase of the South Beach Diet.
Find More Recipes Like This One: Use the Recipes by Diet Type photo index pages to find more recipes suitable for a specific eating plan. You might also like to Follow Kalyn’s Kitchen on Pinterest to see all the good recipes I’m sharing there.
Nutritional Information? If you want nutritional information for a recipe, I recommend entering the recipe into this nutrition analyzer, which will calculate it for you. Or if you’re a member of Yummly, you can use the Yum button on my site to save the recipe and see the nutritional information there.
posted by Kalyn Denny on April 22, 2019
Don’t Miss a Recipe!
subscribe to receive new recipes via email:
We are a participant in the Amazon Services LLC Associates Program, an affiliate advertising program designed to provide a means for us to earn fees by linking to Amazon.com and affiliated sites.

Source: https://kalynskitchen.com/roasted-asparagus-with-garlic/
0 notes
Text
Special Sauce: Osayi Endolyn on the Legacy of Southern Fried Chicken
[Photographs: Andrew Thomas Lee and J. Kenji Lopez-Alt]
The superb young food and culture writer Osayi Endolyn is back again for this week's episode of Special Sauce. This time our far-reaching conversation includes a discussion of a brilliant piece on fried chicken Endolyn wrote for You and I Eat the Same: On the Countless Ways Food and Cooking Connect Us to One Another, a fascinating anthology edited by former Lucky Peach editor Chris Ying and Noma's Rene Redzepi.
First, we talked about the fundamental premise of the book. "It's obviously not true that food always brings us together, and it's obviously not true that food necessitates a further reflection on a culture, right," Endolyn said. "A lot of us eat tacos or hummus without thinking anything more about where those dishes come from. But, if you took the premise that, we are more alike than we are different, and looked at food as the medium to do that, where could you go? And this book wanted to explore migration and immigration in ways that maybe we weren't always welcoming of having those conversations."
Endolyn picked fried chicken, one of my favorite foods on the planet, as her subject. She used the Australian Chef Morgan McGlone as a jumping off point: A classically trained chef, McGlone learned to make hot fried chicken while working for Southern uber-chef Sean Brock before returning to his native country to open Belles Hot Chicken, a mini-chain of hot fried chicken restaurants based in Melbourne. That cross-cultural recognition became the metaphor that shaped Endolyn's story. To quote briefly from her piece: "No matter where it’s cooked, American fried chicken carries the learning and effort and skill of a people who persevered against unfathomable odds. That Southern hue follows fried chicken all the way to Melbourne and Sydney, too. And therein lies an incredible opportunity. If everyone can agree to share fried chicken, then perhaps that’s a step toward sharing the weight of its complex legacy as well."
I asked Endolyn about fried chicken's legacy, and she said, "There's a lot of struggle, it doesn't always come from one direction, as I mentioned in the book. Because of so much of the hateful iconography,that was used to depict the African Americans stealing chicken and as kind of just gluttonous chicken eaters. During the post-enslavement period and into Jim Crow, you have a lot of people who still feel kind of unsure what it means to eat fried chicken. Whether or not to do so in public."
Where Endolyn nets out on fried chicken requires answering the two fundamental questions all of us must answer whenever we are eating something: "Is it delicious?" and "What does it mean?"
So if that's a question that interests you (and I hope it is) then you have to listen to what Osayi Endolyn has to say on this week's Special Sauce.
Special Sauce is available on iTunes, Google Play Music, Soundcloud, Player FM, and Stitcher. You can also find the archive of all our episodes here on Serious Eats and on this RSS feed.
Want to chat with me and our unbelievably talented recipe developers? We're accepting questions for Special Sauce call-in episodes now. Do you have a recurring argument with your spouse over the best way to maintain a cast iron skillet? Have you been working on your mac and cheese recipe for the past five years, but can't quite get it right? Does your brother-in-law make the worst lasagna, and you want to figure out how to give him tips? We want to get to know you and solve all your food-related problems. Send us the whole story at [email protected].
Ed Levine: Welcome to Special Sauce, Serious Eats' podcast about food and life. Every week on Special Sauce, we talk to some of the leading lights of American culture, food folks and non-food folks alike.
Osayi Endolyn: It's old journalism adage, right? Whenever everyone is going left, you go right. And a lot of times, that other direction that's gonna hit the sweet spot is something that you experience, that you observe, that you're complaining to your friends and family about, and not underestimating the uniqueness but also the universality of your experience.
EL: Back with us is the James Beard award-winning, and the great food and culture writer, Osayi Endolyn. So, we gotta talk about fried chicken 'cause I love fried chicken. Who doesn't? And you wrote a wonderful piece about it in You and I Eat the Same, which is this wonderful book that I wasn't even aware of until I saw your essay. And so I literally like ... "I wonder if the publicist would get-" and in an hour, she got me the book, last night.
EL: So, let's talk about that piece 'cause it's an amazing piece because it's both a searing indictment and almost hopeful at the end. And that's a hard thing to get in one piece.
OE: Yeah. It was a tough nut to crack.
EL: Yeah.
OE: So, Chris Ying, who conceived this collection has been working with Rene Redzepi on this series. Teaming up for this piece, we had gone back and forth on a number of ideas over, I would say, maybe almost a year.
EL: Wow.
OE: And things were just not quite gelling, and when we finally landed on this, he kind of had the premise in mind and, but let me run with it. And-
EL: The fried chicken of all nations premise?
OE: Yes, this idea that if we start, it's obviously not true that food always brings us together, and it's obviously not true that food necessitates a further reflection on a culture, right. Like a lot of us eat tacos or hummus without thinking anything more about where those dishes come from. But, if you took the premise that, we are more alike than we are different, and looked at food as the medium to do that, where could you go? And this book wanted to explore you know, migration and immigration, in ways that maybe, we weren't always welcoming of, you know, having those conversations.
OE: So, I was really thrilled and I felt strongly that there needed to be an African American experience in this conversation. Which, you know, sometimes, although African American has grown to encompass many different experiences and types of movement from one diaspora to another. It often gets left out because it's really inconvenient to talk about this history that's based in so much tragedy, yet, you know, spurred so much beauty and diversity. And that's still, I think, an ongoing and fairly new conversation, the diversity of African American cooking, which many people are on that tip. You know, I think we are going to see more of that in the next year or two in terms of books coming out and projects that people are working on, and restaurant openings. But, the story for me was to look at how this chef, Morgan McGlone, whose in Australia, originally from New Zealand, came to the American South, in a kind of talk about roundabout way, he had many different streams of his career and landed in Sean Brock's kitchen and-
EL: Sean Brock is the great Southern chef from Husk and ...
OE: During a time, when Sean Brock was, and he continues to, but doing a lot of study and reflection on the intricacies on Southern cuisine, and certainly not the only person to do it. But, the exposure there was inspiring to McGlone, and he ended up taking ideas from hot chicken that he had had, and said this could look really great back home.
EL: We should say that hot chicken was first made famous in Nashville. Prince's was the legendary, in Nashville. I don't know if it was really the first place, but it was certainly the first place that I went to.
OE: Yes, and they certainly put themselves on the map as being a place where it all started. But, it certainly came out of black communities in Nashville. And if he takes this idea, and launches a brand in Australia that's done very well called Belles. We kind of wanted to look at this, what's the middle part there that seems interesting. Every culture fries bird in some way, but if you take American fried chicken out of America, what gets left behind? It's like that migration movement that we were talking about earlier. Do you leave the history behind?
EL: Right.
OE: How much is that responsible and do we even really understand the history here and what does that, does that constrain us or does that liberate us and how? Those are some of the questions that, I don't know that I really answered any of those questions.
EL: There's a great quote that you say at the end of the piece. You say that McGlone has landed on the two questions that give all food consequence. Is it tasty and does it mean something? And so you quickly and easily say that fried chicken is indisputably tasty.
OE: Indisputably.
EL: And there was not much to say about that. It's eaten all over the planet, as you say. And you know, fried chicken is kind of like pizza, because even bad fried chicken is okay.
OE: Yeah, yeah, yes.
EL: I say that as somebody who has written an entire book on pizza and many pages on fried chicken. And so with this deliciousness unquestionable, all that remains is what fried chicken means. No matter where it is cooked, American fried chicken carries the learning and effort and skill people persevered against unfathomable odds. That Southern you follows fried chicken all the way to Melbourne and Sydney, too. And therein lies an incredible opportunity. If everyone can agree to fried chicken, then perhaps that is a step towards sharing the weight of it's complex legacy, as well. Not only is that beautiful writing, but there is a glimmer of hope there. Did you think you would land on a glimmer of hope? When you first started the piece?
OE: I think that was on the horizon, you're never quite sure. Sometimes the ending comes to you before you get to it. I know that the book wanted ...
EL: That the book was about bringing people together and-
OE: I understood the book wanted to strike an optimistic tone and I did believe that because that is a possibility. I don't know on what timeline we're talking about that, actually coming to fruition. There's a lot of struggle, it doesn't always come from one direction, as I mentioned in the book. Because of so much of the hateful iconography, that was used to depict the African Americans stealing chicken and kind of just gluttonous chicken eaters. During the post-enslavement period and into Jim Crow, you have a lot of people who still feel kind of unsure what it means to eat fried chicken. Whether or not to do so in public.
EL: Yeah, that was a fascinating sentence that even today, a lot of the African American people don't want to eat fried chicken in public, just because of all the baggage.
OE: I think that's changing but I don't think the conversation is gone internally.
EL: Right.
OE: At the Smithsonian's National Museum for African American History and Culture, fried chicken is on the menu, but notably of all the different regions of food waves that they explore in their cafeteria, Sweet Home Café, which by the way, just came out with a beautiful cookbook. Watermelon was not on the menu when I went there and I heard reported that they just didn't even wanna bring it in because of the experience of coming through all these historic images, many of them very painful, it's like do you want to then come into this place in the museum experience where you're resting and you're trying to recover and move on to these galleries that show the beauty of this culture. And then have to deal with whether or not you want to be biting into a rind. I mean, that may have changed since I was there. Just the fact that these are things that people are talking about and I think it's important to understand it's not always about something being good. Sometimes, it's about what it means to have that in your household. I don't, no one in my house ever cooked fried chicken. We would sometimes have it as a fast, casual meal, or even like a fast food meal and that was rare, and I mean rare. We did not do fast food a lot in my house. But, I didn't even know what it took to fry chicken, until I was an adult and then you're almost amazed that people actually that this is available to us all the time, anytime, day or night. It's a lot of work.
EL: And you also make this very interesting observation in the same piece. There is a distinct pattern in the United States where African American chefs struggle to find parity with their white counterparts in terms of recognition, funding, and reward. And I think that goes for many aspects of black culture.
OE: Oh my gosh!
EL: I spent years as you know, 20 years, working with principally African American jazz musicians and that was the story they told everyday, that was their life. That was their life story, each and every one.
OE: It's like you're supposed to do it faster with fewer resources and be more exceptional, and get less credit. That's just across the board, yeah. And I think that every industry has tried to figure out it's ways of navigating that, but yeah for sure. I have heard a lot of stories. So, my grandmother's first daughter, before my mother was born, was my aunt Patrice, Patrice Rushen.
EL: I was gonna say, Rushen, that's ... Patrice Rushen is this beautiful...musician.
OE: She's a fantastic musician. She currently chairs the top music program USC's Thorton Music School and has been doing very wonderful things there. But, throughout her really varied career, she has had experiences as a band leader, a pianist, a composer -
EL: As an African American woman, jazz band leader.
OE: Yes, and music director for tours for all kinds of artists, for award shows. The Grammy's, NAACP Image Awards, many, many different experiences, many hats that she's worn. And many accolades that she's received, but because of her multiple streams of experience, she's gotten to see a lot, too. There's a lot of unfortunate parallels that map between blackness and food and blackness and music. Sort of from only being expected to be able to do one genre.
EL: Sure.
OE: My aunt was classically trained, she studied with the jazz greats, as well. She understands all the technology so she can do the newer iterations of the things that came from R&B and Jazz, as well. But, people are somehow shocked when they hear a symphony.
EL: Right, sure, sure.
OE: It's like it shouldn't be surprising that an African American chef can cook something of Asian background, make something that has Latin influences, same thing goes.
EL: Yeah, sure, now that I think about it, there's a sort of link between your aunt and what Wynton Marsalis has done. At Jazz at Lincoln Center, he has ... I can do this and I can do this and I can do this and I can do this, I don't want to be seen as just another African American, New Orleans-born jazz musician.
OE: And I think from my own observations, that's a perspective, you'll have to talk to Marsalis to then find out where he's at about it, but I think that he has evolved because I think that in the earlier days, maybe in the 90's, it was very strict about-
EL: Super purist!
OE: You play this way and only this way. And this is the way it's meant to be done.
EL: Absolutely!
OE: I think there's a balance between recognizing tradition and valuing and learning it and understanding it. Particularly as more and more of these genres are played by people who are not African American, that did not necessarily come from these lineages. It's really important to know where these ... Where that blue scales came from, what prompted that and so to know that is important, but to be able to evolve it and keep it current and making it feel alive is crucial, too.
EL: So, who inspired you to be a writer? Who taught you the most about writing? This is a three part question, so I apologize.
OE: That's okay.
EL: And what advice would you give to young, aspiring writers about food and culture?
EL: You have 30 seconds.
OE: Well, the closest and most constant influence for writing came from my mom because she encouraged me so much to read and she was such a supporter of me reading. I really think for writers to have a chance, you have to read a lot. And, that's not always the connection that people make.
EL: Yeah.
OE: And, I read a ton as a kid. I mean it was a problem sometimes. I had books taken away from me 'cause they were a little outside my age level.
EL: Now, that was never my problem!
OE: I got caught with reading I, Tina, Tina Turner's biography. That was not a great day. I was like 10 or something. And then, as I kind of started to actually think about writing professionally, I was in my late 20's. I came to it kind of late. I think for a long time, I didn't know how to even conceive of a career like that, and it was really out of desperation, and sort of fatigue of trying to pillow my way around and I just said "screw this" I'm just gonna go for what I really want and that turned out to be the thing that doors opening up for me.
OE: But, one of my best friends, Bailey, her father, Mike Decastro, who died a few years ago, was a huge influence on me and my writing. He would give me a lot of constructive and sometimes difficult feedback.
EL: Was he a writer himself?
OE: He was, he was a writer, he was a photographer, he was brilliant. He was a Puerto Rican Jew living in San Francisco.
EL: Oh! That huge population of Puerto Rican Jews living in San Francisco!
OE: Oh man, just like, he was a special, special man and I miss him a lot. He really, he gave me a lot of courage and encouragement and I think when you're at that early period, where you're trying to figure out who you are as a writer and what matters to you, and what your take is on a subject that any number of people might write about, but what makes you the person to have this conversation. He was very forthright with me about not bullshitting, not being too distant, always pushing me to, kind of blood on the page, I want to feel it, I want to see it.
EL: But you do that and you have this combination of an elegant pro stylist and being an incredibly conversational writer.
EL: My writing heroes were the late Nora Ephron, and Bud Trillon because of the way they could combine those two things.
OE: And I think that you can have writing influences from ... So I loved and still love Joan Didion's writing, she's just a master. But I knew that wasn't quite my ... I tend to be a little more optimistic than Miss Didion, so I knew that wasn't quite where I was going. But, I'm trying to think of other ... Certainly Maya Angelou, talk about a conversational writer. You just felt like she was sitting next to you telling you her life story. Then you'd come across some phrasing, and it's like gosh how did she do that? You asked me so who were those influences and then what would I say.
EL: Well, you've already said you should be reading a lot.
OE: Yes, I think reading a lot is really important. Looking in word, so often particularly with social media, I think we're driven to go out and chase experiences, and do what other people are doing. To a degree, I think that can be useful because it helps give you a sense of what you think about what's trending and what's popular. It's an old journalism added, whenever everyone is going left, you go right. A lot of times, that other direction that's gonna hit the sweet spot is something that you experienced, that you observed, that you're complaining to your friends and family about and that's the thing that you should put in a couple of paragraphs and pitch it. So, not underestimating the uniqueness but also the universality of your experience is really important for people who are kind of starting out. And to find someone who can be the cheerleader for you, find someone who will read your shitty drafts and-
EL: And I think in my case, I actually had a great, for my first book, a great book editor who encouraged me to be both universal and unique at the same time, which I think is what you're saying. And you need editors that push you in both directions.
OE: Right.
EL: And they're hard to find.
OE: They are hard to find. I was really lucky with Mike, I was really fortunate. I went to the Savannah College of Art and Design for my MFA. I attended the Atlantic campus and I knew having been out of school for a few years, I studied French and Afro-American Studies at UCLA. I really didn't know what to do after that. It was about 6 years before I applied for that grad program, but when I did, I was really clear and I was really ready. And so everything that my professors gave me, every writer that came to visit, every office hour-
EL: You soaked it all in.
OE: To the point where it probably damaged some relationships with my peers because I was just so clear, but you're paying that high price for that education. And you don't want to waste time, I kind of felt like gosh I figured this out, what felt to me, a little late. And so I didn't want to waste the moment. And I feel very grateful for having those opportunities because that exploration ... Having people who are, who get lit up around your enthusiasm for learning something, that's a really special relationship. And I got a lot of encouragement, it was challenging.
OE: You get to try a lot of different things out. SCAD for me was a place where yes, it's good to do what you're good at, but you're also encouraged to stretch out. I tried my hand at photography, I tried my hand at printmaking, got a whole new appreciation for what it takes to roll paper through a press and see what comes out on the other side. And those kinds of things humble you and bring you to another level of appreciation in terms of how you tell stories, how you bring images to life through words. I think that cross pollinating yourself, too, as a writer is important. I was at a performance space last night. This beautiful exhibit that just closed called "Black Power Naps," where these artists, Niv Acosta and Fannie Sosa, had created physical space for black people to rest, inspired by this study they had observed where African Americans are the least rested demographic in our nation.
EL: Wow.
OE: And this idea that "hey, if you see people lying down in this space, don't call the police," and they had all this verbiage, but it was also like this really nurturing, soothing environment there, everyone was just kind of lounging. That is influencing me as a storyteller. So, having the openness to go and investigate things like that, I think is important.
EL: So, now it's time for the All You Can Answer Special Sauce Buffet. So we don't have a bell that we ring, but we ask you to move along in a timely manner.
OE: Yes, I'm so stressed out.
EL: Who is at your last supper, no family allowed, and it can be people living or dead, artists, musicians, politicians, anybody that you think would be interesting to share your last supper with.
OE: So, Ida B. Wells, the journalist and activist. She was talking about lynching before a lot of people were and advocating for African Americans to be liberated and to be really free.
EL: And it's not a name you hear very often, I only read a little bit about her.
OE: Yeah, I need to know more about her. But just from one of these ... I'm kind of on a project where we are trying to explore the under-told African American figures of American history. And I think that she is someone that I'm starting to learn more about and be kind of riveted by. How brave and courageous she was.
EL: Alright, so she's there.
OE: She's there. Also because I think a lot of these figures get kind of tied up in there, import, but she probably had to have a pretty good sense of humor.
EL: Alright.
OE: Zora Neale Hurston, I think is up there too. Another writer, of course that as many of us love from Their Eyes Were Watching God. More recently, Barracoon, her long awaited non-fiction work. I think, Dianne Reeves, is a just phenomenal vocalist. And I've seen her perform so many times. I've never really had a conversation with her. I used to work at a concert production site which I would actually be very close to her, proximity wise. But, she's someone who brings so much of herself to her performance. No single iteration is the same.
EL: She's a great singer and an under-appreciated great jazz singer because she's a phenomenal improvisor.
OE: She's a joy. I think those ladies would probably be at the table.
EL: Alright, I think we're good.
EL: So, what are you eating?
OE: What are we eating at the dinner?
EL: Yeah.
OE: Oh my gosh, I would love a persimmon dish on this spread.
EL: You're the first person who has ever said persimmon dish, but keep going.
OE: Some kind of like persimmon dish, I think it would be great. Maybe some roasted lamb-
EL: Like a barbacoa?
EL: Just like a lamb. Lamb roast? Lamb chops.
OE: Some edamame in there with maybe some anchovies, olive oil paste. Some herbs-
EL: Okay, I like this.
OE: I don't know why, but I think dan dan noodles should be on this table. There ought to be some biscuits or like a cornbread.
EL: And then all that's left is a dessert.
OE: A dessert. Well, we need a vegetable. Maybe like a brussels, I love some brussels. And some pecan pie, probably.
EL: Alright, I like it.
OE: That's so absurd.
EL: What's on your nightstand right now, book wise?
OE: Literally, My Sister is a Serial Killer. The novel. It's a fairly new book. Jesmyn Ward, Salvage the Bones.
EL: I've read a lot about that book, but I haven't read it.
OE: Striking. And I also have Bunk, by Kevin Young. The noted poet who is also the director of the Schomburg Center, for black culture research. But, he does this interesting investigation into how we start to tell lies culturally, and it's an interesting book to read now.
EL: So, who would you love to have a one on one lunch with just to see how she or he thinks?
OE: You know, I think it would be really cool to sit down with Ava DuVernay, the film director. I feel like I understand a lot of how she thinks because she's been so open about her processes, but that would be-
EL: Yeah, I like that, So, it's just been declared Osayi Endolyn Day all over the World. I just declared it. What's happening on that day? What are people doing?
OE: People are ... so I love body and energy work. So, there's gonna be yoga classes at different levels if you're interested.
EL: A yoga class on every block!
OE: For everyone, there is going to be massage therapy. I really love a good foot reflexology.
EL: Alright.
OE: There's going to be Swedish Fish for everyone.
EL: I like the combination of Swedish Fish and yoga.
OE: Yes, there will be any book you want, it would just appear in front of you.
EL: Got it.
OE: For free.
EL: I like that.
OE: I think that there will also be maybe jollof rice for everyone.
EL: Jollof rice.
EL: We should explain that jollof rice is native t ...
OE: Well, that's a big debate.
EL: Yeah, I know.
OE: But, my neck of the woods, that's a Nigerian tomato based rice dish that if you're familiar with red rice, you're gonna have a sense of jollof rice which tends to have a more robust flavor profile.
EL: Yes, more intense for sure.
OE: Sort of a ceremonial party dish you can't do without. But the Senegalese and the Ghanians and the...
EL: So, there's jollof rice and Swedish Fish for food. I like that, it's very colorful. Alright, well thank you so much for sharing your special sauce with us Osayi Endolyn.
OE: It's been great.
EL: Do pick up a copy of You and I Eat the Same: On the Countless Ways Food and Cooking Connect Us to One Another, and read her brilliant take on fried chicken. And go to OsayiEndolyn.com, which is what I did, where you'll find a great introduction to her work. And soon, hopefully, you'll be seeing Osayi Endolyn on Serious Eats.
OE: Let's make it happen.
EL: So long Serious Eaters, we'll see you next time.
This post may contain links to Amazon or other partners; your purchases via these links can benefit Serious Eats. Read more about our affiliate linking policy.
Source: https://www.seriouseats.com/2019/03/special-sauce-osayi-endolyn-2-2.html
0 notes
Text
How to get a dozen Krispy Kreme doughnuts for free
Diet, who? New Year’s resolutions are out the window (or put on pause, at least) for brand-new Krispy Kreme doughnuts. From January 14 through January 27, the chain will be offering decadent chocolate versions of four classic filled doughnuts at shops in the U.S. and Canada.
Ways You Didn’t Know You Were Sabotaging Your Diet
First is the Chocolate Glazed Cake Batter Doughnut, which features chocolate dough glazed with more chocolate, dipped in chocolate icing, topped with sprinkles and filled with cake batter. That’s launching alongside a Chocolate Glazed Raspberry Filled Doughnut that starts with a raspberry-filled chocolate shell covered with chocolate glaze, chocolate frosting and a red icing swirl.
Here’s where things get seriously chocolatey. The Double Chocolate Glazed Kreme Filled Doughnut is made with vanilla cream-filled chocolate dough glazed with chocolate that’s chocolate-frosted and decorated with white icing. And last but not least is the Chocolate Glazed Oreo Cookies and Kreme Doughnut that starts with an Oreo cream-filled chocolate shell, which is glazed in chocolate and then chocolate-frosted and topped with Oreo cookie pieces and additional decorative chocolate icing.
Krispy Kreme is a temptress, and there’s more where that came from. If you join the chain’s rewards app now through January 27, you’ll receive a dozen Original Glazed Doughnuts for free if you purchase any dozen doughnuts at regular price. Sorry Canada, this promotion is available in the U.S. only.
Representatives for Krispy Kreme claim the company isn’t trying to sabotage those who’ve vowed to make healthier decisions in 2019, though they were inspired by them. Apparently, people trying to stick to their fitness goals crave chocolate more than any other flavor, according to a survey by TRUE Global Intelligence (the in-house research arm of FleishmanHillard, a public relations firm that represents Krispy Kreme). So that’s where all the chocolate comes in. But let’s face it: Doughnuts aren’t the only things keeping you from sticking to your New Year’s resolution.
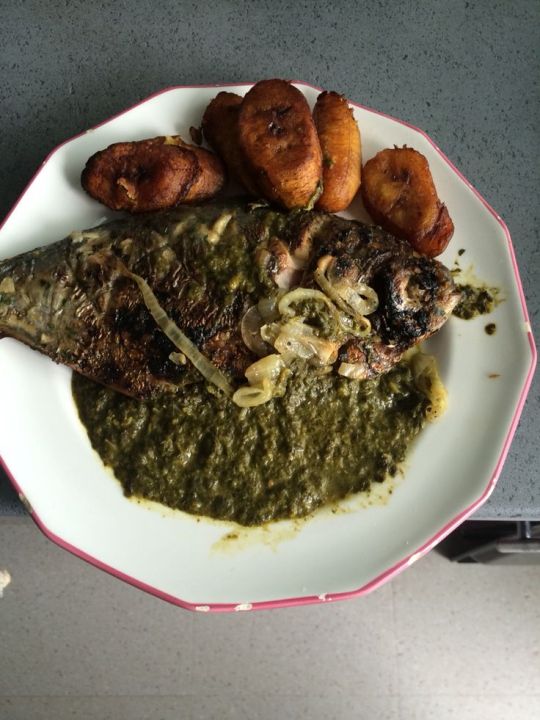
Source: https://www.thedailymeal.com/eat/krispy-kreme-chocolate-doughnuts/011419
0 notes
Text
How to Make Pesto like an Italian Grandmother
If you've ever tasted pesto in Italy you know that the pesto here in the United States just isn't the same. I received a lesson in how to make pesto from a real Italian grandmother last week and now I understand the difference and what makes this pesto recipe so special.
A Special Pesto
My friend Francesca makes the trip from her small town near the pesto-epicenter of Genoa, Italy to San Francisco once or twice a year - this time (lucky for us) she brought her mom and two-year old son Mattia. Her mom makes a beautiful pesto (and perfectly light, potato gnocchi to go along with it) and offered to show me and my friend Jen how it is done. I have to say, it was a complete game-changer. If you love pesto, you really have to try this. Her technique results in an incredibly special pesto.
Chop by hand or blender?
Most of the pesto you encounter here in the U.S. is different for a few reasons. First off, most of what you see is made by machine, usually a food processor or hand blender. This holds true even if it is homemade. Don't get me wrong, it usually tastes good, but because the ingredients aren't hand chopped you end up with a texture that is more like like a moist paste and there little to no definition between ingredients.
During my lesson I quickly began to realize chopping all the ingredients by hand and not blending them is key because this prevents the ingredients from becoming a completely homogenized emulsion or paste. When you dress a pasta with a pesto that has been hand chopped the minuscule flecks of basil will separate from the olive oil in places, you get definition between ingredients, and bright flavors pop in a way they don't when they've been blended into one.
Choosing the right basil
Another thing, Genovese pesto is famous in part because it is often made with young, small basil leaves. For us non-Italians it is easy to find Genovese basil in stores and at farmer's markets particularly in the summer, but chances are it wasn't picked young. I wouldn't worry about it too much, simply by hand chopping all your ingredients, you will see a major shift in personality of your pesto. If you grow your own basil, I'm envious.
The technique
If you're serious about making good pesto, using this technique, get a good, sharp (preferably large, single blade) mezzaluna, or a good knife - you'll need it. Chopping the ingredients will take twenty minutes or so. Whatever you use to chop, make sure it has a sharp blade or the basil will turn dark. Once you chop your ingredients, you'll form them into a cake, pictured above. You add olive oil to this cake, and it's magic - below.
How to Store Pesto
Store any pesto you might use in the next day or two, refrigerated, under a thin film of olive oil. You can also freeze it in snack-sized baggies. Thaw and toss whatever gnocchi or pasta you like with it.
Let me know if you try this and what you think! Use your beautiful fresh pesto with this gnocchi recipe. Tutto bene!
Source: https://www.101cookbooks.com/pesto-recipe/
0 notes