
Don't wanna be here? Send us removal request.
Statistics
We looked inside some of the posts by adt1jackwatters3dmodels and here's what we found interesting.
Average Info
Notes Per Post
0
Likes Per Post
0
Reblog Per Post
0
Reply Per Post
0
Time Between Posts
2 days
Number of Posts By Type
Text
17
Last Seen Tumblr Blogs


Fun Fact
When “GIF” was named word of the year in 2012, Oxford Dictionaries U.S.A. credited Tumblr for pushing the word.
Text
FINAL REFLECTION

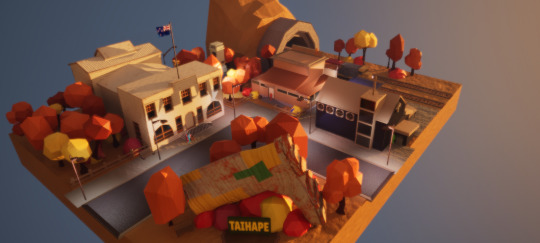
I started off this project thinking I wouldn't make it far since I've never been good at 3d modelling. Only because I've tried it once last year, of which I only really made very simplistic objects while other people seemed to have a strong grasp of the skill. I found Maya to be a frustrating experience, and I found the process of creating 3d models quite difficult. So coming into this course was a major challenge for me.
But, I feel like I definitely came to 3ds max with a greater understanding of it's tools. And once I got a grasp of the basics with editing polygons, I kind of got a hold of it a little bit. I feel like I started to understand how to create simple objects by finishing the plane/car, and substance painter worked quite easily. The final project was great too, I'm very proud of what I achieved with the scale of it meeting my usually high ambitions. But this time I managed to meet them, and to a degree where I feel like I achieved everything I wanted to do and more. I initially wasn't planning to have a train, and I wasn't planning on having people either. But those two choices I made during the modelling process has added tones of life to the scene and shows some flexibility to adapting new ideas deep into a project. I definitely surprised myself with the complexity of the train and gumboot especially, though I did use a tutorial for the gumboot, I didn't for the train. I suppose it's all just shapes at the end of the day. It definitely helped that I went relatively low poly, which is my preference anyway when it comes to games. I feel a strong sense of accomplishment, which is something I wasn't expecting, but I'm definitely happy with that result. :)
0 notes
Text
Final Project 6
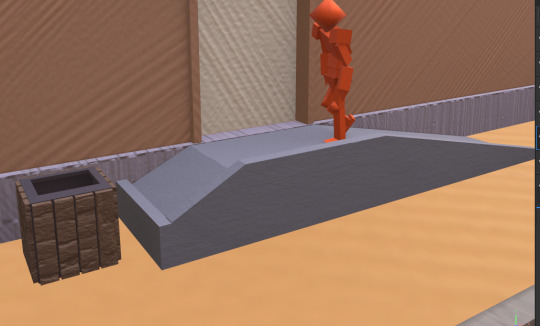
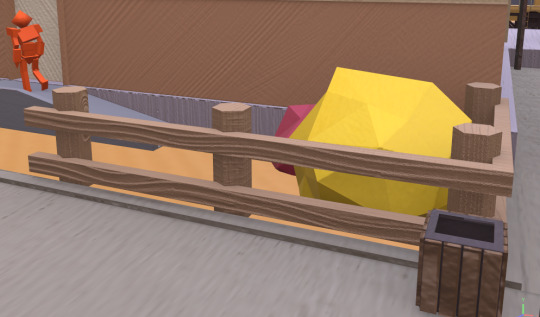
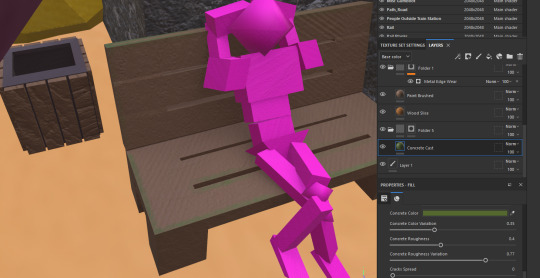
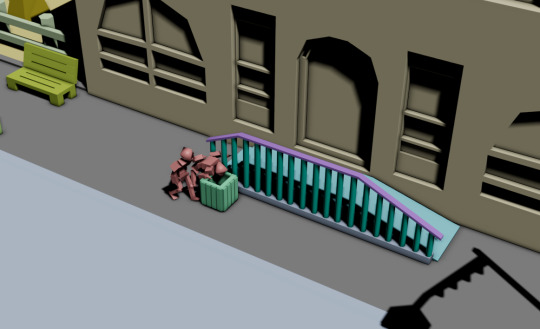
The materials applied for the fence, person, and ram. Replicating the bin texture, also applying a concrete texture to the ramp.
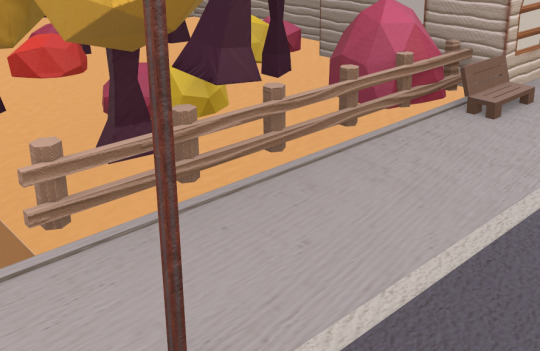
Replicating the fencing, I specifically chose a wonky, rural feeling for these fences because it felt appropriate. Also keeping within the colour palette.
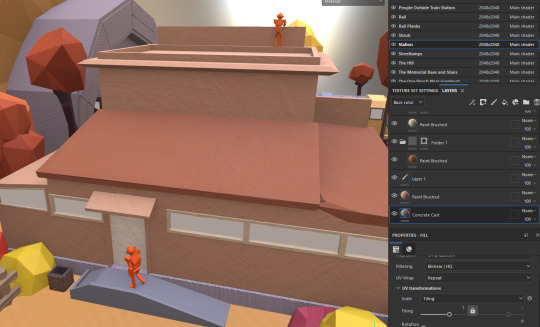
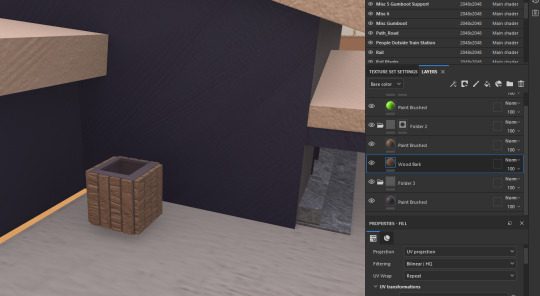
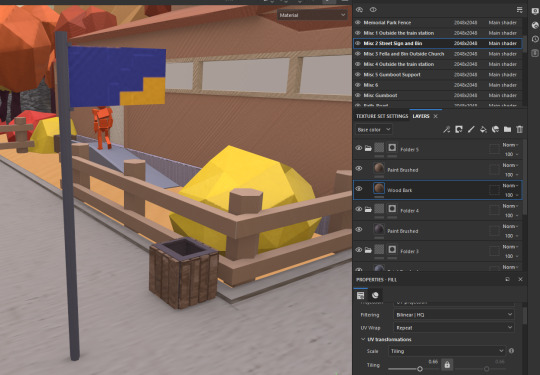
Adding a concrete texture to the train station. It adds some much needed texture, also adjusting the tilling on the paint strokes to make them less apparent.
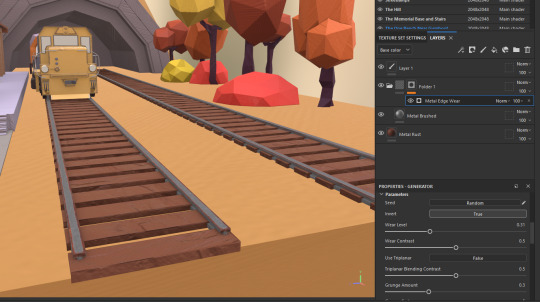
Creating rusty rails to further emphasize the whole rural town that's falling apart theme. A nice texture for the planks as well.
Layering a few textures onto the ground to make it look rough. The natural ground textures are quite inconsequential and there aren't any free materials that exist for the ground.
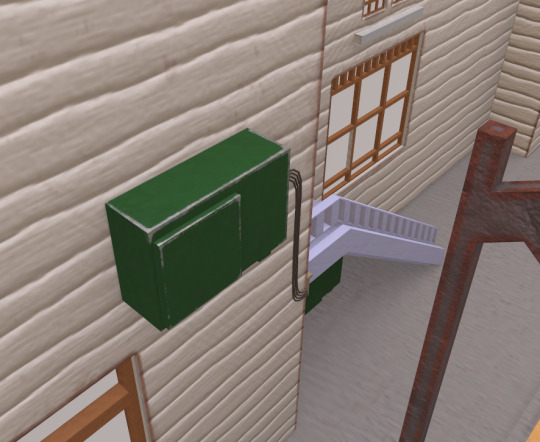
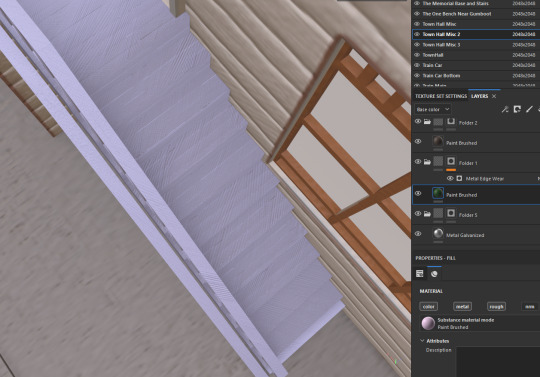
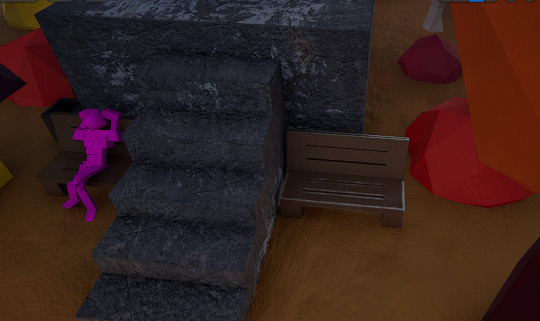
Adding some wood to the stairs and metal wear to the electrical boxes, but keeping the wires the same. Again, adding to the run down atmosphere.
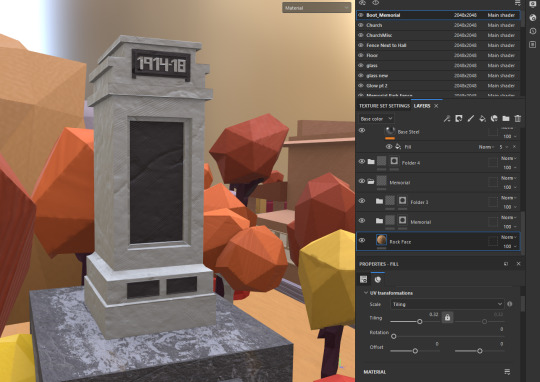
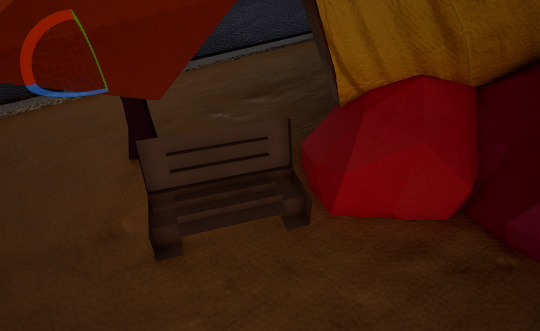
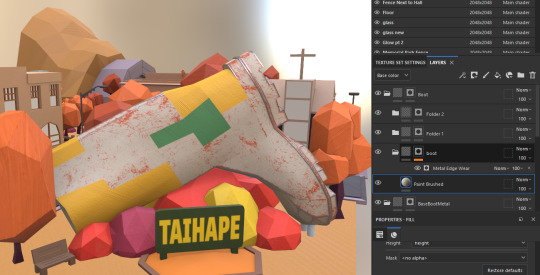
Adding a rocky texture to the monument looks very good. Also making sure it's only masked to the monument as not to clash with the gumboot.
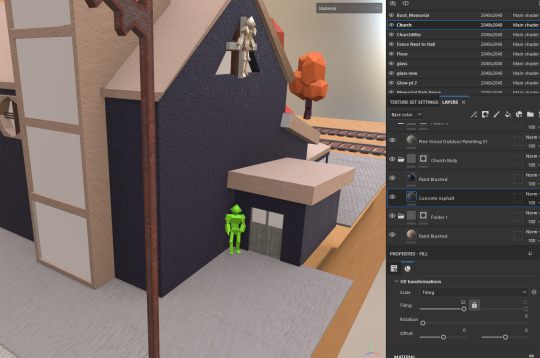
Adding some concrete texture to the church, I found the asphalt to work best here.
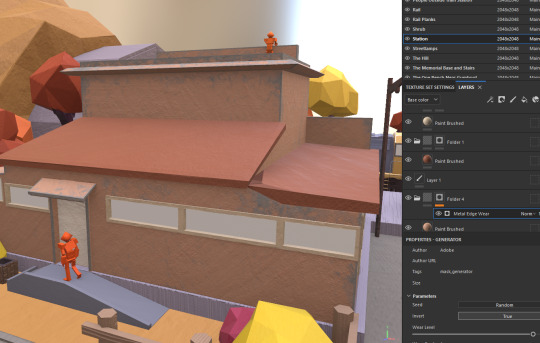
Adding some paint wear on the train station, making it look a bit more run down.
This looks good enough.
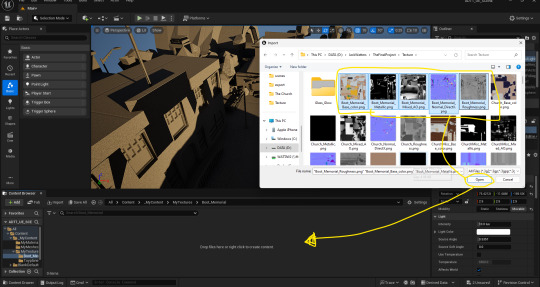
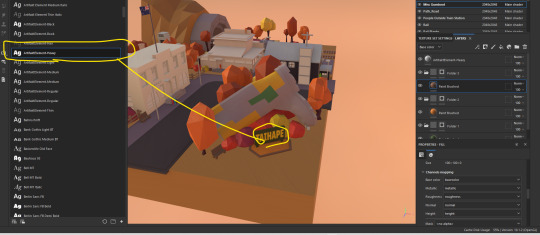
I've deleted all the un-needed textures and are adding them in.

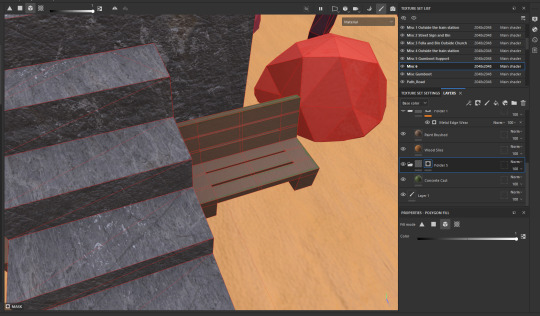
This took a while, but I've got a folder named for each texture set. Also turning off RGB setting for all but the base map.
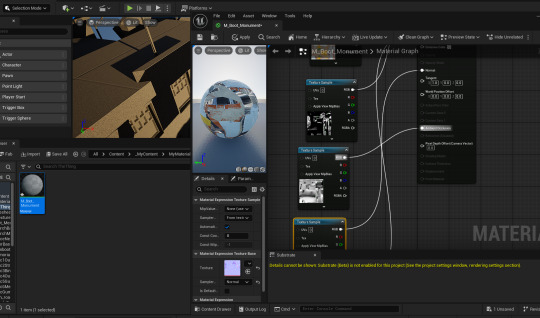
Connecting the textures to the material.
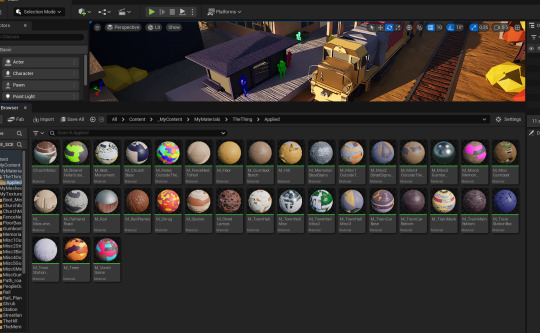
I've created all the materials. When I was applying them I'd have an applied folder, so when I applied a texture it would go in that folder. This ensured I didn't get mixed up with which textures I had/had not applied near the end.
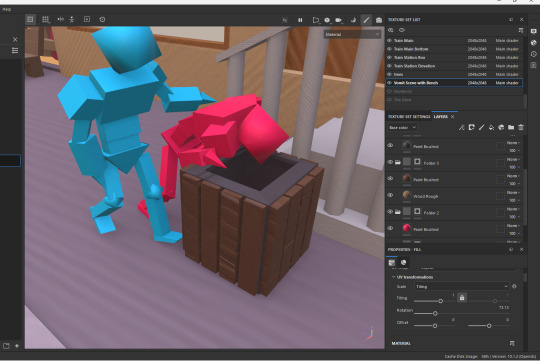
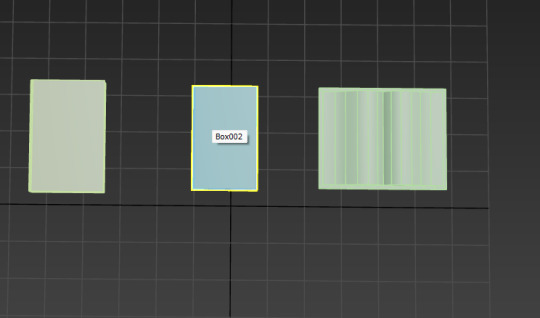
Some issues with the meshes for the benches, unfortunate.

Some issues with the people too, doesn't seem to be affecting anything else.

Selecting the material and turning on two sided seems to fix this.
Result.
Now I see an error, I forgot to apply the moss to this bench.
Fixing the issue in substance.
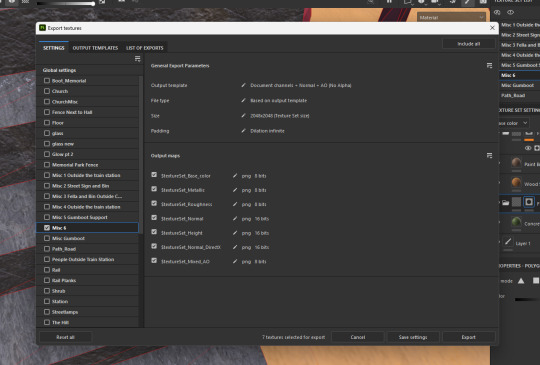
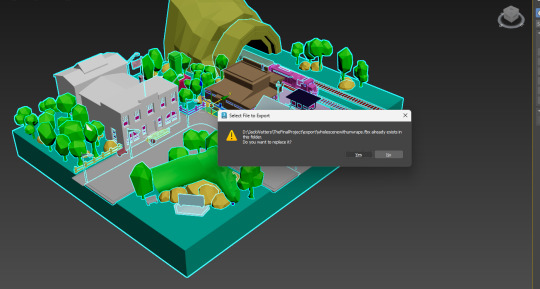
Only exporting the misc6 textures.
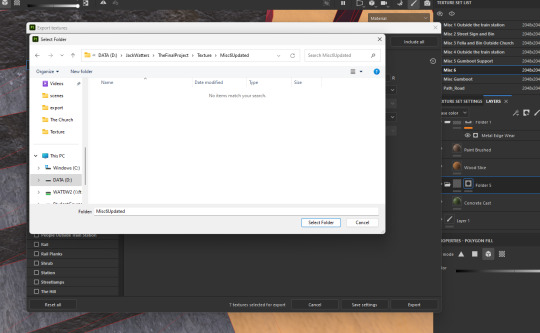
Creating a folder for them in my project texture folder so i can find the files easier.

It seemed to re-apply to the material as i added it in, it also automatically turned off rgb.
Adding some point lights/lighting.
0 notes
Text
Final Project 5

Unwrapping the glowing lights. Making a new material for it. I've also made the gumboot and monument their own material and have unwrapped both of them together so they stop overlapping.

Taking this opportunity to fix the hand of the person and apply a quick backface cull to the flag (I can't add more meshes because I'm not sure if it would fuck up the re-bake).

Re-exporting and importing the mesh, hitting bake again (this time without the new materials for glass and glow.
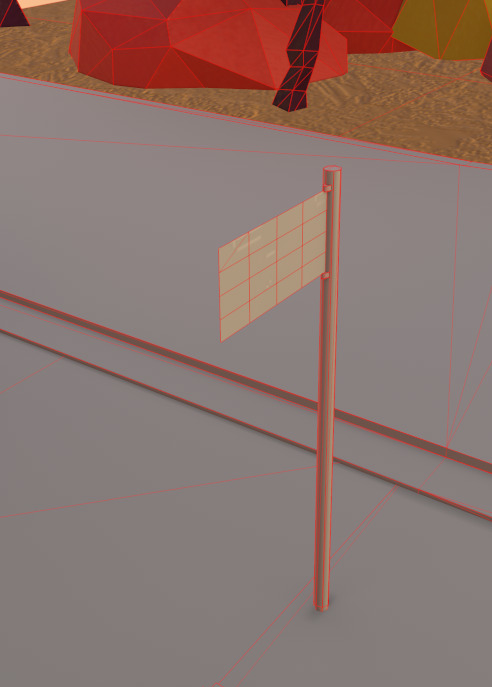
I've layered on this font material onto the sign.
Texturing the town hall again. Making it more orangish, and doing the window frames.

I've added a rough wood texture and reduced it's roughness, but upped it's notches an fibers to give a similar texture to corrugated iron.
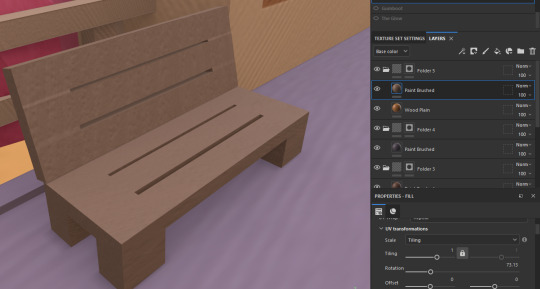
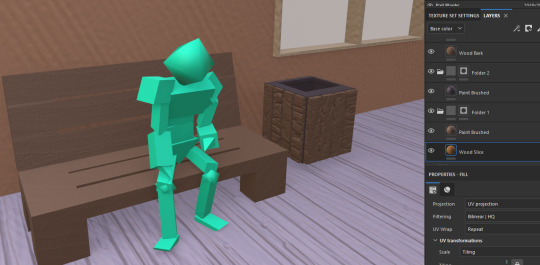
Adding some wooden textures to the bench.

Adding these really nice wood textures to the train stop and support. It's kind of rustic, which is what I'm going for.
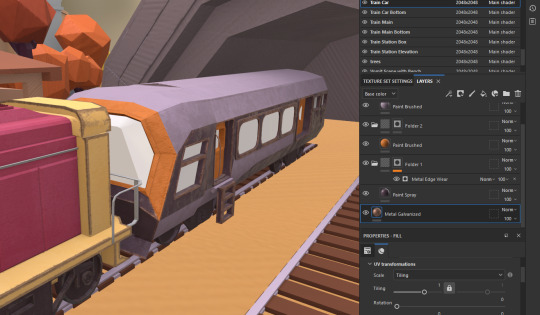
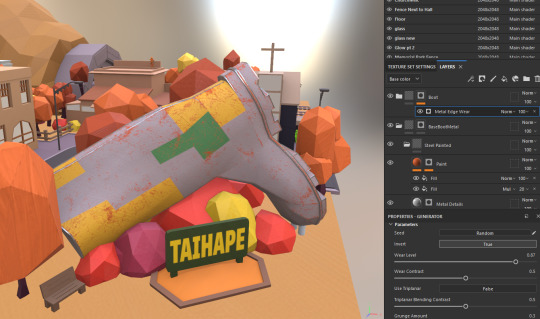
Making the train car look a little worn from exposure.
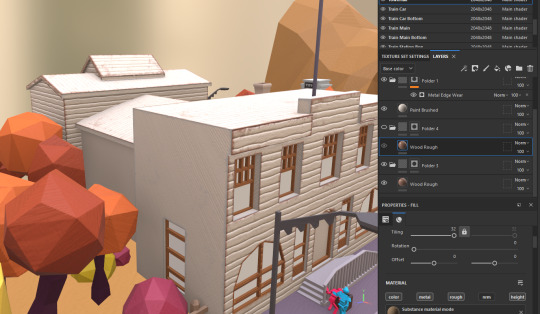
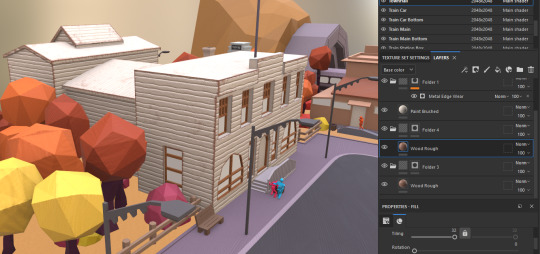

For the wood on the town hall, i had to make two separate textures masking different sections to make the planks at the point at right angle.
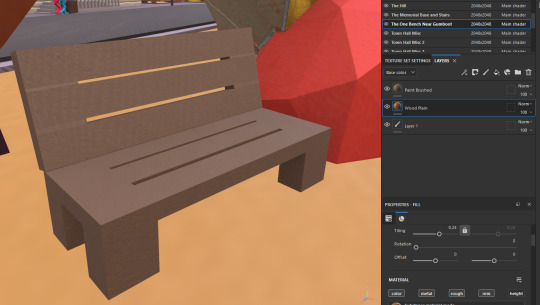
More bench texturing.
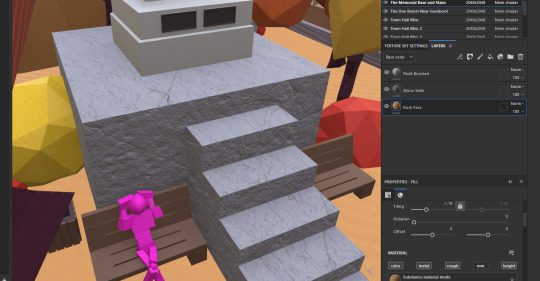
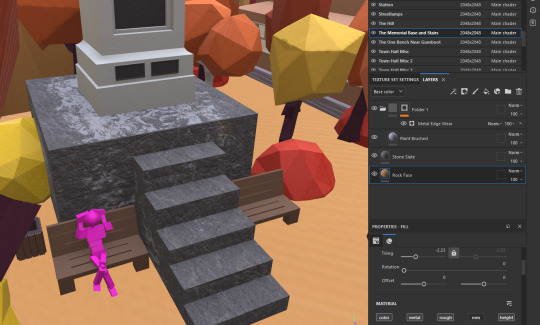
Using a few stone textures plus some metallic wear to create a worn, grungy texture. This will further emphasize the broken-ness of the town.

Adding rust and wear to the streetlamps.

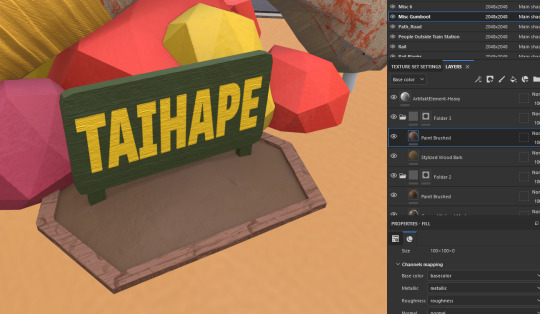
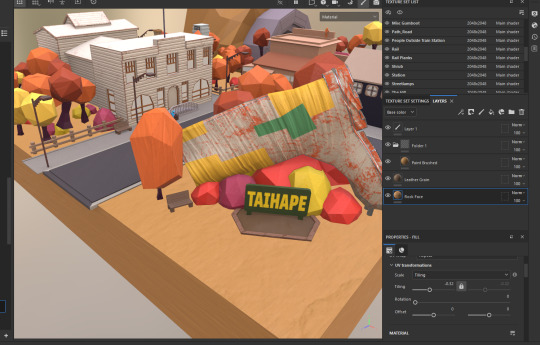
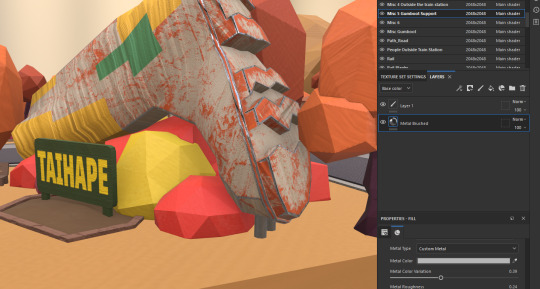
Adding wood and mud to the Taihape sign. I went through a few textures for the ground under the sign, but eventually just went with mud.
Adding some moss to the benches in monument park. It just sort of makes sense if it's in a park where the elements are more prevalent.
Making the boot's supports metal looks more in line with the boot itself.
Just mirroring a lot of the wooden textures on this bench and bin to other bench and bins.
Another bing texture.
Went for the street sign colours on the street sign, also the bin. The textures a lower quality because of how small the unwrap was when combined with the long pole, but it doesn't stand out too much.
0 notes
Text
Final Project 4
Some trouble:
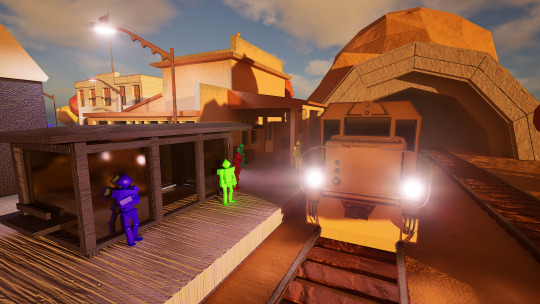
My vision for this project might be too difficult to implement at this point. The whole abandoned town, rust belt aesthetic needs quality textures and more detail to fully get right and I don't have the time for that. Instead I've populated the town with little people.
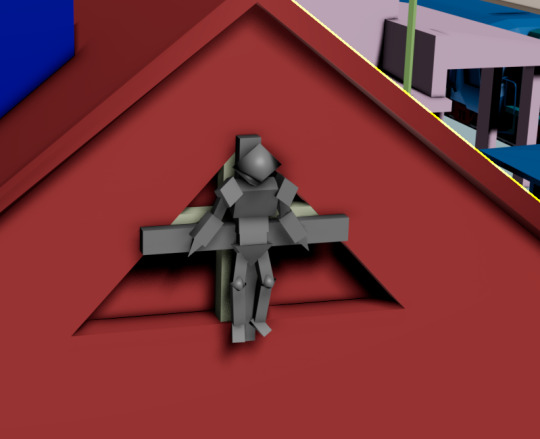
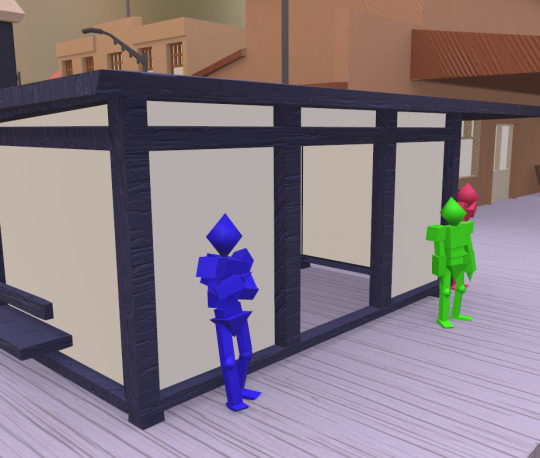
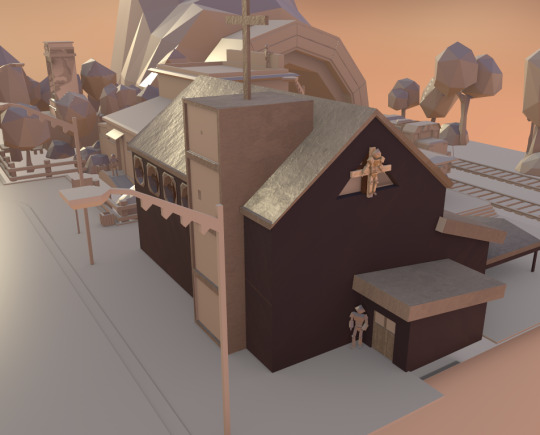
For the church, there was a crucifix with a person on it (statue). My though it that I could create a copy of the person, and then recolor and reposition it as towns people. All looking the same of course, sort of leaning more heavily into the diorama aspect. Not that I'm fully removing the whole economic collapse theme, but it'll be more subtextual. Represented by the autumn, and the train stop with tones of people leaving.

It's just me repurposing the same model, but it since they're so small in scale compared to everything else it really doesn't matter. They exist as a tool to communicate ideas in this specific context rather than being singular characters, though I can definitely have a go at characterizing them through their body language and what they're doing.
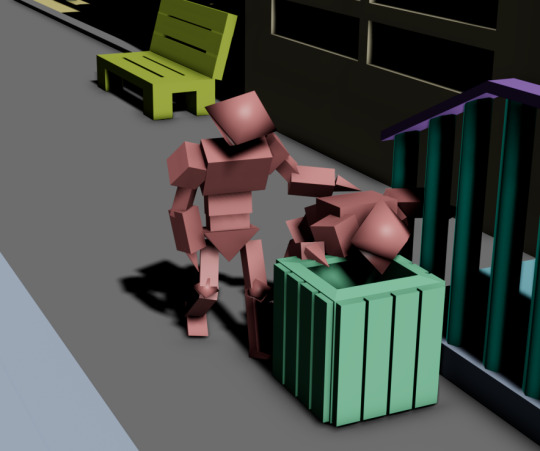
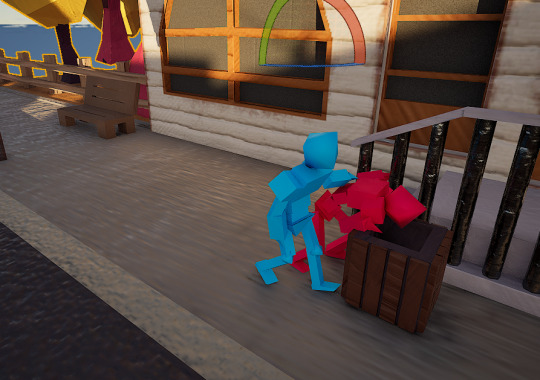
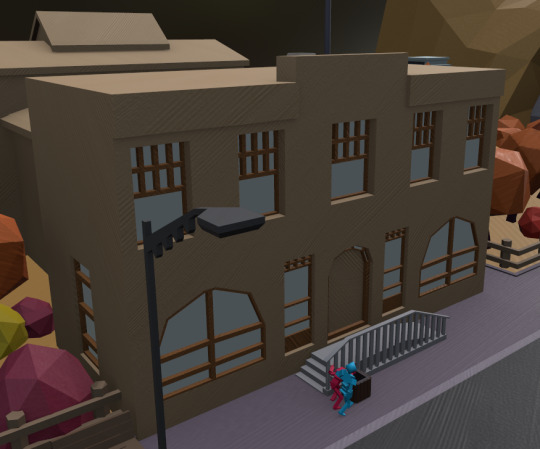
Stuff like this...
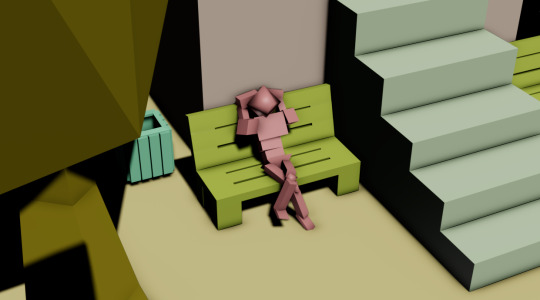
...and this. It not only makes the town feel like it's lived in, but also provides some storytelling/characterization if you're willing to find it.
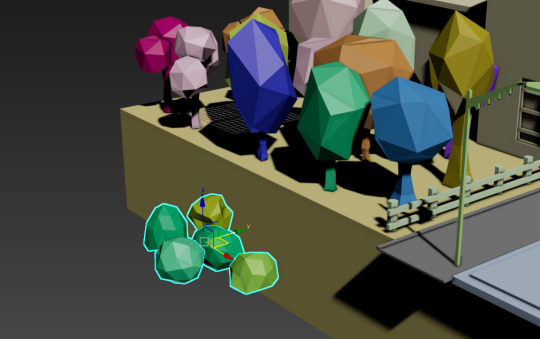
Created some bush meshes.
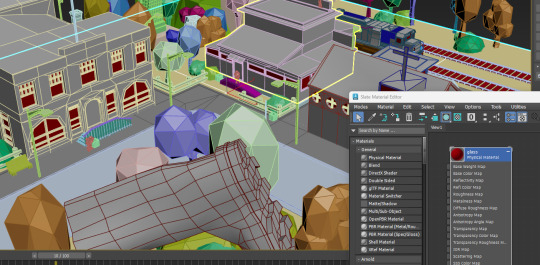
Applying glass texture to all.


Also applying glow textures.
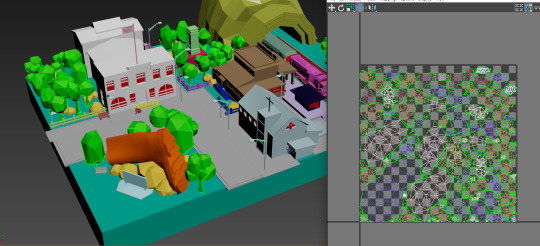
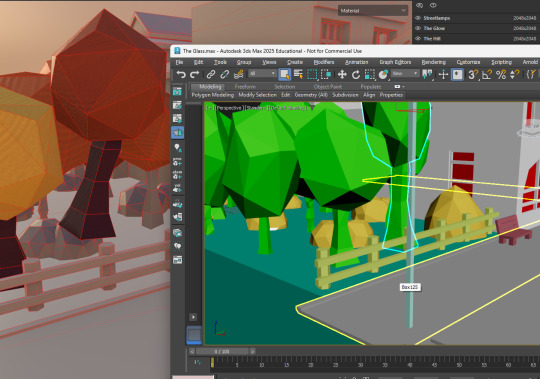
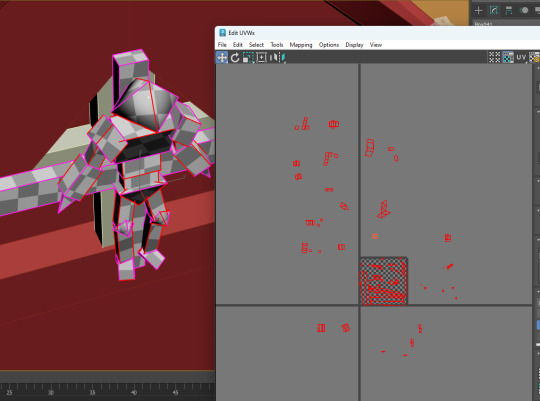
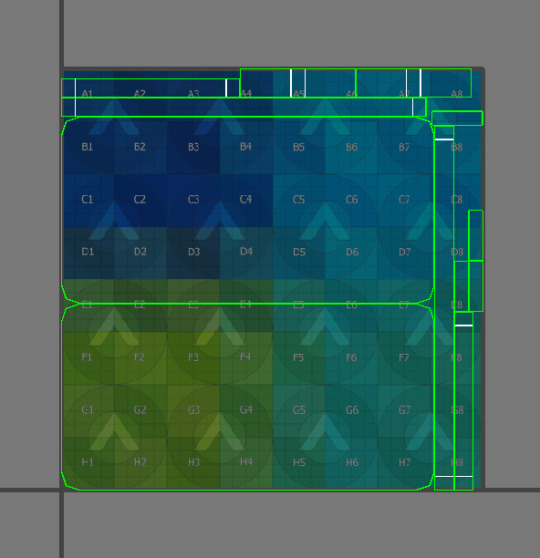
An example of a UV unwrap for the trees. I'm seperating meshes into material groups using M and creating physical materials because I want to import the whole scene into substance painter. This means I've got to put these objects into seperate material groups, then select all objects in a material group and apply an unwrap and pack that unwrap so there aren't any overlapping UVs.
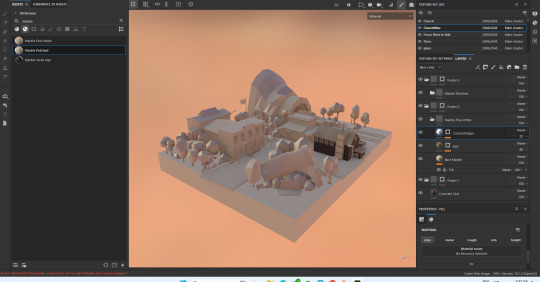
Finally porting the mesh to substance painter. Starting of with some colours.
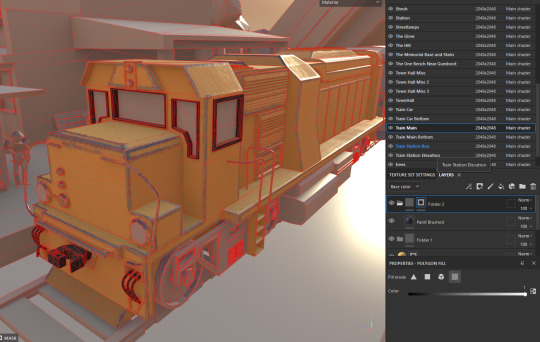
Painting the train, making it look worn to fit the thematics.

Geometry will sometimes be inconsistent cause of the complex shape. meaning paint regions will be trial and error.
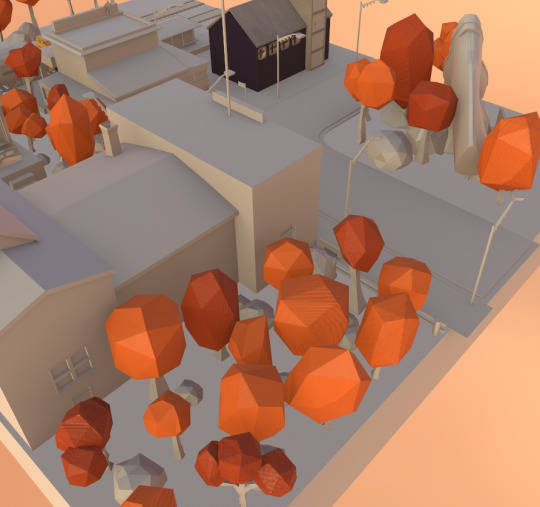
I've decided to go for a simplistic, painterly aesthetic. This ensures everything looks like it's hand crafted. I don't the realistic textures look all that nice.

This purple for trunks is a much nicer colour than the dark browns I usually use, there's more contrast here and it feels more colourful.
For some reason some of my trees have decided they're experts in anti-gravitational magic and have casted floating spells during the export. I have no Idea how this happened.


It appears only three trees have been affected by this error. I have no idea how this even happened, but I assume it's some error during export. Luckily it's not awfully noticeable from a far.
As far as actual mistakes went I've noticed I forgot to adjust my flag's plane.

So it's only one way.

Luckily the plane for my street sign is cloned and flipped and attached.

The hand for this fellow is also disconnected from their arm.
Other than that, aside from actual unsolvable errors, there isn't anything I biffed up so I'm happy that only a few cracks exist.

Importing a nz flag.
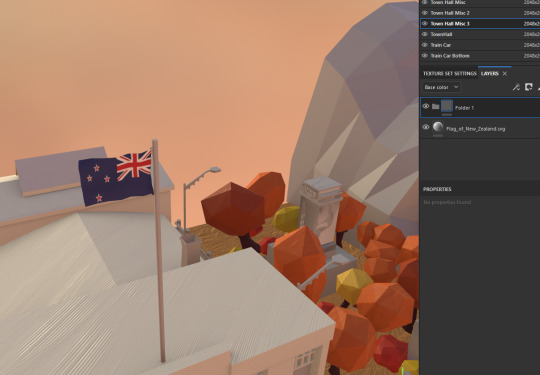
Flag.
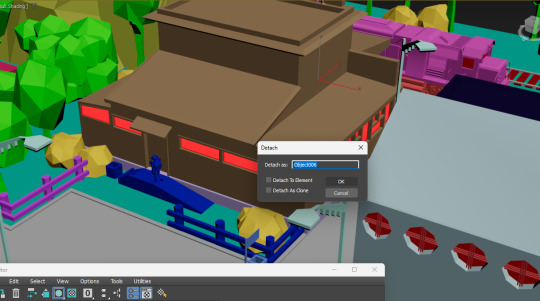

I've detached all the windows, attached them all to be a larger glass mesh, applied a UV package and applied a new glass material. This is so there aren't overlaps inside the glass material, which is what I had before where the UVs were overlapping.

Doing the same for all the glow materials.
0 notes
Text
Final Project 3

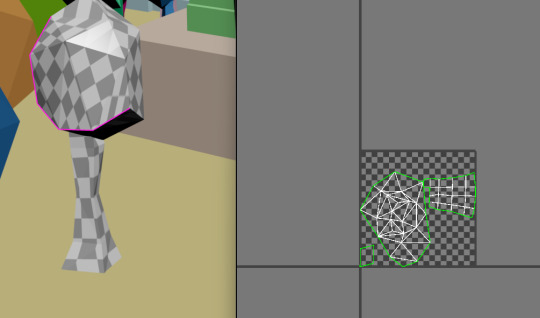
I accidently unwrapped with this section with a hole in the model.

I collapsed the uv, then filled the hole, then reapplied the uv.

I packed the uv, it seperated the piece of geometry I created, then I shrunk it.

I fused that small piece of geometry to it's proper section.

Not going to go in depth with this unwrap as most of this model won't be seen or can be hidden, so connecting and creating correct hard edges for the essentials is about as far as I go with this.


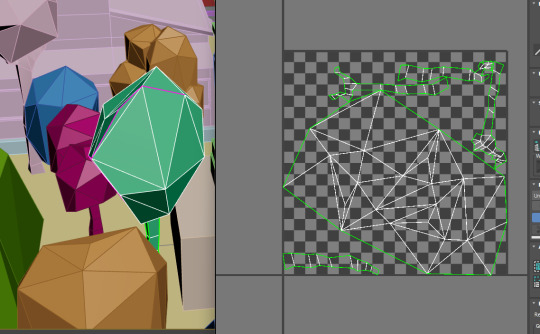
Collapsing the noise, connecting up the trees, and unwrapping them. There seems to be an inconsistency with their unwraps where they're either really together or completely in shambles.

While this unwrap creates a weird inconsistency in the tree's leaf texture, it doesn't really matter.


Some of these have been quite easy so far.

Some of them not so much.
^This is what I've been having to connect up for the past 10 trees I think I'm gonna die.

This tree has evil invisible overlapping edges but I cannot be bothered fixing it at this point cause I've tried and failed to too many times.

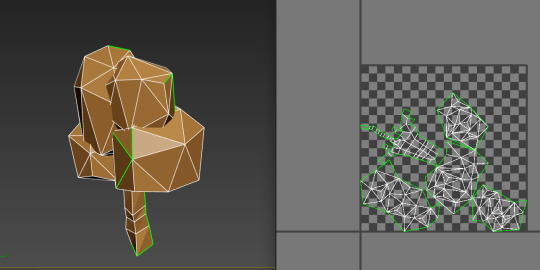
The Final Tree Unwrap, this is what I've been dealing with.

Only really need this bit to be connected up.
Unwrap for this.

Connecting things up for the tunnel itself.
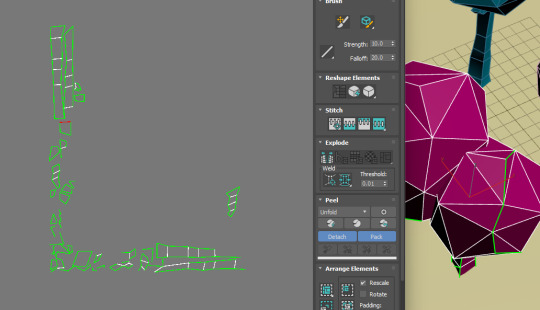
Unwrapping the fences in groups.

I probably could've deleted the cylinder bottoms but I forgot and I just want to get this finished.
I've collapsed the UV and I've deleted the bottoms of the cylinders.
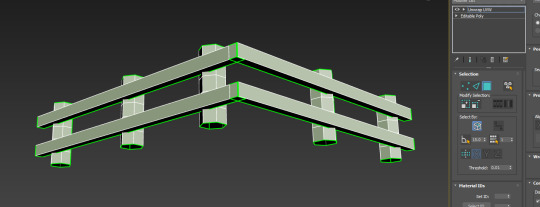
I've re-applied the unwrap, easy as.

Since it's late into the project, and my scene is feeling like it's without smaller detail, I'm adding a collection of small low poly filler (bins, benches, bushes, and streetlamps).

Bin.

Lamp Post.
0 notes
Text
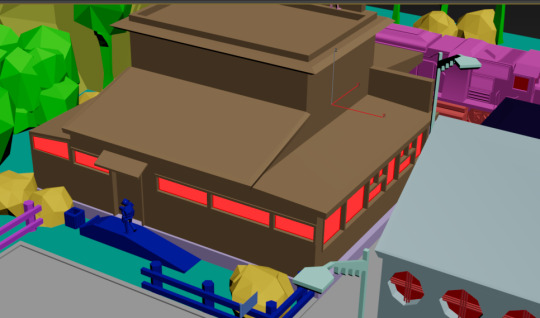
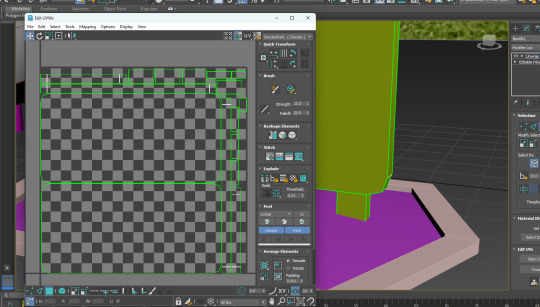
Final Project #3


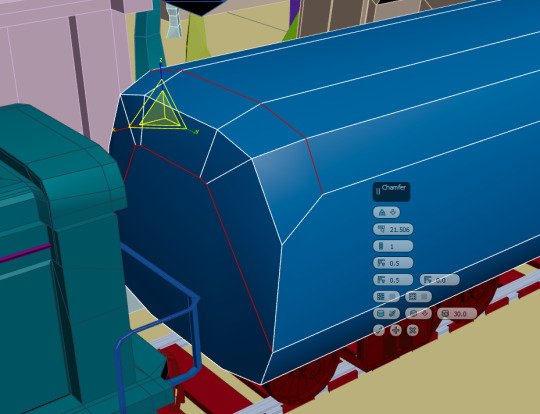
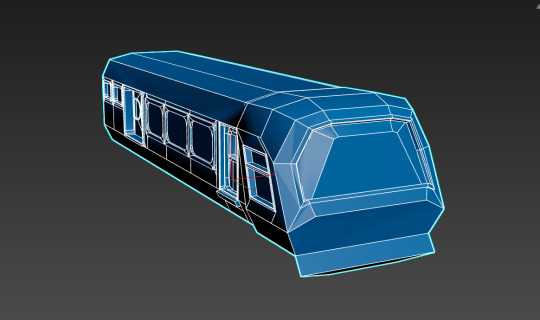
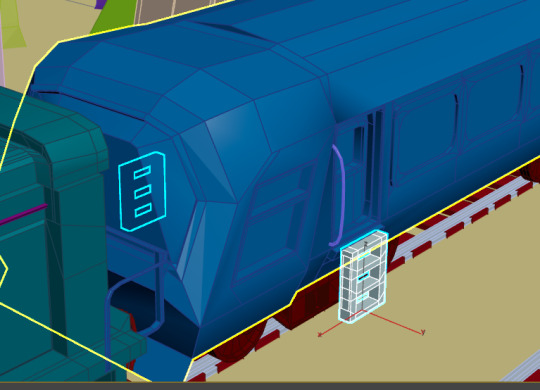
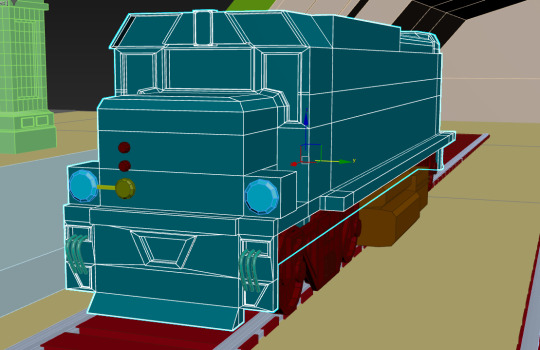
Adding some shape to the train's body, some extrudes. To mainly more accurately mirror it's real life counter part with some creative liberties.
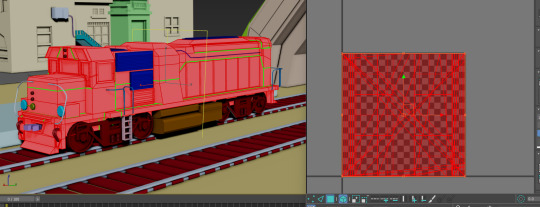
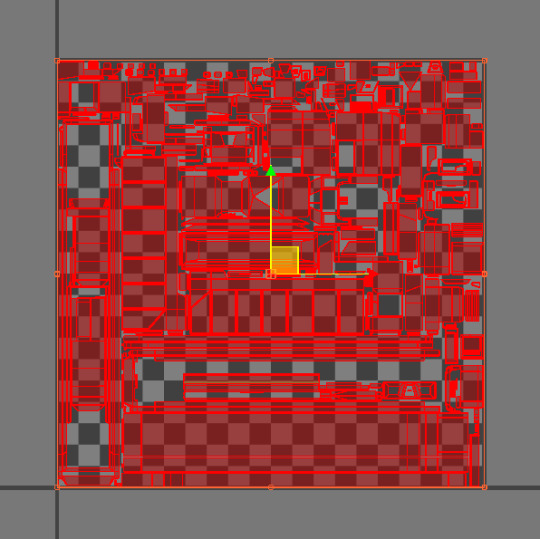
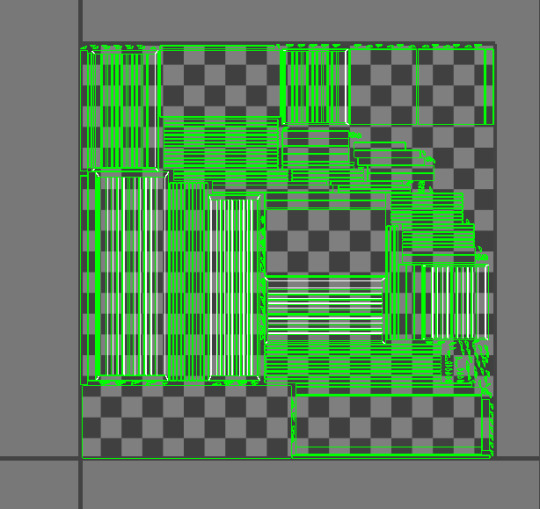

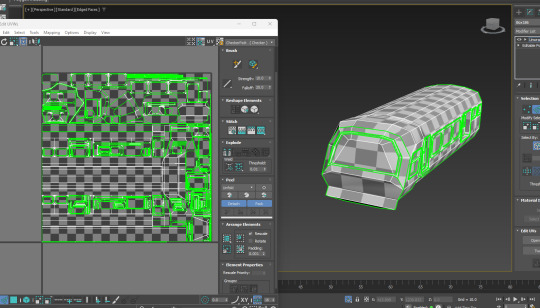
The unwraps monstrous, but I don't feel like I need to do much for it. A lot of the textures will be applied annoyingly anyway. But I made sure to unwrap the window frames properly. Also unwrapping some of it's exterior parts too.

Some more unwraps.

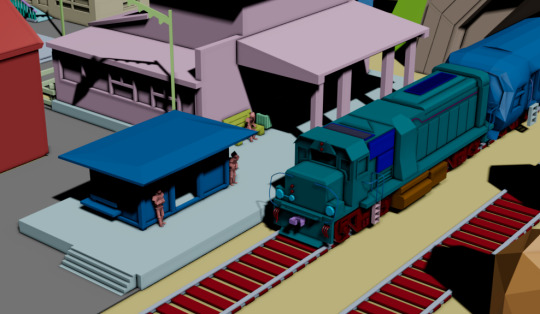
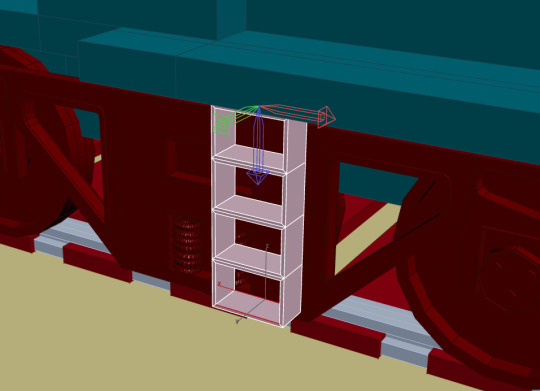
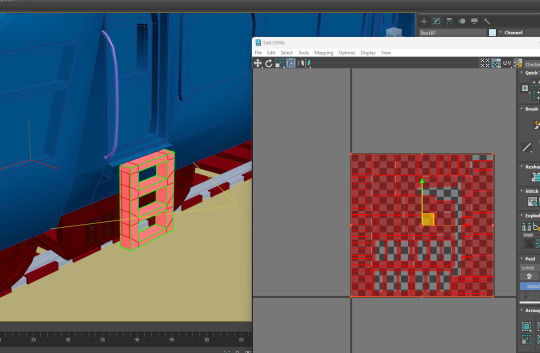
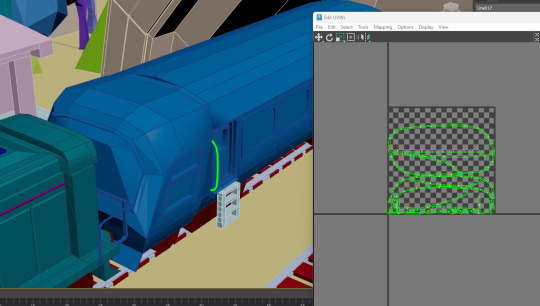
The train station waiting box. The sides are meant to be glass, and it's hollow on the inside. I made sure to add a shell modifier for that.

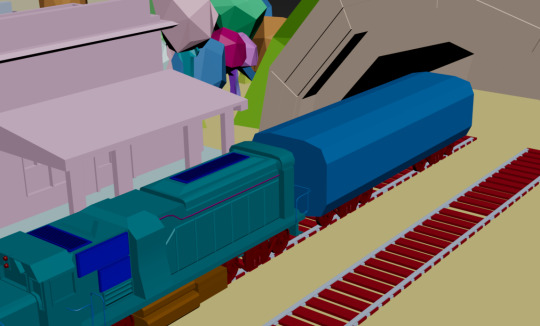

The train car, based on the train cars pulled by the 7077.


It's unwrap, I decided to connect a lot of the parts for this car because it's colour regions are more simplistic. It was a nightmare though.

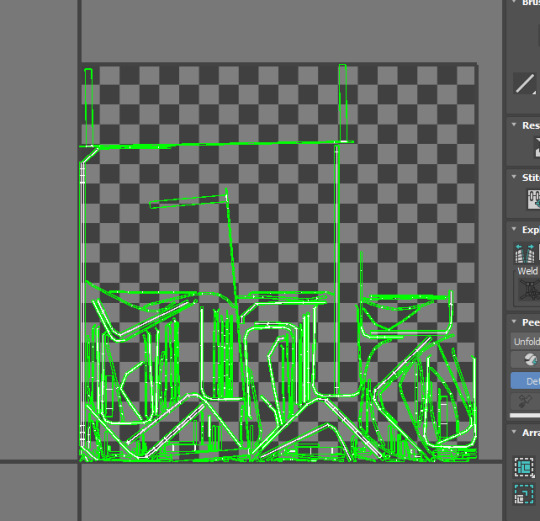
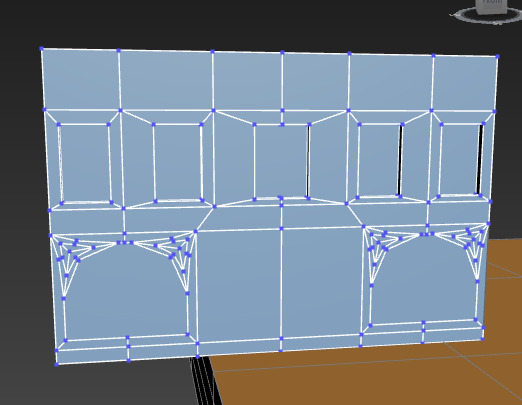
Unwrapping the train station building.


What A nightmare.

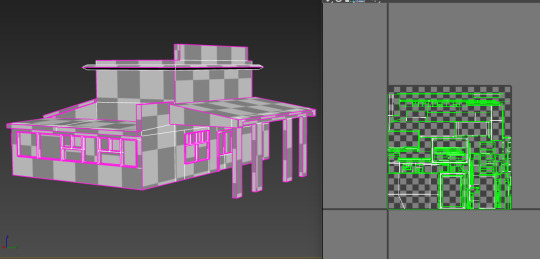
This took way too long, mainly unwrapping the window frames.
0 notes
Text
Final Project #2
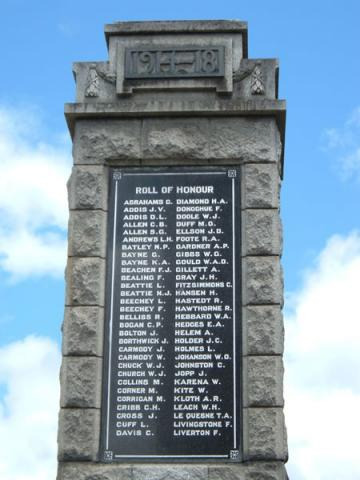

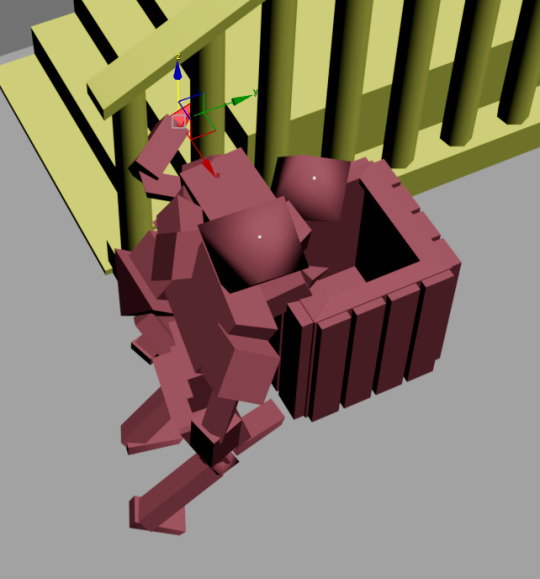
Building the monument, I might've used too many polygons for it.

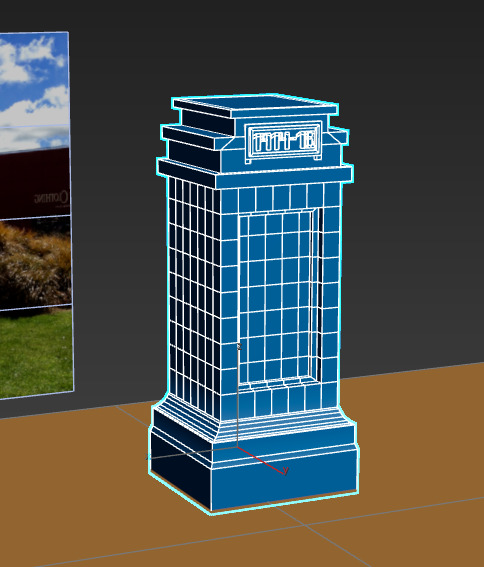
The letters were quite hard to replicate, but I feel like I managed pretty well.
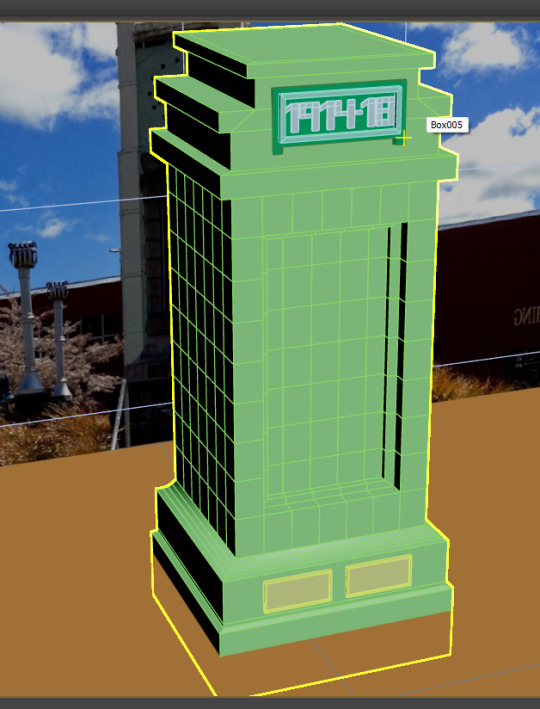
I had to remake a lot of the edits because the program crashed when i went to unwrap and i forgot to save.
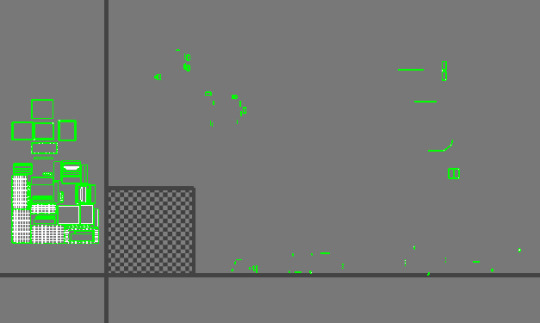
Separating out and connecting a lot of the segments (maybe punishment for using so many sides.
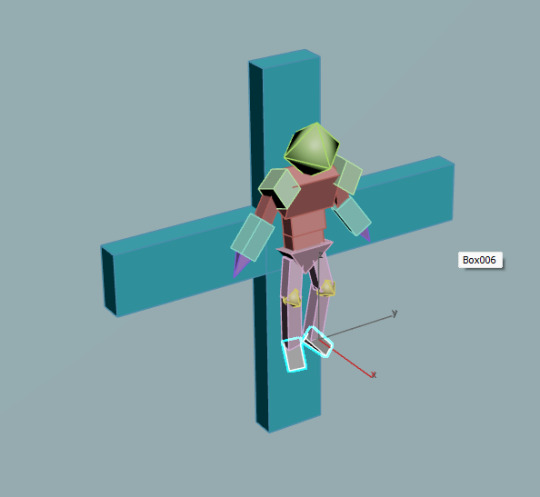

Making the crucified person out of simple sharp shapes.

Time to unwrap the church by individual piece
Unwrapping and connecting all the pieces for this crucified person was quite tedious.


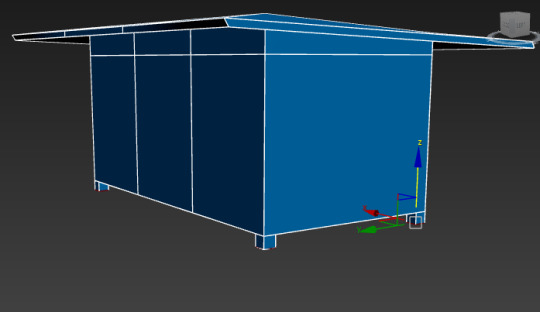
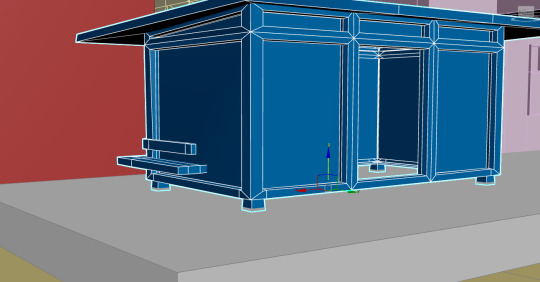
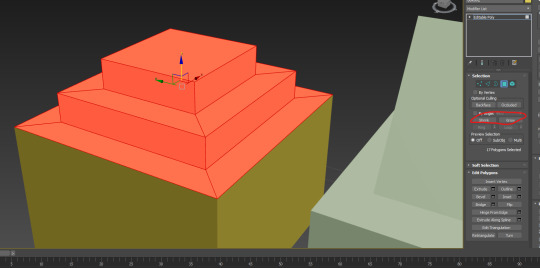
Creating windows, using rounding, etc. to create this nice front for the town hall. This time using a limited amount of sides.
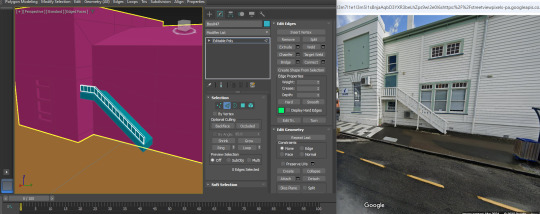

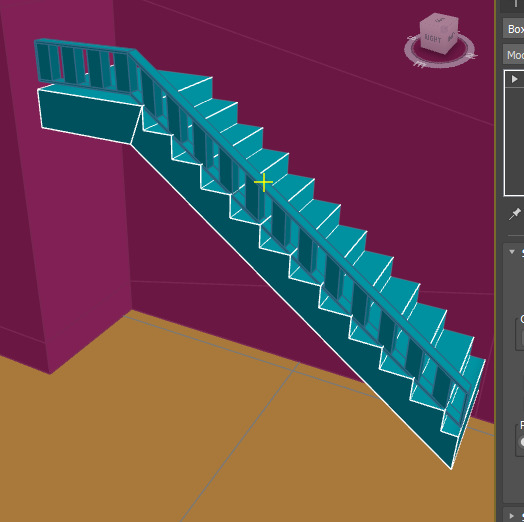
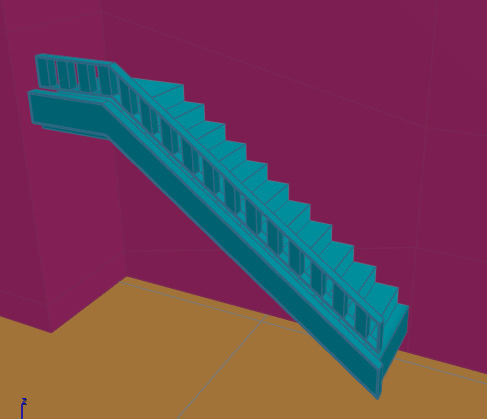
Creating a staircase. It was quite annoying to delete faces and bridge gaps for the railing.


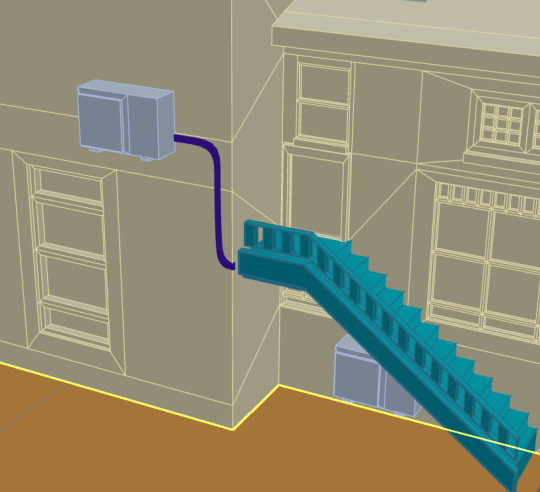
Added some boxes to match the actual town hall.
I've added a flag to and a chimney to the top of the town hall, again to match the real life Taihape town hall.

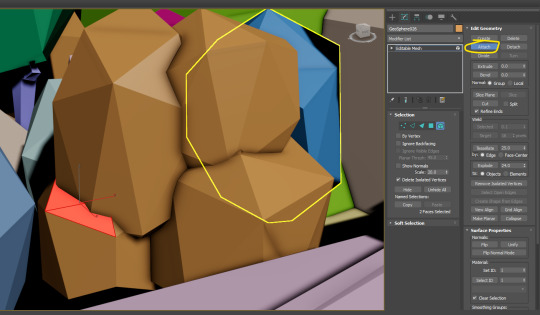
Discovering the noise modifier has been a great boon to me as it most certainly helps morph these geospheres into more tree looking shapes.

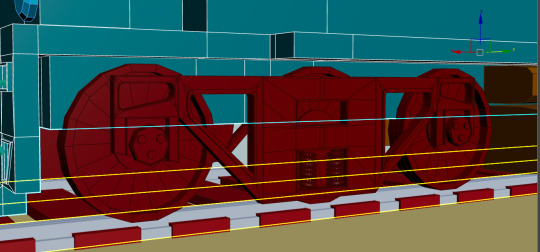
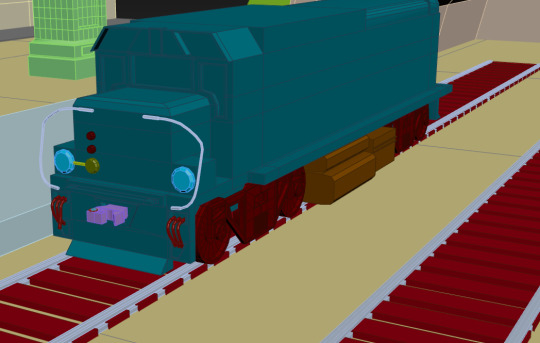
Creating the small pieces and this train shape was interesting. It required many small pieces, like using the line tool to create tubes to replicate the 7077 NZ's wires, but also making sure each wire varied from the other. The hook was quite easy to make, it's just blocky geometry. But the wheels were quite hard. I started off with half a bogie, then used the mirror tool to create the other half and then bridged it. Though that process was tedious. I also took advice from Flynn to make the springs.

^The train that specifically goes through Taihape.
0 notes
Text
Starting the final project
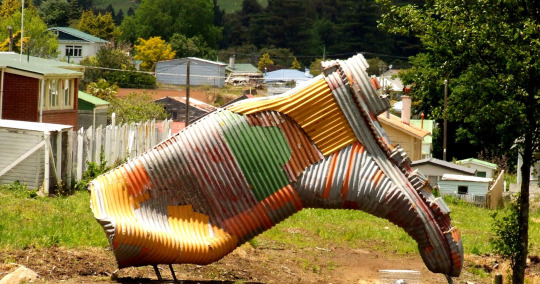
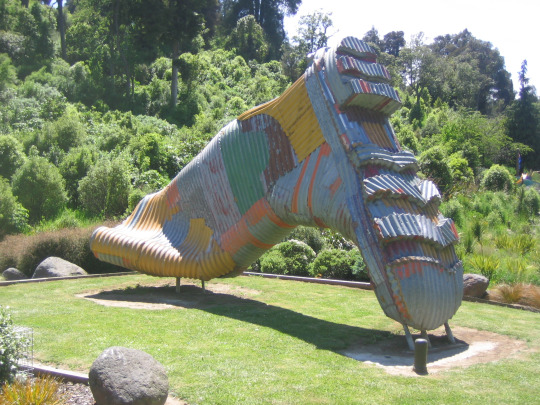
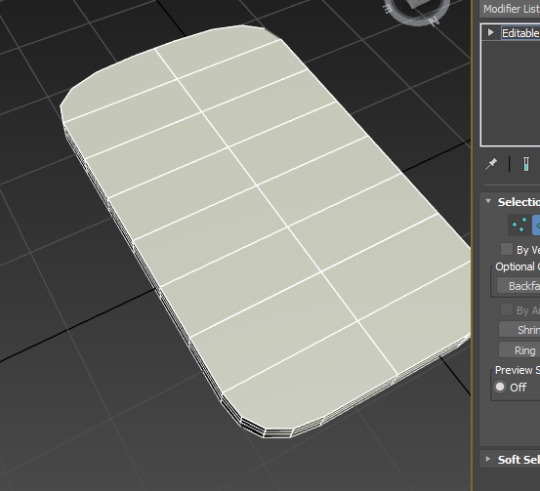
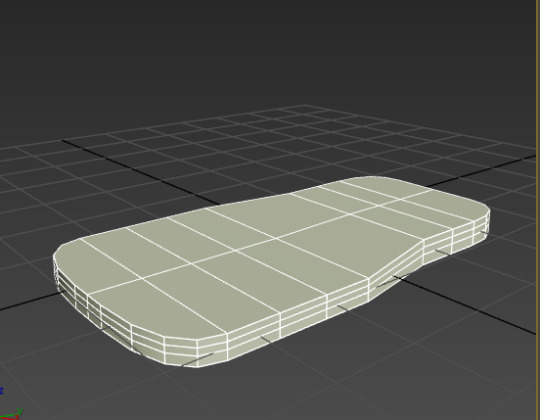
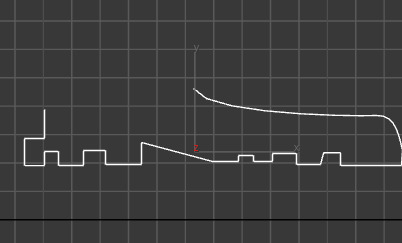
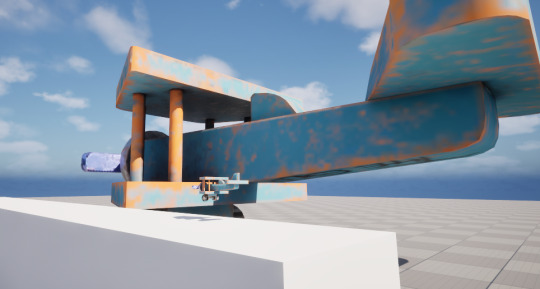
THE GUMBOOT SIGN


youtube
check point 4:50

Target weld these bits, I've pretty much been doing everything up to about 10 minutes into the video.
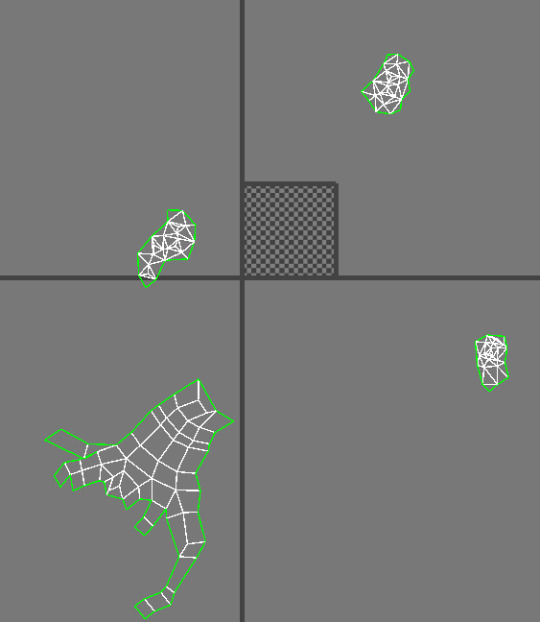
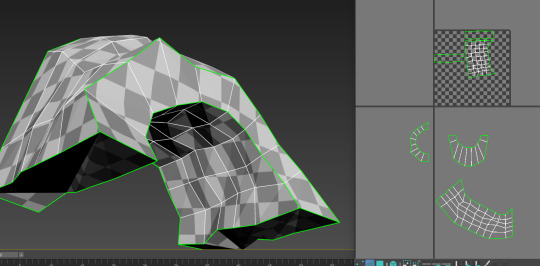
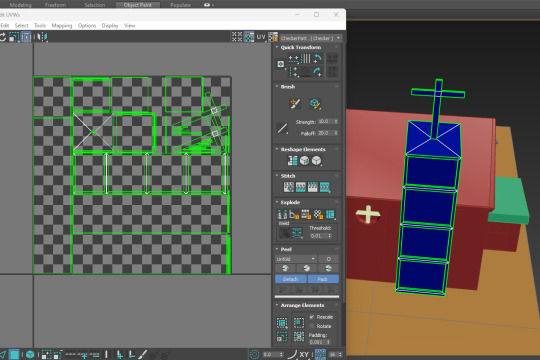
My current progress. The cruelty of having to unwrap this is not lost on me.

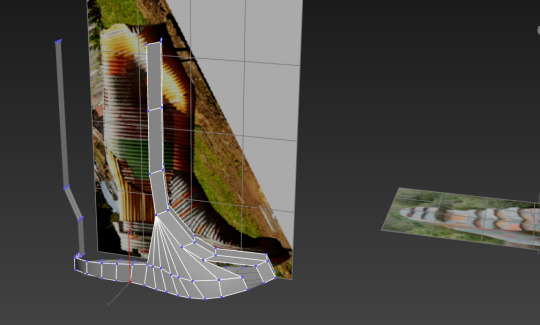
Some bridging. This is going to be the most complex model (hopefully).


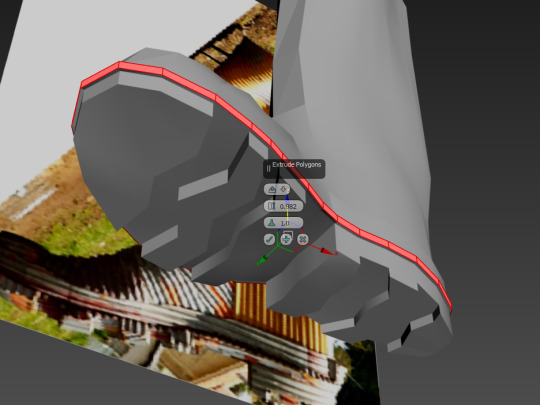

Separating the top part of the boot.
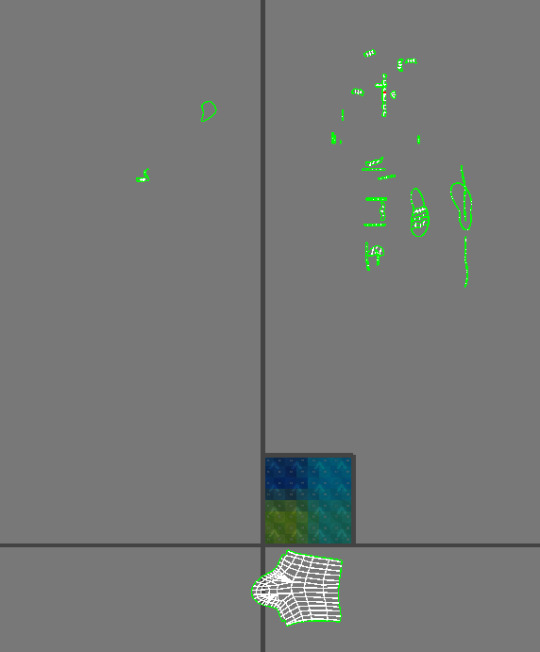
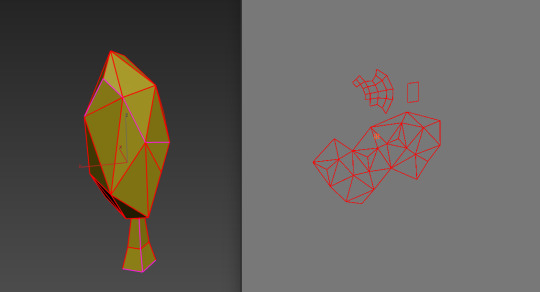
Unwrap of the boot of gums.
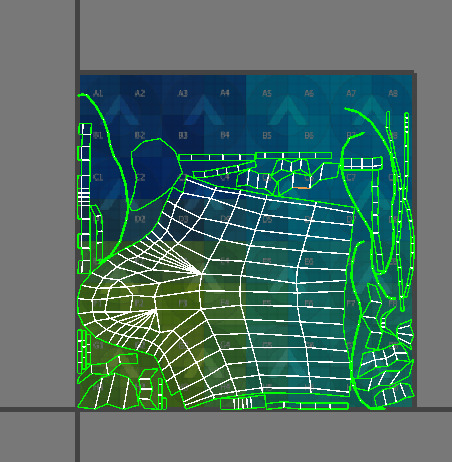
The Pack.

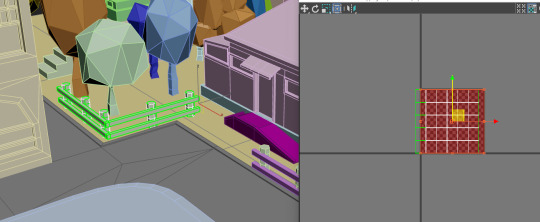
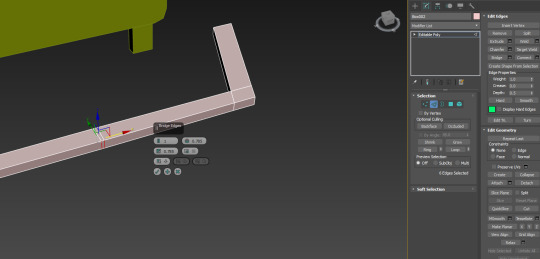
Time for the sign area (will be closer to the gumboot for compactness in the diorama).

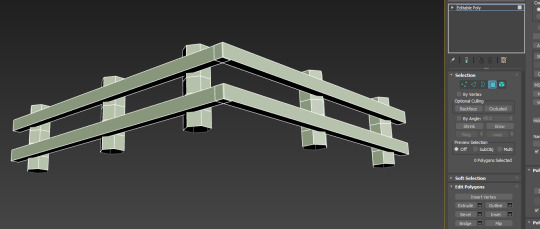
I've chopped off the head faces of the supports. The sign will be quite basic, but some chamfering maybe? I'm not sure if it's awfully necessary to increase the poly count too much.

That's probably a decent chamfer size.

Attached the supports.
Using the mirror tool to create this outline.
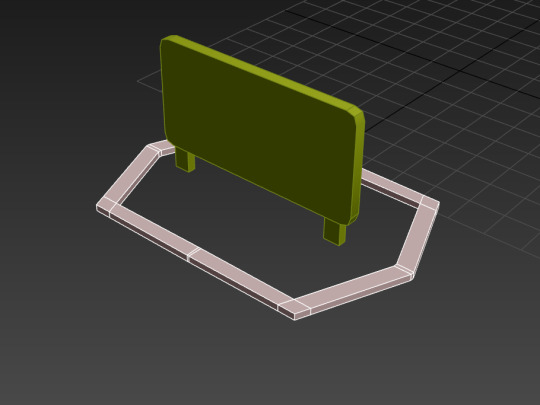
The outline to contain the rocks and woodchips (I might skip out or hyper simplify the flax brush.

unwrapping the sign.
The pack.

unwrap of the border.

0 notes
Text
Day 1 Week 4
Topics - Booleans, 2 Sided Plane (paper?), Translucency (glass) (Mat ID), Emissive (glowing stuff) (Mat ID),
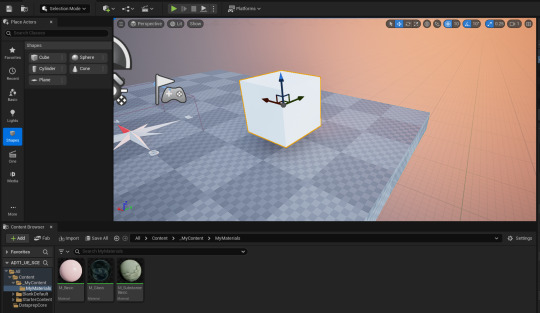
Creating material instances to create a metal texture.

If you move something (i just moved plane textures into a toy plane folder) make sure to right click on the content folder and update redirector references.
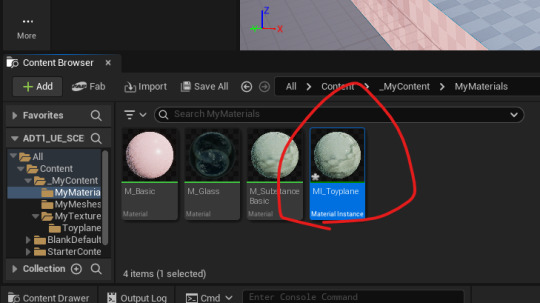
I've created a material instance of the basic substance material.
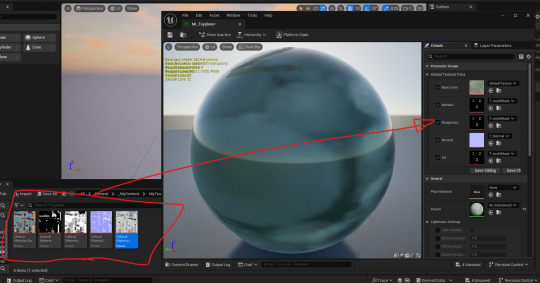

Adding the textures to the material, and adding the material to the mesh.

Creating an emissive instance.
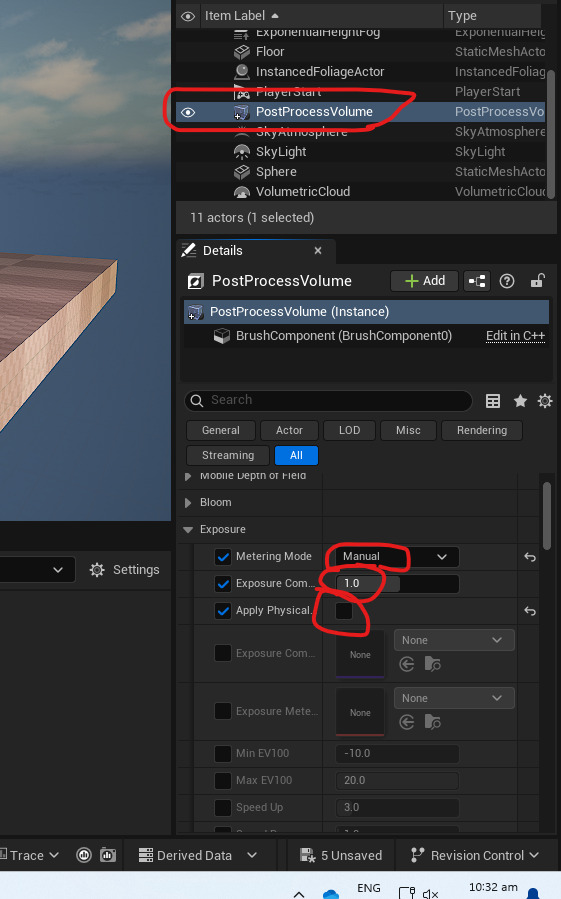
Setting up some post processing exposure effects in unreal (better lighting).
2 SIDED PLANES:


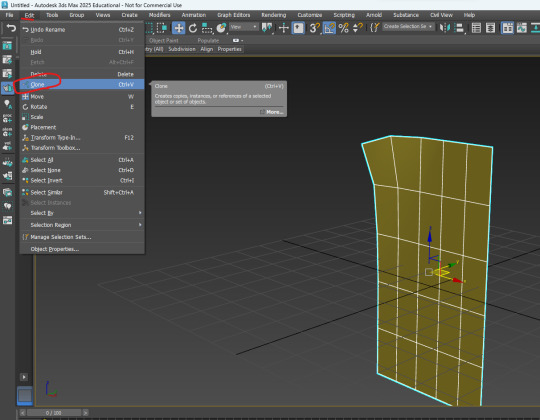
When going into the clone menu, select copy instead of instance.
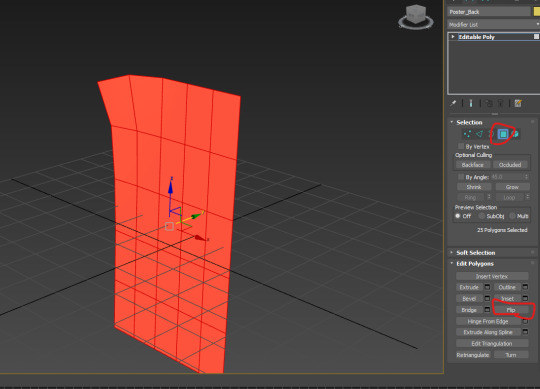
When it's cloned don't click away otherwise it'll deselect the object I just made. Go polygon, select all, and then flip.
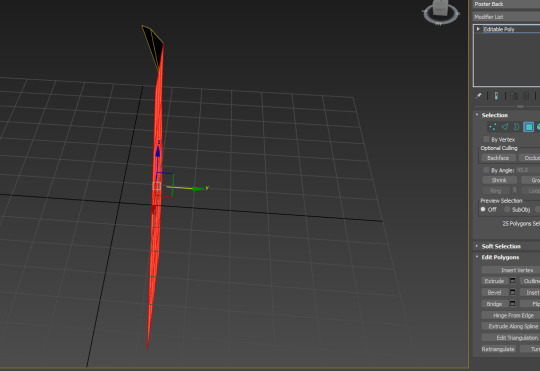
Might have to follow morg's video afterwards to get the full process for whatever this is gonna be.
0 notes
Text
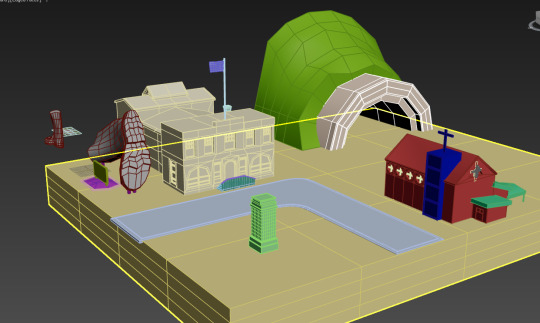
PLANNING FOR THE FINAL PROJECT
Mind map:

^Mind Map of the ideas I had last night.
Goals:
To create a scene that uses all it’s available space to effectively tell a story above anything else.
Communicate a single theme through either subtly symbolic or obviously symbolic imagery.
Have a limited colour palette which helps create a feeling which effectively contextualises the scene/theme.
Effectively use a mix of complex and simplistic objects where it makes sense (e.g importance hierarchy).
I’m looking at crafting a scene to reflect a theme I want communicate. Example; I could show an abandoned town square. Why is it abandoned? What does that mean? Those are the questions to answer. In this case a reason could be because it’s in the rust belt
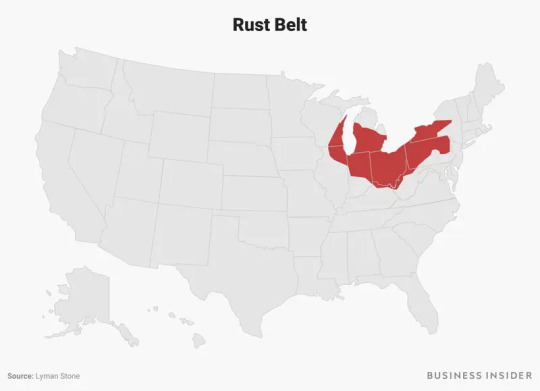
(Ohio, Illinois, Indiana, etc.) where the economic decline of small towns in the area is a result of industrial decline, economies shifting focus, and weak unionization.
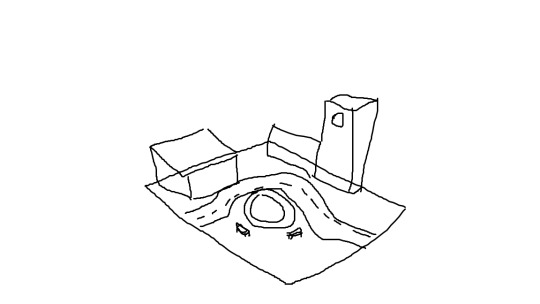
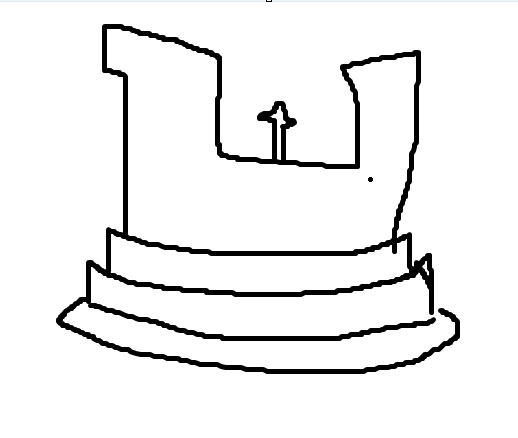
^Here’s a small example of what it could be (very rudimentary and basic). What I could end up doing is blocking off the right exit.

^The way we read things is left to right, an iconic way to subvert that is to mess with that. Breaking the road or blocking off the road with some kind of sign will show a couple of things, 1. there’s no future in a small rust belt town, blocking off that right exit is much like ending a book, 2. signs of economic decline to the point where there’s closed/broken roads that can’t be fixed, 3. there is no escape from an economically depressed town if you don’t have the funds to move. Something as simple as that can tell so much about the thematic of the town, adding substance to the 3D Diorama.

^Another way to present this theme of decay is through which season the town is going through. Autumn, or “Fall” as the Americans call it, is a season of dying. The leaves are crumpling and falling off the trees, is symbolises the process of dying which reflects the towns state. But there’s also a double meaning to it as the town exists within the “rust belt” and the trees are turning orange and decaying much like rust. It’s also about movement too, if I place the leaves falling from the trees mid-air and they’re falling towards the right that could represent people leaving the town for better prospects in other places. Everything can be symbolic, even thinking about the designs itself. Maybe rustic design? It would show a town stuck in the past while also being a pun about being in the “rust belt”. If rustic is a little too old style, then I could just build a mood board around midwestern towns.
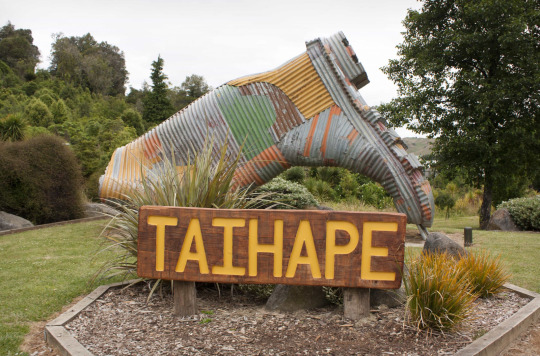
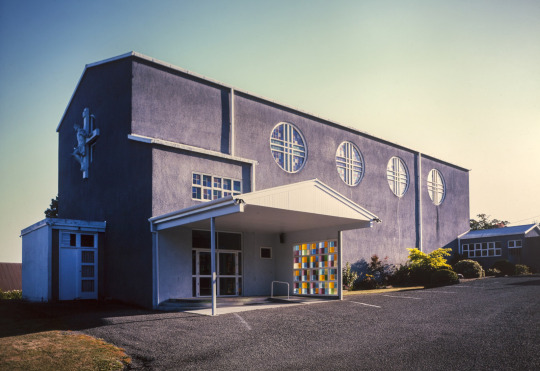
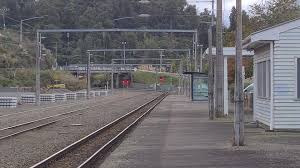

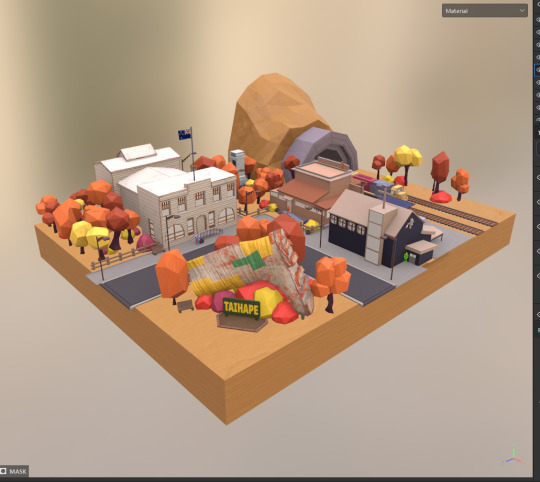
If I wanted to do something closer to home, I could create a diorama of an old NZ goldrush town in economic decline. Using the same themes but basing it on a real location to highlight an aspect of that location. Either celebrating its strengths or exposing its weaknesses, telling the story of the town/location with contextual symbols. Not creating an exact diorama of the location but taking elements that can be found in that location and summing it all up in the project to say something. Example; Taihape in NZ is a seemingly unsuspecting mid-of-nowhere town in the mid-lower reaches of the North Island, a place I have never been too nor have any connection to what-so-ever. However, learning about its history reveals an interesting selection of ideas and locations to pull from. First, the town during its heyday was a center for Rail Works and has a dedicated train station. Second, during an economic downturn in the 1980s, the town became the “gumboot capitol” to rebrand itself and attract tourism as the rail industry crashed and burned. Finally, it has a historic church and a strong religious history. It’s a modern-day rural town in economic decline, so taking those ideas of fall, making everything look worn, but also taking its landmarks (the church, the gumboot statue, the railways, and some other rural flavour) and putting them into one diorama both celebrates the town’s history and comments on its economic decline symbolically. Making the rails worn and warped, the boot rusty, and the paint of the town hall and church chipped and grimy. The theme would be decay.
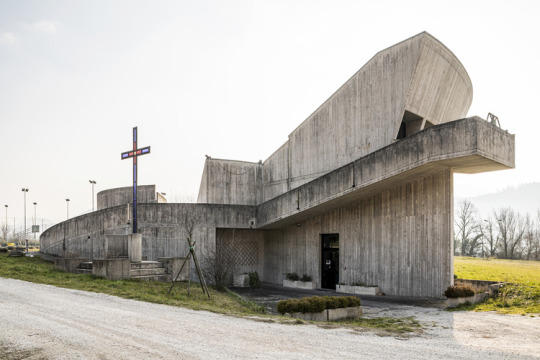
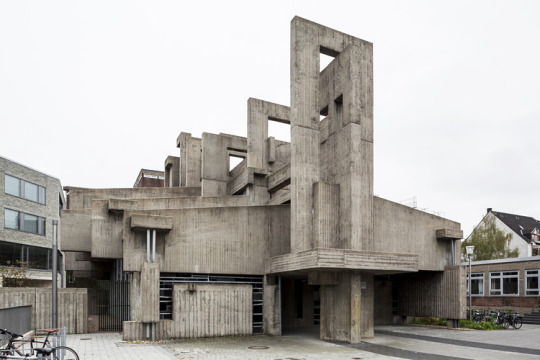
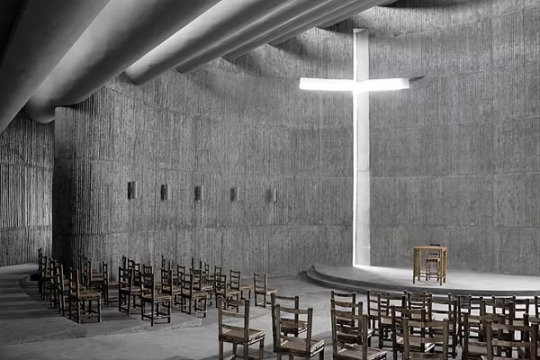
There’s also a less subtle and more artsy way to approach the same ideas. Though crafting a room or a building with more abstract, but visually obvious allusions to the same ideas. Example; Brutalist Churches in Europe. This still shares the theme of decay, but instead of economic decay it’s ideological decay. The virtuous benevolence that Christianity offers is offset by the brutalist architecture which offers a more authoritarian vision of the faith. It’s an interesting contrast, I think.
An interesting way to use this is through creating a large diorama of a city split into layers based on class, where the lowest class people live at the lowest layer, and then the layers build up with income until it gets to the top where there is a large brutalist church building. It would also reflect the layers of hell, further building on the religious aspects while keeping those authoritarian theocracy elements with a clear class system where the ultimate benefactor is God, or the people who profit off God.
A more reasonable idea would be to create a room. A room, be it a bedroom or another room the space has a lot of potential for storytelling. Example; Old forensic dioramas.
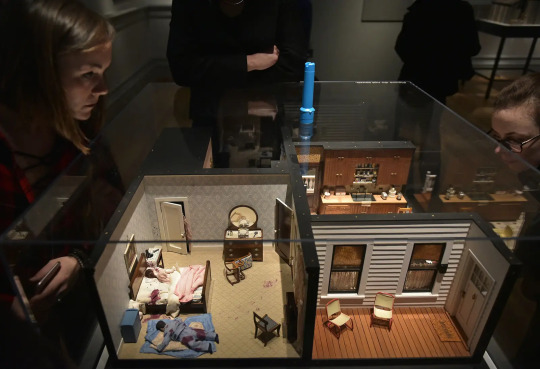
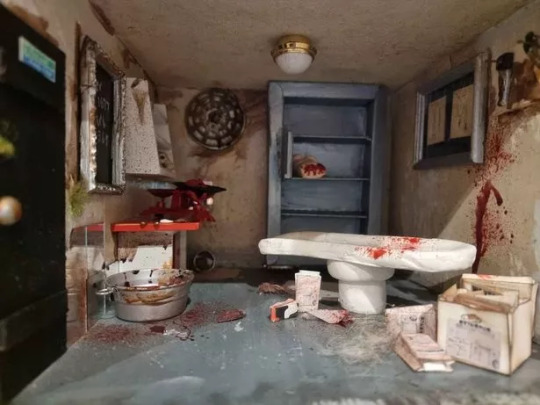
Annie Morrison was a Woman who made dioramas depicting murder scenes to help cops and forensics students identify possible murder methods, suicide methods, and accidental death. I think taking this idea and turning into a mystery room where the viewer must discover what occurred rather than it being obvious allows for some fun modelling opportunities.
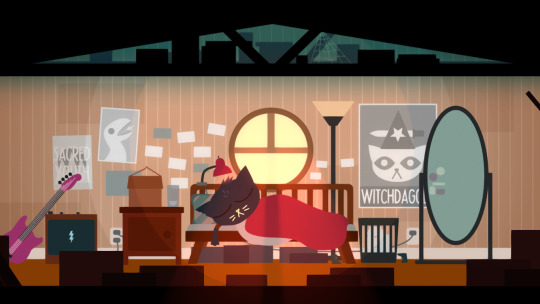
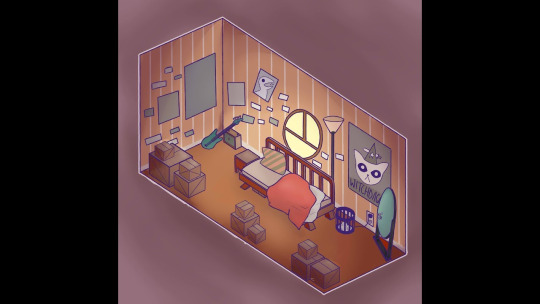
Building a simplistic room that gives a general idea of the person who lives in it would be a very easy and effective way to go for storytelling. A room being a bunch of assorted objects in a confined space, placement wouldn’t be nearly as hard. In this example, Mae, the NITW protagonist lives in an attic in her parent’s house, is a bassist in a band with her friends, just moved back into her parents' house, and is incredibly unorganized, oh yeah, and she’s a cat creature.
Morgan's Feedback: "Some great Ideation here Jack. I think the rust belt idea but set in NZ has real promise. We have lots of great small towns which could easily be turned into a diorama. Visualising the town as abandoned could be a lot of fun!"
TOWN SELECTION POSSIBILITIES:
Taihape, already researched, interesting landmarks and history, looks nice.
Milton, I've been there, storied history of rail, has one large landmark church, misery.
Twizel, I've been there and enjoyed it, small and quaint, long history with fishing, not many landmarks.
Bluff, very unique and has many landmarks, landmarks are quite simple to model.
Something I learned when doing this is that there are lots of small towns in NZ, and a lot of them are a result either the gold rush, some sort of rail town, or a military base was there. As a result, not a lot of them are that interesting, or have any unique landmarks to model. Taihape, the first one I researched, was definitely one of the most interesting ones and closely relates to rust belt town economic struggles in the USA where their main industry (in this case it's rail) dries up and all the workers move to metro areas where employment is more likely. Recently a mill has announced closure, a mill that employed many Taihape residents and since it's announced closure some have moved out already: https://www.rnz.co.nz/news/business/526432/people-already-moving-out-of-town-as-mills-look-to-close-operations. That's why I think I'll model up a compressed version of Taihape's "greatest hits" with those elements of decay and abandonment.
TAIHAPE LANDMARKS:

^this is a collection of places in the Taihape town area that look cool or have historic significance.

^Some smaller bits from the town center.
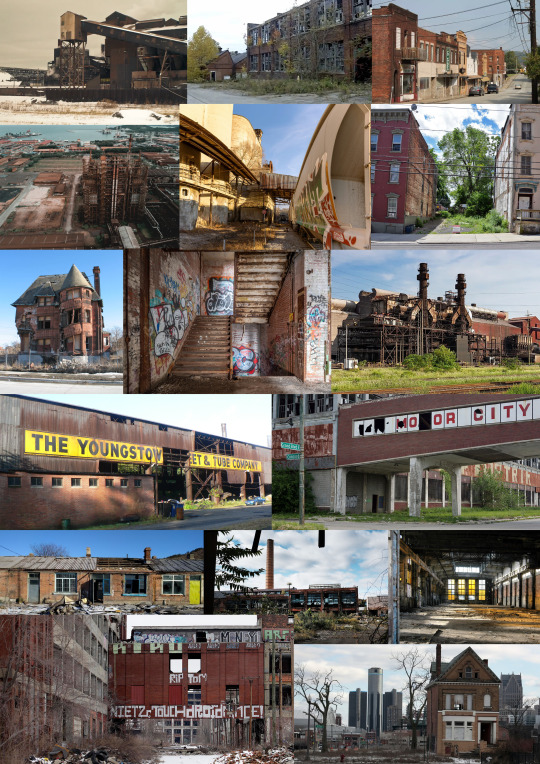
^Some rust belt images to get a sense of what rot and decay looks like within the context of industrial decline. Also colours.
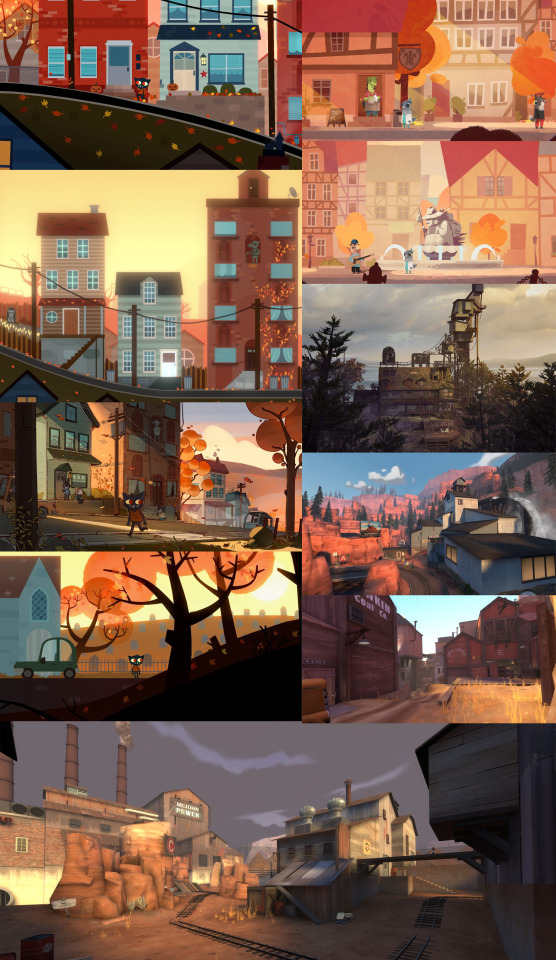
^Games which have a rust belt aesthetic/colour pallet. There really aren't enough games that use this location as a theme in the exact way I'm looking for. The perfect one is easily night in the woods, which makes sense since that game is the main inspiration of this diorama, but looking for 3d games I only really see those simple, industrial models being used in Team Fortress 2 maps.
0 notes
Text
Day 1 Week 3 Pt.2

importing to Substance Painter.
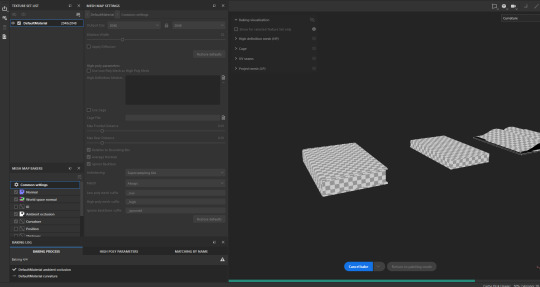
Baking the maps (always the same settings atm).
I've created these folders within folders.
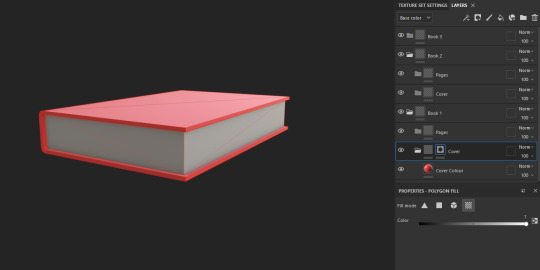

If you drag an image into the layers bar, and set it to a base colour, it adds the image in as a texture. Then, rotate it 90 degrees, set UV warp to none (it's easier), then unlock the tilling to shape it to the right size on the book cover.

Using the triangle poly fill to get these little boarders.
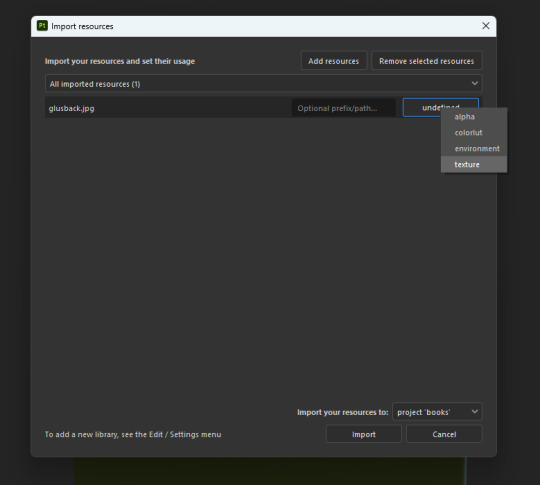
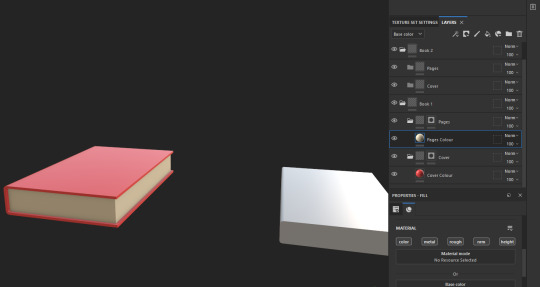
There's also adding textures, I've acquired the book back and am using the file, import setting and defining it as a texture.

Dragging it on I get this. This is more helpful than the settings i got before.


0 notes
Text
Day 1 Week 3
Game art terms
Texel Density - Pixel density of textures in game world. Considering the quality of textures for saving on processing power.
Texture Atluses - Unwrap multiple separate objects into one texture. Like a clown car.
Now I'm going to make some texture atluses. Also remember that our substance painter textures are 2048 x 2048 pixels, or 2k.
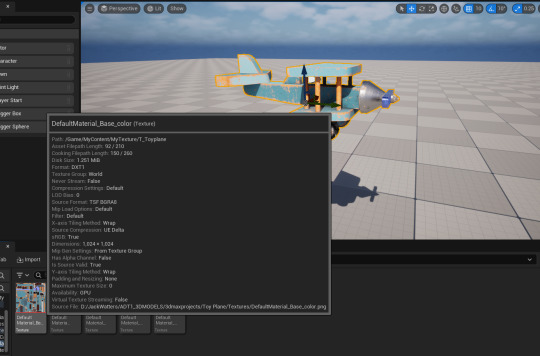
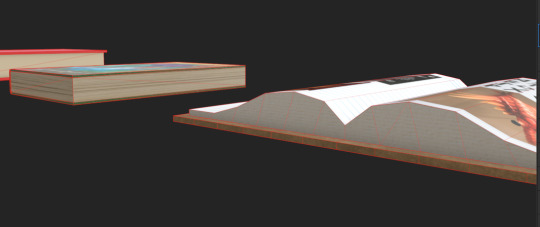
Because of this large resolution the disk size for the textures are going to take a lot of space, especially for an object of this small size (plane). The rule of thumb is 256 pixels per meter.
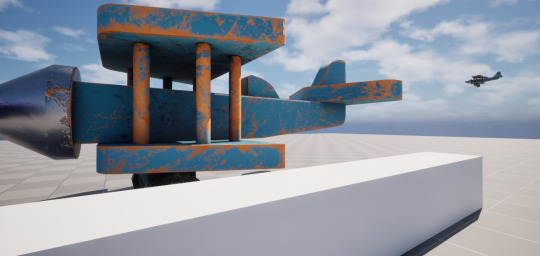
According to this rule, the plane should be about this large, a whole lot larger than the original toy plane.
And even if this were the size it's meant to be we can still see the limitations of 2k at this size. This is a fine quality for an object the player might run past, but if the plane were a hero object (important object the player has to inspect), the resolution should be a whole lot higher. This means the rule doesn't always apply specifically to hero objects, it's about resource management.
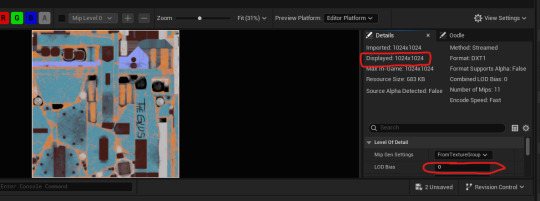

As you can see changing the LOD bias changes the resolution of the specific texture and the size of the file. I'm going to set all these textures to 2.
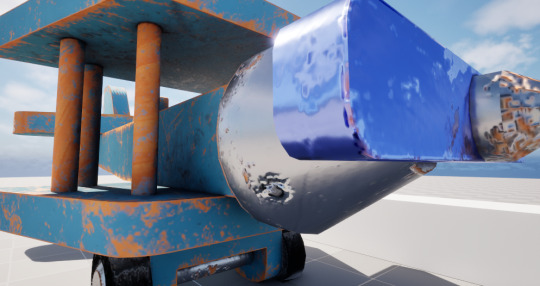
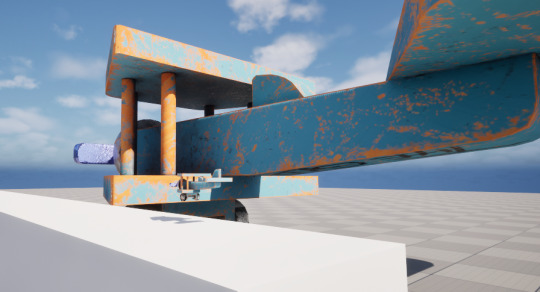
Here's the after of changing all the settings, the texel density has been reduced. We can see the big plane has suffered a lot, but the small one has barely changed.
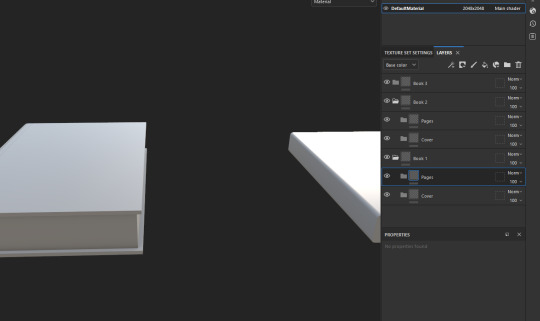
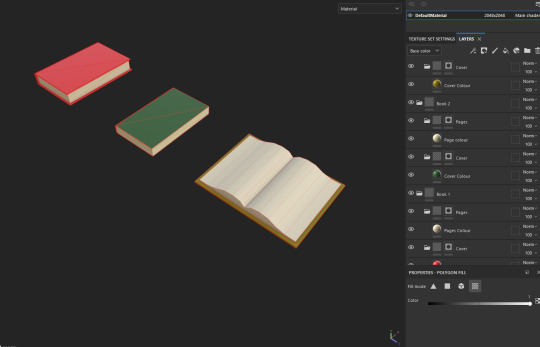
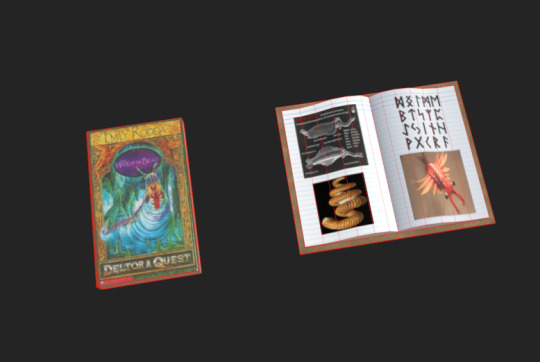
To study texture atlases, I'm going to be crafting a book.
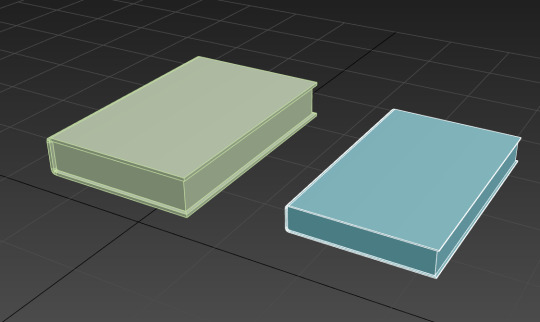
I made two, not cloned one, made two (important).

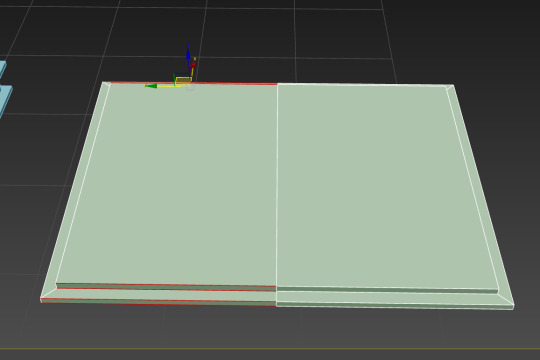


Made an open book.
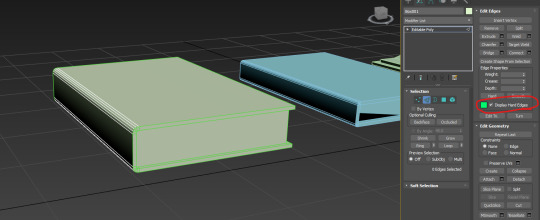

Now check for hard edges, use the hard edge display setting. Making sure all the soft and hard edges are in the right places. Autosmooth all the objects.

Select all of them, then apply the unwrap UVW modifier.
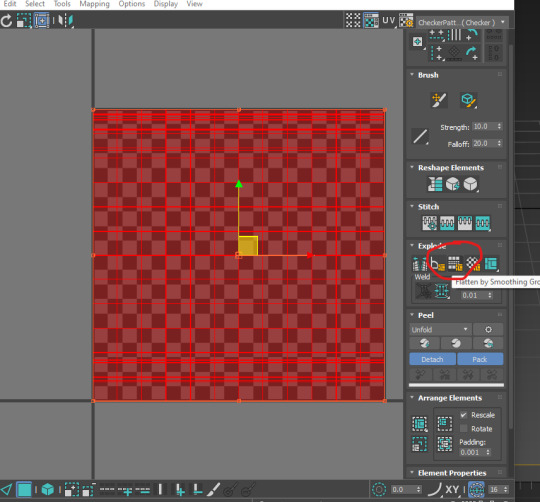

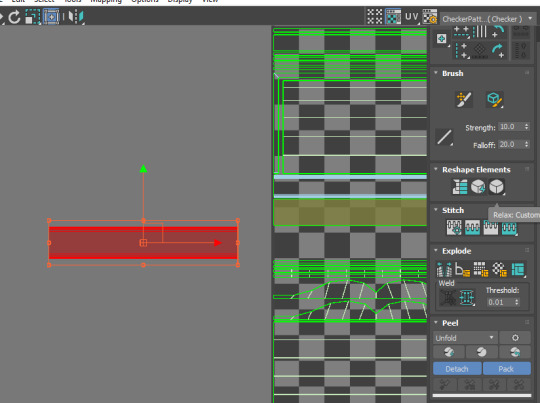
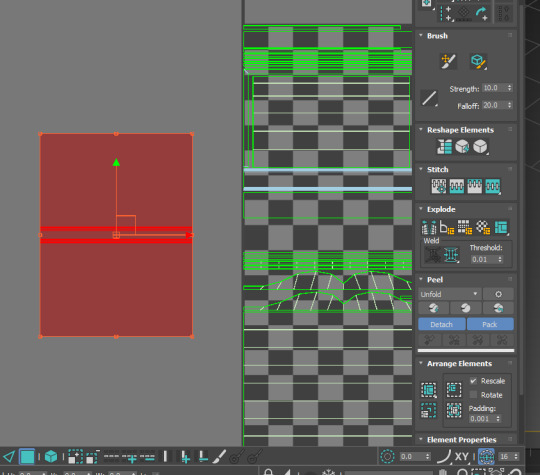

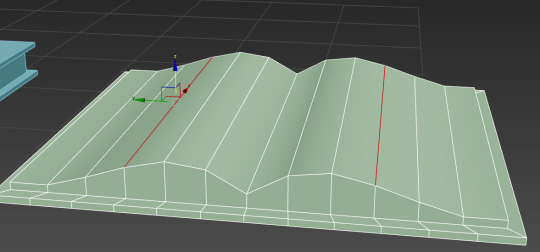
Using the unwrap, I drag out the folded in book face and back, then I click relax to unfold it. Then, with the C shaped bits that connect the underside of the cover to the pages, we drag that out, flatten map it, then stitch it up (might be good to check morg's stream for that, but it only applies to books atm).

Collapsing all.
Space them out for export to substance painter. I actually need to see what I'm doing.
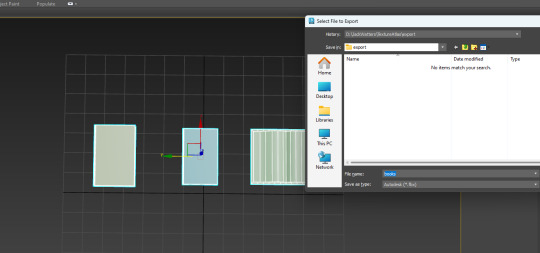
Select them all, then file, export, export selected.
0 notes

Text
Little Car


Crafted the car and separated it's maps n stuff. I made the little circle on the wheel a separate mesh because it's a different texture in the reference.

Ok here's what the final thing looks like, time to slap it in unreal after some other stuff.

Open plane project, then edit the geometry in the export to these settings.

Created a texture folder.

Export the plane as texture, leave all default settings and export. ACTAULLY WIRE IT UP TO THE TEXTURE FOLDER.
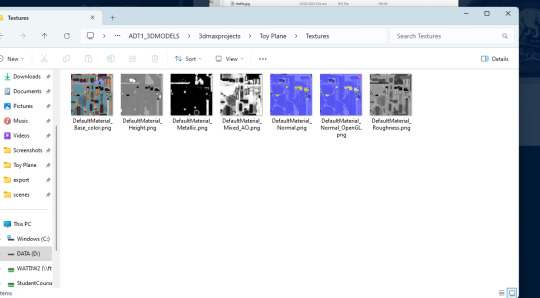
^The Textures.

Opening the unreal engine.


Turn combine meshes on and import on.

turn import materials off.

Turn this setting off.

Do it for all these except the base colour.
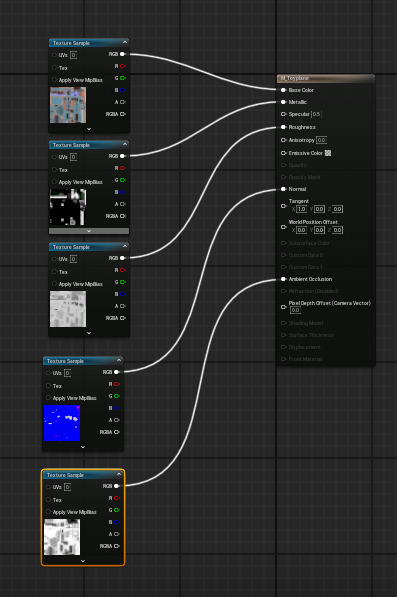
Wiring texture to the material.
TIME TO DO IT FOR DA CAR.

Exporting to a created textures folder in the project.

Exporting in 3ds max using these settings.


Got everything exported with the right settings.

Wired up the textures with excellent organization.

I win.
0 notes
Text
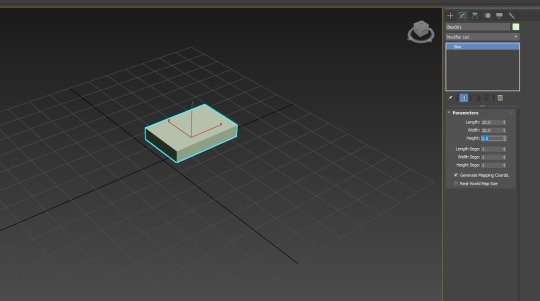
Practice 3 (continued from the spline)
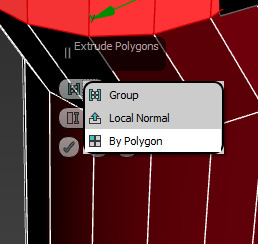
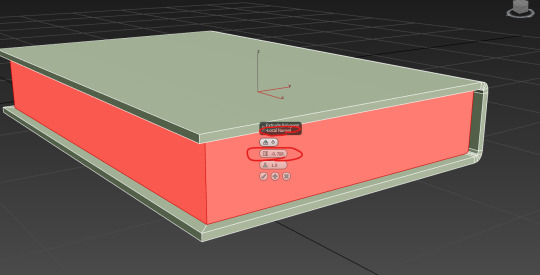
Change the extrude to local normal for this.
That's good.
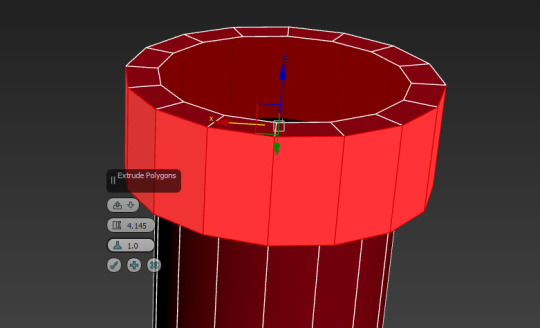
There's no need to chambfer this, we have to be resourceful in game design.
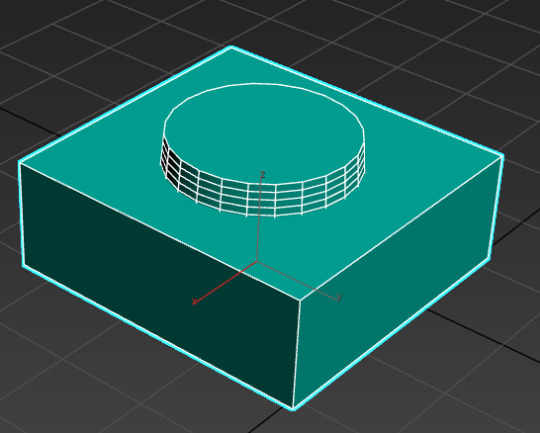
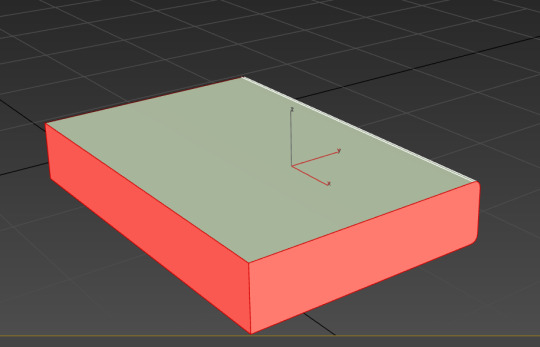
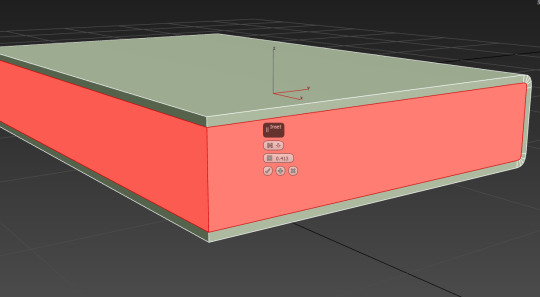
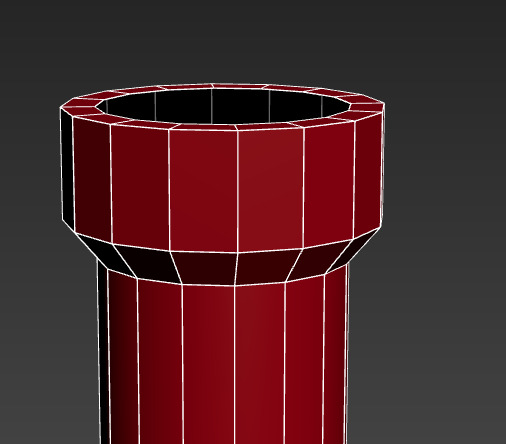
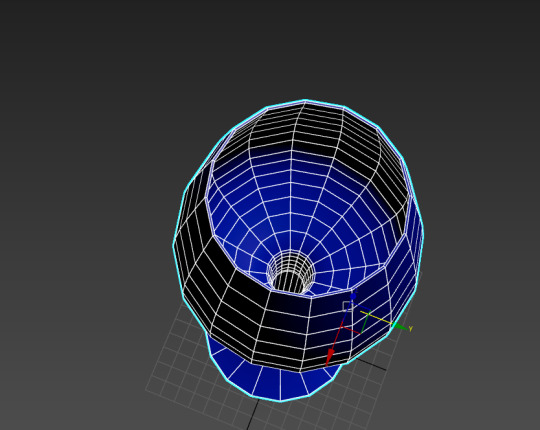
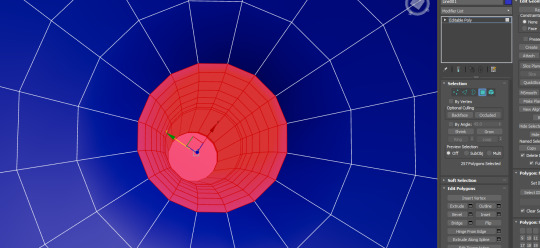
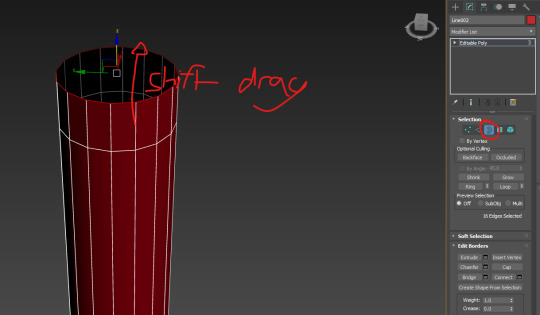
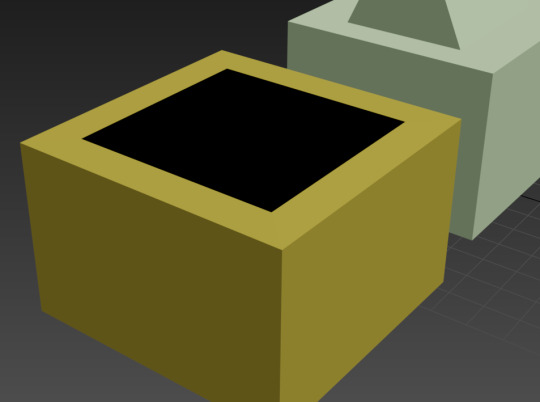
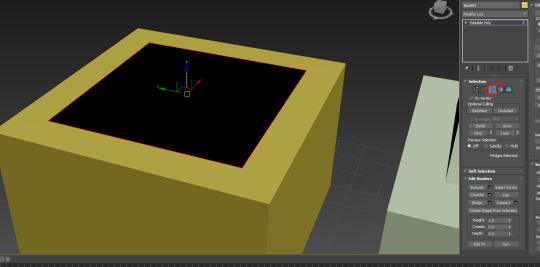
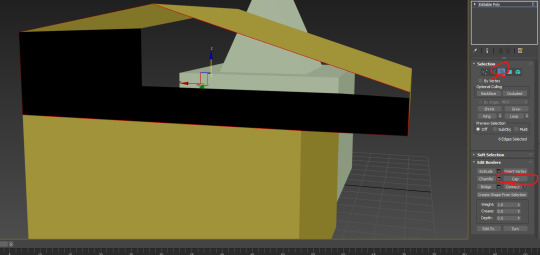
To make it look like it's hollow, grab the border tool, reduce the width of the mouth, then shift drag downwards to create geometry on the inside.

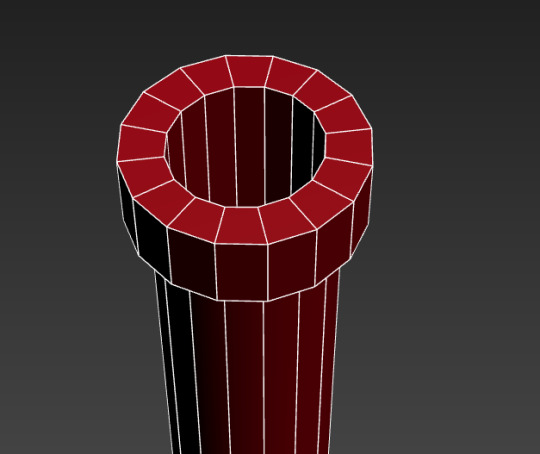
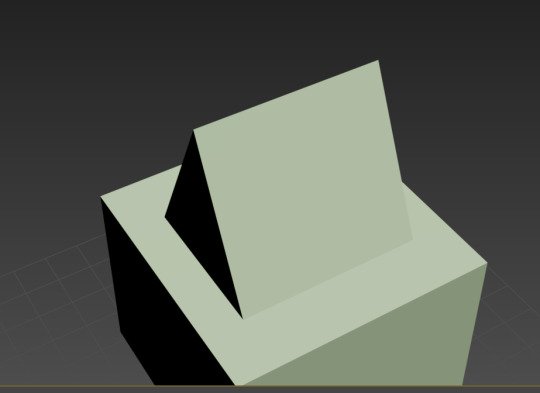
Alternatively you could extrude out a cork using the border tool by extruding upwards then capping, then using the edge tool to create the cork shape. Also used the edge select and smooth tool to smooth out the edges.

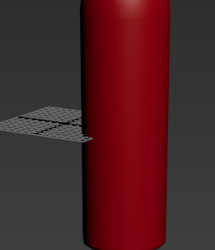
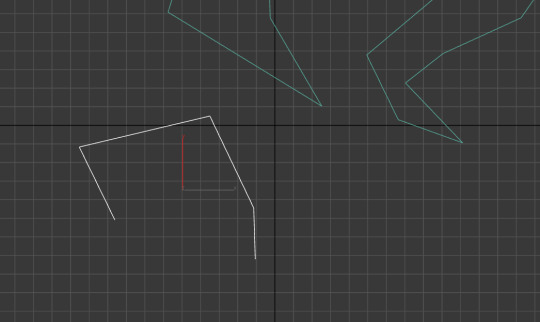
Making an interesting vase out of Flynn's facial side profile.
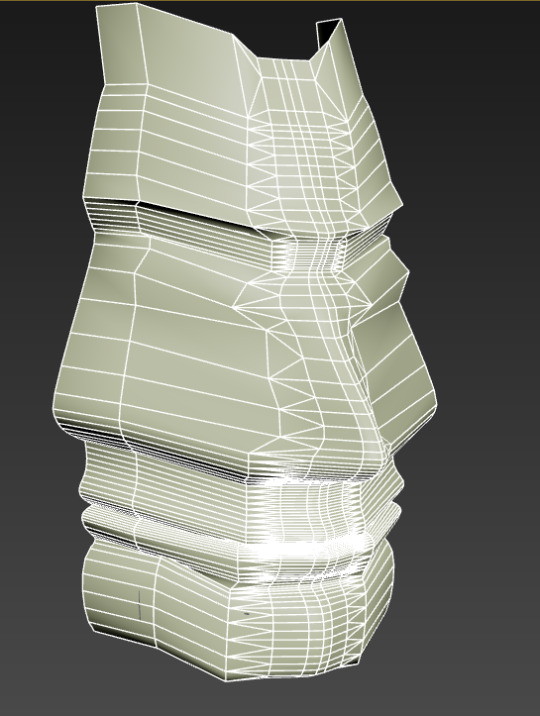

My attempt at creating a face mask like thing.
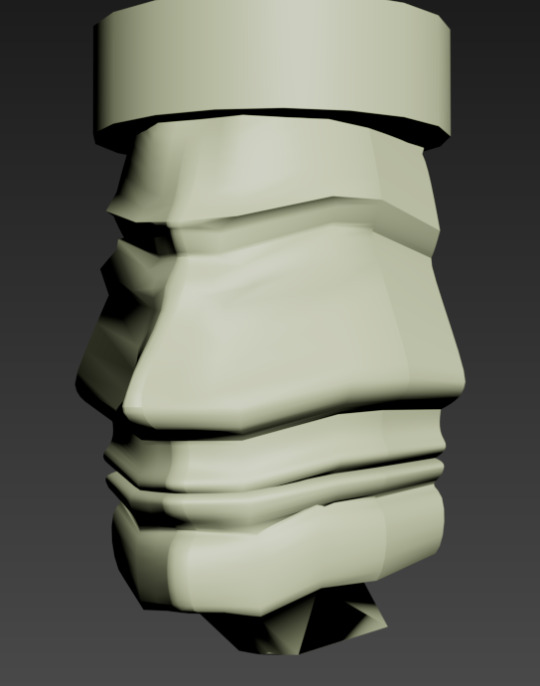
This is supposed to be a Moyai Statue, or something like it.

0 notes
Text
Practice 2 (The Spline)
Terminology:
Cables
Hoses
Pipes
Lathes

Press L, then select the shapes tool.

Create a shape using the line tool. Then close it off.
To end a path I want to keep open, I just right click.

Select enable in view port.
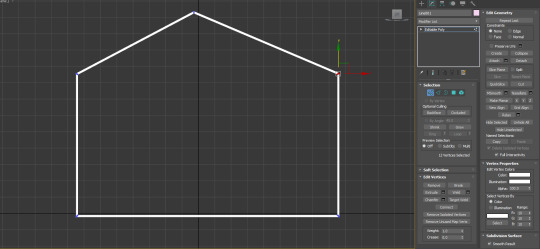
Create a shape and turn it into an editable poly. This allows me to edit it's vertex points.
I can go back into the 3d plane to edit the object.
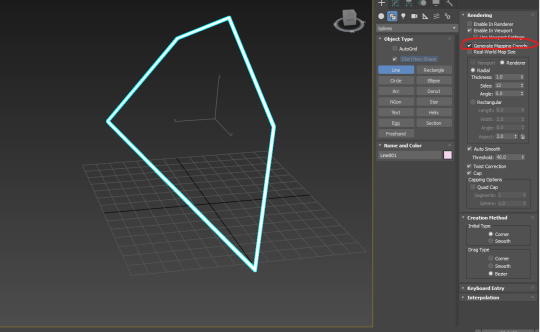
IMPORTANT NOTE: ALWAYS HAVE THIS SETTING ON. IT AUTOMATICALLY UNWRAPS THE PIPE.
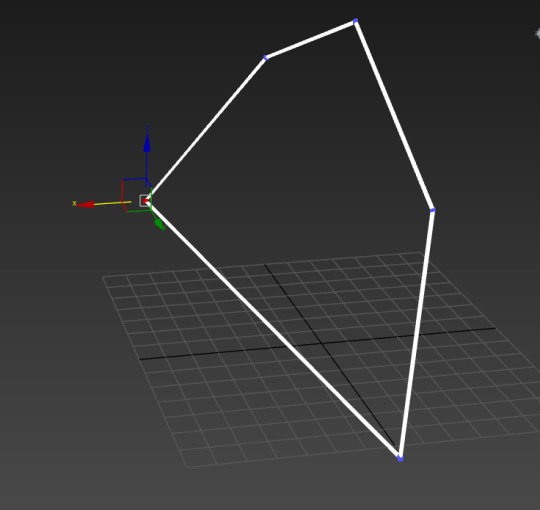
I clicked and dragged to generate curved lines. Also, I switched off the view port setting in rendering so I can see what I'm doing.
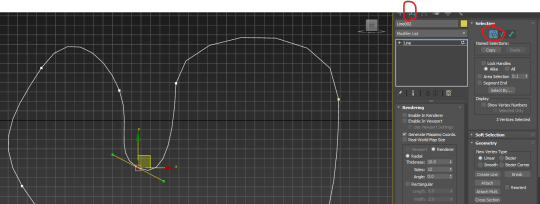
Go to modify and click the vertex tool. Make sure to highlight over the vertex, then click on the middle yellow box, then re-select the vertex to gain full control over the handles.
The line tool is basically the same as the pen tool in illustrator, with a few differences.
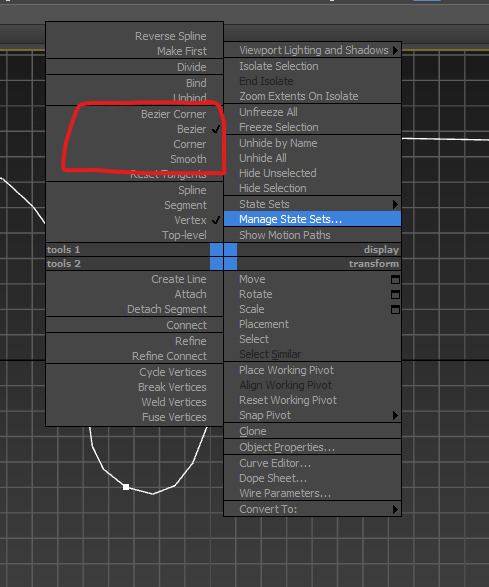
Selecting and right clicking on a vertex allows me to set it's type of corner.

E.g I've set it to Bezier corner. If I want I can change it back to normal Bezier using the right click menu.
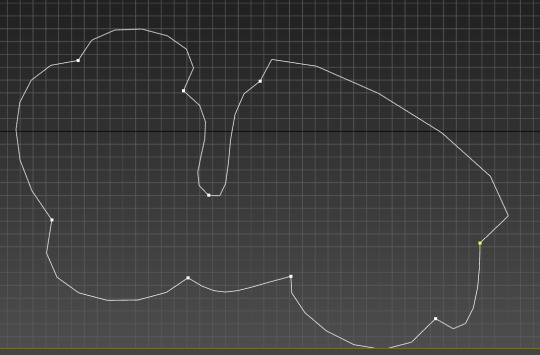
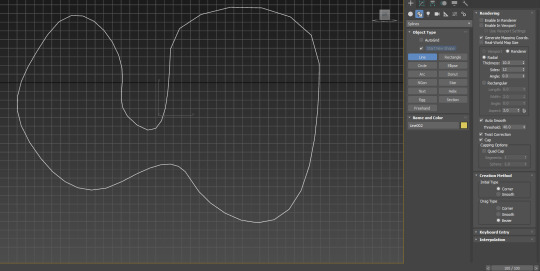
I might create a shape like this.

Use the fillet tool to round off sharp edges too.
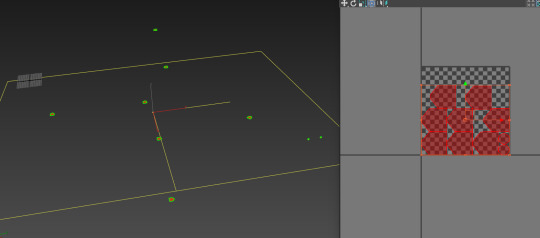
MAKING A WINE GLASS

Making a straight line half of a wine glass.

Adjusting the points in modify mode.
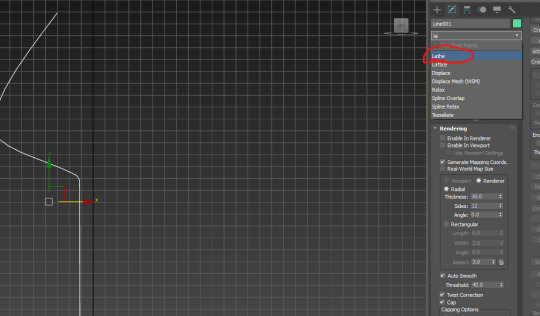
Click on modify and find lathe.

Click on the axis setting and drag out. Flip normals ticked on please.
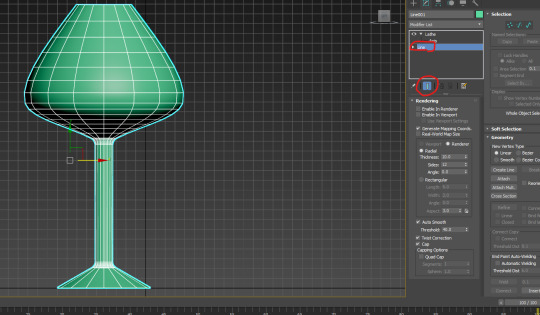
Click back on line, then click this setting which allows me to see the end result.
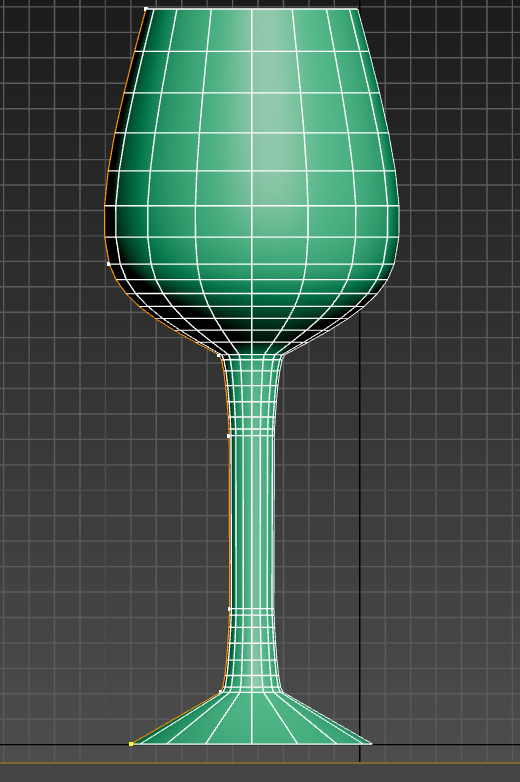
Uncompressing some geometry.
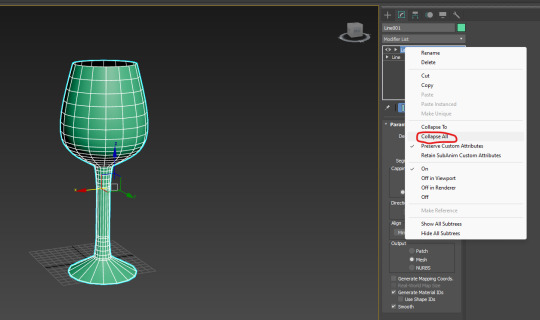
Right click lathe and collapse all to turn the line into an editable poly.
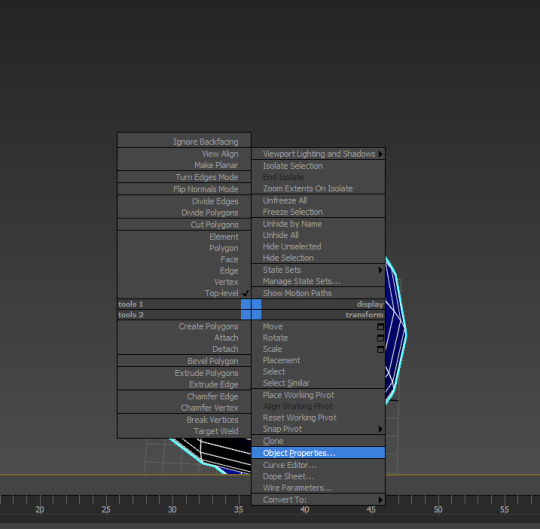

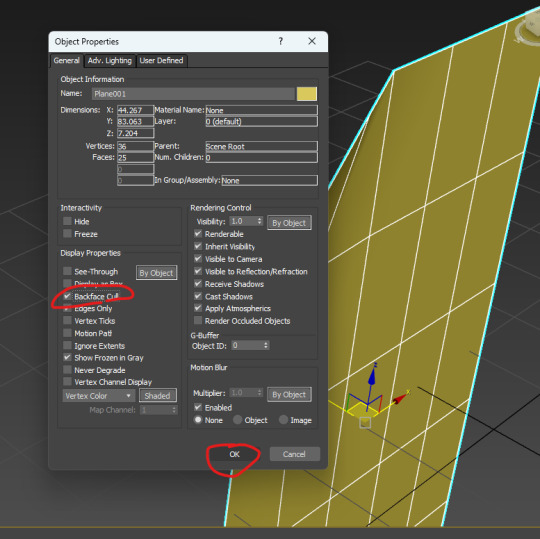
Go to object properties and turn on backface cull (this is what unclosed objects will look like in game.

The Shell modifier adds thickness to a hollow object.

Make sure it comes from inner thickness and not outer thickness.

Cap.
Collapse all, then select the bottom face. Click grow until here, then delete.
Cap the hole.
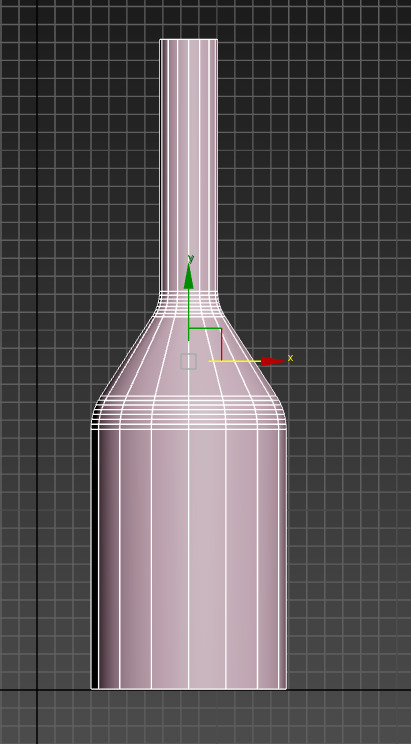
Time to create the wine bottle. I used the line techniques like fillet and holding shift to get a straight line to create this glorious bottle.
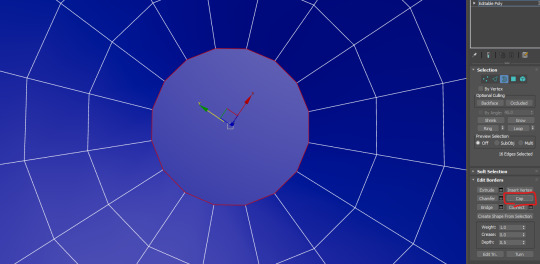
It's time to make a bottle cap, use border tool and then shift drag to create more geometry.
0 notes
Text
Practice 1 (continued from last post)
Now I have this collapsed triangular object.
Made an inset and deleted it.
Using boarder mode you can select the hole.

Clicking cap will re-add the face I deleted.
Using the shrink/grow will allow me to increase/decrease the number of faces I have selected.

I've deleted it again.

Holding shift and dragging on an edge duplicates it and extends the face. You can also use the middle yellow axis to have full control of it's movement.
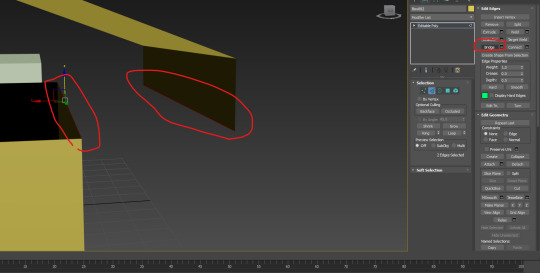
Use the bridge command to connect the two.
Now we've got a hole to cap.

Weird object.

Select bottom and top faces, then inset both at the same time. Afterwards delete the selection.

Now use the edge tool to bridge the gaps.

If it's a single piece then you don't need to extrude. E.g windows on a building, wheels on a car, think of it like constructing lego, except you make the lego pieces.


Turn on open chambfer.
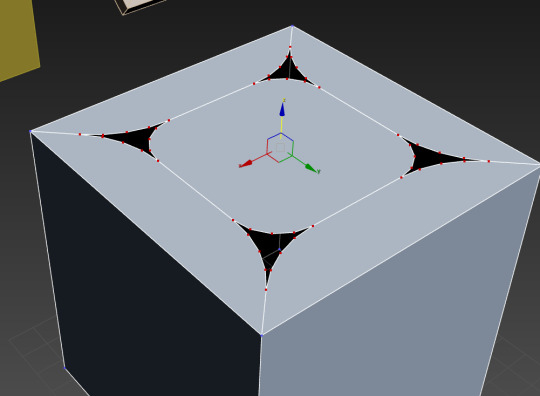

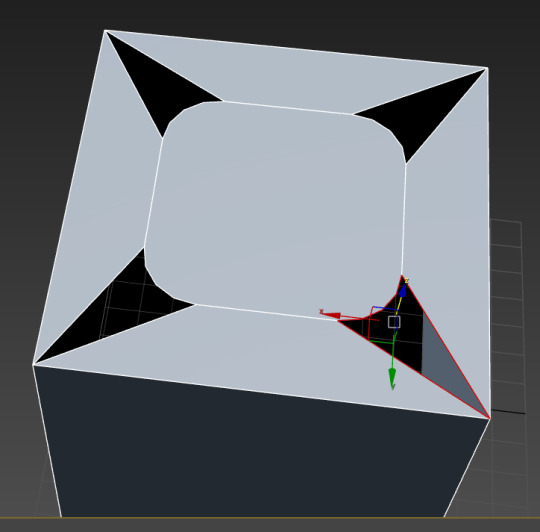
Switch on target weld. This allows me to weld vertexes together.

Weld all those vertexes to the one corner to get rid of them, this makes it easier to fill.
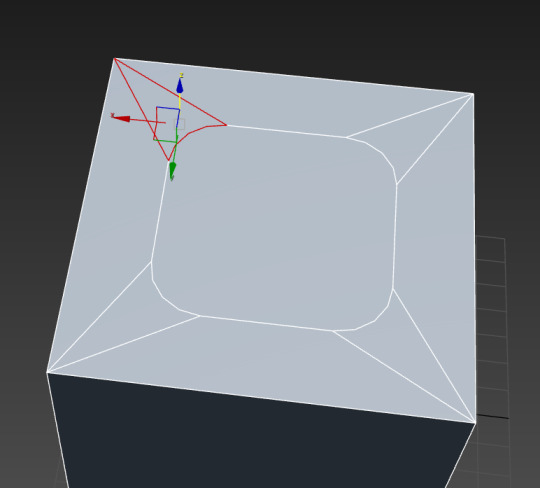
Fill the areas.
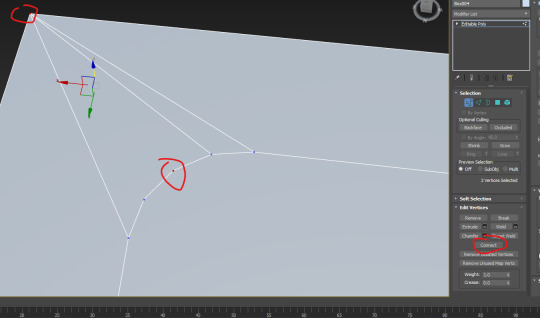
Now I have to connect these vertexes.
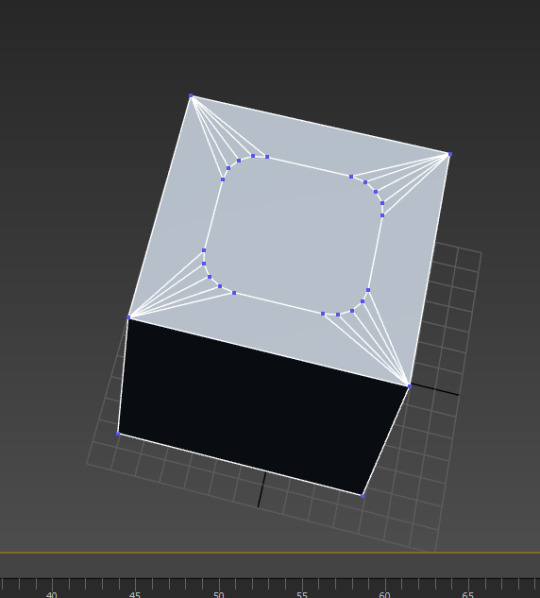
Now we have this shape, which prevents some weird stuff from occurring.

Now I extrude it downwards.

Chambfer the edge to acquire nice geometry.
0 notes