I exist here and make work. Follow me on Instagram: @/trees_fly_
Don't wanna be here? Send us removal request.
Text


Aloy and Varl… in my dining room??
•
•
•
#I can’t believe they made these#poor varl#you won’t believe it they called him multicolor on Amazon I can’t#I want to try and animate with this but her hair keeps falling out of her head#i unironically love it#this took so long to get her to balance but it’s here!#bro her bow actually works#I’m so glad they gave varl his beard#horizon forbidden west#hfw#hfw toys#hfw figurines
16 notes
·
View notes
Text
Aloy Animation - Behind the Scenes!
Hi all! I wanted to give a break down of how I completed my recent animation :)
The program I used was Procreate. (Most, if not all, of this was made entirely on my iPad at work when there was downtime lol).
-=-=-=-=-=-=-=-=-=-=-=-=-
-=-=-=-=-=-=-=-=-=-=-=-=-
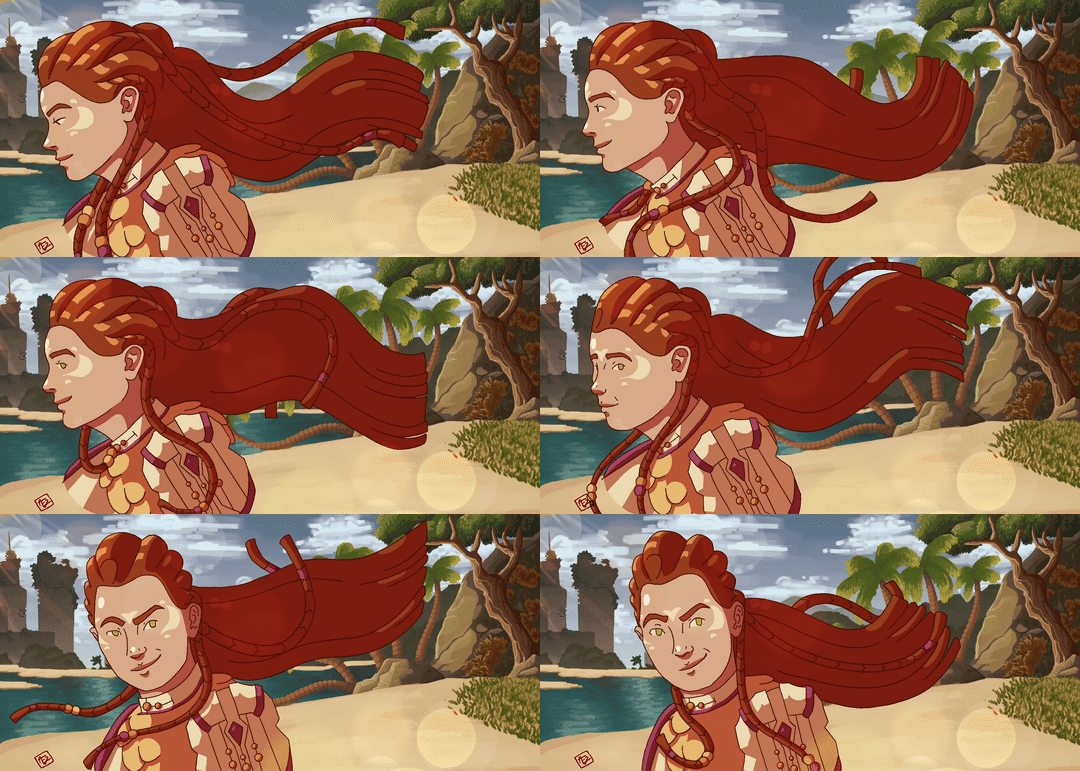
Here is the recent animation. This tiny clip doesn't look like much. Originally, this was just going to be a quick and simple exercise to help me understand each step of the animation process better... But uh, well, nearly four months later, here we are!
-=-=-=-=-=-=-=-=-=-=-=-=-
Roughs -=-=-=-=-=-=-=-
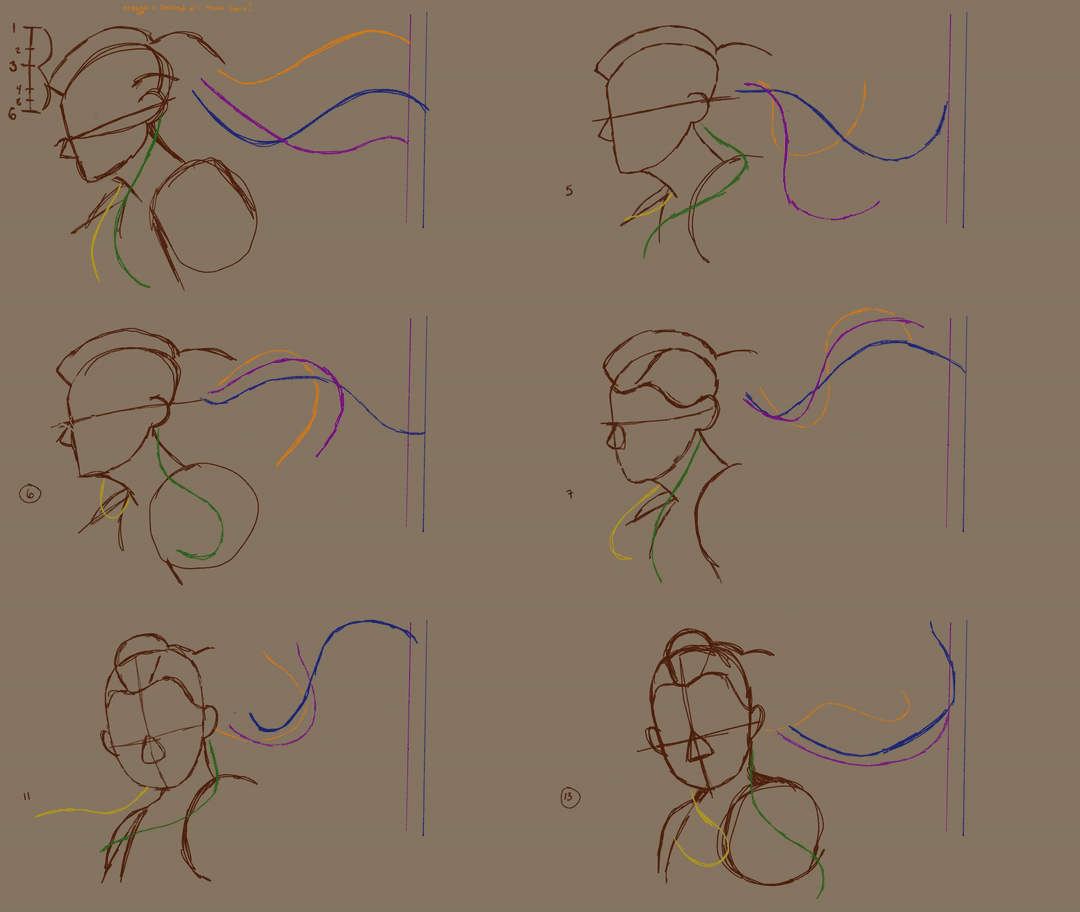
I started with really rough shapes. Like really rough shapes. I only wanted to make sure the general timing of each action worked. Once I felt good about the timing, I added what I called "hair worms". Four represent each one of her braids, and one for her giant mass of hair. Aloy typically has at least 6 braids in the front and two in the back, but I ended up only doing 4 total as part of simplifying her design.
Now what is the flashing bar of numbers you may ask? Those are my fancy-shmancy timing charts! They only appear at the beginning key frame of each big movement. I mainly use them as a way to keep notes about what I wanted to add and what to look out for as I progressed. But for the actual timing, I simply acted out the movements, and then guessed how many frames it was (I know, not a very good way to time things ahah. Really, you're supposed to use a stopwatch to time yourself acting it out and then calculate the frames that way, but alas, I just counted out the frames on my fingers lol).
I was animating in twos at 24 fps the entire time, so I aimed for a low amount of frames to start with, and then added more as needed until the motion felt right.
-=-=-=-=-=-=-=-=-=-=-=-=-
2. Basic Shapes -=-=-=-=-=-
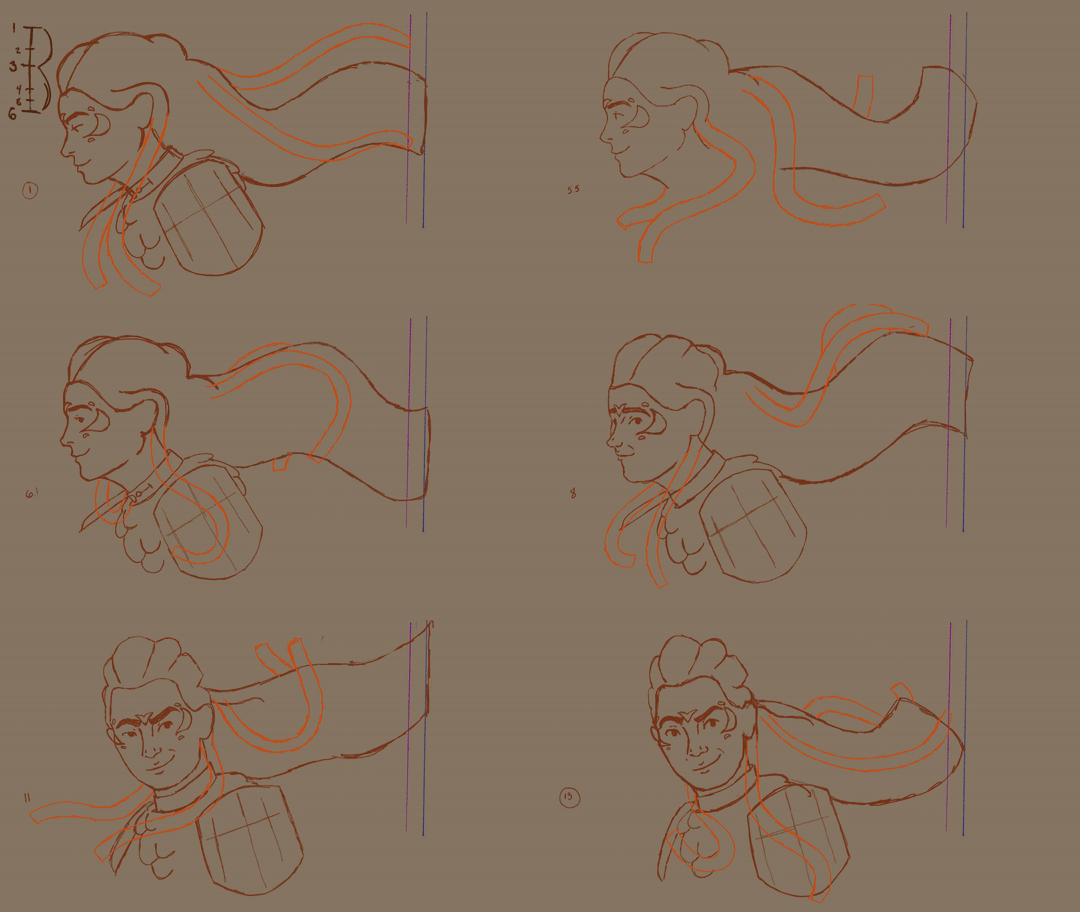
Next, I drew out the basic shapes for her hair, the shoulder guard thingy, and the shell collar. Hair worms begone! They were now upgraded to "hair tubes".
Her face I went a little more detailed with in this pass, mostly because I was so focused on making sure her face kept its proportions while her head turned. You'll see more tweaking and slight changes in the next passover.
This is also where I timed the glance!
-=-=-=-=-=-=-=-=-=-=-=-=-
3. Tie Down =-=-=-=-=-=-=-
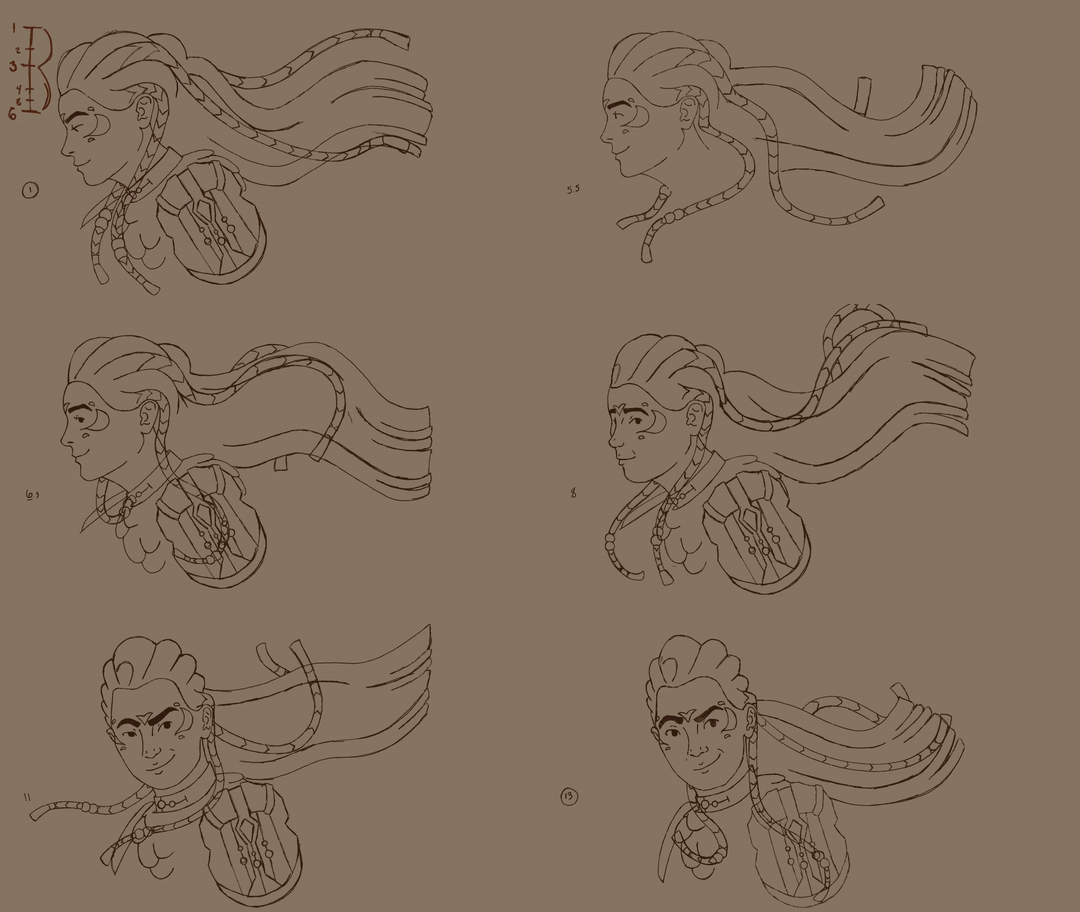
This pass was my super detailed pass. Everything got an upgrade - especially her hair. I also used this pass as a way to tweak the animation so everything stayed consistent while it moved. I did a lot of work on her face and on the shell collar, as they ended up being my biggest contenders for inconsistencies. This pass ended up being my longest part of the animation, taking about nearly 50 hours to do this part alone. But it was all worth it, as it made the clean up stage super streamlined.
-=-=-=-=-=-=-=-=-=-=-=-=-
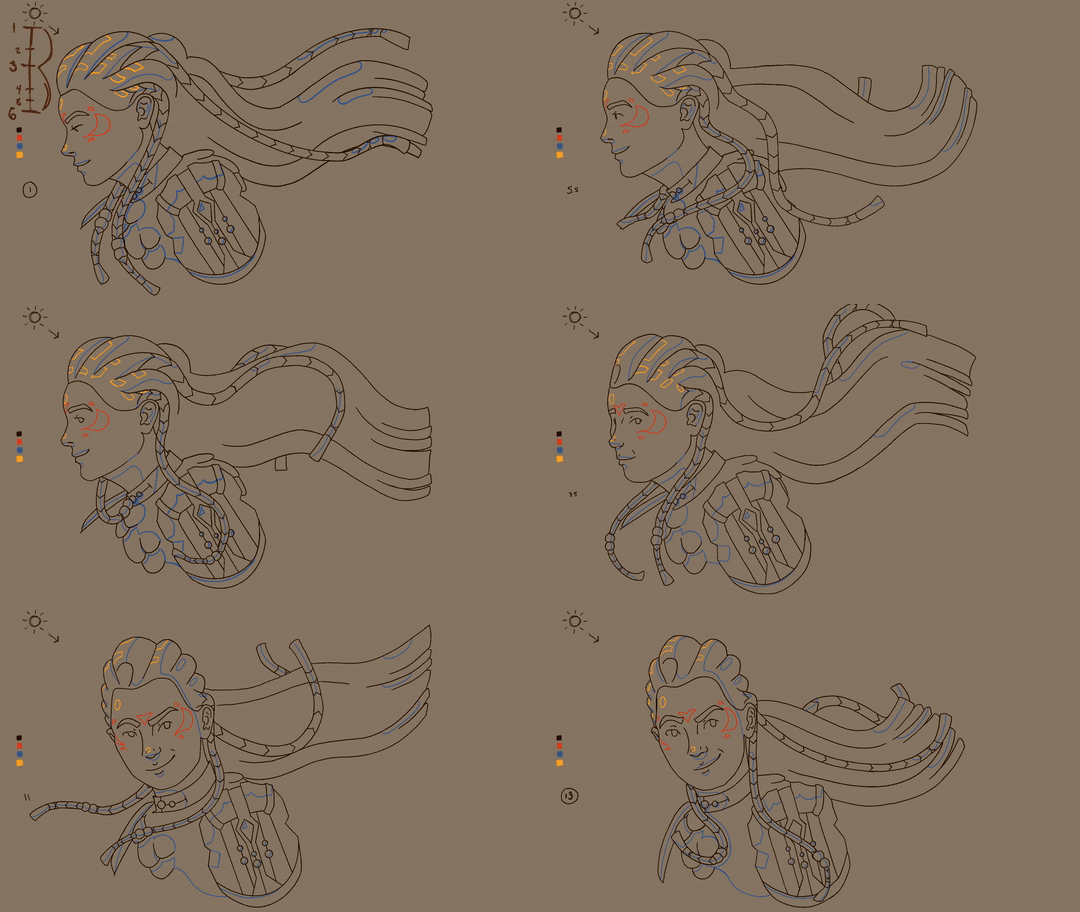
4. Clean Up & Shadow Lines -
Thanks to my previous work in the tie down, this part of the animation was super easy to complete. All I needed to do was trace my keys, then trace my in-betweens. I made some final tweaks to the hair, and most importantly, I added the outlines for where my shadows will be!
-=-=-=-=-=-=-=-=-=-=-=-=-
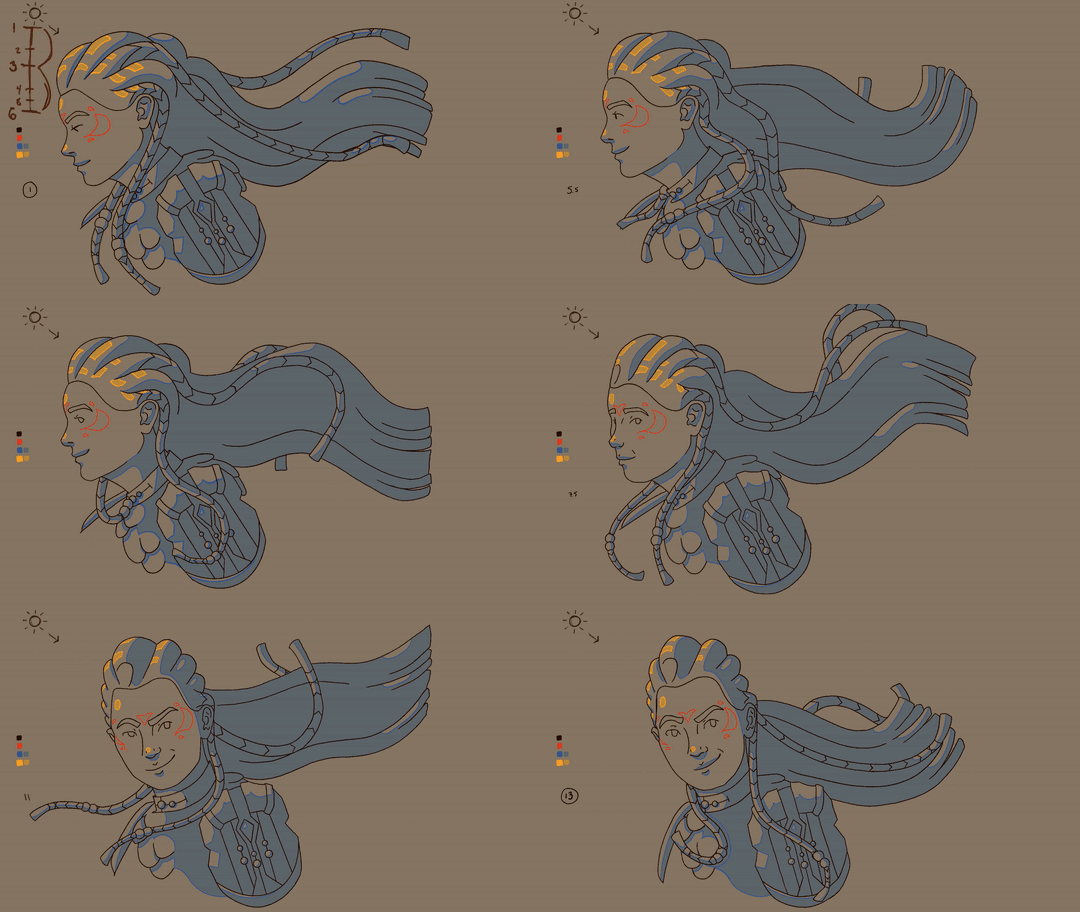
5. Shading Pt. 1 =-=-=-=-=-=-=-
For this pass, I simply filled in my shadows to see how they looked. This really helped solidify my composition. I was worried as I was working on this that the hair would be too busy and that it would distract from her face, which is where I wanted the focus to be. But adding shadows really helped brighten her face, and made her hair blend in a little more to the background.
Filling in my shadows also allowed me to make sure that my lines were all connected for the next part - coloring!
-=-=-=-=-=-=-=-=-=-=-=-=-
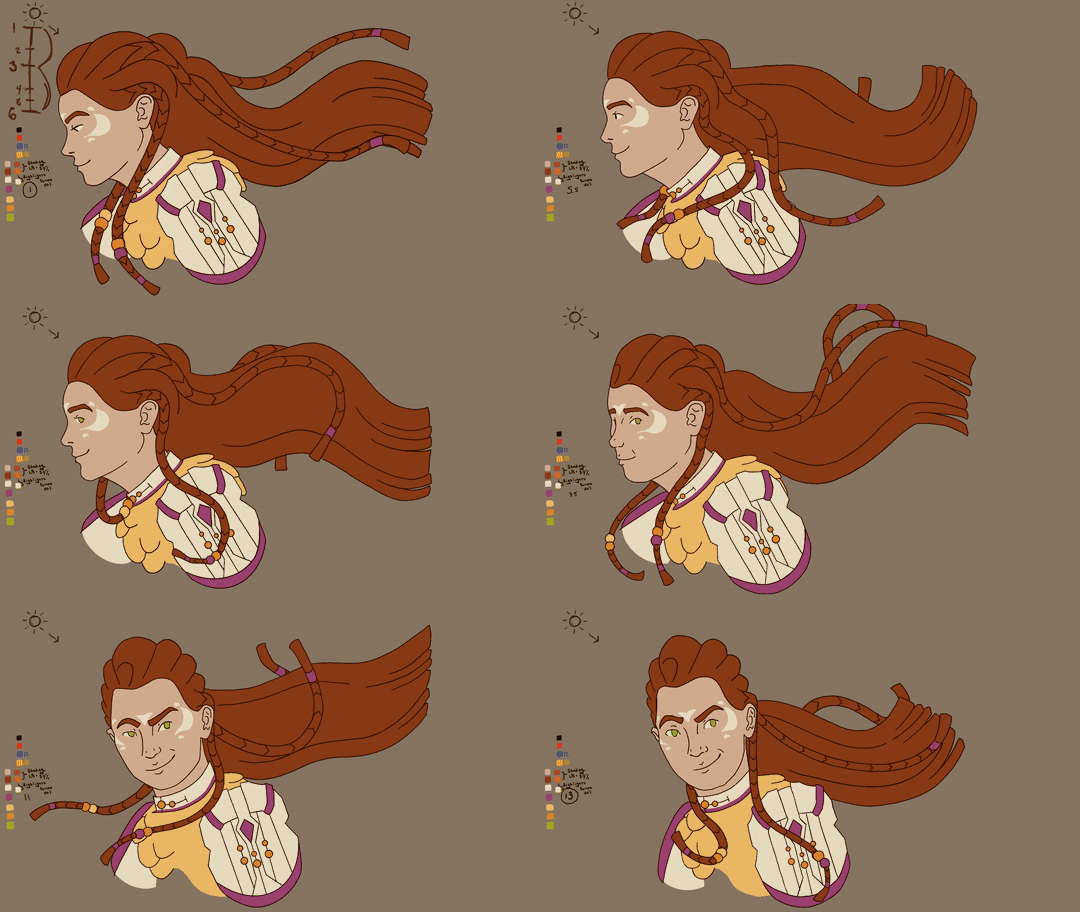
6. Flats =-=-=-=-=-=-=-=-=-
Paint bucket was my best friend during this pass. The only difficult part was simply deciding where the colors would go. Since her design is much more simplified compared to the actual Quen Marine armor, I made a few artistic liberties in making sure the colors don't blend in. For example, the shell collar in game has a very similar off white color to the shoulder pads, however, what sets them apart is the purple negative space underneath all the shells where the netting tying them all together is. I didn't include that negative space, so to compensate, I added a purple line at the base of the collar around her neck, and made the shells yellow instead of white.
-=-=-=-=-=-=-=-=-=-=-=-=-
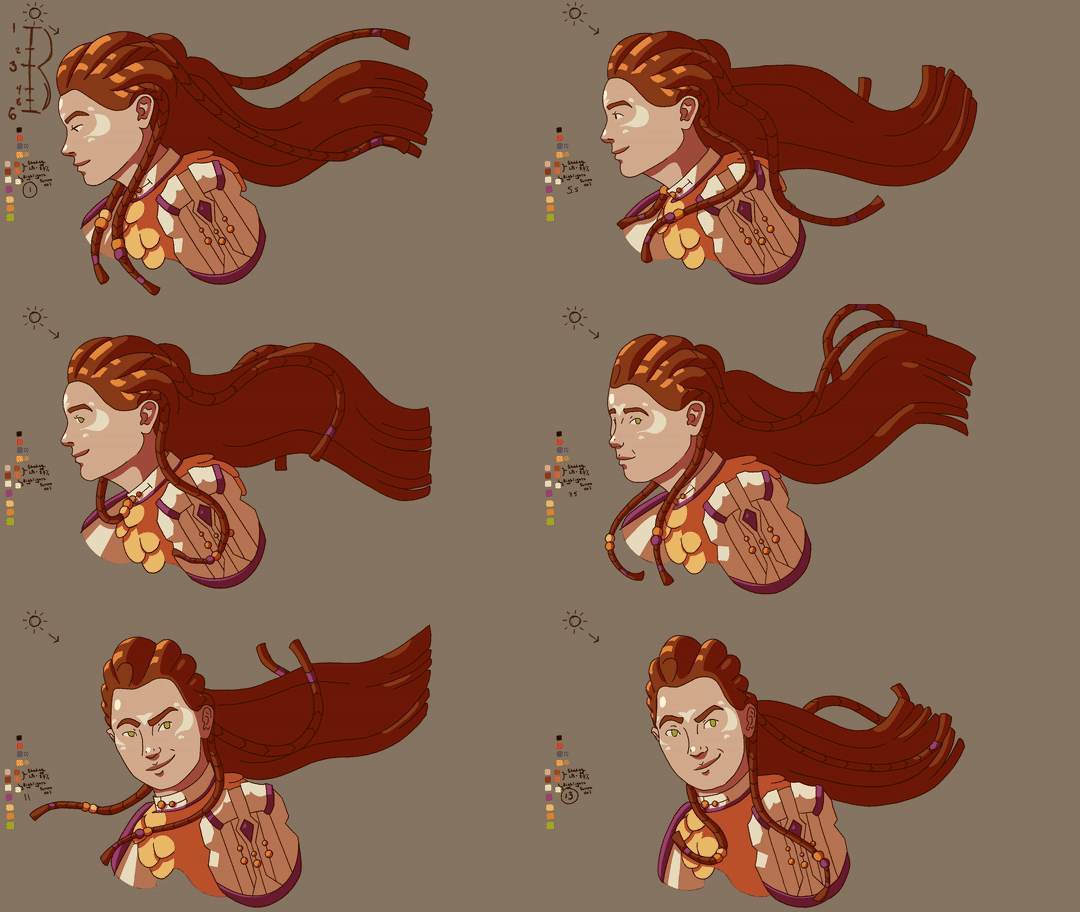
7. Shading Pt. 2 =-=-=-=-=-=-
This shading is the last thing I did to the actual animation. The shadows, the flat colors, and the highlights were all done on separate layers. I ended up duplicating the line art three times for each frame, and then filled in the shadows and highlights using the shadow lines from before. This made adding the shadows so much easier, since I had already animated the shadows beforehand.
-=-=-=-=-=-=-=-=-=-=-=-=-
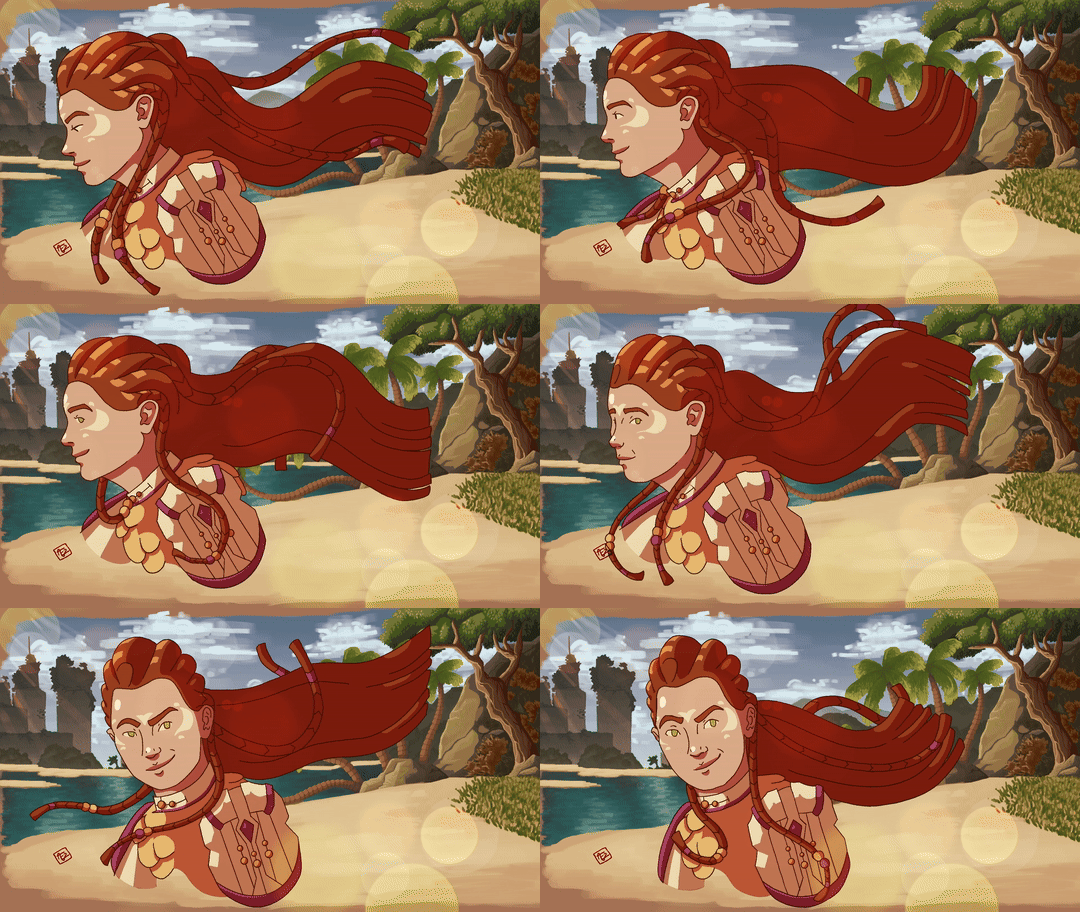
8. Background and Color Correction
Finally! It is done! The last thing I had to do was add a background and be done! Right? ...right? Well, the background took an additional 20 hours to do. I ended up painting it based off of a screen cap from the Burning Shores. I'm not used to drawing backgrounds at all, and struggled to simplify the distant objects. In the end, half of it ended up being covered by Aloy anyways, but that's okay! I learned a lot about backgrounds and I'm excited to try this style again!
I followed a great tutorial by Olof Storm on Youtube. I highly recommend you check him out! Here's the tutorial if you're interested in trying it yourself! x
Anyways, I hope you all enjoyed my break down into how I made this piece. I'm very proud of it, and I hope to make more animations with Aloy in the future!
Thank you for reading my very long post!
-AE2
#horizon zero dawn#horizon forbidden west#animation#2d animation#hand drawn animation#breakdown#behind the scenes#not layer limits causing me to duplicate my file every time I ran out of layers aaaaaahhhhhhh
15 notes
·
View notes
Text
A gentle breeze as she looks towards the wind…
•
•
•
Hi all! This took me over 100 hours to complete. Stay tuned for a behind the scenes look!!
#horizon forbidden west#horizon zero dawn#aloy#aloy despite the nora#animation#hand drawn animation#2d animation
263 notes
·
View notes