Don't wanna be here? Send us removal request.
Statistics
We looked inside some of the posts by alternateesource-blog and here's what we found interesting.
Average Info
Notes Per Post
0
Likes Per Post
0
Reblog Per Post
0
Reply Per Post
0
Time Between Posts
2 months
Number of Posts By Type
Photo
4
Link
3
Text
1
Last Seen Tumblr Blogs


Fun Fact
In Q3 of 2020, 31% of US users access the Tumblr app daily.
Photo

Capturing a view with Every Door opening and Closing -do you need security? call us to assist in the best technology available.
0 notes

Photo

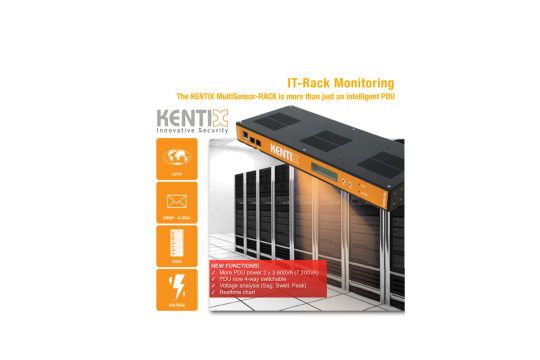
call on one dashboard -know all conditions and in all areas of distributed sensors one place to see alerts in real time. Add IP cameras for video capture and alerting - ingenious !
0 notes
Photo

Monitoring Room Conditions and Door Access -7x24 -alerts to you when needed
0 notes

Text
Solar Winds and Kentix together!
Matt Soper/ Tanja Lewit June 5, 2018
This article will walk you through adding the Kentix Black Box Multi-Sensor Temperature and/or Humidity sensor to SolarWinds NPM. Additionally, you will be able to add other sensors to monitor if you have the OID of the sensor you wish to monitor.
We will assume you have downloaded the Kentix Control Center via Web Interface and have networking set up.
The Kentix dashboard, and are monitoring real time. Lets now send the information to Solar Winds-
we are know (easily) adding the physical aspects of monitoring our IT space.
Kentix Black Box Downloads and Manuals
Step 1: Enable SNMP
1. Launch the Kentix Control Center software and login. Navigate to Email, SNMP & GSM, you will see window on the right “SNMP Monitoring”.
2. Click in the box for “SNMP public community”, delete the default “public” string and enter new string name to something unique.
SNMP_1.pngSNMP_2.png
3. Click the icon to “Save” the new settings
Kentix_Save_settings.png
Step 2: Add Kentix Black Box in SolarWinds
1. Sign into SolarWinds, go to Settings, Manage Nodes, Add Node
2. Fill in the IP and SNMP community string that you just set from above steps
3. Click Next, then “OK, Add Node”
Your Kentix Black Box has now been added to SolarWinds and is monitoring ping. Next we will Create UnDP for the Temperature/Humidity Sensor.
Step 3: Adding Humidity and/or Temperature sensor in SolarWinds
1. Log into your SolarWinds NPM server and launch Orion Universal Device Poller
2. On the top menu bar click “New Universal Device Poller”
Kentix_1.png 3. Enter OID for the sensor you want to add, adjust settings to match below screenshot, then click Next
Temperature Sensor OID = 1.3.6.1.4.1.37954.1.2.2.2 Humidity Sensor OID = 1.3.6.1.4.1.37954.1.2.2.3 TempSensorAddOID.png
5. Select Node you want to assign the Custom Poller to, click test to confirm it is working, then click Next
Kentix_Assign.png
6. Leave the default setting “Use interface names from Orion”, then click Next
Kentix_Label.png
7. Change this selection to No and click Finish.
(The TempSensor is in Celsius so we will be defining a “Transform Results” to convert to fahrenheit and will display that in SolarWinds)
TempSensorWebDisplay.png
Step 4: Transform TempSensor Results from Celsius to Fahrenheit and Display in SolarWinds
1. Login into your SolarWinds NPM server and launch Orion Universal Device Poller
2. Select “Transform Results”
TransformResults.png
3. Click Next
TransformResults2.png
4. Enter Transform Results name “TempSensorFahrenheit”, match all the below settings, click Next
DefineTransformResults.png
5. Click Add Function and select “Celsius to Fahrenheit”
6. Click Add Poller and select “TempSensor”, make sure the Poller is inside the Functions Parentheses
7. Add /10 outside the } of the Poller to convert to decimal value, click Next
TempSensorFahrenheitTransformResults_Function.pngTempSensorFahrenheitTransformResults_Poller.png
8. Select Node you want to assign this Transform Results to, click test to confirm, then Next
TempSensorFahrenheitAssign.png
9. Leave Labels set to default option “Use interface names from Orion”, click Next
TempSensorFahrenheitLabels.png
10. Select Gauge and/or Chart, this will be displayed on the Node Details Summary page, then click Finish
TempSensorFahrenheitWebDisplay.png
TempSensorFahrenheitChart.pngTempSensorFahrenheitGauge.png
You are now monitoring your Kentix Black Box Temperature Sensor, if you want to add another sensor repeat Step 3. You will need to create Transform Results based on the sensor you add.
0 notes