
amandaryanhnd2a-blog
Amanda Ryan
City of Glasgow College
99 posts
Don't wanna be here? Send us removal request.
Last Seen Blogs

knevisbirfday
Birthday Cake and Knives !!
bertybum
Everybody Dies Frustrated & Sad & That's Beautiful
knottymom
Knotty Mom
d469son-daddy469son-bw2
Daddy 469 Son B&W II

putakin
God hates Fax

Text
Creating a brush.
You need to pick a photo i got one from google images. This is the image i picked.

I then needed to get rid of the black to do that i double clicked on the layer and this box comes up you need to move the little tabs to move them until you get what you want.

Once thats done you need to select the thing you want.

When selected to go to edit - Define Brush Preset - then name the brush.

Then you need to open a new canvas change it to black and then you go to the brush tool and if it all worked out you should have the brush.

This is what mine looked like in the end. This was a cool thing to learn too.
*Top image from Google images*
0 notes
Link
0 notes
Text
Displacement Maps
So first you need to add text, make sure its in white for it to work better.

Next two steps you rasterize the type and convert it to a smart object. these two make changing the text not possible and also blends the two texted together to one.


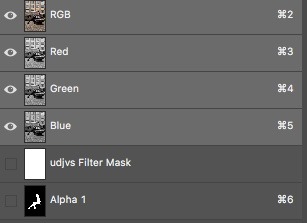
Then go to filter - distort - displace then click ok. You then have to chose you're displacement map that i created earlier show in the image bellow.


You then get this but it isn't quite done yet. It looks okay but not good enough. there is still another step to take.

You need to create a copy of the background layer then double click in that the box bellow comes up. You then change the ‘BLEND IF’ to red and move the little arrows on the tab to split it and move it along until you can see your text again.


This is the final image you get. It looks so much better more natural. I had a lot of fun learning this tool it is so cool and could probably come in handy later.
*I got this image from Google images*
0 notes
Text
Composite
Composite is a good thing it understand it comes in very handy. I used it on the Whisky project. These are the two images that i put together to make one.
I started with this image.

Then with this image.

Then put them together which made this image. I was quite happy with how this turned out but not completely however i wish i had put some kind of water effect on the bottle as it looks kinda out of place considering it is raining outside and the glass is covered in water.

0 notes
Text
Content Aware Scale
youtube
This is the video that ended up helping me with how to work content aware scale.
This is the image that i decided to use for this project. I wanted to keep in simple just to try figure out how to work this.

This is how the image ended up all i did was stretch out the water to make it look longer than it was. if i had used just normal tools to stretch it out my model would have moved too and been all stretched out of place and made her look weird. By using content aware scale i was able to move the water longer and keep her the same size. It is a pretty cool tool to have.

0 notes
Link
Im going to try and follow this video on how to do content aware scale.
0 notes
Text
Retouching.
This is the original image from my Front Cover shoot, you can see her face is like any normal face should with little blemishes and such but i wasn't really bothered about it. However once i found out how to retouch a face by smoothing it out it really made a difference.

This is what my image looked like after i retouched his face. It does make such a difference i feel that it looks a little fake but it was my first try and i figure after a ton of practice i will get better at it.

0 notes

Text
Puppet Warp.
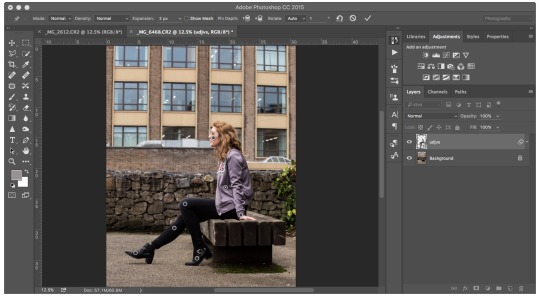
I found this quite hard to get started but once i got to using the actual tool i was having a ton of fun making her move in a really weird way. This was the image i used.
This is what my challenge box looked like while doing this project.
I used to the quick selection tool to select my subject from the image. I then selected the Puppet Warp tool from the edit menu and then you get these little pins that you have to click into place to make the things move thats what al the little circles are on the image bellow. Once you've got your pins in place then you can start moving the part about you have do anything make the leg longer point the top a lot of stuff.
The image below is what i made. She looks super weird and its obviously not done very well but it was my first time messing around with it. I made her let a little longer and flattened her foot and moved her head but that was pretty much it. It was really cool to learn how to do this as it will be super useful at some point I'm sure.

I used two youtube tutorials to figure this out.
http://photoshopcafe.com/use-puppet-warp-tool-photoshop-tutorial/
https://www.youtube.com/watch?v=xLBNSM67Cvk
0 notes
Photo


Colour Grading
This was such a good exercise I've never sat and done curves like that changing all RGB separately it was super cool and im so happy with how it changed the photograph it looks so much better. It has made it look colder and darker which is what i wanted in the beginning so it was pretty fun to play around with this exercise.
0 notes
Photo


These are photos from an exhibition i went to a while ago. It was so cool, i loved that a ton of the photos were in black and white as that is just my favourite thing ever.
0 notes
Photo


This is the paperwork for Work Experience. This was such a fun part of the course i really enjoyed it, it was a bit stressful trying to get a place to take me but once i got one it was super exciting!
0 notes
Photo


I found it super hard trying to get work experience i contacted the two above who both couldn't help, i contacted the police for forensic photography but they couldn't make it work and finally i got in touch with my old school for their art/photography department which worked out in the end a little later than id like but i got it done finally.
I wrote a letter to the school and called them a few times before i finally got somewhere but i was very excited when i did. i was told id just be helping out in the class and observing what it was really like in that kind of job and talk to the kids about photography and such.
During my placement i wanted to get a feel of what it was really like to work inside the creative industries. As I'm not entirely sure which line of photography i wanted to go in i was excited to see what it would be like to be a photography teacher. I think it will be cool to see what really goes on behind the scenes of art and photography classes. I will be interesting to see how many little kids are into photography or if they even know anything about it.
0 notes
Photo


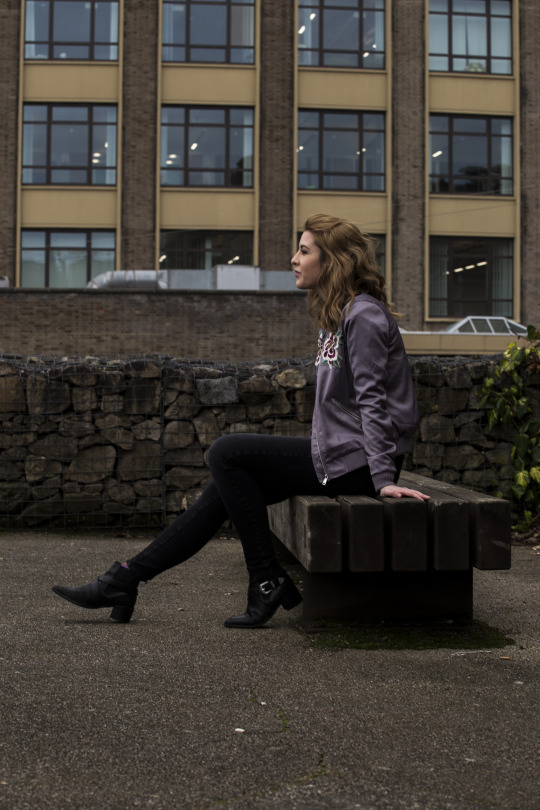
These are my final images for my DIY fashion project. I had to reshoot this entire project but i am really happy i did it worked out so much better than the first. i love the contrast between the models jacket and the background. I love the photo of her standing in the arch way thing it super cute, i wish i had edited out the pink paint splatters on the wall that i didn't notice until the prints came through in the mail.
0 notes
Photo

This is my major fashion final. This was my last shoot that i did as i was very stressed about trying to find the perfect thing but once relaxed i found this idea and ran with it. It was hard to find a nice green forest at this time of year but i did the best with what i had. I love how the white dress stands out in the darkness of the forest.
0 notes