
Don't wanna be here? Send us removal request.
Statistics
We looked inside some of the posts by angel5141446-blog and here's what we found interesting.
Average Info
Notes Per Post
33
Likes Per Post
11
Reblog Per Post
0
Reply Per Post
22
Time Between Posts
7 days
Number of Posts By Type
Photo
9
Text
4
Last Seen Tumblr Blogs


Fun Fact
The most popular pages on Tumblr are about Minecraft, GIFs, and David J. Peterson.
Photo


Week 13 - Sketching
This was an overall relaxing lesson where we practiced the fundamental skills of engineering drawing. I really enjoyed learning how to do perspective drawings because this skill made an obvious difference in the object sketches. It added depth and dimension to objects, making it look much more realistic.
A difficult part of this task was drawing straight lines without a ruler and circles without a compass. Reflecting on my drawings, I do realise that I need more practice in drawing straight lines free-hand.
For that last sketch of the vacuum cleaner, the perspective didn’t look quite right. If I was to do this sketch again, I would not start sketching the object straight away. But instead, make an overall draft of the whole object by sketching rough lines to indicate where the different parts of the vacuum cleaner would go. This way, I could have a much more accurate perspective of the object before starting sketching the details.
Ultimately, this course was very useful in increasing technical and visualisation skills in design.
2 notes
·
View notes
Photo


Week 12 - Photography
This week’s photo essay task was fun to do, it was interesting to see a different aspect of the campus through a camera lens. At first, it was difficult to find a subject through the eyes, but after I held up my phone and saw the world through a screen frame, I immediately became clearer knowing what photos to take.
I enjoyed looking up and down with the phone camera to capture interesting shots.
The most difficult part of this task was approaching strangers, I end up not having a straight up portrait of a face. It was quite a shame because portraits with close ups of a face are much more powerful than a silhouette. If I could do this task again, I would try to walk up to a stranger for a photo.
After the practice of slowing down to see our surrounding environment at a deeper level, we can be more informed about our world and be better at exercising creativity when we own a greater knowledge base.
1 note
·
View note
Photo


Week 11 - Introduction to Perspective Drawing
Perspective drawing is a new concept that was challenging to understand at first. Initially, I had trouble understanding how to draw with the two point perspectives. I didn’t understand how to draw with the horizon lines, and how I should connecting lines to the vanishing point. But after seeing how others draw, and with my own practice I gained a deeper insight into this aspect of drawing.
I enjoyed seeing how an object came out when drawing with this perspective method, it looked much more realistic and technical. But a downside of this method is that you end up with multiple lines on the page that may need to be erased.
If I could do this again, I would make a small drawing to indicate where the guiding lines would be so that I could avoid making mistakes and constantly erasing wrong lines on the A3 paper.
2 notes
·
View notes
Text
Week 10 - Measurement & Model Making

For Project 3, I first attempted to draw my food blender by hand, the lines and curves were highly inaccurate and conform to the actual outline.
Through trial and error, the most efficient way to draw the outline of my object was to use the tools provided in the workshop, it gave the most accurate representation of the outer contour of the blender.

To record all the concaves and convexes of my blender, I placed the profile gauge against it, then, a replicate of the curves of the blender could be seen on the gauge. After, I placed the profile gauge on paper and traced its outlines.

The vernier caliper was useful in measuring details that the profile gauge failed to measure. The width of the blender could be easily measured with the vernier caliper, the data recorded here was useful when drawing the top view in CAD afterwards.
After recording all the necessary data, I then transferred the information and started to render the blender in AutoCAD.
Concluding the efforts of other students and myself, the most useful and time-saving way for measuring the object is to use the profile gauge, trace the curves onto paper, then measure the information on the paper to render the object in AutoCAD.

0 notes
Text
Week 9 - Presentation
For Project 2’s presentation, I have prepared adequate research of my chosen object to show the audience. The downside is that I haven’t put enough time into preparing a fluid speech for the class.
The research and my reasons for choosing an iron for rendering were communicated clearly. My speaking pace and volume were clear to understand, however I forgot to face my body to the audience as I delivered my presentation. I should have faced towards the front of the class and made use of hand gestures to present better. I was fairly nervous as I spoke but I feel relieved after because I didn’t forget anything I needed to say. My support material has been useful in conveying my thought process and showing evidence of what has been put into the project.
I’m fairly satisfied with my presentation but it could have been better if I spent more time preparing a well-organised speech.


2 notes
·
View notes


Text
Week 6 & 7 - Working with Photoshop
This week we started a new method of sketching. Photoshop was quite different from what we’ve previously used before. For this activity, we not only had to sketch the outlines but to also colour in the object with its actual material finishes.
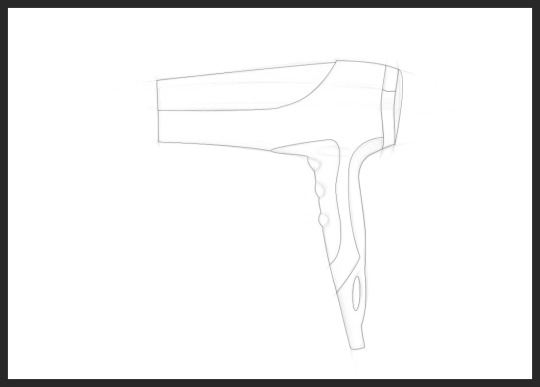
I enjoyed outlining the hairdryer with the pen tool, it was quite difficult to master at first, but after getting to know how to use to handles and how to break the handles to adjust individual curves, the pen tool was quite a useful tool.

Then I coloured in the masks with a solid colour, this method was much more efficient than carefully outlining the hairdryer with a brush tool.

After adding highlights and shadows, I feathered some of the hard edges a smudge tool, this was able to achieve a smooth finish on the hairdryer’s surface. If I could do this part again, I would make more careful observations on the lights and shadows. Looking now, the edges appear too soft and I should have used a brush with a harder diameter.

REFLECTION
I have learnt a fairly new method of drawing this lesson, using paths and masks to draw is a much more effective way of rendering, especially when layers can be individually adjusted. I still need to spend time watching Photoshop tutorials and practice on drawing realistic material surfaces.
4 notes
·
View notes
Photo


Week 5 - More drawing with CAD
This week’s exercise has allowed me to gain further insight into AutoCAD. Our second attempt at drawing in this software allowed us to further explore its functions. Learning from my last experience, I began the sketch by drawing it first on paper, the paper sketch gave me a visual representation of how the end product would look like so I could apply this on AutoCAD with greater ease. However, as I started drawing on AutoCAD, difficulties in calculating the right measurement continuously hindered me in getting the right sketch. Limited information provided on the hand out challenged my calculation skills. But help from friends was a great aid in getting the final sketch right.
A tool I discovered this week was very useful for creating centre lines and determining the centre of a circle – the offset command easily creates parallel lines in between an object by specifying a distance. I have also been using the stretch tool to prolong guidelines instead drawing new lines when sketching side views. One thing I need to remember when using the fillet tool is that when I fillet a corner by drawing straight lines first, the length of the line must include the radius of the curve. Or otherwise the corner is filleted, the lines become shorter than the required length.
Since the last exercise, I find myself more adapted to the operations of AutoCAD but being not familiar with its large range of functions makes me sketch a lot less efficiently. I have missed out on using the mirror command which allows creating a mirrored copy of lines and other objects. If I could do this exercise again, I would’ve have used it to mirror lines instead of drawing both sides of a symmetrical object.
6 notes
·
View notes
Photo


Week 4 – Drawing with CAD
This week’s exercise was a fairly challenging one since we are drawing digitally. I have never used AutoCAD before and it took me some time to familiarise with the operations.
Drawing this week’s object, it took me more than 3 times to get the top view correct. I constantly made mistakes when drawing the widths and lengths: as I was outlining the perimeter, the lines did not end up connecting with each other. I then realised this was because I continuously made incorrect calculations. These mistakes cost me time since I was redoing the same sketch multiple times. This, I realised could be easily avoided if I drew the sketch on paper before starting on the computer. I could have labelled the measurements (that aren’t clear on the diagram of the hand out) so when I start sketching on AutoCAD, I could look at my labelled diagram and sketch directly on AutoCAD without making calculations on top of my head.
Another important thing that Rob pointed out was the mistake of not aligning my view sketches. Different to sketching with paper, I forgot about this aspect of drawing and thought that the images could always be aligned at a different state since they can be easily rotated and moved around in the application. But I then found out mistakes can be easily made since all views of the third angle projection are connected and crucial information is missed out when the figures are not aligned.
Looking back at my sketch, all the diagrams and dimensions are of the same colour. If I could redo this exercise, I would change the colours of the labels to make the dimensions differentiate from the diagrams and make the sketch less confusing when viewing.
There’s still a lot more about AutoCAD I need to learn, a lot of functions are very helpful in accurate drawing but could only be mastered with practice.
6 notes
·
View notes
Photo


Week 3 - Cross Sections & Dimensions
Today’s main learning objective was sketching sectional views. Learning from last week’s lesson, I’ve made fewer mistakes when attempting to do this week’s sketches. A sectional view is the interior features of an object as displayed when sectioned apart. Different from a side view, a sectional view shows more information about the hidden inner details of an object.
When I was drawing the figure in class, I started from the top view since a lot of crucial information can be obtained from the top, then drew guidelines to reference the other view sketches. Guidelines are especially important when drawing accurate and parallel lines, it also saves time since it reduces the number of lines needed to be measured when sketching another side view.
The way of drawing the sectional view was hard to understand at first when I only tried interpreting it with the top view sketch. But after looking at the figure from another view, I gained a better understanding of where the object was “cut through” and how the sectional view sketch should be drawn. At this point in time, I have found it difficult to understand how the sectional view should be like by just looking at the top view and without referencing the other drawings.
I have taken less time to finish this exercise than the last since I have gained a better insight into technical drawings and especially after viewing the Lynda video on orthographic drawing. However, after looking at other student’s work, I have realised that I’ve made some mistakes in this activity, I forgot to draw the cutting-plane line that indicates where the object is cut through. I should also have had to draw arrowheads to indicate the direction of sight of the sectional view, the line should then be labelled with a letter at the end of each arrowhead.
In conclusion, reading the textbook thoroughly before class would be very helpful in understanding today’s content quicker.
4 notes
·
View notes
Photo


Week 2
This week we learnt about sketching multi-view orthogonal projections. The front view and side views seemed easy to draw at first but it turned out the given measurements would not give the entire image of how the final sketch would look like. To do an accurate sketch, measurements must be based off each other, meaning all front, side and top views must be drawn in order to get accurate measures of the given object. In this case, the most efficient way to draw the trophy was to do the side view first, since the angle of the trophy’s slope gave a lot of information about the front (for example, the length of the triangles). A sense of space was also very important in the project since I would not have thought about how the top view of the trophy changed the width of trophy’s base in the side view.
4 notes
·
View notes
Photo


Week 1
On the first IDES1261 studio activity of the year, we did exercises on drawing instruments. I really enjoyed sketching on paper and experimenting with lines and shapes. In the beginning, I had trouble understanding how the phrase ‘measuring is harder than constructing’ applied in today’s activity. But through experimentation, I realised that the most accurate and easy way to draw the figures was not to measure all the lengths/angles one by one by to make use of our given tools. The triangles were really useful in constructing shapes and its different angles made the process of drawing shapes a lot easier. The T square played an important role in drawing accurately straight and parallel lines.
Although measurements still need to be made when for example drawing the inner triangle of our first diagram. At first, I tried drawing a circle and ruling out a triangle with lines that were tangent to the circle. But somehow this made the width of the triangle’s lines uneven to each other.
If I’d do this exercise again, I would keep my centre line clear to see (and not erase it as I’m drawing) as this line turned out to be very important in keeping the figure accurate and symmetrical.
Another thing to note is how taping paper on the table made the sketching process a lot more efficient.
0 notes
Text
Hello I’m Angel Lin! I’m studying Industrial Design because out of all my interests, this degree is most likely to allow me find a job after I graduate.

0 notes