
Follow Us On: Linkedin Github YouTube About.me Pinterest Gravatar Reverbnation Behance Anchor.fm Official Website.
Don't wanna be here? Send us removal request.
Statistics
We looked inside some of the posts by arthurdantonio and here's what we found interesting.
Average Info
Notes Per Post
1
Likes Per Post
1
Reblog Per Post
0
Reply Per Post
0
Time Between Posts
53 seconds
Number of Posts By Type
Text
3
Last Seen Tumblr Blogs


Fun Fact
69% of Tumblr users are millennials.
Text
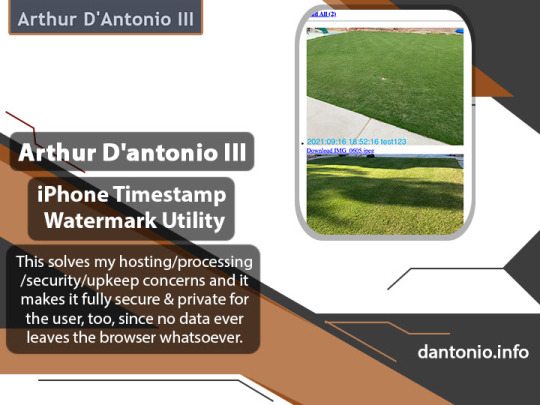
Arthur Dantonio
iPhone Timestamp Watermark Utility
iPhone Photo Watermark Utility - Timestmap Overlay
Have you ever taken a bunch of photos, perhaps to document something, and wanted to send them to a friend or post them online -- and retain or convey the order that the photos were taken in?
I had that problem and I looked around for a solution; I found a few potential solutions but most were paid apps or mediocre web-based uilities.
I knew I that could write the code to solve the issue in an hour or two, and I decided I wanted to make the utility available for myself & others in the future.

[Arthur Dantonio]
Pure Client-Side Goodness: Secure, Private and Free!
Since I didn't want to have to worry about server-side processing or paying for/maintaining/securing a server, I decided to write the code as a purely client-side utility -- this solves my hosting/processing/security/upkeep concerns and it makes it fully secure & private for the user, too, since no data ever leaves the browser whatsoever.
The entire workload & processing occurs purely your local computer, via your browser -- all thanks to the latest Canvas APIs.
Try It Yourself!
Try the Live Demo
Code on GitHub: timestamp-images-js
What it does
Select photos you have exported from your iPhone, and likely any other camera that adds EXIF data (all mobiles & most digital cameras). The tool takes your "pending upload" file, adds an image into the DOM that directly references the image from your filesystem, and then further manipulates the DOM to leverage the Canvas API for overlaying text based on your configuration parameters.
youtube
The Exif data is extracted from your photos using the JS library ExifReader.
Future Plans & Ideas
In the future I'd like to add some additional functionality, almost all of which should be near-trivial to add -- it's likely that the first time I need any of these items I'll probably go ahead and add the functionality. Here are some of the things I'd like to get added:
Arbitrary image overlays
Resizing / thumbnail abilities
Settings should 'Re-Apply' to already-chosen images
Configurable download filename
Setting for 'order' to download files in
Web workers for image processing parallelism - browser support looks good!
In the meantime, if you're so inclined, please don't hesitate to submit a pull-request to add additional functionality or to improve the little tool. -- specifically custom image.
0 notes
Text
Arthur Dantonio III
The Buttons' - The Backstory
Kids are awesome and my kids are no exception, but let's be honest -- kids have their moments, too.
Often those moments may be entirely unavoidable while other times, you may walk yourself directly into a meltdown that was otherwise avoidable. [Arthur Dantonio III]

'The Buttons' were born from the ilk of the latter. We have a number of Sonos speakers around our house & our yard and we found that the kids love to have music playing while they're outside swinging on the playground. So far, so good!
That worked very well for a while, maybe even a week or two, until the point came when there was a near-constant "change to this song" followed by a "no I don't want that song!!!" -- sometimes you could sort through the song requests (most often requested by lyric), other times it could quickly devolve into a moderate-to-severe tantrum.
All the while, the DJ (me) may have been trying to finish up a code review, catch up on tech news, or even just handle some chores around the house. [Arthur Dantonio III]
Solution: 'The Buttons'
So simple, and in hindsight I feel slightly dumb for writing about it because it really is simple -- but I'm pretty proud of it and it's been a true blessing in the level of evening enjoyment (and peace) that it brings to the household, adults & children alike.
youtube
It's also uniquely rewarding when our children have a friend over to play: they will run over to the playground with their friend in tow and proudly request/exclaim, "look at our buttons!" -- quite gratifying. [Arthur Dantonio III]
It's relatively simple, here's the quick rundown:
Hardware
• Streamdeck - The main ingredient.
• Raspberry Pi 4B - Runs the USB server software so that you can control/'program' the StreamDeck from that computer.
• Waterproof Box - I used the one linked because I already had it, but it was a tight fit, I'd suggesting buying something slightly bigger.
• PoE to USB-C Power Adapter - Optional, but great if you want to get both power and LAN from a single cable, which is exactly what I wanted.
• Spraypaint - Optional, but makes things look a bit nicer.
Software
• Node Sonos HTTP API Library (GH Repo) - You will install this on a desktop computer, a server on your LAN, or even directly on the RPi. This is used to control the Sonos system.
• VirtualHere - USB client/server - You will install the server on the Raspberry Pi. Install the client on the desktop machine (macOS or Windows) that will be 'controlling' the StreamDeck. The free version works to get going but the software is very reliable and useful (so buy a license if you like it!).
• Streamdeck Desktop Software - Install this on the desktop.
Building It
Paint your box, if desired. Trace the outside of the StreamDeck on the front of your waterproof box. Grab a rotary tool (Dremel, etc) and carve it out until it fits nicely. Strongly suggest doing the cutting in a well-ventilated area.
Setup the RPi with your favorite *nix distro (make sure it's supported by VirtualHere!) and establish SSH access.
Mount the RPi inside of the box, get the power supply in there, and drill a hole for power and/or ethernet cable.
Install the VirtualHere USB server on the client device - just copy the self-contained binary, chmod it, and create a system service for it so that it will restart itself if the RPi reboots.
Go to the desktop that will be "controlling" the StreamDeck. Download the VirtualHere USB client software & run it; you'll see your LAN-based USB device automatically, right click and select "Auto-use Device".
Install and run the 'node-sonos-http-api' library -- I run it on my desktop.
Almost done! Fire up the StreamDeck control software on your desktop. Drag a 'visit website' action onto any button you want. To configure a button just click on it, ensure the 'Send request in background' checkbox is checked, then set the URL like below -- replacing the replace the hostname/IP your node-sonos-http-api host/IP and the 'SONOS-FAVORITE-NAME' with the name of any item in your 'Sonos Favorites' list.
Grab a beer and start brainstorming playlist ideas with your kids!
Few Extra Notes
The StreamDeck buttons will render animated GIFs, so you can do all kinds of funny things with that.
I'd recommend setting (lowering) the Sonos 'max volume' for the zone which you can do from the iOS or Android apps (but not the desktop app, grr).
The 'node-sonos-http-api' library had been semi-abandoned for a while but has recently been receiving some attention. That said, sometimes the 'node-sonos-http-api' server will need restarted (if speakers ever change IPs, or other edge cases) -- of course, I just put it on a cron & have it restart every 5 minutes, problem ! =D [Arthur Dantonio III]
New Button Requests - Currently ~ Weekly
We take "requests" -- we let our kids request new buttons each week and on Fridays we generally will add them. It only takes a few minutes to search for a playlist, add it as a new Sonos 'Favorite', and find an icon for it -- and it teaches them to be patient as they wait throughout the week for their button requests to be fulfilled.

Not to mention the near-instant gratification for the adult adding it, when they get to go try it out immediately.
One thing I'm not sure of: One of our kids recently asked, "please add a PIZZA button!" -- I'm just not sure exactly how I'm going to be able to code my way out of that one, but I'm thinking on it (approval queue + throttling + local pizza delivery place API, perhaps?). =D
0 notes
Text
Arthur D'antonio III
Monitoring Tesla Powerwall via macOS Menubar!
TMonitor.app is a macOS menubar utility that lets you see information about your Powerwall system(s) at a glance. I made this to scratch my own itch -- specifically, I wanted to be able to view data about multiple Energy Sites and see a small slice of historical data (yesterday & last month). [Arthur D'antonio III]
Download TMonitor-0.2.9-mac.zip (77.9MB)
IMPORTANT NOTES
Currently macOS only -- tested on macOS 12.13.1 though should be resillient (+/-).
Autoupdate is ON and currently cannot be disabled; I'll eventually add a boolean option.

If the app sponaneously restarts that just means newer version(s) were released.
MFA is not yet supported.
It IS fully code-signed and notarized.
High Level Caveats / Disclaimer
Some caveats since I'm releasing it for free! :)
I can't promise that it will always be free. The version you download will be free, but I may decide to charge for future versions.
I may even open-source it in the future, who knows. Right now it solves my "current need" but that may change over time. [Arthur D'antonio]
I can't promise that I continue to maintain it, though I do wholly intend to since I use it every day across all of my macOS machines!
Tesla's Multi-Factor Auth (MFA) is NOT yet supported -- likely will add support in the future.
If you encounter bugs, please let me know -- I can't promise a fix but I'll certainly try my best to get it fixed.
TMonitor currently always has auto-updates ENABLED and they can't be turned off right now. This is so I can ship fixes to all my computers without any fuss.
The app has no analytics, doesn't phone home, etc -- the update check simply pings an AWS S3 bucket, to see if a newer version is available and, if a new version is available it is downloaded immediately & then the application will auto-restart into the new version. If you DO NOT want this behavior then the only way to turn it off, right now, is to block external connections to non-Tesla servers by TMonitor.app -- it'll continue working without issue.
Tech Stack
TMonitor.app was made to satiate my thirst for data & monitoring capabilities -- though I also chose some tech that I wanted to play with so that I could learn things along the way. Those decisions have some drawbacks but that's just how it goes when working on side-projects & trying to kill multiple birds with a single toss. Here's how TMonitor.app is built:
Electron JS
Electron Cross-Platform Menubar Sample/Demo
VueJS (Vue 3x)
TeslaAuthJS
TeslaJS API Helper Lib (custom fork is used because not all energy-related endpoints are in the upstream repo)
youtube
Biggest Downside of the Tech Stack: Filesize
The MAIN major downside here is that the app is "heavier" than is optimal though it's still quite lightweight; really the main practical drawback, for day-to-day/consumer use, is that the binary itself is way larger (filesize) than it needs to be. It's MUCH larger than the same app would/could be if written in native code, obviously.
Positive
On the "Plus side" of the coin: it would only take a few hours of work, mainly QA & visual tweaks, to get the app running on Windows & Linux! :)
Other macOS Tesla Energy 'Monitoring Apps'
There is another tool out there, Powerwall Monitor, which is very good and performs a similar function. I purchased a license for it and have corresponded a bit with the developer, who is great & super responsive.
Unfortunately, if you have more than 1 'energy site' (gateway) on your Tesla account then the Powerwall Monitor app will just "pick" one of the two and show you data about that one, you can't view aggregated data nor can you choose which 'Energy Site' you are viewing data for.
That said, it's a much simpler application & performs a nearly identical function -- though it only shows you information about 'current state' and does not provide any options for viewing historical data -- it does display the data in a much nicer layout. [Arthur D'antonio III] For this project, I was personally all about function-over-aesthetics; in the future I'll probably improve it further but for now it's highly usable. :)
1 note
·
View note