
Bridgewater State University Student blog exploring astrophography in a first year honors seminar. Will be editing and posting products, high-quality images of space. (NASA)
Don't wanna be here? Send us removal request.
Statistics
We looked inside some of the posts by astro-photographer18 and here's what we found interesting.
Average Info
Notes Per Post
204
Likes Per Post
132
Reblog Per Post
72
Reply Per Post
0
Time Between Posts
10 days
Number of Posts By Type
Text
10
Photo
1
Last Seen Tumblr Blogs


Fun Fact
Tumblr has 4 main sources of revenue.
Text
The Flame Nebula

The image above is my final version of the Flame Nebula used for the STARS symposium.
For my final project, I focused on the final edits of the Crab, the Flame, and the Orion Nebula.
This post focuses on the Flame Nebula, also known as NGC 2024. The Flame Nebula is a bright red and orange part of the Orion constellation. It consists of gas and dust clouds that take on reddish-orange colors.
The Flame Nebula, a cluster of stars, is mainly composed of hydrogen gas, which gives it its red hue. It also contains helium, oxygen, nitrogen, sulfur, and other elements commonly found in space. The presence of dust within the Nebula not only adds to its distinct appearance but plays a critical role in light absorption and dispersion.
There are a lot of interesting facts about the Flame Nebula.
One is that it is an easily accessible star to take photos of with the aid of long exposure shots.
The Flame Nebula is around 1,400 light-years away from Earth.
We see the Flame Nebula as it appeared a thousand years ago.
The dust surrounding the Flame Nebula causes it to appear way dimmer than it actually is.
William Herschel discovered the Flame Nebula in the 1900's.
It would take about 20,000 years to travel around this Nebula with the Parker Solar Probe, the fastest spacecraft.
The Flame Nebula is a type of emission nebula, one formed from ionized gas.
The Flame Nebula was found to consist of young stars after being examined X-ray style.
The Flame Nebula is incredible.
The Flame Nebula is a component of the larger Orion Molecular Cloud Complex. This complex, a star-forming region within our Galaxy, the Milky Way, includes a massive cloud of interstellar gas and dust, making it a common area of astronomical study.
I wanted to edit the Flame Nebula for my end-of-year assignment. I first looked up this object online. After seeing how impressive and unique the Flame Nebula is when colorized and processed by professionals, I knew I had to take my own crack at it. Obviously, my version would be subpar compared to that of professionals, but I would be sure to put in my best efforts.
It took a few days of classes to complete my final edits of the Flame Nebula. There are definitely more tweaks that can be made. Due to the limited time I had left, I could only use some of the tools I had used for the Crab Nebula. After the BEAR team calibrated and stacked this space object, I colorized each filter and combined them to form the final product.
I ran into one issue when editing the Flame Nebula. The calibrated and stacked images were not originally lined up. Thankfully, there was an easy fix! I rotated some of the filters 180 degrees to solve this issue. The blue part of this image displays how out of place the images originally were. When submitting my images for the final poster, I cropped the blue out to make it more scenic.
Fact Source: The Planets
0 notes
Text
A New Passion for Astrophotography
Before registering for PHYS 199: Astrophotography, a first-year seminar, I was unsure what to expect. I imagined that the class would simply involve examining different photos of space and writing essays to satisfy the word count.
Instead of tedious essays, our professor gave us the creative opportunity to create our own blog posts that would both satisfy the word count for the class and help us build a platform that shared our experiences during the seminar. Blog posts were a way to keep us informed about space photography. Our professor enabled us to pay attention to details and write factual and understandable posts. I wouldn't have preferred any other way of completing the word count.
I was into looking at the stars I saw in the sky and all of their beauty. I knew little about space photography, or photography in general, and the process by which images were created and published for public viewing. I never imagined that these pictures were taken in black-and-white. At first, I believed they were taken already in color. It made so much more sense to focus on individual filters and then combine them later.
I was blown away by the creative process used to colorize different space objects. What captivated me even more was seeing the BEAR team take photos of the space objects my class chose for our final projects. Bridgewater State University owns a giant telescope perfectly placed within the observatory dome. The dome opens up and rotates to reveal a fantastic view of a clear sky and all the stars. I only attended one BEAR team meeting. I would have gone to a lot more if I had more availability.
Our final project was to colorize the remaining space objects we selected with a minimum altitude of 40 degrees. I chose four space objects. My chosen objects were the Crab Nebula, Flame Nebula, and Orion Nebula. That's a lot of Nebulas, I know. Colorizing these images was time-consuming but worth it and satisfying to complete. The process went smoothly after getting the hang of the different tools. I would love to edit more pictures in the future, but calibrating them would be difficult due to the lack of technology on my part. Maxim DL was not compatible with my Macbook, causing me some frustration.
Some issues with BSU technology limited the student's ability to finish calibrating images using the free trial of Maxim DL. We were running out of time before the trial ended and the STARS symposium began. The BEAR team, led by my professor for the seminar, took it upon themselves to calibrate each chosen space object for the class! I greatly thank them for this because I couldn't have finished the final products without their help and effort.
Looking ahead, I am excited about the new technology that will be installed for the upcoming fall semester. This new technology will make the learning process smoother and more accessible for future students, opening opportunities for growth in astrophotography.
0 notes
Text
The Death of A Star
The stars in the sky do not live forever. However, it is a myth that a majority of what we see when we look up at the sky are stars that are dead. It is true that stars are seen as they were in the past, but that does not mean they are dead. This is due to the travel of light. Light can take minutes to years to travel from one star to the next. Some stars reside hundreds of light years from eachother.
When a star dies, the outcome depends on the overall mass of the star. The death of lower-mass stars are less likely to cause a supernova.
A low-mass stars death begins at the red giant phase. During the red giant phase, the star begins to expand. Helium combines into carbon and oxygen. The layers of the red giant form into a nebula. The formation of a nebula is the second stage of a dying star. Nebulas are clouds of dust and gas in space that appear in different colors due to the components of the gas.
There is a White Dwarf is the core of the dying star. Over time, this White Dwarf fades into a black dwarf due to it becoming cooled down.
In my final project for my astrophotography class, I colorized images of three Nebulas. The Flame Nebula, the Crab Nebula, and the Orion Nebula. What draws me to them is their beauty and different ranges of colors. Absolutely stunning to look at.
The Sun is an example of a low-mass star that is alive and will be for billions of years to come. If the Sun dies, there wouldn't be a supernova.
High-mass stars have considerably shorter lifespans than low-mass stars, with differences between millions and billions of years.
When high-mass stars die they are more likely to explode, causing a supernova. A supernova is the explosion of a star that uses a lot of energy and appears vibrant and spread out. It is very beautiful.
It takes a shorter time for high-mass stars to use up their energy and nuclear fuel. This explosion is very bright and notable. Iron makes up the core of this supernova.
A neutron star or black hole may be the ending result of a supernova, based on the amount of material left over. A neutron star will form if the core of the supernova is less massive. A more massive core will collapse into a black hole. Within a black hole light, gravity, and anything else cannot escape.
An example of a high-mass star is Betelgeuse. According to a Florida State College article, the red supergiant is "500 times the size of our sun" (Pressbooks). Betelgeuse is a star within the constellation of Orion. It is the 10th brightest star along with the Sun. It is also one of the largest known stars. Given the amount of time, stars can remain alive, it is assumed that the death of this star is somewhat near. Astronomists suspect Betelgeuse has around 1000-100,000 years left until a supernova.
It is not common for supernovas to be visible to the eye. They are not a common occurrence.
Source: PressBooks
1 note
·
View note
Text
How'd It Turn Out?
I finished the Crab Nebula with surprising results. It was easier than expected to turn different color filters into something that fits well as one. I used four color filters—clear, blue, red, and green color filters.
I changed each layer mode to screen. In the end, I duplicated each color filter, making a total of 11 layers that include the Visible layer, the Clear median Blur, and the High Pass filter!
Median blur is used to calculate the neighboring pixels' median, affecting the image's edges and corners. The median blur involves a radius, a neighborhood, and percentiles. I set the radius at 3 to increase the blur while setting the percentile and alpha percentile at 50 to make the tone of the image a balanced brightness while becoming more blurred. Alpha percentile works to achieve this balance by becoming more transparent.
The high pass filter "filters high essential details, and larger scale gradients are removed" (Gimp). Standard deviation, contrast, and clipping are adjusted. Increasing the standard deviation allows more details to be accounted for.
I was happy with this final image because I could clearly see the interaction of each color filter in the final product. A lot of the previous noise had been minimized to the extent that the image's primary focus was highlighted.
My favorite part about the results is the Crab Nebula appearing behind the stars rather than in front. I see the stars popping out at me, but the focus still lies in the colorful nebula.
I would prefer my image to be less grainy, even though it is suitable for a first try.
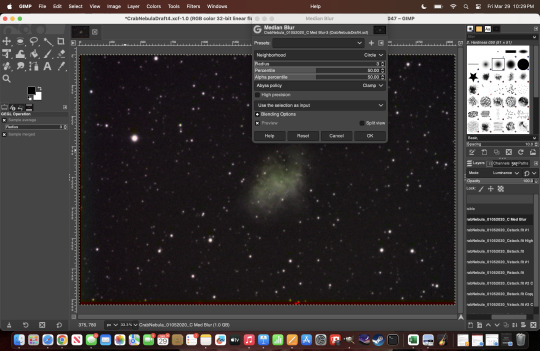
Image shows settings for Median Blur (Screenshot Creds: Sofia)

Image is the final product of my Crab Nebula project (Photo Creds: Sofia Laboy).
Source: Gimp
6 notes
·
View notes
Text
I had the opportunity to experience the BEAR Team in action. The goal of the night was to take pictures of space objects that the astrophotography students, including me, had selected for calibration.
The sky was clear and perfect for taking pictures with the school's telescope.
My specific objects were the Orion and the Flame Nebula. I gained experience operating the computer technology with the help of my professor. We tried to take pictures of the Flame Nebula first, since there was a limited amount of time before it would be out of visibility range.
Due to the lack of time we had until it wasn't possible, the team was unable to take a lot of pictures of the flame nebula. I had to leave before then. When I left the observatory and walked back to my dorm I could see the stars in the sky clearly above.
I would definitely want to experience the observatory with the BEAR Team again in the future. I heard that it was a paid position which seems like an awesome on-campus job to have!
PHYS 199-H01: Class Experience
During class on Wednesday, we looked at two cameras that BSU previously used. We got the chance to touch the cameras and see them up close.
Near the end of class, our teacher took us to the top of the DMF center to visit the BSU observatory. I saw the different telescopes that BSU uses to look at the stars. We entered the giant dome holding the biggest telescope BSU offers. There is a camera within the dome, the SBIG STXL-6303. The camera is placed on the back of the telescope.
It was very beautiful, and the design technology looked complicated. The room appeared to be spinning, but the dome spun around to adjust itself to face the same way as the telescope. We could not open the dome and reveal the sky because it was raining/snowing. I would love the class to go back to the dome when the sky is clear to see this telescope in action.
I took a photo of the telescope that is in the dome. A red light surrounds the inside of the dome because it is important for night vision. Rods at the periphery of our eyes help us see in the dark; to activate these rods, the body must release a chemical called rhodopsin. Unlike white light, a dim red light does not activate the neutralization of the rhodopsin. Therefore, astronomers can continue to use night vision when taking images. I find the red light to be easier on the eyes compared to a bright white or yellow light.

Photo Creds: Sofia Laboy
2 notes
·
View notes
Text
Calibrating Data Images
Dark calibration images help eliminate noise from unevenly distributed light. Dark calibration images are helpful in calibrating a flat or data image because they remove thermal signal at a specific temperature and time frame, reducing thermal noise. Dark images are used to for calibration after they are properly selected by eliminating the bad options.
A flat image is an evenly illuminated image created by combining multiple pictures of a certain object. Calibration enables all of the pixels to have the same reaction to each photon. Flats strengthen the image quality, reducing noise and removing distracting details. Dust, for example, should be minimized through calibration. "Dust donuts" appear when dust particles are present on the lens or the telescope mirror. Here is an example of a flat image

Lazy Astronomy
Even when the light source is even, the image captured will not display an even amount of light. We choose the median combine mode to exclude the differences between the multiple pictures. It also reduces the outliers that would otherwise appear by just using the average mode. Outliers are abnormalities that would not occur within the perfect shot of a space object. It is important not to make pixels too bright or too dim. Images with pixel brightness between 22,000 counts and 38,000 counts are ideal for flats. Images outside this brightness range are considered "bad" and should be removed from this file, but placed into another file. Keeping "bad" files in another file is beneficial because a creator may need to explain what photos they removed from the final equation and why.
Source IMAGE: Flat frames and coffee rings
11 notes
·
View notes
Text
Work In Progress: Crab Nebula

Photo Creds: BSU Observatory
Editing Creds: Sofia Laboy
This colorized image of the Crab Nebula is a work-in-progress astrophotography photo I have been working on since the first week of the second semester. The picture began as four different black-and-white images, each separate image picked up clear, blue, green, and red light through filters that were not initially apparent.
To create these colorized images, the class is using the GNU Image Manipulation Program (GIMP). GIMP incorporates a variety of editing tools. For the beginning stages of this image, I took advantage of the color curves tool.
Curves is a non-linear contrast stretch tool that can control how specific, initially set brightness levels are increased. Curves work best when focusing on one color filter at a time. The colors really pop this way.
Curves make the specific colors of the filter appear brighter for the final product. They can also dim the brightness of the image.
I was able to adjust the level of color accordingly. I carefully adjusted the curve and level settings one minor edit at a time. I lined up each filtered image with the other so the colors appear balanced in the final image. Red, Blue, and Green filters require screen mode, and clear requires luminance. Following the rules of the curves and levels and certain modes helped me create my first beautiful colorized image of a space object.
At first, I thought that I had created a very decently colored image; I could see each color as it layered with the others. It was just excessively blurry. Rather than trusting the process, I began tampering with the filters beyond repair, later restarting. I was stressed because a photo of my current progress was due for the next class. The situation turned out alright, as I got back on track and re-did each filter. The colors now layer better than before!
I am glad that GIMP has all of the necessary tools needed to form the color of my image. GIMP is not too complicated to use, making it suitable to play around with. The service is also free. It is easy to save files to continue where I left off previously.
I prefer my image to be clearer, less blurry, less grainy. Hopefully, this work in progress will be at least 50% clearer by the end of this week.
Update: The finished product is similar. I decided to stick with the last image of work in progress that I had created. I experimented with curves slightly before deciding that my current image was better. Near the beginning of editing the Crab Nebula (as stated before), I ran into some issues involving the accidental deletion of my progress. This occurrence resulted in me having nothing but an overly green and saturated image rather than a mix of all the colors. So far, the current photo is the best that I have been able to re-edit. The image is darker, and the green and yellow hues are more visible. The stars have a purple-ish hue that is notable when zoomed in. I am very proud of my first attempt at astrophotography editing.
1 note
·
View note
Text
PHYS 199-H01: Class Experience
During class on Wednesday, we looked at two cameras that BSU previously used. We got the chance to touch the cameras and see them up close.
Near the end of class, our teacher took us to the top of the DMF center to visit the BSU observatory. I saw the different telescopes that BSU uses to look at the stars. We entered the giant dome holding the biggest telescope BSU offers. There is a camera within the dome, the SBIG STXL-6303. The camera is placed on the back of the telescope.
It was very beautiful, and the design technology looked complicated. The room appeared to be spinning, but the dome spun around to adjust itself to face the same way as the telescope. We could not open the dome and reveal the sky because it was raining/snowing. I would love the class to go back to the dome when the sky is clear to see this telescope in action.
I took a photo of the telescope that is in the dome. A red light surrounds the inside of the dome because it is important for night vision. Rods at the periphery of our eyes help us see in the dark; to activate these rods, the body must release a chemical called rhodopsin. Unlike white light, a dim red light does not activate the neutralization of the rhodopsin. Therefore, astronomers can continue to use night vision when taking images. I find the red light to be easier on the eyes compared to a bright white or yellow light.
Photo Creds: Sofia Laboy
2 notes
·
View notes
Photo
This astronomy picture of the day is very aesthetically pleasing. The star cluster shown is IC 348, a part of the constellation Perseus. Colors most noted within this picture are purple, pink hues, brown hues, black, and hints of green. Most obviously defined are the pink and purple hues that surround the middle and upper right sections of the picture.
Purple hues overlap with the black background to make a dark purple color. The dust is shaped in a stringy, ribbon-like appearance that is tied and overlapping. The pink color is actually "energized hydrogen, which is typically as hot as around 10,000 °C (approximately 18,000 °F) or more, while the more orange gas represents dense, molecular hydrogen, which is much colder at around -200 °C or less (approximately -300 °F), and associated dust" (NASA's Webb Uncovers Star Formation in Cluster's Dusty Ribbons). Rather than orange, the gas in this photo is a dark brown color.
Swirls of dust surround what appear to be stars, and as mentioned by APOD, a young brown dwarf. Brown dwarfs, “cross the line between star and planet, requiring an exciting re-thinking of the universe” (Dwarfing the Giants, Webb). While having a title involving dwarfs, a brown dwarf is not necessarily small. They can be humongous. Brown dwarfs are birthed similar to stars, but lack the mass necessary to emit starlight. They do emit infrared light, but the visible light from their creation decreases with time, making them difficult to detect.
How do stars shine, you may ask? Stars are giant balls of hot gas in which hydrogen atoms collide, forming helium. This process causes nuclear fusion. This nuclear fusion is the shining light that stars emit. The larger the star, the more luminous it is. Stars are important because they are "factories for elements, proving them useful from birth until death (American Museum of Natural History).
This picture overall is gorgeous and well edited.
Source: What Makes Brown Dwarfs
Source #2: NASA
Source #3: Stars

2024 January 15
Star Cluster IC 348 from Webb Image Credit: NASA, ESA, CSA, STScI, and K. Luhman (Penn State U.) and C. Alves de Oliveira (ESA)
Explanation: Sometimes, it’s the stars that are the hardest to see that are the most interesting. IC 348 is a young star cluster that illuminates surrounding filamentary dust. The stringy and winding dust appears pink in this recently released infrared image from the Webb Space Telescope. In visible light, this dust reflects mostly blue light, giving the surrounding material the familiar blue hue of a reflection nebula. Besides bright stars, several cool objects have been located in IC 348, visible because they glow brighter in infrared light. These objects are hypothesized to be low mass brown dwarfs. Evidence for this includes the detection of an unidentified atmospheric chemical, likely a hydrocarbon, seen previously in the atmosphere of Saturn. These objects appear to have masses slightly greater than known planets, only a few times greater than Jupiter. Together, these indicate that this young star cluster contains something noteworthy – young planet-mass brown dwarfs that float free, not orbiting any other star.
∞ Source: apod.nasa.gov/apod/ap240115.html
176 notes
·
View notes
Text

Wolf-Rayet, WR 124 // NASA
Source: https://www.flickr.com/photos/nasawebbtelescope/52747003647

flickr
1 note
·
View note
Text

Jupiter //NASA, Judy Schmidt.
Source: https://www.flickr.com/photos/nasawebbtelescope/52303461859

flickr
4 notes
·
View notes