
Statistics
We looked inside some of the posts by baby-steps-bindery and here's what we found interesting.
Average Info
Notes Per Post
5K
Likes Per Post
4K
Reblog Per Post
795
Reply Per Post
33
Time Between Posts
2 days
Number of Posts By Type
Text
17
Last Seen Tumblr Blogs


Fun Fact
Tumblr has a low social media market share in South America.
Text
Let Them Talk by @manic-intent
My bind of the Let them Talk Series


This is one of the fics that I find myself re-reading very often. I'm usually a Cherik fan but Logan/Charles work SOOO well in this.
The typeset for this was pretty simple but it works for the vibe and setting of the fic.

I even included the first mini fill in for the prompt as a sort of prologue.


There also a cute tony/Steve fic included in the series.


As always, this was bound for personal use.
164 notes
·
View notes
Text

Itoshii yasuragi...
Once again, another artwork inspired by As if in a dream...
4K notes
·
View notes
Text
wild geese by mary oliver
My lovely friend @kitebird-hockey hosted a snack exchange for those of us in the @fanauthorworkshop, and I was fortuitous enough to be paired up with her🤩! She spoiled me rotten with my snacks omg the unboxing experience was better than all my Christmas' combined I swear...
I, of course, sent kitebird some snacks too–but with a bonus of a mini book😉. She gave me a few poems to potentially typeset and I ended up choosing wild geese by mary oliver.
Here are a few pics:


And my cat for size lol😂
I initially struggled with the typeset, since it was my first time doing poetry. But I think it turned out great! And I'm glad kitebird thought so too🥰
With love,
Emi xoxo P.S the fonts are P22 Franklin Caslon (body) and Milonguita (title).
12 notes
·
View notes
Text


“where all the veins meet” by @saxamophone (thank you for writing this beautiful fic I love it with my entire heart).
Artwork is by the incredibly talented @amomorii 💖
Bound for my bestie @inkstainedforever bday MWAH ILY
70 notes
·
View notes
Text


I am neck deep in pre production for a project I’m really really excited about. This is another test notebook for that project. It’s another stab binding, this time using a combination of the traditional noble and hemp-leaf stitching designs. I’m happy with it; I really think I’ll be able to pull this project off 😁
The covers are made from watercolour paper that I marbled myself. I’ll be taking another workshop on that next month, so hopefully my marbling will improve enough I can include it in the upcoming project without dying from embarrassment, haha
8 notes
·
View notes
Text
This book has been a looong time in the making. I think I printed and stitched it together all the way back in February? But my plan for the case required me to figure out some things so I just kept putting it off, lol.
But finally! Here it is! My rendition of the Tumblr Stories typeset, courtesy the amazing people over on the Renegade discord.


This is the first bradel binding I’ve done, and I am really pleased with how well it turned out.
The end papers are ones I designed and had printed. Also very happy with them!
And the thing that held me back the most on this book was the cover decoration. I knew what I wanted, but not how to get there. I personally don’t like the look of heat transfer vinyl, and I don’t have access to a cutting machine anyway.
Or so I thought.
Two weeks ago, I took a little certification course at my local library which means I now have free access to the cricut machines in their public Makerspaces! It took some time and experimenting, but I did settle on a way that works for me to paint the covers that looks, in my opinion, not too shabby.
Overall, I’m really happy with this one. I think it’s my best bind yet. Here’s hoping the next ones are even better!
105 notes
·
View notes
Text
iconoclasts by rowanisawriter
AUTHOR COPY HAS SAFELY ARRIVED🙏🔥🔥🔥
which means I can finally share my bind!


Another classic book look! Which was perfect for this bind especially, on account of its themes of sacrilege, blasphemy, and doubt.
The cover art is “Saint Veronica with the Veil” by Mattia Preti. When I saw it, I knew it was The One—it made me think of Mira looking up fearfully in face of Mystra’s perceived wrath.

(I wish I could’ve included the blood-stained cloth shaped in Jesus’s face, but you win some, you lose some.)
As for the typeset, here it is:


I’m so proud of it—I think it’s the best typeset I’ve done so far!
All the chapter images are from the public domain, by French artist, Maurice Denis. Each were carefully selected to suit each story. I’m especially a fan of the art I chose for heretic’s Act I and Act III.
Now, the dust flaps:


Fun fact: the “follow Rowan on tumblr” section is inspired by Megan Whalen Turner, since on the edition I have of her book only lists tumblr as her social media which is so iconic🤣💖
Thank you @rowanisawriter for letting me typeset this, but also for writing this series, thereby dragging me into BG3 fandom and allowing me to meet all my new friends! Will always be grateful for that💖
With love,
Emi xoxo
84 notes
·
View notes
Text


Black Myth Wukong: Journal Entries
Personal use only, not for sale! I don't do commissions either.
I loved this game so but I wished there was a way to read the journal entries while listening to the Music Library, so I've decided to make my own physical book with all the journal entries. Also because because staring at the TV screen reading the tiny fonts was too much on my eyes.
✦ Everything is made by myself, from the book formatting to the text block and case and slipcase. ✦Yaoguai portraits are screenshots I took from my game, the entries text are copied from the fandom wiki page. ✦ Endpapers are foild with red foil and the slipcase pattern are the achievement pictures, which I printed on textile for the slipcase. ✦ I decided to format the book to be read from right-to-left, as this is how text in ancient china were read. ✦ Front page illustration is a screenshot I traced from the game
WIPs: https://szynkaaa.tumblr.com/post/761687159583473664/some-progress-textblock-has-been-sewn-together-i https://szynkaaa.tumblr.com/post/761966032402432000/endpapers-have-been-foiled https://szynkaaa.tumblr.com/post/762358966045016064/some-more-wips-both-copies-are-cased-in-so-the https://szynkaaa.tumblr.com/post/762969024938295296/got-the-achievement-icons-printed-on-textile-to
Link to the PDF of journal entries for those who wants to read it on your device.
Some journal entries are incorrect, typos have not been fixed either, I might go back and fix the mistakes another time! It is read right-to-left, so please scroll to the last page of the PDF to start reading :)
I'm kindly asking you to not use professional book printing services to print your own book, thank you!
262 notes
·
View notes
Text
FINISHED BINDING MY BOOK!!!
tell me why this took me forever 😭😭 well, I know why... I fucked up... but whatever, we persevered
anyways, behold. my baby


overall, I'm pretty happy with how it turned out (if we ignore the crook in the embroidery on the front cover....), and now this exists as a physical entity :)) very cool
alsooo, I made a video about my process, so would reaaaally appreciate it if y'all checked it out and told me I did a good job ok great thanks (I am soooo not nervous about putting my face on the internet, I am sooooo calm about it)
youtube
#SCREAMING CRYING THROWING UP THIS IS AMAZINGGGG#literal goals!!! AND THERE’S A VIDEO!!#tysm op im so excited to watch it!#bookbinding#embroidery#cover
105 notes
·
View notes
Text


Dated calendar/organiser cases to notebooks
Materials used case - re-used from bought calendars/ organisers inner book - copy paper endbands - woven endpapers - bugra bütten (grey and antique pink)
See more about the process here
12 notes
·
View notes
Text
Patience on a Monument – betts
I've been binding at such a rapid pace, yet neglecting to post about them! Time to catch up💪😤
So here's the third fic I've bound, Patience on a Monument by my dear friend @bettsfic💖
Fun fact: this fic is how we became friends! Years ago, I read it, went crazy over it, followed betts on tumblr, then a few years after, decided to participate in the @fanauthorworkshop to get better as a writer and meet senpai
Well, not only did I meet senpai, I also became senpai's friend! I'm living the dream ya'll.
Anyway, PICS:


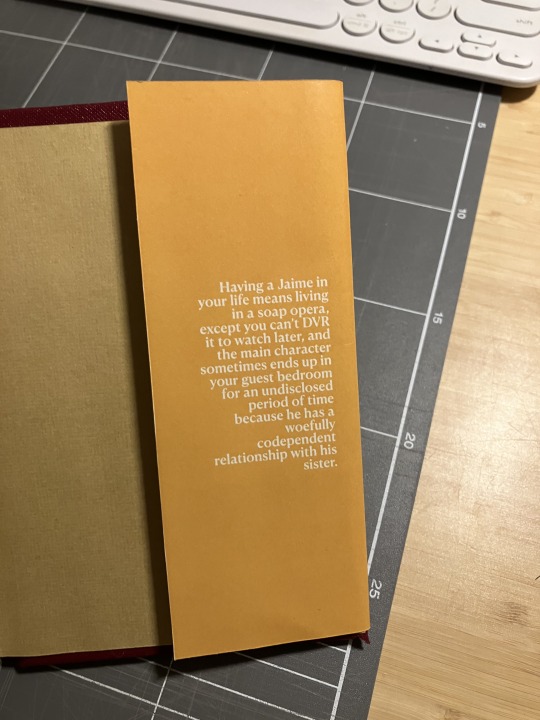
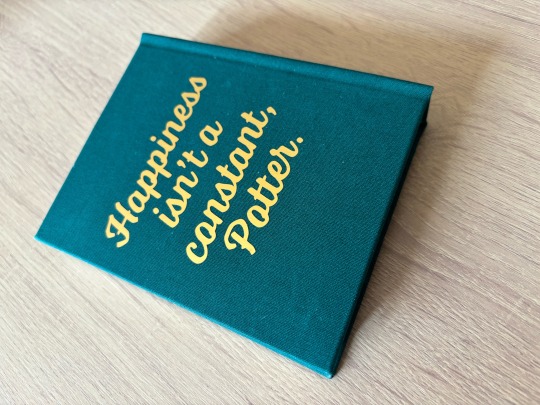
The cover was inspired by that trend of classic art slapped over with graphic type, a la Ottessa Moshfegh’s books. As for why I chose this artwork? Because it’s called Patience on a Monument😂. But! Also because of the back cover, with figures that match on quite well onto Jaime, Brienne and Cersei, imo😉

For the epigraph, I chose to include a photograph from Marilyn Monroe’s last photoshoot, since A) Betts loves her B) the pose fits the quote very well.


Here’s the interior! I chose a font for Jaime’s handwriting that I felt best fitted Betts’s description of it.


Spine and flaps!! For the author photo, I got it from Betts’s profile pic of her substack (her newsletter is so good btw definitely check it out here).
And thus concludes this bind! I’m so chuffed about how it turned out. It set off a “classic book look” craze in me lmao which you’ll see in future binds.
Until then!
With love,
Emi xoxo
49 notes
·
View notes
Text


The Phantom of the Opera by Gaston Leroux
Another Phantom! But this time, it’s a rebind for a friend. I experimented with inkjet canvas. It feels and looks pretty legit. I sprayed the case down with varnish to seal and protect the colors. I added these metal corner protectors that have bats on them because bats are one of their favorite animals.
This was also my first time adding a pocket to the end paper of a book. I was asked to preserve the front of the original soft cover, so now it has a spot right inside!
The cover art was originally painted by artist Annie Stegg Gerard.
34 notes
·
View notes
Text
Stuck in the Sunshine/In Spite of the Way that It Is by anomalation
First off, thank you so much for all your love on my first post! It warmed my heart to see all that support🥹💖
Second off! Here's my second fanfiction bind, that I bound for my dear friend and graphic design senpai, @significationary, who is also the author of these beautifully written fics.
In Other Lands is my most favouritist book EVER, and Anna is among my most favouritist people, so the fact she wrote fanfiction for it had me wild. I simply HAD to bind it!
So, here you go:


A few notes:
Since these fics are based on a book, I wanted the cover design to capture the original's design as well. So desperate was I to achieve this effect that I even illustrated the cover, despite being in a years-long art block that this project clawed me out from. So grateful for that!
I bound this in a tête-bêche format, which basically means that if you flip the book, there's the other one shot to read. Since I consider Stuck/Spite to be sister stories, I just had to bind them together. I was, of course, inspired by @oficmag's Issue #9 (which Anna and I both worked on as designers!) that features two novellas bound as a tête-bêche. Thank you Anna for the inspiration!
This was the first book I bound without any help, so I ended up making quite a few mistakes. I even ended up crying because I wasn't happy with the result. BUT!!! I woke up the next morning feeling better about it and absolutely euphoric when it arrived at Anna's place safely. She was so so happy with it, which in turn, made me so proud of myself! So never give up guys :)
36 notes
·
View notes
Text
OMG I'VE DIDEN IT!!


I wanted to make a cassette notebook for half a year already omg it's finally done!!
43 notes
·
View notes
Text


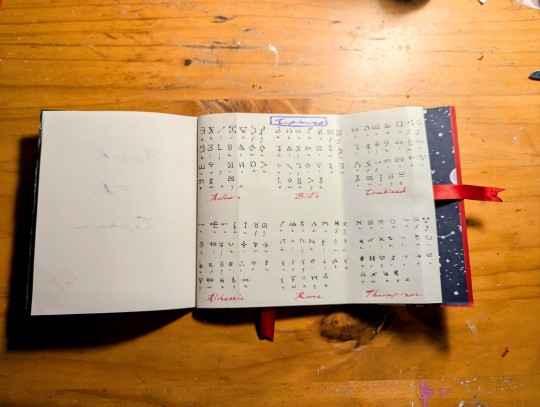


In singular deranged days work (where I was supposed to be getting OTHER things done) I made a cipher journal for decoding the ciphers in Gravity Falls, specifically for Journal 3, the Book of Bill and thisisnotawebsite.com. This included (ultimately) three pages of common ciphers used in the Gravity Falls fandom; originally I was only going to do two, but then got to the Blendin page in Journal 3, sighed deeply and made an extra page on the Vignére cipher. The clasps I made myself by hand, and the little white toggle is a raccoon tooth, which I may change out depending on what becomes available. The purple ink, although unable to be seen within the photos, actually glitters and looks rather cosmic to my delight.
Considering I made the most of it within a day, it meant I used the paper I had at hand, which wasn't good paper for actual ink as it bleeds through slightly (and is thus unbecoming), but as a fancy schm-ancy idiot who insists on using actual ink with dip pens for the 'breadth of the experience', this means I'm ultimately only using one side of the paper (to my chagrin) and the letters aren't as clear as they could be when I write on the paper. Nevertheless, I am rather happy about the result; young me from about a decade ago, who began to make a similar journal only to abandon the project would have been immensely excited that I actually made one and am currently using it to decipher things within Journal 3. There is something rather satisfying about it, I do confess.
159 notes
·
View notes
Text
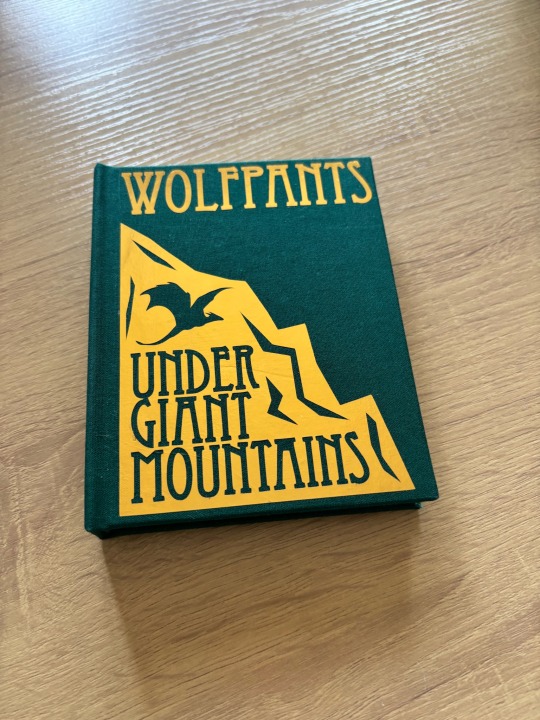
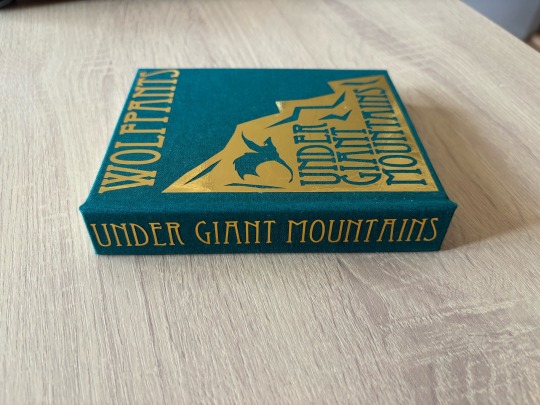
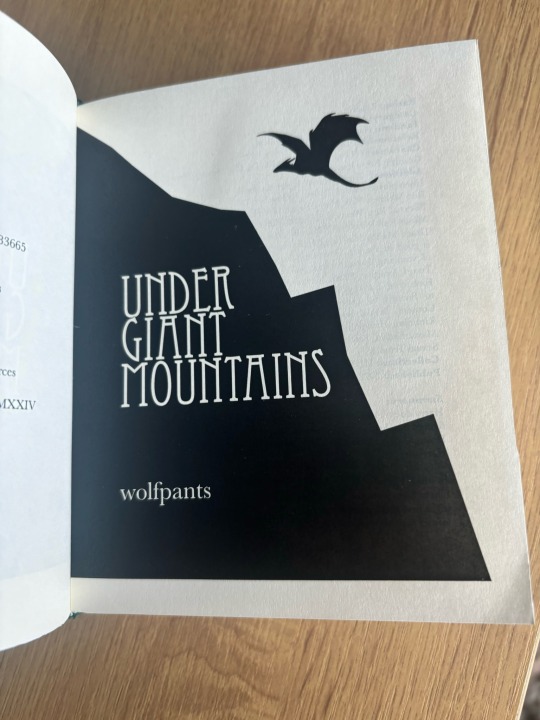
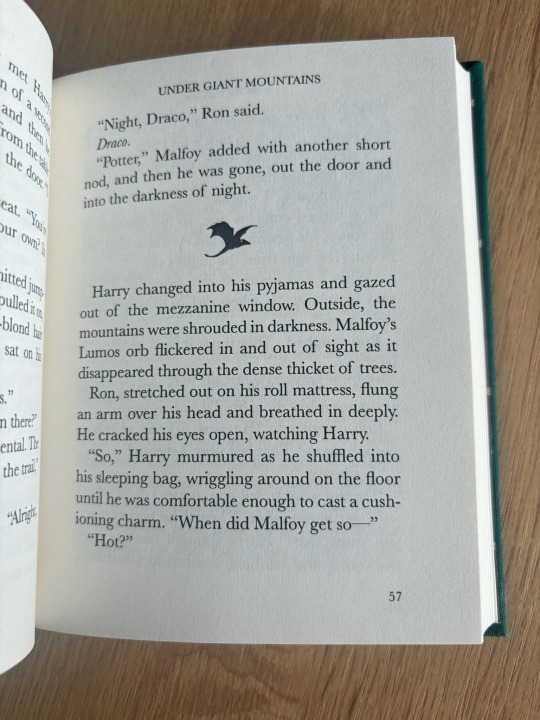
Bound: Under Giant Mountains by wolfpants
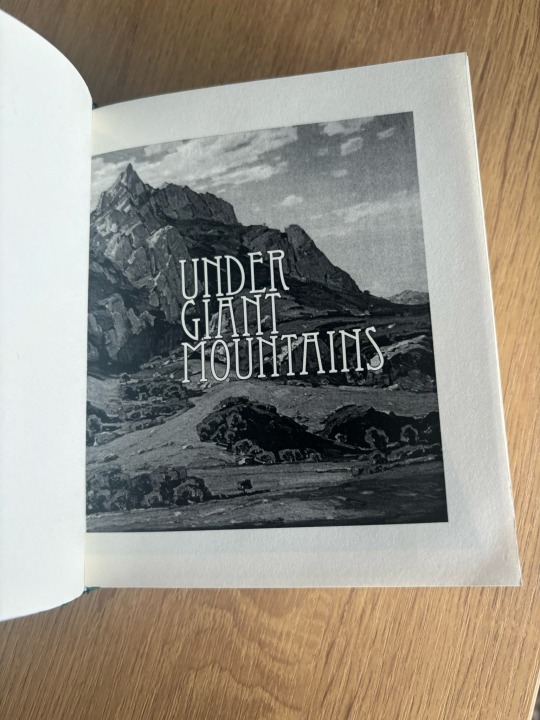
The delightful, evocative, and thoughtful Under Giant Mountains by @wolfpants is up next in my tour of wolf’s fic I bound. This landscape of this fic is soaring: mountains and dragons and wilderness. But at the same time, its subject matter is as small and carefully contained as Harry's postwar pain. This is a Harry who is struggling, and struggling to even admit he's struggling. At the risk of spoiling anything, the way wolf writes Harry's breakdown and surrender is so, so soft and sweet and real. I love a Harry who confronts any danger head-on except the danger of what's going on inside him.
(Fun fact: this fic was posted while I was in the midst of writing Polar Night/Midnight Sun and I was like OH GOOD WOLF HAS DONE THE DRACO IN NORWAY THING AND DONE IT BETTER THAN I COULD, I CAN STOP WRITING NOW but of course, I didn't stop; I let wolf's words inspire me onwards, and this is another reason why I love fandom: the overlapping of writerly worlds, the echoes and resonances we experience as creators and fans.)
For this bind, I chose a relatively simple aesthetic, but couldn't resist inserting little tiny dragons as scene breaks.
More process and materials talk under the cut.
Materials: This was my first go at making bookcloth! I had purchased a little remainder scrap of forest green cotton at the fabric store and only noticed after ironing it out and laminating it to the tissue that there were stripes of sun damage on the creases of the cloth, sigh. I had to start over. I used mulberry tissue but some of the fibres are palpable through the cloth, which I am not wild about. Still -- homemade bookcloth! Fun!
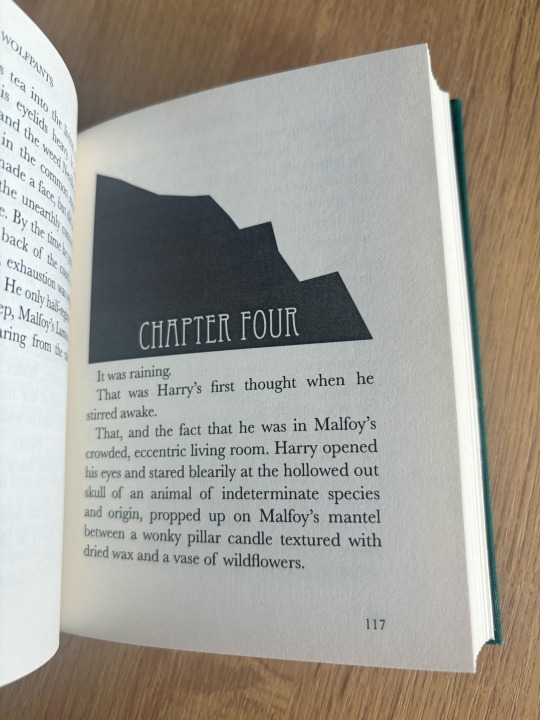
Text block is printed on 24 lb cream letter cut down to a quarto bind, and is actually the first bind I did where my grain direction was correct. (I know, I know...) Sewn on two linen tapes with waxed linen thread.
Endbands (which I neglected to photograph, apparently) are machine made.
End papers are just scrapbook paper, nothing special.
The decoration is gold HTV. Hoo boy. More on that shortly.
Process: My first quarto bind! First bookcloth making! First bind with the grain direction correct! So many firsts!
That being said, there was nothing particularly special about this bind's process. My biggest struggle (which is visible) was the gold HTV. I think I've since cracked the code more on how to apply larger bits of HTV without making marks in it (short version: higher heat, less pressure, more patience) but I was still struggling here, as you can see. That being said, I do love the sort of hobbity vibe of the rune-ish font and the dragon/mountain.
I made myself a copy of this as a test first, and the HTV is even more messed up on that. :| Also, I realized when reading it afterwards, I fucked up the page order in one signature. This is fixed (god, I hope it's fixed) in wolf's copy.
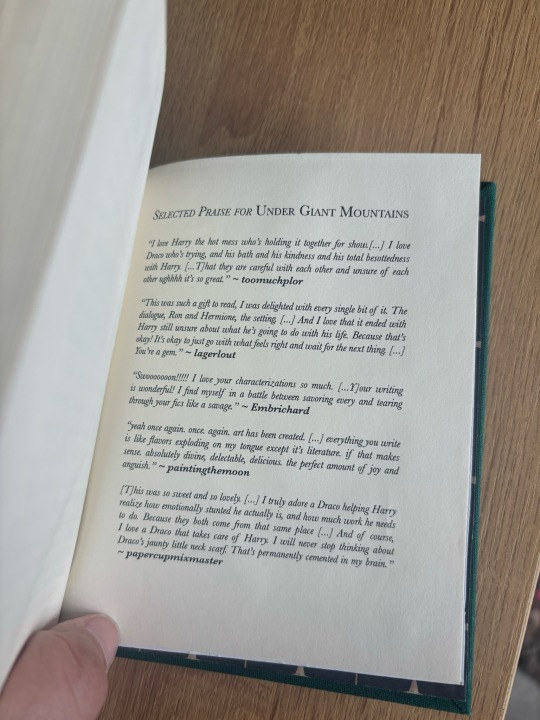
Signature length is a tricky thing with case binding/sewn binding in general. I wound up needing a bunch of blank pages at the back of the typeset so I did something I have since done in other binds: added a "selected praise for" section where I copy/pasted AO3 comments into the text block like literary reviews. I love this so much: the juxtaposition of the formal literary trope with the squee and all-caps and hype of fandom commenters. I am not the first to do this, of course, but you'll see it appear again in future binds from me for sure. (And of course I put my own comment first. OF COURSE I did. Binder's privilege!)
66 notes
·
View notes
Text
How I bound my fic
Disclaimer. I watched like three you tube videos (one of which is here) and this is like my fourth or fifth time that I've bound anything. I don't think I'm doing things correctly and in those steps I will be pointing that out.
This is going to be long so I'm going to tuck the rest under the cut.
Formatting your text block.
I spent so long working on my text block(s). It got easier with each one I did. I work in MS office.
My page size is set to 8.5" by 5.5" because that is half the size of a standard piece of printer paper. I put the margins on the smallest possible because the site I use to organize the pages into signatures tends to add a bit of a margin.
I use this to make my signatures. I got this original link from a reddit post about book binding. (I thought I had a link to it but I can't seem to find it.) I tend to have my signatures made with 16 pages, which is 4 sheets of paper. You'll need to make an account (it's free) and make a copy of this project to add your own pdfs to. It automatically puts them in order and the pages on the same sheet of paper.
You'll want to print your pages double sided. I use the base setting for my printer (because when I fucked with it they came out wrong) so you might want to test print a signature before making your printer run a full copy.
"I have all my pages printed. Now what?"
Folding, punching, and sewing your text block.
It's exactly what it sounds like. Fold all of your signatures. I like to use the back of a sharpie to get a nice crease on the spine edge (and to save my fingers the pain).
I use this handy guide and the awl that came with it now, but the process can be completed by making a guide on a piece of paper and punching holes with a thumbtack or straight pin.


Once that's done it's time to sew. I have no clue what the stitch I use is called. I just made it up as I went along and it turned out pretty.
the edge stitches (after coming back to the edge of the spine) get slipped between the last two signatures. I think this is a French stitch? no clue. Then the short ones loop back through the last stitch once while the long ones go through the last twice. makes a pretty ladder. (did I mention I know basically nothing about binding or how to make text instructions?)

Glue is your friend. Not your enemy.
SO this first picture is everything I use to case in my text block.
Use a thin line of glue to attach your end pages. I have to cut mine down to the correct size and I use a small paper cutter because I can't cut a straight line to save my life.
Then basically smoosh your text block under some heavy books or put it a book press. Paint the spine with a lot of glue. like multiple coats.
Go ahead and add your headband and a ribbon if you want a bookmark built in.
(also most people use a cloth on the spine but I keep forgetting to buy that so I use scraps from my end papers to cover the spine. I know this isn't the correct way but it's worked out somewhat okay for me.)


I'm glad I didn't fuck up with a box cutter.
So I've got some shitty math scribbled on a piece of paper for you guys.
you want to add 1/4 of an inch (or 6mm) to the length of your cover board. (5 1/2 x 8 1/2 inches becomes 5 1/2 x 8 3/4 inches).
The spine is the width of spine + 1 board. I use a chip board that was sold near the cricuts in Michael's currently but I have used card board in the past.
Trace measurements, cut. I precut with my paper cutter then go the rest of the way with my box cutter.

Space hinges.
I use a little hinge spacer I found on amazon. People 3d print them too and sell them on etsy or you can cut another piece of chipboard for this.
my hinges are 5mm and honestly... I'd probably go bigger if I could. I'm just too lazy and want to work with what I've got.
Biggest tip. Use painter's tape to test fit your hinges. I fucked up tho and used an automotive painters tape and it wouldn't come off.

Gluing everything together.
I wrap my cover boards in a card stock and use book cloth on the spine. I prefer this look and it comes out pretty good all things considered.
Highly recommend watching a professional doing this on you tube rather than me trying to type instructions.


Glue it together and let it sit under all of your books/in your press for a while.
If you want to see how the hellmark book turned out check out my other post here. This is it with the dust jacket I made (with my lovely friend Lily) for it.
If anyone has any questions feel free to hit me up. I might not have the best answers but I will try my hardest to point you in the right direction.
7 notes
·
View notes