
bananaqueensewandsketch
Sew and Sketch
just here to document my sewing projects and art and DND world building with my friends
see my other random stuff at bananaqueen2319
61 posts
Don't wanna be here? Send us removal request.
Last Seen Blogs


Text
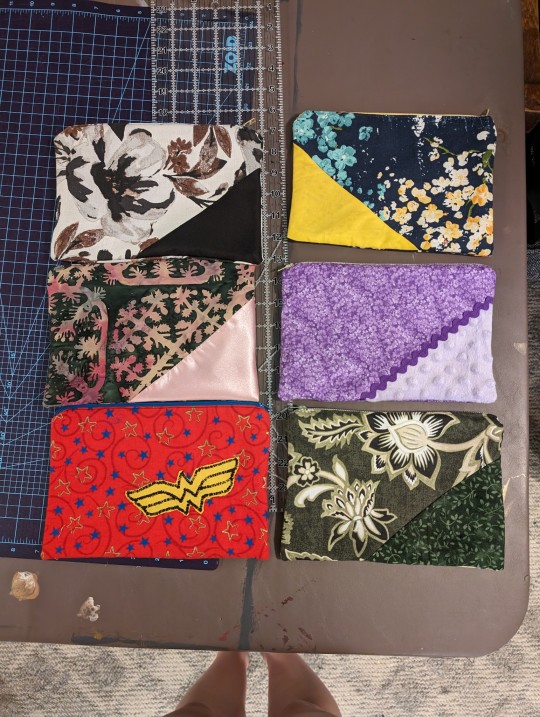
Getting my mom back into sewing! It's been a long time for her but she made half of these pouches while I was over, and more today without me! They all turned out super cute and were great at using up scraps of fabric I've accumulated
1 note
·
View note
Text
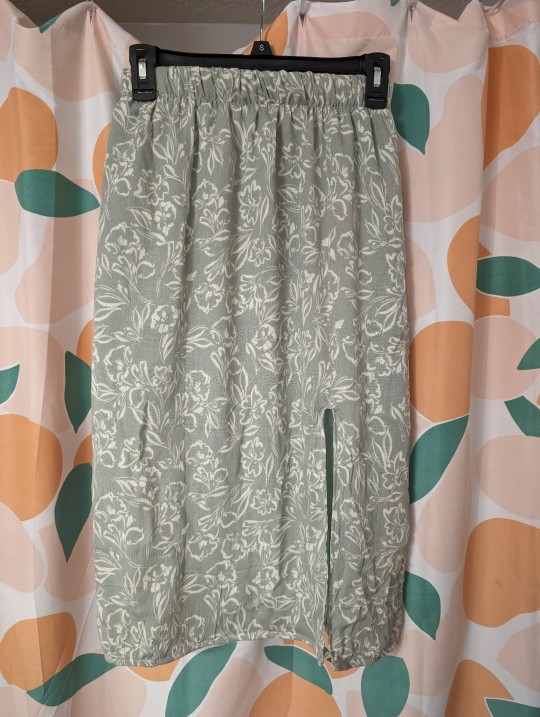
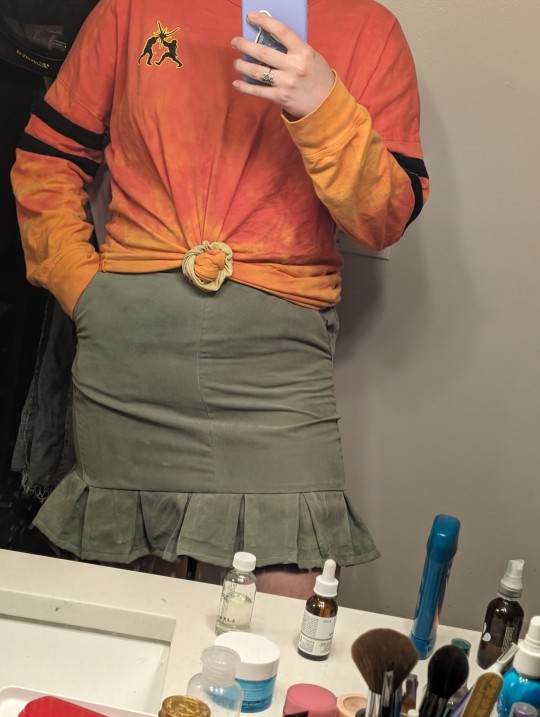
Made this skirt for my sister!!! The lining is somehow too tight? Weird but either way I'm gonna cut it out and rehem and it'll fit perfectly
7 notes
·
View notes
Text
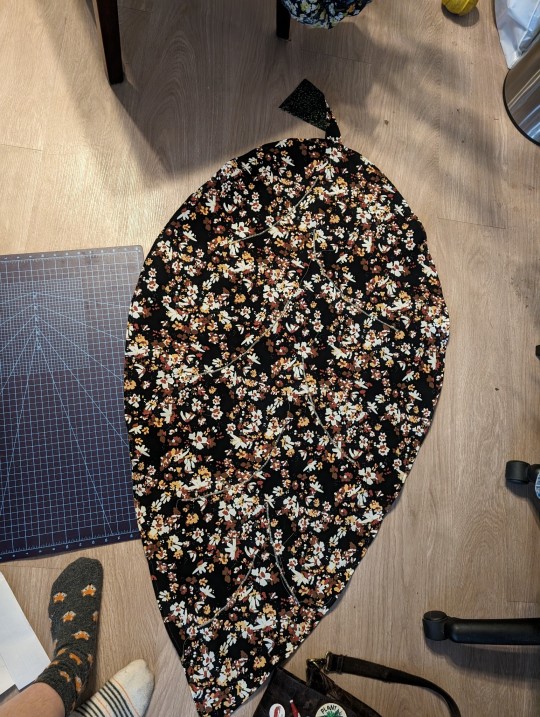
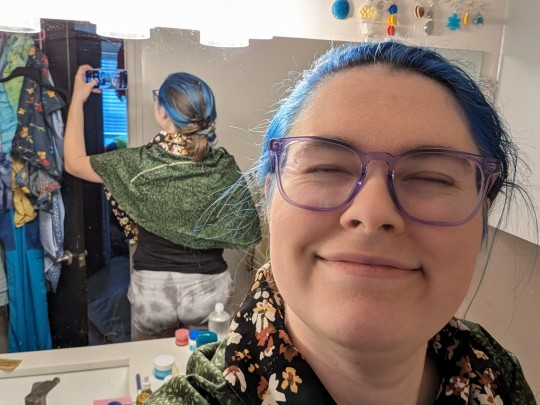
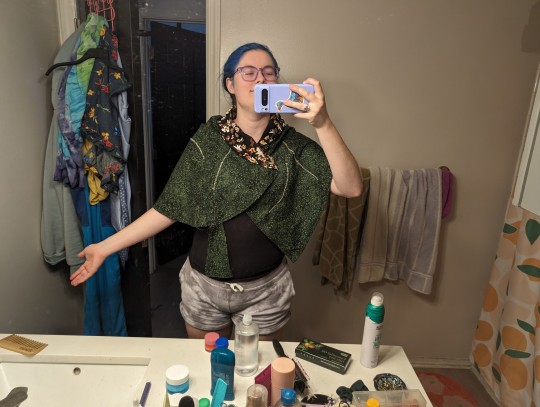
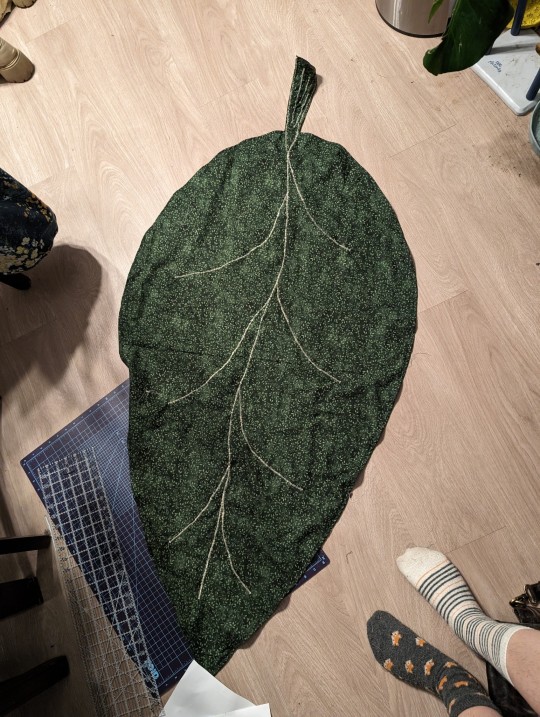
A gift for one of my besties! I made this leaf cloak/scarf/whatever you want it to be for their Ren faire and fantasy looks!
3 notes
·
View notes
Text
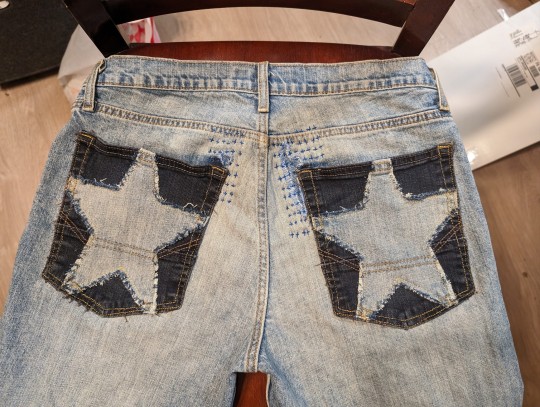
Mended this pair of jeans for my partner! They're one of his favorite pairs and I had tried mending before, but I went a lot sturdier this time with sashiko style mending! I had to take the pockets off to accomplish this so I added a contrasting pocket and used the originals to make the stars!
4 notes
·
View notes
Text
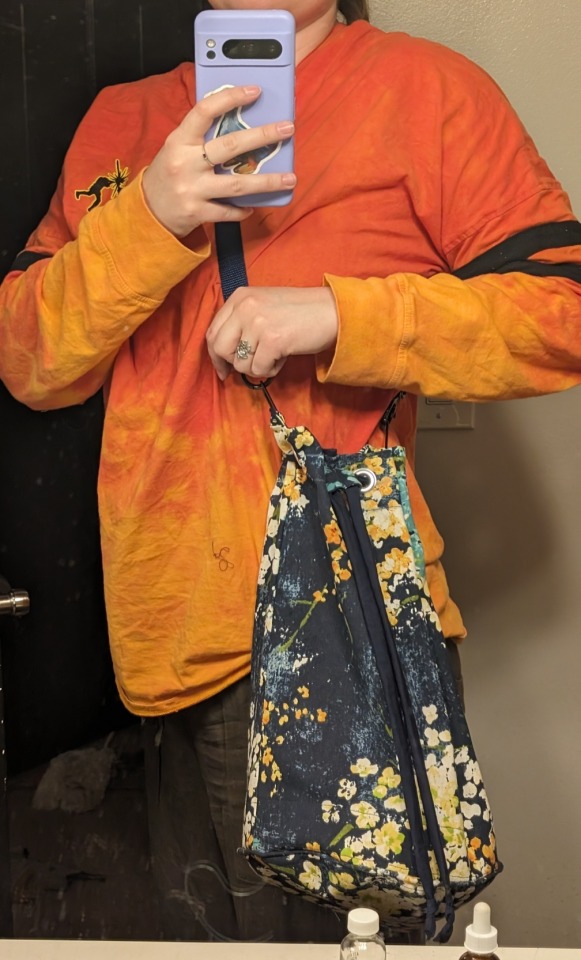

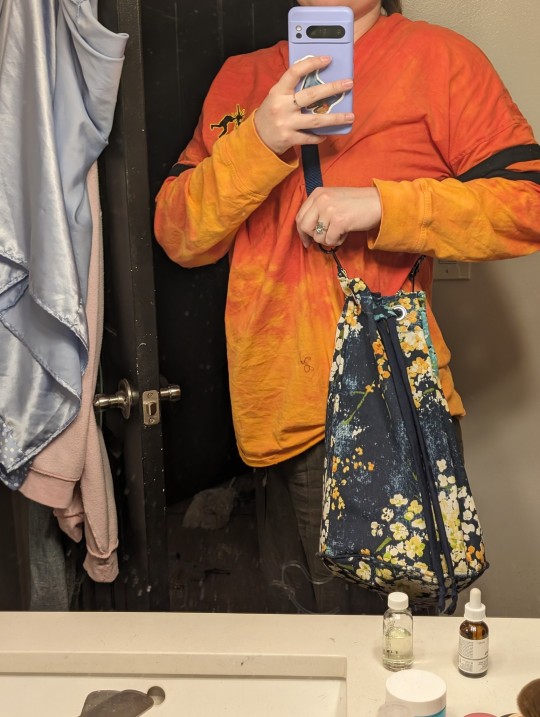
Made a bucket bag inspired by one I had as a kid! I ended up getting the grommets from harbour freight they're so much cheaper and better quality from there for such large ones hahah
0 notes
Text
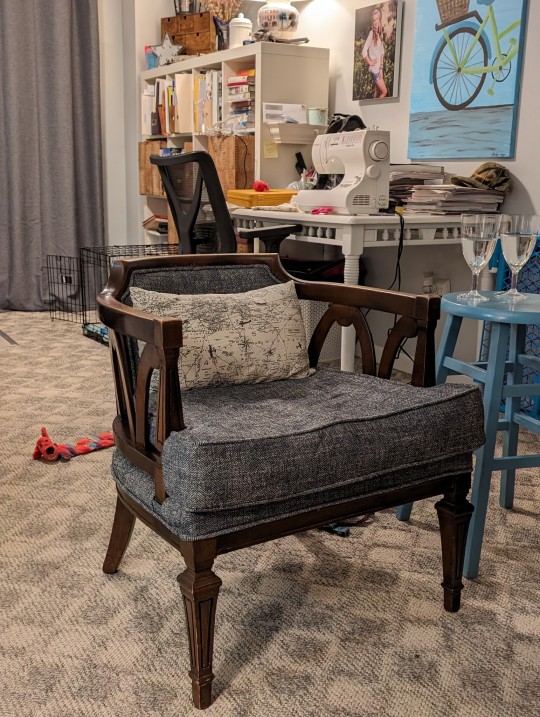
I do not know how my grandma reupholstered two of these chairs by herself multiple times...but it took 3 of us working on it at a time approximately 12 hours in total to pull off! It looks awesome, and I had the perfect scrap of fabric of a world map with plane lines on it for the pillow! (This room at my parents is travel/vacation themed)
3 notes
·
View notes
Text
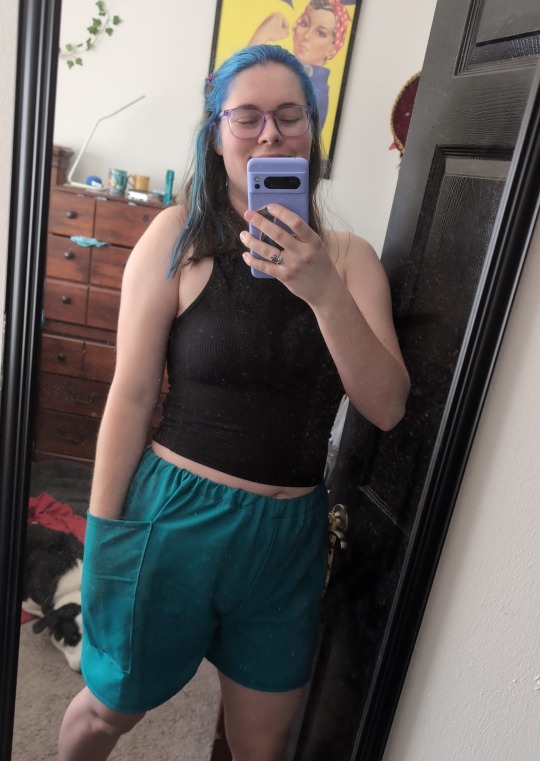
I made these linen-viscose blend shorts in about 2 hours on a whim! I used my self drafted PJ shorts pattern with giant patch pockets on the side and no tie, they're so comfy for the warm weather
2 notes
·
View notes
Text

Now this dress I'm super proud of, I used the Dyanna Dress pattern from Mood! Satin is slippery AF but I wrangled it and made this 70s style dress for a sewing group meetup! Photos were done by photo_by_kitoko on insta 💚
7 notes
·
View notes
Text
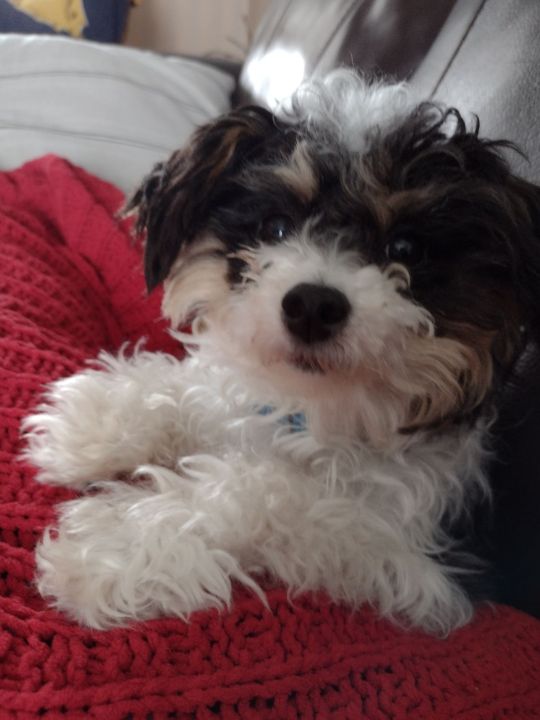
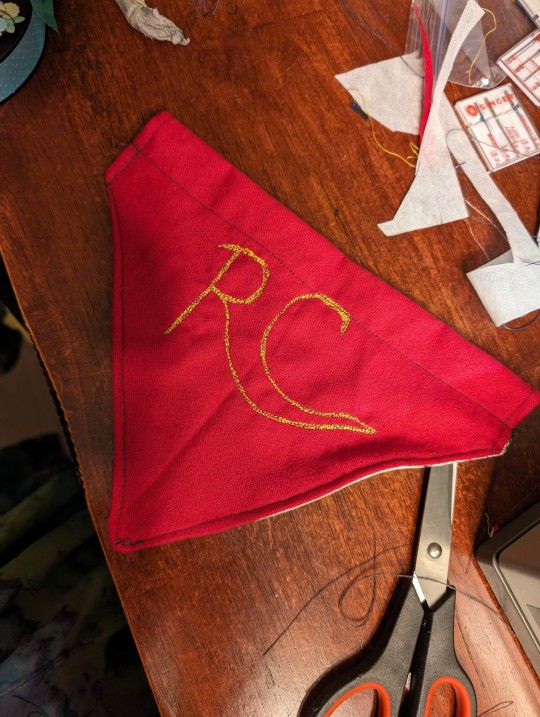
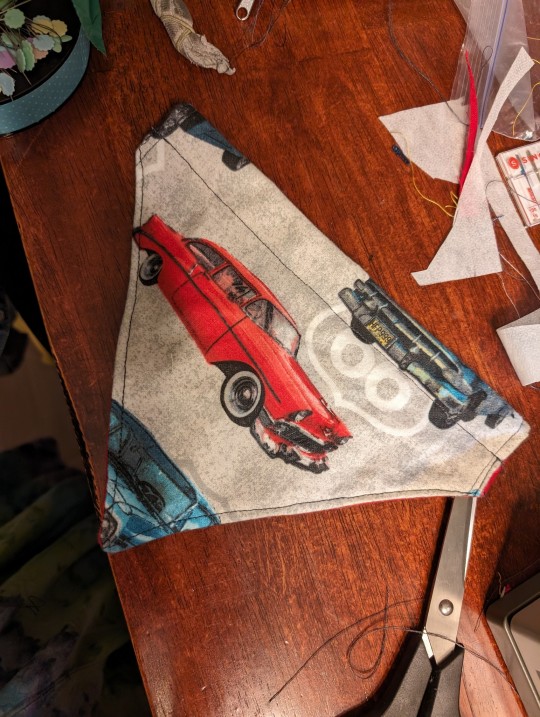
My parents adopted a sweet little poodle mix puppy! His name is Rusty, and his original name from the shelter was Cecil. It's stuck around as "RC" and so I made him this reversible bandana!
2 notes
·
View notes
Text
Saving to make something similar for my friend!!
Easy Skjoldeham Medieval Hood
I’ve posted this elsewhere, but I’m trying to get all my tutorials/rants on ONE PLACE on the internet, so I’m re-posting it here.
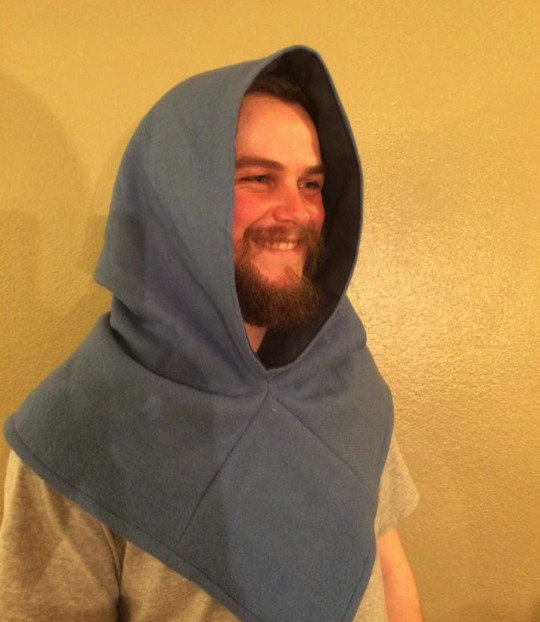
Hello, nerdfriends! Today we’re making a simple hood. This particular hood pattern will keep you warm, shield your eyes, and jazz up your kit without much effort, AND it’s based on history! A body from about the 11th century was found in the Skjoldehamn bog in Norway wearing this style of hood.
The Skjoldehamn body was quite small— probably a slender lady— and we’ve found that this hood isn’t ideal for people with very broad shoulders. The hood fits Alric here very well, but you’re a super-burly dude, you might do better with a pattern that puts the gores at the sides, like the Sunnfjord hood.
Materials for the Hood
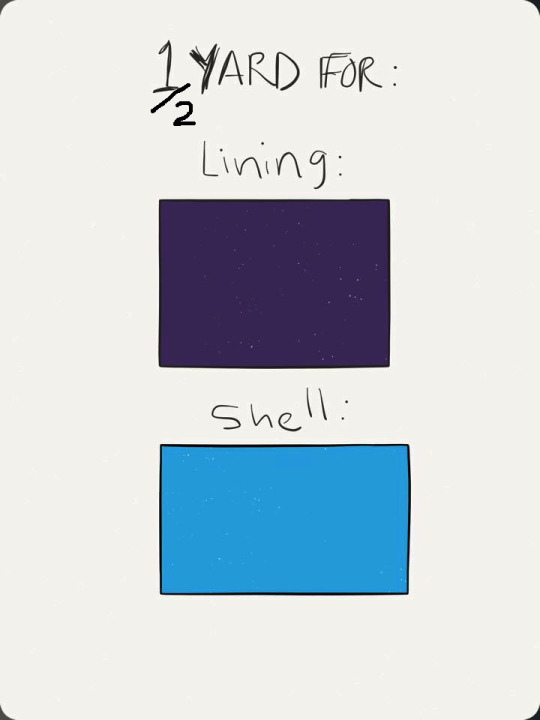
For this hood, you’ll need:
—1/2 yard of outside (“shell”) fabric. Pick something warm. I used wool. (Sorry for the ugly pic edit– you really only need ½ yard!)
—1/2 yard of inside (“lining”) fabric. Pick something soft enough to go next to your face. I used linen.
—needle and thread (or a sewing machine)
—pins
—shears
—a ruler
—chalk/marking pen for fabric
Cut Your Pieces
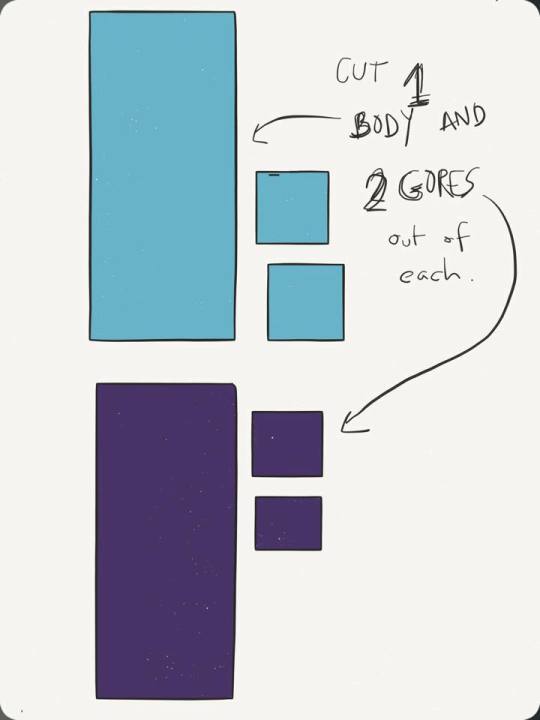
First, cut out your pieces. There are only three parts to this hood: the main ‘body’ of the hood, plus two square ‘gores,’ which add width to the hem.
From both the lining and the shell fabric, you’ll cut:
—one 18” x 46” body panel
—two 8” x 8” gores
Prepare the body panel
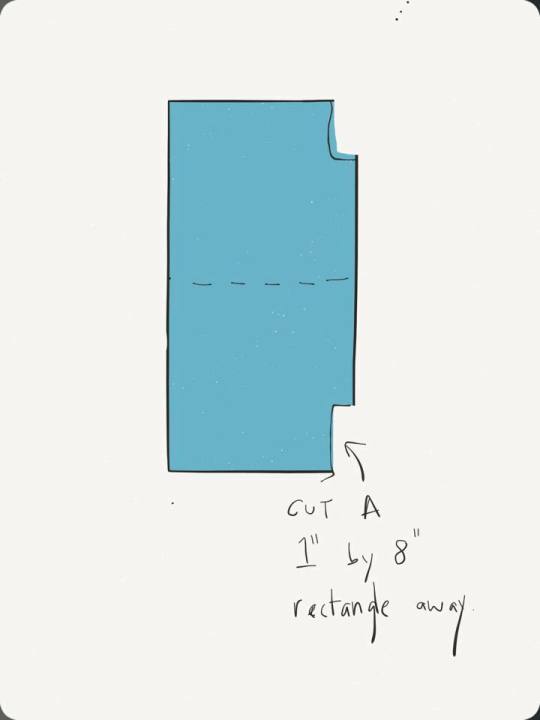
The shell and the lining are assembled separately, so for the first couple steps, it’ll look like you’re making two separate hoods: one out of your shell fabric, and one of your lining. You’ll join them together at the face-opening later.
Trim a 1” x 8” rectangle away from both edges of one side of the body panel. This side will be the front of the hood. Cutting this notch will make it easier to sew the gore in.
Sew the First Edge of the Gore
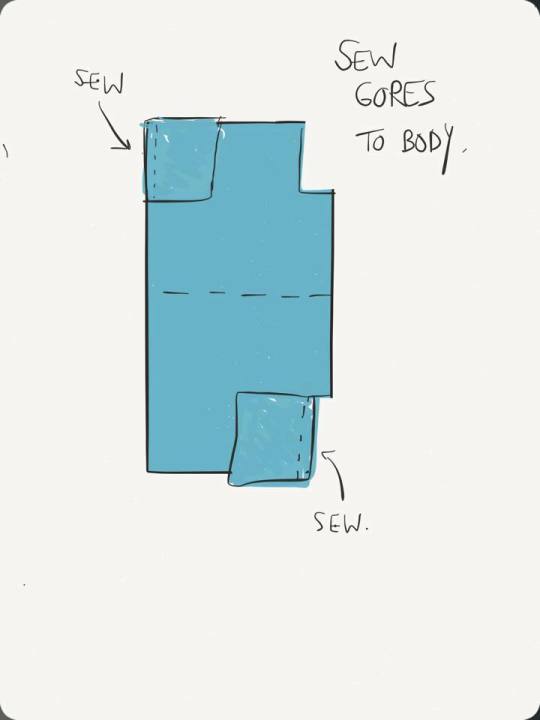
Pin one edge of each gore to the body panel, wrong sides together, like this, and stitch. Make sure to put the gores on opposite sides of the hood!

Fold down the other edge of the hood’s body and stitch it to the other edge of the gore. You’ll sew the back of the hood all the way up, but you’ll only sew the front gore to the notch. If this doesn’t make sense, look at the next picture.
Repeat with your lining fabric.
Yay! You should now have two hood-shaped pieces, one made out of lining fabric, one made out of the shell.
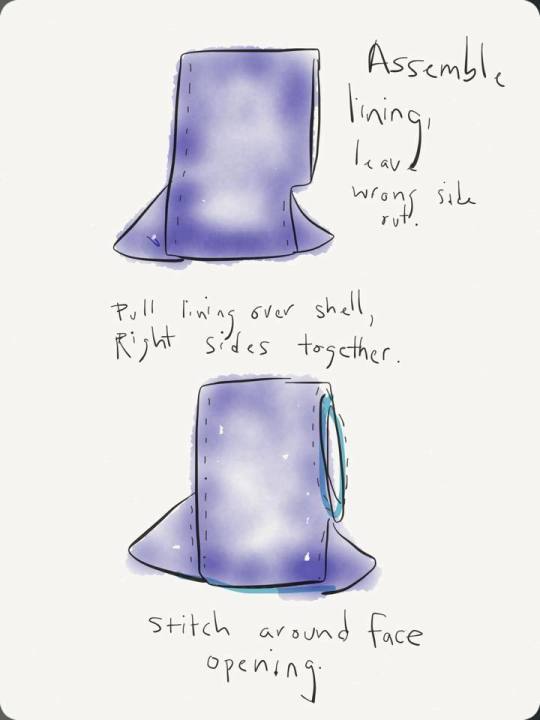
Flip the shell hood so it’s right side out. Pull the lining, right-side-in, over the shell. The “right” sides of both layers should now be facing each other. Pin around the face opening, then sew these two layers together.
Topstitch, Hem, and You’re Done!
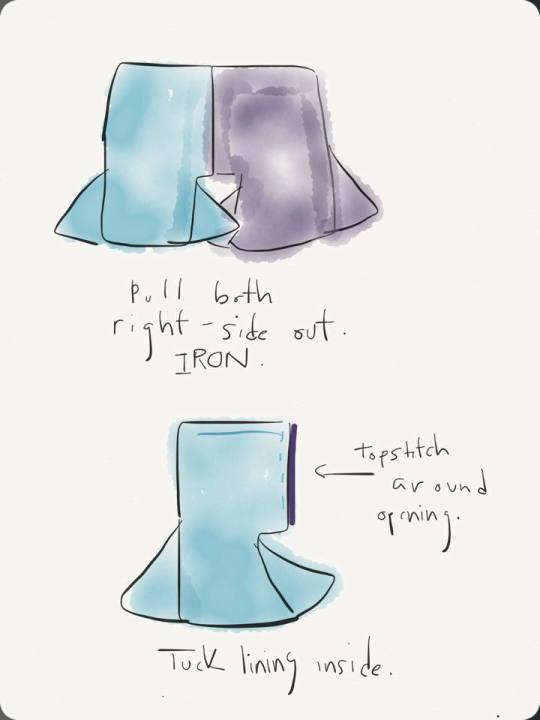
Pull the lining away from the shell until everything is right-side-out. The lining and the shell will only be connected at the face hole. Iron this seam.
Tuck the lining inside the shell. Iron this edge until it looks nice, then topstitch the edge so the lining won’t creep out of the face-hole when you wear it.
To hem the bottom, match the lining to the shell, pinning at the points of the gores and at the seams to make sure everything lines up. Baste the lining to the shell at the hem. The raw/cut edge will still be visible– this is just to keep the two layers from shifting around in the next step. Because the two layers are now tacked together, you’ll now treat your bottom hem like it’s just one layer.
Turn the hem up twice and topstitch to hem. If your shell fabric is bulky, use a bias tape or a self-fabric facing so the fold won’t be too thick. If you’re not bothered by bulk, just fold the hem up twice to the inside and stitch it down.
Variations and Other Ideas
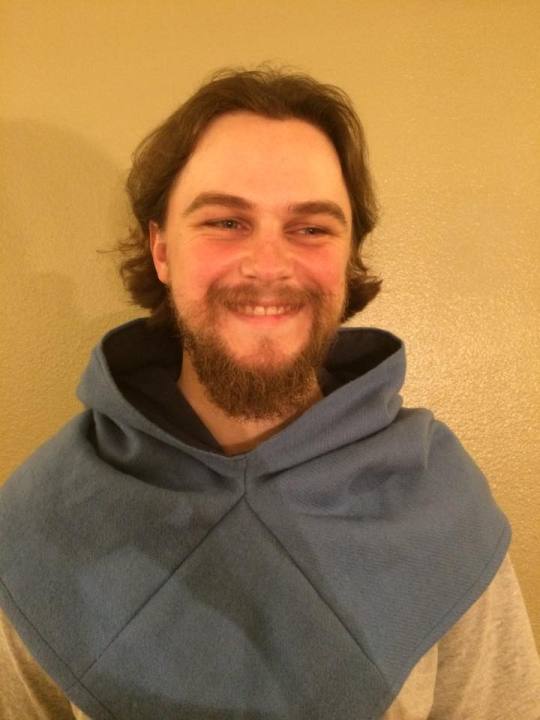
Hooray, you made a hood! Look how happy you’ve made Alric! :D Now that you’ve managed your first one, you might be interested in exploring some fun variations:
—round off the points of the gores for a different look
—cut the hem into interested “dagged” shapes
—make the hood reversible: stitch the lining hem to the shell hem during step 6, leaving a gap for your hand, then turn and press
—round off the back of the hood, or add a long “liripipe” tail
Thanks for reading! Let me know if you’ve made a hood!
150 notes
·
View notes


Text
I've decided this year in sewing I'm on a mission to up cycle things that don't fit me anymore that I've been sitting on in my closet...this skirt was the first of many! It used to be a pair of pants, but with no stretch it always felt like I would be busting a seam if I moved regularly. Now it's comfy and roomy as this skirt!
0 notes
Text
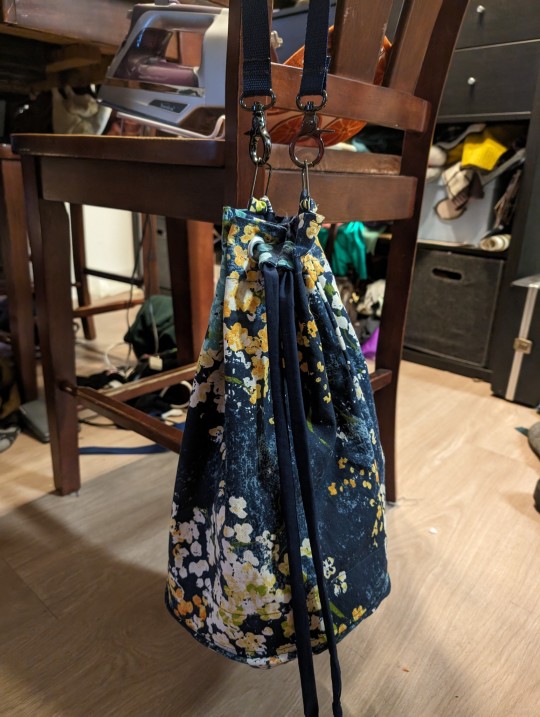
I was struck with the sudden need to create a bag that nods to my favorite childhood bag....a bucket bag! Took less than a week to have the idea to finished product. I love how it turned out!!!
0 notes
Text
When I have enough space to contain yarn and fabric ............
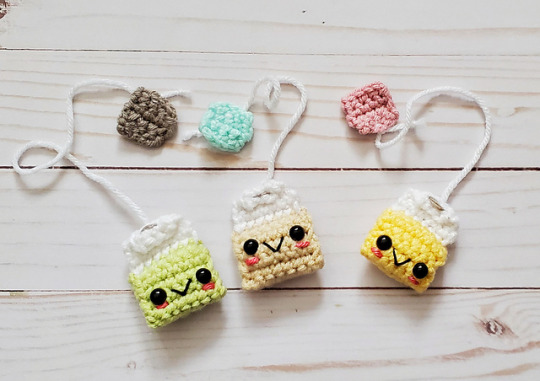
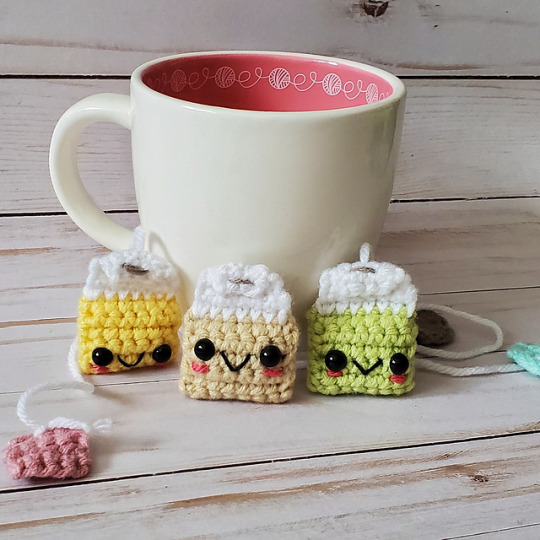
Crochet a Lil Teabag Amigurumi Bookmark ... So Wee! 👉 https://buff.ly/3rj73VG
74 notes
·
View notes
Text
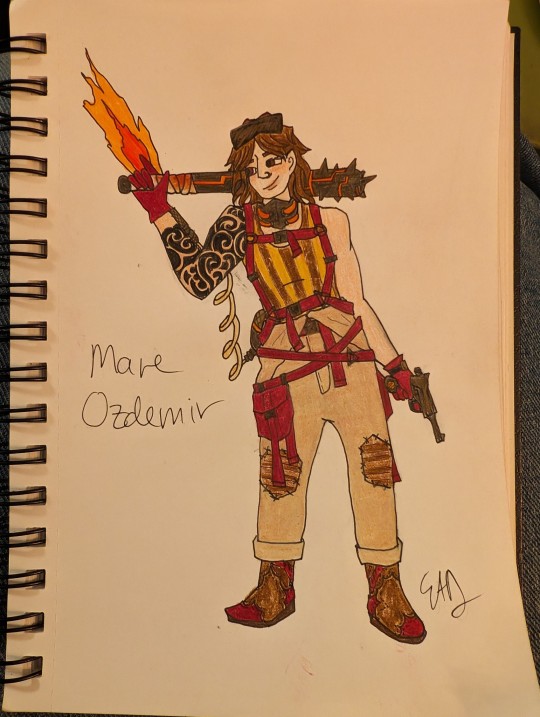
New DND campaignnnnnn we are playing in a minimal magic steampunk setting but I'm still playing a druid because WHY NOT
6 notes
·
View notes
Text

Made the Sunday jumper from mood with knit fabric I got at a favorite thrift store!
2 notes
·
View notes