
Don't wanna be here? Send us removal request.
Statistics
We looked inside some of the posts by blogeve913 and here's what we found interesting.
Average Info
Notes Per Post
1
Likes Per Post
1
Reblog Per Post
0
Reply Per Post
0
Time Between Posts
13 days
Number of Posts By Type
Text
12
Last Seen Tumblr Blogs


Fun Fact
In 2020, 44% of users from Denmark used Tumblr daily.
Text
Completely Free Mac Cleaner
Best 100 Free Mac Cleaner
Free Mac Cleaner Reviews
100 Free Mac Cleaner
£39.95/$44.95 here, a free trial is available. MacCleaner Pro from Nektony is actually a suite of six applications developed to clean up and speed up your Mac. Answer (1 of 3): Q: What is a CCleaner’s totally free alternative on a Mac? A: There is absolutely no need for any “cleaner” app on macOS, ever. I have tested all the well advertised cleaner apps and none of them do anything that is actually useful to Mac users, because macOS is descended direc.
So you’ve had your Mac for a while, and things don’t feel as fresh and clean as they used to? Although Macs don’t require a lot of maintenance for cleaning, those temporary files, app leftovers, and system cache do accumulate. These files may slow down your machine and take up a lot of valuable space. In this article, we share quick and easy ways to clean up your MacBook. If you want to clean up your Mac manually, jump to the section linked below. Let’s get started!
OnyX is a completely free Mac cleanup software. It makes it convenient to perform various maintenance and cleaning tasks on Mac. It helps in the accurate identification of problematic files and folders. It even lets you rebuild miscellaneous indexes and databases. This free Mac cleaner is also capable of validating the structure of the system. Clean Me is an open source cleaner for Mac that started as a personal project and gradually evolved into a compelling alternative to the best disk cleaners for Mac. It can clean everything from the Trash folder to downloaded mail attachments, document revisions, app, user, and system caches, spotlight indexing data, system logs, and more. Having an free Mac virus cleaner installed on your Mac is one of the most important things that you should do and have on your Mac. This is for your Mac to become safe and protected from any malware infestations. Antivirus software has the ability to remove any threat and suspicious files, folders, or applications on your Mac.
How to clean your Mac automatically
Here’s a simple diagram to explain the most common types of computer junk, sorted by size. Some of these, like Trash bin files, are easily reachable, while others are stored away in hidden system folders. Sadly, there’s no easy way to clear them up without special skills.
If you don’t feel like spending the next several hours cleaning your Mac manually, you can use a powerful cleaning tool CleanMyMac X to find and remove all the clutter your Mac contains. It knows which files are useless, how to find and remove them completely. CleanMyMac X has everything to finish the 3-hour task of a Mac cleanup in under 5 minutes. It will even clean up the junk you didn’t know about and give your computer a speed boost.
How to clean up system storage on Mac with CleanMyMac X:
Download CleanMyMac X for free here.
Run the app and go to System Junk.
Click Scan.
Press Clean to get rid of all junk.
Done! Now your Mac looks much better!
How to Clean Mac Hard Drive Manually
If you never performed an automatic or manual system cleaning — it means that your Mac has been collecting unnecessary files and clutter for years. You can quickly clean up your Mac with these easy steps.
1. Clean up cache
You’ve probably heard “Remove your cache” as a web browser troubleshooting tip. In fact, your Mac stores a lot of information in files called caches, allowing fast access to that data and reducing the need to get it from the original source again. Unfortunately, those files take a lot of space on your Mac, and instead of speeding things up, they slow your computer down. Therefore, if you want to give your system a boost, clean your Mac from the cache files.
There are two ways to do that: you can delete them manually or use a MacBook cleaner like CleanMyMac X to do the job for you. Of course, the second way is an easy and fast one. However, if you decide to clean up the cache manually, check out a comprehensive guide on “How to Clear Cache on a Mac.”
2. Uninstall apps you don’t use
The applications you’ve installed on your Mac take up space, of course. And over time when your Mac becomes full of different apps, it may start running slowly. How to clean MacBook? In the first place, you need to remove the apps you no longer use or need. To do this, right-click on the app you want to remove and choose Move to Bin.
You may be surprised to find out that sending an app to the Trash will not uninstall it completely because the app leftovers still remain on your Mac taking up a lot of storage. So, if you want to be a responsible Mac user, you need to uninstall applications the right way. Macos mojave download for vmware. Here’s a step-by-step guide on “How to Uninstall Apps on a Mac.”
Extra step: Trim down your login items
Login items are applications that run automatically upon startup. Nowadays, every second app tries to become as prominent as possible and get into your Login Items. First of all, you may not even know what they are (not all of them appear in the Dock). Secondly, such apps consume memory. That's enough reason to get rid of extra login items you don't need.
Open System Preferences.
Go to Users & Groups.
Choose your nickname on the left.
Choose the Login Items tab.
Check startup programs you want to remove.
Press the “–” sign below.
You’re done. Soundflower mac download 2020.
3. Clean out useless duplicates
Identical photos, music tracks you’ve added one time too many, saved and re-saved PDF files… all of that sits on your Mac and gobbles up storage. The storage that could be used for better purposes.
So how do you quickly weed them out? The fastest way is to use Gemini 2: The Duplicate Cleaner.
Download and launch the app
Click “Scan for Duplicates”, and watch as it quickly fetches them from different corners of your Mac.
Once the scan is done, hit Review Results and check which copies you want to remove.
Click Smart Cleanup to delete everything you’ve selected.
That's it. Now your Mac should be completely duplicate-free.
4. Empty the Trash
Even though you’ve deleted the files, they reside in your Trash bin taking up a lot of storage on your Mac. They are just waiting to be removed completely. If you want your precious hard drive space back, you need to empty the Trash.
Here’s how to clean your MacBook from the trash:
Click and hold on the Trash can icon in the Dock.
Click Empty and then Empty Trash.
The process is quite simple, right? There is even a more effortless way to clear Trash. CleanMyMac X scans your Mac for junk and lets you remove all trashed files. To do that, launch CleanMyMac X and press Scan. When the scan is completed, click Review Details to see what exactly CleanMyMac X has found.
I’ve already cleaned Bin a couple of weeks before, but over some time, almost a gigabyte of trashed files has accumulated. Now, I can simply click Back to Summary and then Run to clean Trash and system junk.
5. Reduce clutter
Apple has already thought about the clutter that can be generated on the Macs and provided a possible solution. Here’s how to reduce clutter on your Mac:
Go to the Apple menu.
Choose About This Mac and then Storage. Here you can see how much free space is left on your computer.
Then click Manage.
Here’re some recommendations for saving space on your Mac. You can choose Review Files to examine apps, documents, and other files that are stored on your Mac.
You can choose any file in every category (Applications, Bin, Documents, etc.) and click Delete to remove it and optimize space. Look through other recommendations and make the necessary changes to use your Mac’s space more efficiently.
6. Delete large and old files
It has always been a rule of thumb among computer geeks, that you should keep a minimum of 15-20% of free space on your main hard drive. This is just a rough estimation, but the more free space you have, the faster your Mac works. A computer magazine once performed a test on this, which concluded that the difference in speed can reach as much as 35%. If you work with heavy graphics or video rendering, even more free space is recommended.
How to have more free space? Delete large and old files.
The first way is totally manual and requires you to find them one by one, while for the second way, you just need to make two clicks and CleanMyMac X will do the job for you.
How to clean up Mac with CleanMyMac X:
Download CleanMyMac X (a link to a free edition of the app)
Launch the program.
Go to the Large and Old Files section on the menu.
Click Scan.
Review the details, select what to clean, and then click Clean.
That’s it!
7. Remove old iOS backups
Having your files backed up is a wonderful thing. But over time your Mac becomes overloaded with old backups that take gigabytes of storage on your hard drive. That’s why you should consider removing the old iOS backups you no longer need.
Each backup remains stored on your computer and is accessible via iTunes. To delete the old backups, you need to do the following:
Choose the Apple menu and then select About This Mac.
Go to the Storage tab and click Manage.
Here, choose iOS Files.
Select the backup you want to remove and click Delete.
Confirm and you’re done!
That’s it! The backup files are gone from your Mac forever.
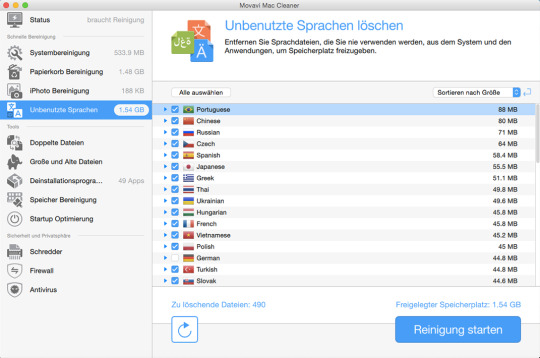
8. Wipe out Language files
Unused language localizations take up about1 GB of storage space. Mac applications come with language files for every language they support. It allows starting using the app in that language immediately. Cool, right? Not always. Just consider: when was the last time you used the app in Bengali or Korean? Since you don’t speak those languages, such files just waste space on your Mac. You need to remove the unnecessary language files and clean MacBook from that clutter.
Best 100 Free Mac Cleaner
How to delete the language files? Go to Finder > Applications, then right-click the app which language files you want to remove and choose Show Package Contents. Open the Resources folder and then find folders ending with “.lproj.” Every folder contains language files for one particular language. Note that for every app you should manually find and select the files to remove. But there is an automatic way to delete the language files that will save you tons of time — CleanMyMac X. Just download the application (for free) and it will do the job for you.
9. Delete old DMGs
Disk images (DMGs) often take up valuable space on your Mac. Here’s how to perform a Mac cleanup and get rid of those files:
Open Finder and type “.dmg” in the search bar.
Then delete all files that have .dmg extensions. Don’t forget to remove them from Trash as well.
CleanMyMac X allows you to locate and delete DMGs quicker. With its System Junk module you can remove unused disk image with a single click of a button:
Just press Clean and it’s done!
10. Sort your Downloads folder
Do you also download things and never get rid of them? Then, your Downloads folder probably needs a good old sort out. If you’re too scared to face that enormous pile of files, here’s a quick trick: sort all your downloaded items by date added. Then, scroll till the end of the folder, and you’ll see the dusty files that have been there for a while. Command-click to highlight multiple files and send them to the Trash.
Free Mac Cleaner Reviews
11. Tidy up your desktop
Many people use Desktop as their primary destination for files. But this could be tricky because your OS treats every file on a desktop as an active window. When items on your desktop are too many, Finder gets substantially slower. This leads us to the most compelling advice in this article — cleaning up desktop does miracles!
Rather than just leaving every file on your desktop, organize them into folders. The latest macOS does that automatically thanks to the Stacks feature: right-click your Desktop and choose Use Stacks. Now all your files are grouped and you can delete them with a click. You can also use Google Drive, Dropbox, or any external storage device to save your files and keep your desktop tidy.
12. Clean your Mac’s keyboard
Our last but not least advice is to wipe your Mac’s keyboard. As you use your keyboard daily, it quickly gets dirty. Moreover, all those crumbs may live under the keys forever!
If you were wondering how to clean Mac’s keyboard, there are no special rules here. You can try blowing the dust and other particles out of your keyboard once in a while. Disinfecting wipes and alcohol-based sprays may also prove useful. Just choose the piece of fabric and wipe the keys gently to make them clean and shiny!
All in all, be careful with your system files. Don’t delete things you’re not sure about. If you are not completely confident that you can manage the task by yourself, better use a dedicated utility like CleanMyMac X to get a fresh and clean Mac in just two clicks. Here's the video describing quick tips to clean up your Mac:
100 Free Mac Cleaner
Happy cleaning!
0 notes
Text
Emulator Android Di Mac
Super Mario was one of the video games that floated our minds when we were kids. Up until now, it’s still the favorite retro game of many people. Apart from Super Mario, Tetris and Pac-Man were a hit but they’re difficult to come by today, which is kind of sad as there can be times when we feel like revisiting joyous childhood days that consist mostly of playing such games.
Android emulator mac os x el capitan Warning: Can only detect less than 5000 charactersA DIR Emulator Emulator: Found Target-Specific 64 Binary Binary Emulator: Emulator / Qemu / Darwin-X8664 / QEMU-SYSTEM-I386 Emulator: Added Library Research path 'Emulator / Lib64' Emulator: Directory found: found: Emulator: Found Directory: / Users / Mac / Library / Android / SDK /. Dapatkan kinerja game tercepat dan terlancar dengan BlueStacks - emulator Android terpopuler, teraman, dan GRATIS di dunia untuk Windows dan Mac. Dipercaya oleh lebih dari 500 juta gamer.
Back in the day, consoles didn’t put a lot of focus on game graphics as they put more emphasis on stories and gameplay. Today, gaming has evolved and brought us stunning life-like visuals. Still, great graphics don’t necessarily mean better games. If you’re like us, then you definitely know that pixelated graphics can offer some of the best gaming experiences.
If you want to relive and re-experience how it was to play a game using an old-school console, you’re in luck as you definitely can without having to purchase individual consoles! You can enjoy the best of old gaming consoles using only your PC! Just choose an emulator that emulates your preferred console, and you’re all set!
The great thing about emulation and console emulators is they let us preserve our history and love for the classic games! Without emulation, it would be hard to get an old Atari, Sega or Nintendo game to work on a computer. Fortunately, there are emulators that help ensure even an obscure title stays alive in one form or another.
As there are tons of console emulators that you can choose from, we’ll help you by featuring the best ones for Mac, Linux, and Windows. But also some are supported for smartphones operating systems too, including iOS and Android. Check them out below!
Quick Navigation: – PS1 Emulator – PS2 Emulator – PS2 Emulator for Android & iOS – PS3 Emulator – PS4 Emulator – PSP Emulator – Nintendo 64 Emulator – Wii Emulator – GameCube Emulator – Nintendo DS Emulator – Sega Dreamcast Emulator – DOS Emulator – Arcade Emulator – Nintendo 3DS Emulator – GameBoy Advance Emulator – Xbox One Emulator – Xbox 360 Emulator – Sega Mega Drive Emulator – Retro Consoles Emulator – Multiple Consoles / Best Emulator
The List of Video Game Consoles Emulators:
PS3Mobi – PS3 Emulator

Download from: Official Website PlayStation 3 games are very popular even to this day. In fact, a lot of people love the PS3 just because they like its titles more than the PS4 ones. Thankfully, you can run your PS3 games on other devices through PS3Mobi emulator.
PS3Mobi is designed to run on iOS, Android and desktop platforms. They also have a Linux platform, but it’s on a different name. The great thing about the PS3Mobi is that there’s no need to tinker with the BIOS file as they’re already built-in into the emulator.
To download PS3 games, you have to visit the PS3Mobi servers where you’ll find a list of available games that you can play in other devices using the PS3Mobi emulator. Theoretically, you can run any PS3 game if it’s in “.ISO” format. However, some games may not run properly if they haven’t been officially reviewed by the PS3Mobi team.
PCSX2 – PlayStation 2 Emulator
Download from: Official Website PCSX2 is another emulator for PlayStation 2, which means you can use it to play PS2 games in other devices. The thing that sets PCSX2 apart is that it has an active community. The forum can significantly help you in case you have problems or issues with the emulator or the games that you’re trying to run. PCSX2 is designed to run on Mac, Windows, and Linux.
Perhaps the most fantastic thing about the emulator is that you can run it and just place your PS2 game on your PC’s CD or DVD drive.
The team behind PCSX2 is also very active. You can check out their website and see the “compatibility score” of the games that you want to play. This will save you a lot of frustration and disappointment.
The GUI of PCSX2 is not the best in the world. However, it gives you a lot of freedom, and it’s very flexible when it comes to your settings.
PS2Smart – PS2 Emulator for Android & iOS
Download from: Official Website If you want to play PlayStation 2 games on your mobile device, then the PS2Smart is an excellent emulator to try. It’s designed to run on both Android and iOS. It doesn’t run on a desktop, but the PS2Smart team has developed another emulator for that.

For iOS users, there’s no need to jailbreak your phone, and that’s a huge plus.
The good thing about the PS2Smart is that you can download the games you want straight from the emulator’s GUI. There’s no need for you to download the .ISO files and place them on one folder. All the steps are done for you once you download from inside the app. However, make sure you have a stable Internet connection as downloading PS2 games tends to take a lot of time.
ePSXe – PlayStation 1 Emulator
Download from: Official Website ePSXe is an incredible emulator for PlayStation 1 as it has a ton of unique features. The emulator boasts of surprisingly fast speed, accurate sounds, as well as support for up to four players on one screen. There’s even a split screen mode which allows you to have great arcade fun together with your buddies.
ePSXe can run easily if your PC is no less than 5 years old. You can expect no trouble in running the emulator at a very good speed. If you have an older PC, then it should have at least a GeForce2 series graphics card or the equivalent, DirectX 8, a CD-ROM drive, and 512MB of RAM.
Check this emulator out for yourself as it’s of great quality, plus it’s quick and easy to set up as soon as you have the files that are needed. With the ePSXe, you’ll be up and ‘playing’ in no time!
PPSSPP – PSP Emulator
Download from: Official Website If you want Sony PSP games to run on your PC, then PPSSPP is perfect for you. You’ll be able to use it to play free homebrew games. You can even dump PSP games in .cso or .iso format. With PPSSPP, you’ll be able to transfer your saved PSP games to your PC. Because PSP is fairly powerful and recent, your PC needs to have decent specs in order to run the games. Although not every game will run perfectly as slowdowns can be pretty common, PPSSPP is still capable of curing old school gaming nostalgia.
PPSSPP has been around for years, so it’s a stable emulator for PSP. Its features include autosave of progress on games, external gamepad and joystick support etc.
PS4 Emus – PS4 Emulator
Download from: Official Website PS4 Emus is a PlayStation emulator that can run on iOS, Android, Mac, and Windows. One of the first things you will notice is that the GUI looks clean and it’s intuitive to use. The emulator has its own website, and you can also download various PS4 titles from there. In fact, it’s best that you only play the games that are on the site as they have been tested and proven to be sufficiently functioning and free from malware.

Installation is also a breeze. Once you download the PS4 Emus installer, you simply run it. After that, it’s all about following the instructions just like with any other installer.
Another thing that’s worth mentioning is that the BIOS file is already included with the package. There are plenty of horror stories about downloading BIOS files from unknown sources, which can then lead to the decimation of user system files. Thankfully, you don’t have to worry about this issue with this emulator.
RetroArch – All-in-One Emulator
Download from: Official Website RetroArch is a reputable emulator as it’s all-in-one, which means it’s compatible with every single system imaginable. From arcade boxes to classic Nintendo consoles and Wii or PlayStation, RetroArch brings about a huge collection of games under one roof.
It also does more than simply run games. RetroArch can make playing sessions even better with filters and cheats, as well as real-time rewinding that can be triggered with only a button press or a single keystroke!
Older games don’t provide a saving option, which definitely sucks, especially when you need to do something else for a minute. Luckily for us, RetroArch makes it incredibly easy to load and save progress so you can carry on where you stopped or left off.
Project64 – Nintendo 64 Emulator
Download from: Official Website The Project64 is a Nintendo 64 emulator for Windows and Android. Unfortunately, iOS and Linux are not yet supported. There are plenty of emulators for the Nintendo 64, but Project64 is perhaps the best one to start with for a couple of reasons.
For one, it’s straightforward to set up. If you’re having problems, then they have a forum where you can ask questions to get the emulator running. It’s also the most compatible when compared to its competitors. The emulator supports any USB gamepad, and you can also customize the layout of the buttons. Aside from that, the emulator supports a bunch of extra plugins such as audio, video, controllers, and other features that increase stability and enjoyment.
Keep in mind that playing Nintendo 64 games in Project64 will require you to load the ROM file.
Dolphin – Wii and GameCube Emulator
Download from: Official Website Dolphin is an emulator for Wii and GameCube developed in 2008. Most importantly, the team behind the emulator is still active even to this day. The emulator is designed to work for Mac, Windows, and Linux.
Another thing that’s worth mentioning is that the emulator has a lot of documentation behind it. On their website, you can find a lot of guides like how to rip games, increase performance, and configure controllers. If you’re still having problems after following the guides, then you can check the forums. The community is active and very helpful.
They also have a list of titles that are compatible with the emulator. This is not only convenient, but it’s being updated regularly.
DeSmuME – Nintendo DS Emulator
Download from: Official Website It can be hard to get an emulator for Nintendo DS, but we still managed to find a good one to play Nintendo DS games with, especially the ones that you’ve been wanting to play for a long time! All titles may not be available, but you can certainly find a good number of Nintendo DS classics that are compatible with DeSmuMe.
Another thing that we found to be impressive with the Nintendo DS emulator, DeSmuMe, is that it can be downloaded for free! Yes, you heard that right. All you have to do is set it up and get started right away!
Aside from being free of charge, DeSmuMe has lots of great features that you can’t find in most emulators like recording game-play footage. There’s also lots of support documentation that you can find easily on their site. Games run crash-free as well and saved games boot up easily and quickly. On top of all that, the DeSmuME is also simple to run unlike lots of other emulators.
NullDC – Sega Dreamcast Emulator
Download from: Official Website NullDC, an open-source emulator of Dreamcast for Windows, is one of the most popular emulators. It runs any Sega Dreamcast game as well as the commercial games, giving NullDC an instant edge over the other few emulators that can run commercial games.
According to user reviews, NullDC provides an amazing gaming experience. The sound and graphics are on an exceptional level as NullDC makes use of plug-in architecture for sound, graphics, memory cards, as well as reading games that are burned on CD-ROMs.
Unfortunately, the emulator is no longer being actively supported. Its latest version was launched way back in 2011. Still, you can expect NullDC to run smoothly on any Windows PC. If you really want the newest version of NullDC, consider downloading Reicast as it’s a product of the same developers. Reicast was developed using the code of NullDC.
DOSBox – DOS Emulator
Download from: Official Website DOSBox is an open-source program that’s free of charge to use to emulate the MS-DOS OS right from your very own Windows PC. To launch the emulator, you simply need to install it on your PC. Then, create a folder where you can stash your games into.
We suggest you have all your favorite games in a single folder as that’s the key to having a fun and enjoyable experience with DOSBox. This is even more crucial if you’re not familiar with MS-DOS OS.
MAME – Arcade Emulator
Download from: Official Website MAME Arcade Emulator was created to emulate arcade game systems. The reason behind the creation of MAME was noble like all other emulators. The developers wanted to have software that could mimic the hardware of retro games to help preserve the gaming community’s history of games. The team behind it also wanted to prevent classics from disappearing into oblivion.
Right now, you will be able to download MAME on a computer. The accuracy of this emulator improves with every single update that’s introduced monthly. MAME is one of the best around as it allows you to play at least 8,000 games that are, as of today, impossible or difficult to emulate using other emulators. What we love about MAME is that it allows a user to play several different classic games that are from different systems without having to install several emulators. This is not just convenient, but it also saves lots of valuable hard drive space.
Citra – Nintendo 3DS Emulator
Download from: Official Website Citra is an emulator for Nintendo 3DS. It’s designed to run on Mac and Windows. The great thing about this emulator is that it’s made to run games at 100%. This means that you can get the same level of performance as if you’re running games from a console. In fact, there are cases in which Citra can display higher resolutions than the console.
Keep in mind that Citra’s performance is still reliant on your system resources. An emulator can’t simply add more RAM or processing power from thin air no matter how good it is.
The first public version of Citra was released back in 2015. Hence, it’s an emulator that’s been here for a while, and it’s still being updated. The emulator is also equipped to run one or two screens depending on the game. The touch control is converted to mouse control when playing on your desktop.
VBA-M – GameBoy Advance Emulator (Visual Boy Advance)
Download from: sourceforge.net If you want to play GameBoy Advance on a desktop, then the emulator you’ll need is the VBA-M. When compared to other emulators, the VBA-M is not the most streamlined option. However, on the upside, it’s compatible with most of the GameBoy Advance titles.
Keep in mind that VBA-M doesn’t have its own official website yet. To download it, you can go to ScourgeForge.net or EmuParadise.me. Installation is pretty much standard.
What’s not the standard is how you play the games. Usually, you have to load the emulator, and from there you click the games that are already loaded. With VBA-M, you have to run the software first. Once it’s opened, you need to drag the ROM file into the screen. If everything is a green light, then the game should start in a few seconds,
BolXEmu – Xbox One and Xbox 360 Emulator

Download from: Official Website BolXEmu is an excellent emulator that’s able to run Xbox One and Xbox 360 games. It’s like having two emulators in one. The emulator is designed to run on Windows, Linux, iOS, and Android.
Playing the games is also fun as the frame rates are high thanks to the vSync technology. The BIOS file is also included, so you don’t have to bother with that. With BolXEmu, you also have the option of setting different screen resolutions. This is an excellent way of increasing the FPS if the game is too resource-intensive and your system can’t handle the demand.
The emulator can make use of your device’s GPU if it’s Nvidia or ATI Radeon. However, you might want to check their website as not all GPUs are supported. Thankfully, the BolXEmu emulator can automatically optimize the settings which will fit best with your system’s resources.
Kega – Sega Mega Drive Emulator
Download from: Official Website Kega is an emulator for a lot of Sega consoles such as SC-3000, SG-1000, Game Gear, Mater System, 32X, Mega-CD, and Sega Mega Drive. It’s designed to run on Windows, Linux, and Mac.
The beauty of Kega is that it’s designed to run efficiently, and it’s also highly optimized. It has no problems running games at 60 frames per second even on a Pentium III class computer. Steve Snake, the primary developer of Kega, has placed heavy emphasis on accuracy. As a result, you can get near 100% emulation when playing the games on a desktop. Another benefit is that Kega offers a higher rate of compatibility compared to other competing emulators. However, Kega is not as well known. Hence, it’s kind of a hidden gem that works even better than the popular ones.
Mac Emulator For Pc
Keep in mind that if you’re playing on a Windows 10, there’s a common incompatibility issue that causes the emulator to freeze up. Thankfully, you can easily fix this problem by right-clicking the Fusion.exe file, choose properties, then compatibility, and lastly, check “Disable Fullscreen Optimizations.”
OpenEmu – Retro Consoles Emulator
Download from: Official Website The last emulator on our list is OpenEmu. This is an emulator for almost all classic retro gaming consoles with complete support for VirtualBoy, TurboGrafx 16, Super Nintendo (SNES), Sega Genesis, Sega Game Gear, Sega 32x, Nintendo DS, NES, NeoGeo, Game Boy Color, and Game Boy Advance.
Emulator Android Di Mac Os
Basically, OpenEmu bundles every single emulator into one app that allows users to have one central hub for all their emulation needs. It offers a beautiful gaming library browser as well.
OpenEmu works incredibly well in all modern Mac OS X versions, but you would have to bypass Gatekeeper if you have a new version like Mavericks, so you can open the emulator. Don’t worry as you only need to do it once. As for games, they can easily be played. You simply have to drag and drop ROMs into the app. You can also use the emulator to scan your hard drive for ROM files that are compatible.
Macam Macam Emulator Di Android
Conclusion
From the list above, you already know very well that console emulators come out in large numbers as more and more people become drawn to the graphics of old games that are now rare and almost non-existent! As we’ve explored Internet’s every single tooth and cranny, we can confidently say that you can’t go wrong with any of the console emulators that we have featured above as they’re guaranteed to bring back your nostalgic memories and do so in high resolution!
Android Emulator For Pc
Tell us what you’ve chosen to use by dropping a comment below.
0 notes
Text
Reinstall Os X El Capitan
Learn the common OS X El Capitan problems and be instructed on the workflow of downgrading to previous operating system version in a hassle-free way.
Step 1: Before you can install OS X El Capitan, you will need to download it from the Mac App Store. It is available for free. Make sure that when the installer is finished downloading, you quit the installation process and don’t actually allow it to install El Capitan over your existing Yosemite or Mavericks system.
DVD DL, Mac OS X 10.11 El Capitan Full OS Install Reinstall Recovery Upgrade. Latest certificate (expires ). Please CHECK twice if your Mac model is compatible with this macOS!! If you are not 100% sure please check the pics or message me your mac model and year and I can tell for sure if would work or not!
To get the latest features and maintain the security, stability, compatibility, and performance of your Mac, it's important to keep your software up to date. Apple recommends that you always use the latest macOS that is compatible with your Mac.
Learn how to upgrade to macOS Big Sur, the latest version of macOS.
Check compatibility
The version of macOS that came with your Mac is the earliest version it can use. For example, if your Mac came with macOS Big Sur, it will not accept installation of macOS Catalina or earlier.
If a macOS can't be used on your Mac, the App Store or installer will let you know. For example, it might say that it's not compatible with this device or is too old to be opened on this version of macOS. To confirm compatibility before downloading, check the minimum hardware requirements:
macOS Catalina 10.15 hardware requirements
macOS Mojave 10.14 hardware requirements
macOS High Sierra 10.13 hardware requirements
macOS Sierra 10.12 hardware requirements
OS X El Capitan 10.11 hardware requirements
OS X Yosemite 10.10 hardware requirements
Why Can't I Reinstall Os X El Capitan
Download macOS using Safari on your Mac

Safari uses these links to find the old installers in the App Store. After downloading from the App Store, the installer opens automatically.
macOS Catalina 10.15 can upgrade Mojave, High Sierra, Sierra, El Capitan, Yosemite, Mavericks
macOS Mojave 10.14 can upgrade High Sierra, Sierra, El Capitan, Yosemite, Mavericks, Mountain Lion
macOS High Sierra 10.13 can upgrade Sierra, El Capitan, Yosemite, Mavericks, Mountain Lion
El Capitan Os X Download
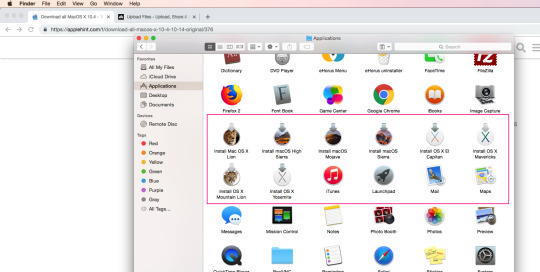
Safari downloads the following older installers as a disk image named InstallOS.dmg or InstallMacOSX.dmg. Open the disk image, then open the .pkg installer inside the disk image. It installs an app named Install (Version Name). Open that app from your Applications folder to begin installing the operating system.
macOS Sierra 10.12 can upgrade El Capitan, Yosemite, Mavericks, Mountain Lion, or Lion
OS X El Capitan 10.11 can upgrade Yosemite, Mavericks, Mountain Lion, Lion, or Snow Leopard
OS X Yosemite 10.10can upgrade Mavericks, Mountain Lion, Lion, or Snow Leopard
This posting could also be titled one of the following: Mac extract files from multiple folders.
Reinstall Os X El Capitan From Usb
Unable to download Mac OS X El Capitan/Yosemite
Download may be corrupt or invalid
Re-Installing OS X El Capitan/Yosemite
Although Apple is about to release the next version of the newly renamed macOS in the coming days/weeks, I expect this posting will be useful not only for OS X El Capitan or Yosemite, but also likely for the next version of macOS Sierra (10.12).
If you are already running OS X El Capitan (10.11) and need to reinstall the OS or install a fresh installation to a new hard drive (or partition), you may find as I did that downloading the OS X El Capitan (10.11) from the Mac App Store is simply not working. What I experienced after clicking the Download button was a busy indicator spinning indefinitely and the download never happening. I tried this on several different Macs with the same result. https://blogeve913.tumblr.com/post/655785314468724736/unzip-zip-file-mac-terminal. Of course, all my Macs were already running OS X El Capitan (10.11) so my attempts failed consistently on all three.


After contacting Apple Support, my first call ever by the way, apparently Apple now only allows each Mac to download the OS X El Capitan/Yosemite installation file one time per machine. This is what I was told by Apple Support. Also, when looking at my Purchased apps in the Mac App Store the OS X El Capitan did not allow me to download it and showed disabled “Downloaded” button instead, even though the OS install file already on my Mac was unusable. Delete this file had no affect on the ability to re-download the OS installation file.
However, Apple Support instructed me how to accomplish this another way – a legal and supported option. And that is by booting your Mac into Recovery Mode (or OS X Utilities) menu. Here are the steps.
Reboot your Mac and enter Recovery Mode by pressing Cmd-R during the boot up sequence. You need to hold down the Cmd-R keys until the Apple logo appears. It can take several minutes before the Recovery Mode menu finally appears, so be patient.
Select the Reinstall OS X option and click Continue.
You will be given the option to select the target drive where the new OS will be installed. For me, I had two drives and wanted to install it on a newly attached SSD drive. Also, depending on the your computer you may need to select and connect to WiFi.
A new copy of OS X (macOS) will be downloaded and the installation will begin.
Cannot Reinstall Os X El Capitan
Here is a snapshot of the OS X Utilities (Recovery Mode) menu.
0 notes
Text
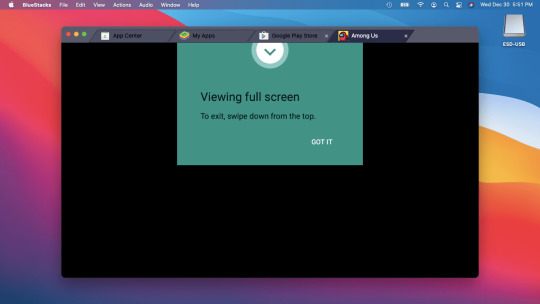
Among Us On Mac Without Bluestacks

How To Get Among Us On Mac Without Bluestacks
Update Among Us On Bluestacks
Whatsapp is one of the most famous messaging app available for smartphones, so people who don’t own a smartphone like to use it via their laptops or computers. Now if you are one of those people who want to install Whatsapp on their phone without installing Bluestacks or any other App Player or Simulator.
Herunterladen Spielen Von Among Us Auf Pc Mac Emulator from cdn-www.bluestacks.com If you have found yourself in the situation where you need to install among us on your computer, you no longer have to worry. Then, exit these settings. ☛ Get BlueStacks For Mac - how to get BlueStacks for free on Mac! Get BlueStacks for Mac OS X.#BlueStacksMac #BlueStacksMacDownlo.
We know that there are many reasons for not using these players or simulators, they are bulky, they require high configuration, they require graphic cards to run or may be you don’t trust them to be installed on your PC. But Now with this method you don’t need any Graphic Card.
Things you Need –
Working PC with Windows XP/Vista/7/8
A Internet connection
Mobile number to create your new Whatsapp account (not needed if you already have a Whatsapp account).
Wassapp Application
Wassapp application basically allows any user to chat with his WhatsApp contacts from a computer (using a phone number that has been previously registered in WhatsApp, using a smartphone or any other method).
Linux and OS X versions will be available soon.

Here are the easy steps to Download Whatsapp on your PC without using Bluestacks or any other App Player.
First of all Download Wassapp for Windows.
After completeing the download, double click the downloaded file and install the Wassapp application.
When installation is completed open Wassapp using desktop shortcut.
Now enter you mobile number and password.
Then either click on Login or Register. Login if you are already using Whatsapp from your number or register if you don’t have an account.
That’s it, now add you friends to your list using their contacts and chat with them for free.
NOTE:
If the phone number was registered on an Android phone, the password is the phone’s IMEI. If the phone number was registered on an iPhone, the password if the WiFi MAC address.
If you are having any problem, feel free to contact.
Do you want to know how to play among us on pc for free?
This article will show you how to play Among Us on PC FREE!! with EVERYTHING UNLOCKED without bluestacks! MODDED CRACKED
https://www.starsupport.tk/2020/08/among-us-pc-free.html
How to get ALL MAPS HATS PETS COSTUMES FOR FREE ON AMONG US MODDED
Step 2: After the visit, you need to scroll down and you will see a download button.
Step 3: Click on the Download button and you should be redirected to UploadHaven.
Step 4: Wait 5 seconds and click on the blue 'Download Now' and let the download begin and wait for it to finish.
Step 5: After download 'right click' on the file and extract it. You need WinRar to extract the file.

Step 6: Double click inside the Among Us folder and run the exe application.
How To Get Among Us On Mac Without Bluestacks
This game is already pre-installed for you, meaning you don’t have to install it. If you get any missing DLL errors, make sure to look for a _Redist or _CommonRedist folder and install Directx, vcredist, and all other programs in that folder.
What is Among Us?
Among Us is a game where 4 to 10 players join one of three maps and play as either an imposter or a crewmate.
The imposter is hidden among the crewmates and must convince the other players that he is a crewmate, his goal is to kill everyone.
The crewmates' goal is to finish their tasks and vote out the imposter.
This is a very simple premise but the complexity of the game comes from the social deduction aspect of it.

Update Among Us On Bluestacks
In many games I played as an imposter I have killed someone in front of another person but then I reported the body and swore that the person who saw me was in fact the person who is the imposter. While they begged and begged, I could get into the psychology of the other players since I called him out first and he was voted out. When it was revealed that he is not an imposter my crewmates grew suspicious of me because they saw I lied about the other guy being an imposter and voted me out. Had I thought this through maybe I would have won and that is exactly why this game is so addictive.
There is always something you can do differently and there is always someone who can be fooled.
Download netflix on computer mac. The best part of this game is when you play on a call with friends. When everyone starts shouting their attacks and defenses, too much emotion on any side can strain or ruin friendships so everyone must be aware that this is just a game. If everyone is aware this is just a game this game ascends into levels of scheming and 'gutibaji' as 'chor publish' or 'wink murder',
Download Game Here
Currently, in the lockdown, I could not play a match of 10 people in person but I can predict that once the lockdowns are over Among Us will become a staple game for any gathering of friends or family. So if you want to play with your friends now download AMONG US for PC FREE with everything unlocked. You do NOT need blue stacks to play this version.
0 notes
Text
Mac Extract Files From Multiple Folders

Mac Extract Files From Multiple Folders
Mac Extract Files From Multiple Folders Free
Batch Extract Files From Folders
Get a secure archiver app
Compress and unpack any files on Mac with Archiver.

On your Mac, click the Finder icon in the Dock to open a Finder window. Select the files you want to combine into a PDF. Alternatively, you can select the files on your desktop. Note: The files appear in the PDF in the same order that you select them. Control-click the selected files, then choose Quick Actions Create PDF. Extract files from multiple folders into single folder Problem: I need help with it Extract files from multiple folders into single folder. Asked May 15 Junia Phoebe 83.8k points.
The allure of zipped files is simple: they allow you to directly send and receive files, or batches of files, without encroaching on file size limits. Often, email providers have limits on how large attachments can be. Zip files make it easy to bypass that limitation without sending multiple emails.
Zipping files can also be useful for compressing files for storage on your Mac, or an external hard drive.
All-in-one file management
Get 190+ apps to deal with your files in one Setapp suite. Zip and unzip files, edit and search PDFs, change file formats, and more.

How do you open a zip file on a Mac? Or what's the best way to do that? There are, of course, several methods for creating archives, such as built-in utilities, Terminal, and third-party apps. Below, we are going to explore how to unzip files on Mac, how to create zip archives, and showcase some archivers that make it really easy to zip and manage zipped files.
What is a Zip file?
A zip file is a lossless way to compress and archive files and folders. You often encounter zip files in emails, as mentioned, but also when downloading from the internet. If you've ever downloaded an app or extension directly from a developer website, chances are it was a zipped file.
It uses the '.zip' filename, and its icon is typically a folder with a zipper running up the middle. Zipping files is a time-tested method, and is largely unchanged. Its use-cases have expanded, though. We use zip files for sending large files and bundles of PDF or text files, but it's now used as a method to send large folders of images as well as for downloading applications or games from the internet.
How to zip files on a Mac
Before we talk about some special apps and tools, we need to mention built-in macOS's utility that allows you to compress and decompress files and folders. Your Mac's simple Archive Utility, stored in the Applications > Utilities folder, is a simple, direct way to zip files. Its functionality is limited, but it's a decent option for quick zipping and unzipping of files and folders when you need to open zip files someone has sent you.
Here's how to zip a file on Mac with the Archive Utility:
Find the file or files you want to zip. Note: if you'd like to zip multiple files, it's best to put those files in the same folder. Then you can proceed to step two.
Right-click on the file or folder.
Select 'compress'
That's all it takes. Note the zipped file or folder will be created in the same location as the file or folder you zipped. You can move it manually if you like.
If you want to zip multiple files without first adding them to a folder, that's also possible with Archive Utility. Here's how:
Open the folder with files or folders you want to zip up
Select the items you want to include in the zip file and right-click on any one of the items.
Select 'Compress (x) Items' from the pop-up menu.
Once again, a progress bar will display. When the compression is finished, zipped items will be stored in a file called Archive.zip, which will be located in the same folder as the original items.
How to create an encrypted zip archive
Now that you know how to create a zip file on Mac, you may be wondering how to encrypt that zipped file. Archive Utility doesn't allow for this, but you can use the Terminal to accomplish this feat. Here's how:
Open 'Terminal' from your Applications
Enter the following command: cd desktop
Press enter on your Mac's keyboard
Enter the following command: zip -e (zipped filename) Note: Do not use brackets. If your filename were 'test.zip', you would enter: zip -e test.zip
Press enter
Terminal will ask for you to assign and verify a password.
The encrypted file will then appear on your desktop. Opening it will require a password.
We should note this method is clunky, a bit confusing for many – and dealing with Terminal is always a bit nerve-wracking. There's a much better way!
Get BetterZip for all ZIP tasks
Create encrypted ZIP archives and handle compression effortlessly. BetterZip is part of Setapp, so it’s free to try for 7 days.
BetterZip is an app that makes compression and encryption a breeze. In fact, you can set BetterZip up to encrypt all files by default! It uses strong AES-256 encryption, and has the same lossless compression you'll find with any zipping method.
Here's how to encrypt zip files using BetterZip:
Open BetterZip on your Mac.
From the menu bar, select 'BetterZip,' and 'Preferences'
From the 'Presets' menu, select the 'Save' menu
Select 'Clean and Zip'
Under 'Encryption method,' select 'Strong (AES-256)'
If you'd like to use the same password for every file you encrypt, you can enter it in the filed just below 'encryption method'. If you don't supply a password, BetterZip will prompt you for one each time you zip and encrypt a file.
BetterZip is impressive for encrypting every zip file you create. If you're looking for a simpler approach, Archiver is the app you're looking for. It uses a drag-and-drop interface, and makes encryption as easy as checking a box and assigning a password. Here's how:
Open Archiver on your Mac
Drag the file you want to zip into the app
Select 'encrypt' if you want to secure the file with a password
Enter and verify your password
Select 'Archive'
How to add files to an existing zip file
BetterZip is your best path forward for adding files to an already zipped file. Here's how it's done:
Open BetterZip on your Mac
Select the zipped file you want to add new files to
Select 'Add' from the top of the betterZip window
Select the file or files you'd like to add to your already zipped file Note: If you want to add multiple files, you can shift-click to add a list, or command-click to add them one at a time.
Select and hold 'Save' from the top left of the BetterZip window
In the menu that appears, select 'Clean and Zip'
This creates a new .zip folder with the already-zipped file, as well as the files you added, all of which are now zipped in the same folder.
Unzip files on a Mac
Unzipping files on your Mac is simple. The best method is using the built-in Archive Utility app. The process is simple, and essentially a reversal of the process for zipping a file. Here's how to unzip files:
Right-click the zipped folder or file you'd like to unzip
Select 'open with'
Select 'Archive Utility'
The zipped file or folder will be unzipped. If you'd like to re-zip the file, simple follow the steps we've outlined in this article to zip it again.
How to open zip files as a pro
To open zipped files and folders, both BetterZip and Archive are great options. We especially like BetterZip, here, because each zipped file or folder is previewed in the BetterZip window before you open it up. That way, you always know what you're about to open!
Here's how to unzip files using BetterZip.
Open BetterZip
Select the zipped file or folder you want to unzip
Select 'Extract' from the top of the BetterZip window

Your file or folder will be unzipped.
Here's the method if you choose Archive:
Open Archive on your Mac
Select the zipped file or folder you want to unzip
Drag it to the Archive window
Select it from the menu
Select 'Extract' from the bottom of the Archive window
That's all it takes!
Look inside the archive without extraction

Viewing a zipped file without actually unzipping it can be important if you have many zipped files on your computer, or have zipped folders and can't remember where you stuck a particular file.
Mac Extract Files From Multiple Folders
For this, we like BetterZip. It automatically offers up a preview of zipped files and folders on the right side of its screen. There's no guessing, or fussy methodology. All you have to do is select the file in BetterZip, and the preview loads immediately.
Extract a separate file from a zip archive
Again, we really like BetterZip for this. Here's how to do it:
Open BetterZip on your Mac
Select the zipped folder with the file(s) you want to extract
Right click the file you want to extract
Select 'Extract Selected' from the drop-down menu
Unzip files and folders using Terminal
Mac Extract Files From Multiple Folders Free
If you would rather unzip files using the Terminal, here's how to do it:
Open Terminal on your Mac
Change directory to where your zipped file or folder is located using the 'cd' command. (As an example, if your zipped file were in the documents folder, you would enter 'cd documents' into Terminal – without the quotations. Keep in mind if your zipped file is buried in another folder, you will have to change directory until you reach the file's location.)
Enter the following command: unzip (filename). (If your file were named zipped-stuff.zip, you would enter 'unzip zipped-stuff.zip' – again, no quotations.)
Batch Extract Files From Folders
Setapp uses cookies to personalize your experience on our website. By continuing to use this site, you agree to our cookie policy.
0 notes
Text
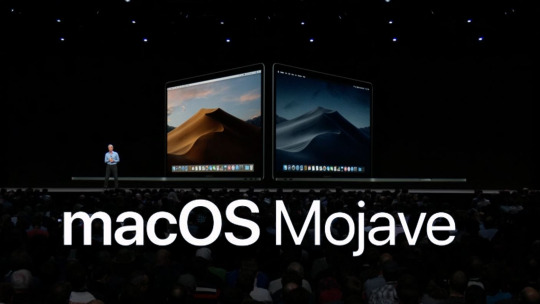
Macos Mojave Download For Vmware

This post will provide you with Download macOS Big Sur VMware & VirtualBox Image. Apple kicked off the new working system for the users by the name of macOS 11 Big Sur. At the Worldwide developer conference, you have the best operating system with many extraordinary features and updates. Therefore, you can download it in one click because it is the direct link. We try our best to provide your genuine file when needed. Download macOS Big Sur VMDK Download macOS Big Sur VMDK (Virtual Machine Disk) File. In fact, creating macOS Big Sur is very difficult and you can get it easily. We have made a macOS Big Sur ISO file for the users.
Download netflix on computer mac. How to Install macOS Mojave on PC – Hackintosh. Installing a Mac operating system on Apple’s Mac computer is certainly easy because they are supported by each other but installing Mac operating system on another computer is definitely pretty difficult. To Install macOS Mojave on VMware on Windows 10 using a pre-made ISO filled with only macOS Mojave setup then go through the step by step guide down below and do exactly as the guide is shown. Newer versions of macOS are out, So check the guides below to install them.
This post will provide you with Download macOS Big Sur VMware & VirtualBox Image. Apple kicked off the new working system for the users by the name of macOS 11 Big Sur. At the Worldwide developer conference, you have the best operating system with many extraordinary features and updates. They have made some new and unique modifications to macOS Big Sur. This time WWDC event was fairly different compared to previous events. According to Apple, the Final version of macOS Big Sur will be out in September or October 2020. On the other hand, there are a lot of changes and updates on Safety and performance. Well, Apple always tries its best to be able to provide a much better operating system.
Perform a Clean Installation of macOS Mojave; Step 1: Download the Prerequisites. To install macOS Mojave on VirtualBox on Windows, you must download the following files and read the step by step guide to avoid any problems. If you miss any of the steps below, then you might be unsuccessful in running the macOS. Download macOS Mojave ISO.
Download macOS Big Sur VMware & VirtualBox Image– Latest Version.
Installing macOS Big Sur on supported is not a challenging undertaking. Due to downloading from AppStore, you can install macOS Big Sur on Mac with no limitation.

Once you get installed, you may enjoy the features of macOS Big Sur such as New Notification Center, Faster Safari, Big UI Refresh, Control Center, New Dock, Particular icons, and many more. The upgrades were especially focused on the brand new design and some much better improvements. Apart from that, Apple also published iOS 14, iPadOS 14, watchOS 7, tvOS 14, and macOS Big Sur. And a few major upgrades to Apple AirPods.
If you do not have Mac or MacBook to attempt macOS Big Sur, then do not worry. There are many ways in which you may set up macOS Big Sur. I believe virtualization software is the best to go with since you can use the same as your actual operating system. Nowadays, the most popular virtualization software is VMware and VirtualBox that provides the ideal user interface. You can use the virtual machine to set up macOS Big Sur, Linux, Windows, Ubuntu, and many more operating systems. Personally, I use VMware & VirtualBox when any operating system becomes released. When you install macOS Big Sur on virtual machines, you can do anything you would like to do.

Creating apps or catch up with each and everything on macOS Big Sur afterward VMware and VirtualBox is going to be the best alternative for you. For this, you will likely want macOS Big Sur VMware & VirtualBox Image because it is one of the main documents while installing. We’ve made or created VMware, and VirtualBox images, particularly for the digital machines, and it doesn’t work someplace else. If you’d like an image for Hackintosh, then you can directly download it from App Store.
To install macOS Big Sur on virtual machines, you have to Download macOS Big Sur VMware & VirtualBox image. Because VMware & VirtualBox accept VMDK expansion, which stands for Virtual Machine Disc. A single VMDK image will do the job for both VMware & VirtualBox. But, creating the macOS Big Sur image for virtual machines is difficult for the newbie. We have established VMware and VirtualBox image and successfully uploaded on Google Drive and MediaFire to reduce virus and malware. Head towards the under sections.
Pictures: The photographs are just amazing in macOS Big Sur. You can access all your albums and press types from the sidebar. It has a great interface that’s a huge update for Apple users. Safari: Safari is a superb internet browser on macOS. This time Apple must boost the speed of Safari than before. It works 50% quicker and correctly than before. Menu Bar: Menu pub is simply wonderful for controlling both the Mac and customizing all items like Wi-Fi, Sound, Brightness, and many more. According to Apple, all of your Mac controllers will probably be from the pub, and it is now simple to make adjustments. Control Center: Control center on macOS Big Sur is a fascinating feature. You may get it from the menu bar. It features new widgets and notification apps, and many more. Messages: On the messages program, you can pin your favorite conversation to the top of your list. The user can also search the old messages, photographs, links, and a lot more. Maps: The map program is even better today than before. Next, you won’t miss your favorite place as it gives full functionalities to discover. Soundflower mac download 2020. If you want to visit any location, then it’s possible to create your own guide. This attribute is released on iOS 14 will soon be accessible on macOS Big Sur later.
Download macOS Big Sur VMware & VirtualBox Image – Latest Version
You can create your own VMware & VirtualBox image. For our manual, we will give you a direct connection to download it. Nothing to worry about the images as they’re wholly fresh and prepared to use it to install macOS Big Sur on VMware & VirtualBox.
DISCLAIMER: The macOS Big Sur ISO image is created only for testing & educational purposes. We are not responsible if anyone is misusing the macOS Big Sur ISO image. How to Speed Up macOS Big Sur? 7 Easy Methods
Important Note: The download links are macOS Big Sur ISO File. The ISO will operate flawlessly to set up macOS Big Sur on VMware & VirtualBox. Later on, we will create an especially image for you and update the links for you.
macOS BigSur ISO 11.1 by techrechard (Mega.NZ) Updated 4 Jan 2020.
macOS BigSur ISO 11.1 by techrechard (Media Fire) Updated 4 Jan 2020.
The ISO file is around 16GB, so you will need a good internet connection to download the macOS Big Sur ISO file. So, here is a tool that you can use to speed up the download process. Internet Download Manager tool that will help you enhance your downloading speed. You can download the full version from below.
IDM 6.27 Build 2 Registered (32bit + 64bit Patch) (Techrechard.com) – This file is password-protected, and the password is www.techrechard.com. You can extract this file using WinRAR download free and support: WinRAR (win-rar.com).
Macos Mojave Download For Vmware Windows 10
macOS Big Sur Image (Alternate): macOS Big Sur is one of the most powerful operating systems out there. We’ve brought you the macOS Big Sur ISO file’s latest version. For a better experience, we have uploaded the document on MediaFire.
If you get a Quota exceeded error, you can use the Mediafire links provided. If you want to use Mega.NZ links only, check this- How to Download MEGA files without Limits: 16 Easy Steps in 2021 How to Speed Up macOS Big Sur? 7 Easy Methods
You can also get: macOS Big Sur VMDK File (Virtual Machine Disk). Download macOS Big Sur DMG for a clean setup.
When you download macOS Big Sur Image, then you will be prepared for the setup. We’ve got guides on it, have a look at the down under link, and follow the complete procedure.
Macos Mojave Download For Vmware Vm
How to Install macOS Big Sur on VMware on Windows PC How to Install macOS Big Sur on VirtualBox on Windows PC How to Speed Up macOS Big Sur? 7 Easy Methods How to install Windows 10 on macOS 11 Big Sur: Step-by-step Guide
Download macOS Big Sur VMware & VirtualBox Image: Bottom Line
Download Macos Mojave Iso For Vmware & Virtualbox
I hope you’ve downloaded macOS Big Sur VMware & VirtualBox Image — Latest Version. Do not be afraid to leave comments in the comment section down below for any problem or question.
0 notes
Text
Unzip Zip File Mac Terminal

Unzip Zip File Mac Terminal Tool
Unzip Zip File Mac Command Line

Unzip Zip File Mac Terminal Tool
Zip is a command-line utility tool used for compressing files and folders. Compression of files & folders enables faster and more efficient transfer, storage, and emailing of files and folders. On the other hand, unzip is a utility tool that helps you decompress files and folders.
Benefits of zipping files:
Compressed/zipped files take up less disk space, leaving you with more space to work with.
Zipped files are easy to transfer including uploading, downloading, and attaching them on email.
You can easily decompress zipped files on Linux, Windows, and even mac.
Step 3 – Unzip the ZIP File Using Terminal. The next step is to navigate to the ZIP file and unzip it. To navigate to the correct folder, we can use the cd command, as shown below. We uploaded our backup.zip file to the /private directory, so we’ll use the command below.
Fig.02: How to unzip a zip file from the Terminal using unzip command A note about bash: unzip: command not found If the unzip command NOT installed on your Linux or Unix box, then run any one of the following commands as per your Linux distribution to install the unzip command.
Enter the 'unzip' command. Type in unzip file.zip where file is the folder's name, then press Enter to run it. This extracts the files to the current directory. If the file's name has spaces in it, you'll place quotation marks on either side of 'file.zip' (e.g., unzip 'this is a zipped folder.zip'). On Linux or OSX you can unzip ngrok from a terminal with the following command. On Windows, just double click ngrok.zip.
In this topic, we focus on how you can install the zip and unzip utilities on various Linux distributions.
On this page:

Let’s now see how you can install these useful command-line utilities.
How to Install Zip/Unzip in Debian/Ubuntu/Mint
For Debian-based distributions, install the zip utility by running the command.
After installation, you can confirm the version of zip installed using the command.
For the unzip El capitan os x features. utility, execute a similar command as shown.
Again, just like zip, you can confirm the version of the unzip utility installed by running. Soundflower mac download 2020.
How to Install Zip/Unzip in RedHa/CentOS/Fedora
Just like on Debian distributions, installing zip and unzip utilities on Redhat distros is quite simple.
To install zip, simply execute:
For the unzip utility, install it by running:
How to Install Zip/Unzip in Arch/Manjaro Linux
Unzip Zip File Mac Command Line
For Arch-based distros, run:
For the unzip utility,
How to Install Zip/Unzip in OpenSUSE
On OpenSUSE, run the command below to install zip.
And to install unzip, execute.
For more information, read our article that shows how to create and extract a zip files in Linux.
Conclusion
For newer versions of Linux distros such as Ubuntu 20.04 and CentOS 8, the zip and unzip utilities already come pre-installed and you are good to go.
We covered how to install zip and unzip command-line tools on various Linux distributions and the benefits that come with compressing files.
For information on making use of an macOS Launch Daemon to automatically start and stop MySQL, see Section 2.4.3, “Installing a MySQL Launch Daemon”. For information on the MySQL Preference Pane, see Section 2.4.4, “Installing and Using the MySQL Preference Pane”. Mysql mac start up safe mode. MySQL Community Edition is a freely downloadable version of the world's most popular open source database that is supported by an active community of open source developers and enthusiasts. MySQL Cluster Community Edition is available as a separate download.
0 notes
Text
Mysql Mac Start

Table of Contents
MySQL Cluster is a real-time open source transactional database designed for fast, always-on access to data under high throughput conditions. MySQL Cluster Plus, everything in MySQL Enterprise Edition.
MySQLTutorial.org is a website dedicated to MySQL database. We regularly publish useful MySQL tutorials to help web developers and database administrators learn MySQL faster and more effectively. All MySQL tutorials are practical and easy-to-follow, with SQL script and screenshots available.
MySQLTutorial.org is a website dedicated to MySQL database. We regularly publish useful MySQL tutorials to help web developers and database administrators learn MySQL faster and more effectively. All MySQL tutorials are practical and easy-to-follow, with SQL script and screenshots available.
2.1 General Installation Guidance
2.1.1 Supported Platforms
2.1.2 Which MySQL Version and Distribution to Install
2.1.3 How to Get MySQL
2.1.4 Verifying Package Integrity Using MD5 Checksums or GnuPG
2.1.5 Installation Layouts
2.1.6 Compiler-Specific Build Characteristics
2.2 Installing MySQL on Unix/Linux Using Generic Binaries
2.3 Installing MySQL on Microsoft Windows
2.3.1 MySQL Installation Layout on Microsoft Windows
2.3.2 Choosing an Installation Package
2.3.3 MySQL Installer for Windows
2.3.4 Installing MySQL on Microsoft Windows Using a noinstall ZIP Archive
2.3.5 Troubleshooting a Microsoft Windows MySQL Server Installation
2.3.6 Windows Postinstallation Procedures
2.3.7 Windows Platform Restrictions
2.4 Installing MySQL on macOS
2.4.1 General Notes on Installing MySQL on macOS
2.4.2 Installing MySQL on macOS Using Native Packages
2.4.3 Installing a MySQL Launch Daemon
2.4.4 Installing and Using the MySQL Preference Pane
2.5 Installing MySQL on Linux
2.5.1 Installing MySQL on Linux Using the MySQL Yum Repository
2.5.2 Replacing a Third-Party Distribution of MySQL Using the MySQL YumRepository
2.5.3 Installing MySQL on Linux Using the MySQL APT Repository
2.5.4 Installing MySQL on Linux Using the MySQL SLES Repository
2.5.5 Installing MySQL on Linux Using RPM Packages from Oracle
2.5.6 Installing MySQL on Linux Using Debian Packages from Oracle
2.5.7 Deploying MySQL on Linux with Docker
2.5.8 Installing MySQL on Linux from the Native Software Repositories
2.5.9 Installing MySQL on Linux with Juju
2.5.10 Managing MySQL Server with systemd
2.6 Installing MySQL Using Unbreakable Linux Network (ULN)
2.7 Installing MySQL on Solaris
2.7.1 Installing MySQL on Solaris Using a Solaris PKG
2.8 Installing MySQL on FreeBSD
2.9 Installing MySQL from Source
2.9.1 Source Installation Methods
2.9.2 Source Installation Prerequisites
2.9.3 MySQL Layout for Source Installation
2.9.4 Installing MySQL Using a Standard Source Distribution
2.9.5 Installing MySQL Using a Development Source Tree
2.9.6 Configuring SSL Library Support
2.9.7 MySQL Source-Configuration Options
2.9.8 Dealing with Problems Compiling MySQL
2.9.9 MySQL Configuration and Third-Party Tools
2.10 Postinstallation Setup and Testing
2.10.1 Initializing the Data Directory
2.10.2 Starting the Server
2.10.3 Testing the Server
2.10.4 Securing the Initial MySQL Account
2.10.5 Starting and Stopping MySQL Automatically
2.11 Upgrading MySQL
2.11.1 Before You Begin
2.11.2 Upgrade Paths
2.11.3 Changes in MySQL 5.7
2.11.4 Upgrading MySQL Binary or Package-based Installations on Unix/Linux
2.11.5 Upgrading MySQL with the MySQL Yum Repository
2.11.6 Upgrading MySQL with the MySQL APT Repository
2.11.7 Upgrading MySQL with the MySQL SLES Repository
2.11.8 Upgrading MySQL on Windows
2.11.9 Upgrading a Docker Installation of MySQL
2.11.10 Upgrading MySQL with Directly-Downloaded RPM Packages
2.11.11 Upgrade Troubleshooting
2.11.12 Rebuilding or Repairing Tables or Indexes
2.11.13 Copying MySQL Databases to Another Machine
2.12 Downgrading MySQL
2.12.1 Before You Begin
2.12.2 Downgrade Paths
2.12.3 Downgrade Notes
2.12.4 Downgrading Binary and Package-based Installations on Unix/Linux
2.12.5 Downgrade Troubleshooting
2.13 Perl Installation Notes
2.13.1 Installing Perl on Unix
2.13.2 Installing ActiveState Perl on Windows
2.13.3 Problems Using the Perl DBI/DBD Interface
This chapter describes how to obtain and install MySQL. A summary of the procedure follows and later sections provide the details. If you plan to upgrade an existing version of MySQL to a newer version rather than install MySQL for the first time, see Section 2.11, “Upgrading MySQL”, for information about upgrade procedures and about issues that you should consider before upgrading.
Mysql Mac Start Stop

If you are interested in migrating to MySQL from another database system, see Section A.8, “MySQL 5.7 FAQ: Migration”, which contains answers to some common questions concerning migration issues.
MySQL Community Edition is a freely downloadable version of the world's most popular open source database that is supported by an active community of open source developers and enthusiasts. MySQL Cluster Community Edition is available as a separate download.
Installation of MySQL generally follows the steps outlined here:
Install or update the Netflix app. If you're using an Android device, you can download and install Netflix from the Google Play Store. On iPhone and iPad, you can download Netflix from the App Store. To update Netflix on Android, open the Google Play Store and search 'Netflix' in the search bar at the top. Select the free Netflix app from Netflix, Inc. To install the app, tap the cloud icon. If you can't download the Netflix app from the App Store, visit Can't find the Netflix app in app stores. Once installed, try Netflix again. Download netflix on computer mac. Since Netflix is available for Windows, you can download Windows on your Mac, run it and install the Netflix app there to watch the downloaded content. It may be a bit tedious, but if you really want to download Content from Netflix, it works.
Determine whether MySQL runs and is supported on your platform.
Please note that not all platforms are equally suitable for running MySQL, and that not all platforms on which MySQL is known to run are officially supported by Oracle Corporation. For information about those platforms that are officially supported, see https://www.mysql.com/support/supportedplatforms/database.html on the MySQL website.
Choose which distribution to install.
Several versions of MySQL are available, and most are available in several distribution formats. You can choose from pre-packaged distributions containing binary (precompiled) programs or source code. When in doubt, use a binary distribution. Oracle also provides access to the MySQL source code for those who want to see recent developments and test new code. To determine which version and type of distribution you should use, see Section 2.1.2, “Which MySQL Version and Distribution to Install”.
Download the distribution that you want to install.
For instructions, see Section 2.1.3, “How to Get MySQL”. To verify the integrity of the distribution, use the instructions in Section 2.1.4, “Verifying Package Integrity Using MD5 Checksums or GnuPG”.
Install the distribution.
To install MySQL from a binary distribution, use the instructions in Section 2.2, “Installing MySQL on Unix/Linux Using Generic Binaries”. Alternatively, use the Secure Deployment Guide, which provides procedures for deploying a generic binary distribution of MySQL Enterprise Edition Server with features for managing the security of your MySQL installation.
To install MySQL from a source distribution or from the current development source tree, use the instructions in Section 2.9, “Installing MySQL from Source”.
Perform any necessary postinstallation setup.
After installing MySQL, see Section 2.10, “Postinstallation Setup and Testing” for information about making sure the MySQL server is working properly. Also refer to the information provided in Section 2.10.4, “Securing the Initial MySQL Account”. This section describes how to secure the initial MySQL root user account, which has no password until you assign one. The section applies whether you install MySQL using a binary or source distribution.
If you want to run the MySQL benchmark scripts, Perl support for MySQL must be available. See Section 2.13, “Perl Installation Notes”.
Instructions for installing MySQL on different platforms and environments is available on a platform by platform basis:
Unix, Linux, FreeBSD
For instructions on installing MySQL on most Linux and Unix platforms using a generic binary (for example, a .tar.gz package), see Section 2.2, “Installing MySQL on Unix/Linux Using Generic Binaries”.
For information on building MySQL entirely from the source code distributions or the source code repositories, see Section 2.9, “Installing MySQL from Source”
For specific platform help on installation, configuration, and building from source see the corresponding platform section: Soundflower mac download 2020.
Linux, including notes on distribution specific methods, see Section 2.5, “Installing MySQL on Linux”.
Solaris, including PKG and IPS formats, see Section 2.7, “Installing MySQL on Solaris”.
IBM AIX, see Section 2.7, “Installing MySQL on Solaris”.
FreeBSD, see Section 2.8, “Installing MySQL on FreeBSD”.
Microsoft Windows
For instructions on installing MySQL on Microsoft Windows, using either the MySQL Installer or Zipped binary, see Section 2.3, “Installing MySQL on Microsoft Windows”.
For details and instructions on building MySQL from source code using Microsoft Visual Studio, see Section 2.9, “Installing MySQL from Source”.
macOS
For installation on macOS, including using both the binary package and native PKG formats, see Section 2.4, “Installing MySQL on macOS”.
For information on making use of an macOS Launch Daemon to automatically start and stop MySQL, see Section 2.4.3, “Installing a MySQL Launch Daemon”. Descargar os x el capitan iso.
For information on the MySQL Preference Pane, see Section 2.4.4, “Installing and Using the MySQL Preference Pane”.
MySQL Community Edition is a freely downloadable version of the world's most popular open source database that is supported by an active community of open source developers and enthusiasts.
MySQL Cluster Community Edition is available as a separate download. The reason for this change is so that MySQL Cluster can provide more frequent updates and support using the latest sources of MySQL Cluster Carrier Grade Edition.
Mysql Mac Startup
MySQL 8.0 is the most current GA release. Download MySQL 8.0 »
Learn What's New in MySQL 8.0 and view the Performance Benchmarks.
Start Mysql Mac Brew
Online Documentation:
Installation Instructions, Documentation and Change History for the MySQL 8.0 Generally Available (GA) Release
Installation Instructions, Documentation and Change History for the MySQL 5.7 Generally Available (GA) Release
Installation Instructions, Documentation and Change History for the MySQL 5.6 Generally Available (GA) Release
Looking for previous GA versions?
Please report any bugs or inconsistencies you observe to our Bugs Database. Thank you for your support!
0 notes
Text
Xcode 7 Download

With an all-new design that looks great on macOS Big Sur, Xcode 12 has customizable font sizes for the navigator, streamlined code completion, and new document tabs. Xcode 12 builds Universal apps by default to support Mac with Apple Silicon, often without changing a single line of code.
Download Xcode For Pc
Xcode 12.5 For Higher Sierra
Xcode 12 Beta 7 Download
Apple Xcode 7 Download
Xcode 7 Download For Mac
Designed for macOS Big Sur.
Xcode 12 looks great on macOS Big Sur, with a navigator sidebar that goes to the top of the window and clear new toolbar buttons. The navigator defaults to a larger font that’s easier to read, while giving you multiple size choices. New document tabs make it easy to create a working set of files within your workspace.
Document tabs.
The new tab model lets you open a new tab with a double-click, or track the selected file as you click around the navigator. You can re-arrange the document tabs to create a working set of files for your current task, and configure how content is shown within each tab. The navigator tracks the open files within your tabs using strong selection.
Apple Xcode is part of these download collections: View XML, Edit XML, Open XML. Apple Xcode was reviewed by George Popescu. DOWNLOAD Apple Xcode 12.4 Build 12D4e / 12.5 Build 12E5244e Beta 3. This enables Disqus, Inc. To process some of your data. This version includes the SDKs for iOS 14, iPadOS 14, macOS Big Sur, tvOS 14, and watchOS 7. Download the beta. Xcode Download and Install for your computer - either Windows PC 10, 8 or 7 and macOS 10 X, 32/64-bit processor, we have you covered.
Navigator font sizes.
The navigator now tracks the system setting for “Sidebar icon size” used in Finder and Mail. You can also choose a unique font size just for Xcode within Preferences, including the traditional dense information presentation, and up to large fonts and icon targets.
Code completion streamlined.
A new completion UI presents only the information you need, taking up less screen space as you type. And completions are presented much faster, so you can keep coding at maximum speed.
Redesigned organizer.
An all-new design groups all critical information about each of your apps together in one place. Choose any app from any of your teams, then quickly navigate to inspect crash logs, energy reports, and performance metrics, such as battery consumption and launch time of your apps when used by customers.

SwiftUI
SwiftUI offers new features, improved performance, and the power to do even more, all while maintaining a stable API that makes it easy to bring your existing SwiftUI code forward into Xcode 12. A brand new life cycle management API for apps built with SwiftUI lets you write your entire app in SwiftUI and share even more code across all Apple platforms. And a new widget platform built on SwiftUI lets you build widgets that work great on iPad, iPhone, and Mac. Your SwiftUI views can now be shared with other developers, and appear as first-class controls in the Xcode library. And your existing SwiftUI code continues to work, while providing faster performance, better diagnostics, and access to new controls.
Universal app ready.
Xcode 12 is built as a Universal app that runs 100% natively on Intel-based CPUs and Apple Silicon for great performance and a snappy interface.* It also includes a unified macOS SDK that includes all the frameworks, compilers, debuggers, and other tools you need to build apps that run natively on Apple Silicon and the Intel x86_64 CPU.
Updated automatically
When you open your project in Xcode 12, your app is automatically updated to produce release builds and archives as Universal apps. When you build your app, Xcode produces one binary “slice” for Apple Silicon and one for the Intel x86_64 CPU, then wraps them together as a single app bundle to share or submit to the Mac App Store. You can test this at any time by selecting “Any Mac” as the target in the toolbar.
Test multiple architectures.
On the new Mac with Apple Silicon, you can run and debug apps running on either the native architecture or on Intel virtualization by selecting “My Mac (Rosetta)” in the toolbar.
Multiplatform template
New multiplatform app templates set up new projects to easily share code among iOS, iPadOS, and macOS using SwiftUI and the new lifecycle APIs. The project structure encourages sharing code across all platforms, while creating special custom experiences for each platform where it makes sense for your app.
A guide to installing OS X El Capitan on a PC UPDATE: This was removed earlier because it's technically piracy, but HackinDoge suggested I put this back up anyway (thanks!). This is for those Windows users who just aren't able to get access to a Mac, and don't want to use highly modified distros either. Oct 22, 2018 How to download Mac OS El Capitan I need to download the El Capitan to install on my Mac computer. What is the best place to download the El Capitan dmg or El Capitan iso. Sep 30, 2015 Download El Capitan OS X is also significant since it’s the last version of Apple Mac OS X releases as its successor Sierra was released in the year 2016 under the brand macOS. El Capitan is a rock formation found in Yosemite National Park, which gives out the meaning that the new release is a solid version of its predecessor, Yosemite. OS X El Capitan 10.11.4.iso (7.14 GB) Choose free or premium download SLOW DOWNLOAD. FAST INSTANT DOWNLOAD Download type. Iso el capitan os x.
Improved auto-indentation
Swift code is auto-formatted as you type to make common Swift code patterns look much better, including special support for the “guard” command.
StoreKit testing
New tools in Xcode let you create StoreKit files that describe the various subscription and in-app purchase products your app can offer, and create test scenarios to make sure everything works great for your customers — all locally testable on your Mac.
Download Xcode For Pc
Get started.
Download Xcode 12 and use these resources to build apps for all Apple platforms. Soundflower mac download 2020.
Xcode is coding software or to precisely say is an app development software for Apple devices created by Apple Inc. The devices like iPhone, iPad & MacOS can use the software or applications developed using the Xcode. The Xcode IDE (Integrated Development Environment) can easily analyze the project made by the user and even identify the mistakes or issues that can arise because of an incorrect logic or syntax. But still, you can’t use the application because you do not have a system having MacOS and you want to download Xcode for Windows now.
So, today in this article I will help you install Xcode in Windows PC Can i download netflix on my mac air. if available and if not available then will let you know what are the best alternatives instead of Xcode.
Contents
2 How to Install and Run Xcode on Windows?
3 Windows Alternatives for Xcode
Is Xcode available for Windows?
Since it is developed by Apple, meaning that it is not officially available for Windows platform to develop applications and users can use it for Mac OS only. But, though there are some ways using which we can use Xcode in Windows.
Below, in the next point, I will discuss a few methods using which you can install the Xcode for Windows OS. Just follow the steps that I provide and you can install Xcode easily and start developing applications for various Apple devices.
How to Install and Run Xcode on Windows?
Apple has not launched any software or application using which one can use Xcode on Windows and create applications for iPhone, iPad or MacOS. Meaning you would need MacOS to run the Xcode software and create your own apps. So, you should install MacOS in your system first and then you can install Xcode for your Windows.
1. Virtual Box.
A Virtual Box is a software developed that allows users to use multiple operating systems in one single operating system of a PC. You can use any operating systems like Windows, Linux, Mac, whichever you want to use and the best part of using this app is you don’t need to remove your old operating system.
You can download the Virtual Box software from here.
Install the software and run it.
Open the OS that you want to open using the Add button in Virtual Box. But you need to download the Virtual Box image file of that O.S. in your system beforehand.
After the O.S. is added you can use the Xcode software to create the apps of Apple devices howsoever you wish.
Apart from Virtual Box, there is another similar software for using multiple operating systems i.e. VMWare Player. If you have already installed VMWare then you can use it for the installing Xcode for Windows.
2. VMWare Player
VMware player is also the same as Virtual Box and can be used to install any operating systems on a single PC and run multiple OS at the same time. The steps for the installing VMware would be the same as those of Virtual Box but for your reference, I will guide you using these simple steps:
Download the VMware using the link.
Install & run the software now.
You must have download OS image file (MacOS image file for VMware) already in your PC.
Add the OS using the add button and after installation is done, you can start using it.
You can now create applications for various Apple devices like iPhone, iPad or Mac or if you are a beginner then you can start learning & creating applications slowly.
3. Boot Windows to Mac OS
In this method, you can download and create a bootable drive(like pen drive) to install the MacOS on your Windows PC. You can use the devices as an external bootable drive to use it for MacOS(but it should have a large space of more than 16GB) or you can boot it into your device keeping or removing your Windows OS during the process and install MacOS.

The whole process can be followed using this link.
After the MacOS is installed using any of the above mentioned 3 methods, you can now download and install Xcode software to your MacOS.
The link to download Xcode for Windows is here.
Using these methods you can download Xcode for Windows 32 bit or 64 bit and use it for developing the apps. But an important note – Apple has not legalized the use of MacOS in Windows by anyway yet and using the Xcode in Windows is illegal.
Windows Alternatives for Xcode
Now since we know that Xcode is not officially available for Windows and so, we can use some alternatives instead of Xcode to develop applications for Apple devices.
1. These applications/platforms might help
React Native – Uses JavaScript to build native mobile apps for Android & iOS.
Xamarin – It uses C# language to build mobile apps that you can deploy natively to Android, iOS, and Windows operating systems.
Appcelerator – It can also be used to build native mobile apps using JavaScript.
PhoneGap – It builds a hybrid cross-platform mobile app using HTML, CSS, and JavaScript languages.
Flutter – Flutter is a mobile application development framework created by Google to develop applications for Android and iOS.
These are the best alternatives available in the market which can develop apps for both Apple & Android and some can develop for Windows too. But using them to develop applications for Apple devices won’t be of worth because as a result, you will be needing the Xcode software to check the application & also you would need an Apple developer I’d to add the application to the Apple Store.
2. Other Alternatives
Rent the MacOS over a cloud – The cheapest way to use MacOS for those who can’t afford to buy the MacOS system then you can use MacOS by renting it through the cloud. You can just google rent MacOS using cloud and there will be a bunch of results helping you out. Review the site properly before renting the MacOS and then only pay. Using this method, you can use MacOS and complete your needs for a short term period.
Xcode 12.5 For Higher Sierra
Buy a Mac – The best option and the last option left is to buy a system from Apple and use it for developing applications for Apple devices. The easiest and legal way for those who can afford the system.
Xcode 12 Beta 7 Download
Also Read: Best Android Emulators for Win 10
Conclusion
Apple Xcode 7 Download
The Xcode isn’t available for Windows since Apple hasn’t launched anything on this topic yet. Also, if you really need to install MacOS and use Xcode for Windows then the alternatives are there for your help. For more help, we are there for you and you can comment below and let us know if in case you have any doubts or queries. Also, you can comment below if you find any new method or alternative that can help people use Xcode on Windows OS.
Xcode 7 Download For Mac
Related Posts:
0 notes
Text
Soundflower Mac Download 2020

Its so weird something so simple is not possible in 2020. This is my scenario: Digital piano (2 outs) MOTU mk3 Mac book Pro 10.12.6 (via usb) Ableton 10 Motu / Multichannel Output device / Soundflower OBS. Soundflower - 'MacOS system extension that allows applications to pass audio to other applications.' WavTap - 'globally capture whatever your mac is playing—-as simply as a screenshot' eqMac, GitHub - 'System-wide Audio Equalizer for the Mac' llaudio - 'An old piece of work to reverse engineer the Mac OSX user/kernel audio interface.
Soundflower Mac Download 2020 Software
Soundflower Mac Download 2019
Soundflower Mac Download 2020 Pc
Soundflower Mac Download 2020 Windows 10
With so much live video on the web, a streaming video recorder is becoming an essential tool. Whether you’re looking to capture your own YouTube live streams, record Skype for Business meetings or something else, this guide is going to walk you through recording any streaming video.
Full disclaimer: Please keep in mind that this tutorial for recording live streaming videos is for personal use only—for example, if you wanted to record your YouTube live stream to edit later. We do not encourage the capturing of streaming video from sites like YouTube, Vimeo, Facebook, Twitter, and Dailymotion. Neither do we support people who are looking for ways to record streaming TV, live TV shows and copyrighted YouTube videos.
Contents
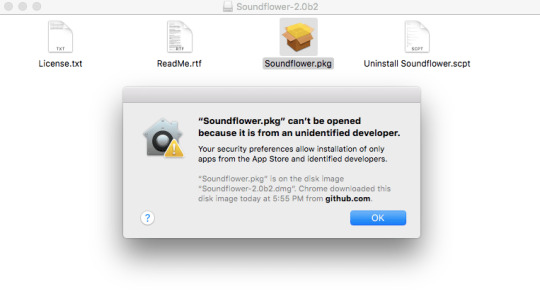
How to Record Streaming Video for Free on PC
See this video or follow the text-based guide below.
Step 1:Set your resolution up for 720p or 1080p recording Check your computer’s capabilities and crank that resolution all the way up. How?
On your desktop, right-click and select Display Settings
Click the Resolution drop-down and choose one of the two HD settings (1280 x 720 for 720p HD or 1900 x 1080 for 1080p Full HD)
Pro Tip Not all monitors support HD resolution settings. If that’s your case, you will need to customize the resolution to ensure your recorded video file is in HD or Full HD. However, this may require a graphics card or additional software installations. Learn how to customize your resolution here.
Step 2:Download and installScreenRec ScreenRec is one of the easiest streaming video recorders available for free. We’ll get into why later but, for now, let’s get it installed and you on your way to record online videos.
Step 3:Set your video to full screen For the video best quality, play your video in full screen.

Step 4:Press Alt-S to select your capture area This keyboard shortcut will start up ScreenRec.
Soundflower Mac Download 2020 Software
Step 5:Drag across the screen to capture the entire screen
Step 6:Record the audio Not all stream recorders can record a screen with audio. Luckily ScreenRec has an easy way to record both the sound from your microphone and the sound from your computer. Let’s see how you can do this.
Record computer audio. Just click the audio icon in the recording panel.
Record microphone audio. ScreenRec has already enabled microphone recording by default, so you can talk and quip as much as you’d like! To disable the microphone, click the icon in the recording panel.
Step 7:Press Alt-S to stop recording You’re all done! You have your very own recording of live video! Now what? Well, you have several options. You can download and save your streaming video or you can share it. Here’s how.
How to Download Streaming Video When you’re done recording your streaming video, you’ll see the video player. Click the Download button to save the video file as an mp4.
Alternatively, you can go to Recording History, preview your video and select the Download button to save it as a local file.
How to Share Your Video Capture With Others If this is your first time using ScreenRec, click the Chain icon and create your free account.
You only need to do this once. As soon as you create your account, ScreenRec will start uploading your streaming video recordings to your private cloud storage (you get 2Gb free). You will then get a private shareable URL copied directly to your clipboard.
In the future, when you’re logged in, ScreenRec will do the uploading while you’re recording which means that you’ll get the shareable link instantly.
All of your past recordings are saved in Recording History. You can always go back, preview the video and click the Chain to get that sharing link again.
With the link, sharing your live stream recording is easy peasy. You can paste it directly into an email or a text message. No need to upload your stream recording to a file sharing service or attach it to an email.
So, why use ScreenRec? Certainly, there are other similar tools out there but there are a few things that make ScreenRec one of the best streaming video recorders. To begin, it is a free live stream recorder that can take and annotate screenshots record video, and capture audio. What’s more, there are no recording limits. Download and share your live stream recording as you see fit. No spamware or adware of any kind to frustrate you.
How To Record Streaming Video On A Mac
There are two ways to record your screen with the built-in apps on a Mac.
Method 1: The Built-in Screen Recorder On MacOS Mojave Or Later
Step 1: Press Shift-Command-5 to open the recording controls.
Soundflower Mac Download 2019
Step 2: Select recording area
Record your entire screen. Click the Full Screen icon and choose the screen you wish to record.
Record a specific area. Click the Region icon and drag across your screen to select your capture area.
Step 3: To record audio, click Options, and select Microphone
Step 4: Click the thumbnail of your recording to edit, save, or share it When you’re done, a thumbnail will appear in the bottom right corner. Click it to share or edit your live stream recording.
Method 2: Soundflower If you’re a little behind on your Mac updates, that’s perfectly fine! You can record your screen using the free app SoundFlower.
Step 1: Download and install Soundflower
Step 2: Set up Soundflower as your output Go to System Preferences > Sound and click on Output. Select Soundflower (2ch) as your output.
Step 3: Open QuickTime and select File > New Screen Recording Your control window should pop up.
Click the down arrow next to the recording icon for settings including audio source recording settings. Select Soundflower (2ch) to record your computer audio.
Step 4: Start Recording
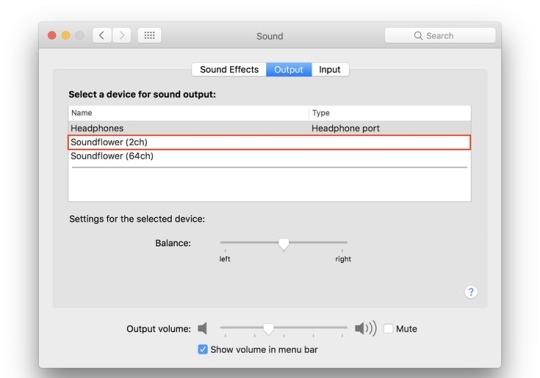
Click the Record icon and click anywhere to record your full screen. Otherwise, drag your mouse across the screen to crop your recording area. Once finished, QuickTime automatically opens your recording and from here, you can play, edit or upload it to a file-sharing site.

Now, what about stream recording on a mobile device?
Oh, yes!
Many Android and iOS devices have built-in video recorders. Getting to them takes a little bit of trickery and hunting, but we’ll guide you through it.
How to Record Your Screen on an Android Device
Soundflower Mac Download 2020 Pc
Android 10 comes with a built-in screen recorder but, unfortunately, it’s very difficult to get your hands on it. Let us walk you through.
Step 1: Open Settings > About Phone Scroll down to Build Number and press it 7 times, quickly.
Step 2: Enter your PIN or passcode You’ll see a message that says “You are now a developer!” Congratulations!
Step 3: Go To Developer Options Now go back to the System settings, press Advanced, and press Developer Options.
Step 4: Scroll down to Debugging and choose Feature Flags. Scroll until you find settings_screenrecord_long_press and switch it on.
Step 5: Start recording Long-press the power button to see the power options menu. Long-press button to Start Recording. Take note of the warning on your screen. Everything on your device’s screen will be recorded. Are you okay with that? If so, select Start Now.
Step 6: Stop the recording In your notifications, you’ll see options for your recording (stop, pause, cancel).
Once you’ve finished recording your streaming video, the file will be saved in your gallery where you can share or delete it.
How To Screen Record On iPhone
Before we begin, it’s best for you to know that some apps will not allow the screen recorder to record audio. So keep that in mind as you begin to record your live video streams.
Step 1: Open up your settings and select Control Center.
Step 2:Press Customize Controls, then tap the green plus sign next to Screen Recording. Go back to the home screen and swipe upwards from the bottom of your screen. Long press the gray recording sign that just appeared in this menu.
Step 3:Stop Recording Touch the red timer at the top of your screen and select Stop. The finished recording is saved in your Photos gallery.
Wrapping Up
There you have it! Four different ways to record streaming video on any device. Let’s wrap it up.
Operating SystemsSummaryScreenRec (Windows 7, 8, 10 PC)– Free – No recording limit – Records video and audio from system or mic – Easy & secure sharing link – Not a built-in appBuilt-In Mac Recorder (MacOS Mojave or later)– Records video and system/mic audio – No shareable link – No video editing options besides trimmingSoundflower + QuickTime (MacOS)– Best for older MacOS versions – Saves the file locally but no sharing optionsAndroid Screen Recorder– Built-in but impossible to find (or use) without enabling developer options – Doesn’t record audio – Videos can easily be shared from galleryiPhone Screen Recorder– Built-in – Records video and audio (almost always) – Easy to access – Videos can easily be shared from gallery
If you’re on a Windows PC, we encourage you to try ScreenRec. It allows you to simultaneously record video, mic and system audio. Not to mention the shareable link automatically copied to your clipboard and 2 gigs of free cloud storage. This is all at your fingertips without the need for a free trial because it’s always free! DownloadScreenRec and see for yourself.
How do you record streaming video with sound?
Soundflower Mac Download 2020 Windows 10
You need a desktop screen recorder like ScreenRec which can record both the computer screen and audio. Also, make sure that this screen recorder can capture HD video so that you can get the best quality. With ScreenRec, in particular, your videos will be saved to your cloud account and you can save them as mp4 files on your computer, if you want.
Can I record a live stream on my computer?
Yes, you can if you have a screen recorder that can capture the system audio (the sound coming from your speakers). Not all screen recorders offer this option. For example, the built-in Windows Game Recorder can only record your microphone but not the audio. One of the solutions that can record your computer screen and audio is ScreenRec. There is also recording history that allows you to go back and preview your videos.
How can I record a live stream video to the cloud?
Recording your live stream video to the cloud can be an easy task if you are already using ScreenRec. This video capturing tool automatically uploads your video while you’re recording, so you’ll not only upload your live stream recording to the cloud but you’ll also be able to do it in real time. As soon as you stop recording, you get a shareable link. Additionally, you have access to recording history, where you can preview your video and get your sharing link again.
References and Further Reading
0 notes
Text
Download Netflix On Computer Mac

Netflix is a giant in the industry of streaming services and has maintained that position for a long time. Windows users along with mobile platforms enjoy the Netflix Application, the ability to download and stream at one’s own convenience. This definitely has brought up the question for many MacOS users: Is Netflix available for Mac? Is there an application? How do I download from Netflix on Mac?
All these questions, along with how to use and download from Netflix on your MacOS will be answered in this article.
Contents
How to download Zoom on your Mac. If you've never used Zoom before, clicking an invitation link or heading to the main Zoom website to join a meeting will automatically prompt the app download. Netflix Video Downloader allows you to download select TV shows and movies from Netflix limitlessly to watch offline later on your computer, mobile phone or tablet. This is great for when you're on the go and don't need to worry about streaming over a cellular network or without internet access in the flight. Netflix is a video streaming application that allows you access to the service's huge library of movies and TV shows.Netflix gets a Windows Modern UI application for Windows 8 with a beautiful interface. From the home screen, you are given 3 of your most recently viewed videos and your Instant Queue.
1 Netflix for Mac (Everything You Need to Know)
1.3 How to Download Netflix Content on Mac
Netflix for Mac (Everything You Need to Know)
Here’s everything you should be knowing about this.
Is the Netflix App Available for Mac?
Sadly, no. For unknown reasons, Netflix does not have a desktop application for MacOS, even though it has an application for Windows, Android, and iOS. This means that to stream Netflix Content, you will have to visit netflix.com on any of the following browsers. Here is a list of the supported browsers with the streaming quality:
Google Chrome up to 720p
Mozilla Firefox up to 720p
Opera up to 720p
Safari up to 1080p
How to Use Netflix on MacOS
To use Netflix on your Mac, open any of the supported browsers: Google Chrome, Mozilla Firefox, Opera, Safari Browsers.
In the Web browser, visit netflix.com.
Select the Sign In Option on the top right corner
Enter your Credentials
That’s it! Start using Netflix for your Mac and stream any available content you want!
How to Download Netflix Content on Mac
There are tons of websites claiming to provide the Netflix Application for your Mac and that you can easily download Netflix content. However, most of these Netflix Apps for Mac are infested with malware and will harm your Mac instead of actually helping you download Netflix content for Mac. Thus, there is no straightforward way with which you can download movies and shows from Netflix and watch.
However, here we have compiled 3 methods that you can use if you are really desperate to watch downloaded content for Netflix on your Mac. Let’s get started!
1. Download Windows on Your Mac
Since Netflix is available for Windows, you can download Windows on your Mac, run it and install the Netflix app there to watch the downloaded content. It may be a bit tedious, but if you really want to download Content from Netflix, it works.
Boot Camp is a tool present in MacOS that can help you install Windows for your Mac. Here is a full guide on How to Run Windows on Mac.
Once Windows has been installed, you can visit the Windows Store and Search for the Netflix App
Get the Netflix App from Windows Store, and then log in to start using and Downloading from Netflix!
2. Using Other iOS/Android Device: iPhone/iPad/iPod Touch

Since Netflix App is not available for your Mac, to download and stream content you can use your mobile devices such as the iPhone, iPad, or an Android Device that supports the Netflix application. You can easily download content from Netflix on any of these platforms and stream them using a casting service.
This is a pretty simple method to download and watch Netflix content on your Mac, even though it may not be as convenient as downloading on your Mac computer itself.
3. Using Screen Capture
Although Netflix is taking measures to prevent users from, it is a risky method, but one that you can take to download Netflix content. Basically, all you require is a Screen Capture software for your Mac, and stream the entire movie/TV Show.
Recording Netflix content, however, come with huge risks as capturing and keeping it yourself might still be fine, but distributing the downloaded content with others is illegal.
We would advise against this, but if you really want the downloaded content from Netflix for Mac, you can do this.
Popular Screen Capture Software for Mac

Here’s a list of some Screen Capture applications that you can use on your Mac while capturing from Netflix:
OBS Studio
Monosnap
Apowersoft
TinyTake
Screencast-o-Matic
Jing
QuickTime Player
If you want other software, you can find them on the internet. These software help you download content from Netflix on Mac.
Final Verdict
Even though Netflix is not available as an application for Macbook (yet), you can stream it using the Netflix website very easily. As for downloading content, that might be a bit of discomfort to Mac users, but we have provided the best possible ways for you to do that. If you have any queries regarding the information or methods described above, you can drop us a comment below and we’ll do our best to get back to you with a relevant answer.
Keep on reading more interesting articles on our website.
Related Posts:
There are abundant ways you can try on if you wish to download Spotify music to MP3 or other plain formats on your computer. But most of the third-party softwares are simply a recording tool with limited output audio quality and 1:1 recording speed. Among all of the Sidify Music Converter, unquestionably, Sidify Music Converter is a hassle-free and handy tool worth trying. As Sidify Music Converter is a professional and unique Spotify Music Downloader and speedy converter, that assists you to directly download Spotify music to a computer with great output audio quality and 5x faster speed.
Key Features of Sidify Music Converter
Sidify Music Converter
Record Spotify music/Playlist to MP3, AAC, FLAC, WAV or AIFF
Preserve the quality of the original sound
Keep ID3 Tags and all metadata
Highly compatible with the latest Windows & macOS and Spotify
Free updates and technical support
Tutorial: How to Download Spotify Music to Mac/ Windows Computer?
Download Sidify Music Converter, install, and launch it on your Mac/PC. In the following guide, we'll show you how to easily download Spotify music to a computer with Sidify Music Converter.
Equipment Preparation:
A Computer running Mac OS or Windows OS
Installed the latest version of Spotify
Sidify Music Converter
Step 1Import Music from Spotify to Sidify
To start with, just click on ' icon and then drag and drop any music file or playlist from Spotify to Sidify adding window.
Step 2Choose Output Settings
Then click the setting button to change the basic parameters (Including Output format, Output quality and Conversion mode, etc.). Here you can choose format as MP3, AAC, FLAC, WAV or AIFF, adjust output quality up to 320 kbps.
Tips: Sidify program supports saving the output audio into Artist, Album, Artist/Album or Album/Artist folder for meeting various user's needs.
Step 3Start Conversion
Tap the 'Convert' button to downloading Spotify music to plain format with ID3 tags kept after conversion.
Step 4Find the Well- downloaded Files
After conversion, you can click on the 'Converted' button to easily find the well-downloaded MP3/AAC/FLAC/WAV/AIFF file in the top right corner.
Download Netflix On Computer Mac
Download Spotify for Android, iOS (iPhone,iPad) and Windows Phone, etc.:
Although Spotify is available for all kinds of mobile devices like android, iOS and Windows phones, there are still many restrictions. Now, you get the digital audio format Spotify music, thus you can enjoy Spotify music like common music files freely even without installing Spotify app and network connection. You just need to transfer the converted Spotify music from computer to devices for playing, such as car players, iPod, iPhone 8, Zune, PSP and Samsung Galaxy S8, etc.
Video Tutorial: How to Save Spotify Songs to Computer:
Note: The trial version of Sidify Music Converter enables us to convert 3-minute audio for sample testing, you can unlock the time limitation by purchasing the full version.
Related Articles
Download Netflix On Computer Macbook
Convert Netflix Videos to MP4 Format
Netflix Video Downloader is a professional tool for downloading Netflix movies and TV shows to your local computer, keeping audio tracks and subtitles. If you are looking for a simple and efficient way to save Netflix videos as MP4 files, it's the perfect solution recommended for you.
Can I Download Netflix On My Mac Air
Read More >
0 notes
Text
Iso El Capitan Os X

Os X El Capitan Iso To Usb
Iso El Capitan Os X Download
Download Os X El Capitan Iso
Mac OS X El Capitan 10.11; Mac OS X Yosemite 10.10. In 2001, Windows XP ISO was released, forever changing the way that the world looked at computers.
OS X El Capitan 10.11.4.iso (7.14 GB) Choose free or premium download SLOW DOWNLOAD. FAST INSTANT DOWNLOAD Download type.
Sep 30, 2015 Download El Capitan OS X is also significant since it’s the last version of Apple Mac OS X releases as its successor Sierra was released in the year 2016 under the brand macOS. El Capitan is a rock formation found in Yosemite National Park, which gives out the meaning that the new release is a solid version of its predecessor, Yosemite.
Mac OS X El Capitan 10.11; Mac OS X Yosemite 10.10. In 2001, Windows XP ISO was released, forever changing the way that the world looked at computers.
Apple OS X El Capitan beta was first released to developers in July 2015 and was released to the millions of Apple consumers worldwide September of 2015, following several beta releases. This version of the Apple Mac OS X marks a significant milestone in Apple Mac OS history for many reasons. It was the 12th major release of the Mac OS X line, since the introduction of the new brand in 2002 by Apple from its previous product line of Mac OS.
Os X El Capitan Iso To Usb
OS X El Capitan 10.11.4.iso (7.14 GB) Choose free or premium download SLOW DOWNLOAD. FAST INSTANT DOWNLOAD Download type.

Download El Capitan OS X is also significant since it’s the last version of Apple Mac OS X releases as its successor Sierra was released in the year 2016 under the brand macOS. El Capitan is a rock formation found in Yosemite National Park, which gives out the meaning that the new release is a solid version of its predecessor, Yosemite. The naming convention to use important landmarks of Northern California started with the Apple release of Mavericks.
At the time of release, El Capitan was promoted as a significant release by Apple similar to how they promoted Mavericks and Yosemite upgrades which were the predecessors of El Capitan.

Brief Guide For Download El Capitan
Iso El Capitan Os X Download
In this article, we’ll also discuss few things that you should do before you upgrade your OS to the new Download El Capitan version in order to make sure your computer is all ready for the new upgrade including whether your Mac is compatible both in terms of hardware and software. There we will discuss the minimum system requirements and supported Mac devices released in the past.
Installation Methods For Download El Capitan
1. Download El Capitan Mac OS X from scratch while upgrading the current Mac OS version
The new Apple El Capitan supports two installations methods. As in the case of many other operating system installations, Apple El Capitan also provides an option to upgrade from your current OS version or the option to install the new download El Capitan Mac OS X from scratch. The default method which is the upgrade installation option will try to install OS X El Capitan to your Mac device while protecting your user data and app data. This is currently the most frequently used method of upgrading to the new version of Mac OS X and also the easiest too. If your Mac computer is in very good shape and running smoothly, it is recommended to install using this method.
2. Download El Capitan and install fresh the Mac OS without upgrading current Mac OS version
The second method of installations is the clean install method. It basically erases the entire content of your chosen drive and installs a fresh, smooth version of the new operating system which is download El Capitan Mac OS X in this case. This would mean no older versions of the Mac OS X, system applications and user data all will be wiped out with a clean install. This is an excellent choice to test an operating system on a separate disk drive or a partition in cases where you have had prevailing software issues on your computer which you have been unable to fix. Therefore when these issues become a major headache for you, your best option is to perform a clean install of the OS X – El Capitan. Although you may have to let go of your apps and their data, it becomes a smaller price to pay for when compared to running the system in its current state with a truckload of software issues.
The upgrade install option is pretty straightforward. Therefore in this article, we will only discuss the download El Capitan andclean installation of El Capitan Mac OS X.
Download Os X El Capitan Iso
Download El Capitan iso and dmg installer
1 note
·
View note