
Don't wanna be here? Send us removal request.
Statistics
We looked inside some of the posts by bowbeforemegatron and here's what we found interesting.
Average Info
Notes Per Post
309
Likes Per Post
257
Reblog Per Post
46
Reply Per Post
6
Time Between Posts
2 months
Number of Posts By Type
Text
11
Photo
6
Last Seen Tumblr Blogs


Fun Fact
The KCSC sent more than 20K requests to delete posts related to prostitution and porn to Tumblr from January to June 2017.
Text
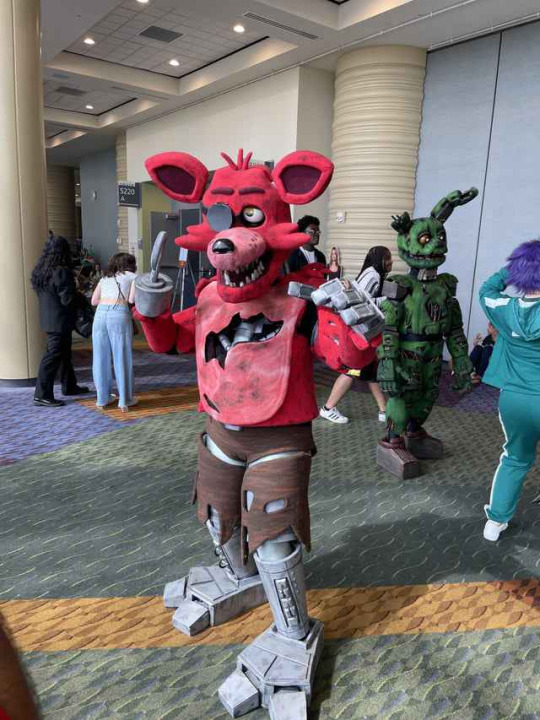


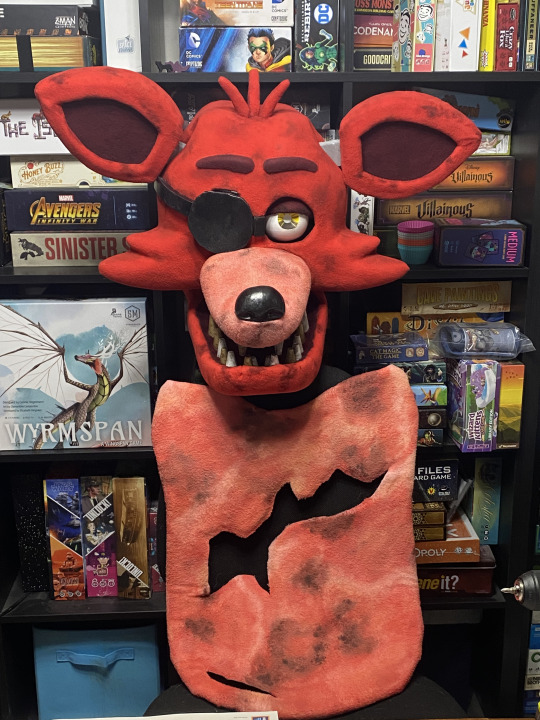
@8bithellscape and I's Springtrap and Foxy costumes at Megacon 2025! We didn't have time to do everything we wanted, and there's definitely some room for improvement, but we were still pretty happy with how they turned out.
27 notes
·
View notes
Text


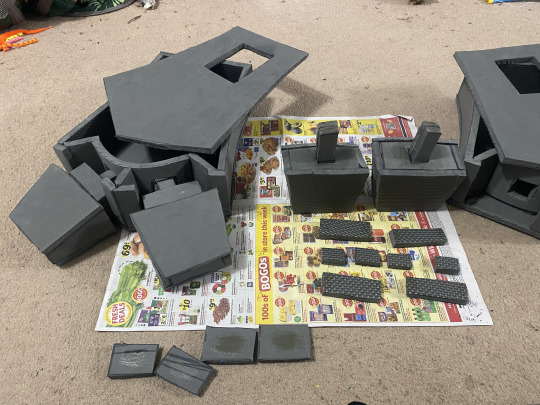
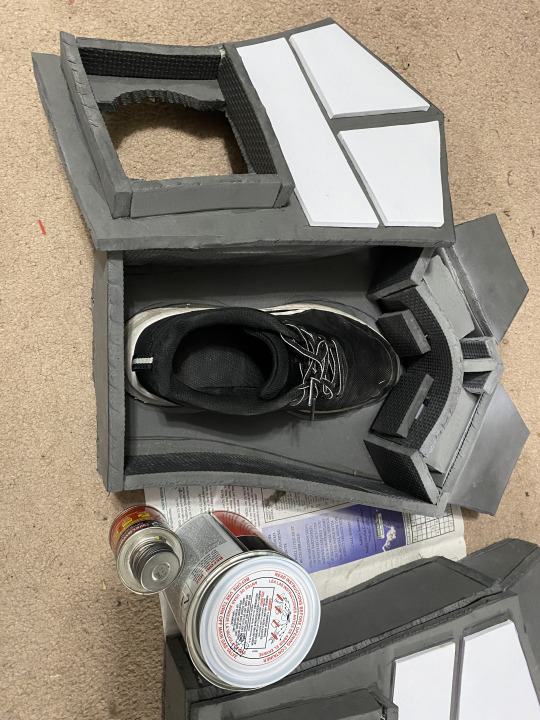

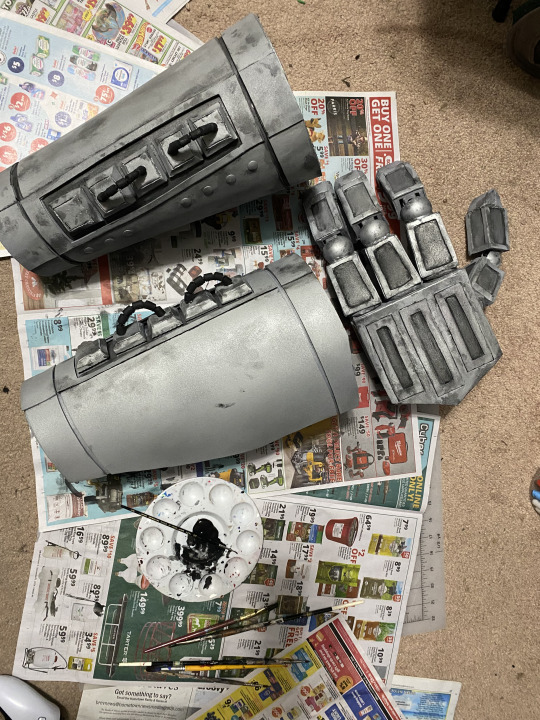

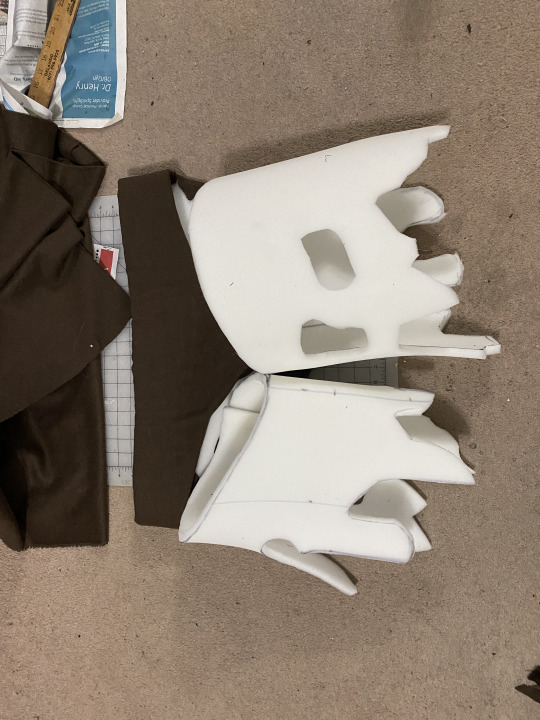


Whoops! I forgot to post the rest of my Foxy costume. Here are the last of the progress photos. The feet were made from EVA foam puzzle mats and some thin foam for the top glued together with contact cement. The toes are attached in a way that allows them to move slightly as I walk or tap my foot. The shorts were made with more project foam and wrapped and painted in a striped pattern somewhat like his original model. The legs and arms were made of a thick EVA foam and covered with thin pieces for detailing. Once the base was done, they were painted, distressed, and strapped together with some nylon web strap and buckles. Foxy's hand was made from foam with a thin wood interior support structure. The fingers have trimmed down ping pong balls at the joint which cover toggle bolt spring clasps that have been glued to either side of the finger. A string has been attached to the fingertips and runs down into the hand where I've made loops to pull. It doesn't work perfectly, but it's enough to move them a bit. I made an endoskeleton from foam and PVC pipe to add to the interior of the body. Finally, the torso was covered in fleece and painted.
2 notes
·
View notes
Text
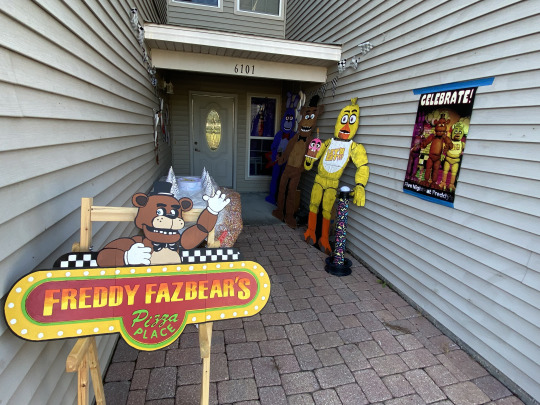
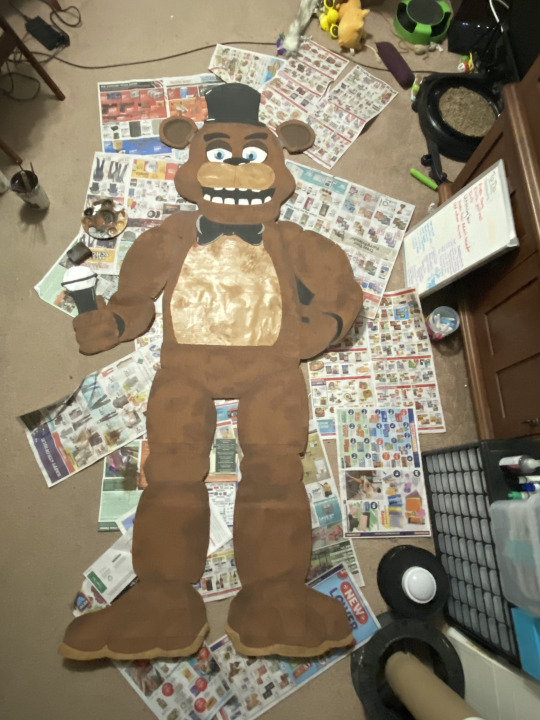
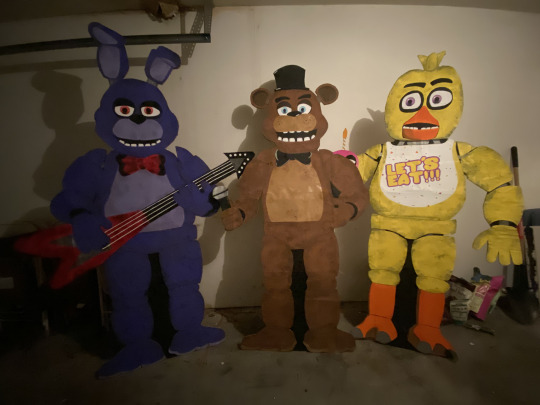
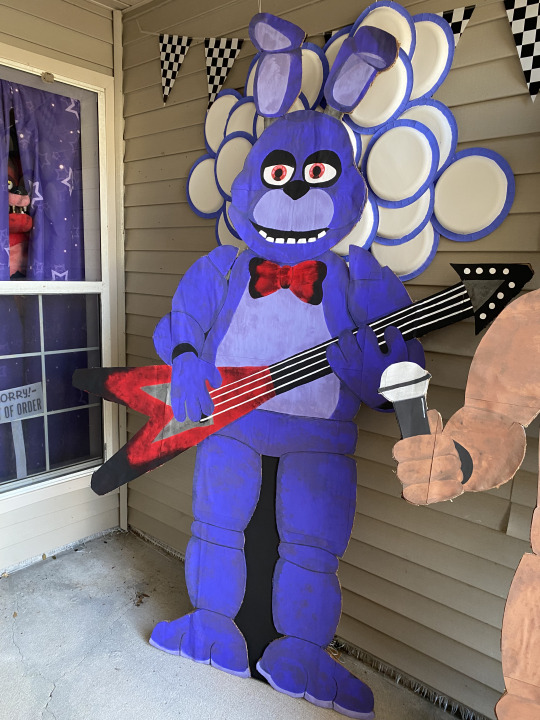
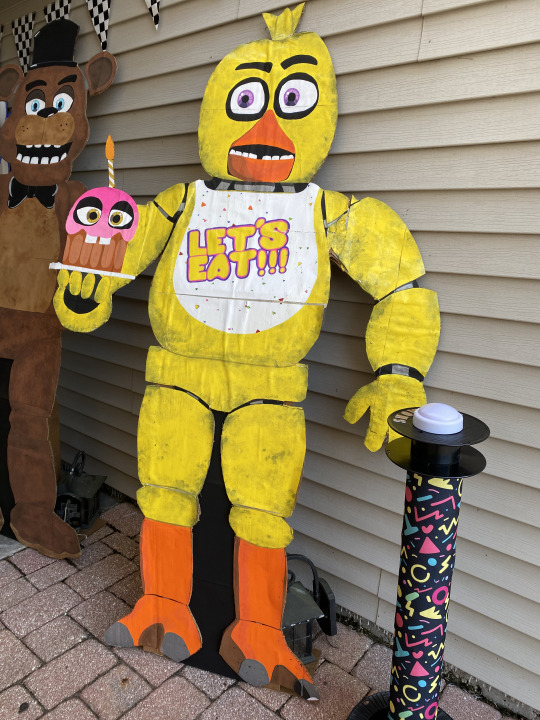
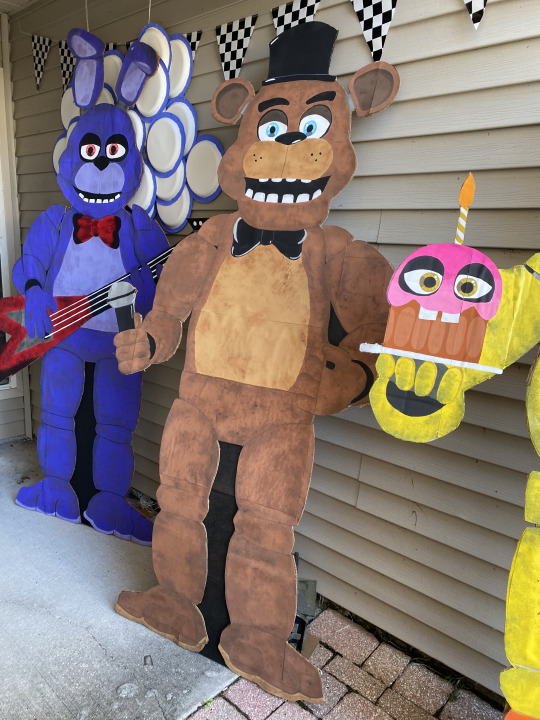

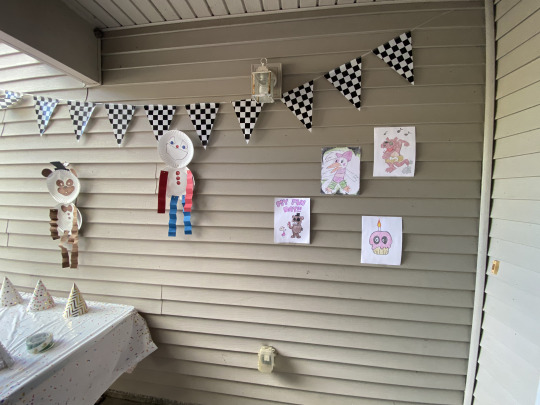
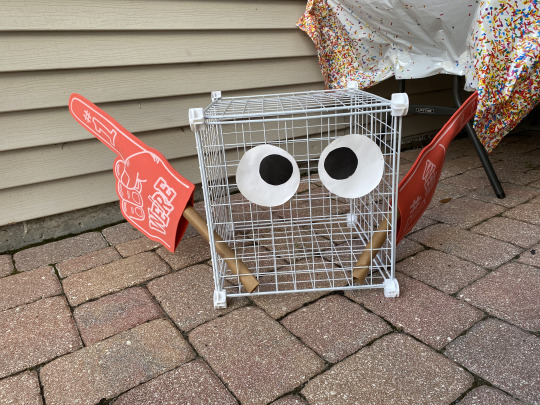
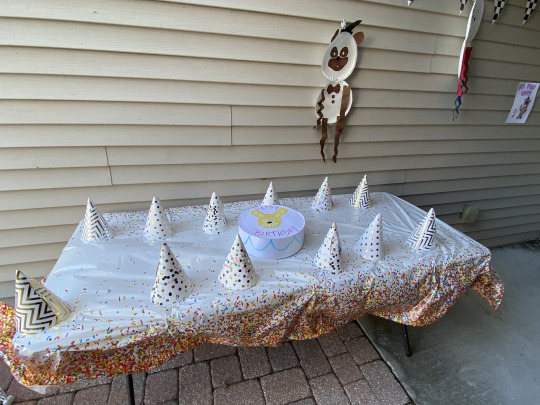
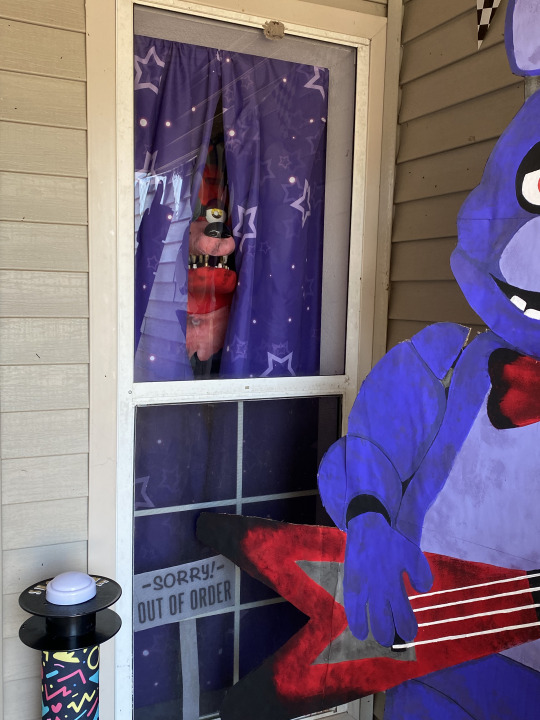

I decided to take a bit of time off from the costume to make some Halloween decorations for the door. The standees were made of cardboard, posterboard, and more than a bit of paint. @8bithellscape made some beautiful paper pals, drawings, and of course No. 1 Crate! My favorite part was of course Foxy, though. I stuck Foxy's helmet and chest on a precarious stack of boxes in the window with some curtains made from fabric I found on redbubble. My roommate rigged up the light's she's been working on for the eyes to make him extra spooky.
The kids who came to the door loved it and our first visitor was even in a Monty costume. Adorable!
Happy Halloween all!
#fnaf#five nights at freddys#halloween#standee#freddy fazbear#Chica#bonnie#foxy#trick or treat#No 1 crate
15 notes
·
View notes
Text

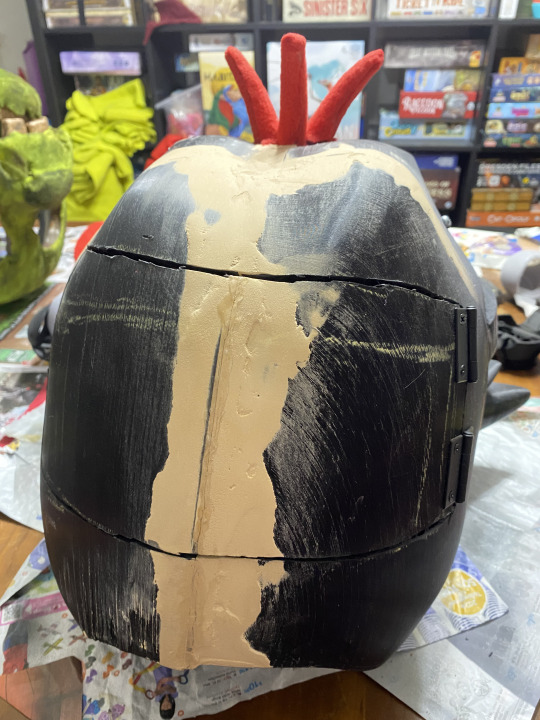


Before fully covering Foxy's head, I added a hatch in the back to make accessing the eye and ear mechanisms easier. It swings on a hinge and is locked in by a pair of magnets on some corner braces. After that, I covered everything with fleece and glued it all down with Fabri-tac. Once it was wrapped, I added some weathering to it and the stomach. Foxy has a strange pattern on his stomach, but I did my best to imitate it and am pretty happy with how it came out. Also included in this compilation is an updated look at @8bithellscape 's Springtrap head. So creepy.
12 notes
·
View notes
Text


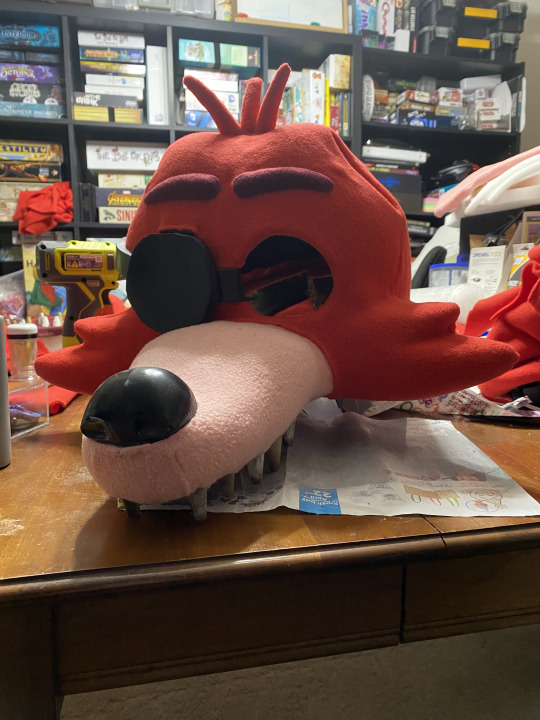
Next up, I tackled the eye mechanism while @8bithellscape got to work on some gnarly painting of Springtrap's ear fur. I got the eyes, and eyelids from Tioh's Moveable puppet eye file on Thingiverse and made a simple harness and some bars to hold them. I also made a platform that could be attached to Springtrap's springlock and inserted through a rear hatch in Foxy's head. I had to add some extensions to Foxy's cheeks to attach the jaw to, so it made the hatch necessary. It'll make it a lot easier to reach the electronics if anything goes wrong, though. These were all printed on the 3D printer. I also made a simple ring out of thin foam for Springtrap's eyes. It needed to be super thin to fit between the eyes and eyelid. We Plasti-dipped them to make them stronger. The teeth were painted and I added on Foxy's eyepatch with a simple hinge. He got a coat or three of shiny black spray for the eye patch and nose. While I did that, @8bithellscape started adding fur to Springtrap's head. This was accomplished by Fabri-tacing it in sections and making a few small seams as close the holes as we could manage. After it was fully wrapped, she found the holes and cut them. Most were left jagged so it looks like it wore away or was ripped as opposed to neatly tucking them in.
14 notes
·
View notes
Text


Next we made Springtrap and Foxy's ears. We cut the shapes out of EVA foam and glued them together with contact cement to create an outer shell. Then made pieces for the outer rim of Foxy's ear, the inner ear for Springtrap that actually sits on top, and the "metal" bars. The ear parts were wrapped in fleece and glued on with Fabri-tac. I know a lot of people recommend hot glue, but the Fabri-tac made for a strong flexible hold that took a few minutes to dry so we could still stretch the fabric as we went. For foxy, the foam metal bars were simply inserted along with some leftover soft foam from the bodies to fill the voids. I did forget to paint them before gluing them in, but took care of it later with a creative use of a grocery bag (holes in the bottom for the bars to stick out and bag protects the fabric from paint!). Springtrap's ears slide over the rods and are removable. @8bithellscape wanted the larger ear to bend, so we included a wire, toggle bolt hinges, and some PVC pipes to guide the cable. A servo in the head will pull the wire to create the bend and both heads will have ear wiggle and eye movements.
17 notes
·
View notes
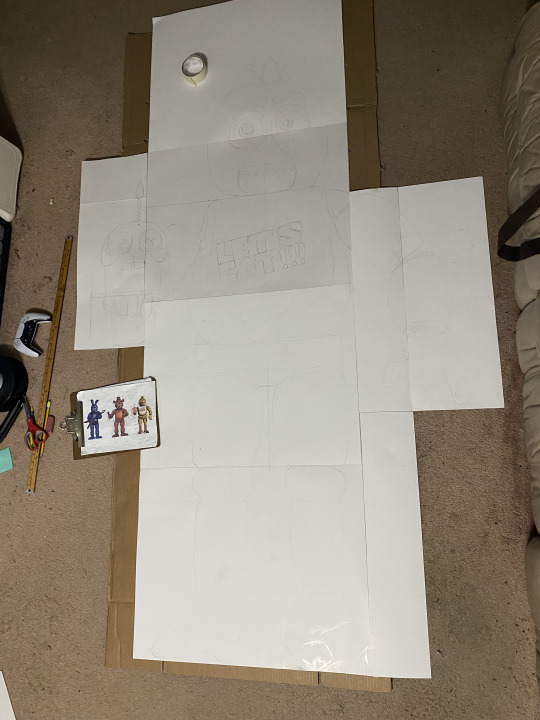
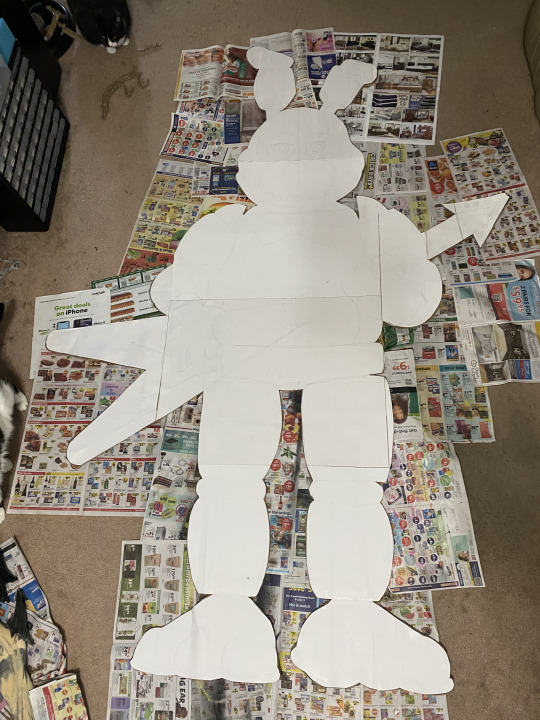
Text


My roommate @8bithellscape and I are making some Five Nights at Freddys costumes for Megacon! If all goes well, these will be our first animatronic costumes with movement in the eyes and ears. So exciting! We started with 3D printing the heads based on some 3D models. Foxy was divided into 7 parts to fit on my 3D printers, and Springtrap was split into 6. After they were done, we used some Loctite 2 part plastic glue to get them together and DAP plastic wood filler to seal any gaps. They'll be covered in fabric later, so they don't need to look too pretty. I also printed some eyes from Tioh's puppet eye file I found on Thingiverse after adding a bit to round out the bottom of the eye. In addition to the heads, we started on the bodies. Using 1 inch project foam, and some guidance from Andiematronic's making Glitchtrap video, we made the basic body shape. After staring at Foxy a while, I decided to put the seam on the side instead of the back since his back has a large open space. I'll cut that back section off a little later but am leaving it for now for stability. The bellies are made of 1/2 inch project foam and won't be glued on until they're covered in fabric. Next I made Foxy's ears and hook. These are made with EVA foam glued with contact cement. The pieces are stuck together and after full cure, I sanded down the edges with a Dremel and some light sandpaper. It makes a big mess, but the results are pretty decent.
We're very fortunate so many great cosplayers have made these costumes before and shared how they made their versions. I'm sure it will help a lot in the long road ahead. Looking forward to the journey!
8 notes
·
View notes
Text
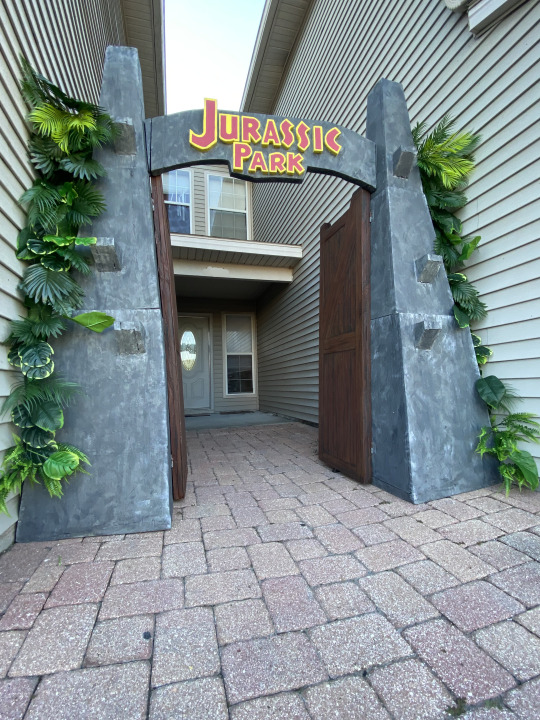


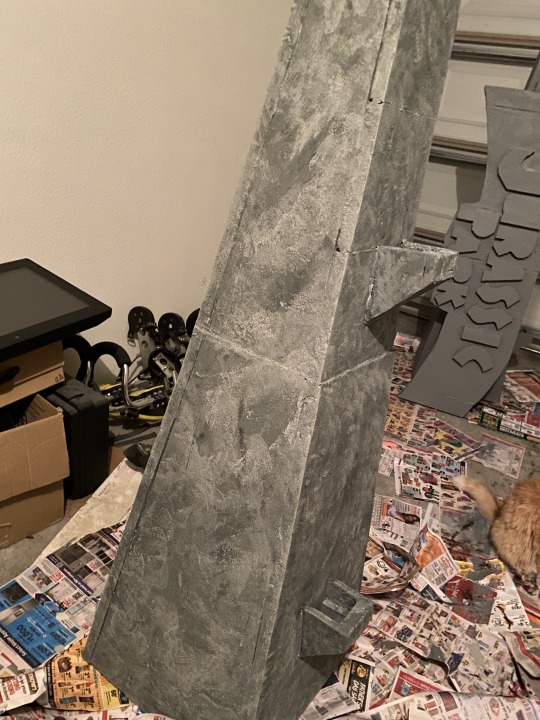


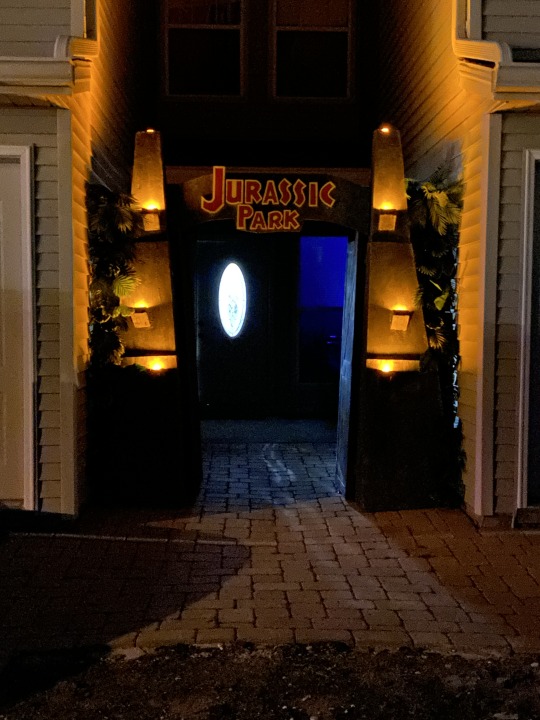
The gates are finally done! For texturing, I used a technique I saw on youtube. Spraying water and then using a heat gun over the foam makes a cool crackling effect. They were then coated with a waterproofing paint and then a small can of grey house paint. I sponged on some acrylics in different greys and then gave it a wash of black to give it a weathered look. Finally, I used the foam scraps to make side panels and covered them in faux plants.
I wanted to make the door up as the visitor complex, but I ran out of time. However, I'm really happy with how they came out and the trick or treaters seem to be enjoying them.
Happy Halloween!
25 notes
·
View notes
Text


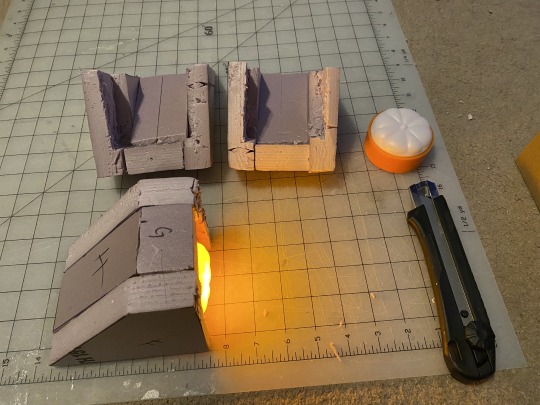


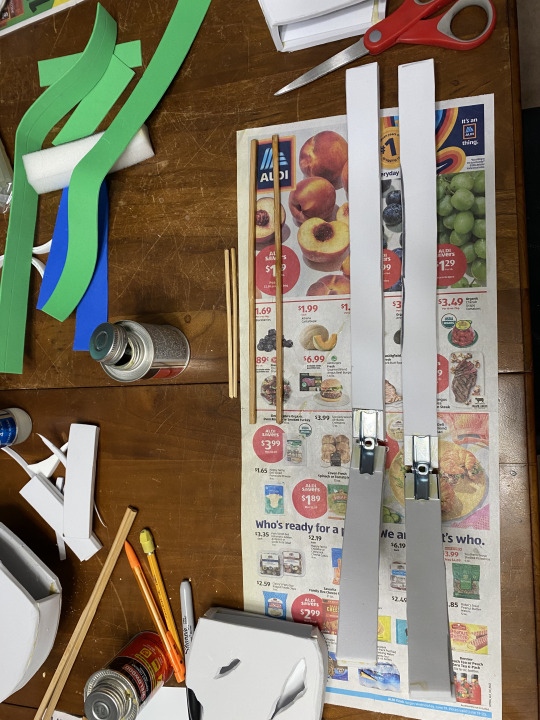
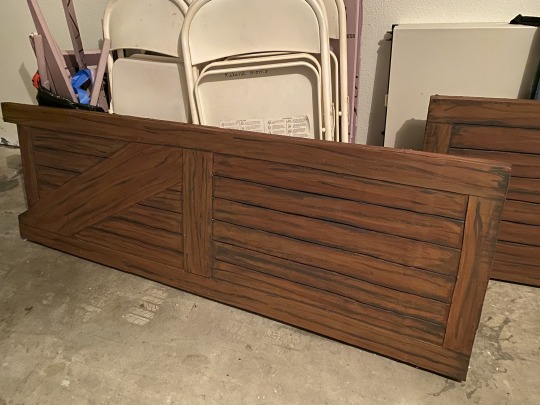
Jurassic Park Gates continued - I made the small torch holders and, since those little fan flames were way too expensive, I bought some simple flickering pumpkin lights to put inside them. Each holder has a shelf cut into it to keep the light from dropping all the way in. The picture above is a quick stack test. The top two pieces and the larger bottom piece are not currently attached to one another. I'm going to come up with a way to make it so they'll come apart for storage. For the doors, I glued two boards together and then cut the front pattern out of thin foam I bought in a roll from Michaels. This was glued on and then grooves were cut out between the "wood panels". I want the doors to come off (again for storage), so I used these hinges that easily come apart. I did have to buy left and right hinges which were sold separately though.
The arched sign will also be made to come off. I'm going to do some tests with industrial strength velcro to see if that works. Once that part is sorted, it'll be on to texturing with this cool technique I saw on Youtube and then weatherproofing and painting!
3 notes
·
View notes
Text


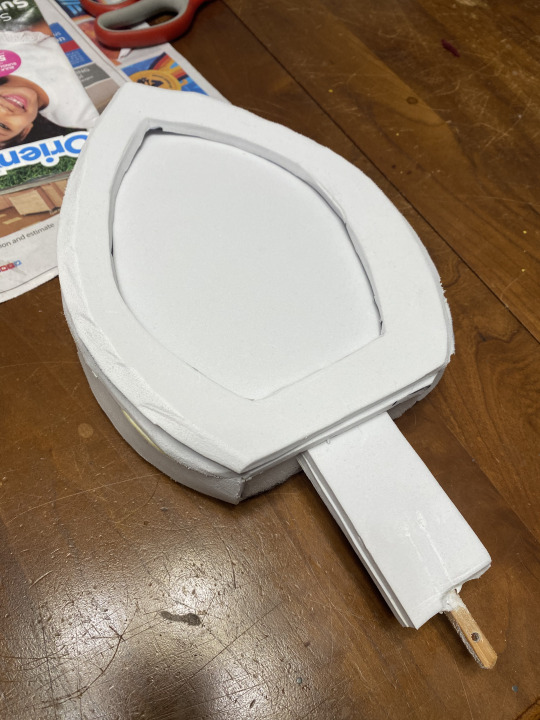
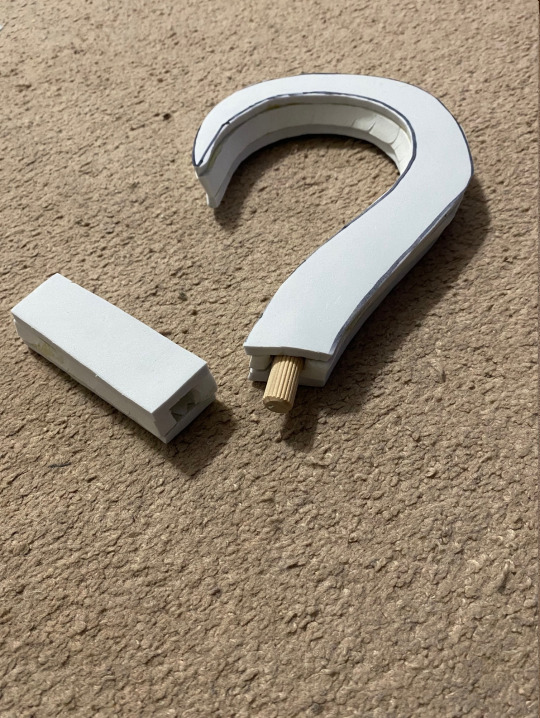
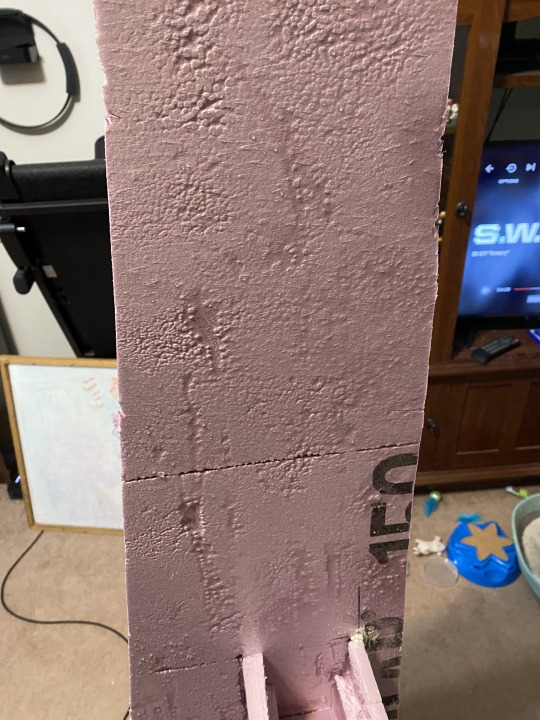
This year's Halloween Doorway theme will be Jurassic Park, so I decided to start off with the iconic gates! I grabbed a picture off the internet and printed it, then used a scale ratio calculator to figure out the ratio between the picture and the size of my porch entryway. With that ratio, I was able to use the calculator to figure out the size of everything. After a quick run to Home Depot for several sheets of one inch foam, and a little surgery in the parking lot since they wouldn't fit in the car, I got started! I glued and taped the boards back together, then measured and cut out all the pieces. With some gap filler, I plugged any egregious gaps from where I'd cut into the foam that the glue didn't quite fix. After a little sanding, I formed the basic blocks and used some toothpicks and painters tape to help align and keep the pieces together while they dried. The sign was a bit tricky. After stacking all the pieces in place, I discovered that one - They were shorter then I wanted, so I added about a foot to give them a more impressive height, two - I'd need to add a wedge at the bottom to compensate for the angled drainage in the porch paving and three - the sign was somehow too short, so I added another inch or two to either side. Really glad I tried it out before I went any further.
Next up, the doors and lights!
10 notes
·
View notes
Photo
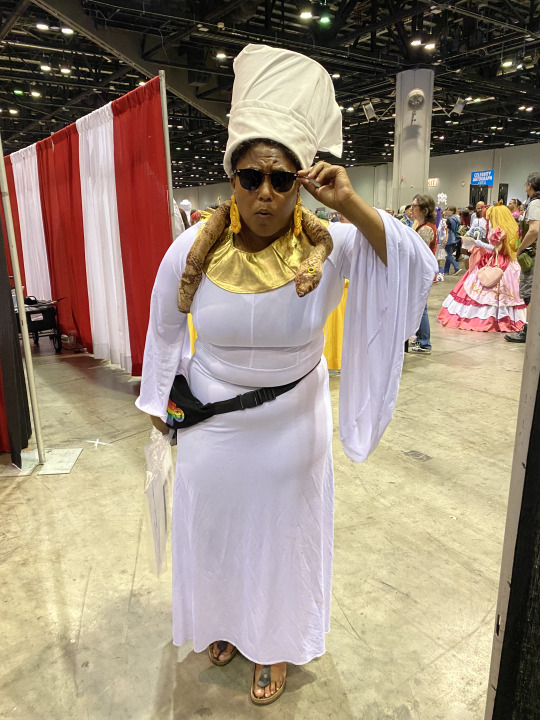


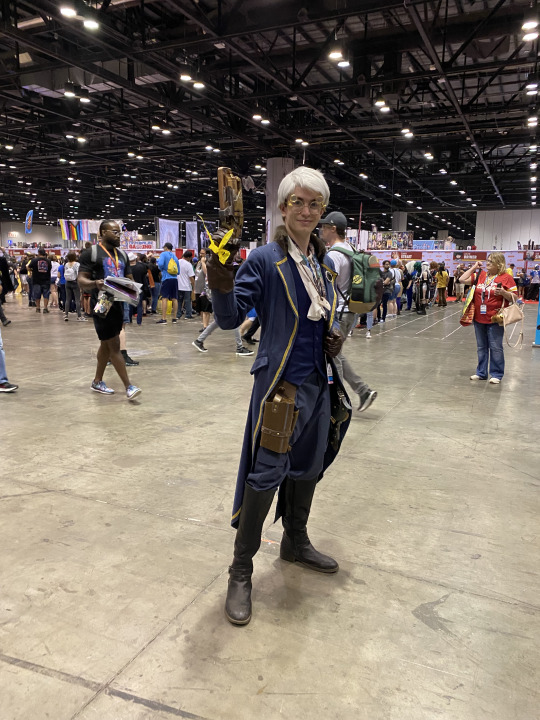
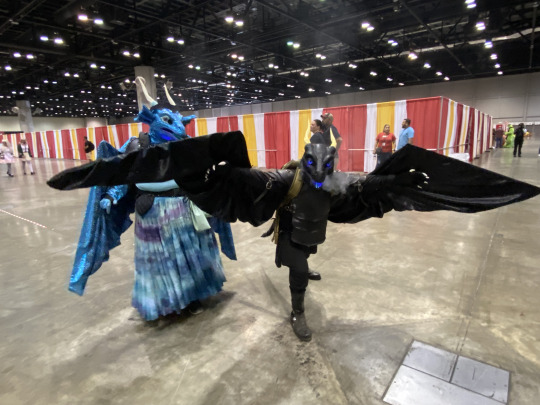
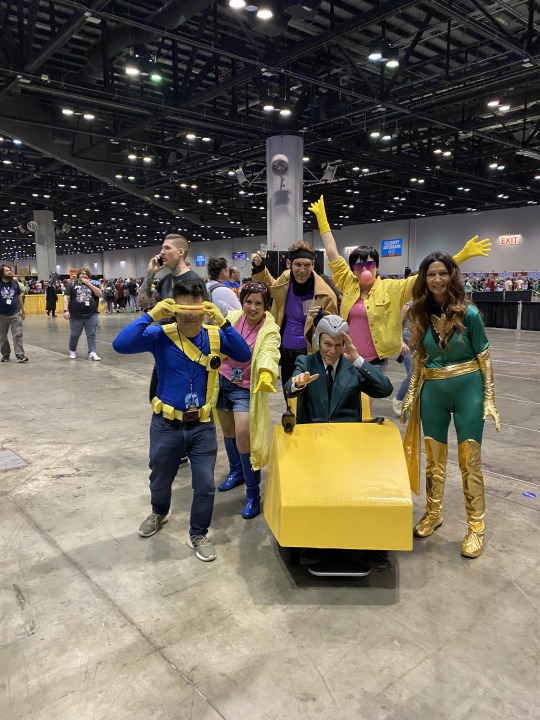

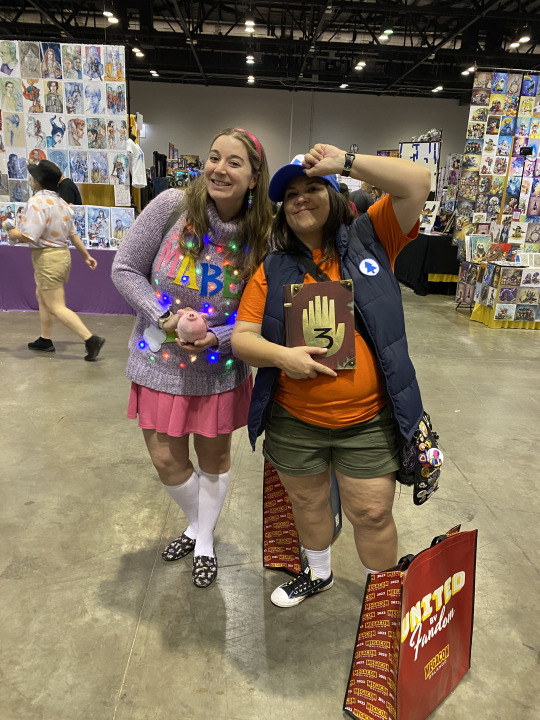


Here are some other great cosplays I saw at Megacon!
#Megacon#Megacon 2023#Mama Odie#Princess and the frog#terminator#T-1000#Eevee#Pokemon#Percy#Percy and Vex#Vex'ahlia#Dragons#Xmen#Gravity Falls#Stan Pines#Bill Cypher#Stanford Pines#Dipper#Mabel#Godzilla#Cosplay
58 notes
·
View notes
Photo


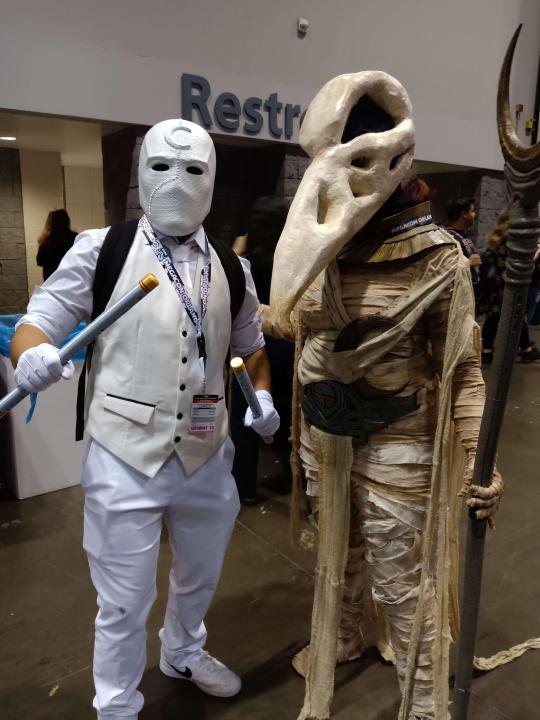

My Khonshu costume! Unfortunately the staff warped and broke in the car on Thursday, but a lovely cosplay repairman helped me get it mostly back together. The moon and cape also slipped often while I was walking about. I ended up sewing it later but it’s askew in several of these pics. Regardless, I’m really happy how it came out and that so many people said they liked it. My most popular costume to date hands down! I’ll remake the staff and wear it again one day for sure.
29 notes
·
View notes
Photo


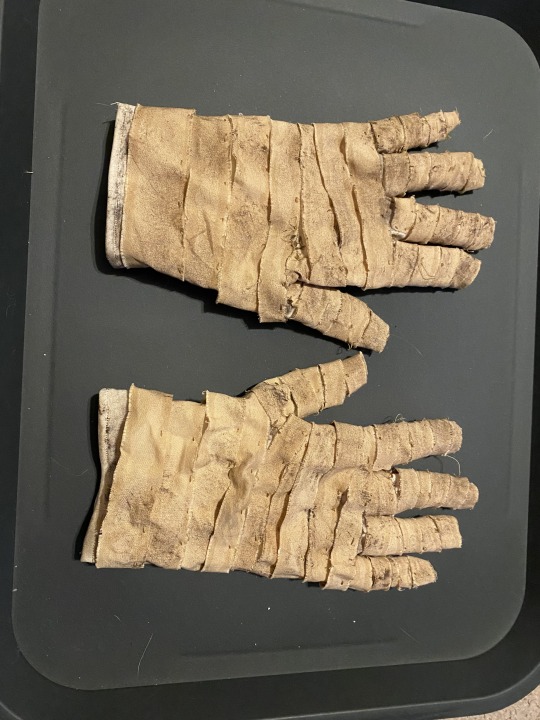

I created Khonshu’s many many bandages by cutting strips of different types of fabric, dying them with tea (and sometimes coffee), and then dry brushing them with brown paint. Once dry, they were hand sewn to dyed pants, shirt, and gloves and to some shoe covers I made. The flowy robe and loincloth were made of cheesecloth which was dyed with the same process. I realized after dying everthing that the fabric I had chosen frayed a lot. I ended up using about 8 1/2 bottles of fray check to stop all the errant strings.
4 notes
·
View notes
Photo

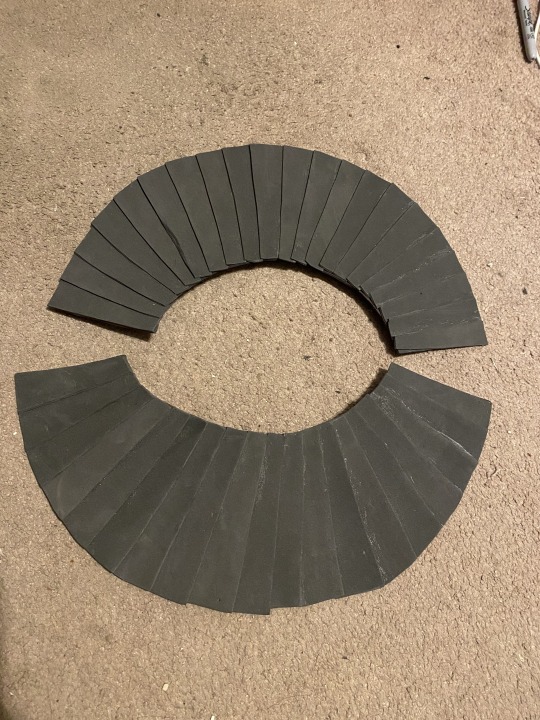


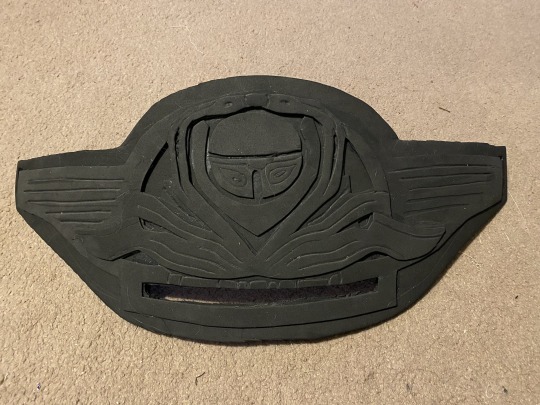

I finished the paint job on the head and made the collar and belt. Both collar and belt are made with layered foam glued together with contact cement. Once dry, they were mod-podged and painted with acrylics. The collar has velcro on one side to make it easier to take on and off.
7 notes
·
View notes
Photo


Here’s my Khonshu staff. I 3D printed it with the help of a file I bought, assembled it with liquid nails and primed it with a coat of sandable primer. Then I added a base coat of grey and dark brown followed by a second coat of dry brushed light brown and gold. The other side has the inlaid part that’s showing in the picture. I’m quite happy with how it came out!
13 notes
·
View notes
Photo
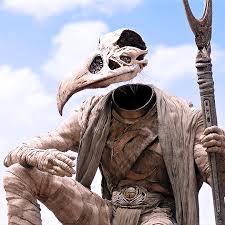


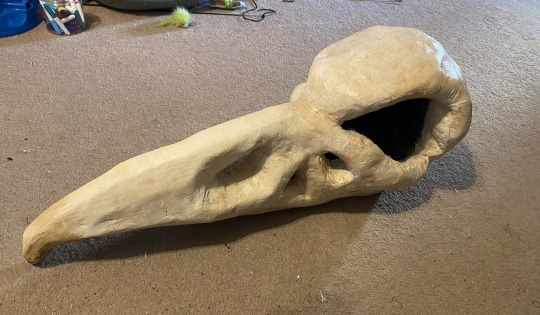
I’ve been working on a Khonshu costume for Megacon! Here’s the head so far. I started with a foam base. Paper mached around it and ended up cutting the eyes larger. Both outside and inside were coated with a thin layer of joint compound to help harden and smooth it and then a layer of mod podge to keep it from cracking. A foam head kept it from drying too small and after the outside was mostly done, I added fleece and foam to the inside to make it more comfortable to wear and cut out a larger area around the mouth and nose so I can breathe easier. From here, I’ll be finishing the paint job and add black mesh in the eye holes. -- Khonshu photo is not mine
18 notes
·
View notes
Text
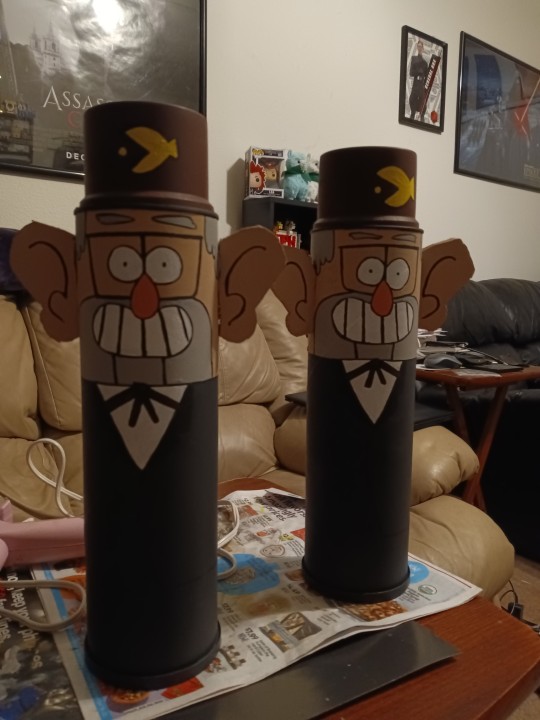
I am proud of these dumb things.
Roommate made these Stan "nutcrackers" for our Shack setup and I love them so much I can't properly put it into words.
47 notes
·
View notes