
what up i'm rhed, i'm gayy, and i never learned how to fucking art
10 posts
Don't wanna be here? Send us removal request.
Last Seen Blogs

fee-bee-lay
Eternally trying to decide what Sims game to play…

richfamily2021
Rich.family2021
richfamily2021
Rich.family2021

yazaelarabe
Untitled

button-eyed-hcs
。・゚゚・{cute as a button in the eyes}・゚゚・。
Photo

Hi!! Sorry, this took me suuuper long ; ; But uhh yeah!! Here’s a step-by-step of my coloring process!! Please keep in mind that my method is by no means the “best” or “most efficient”, especially since I like to break the rules of color theory sometimes!

Step 1
I set the lineart layer to multiply (so the colors blend together more nicely), create a new layer underneath it and start to color my drawing.
(Honestly, despite drawing for almost 16 years I’m still not overly familiar with color theory. I usually just go hog wild with my colors until they look nice to me).

Step 2
Next, I create a clipping mask above the layer with the flats, set the layer mode multiply and start to add some shadows, then I slide the opacity of the layer down to ~50%.
I either use a dark red (like the one in this example) or a dark purple to shade but, seriously, you can do what you want.

Step 3
After adding the shadows, I create a new clipping mask layer above the shadow layer, pick a round soft brush, set its flow to 40-50% and soften the shadows (I also added some blush to her face here to make it look more rosy and less “empty” ;> ).

Step 4
Next, I create a new layer above the one with the flats, set it to vivid light, slide down the opacity level to 30% and add some nice little highlights.
(Technically, I should’ve used a cold(er) color for the highlights since I’ve already used a warm one for the shadows but I prefer working with warmer colors in general, so… ;) )

Step 5
Now I add a clipping mask layer above the lineart layer, set its opacity to 75% and color some parts of the lineart that I want to look “brighter” and “softer”.
By the way, I never use black for my lineart, it’s just not…appealing to me. Depending on the drawing and the colors I’m going to use, I mostly use dark red, dark blue or dark purple for my lineart.

Step 6
For the last step, I added some additional stuff, like a (very minimalistic) background, an orange overlay layer with an opcaity of ~20% for some final color corrections and a grainy filter.
Hope this helps!
265 notes
·
View notes
Photo


So Tumblr doesn’t allow picture formatting to ask answers, whoops.
An anon asked me how2draw hair (’specifically wavy or curly’), and here’s my process. You really have to draw/paint hair a lot to get an idea of how it should look in my opinion, but hopefully you can glean something from this^ Check the captions for extra tips :)
6K notes
·
View notes
Text
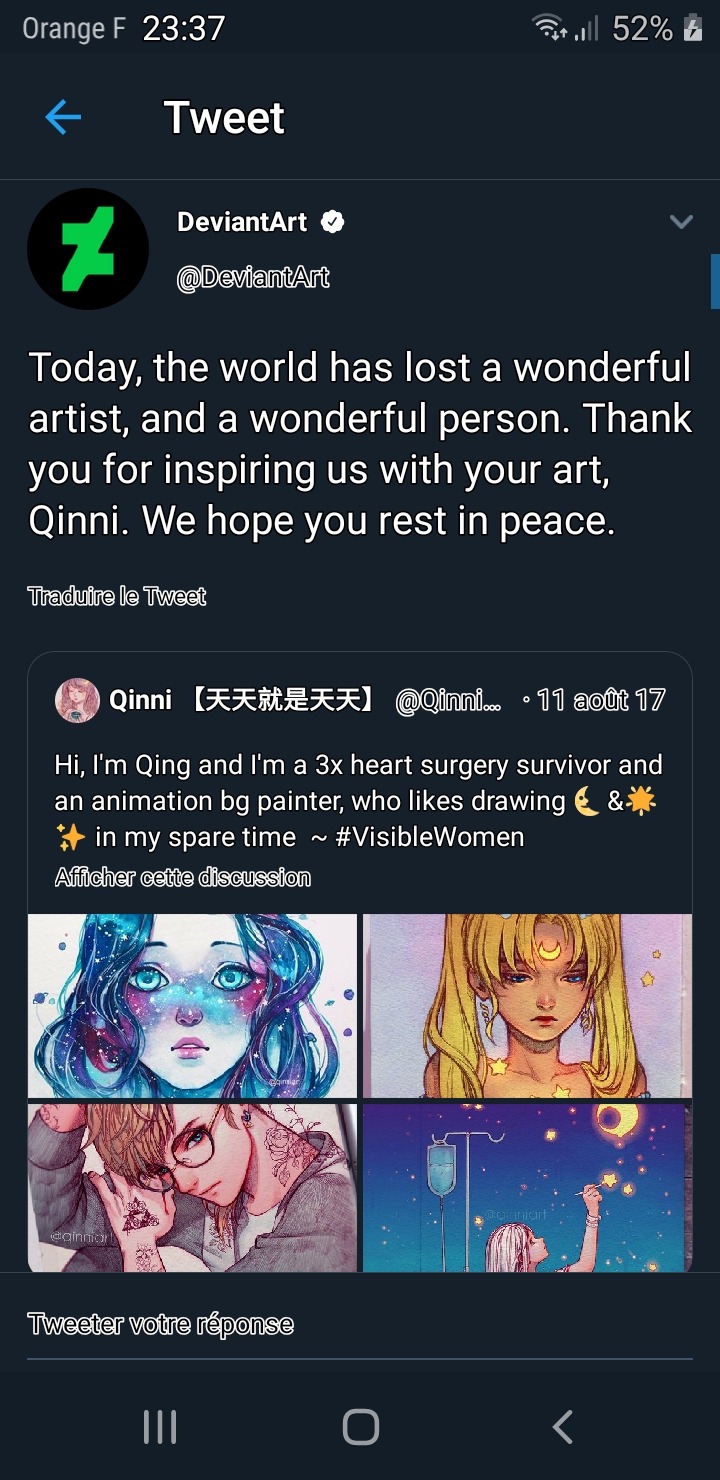
You most certainly know the meme below. It is her creation.
Whenever you use it, remember that it was achieved by the incarnation of courage
Rest in peace, Qinni

75K notes
·
View notes
Photo


i h,,... ave to p..,,i, iss so ldmnj b a...dly. need... ne mo... mouth,..... jndno pis,..ss
1 note
·
View note

Photo


hnnnnggggg lowkey the love of my life, this little thot amira edwards
#original art#portrait#haha idk what to do :')#rhed's shit#amira edwards#real life people#amira leilani edwards#uhhh happy birthday ;)
1 note
·
View note
Photo


the good thing about my creepypasta phase was that i learned that i wasn’t as straight as i thought i was :’)
#creepypasta#fanart#creepypasta fanart#jane everlasting#jane everlasting fanart#jane todd richardson#jane todd richardson fanart#jane the killer#jane the killer fanart#jane arkensaw fanart#jane arkensaw#tw//blood#tw//slight gore#blood#slight gore#trigger warning#tw
11 notes
·
View notes
Photo


This is John, try not to get crushed under his crippling depression :’)
#Rhed's Shit#Original Character#John Bublé#uwu he's a smol bean#hi yes im a noob at art :)#pls....criticize my art uwu#lmao doesn't even have to be constructive. just hate on my art#that's my kink so you won't be able to get much satisfaction uwu#or will you Owo ?#i struggled a lot with his sweater bc i'm actually really shit at art#this is just all an illusion#i've only stared at this piece five times and it's all been for 5 seconds#it's not enough for me to hate this but thanks :')#also i made two bc i couldn't decide on some cool signature#everyone has one except for me y'all :(
4 notes
·
View notes
Text

here have a dumb bitch. this is Greg. Greg is human yes yes. very human. this human form is hella gucci 👌🏼👌🏼👌🏼
#lmfaoo#Rhed’s shit#Human!Greg#this is their human form bc i didn’t actually wanna draw their down horns/halo#i wanted to see how good they looked WITHOUT their ugly ass extra bones 👀👀👀#aND BOI DO THEY LOOK GOOD 👀👀👀👀👀👀#hMMMMM what a thot 👀👀👀#angel oc#human form#Greg the Human#thottie as an angel decent as a human#their motto is that one vine with the thottie#the hot thot#she’s very pretty tbh
3 notes
·
View notes
Photo

wow my very second finished digital art. what a fucking babe
#my art#BNHA OC#MHA OC#Neferom Miyamoto#sweet sweet girl#im pretty fucking g A Y#hA.#first art of a character by themself#bleugh the first time i used digital art was horrible#lol im a noob#thanks for checking in i'M S TIL L A PIE CE OF G AR BAG E#Rhed’s shit
0 notes