Statistics
We looked inside some of the posts by creatures-by-ada-street and here's what we found interesting.
Average Info
Notes Per Post
47
Likes Per Post
39
Reblog Per Post
8
Reply Per Post
0
Time Between Posts
2 days
Number of Posts By Type
Text
17
Last Seen Tumblr Blogs


Fun Fact
Forty percent of Tumblr users are between the ages of 18 to 25.
Text
Scratch-made Apple Pie (method)
I have heard some people say that when you make apple pie from scratch, you HAVE to pre-cook the apples for the filling. Not so. I like my apple pie to be made from scratch, hold together well enough to slice and serve, but not too well set up because I like it to still be soft and squishy and fall apart without too much difficulty.

How to:
Get the ingredients together for your preferred pie crust recipe, plus apples (I prefer to use crisp apples that are red with some yellow on the peel, like fuji or rome) ...plus apple pie seasonings (such as cinnamon, cloves, ginger, maybe mace or something more if you like) ...plus sugar, and, very importantly, cornstarch. (if you don't have a preferred mix of spices and amounts for them, pick a recipe you like and follow those amounts. I measure 'to taste' but generally use about twice as much cinnamon as other spices, and mostly just ginger and cloves for that. (maybe about a half or full teaspoon of cinnamon, and a quarter teaspoon of each of the others? Depends on how much spices you like in your pie. If you aren't sure, use less spices than you think you need and pay attention to the amounts so you can adjust to your liking the next time.) (don't add cornstarch yet)
Peel and slice up your apples (4-5, depending on size of apples and pie dish) ...as you add each sliced apple to your big mixing bowl, sprinkle some sugar on it, and maybe give a stir, because the sugar helps prevent the slices browning while you slice more apples. Also, the sugar draws some juice out of the apples while they sit. So, let the sliced apples and sugar sit while you mix up your pie crust, and if you want, you can add the apple pie spices to marinate with the apple slices, or add later. (don't add cornstarch yet)
Get your crust mixed up, rolled out, and lining your pie dish. Then, you take your apple slices (with sugar and spices) and give them a good stir, and (VERY IMPORTANT) DO NOT just dump it all into your pie shell. Scoop out the apple slices, leaving the liquid in the bowl. Fill the pie shell to mound up higher than the top of the pan, but don't pack it down and if you ended up with more apple than fits in, don't try to make it all fit, just use as much as you need to fill the pie nicely.
NEXT IMPORTANT STEP: take some of the spiced apple juice left in the bowl (for a deep dish pie, I use about maybe 1/2 cup, or just whatever is left in the bowl) and (with room temp juice) THEN add some cornstarch to this juice. I use generally between 1-2 tablespoons of cornstarch (for a deep dish), depending on how set up I want the pie to be. If I weren't doing deep dish size pie, I'd probably make sure to not use more than 1/2 cup of juice (or a little less, like maybe 1/3), and only about 1 tablespoon of cornstarch. Again, this is to your liking, so keep track of how much you use, and then you can use more or less on the next pie you make, depending on how it comes out and how you want it to be.
Mix the cornstarch into the juice as well as you reasonably can without heating it; (I use a fork) and try to get lumps out but as long as visible bits of cornstarch are very small, don't worry too much. Then drizzle the spiced-apple-juices-with-cornstarch mix over your apple slices in the pie shell, roll out a crust top for your pie and seal the edges together using your preferred edging. For the pie crust recipe I like, the pie bakes about 350 degrees (F) and once the pie is nicely browned on top, I look at the glass bottom of the pie dish to make sure the bottom looks like it is starting to brown. If it isn't yet, I cover the top of the pie with foil so it won't brown much more, and bake the pie a little longer. Ovens vary (especially at different altitudes) and especially if you bake deep dish pie, it's extra important that the bottom crust gets cooked through, so that's why I like a glass pie dish.
Admittedly, sometimes I don't seal the crust edges well, and some juices leak out during baking, but that's why I like to put some parchment paper on a cookie sheet, under my deep dish pie.

It may be messy, but it's guuuuuud.
1 note
·
View note
Text
wip coloring: Squishies
Coloring process for my squishy jelly monsters, based on zol and gels from the original Legend of Zelda (NES console 8-bit version)
I had fun trying to make them look semi-transparent, but also very colorful. Also, I wanted them to look like they weren't just piles of slime, but more like fully-set jelly stuff, coated in drippy slime. With floating eyeballs set in the jelly, of course.

(here's the finished colored art in a lazy pic, see below for the coloring steps)


Lines were inked with pitt artist pens (india ink) and I laid down some base colors with copic sketch markers before getting to the colored pencils. I know the subtleties of the colored pencil doesn't come through in the kind of lazy photography I did here, but you can see how many different pencils I used, representing how I like to layer/overlay many colored pencil shadings to get the effects I like.
1 note
·
View note
Text
WIP Sorcerer's Familiar coloring
More from the "build a beast" theme from Halloween a few years back on tumblr... this entry is the Sorcerer's familiar, who is named "Hyperbole" or "Hype" for short. He has a pet beetle (named "Syllabub" or "Bub" for short), is small enough (for now) to fit in the cage in the sorcerer's hat (when Hype has been naughty) and is a hyperactive, childlike creature who has an ongoing feud with the local ducks (who are bigger than him)
Also, for Halloween he dressed up as (a not entirely accurate) Harry Potter, and had the Sorcerer make a golden snitch costume for his pet beetle "Bub".

(see below for more wip pics)
(Hype and Bub both love to eat berries)


(not finished, but that's progress)
1 note
·
View note
Text
WIP Ancient Sorcerer coloring process
Also part of the "build a beast" theme from a Halloween a few years back on tumblr. The "beast" I started drawing turned into a sorcerer who has lived a reallllllllly long time, but does not have everlasting youth, so he looks kind of ancient, but also got a bit deformed. Again, I started with sketch markers, and then colored pencils.

(see below for more, though not much progress on this one yet)


1 note
·
View note
Text
WIP Sorcerer's Lair
So, maybe you might have seen how a few years ago, on tumblr there was a "build a beast" theme for Halloween. At the time, I finished line art for those a bit late, and didn't get to coloring. But it was fun, and I said I'd color my "build a beast" drawings... eventually. Here follows some wip pics of my coloring process for the "Beast's Lair" part of the theme, using my original drawing.
(I started with some sketch markers, then colored pencils)

(scroll down)


(not finished, and sorry that photos don't really show all the subtle layering I like to do with colored pencils, but maybe you can get something of an idea of how it goes)
#wip art#original design#colored pencils#sketch markers#build a beast#lair#yes the ducks are partially there just to show scale
1 note
·
View note
Text
BTW
So, maybe it's obvious to a lot of people, or maybe not so much... but, if you couldn't already tell, let me just say this: I have focus issues, and also I like lots of different kinds of art and crafts.
I have tried LOTS of different ways of going about doing stuff, and I have found that what works best for me is to switch between different projects and different types of projects, like... frequently. And a lot of the projects I like to do, are the kind that take hours and hours of work. So it's very rare for me to just sit and work on only one thing from start to finish... or even to work on only one project allllllll day. Hence why sometimes I post wip pics of something that you likely won't see more of until weeks or months later. And, sometimes I wait until I've gotten a lot done on something before I post collections of wip pics of them that were taken over a long period of time instead of all in the same day. (and sometimes I just don't bother with wip pics)
I hope that doesn't bother anyone, but... on the other hand... sorry, I just really don't function well any other way. On the other other hand, someday I might consider splitting different kinds of art off into different blogs... like, for example, if a lot of people wanted me to put sewing and threadcrafts into a blog by themselves... or something.
1 note
·
View note
Text
WIP Coloring Process Sneezy Kitten
(aka the kitten with a rodent allergy)

(please excuse the lazy photo here... will get a proper scan sometime later on. For now, here's the "after" - see below for the "before" pics)
Some pics showing my usual coloring process when using colored pencils, in this case also having put down some base values using sketch markers over inked lines. (had some previous pics of this drawing as a wip, back when I was inking the lines and such)


1 note
·
View note
Text
Filet Crochet Lace WIP
Made using sewing thread, a size 12 crochet hook, and a pattern that was modified from one provided to me by the person I am making this for.


Times when I have timed this, it basically came out as an average of a half hour for 1-2 rows (the longest rows being about 3 inches). As you can see in the picture, each inch has approximately 11 rows, and thus it literally takes HOURS per inch. If I were to charge $10 per inch, I would be charging about $85 for each 8.5-inch section (the pattern is a repeating motif of right-facing dragon, peacock, left-facing dragon) ...and also at that rate, I would be making less than $10 per hour for my work.
Just an example of how labor-intensive it is to make this kind of lace, and also why I don't do it on commission... because for me to earn a minimum of $10 an hour for my work on something like this, someone would have to be willing to pay me... quite a lot. Like literally hundreds of $ per YARD. Still, if someone out there is both willing and able to pay me what it would realistically cost at $10/hour of my time and effort... then maybe let me know in comments and maybe we'll talk.
I am also working on some filet crochet patterns of my own design; I'd like to make some available as patterns to buy online when I get some ready. Don't know if anyone would be interested in that, but I guess we'll find out eventually.
(the source pattern for this particular project was from somewhere online some years back, and sorry I don't have the info anymore on who to credit it to, or a link to the website. Just be aware that I didn't make this pattern myself, and the person who had posted it online had said that they'd modified it from an old pattern, possibly a medieval one, or just super old and inspired by medieval designs)
#wip crochet#filet crochet lace#handmade crochet lace#crochet with sewing thread#dragon peacock dragon#it is a peacock and not a phoenix#but was chosen because it reminded someone of dragon phoenix symbolism
5 notes
·
View notes
Text
wip crochet beanie bird

Progress on a rainbow version of a beanie bird thing... in this case, I had first stitched a fabric shape of this little birdie to fill with the beanie stuff, and then afterwards did crochet to cover it, and current stage is working on peripherals like beak and wings. An inner lining of fabric is because when I tried making some beanie birds before (albeit with heavier weight of crochet threads) I had some issues with the little beanbag stuffing pellet things escaping one at a time through a few places where the crochet (when one part was joined to another) had bigger holes than elsewhere in most of the stitches.
So, I am working on a pattern for sewing these. They can function sort of like stress balls (or like for hand exercise where one needs a squeezable thing with a lot of resistance to it), where one can stuff them with either beanie pellets or very firmly with fiberfill stuffing, depending on what kind of squeeze resistance one prefers/needs.
3 notes
·
View notes
Text
another hand-lettered drawing wip
Here's another example of me drawing a layout for hand-lettered text (with a small drawing to go with it)
Shown here after inking the lines and laying down base colors with sketch markers. (more info and previous wip pics below)

In particular, with this project my goal has been to design lettering that (for me, at least) gives the impression of a particular rhythm... in this case, a parody of the Cheers theme song... but the opposite in meaning. Because sometimes people with reclusive tendencies don't want to go where everyone knows their name; very often they want the opposite, which is to go somewhere they can be entirely anonymous. >:)


Also with this project, my plan has been to use the same lettering with a selection of different images, all designed to represent wanting to be anonymous, and/or wanting to relax. This version is with an ice cream sundae; other versions will feature a selection of beverages, desserts, and maybe a name tag or something.
#wip art#hand lettering#design layout#rhythm lettering#original design#sometimes you wanna go#where nobody knows your name#Cheers theme song parody#ice cream sundae
2 notes
·
View notes
Text
Another old project...
So, something I did a couple years ago, and came across the pics.
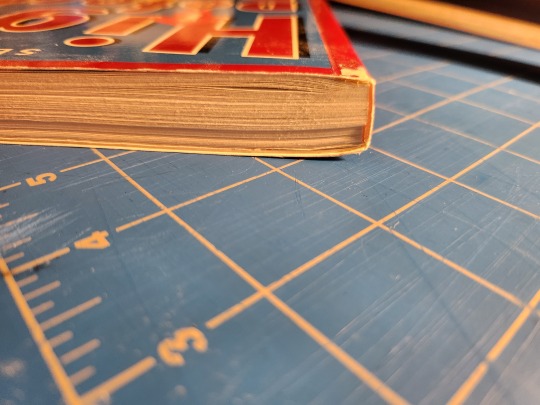
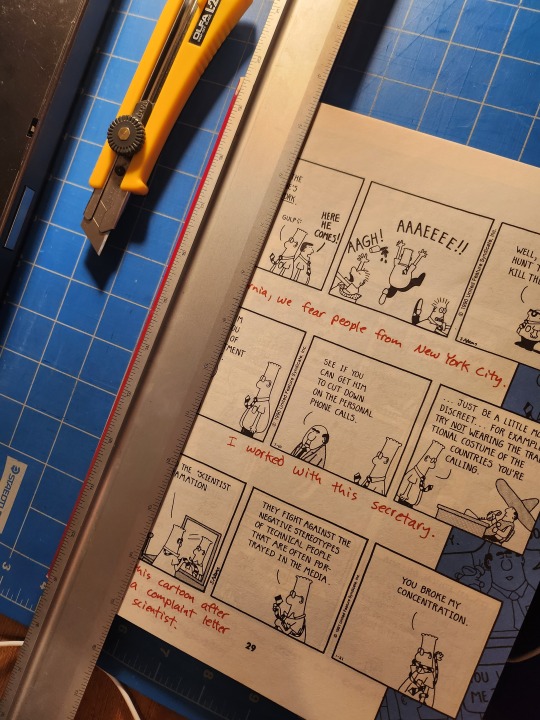
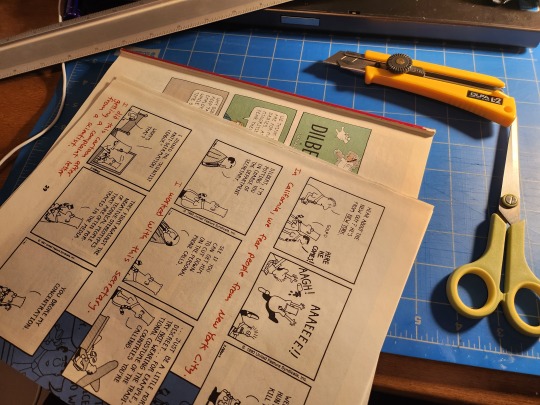
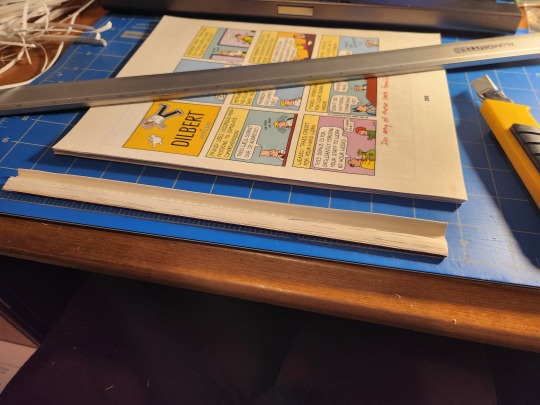
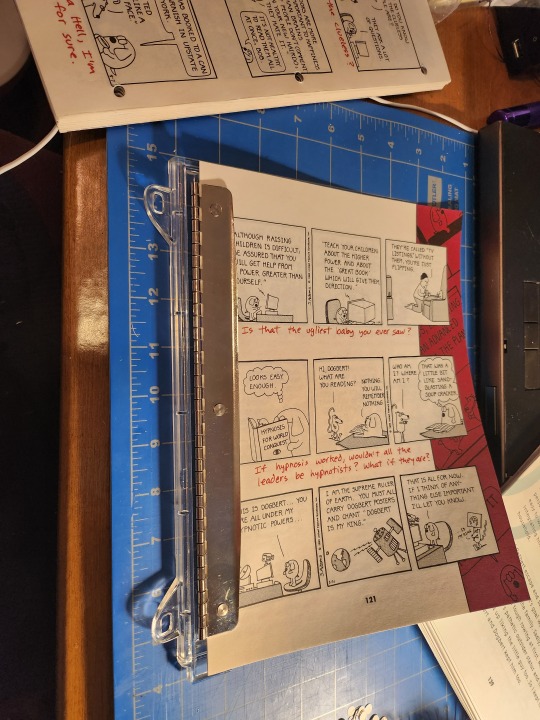
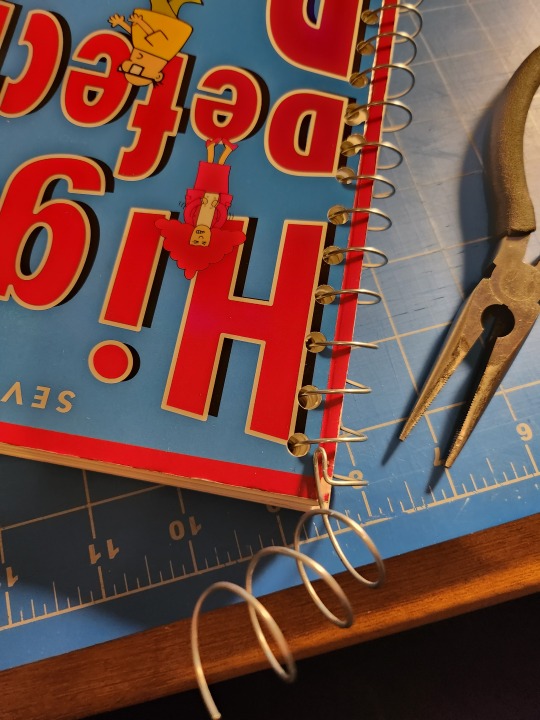
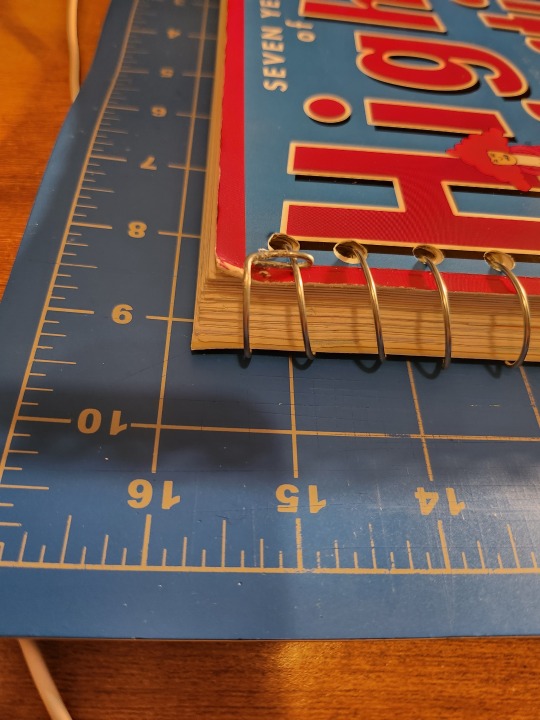
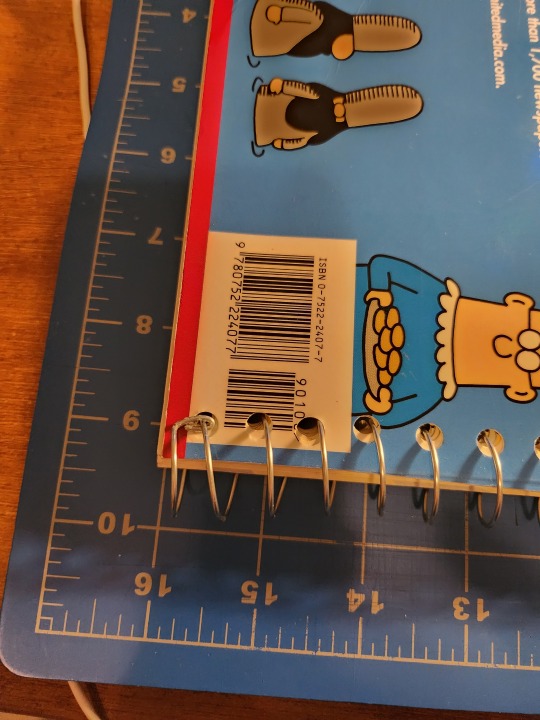
This is a do-it-yourself version of converting paperback books to spiral-bound. I used the metal spirals from a couple old, used-up spiral notebooks (the thick kind that had tons of paper that I used to always use for note-taking in classes)
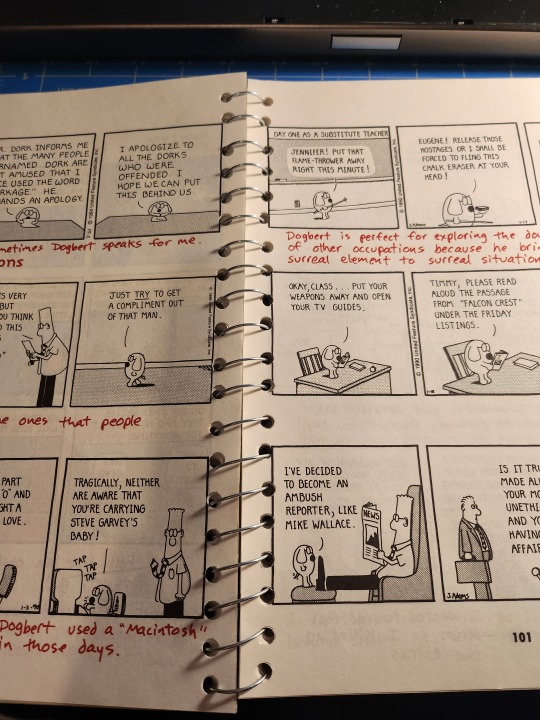
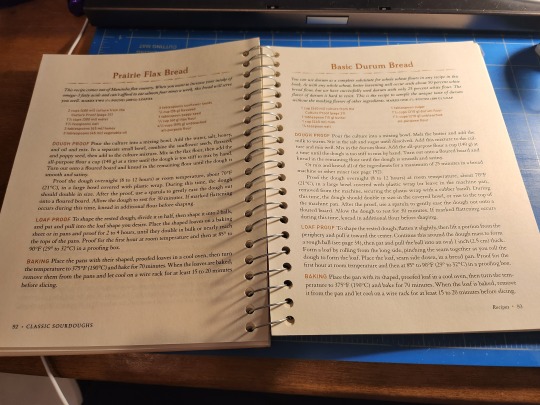
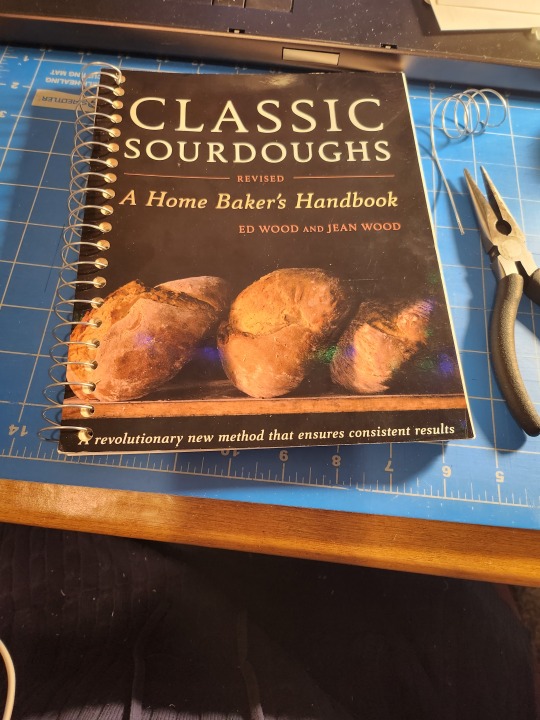
One of the two was a book of Dilbert comics (Seven Years of Highly Defective People by Scott Adams) that, after suffering through many years of many moves, had a significant portion of pages that came loose. The other is my favorite book on bread-making (Classic Sourdoughs by Ed and Jean Wood), all about sourdoughs and including many recipes, which I wanted to be able to open flat and have the book stay open, flat.
See below for pics of my process...
...using some limited tools in my possession:
Good ruler with a cutting edge (and a cutting mat to go with)
Serious craft/box knife (to cut the pages from their spine)
plain scissors (cleanup edges when I goof with the craft knife)
wimpy 3-hole punch that can only handle a few pages at a time
additional hole punch that only does 1 hole at a time
needle-nose pliers (to bend and also cut wire)
(and of course, upcycled wire spirals from old notebooks)


1 note
·
View note
Text
the opposite of fingerless gloves... should I call it handless gloves? Finger-gloves? (more pics farther down)


So I have this problem with eczema on the hands, that has an effect where no matter how much crafting or sewing I do, I don't develop calluses to protect the skin... instead, my fingers (especially fingertips) take damage that causes the skin to get abnormally dry and can get brittle and cause deep painful cracking (not to mention risk of bleeding). I hate trying to sew with my fingertips all bandaged up, and thimbles don't really work well for me the way I want... and my best treatment for the eczema is ointments (creams don't work well for me) but I don't want to be doing art and getting greasy ointment on my supplies... and I generally dislike wearing gloves, especially if not all my fingers are experiencing severe problems, and I don't want to fumble with having all my fingers gloved up.
SO! I took some scrap denim and hand-stitched up what essentially is only two fingers worth of a pair of gloves, that I can wear when sewing, doing crochet, or other crafts to minimize damage to the most vulnerable fingers. Also, I can apply ointment to fingertips and then cover them with the finger-gloves so as to avoid having ointment get all over my art supplies.
Sometimes I like to wear longer fake nails than other times, so I left openings in the tips of these finger-gloves at the part where the nail tips go, to accommodate possible nail extensions.
This particular pair was actually made a couple years ago (found the pics recently) and are now kinda worn, so I made another pair to use... and now I'm not sure if I took pics of those. Will post those later if I come across them.
#handless finger gloves#craft supplies#personal protective gear for crafting#upcycle denim scraps#hand stitched#minimal gloves#finger gloves
1 note
·
View note
Text
more pics, wip mama shark complaint


inking lines with a pitt artist pen (india ink, size XS)
Don't steal baby sharks from their mamas.
#original design#wip art#hand lettering#india ink#line art#artistic license shark#also don't watch Jaws 3
2 notes
·
View notes
Text

Embroidery project; finished patch, with wip pics below...


I used the threads pictured... I previously had posted a pic of how I sketched out the basic layout for this onto the fabric, and also I have a previous post showing how I made a practice Brigid's cross to use for reference on this.
Brigid's cross being a symbol (depending on one's affiliation) representing one of the following: Ireland (and the culture of), Paganism (and/or spring), or Catholicism (St. Brigid, a missionary)
In this instance, it was used for visual similarity to a raft (made of reeds) afloat on water.
Will be used as a 'cutie mark' on a plush pony that is an oc of someone I know.
2 notes
·
View notes
Text
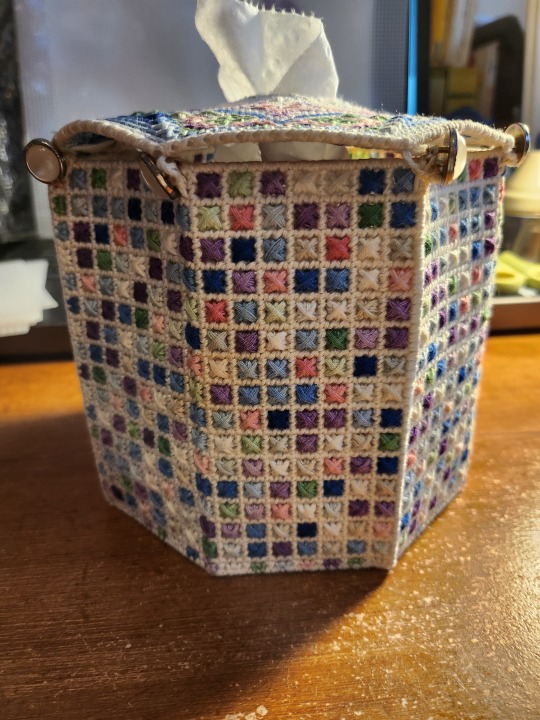
Dispensers for TP as tissues...
(see below for notes about both and process making the second one)
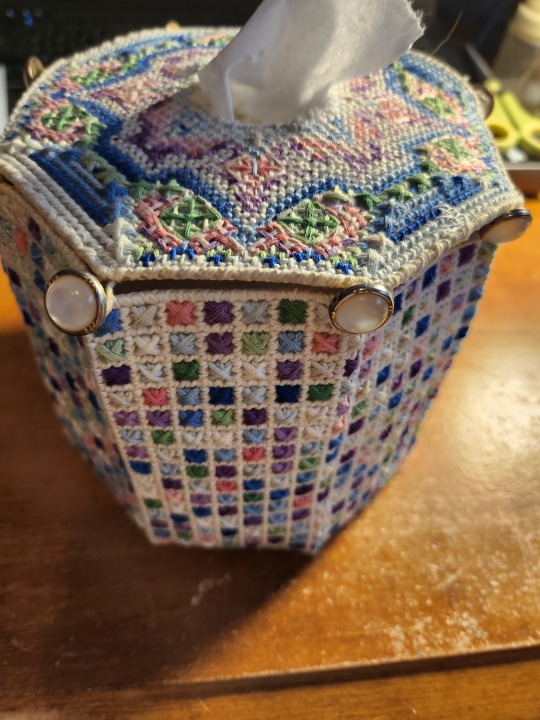

So first, here are pics of the old one that I made years ago (bottom, top, sides)
Made with plastic mesh, and both assembled and decorated using embroidery floss, with some buttons around the top corners to be able to open it up and put a toilet paper roll in.


Next, process making the second one (I decided I wanted a new bigger one, because some parts of the old one are wearing out (plastic breaking) and because I want a bigger one to accommodate larger rolls, and also I am kind of tired of the buttons method for opening and closing the thing and wanted to try out a zipper instead.
(note, the process making the first one was basically very similar at first, cutting out plastic mesh to make an 8-sided cylinder with a solid bottom octagonal piece and a top with a hole in it)


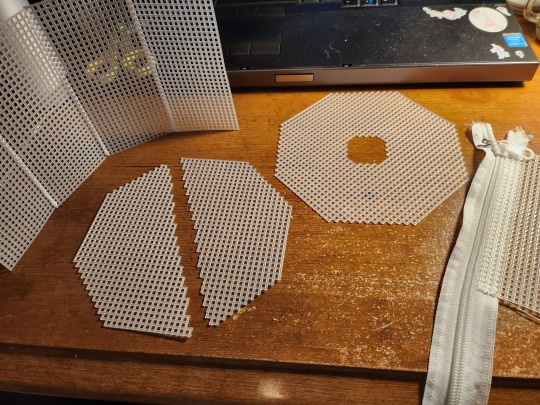

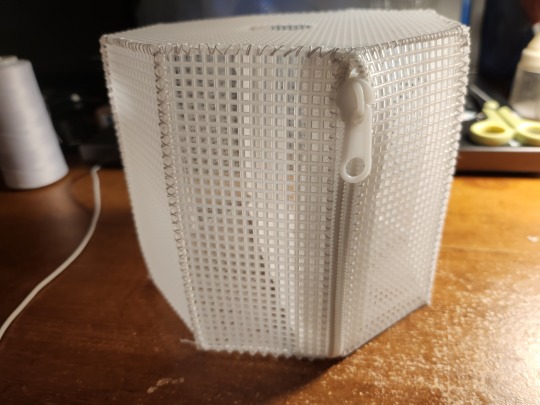


For the zipper, I took a plastic one off of one of those old plastic cases that you get when you buy a blanket or set of sheets that come in that heavy plastic thing with the zipper to open and close. After cutting the seams to remove the zipper from where it was sewed to the old plastic case, I cut out the plastic mesh pieces and used sewing thread to put the pieces together. Note that for this one, instead of a solid mesh piece for the bottom, I cut out a couple diagonal-ish rows in an octagon from one corner to another, and also 4 of the rectangles for the sides are slightly narrower than the other four. The short ones go on either side of the zipper, because the big chunky plastic zipper adds to the width.
Haven't decorated the thing yet, but here you can see the top, bottom and sides of the assembled thing. Remember, if you use a toilet paper roll for tissues, take the cardboard tube out from the middle so you can pull the tissue from the center of the roll.
#original design#toilet paper tissues#tissue boxes for toilet paper#upcycle plastic zipper#plastic mesh uses#octagon shape tissue box#wip
1 note
·
View note
Text
Baking experiment!
Found this pic of a cake I made that I call 'hooked on a filling' style.

Middle layer is mostly chocolate pudding, as thick as the cake layers! process making it was like this:
baked two layers of chocolate cake in rounds
baked a chocolate cheesecake, same width, with chocolate cookie crumbs around the outside of it (not the bottom)
cut a big ol' circle out of the middle of the cheesecake, to leave only a ring of cheesecake to go around the pudding layer.
prepped some layers together thus: chocolate cake layer stuck to cardboard round covered in foil, cheesecake ring on top of that with melted chocolate under the ring, but not across the middle, and put in fridge to chill and cool the chocolate 'glue'
mixed up some instant chocolate pudding, WITH some unflavored gelatin in it to help it firm up a little and not be toooooo squishy - important that it still be soft and easily eaten with a spoon, though... (tested amounts previously on a test batch of pudding) ...filled the center ring with pudding and back in the fridge to chill.
after pudding chilled, used more melted chocolate around the cheesecake ring to stick the top layer of chocolate cake on top.
made a topping of whipped cream stabilized with gelatin and put it over top like frosting (might have also incorporated the cream filling that had been taken out of the cookies that had been used around the outside edge of the cheesecake)
before the cream topping was totally set, pushed some oreo cookies into the top of the cake, and then drizzled melty chocolate all over the whole thing. (and again chilled it, though this cake was designed to remain stable when served at room temperature later, and it was ^_^)
It came out very tasty, although I deplore how messy the execution of this experiment came out looking. Someday I want to try again, making the same thing but hopefully prettier. [I think I also put cookie crumbs around the outside edges of the cake layers, but hadn't done an even job of patting the crumbs around the sides of the cake pans (was in a bit of a hurry at the time) and I think some of it broke off when assembling the cake, making it so that layers baked in the exact same size pans ended up sorta not the same width around when stacked up together. I was, however, pleased with how well the whole thing held together (pudding included) and could sit at room temperature and be sliced up and served in slices]
Note to self: Maybe someday make one of these with the whipped cream stuff made up like a cream filling to go in the middle instead of chocolate pudding.
#original design#cake making#pudding filling#chocolate chocolate chocolate cream cake#oreo chocolate pudding cake#hooked on a filling#cake pudding cake#cheesecake used as a structural element#baking#cake#dessert#chocolate#oreo#oreo cake
22 notes
·
View notes
Text
Hand-Made Blank Book (untitled)

Measures about 4.5 in by 5.5 in and close to 1.75 in thick. A rather unprofessional attempt at making a blank book... my second one ever. First one had come out very similar quality using same materials, but was a much smaller (like pocket size) sketchbook. Not sure where my pics of that went, will post them someday if I find them.
Here's some more pics:


I never did take an actual class on bookbinding; the way I put this together was really just based on amateur examination of really old books and not a lot of reading about the subject of book repair in general.
I cut pages out of plain blank printer paper (which I like for basic sketching) and sewed them together in groups/sets that I have read are called signatures.
Then I sewed a block of those together, and had a contrasting strip of fabric stuff sewed to the spine of it.
Then, the most annoying part: the cover. I cut out cardboard (repurposed or upcycled from the back of a spiral notebook) and cut two pieces of suiting fabric... and got glue alllllllllll over while trying to glue the fabric to the cardboard on both sides and tuck the fabric edges under and pin to hold in place while having to add more glue so it wouldn't all dry before I finished.
Kind of ended up with an uneven application of glue, which can be seen in places where the fabric shows up a little darker, and when handling the book one can notice places where the fabric lays flat but is unstuck from the cardboard inside. (I should try to come up with a better process next time I make one, but I like having full coverage fabric inside and outside the book cover)
Last part of all, was that I stitched around the edges of the book cover, sewing the outside and inside fabric pieces together, and sewing the book spine fabric to the spine of the cover. When I cut the cardboard this time, (unlike the pocket sketchbook I made before) I had only scored the lines between the spine and front and back covers, instead of cutting three separate cardboard pieces. When I sewed the page block in to the cover, I ran a sturdy needle through the score (fold) lines in the cardboard between the inside and outside of the finished cover, catching the fabric on the spine of the page block to sew it to the cover.
#amateur bookbinding#hand made blank book#upcycle cardboard#suiting fabric uses#ways to get glue all over your hands#blank book#hand stitching
1 note
·
View note