
Don't wanna be here? Send us removal request.
Statistics
We looked inside some of the posts by ctgames-term1-ig and here's what we found interesting.
Average Info
Notes Per Post
0
Likes Per Post
0
Reblog Per Post
0
Reply Per Post
0
Time Between Posts
8 hours
Number of Posts By Type
Text
16
Video
1
Last Seen Tumblr Blogs


Fun Fact
Tumblr has 4 main sources of revenue.
Text
Reviewing My FPS - My Brief
Development Time
I spent about 5 hours planning, learning Unreal Engine and testing my game, these 5 hours were very crucial, because I can now use this knowledge in the future if I need to lay groundwork next time I make a game (score, HP and modifiying blueprints)
After these 5 hours, I spent about 2 hours in total of modelling assets in maya. These 2 hours were spread through out development, whenever I wanted to add anything, I would open up maya and make it as quick as I could, I also faced a few problems like maya crashing, assets not importing correctly and components being mixed up. This added about 30 minutes to my time using maya.
The next 4 hours I spent creating my final game, including adding new featured like portals, checkpoints and moving platforms. These 4 hours were more freelance, I taught myself new things that would be needed (checkpoints and teleportation specifically) for gameplay. I also learned about lerping and timelines, this was used to create moving platforms and animations.
Play Time
My brief specified that my game must play for 10 minutes maximum, in this time, the player should be taught how to play the game and be able to complete it. My game lasts for around a minute or two (depending on whether the player collects coins or dies) and in that time, the player learns what the hazards are and what their end goal is. In future, I want to make sure that I flesh out my game with longer levels so people can see my potential.
0 notes
Text
Reviewing My FPS - PEGI Ratings

PEGI (Pan European Game Information) are in control of age ratings and content warnings in games, they’re main focus is to protect children from certain things such as violence, drug abuse and gambling.
My game is at a “maximum” of 12, this means that violence towards fantasy characters and non-realistic violence towards human-like characters can be shown. Innuendos and sexual posturing can be present, and mild language can be used. Gambling can be present in-game.
However, none of this is really present in my game, other than the player, there are no other characters, meaning violence is not frequent, and even then, violence is extremely mild and only implied. The entire game is very child friendly, bright areas and no fear can be seen. This would make my game have an age rating of 3.
In terms of violence in my game, the only two hazards in the game are water and spikes, the water instantly “kills” you whereas spikes take one health point from the player, no blood, drowning is seen by the player, when the player touches a spike, it plays a hurt noise that wouldn’t create fear.
I did not make this choice because of PEGI ratings, instead I made this choice in the name of aesthetics and because it was easier to create, rather than adding in blood and drowning animations.
0 notes
Text
Reviewing my FPS - The Gameplay
The gameplay in my FPS is heavily inspired by puzzle platformers, like ClusterTruck, in which the player can’t touch the ground and has to traverse using moving platforms.

Another game I’m inspired by is Assassin’s Creed Revelations, there is a minigame that is completely different to the main game, in which the player can place platforms in front of them that could be affected by the world in different ways, it was a fun experience and I don’t think I’ve seen anything like it.

0 notes
Text
Reviewing my FPS - The Aesthetics
When I began my game, I instantly knew I wanted a game that looked like Krunker, it’s simple aesthetic still had the detail I was looking for.
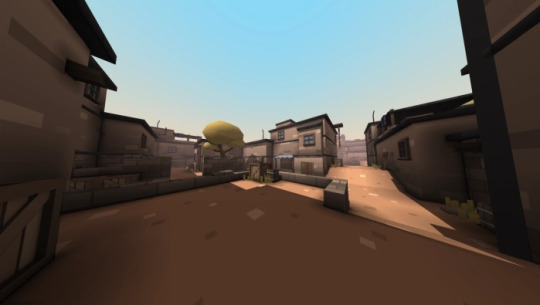
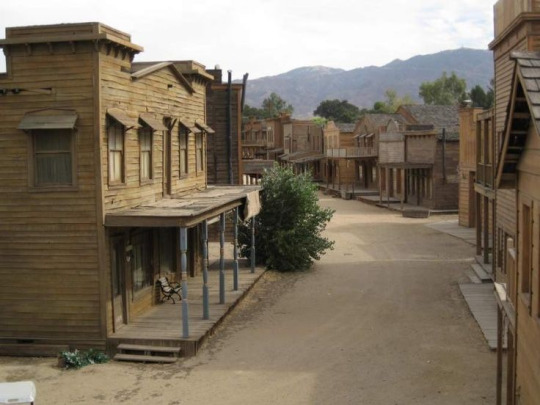
I planned on going for an old western town aesthetic, dirt paths and dull coloured buildings and little plantlife.
In the end, my game ended up being heavily inspired by the town of Florence in Renaissance Italy, specifically from Assassin’s Creed II
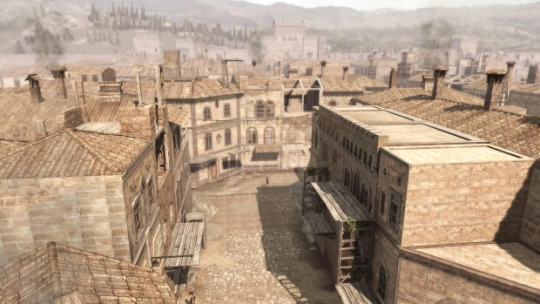
The dull buildings, the distant landmarks that towered over the simpler buildings (like churches and towers), scaffolding for climbing and parkour (the main focus of my game) were perfect for my aesthetic.
If I were to make my game again, I would focus on the variety of assets used, this is because my platforms were primarily barrels and islands of dirt. I would have added in planks, scaffolding and other related items.
0 notes
Text
Unreal Engine - Level Design

The first level of my game was very open, this was to let the player explore the controls and movement of their character. It is set in a marketplace, with stalls and an exit, which leads to the next level.

Level 2 is based on the lack of ground, the entire town centre is flooded, meaning the player has to be careful with their jumps. The portal is located on the other end of the centre.
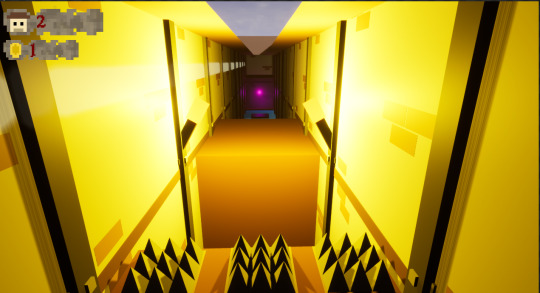
Level 3 is a short alley way which leads to the final portal, movement is restricted, which would have been the entire theme of the level should it have been longer.
0 notes
Text
Unreal Engine - Checkpoints
My plan for the game was to complete all the levels and have a summary of how many coins you collected, however when you load into a new level, all variables are reset, making it impossible to show this value. So I had to rethink my design, so I implemented in a checkpoint system, rather than making an entirely new unreal level for every level, I created checkpoints that would teleport the player back to it should they run out of health.

When the player, runs over the checkpoint, the current checkpoint is updated to the last activated checkpoint, it then adds 100.0 to the Z value so the player teleports above the checkpoint, rather than in it.

When the players health reaches 0, the player is teleported to the current checkpoint, and their health is reset
0 notes
Text
Unreal Engine - Bounce Pads
When testing the platforming of my game, I wanted to add bounce pads as a variety for jumping puzzles, this was simply done. I created a vector variable called Impulse, this would be for the direction of the impulse, which is up.

I then casted this to player so it would only affect them.
0 notes
Text
Unreal Engine - Sound Design
To give my game some life, I added in sounds for collecting coins and getting hurt. I did this by using the program Bfxr, a simple DAW that lets you create 8bit sounds using different types of waves.

Bfxr comes with a lot of prefabs, which are randomised whenever you click them. I exported the sounds as wav files and put them into my game.
When I added them in, I decided to make the pickup noise vary in pitch every time it plays, this would be so the same, monotone pitch wouldn’t play. This was done by adding a modulator, I gave it boundaries 0.95 and 1.05.

0 notes
Text
Unreal Engine - HUD
The HUD of my game was simple, it showed your health and your score, there originally was a crosshair but I removed this as well as the gun. I went into Photoshop and I started to draw the HUD, I went for an 8 bit look to match the blocky look of the game.

I didn’t have any text, as I would add this into the HUD element in Unreal. I imported the HUD into Unreal and created a HUD blueprint.
Once inside, I dragged in the HUD and resized it to fit the screen. I then added two text blocks and set them to variables, these would be used to show the amount score and health the player had.

I also imported a custom font for my game from dafont.com, I went for an 8 bit, hand written looking font to make it look like a Wanted poster. I then returned to the FPS character and made a HUD variable, this was linked to the HUD I just made, this was so I could technically “cast�� the variables. Once this was done, I set up the HUD to check the player’s health every tick (frame).

This then displayed the health of the character, and the score beneath it.

0 notes
Text
Unreal Engine - Screen Shake
Screen Shake is a staple of most FPS games, for example, Nuclear Throne uses screen shake a lot with varying amounts, depending on the weapon’s recoil.
Screen Shake is used for immersion, so when I started my game, I had planned to add in shooting mechanics, in which the ricochet of bullets would be used to curve around walls to hit switches, however I changed this because I wanted a main focus on platforming. Whenever the player shot, the screen would shake slightly, to simulate recoil. Screen Shake is a special type of blueprint that you have to search for.

When opening the screen shake blueprint, there’s no viewport or event graph, this is because camera shake is a data-only blueprint. All of the properties of the camera shake are number based, the main options being the first 6, the oscillation of the shake was a short duration, this is because the gun shot is quick and didn’t have a lot of kickback.

After creating the screen shake, it was easy to implement, I went into the FPS character’s blueprint and added the screenshake in after the player shoots a bullet.

0 notes
Text
Unreal Engine - Triggers, Health and Score
When adding in the HP system, I had to make sure there was a way for me to lose health, this was done by adding in a trigger. A trigger is a component that activates when something touches it. I started by making a red box with a trigger attached, when the player steps on the red block, they lose 1 health.


Casting
Casing is a way for blueprints to “talk to each other”, this means that blueprints can affect variables in other blueprints, in this case, the hurt trigger is removing 1 from the HP variable in the FirstPersonCharacter.
I did the exact same for the score trigger, but instead it increased the score by 1. At this point, I had no models made so I made a placeholder.


0 notes
Text
Unreal Engine - Variables

The first thing I added into my game was a score and HP system. I started by adding two variables, named Score and HP and set them to integers. I set them to integers rather than floats because it wouldn’t be possible to have a decimal score or health.

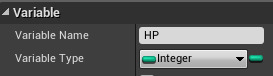
There are quite a few types of unreal integers, but the ones I used the most were: Boolean, Integer, Float, String, and Vector.

Booleans are true or false statements, they are used to check for things.
Integers are whole numbers, they are used to give values.
Floats are decimal numbers, they are used to give values with precision.
Strings are lines of text, they are used to display text.
Vectors are 3 floats that are usually used for XYZ coordinates.
0 notes
Text
Unreal Engine - Character Blueprint
Another part of the character that wasn’t in the blueprints, was the First Person Character (self) component, it let me change the amount of jumps and the sensitivity, originally I had planned for a double jump ability, but removed this because it would make level design more difficult.

0 notes
Text
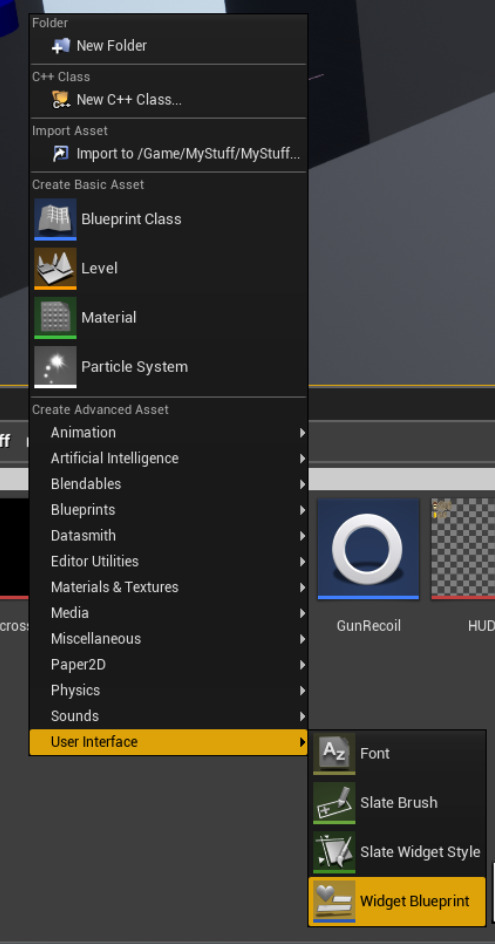
Unreal Engine - Starting an FPS
It’s extremely simple to create an FPS on Unreal, when opening the editor, you can choose to make a Starter FPS Blueprint.

When inside, there is a small area for testing, cubes with physics and walls on either side of the room.

The main part of this is the First Person Character blueprint. It was difficult to understand at first, but thankfully the comments made sense of things.


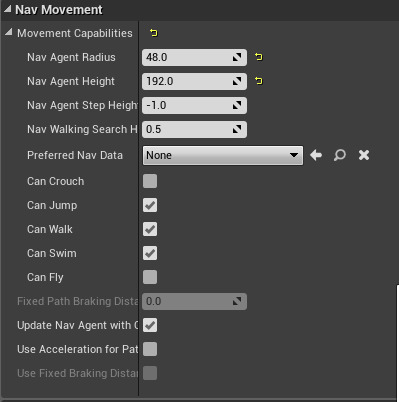
A part of the character that was vital to me was in the CharacterMovement component. this is where I could control walk speed and air control. I changed the air control to a higher value so there was a small amount of it. This meant the player could change direction slightly when mid-air.
There was also an option to add crouching, which I included because I had planned to have areas in which the player had to duck beneath hazards.
0 notes
Text
Playtesting
I was ready for playtesting, I had a full working level that I was proud to show. My questionnaire was very useful, it asked the questions that I wanted to know the answer to. Next time I want to make sure the next questionnaire has more in-depth questions so I can get more feedback.
I learnt that everyone enjoyed my game, and that the main problem was lack of length. Next time I will ask questions about any new features to add, to see what the majority of people think.


0 notes
Text
UV Mapping Process
A basic cube UV is simple. 6 square faces that can be easily edited.

Once you have the UV, you create a snapshot of the UV to use as an underlay to draw out your texture.

Put the UV into a photo editing software, create a new layer and create your textures

Once complete, move the new image into Maya as a .png file, this will get rid of any backgrounds and will help with creating the UV map.

Return to the UV Editor, and apply the new material to your object, now press create and Automatic. Automatic mode creates the UV faces automatically. I had to rearrange the UVs, I made sure that each face was filled with colour

Make sure to stay in the first square of the UV, this is so everything doesn’t break.
0 notes