
daeris-cosplay
Daeris Cosplay
23, Dutch.
Because you can play dress-up when you're an adult.
64 posts
Don't wanna be here? Send us removal request.
Last Seen Blogs

joker-theclown
meu blog

felassan
The Vir Dirthara

bing-bong-your-gender-is-gone
Untitled

shitrxy
😶
beyondthescribbles
Beyond The Scribbles
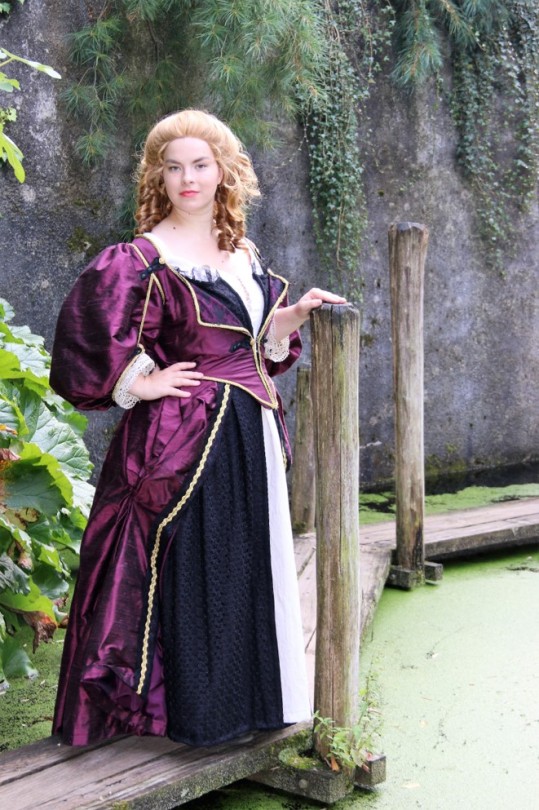
Photo


Look at these lovely photos I got back from Rene Mourik!
2 notes
·
View notes
Text
Time for a Claire Fraser WIP post

This has become the project I had done the fastest. 24 hours spread over five days. I must learn to plan these kind of things. Anyways, I always attend a Ren Faire in April, which is always freezing, so I decided I really needed a warm costume. And so project number seven came into existence.
Undergarments
See my Eliza Hamilton WIP post for a description of my stays and the whole bunch of underdress, skirts and bum roll. I have decided to make new stays, someday in the future. I just really dislike tab binding... This is how they ended up:

Bodice
In this particular outfit combination it’s easy to pick any random bodice you would like. However, I found in the reference pic on top of this post that Claire is wearing a brown bodice and stomacher, most likely this bodice:

For this bodice I bought McCalls 7735. It needs minor tweaking, I didn’t use the additional cuffs (because that should be the shift) and it needs to be taken in in the bust area, since the pattern is made for a non-corseted body. My second version for a different outfit will be a combination of the J.P. Ryan bodice from my Robe à l’Anglaise and this McCalls pattern. You might also want to consider to cut the bodice one or two sizes smaller, since it should fit pretty snugly.

These are my pattern pieces, the pattern itself is pretty easy to follow and other than the bust issues, this is a good looking and well fitting pattern. It closes with a piece of cord and several plastic rings (hidden grommets).

Skirt
Having completed the bodice with the McCalls pattern, you can ditch the pattern for the rest of the process. The thing is, the 18th century is pretty straightforward and easy to recreate in terms of shape. As you might have read in my Eliza and Elizabeth posts, the skirt is generally a very wide rectangle, sewn together as a tube. Step 1: hem the thing. Because I’m a very smart person, I used a full 6 meters of boiled wool, so that whole thing had to be hemmed first.

Because the bum roll will change the length of your skirt, measure the waist to floor with bum roll center front, side seam and center back. This will probably differ 5-10 cm, which creates a curved top with a dip around the center front. I wish I had a picture of mine laid out. After determining the length of the skirt, you can pleat it as you want to fit your waistband. I went with knife pleats and an inverted box pleat at the center back and a large box pleat at the center front.

Stomacher
My stomacher should have been brown, but I thought it would be very brown and dark if I went that route, so I based myself off several other stomachers Claire can be seen wearing. I picked a leftover piece of my Elizabeth shift and made a stomacher using the McCalls pattern as a guideline. The pattern is asymmetrical, don’t put too much faith in that haha. I forgot to add boning, so this must be the saddest stomacher that has ever seen daylight, but it sort of does it’s job. I don’t even have a picture of this horrible thing.
Coat and gloves
When I got started with this version of Claire, the pattern for the coat (McCalls 7792) hadn’t been released. I couldn’t see myself dealing with this 1950s style olive coloured wool and most certainly not with faux fur, so for the first time ever, I bought myself a cosplay item. AbbyShot sells licenced Outlander merchandise, and I bought the Riding Coat and the matching Riding Gloves. No way I was going to be cold!

This is a really nice coat, which looks very accurate too! I just bought it two sizes too big because I forgot you get smaller wearing stays. If I take it in just a bit at the side seams it’s totally perfect! (I’m not sponsored, just really excited about this)
Wig
First I thought about using a Wigisfashion wig, but 14 inches is way too short for Claire’s hair, not to mention the wig was really thin. I looked more like Kylo Ren when I put it on for my make up test. After my first event, I settled for an Aliexpress wig, heavily curled, which I managed to pull up in a nice updo!

As you can see I have added Claire’s cowl and grey armwarmers to this look, these were knitted for me by a friend.
The final result


This is the development of my Claire so far: first event it was 30C so I melted, ditched the coat and the wig and melted some more. Second shoot I got my new wig and finally wore the full riding outfit as I intended. Third shoot I complemented my look with the cowl and armwarmers. But since there is so much I dislike about this project, I will definitely make her again. Second version is already planned and I have enough wool left to remake this bodice too.
4 notes
·
View notes
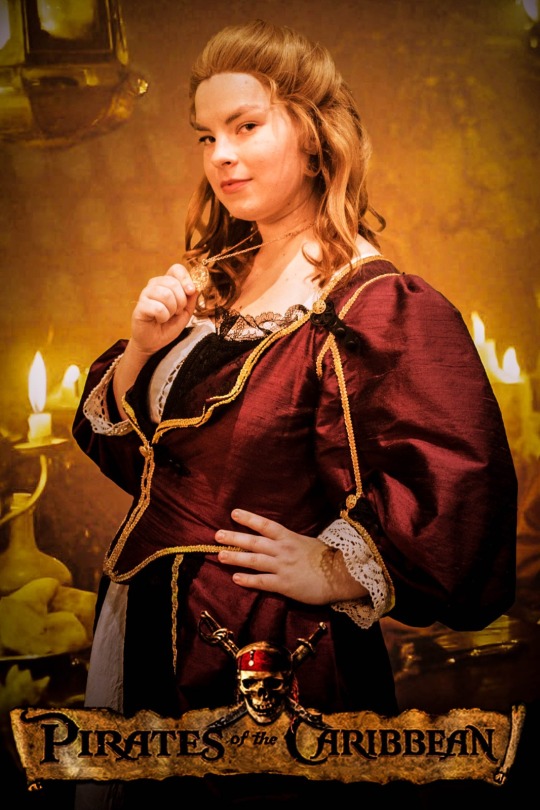
Photo


Yes, hello, I am still alive (but more active on Facebook and Instagram) and to make up for it, here is the first set of my new Outlander shoot I did last month with Sherley Freke Photography! I love how she made me look like Claire, it’s like I could have run off the opening titles!
7 notes
·
View notes
Text
Time for an Eliza WIP post

This has officially become the project that has been in my progress stash the longest. I wanted to do Eliza with a former friend of mine, but I couldn’t get her done for that event, then the friend stopped talking to me and now, a year later I have decided to finally finish my dear Eliza Hamilton, and she ended up on the list as project number six.
Undergarments
Because I’m stubborn as hell, I wanted to make Eliza slightly more historically accurate than her stage costume actually is. I decided upon making not only the Robe à l’Anglaise she actually is wearing, but also on making an accompanying shift, pair of stays, bum pad and two petticoats.

As the general Hamilton fan might know, the musical gives a pretty straightforward description of the accurate historical period. 1776, New York City. This meant I had to dig into the historical fashion of that particular period. Without any knowledge of accurate undergarments I chose the Butterick B4254 for my stays. Since this is a commercial pattern, I followed several reviews that recommended making them two sizes smaller than your actual measurements. I would also recommend extending the middle vertical bones upward to the neckline if you have a bigger bust. I made mine with four layers: plastic boning sandwiched between two layers of duck cloth, outer layer of cotton and inner lining of an old bed sheet. Be prepared for tab binding, which takes hours.
Always make the undergarments before making your outer layers! I cannot stress enough that the stays and the bum pad are so defining for the shape of your body, it will drastically change the shape of your dress if you wear it without your garments!
I freestyled my shift, using the guidelines from Marquise here. Basically it’s several rectangles sewn together. It’s shaped by the stays anyways.

I also freestyled my bum pad. Judging from this particular photo, it seems as though Eliza is wearing only hip padding. The curve is too small to be full side hoops (think Marie Antoinette), but in other photos it seemed more like a full pad. I made one shaped like a massively huge crescent/croissant and stuffed it with filling. It’s lightweight but it does the trick for this dress.
Dress
Since I wanted to make a historically accurate dress, I had to go with a historical pattern. I bought the Robe à l’Anglaise by JP Ryan (and ended up publishing that for Elizabeth earlier, but I got it for Eliza first). The pattern is really easy, and is measured over your corseted bust. There is enough room for adjustments, adding boning etc. However, there was one major thing with this pattern, and that was the closure of the bodice. The stage dress uses a zipper in the center back, hidden by fake lacing, as you can see above. Changing this into a functioning 18th century dress meant I had to make the front opening with the buttons functioning.

Since my dressform doesn’t really like my shape with stays, I had to try to adjust the front closure while wearing my mock-up. Not recommended. Anyways, I had to move the center front closure to the left side of my torso (photo is mirrored because I photographed it in selfie modus). I forgot to add a decent amount of overlapping fabric, so my bodice is now slightly too tight (until I lose a decent amount of weight.

I had some duck cloth left, so I made a rigid inner layer of the bodice of it. I hoped to avoid using boning, but I needed it anyways. Up until this point it all worked miraculously well. It fitted and the silhouette was looking great!

Here you can see my first petticoat, which was made of two rectangles of 100x140 cm (I used the fabric width), and I pleated this with knife pleats onto a waistband. Really simple. It doesn’t have to be even, since you won’t see the petticoat anyways. I do create a flat front and a inverted box pleat on the back to easily see which side is front and which one is back (since the back is a couple of cm longer to accomodate the butt pad).

Back to my bodice. I chose to work with satin, since I accidentally found the perfect mint green color when I was out shopping with a former friend. It’s slippery as hell, so if I were to remake this dress I would definitely go with taffeta. I locked the edges of this frilly fabric before working any further with it, but I didn;t account for the stretch it has. The front edges are terribly out of shape, and since I’ve sewn them together there is a nasty diagonal fold on my bodice. I might remake it after all... As you can see, I covered six buttons with the same satin. I decided on a hook and eye closure instead of functioning buttons, since I need to dress myself and hooks are easier to close on your own.

For the skirt I also went with two lengths of the fabric width. If I look back on it, I could have used wayyy more fabric there. I had a skirt circumference of 3m now, made of a pleated rectangle, but the stage one has probably a full circle skirt of roughly 5-6m. Anyways, I pleated this in the same way as I did with the petticoats. I did measure out the width of each pleat, since this was my outer petticoat. I also made a tie-able waistband for this skirt.

Don’t get me started on these sleeves. I made two pairs of them. The first pair was way too tight, even though my mock-up fit perfectly. This pair had a really large sleeve cap. The pattern asked for three backfacing pleats, but upon trying that, I realised that no matter what I would do with my arms, I would end up with this really weird horizontal fold. Apart from being too tight, they also ended up too short for Eliza, so eventually I went for another pair. The other sleeve the pattern came with, was really better. They were longer, and I made sure to cut them wider than the other pair.

There went 1m of lace in each sleeve, which I obviously forgot to photograph. I just pleated the whole lot, and handsewed it to the lining of each sleeve. The lace pictured here went into the neckline of the bodice. I haven’t measured the total length, but I think I used like 3m? I made rather tight pleats, and handsewed this to the duck cloth of the bodice, after hand hemming the entire bodice to avoid visible stitching.

I measured out where to place the buttons, and accompanied each button with an invisible hook and eye. Next, I handstitched the waistband of the skirt to the inside of the bodice, to avoid slipping. I still tie both sides around my waist to emphasize the waist as opposed to the bum pad, but the ‘weight’ of the skirt keeps the bodice down.
The final result


Surprise appearence by Hamilton (Vagueary on Instagram). Side note: as you can see I used my own hair, simply because I couldn’t be bothered with finding a wig, and my own hair has the right color anyways. I am really glad I finished this project, and I am ready to do a less intense project now.
3 notes
·
View notes
Photo


Got Eliza Hamilton done! I am a happy bean, haha ;)
Photos by John van Oers!
4 notes
·
View notes
Text
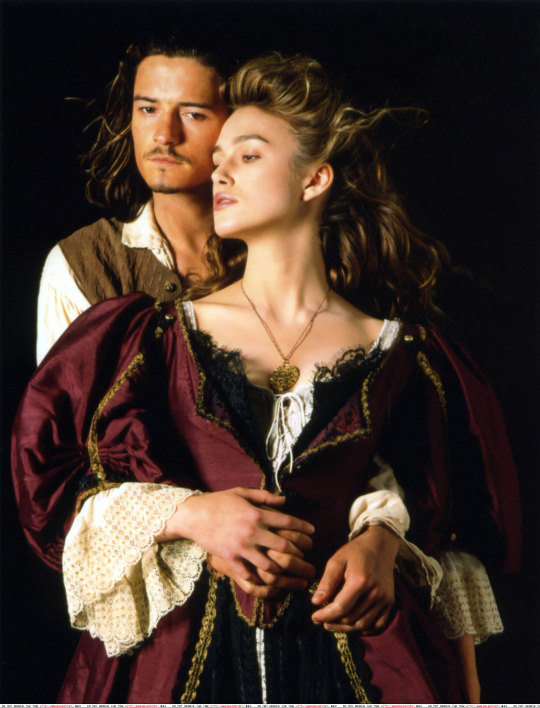
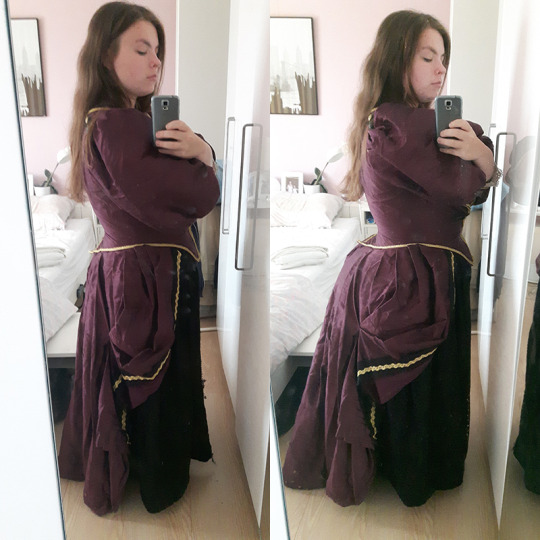
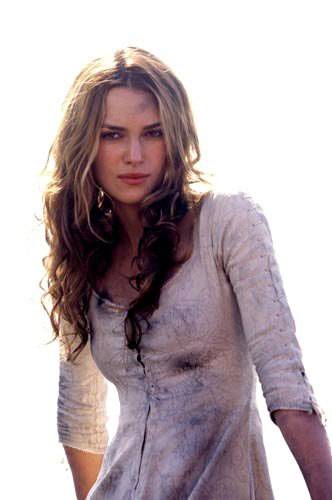
Time for an Elizabeth Swann WIP post
It has been way too long since I made a post like this! Granted though, in the entire year of 2017 I only made this costume, so there was little to write, This year was crazy, so many things of life happened, I just had no energy to make anything. Anyways, I had been a sleeping member of the Dutch Pirate Crew for a year, and with no pirate dresses to fit the group, I really needed that to change. And so project number five was born!
Overdress
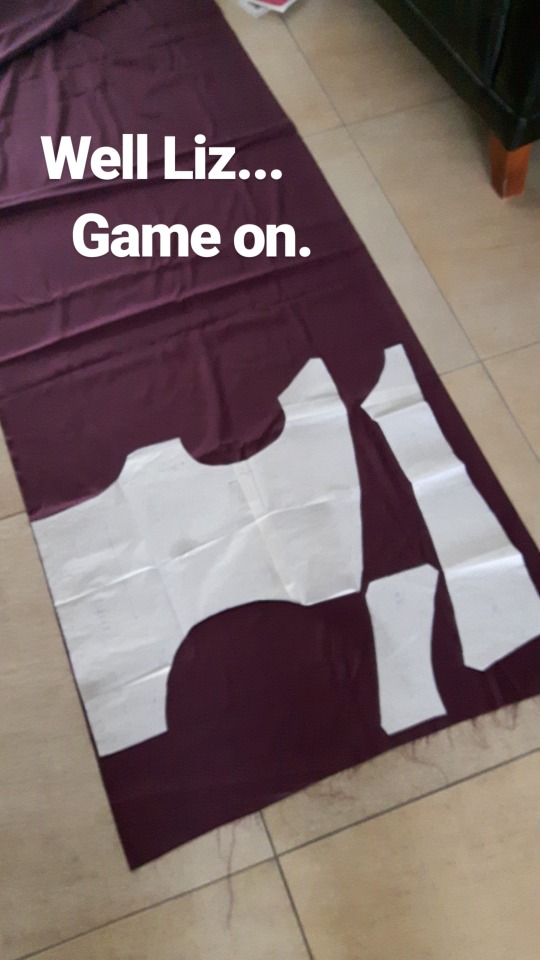
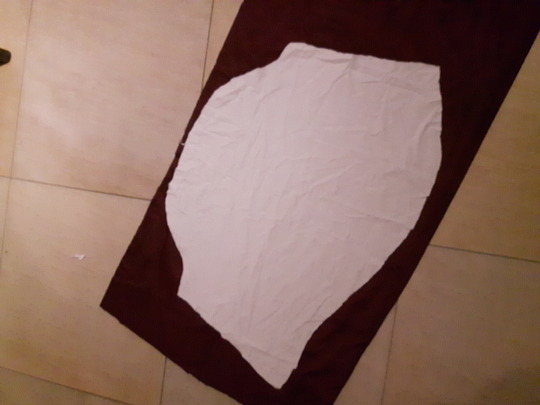
What a wild ride this pattern was. Maggie’s write-up from thecostumersguide.com (here) was the best help I could have found. I did not go with the suggested Butterick pattern, I grabbed a historically accurate pattern for a Robe á l’Anglaise by J.P. Ryan. This dress is zipperless, and closes in the front with hooks and eyes. The actual dress has an additional diagonal seam in the front panel, and the back seams are princess seams instead of the back seams the pattern came with, but other than that, it’s a really close match! I went with 6,5 metres of this gorgeous burgundy silk that appears red in artifical light and reddish purple in natural light. (as you can see, I use Instagram a lot these days, pictured here is my lining)
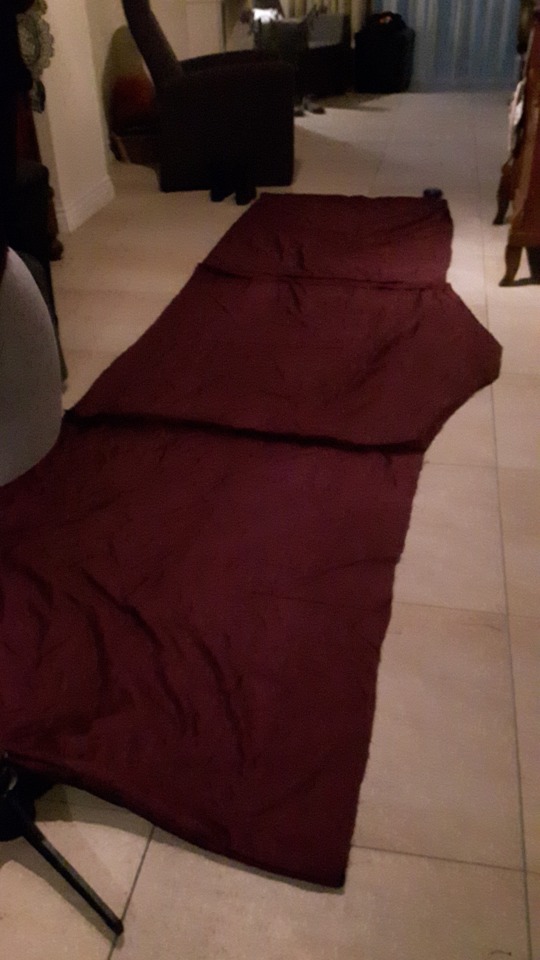
My skirt is essentially a rectangle of three times the fabric width. I realised too late I wanted a short train on the dress so the middle panel is a bit bumpy. I would recommend a more gradual curve. The straight line was attached to the bodice lining by hand. First attach the burgundy layer, as this is the outer layer. Just pleat the hell out of it until the entire width fits your bodice waist.
Do note that historically, this dress should be worn with a bum roll, bum pad or panniers. Adjust the waist seam according to your undergarments. For the cosplay, I don’t wear a bum pad, but for a historical costuming event I will definitely wear the dress with both stays and a bum pad.
But I’m drifting off topic. The bodice and the skirt shape are the easiest parts of this dress. The sleeves are an absolute pain and the literal definition of hell. The pair of sleeves that ended up in my dress are the third pair. First, I went with a pleated rectangle. Didn’t work out, because the rectangle doesn’t fit in the dress. Eventually I went with a massively stretched bishop sleeve, which seemed to do the trick. I still think I could have stretched it even more, with more fabric the sleeves become even more lush and piratey.
After assembling the sleeve, there are three pleats in the sleeve under the golden trim. I don’t know if it actually serves a purpose, but my pleats fell out after my first event and I haven’t gotten around to fix them.
Another pleat / gathering is to be done in the skirt. I had no access to my mannequin when making this gather, so I roughly measured where my skirt was at kneeslength and pulled that up to mid-thigh, where the side seam would have been if you had one. I would have measured it if I would have done this carefully. Check the undergarments photo for a clear side view of the overskirt.
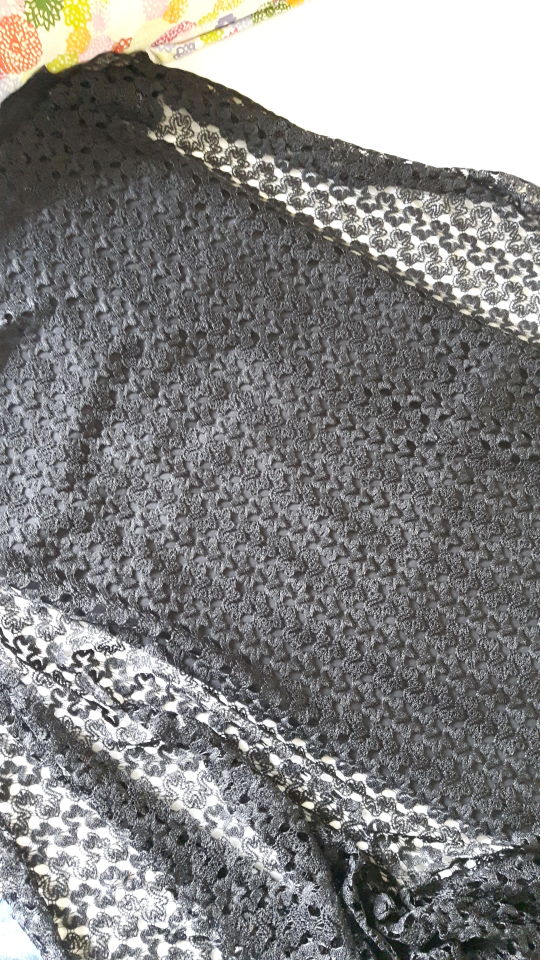
Next, the overdress has a black underlayer. I used cotton and a swirly lace overlay, the original has a texture that looks like many ribbons are applied to the fabric, but honestly I think every black fabric is fine as long as it isn’t shiny.
I took two fabric widths for the underlayer of the skirt, with the lace overlay only on the front side of the skirt. The black skirt also attaches to the lining of the bodice, however, this skirt ends at the opening of the bodice (in the middle), whereas the burgundy skirt opens at the hips, where your princess seam would have been if you had one.
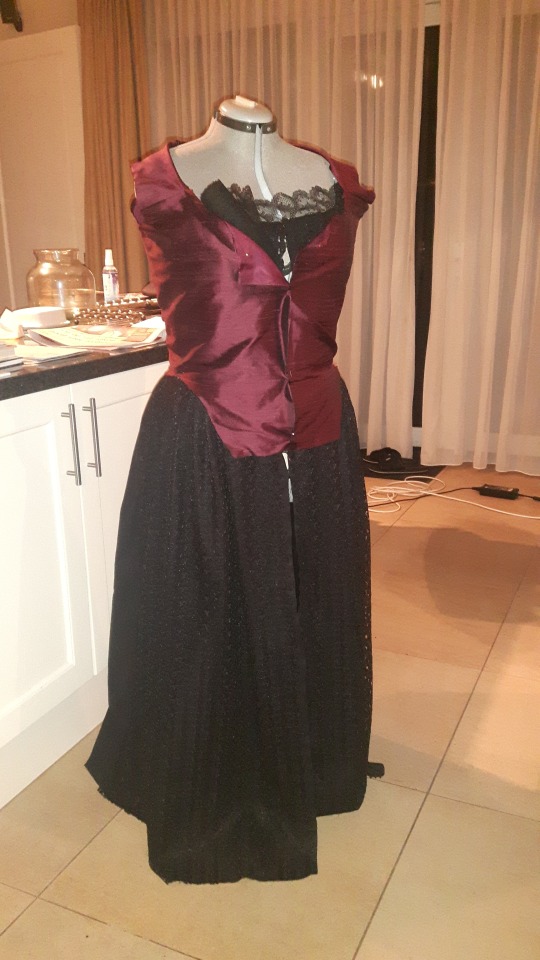
As you can see, the black part of the dress also extends to the top of the bodice. I did not make an entire second bodice, but made a rectangular inlay of the layered fabrics, finished with fine black lace. I also inserted a bone in the seam allowance of the closure to add strength to the hooks and eyes that would be added on in the middle and to prevent the wrinkling that is already happening in this photo. You can also choose to make a full black dress, with a burgundy overlay. It’s unclear in the film how this dress is shaped, so I went with a heat-friendly version of a silk lined bodice with a cotton inlay.
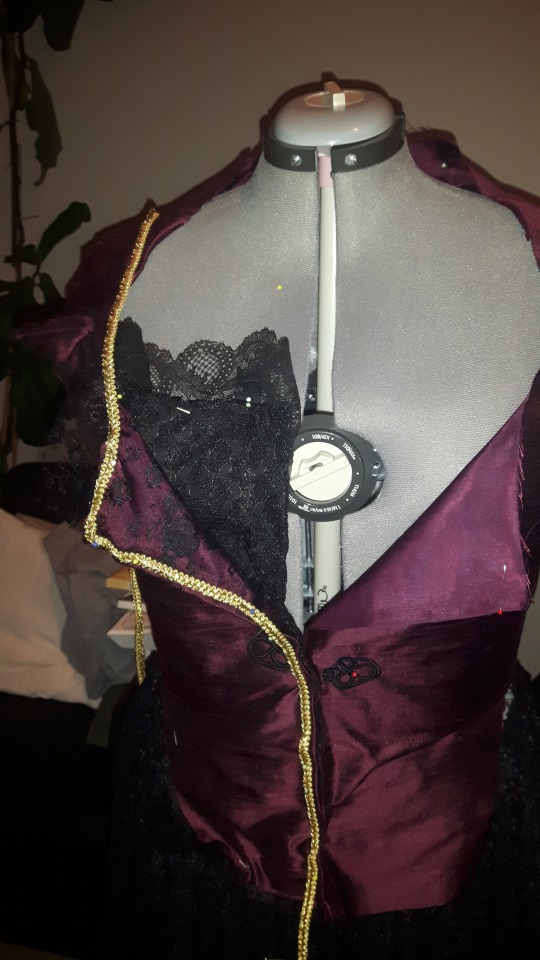
The inside of the burgundy panel was both lined with silk lining and with fine black lace. This is also the moment where you cry about the amount of trims that need to go on this dress: the major part goes around the neckline, the front closure and the bottom of the bodice, a part around the armpits, a part on the bottom of the sleeves and two short pieces on the back seams. Then the burgundy skirt is finished with black lace with another, broader golden trim on top. I also added a trim on the black skirt for a rich finish.
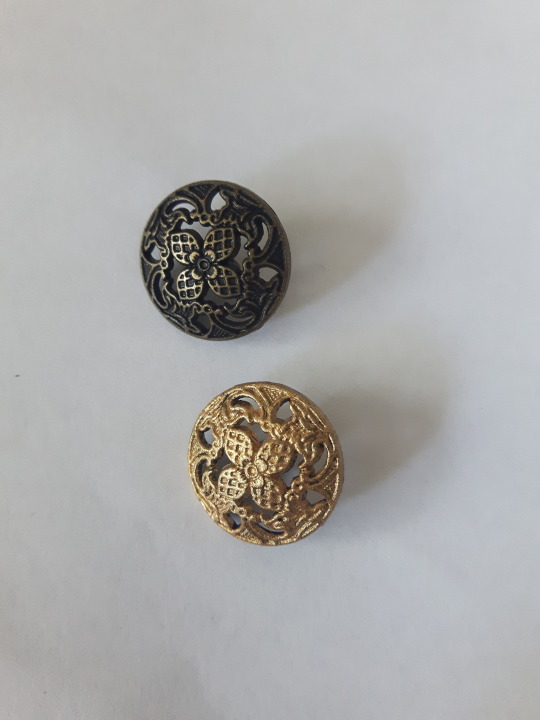
Then there are a total of ten decorative frogs, involving seven golden buttons (I handpainted them). I was unable to find a picture of my finished frogs, because I hurried them the night before the con (I have zero planning skills). The gold button is in the middle. Extending from there is a piece of black elastic, ending in a point. the flat side is decorated with a chinese frog (that’s what I got, you can also make your own, but it takes an endless amount of time for ten pieces). The pointy side of the elastic is then decorated with two black mini buttons. I placed the four on my bodice over my shoulder seams, two more at the top of my hooks and eyes, and there should go two per sleeve right under the horizontal pleating. The sleeve is then finished with some beige lace. (mine was done too hastily, I need to get it redone, because my lace is super tiny).
Underdress
If you thought you were done, you are wrong! You do have an overdress, but what’s the use if you have no rum shift?
You can obviously dirty it all the much you want if you are wearing it without the plum dress.
I made the mistake of making this monster without a pattern, so the fit is horrible and my skirt is nowhere near as wide as I would like it to be. I just did two panels with two godets (because Keira has that too and I didn’t want to overspend on my shift, unfortunately I am not a little stick like Keira is, so I would definitely recommend using a pattern. I would have gone with magic pattern Simplicity 1551). The sleeves have an obvious seam on top, so you could either make a two piece sleeve, or a one piece sleeve with the seam on top instead of out of sight, which is what I did for mine.
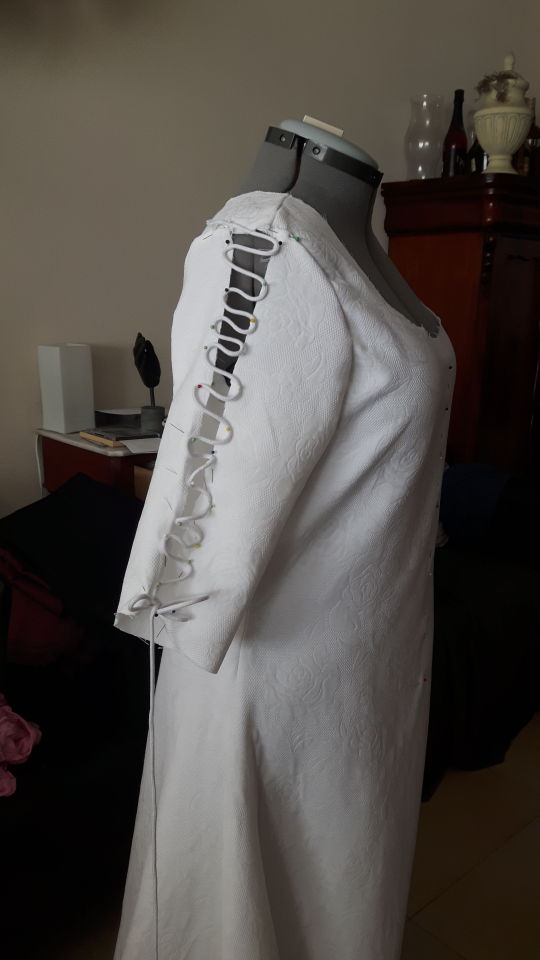
I still think my first rope was a little bit too thick, so I got some other cotton thread. The one in this picture is 3mm, whereas my newer one is just 1mm. I think 2mm is the perfect width of the thread needed. Mine was thin enough not to sew any eyelets, but the wider the thread, the more you actually need eyelets. For the front, I just made a cut and closed it with the thread. Basic shift, horrible fit (I need to shimmy in and out if I wear it)
I wear the shift and I use the plum overdress as a coat (that’s how I put it on anyways). Don’t forget to dirty the shift, as this was the one piece of clothing people almost never took off, and also the Caribbean were warm as hell, so you generally sweated a lot in the shift. Plus off-white looks better in photos anyways. So I threw mine in a tea bath! It needs a new bath, because it can be dirtier. If you make a pirate attire, you are never dirty enough!
Wig
For the longest time I thought I was going to use my own hair for Elizabeth, but eventually it occurred to me my own hair is too brown in comparison to Keira, so I went wig hunting. After a month, I came across a girl who resold a Royal Enchantments wig, styled like Elizabeth’s English gowns. It was half priced, so I bought it.
I then did what I now think of as the stupidest cosplay move ever: I took out all the pins to create Elizabeth’s nightgown and dinner-with-Barbossa look. This ended up like this:

Which I obviously found more fitting than the English hair at the pirate ship. The next con, I decided the wig was too curly, so I straightened all the curls out in hopes to create the messy beach look (I have never seen that in wigs). I am now considering a new wig, since this one also turned out to be too blonde for Elizabeth anyways. New adventure: actually curling a wig to get it back to the English style it was when I bought it.
The final result
The bottom picture shows my ‘beach’ wig. There are so many things I would like to change about this cosplay, but I am so happy I managed to complete this project!
#disney cosplay#elizabeth swann cosplay#progress post#wip#dcc#elizabeth swann#elfia#disney#cosplay#cosplay help
0 notes
Photo

Long time no post! I sometimes forget I have a tumblr, so go follow me on Facebook and Instagram, because I’m way more active over there.
Anyways, I finished a new cosplay! It’s Elizabeth Swann from Pirates of the Caribbean :D
#disney#disney cosplay#elizabeth swann#elizabeth swann cosplay#pirates of the caribbean#elfia#photoshoot
5 notes
·
View notes
Text
Time for a Merida WIP post

And so I did project number four! Because I wanted to make a Disney princess and a friend of mine wanted to join me, I decided on making Merida. I am a lot like her actually, stubborn, enthusiastic and loving archery.
Dress
I know there are several patterns made specifically for Merida, but because I am very stubborn, I didn’t want to use those. Even though my skirt should have been way fuller than it is now, I reached once again to my one pattern I own: Simplicity 1551. The actual thing should probably look a little more like this:

Mine obviously isn’t as wide as is suggested here.
I bought 6m of teal colored cotton. I was looking at a wool in the same color, but I was afraid I would die of a heatstroke if I wore it in summer. I made a good choice, because it was close to 30 degrees Celsius when I wore it. Because of this very same reason I decided not to make a separate underdress. Furthermore I used some leftovers of my Galadriel chiffon and an old piece of a bedsheet. I was too lazy to make a lace-up back, so I put in a zipper. Shh.

Here I faced a challenge. After all, I needed sleeves. I found the tutorial from Angela Clayton very useful. Basically you measure your own arms and you roughly sketch the shape of your puffs.

Mind you, my shoulder puffs were way too large because I used the bottom end of my bedsheet and I forgot to cut the shape.
I also love the gathering technique she mentioned in her post: put your machine on the longest stitch and the highest tension. Don’t ever worry about your ruffles again. You can prevent the ends from fraying by sealing them in clear nailpolish.

It might be worth mentioning that I threw my very white chiffon into a pot of tea. I was rewarded with a lovely beige color that gave a more medieval feel in combination with my cotton than the original white.
If you are making a separate underdress you don’t have to make all these ruffles!
Don’t forget to cut out the V-shape in the neckline and make a ruffled piece underneath too. Mine isn’t perfect, but you should end up with something looking like this:

Wig

This is by far the cheapest wig I own. I found it on Aliexpress, and I must say, I am amazed by the thickness of this wig. It came drowned in hairspray, so I brushed the whole thing out and look at that. In theory you could spend hundreds of dollars on a custom wig, but a cheap wig could do the trick just fine. ;)
Bow, arrows and quiver
On my first event as Merida I hadn’t finished any of my props. For my second event I had... the night before the event. The father of a friend of mine made my bow out of PVC pipe and painted it with a very light shade of brown. Then it was my turn to grab my pencil to sketch the etched pattern on the bow. Did anyone ever mention how hard it is to draw on a pipe, because it was hard.

Yes, I handpainted all of that. You probably can’t tell, but this was at 2:30AM the night before the event. I would not recommend this kind of time pressure. I used a triangular piece of faux leather to wrap around the center and both ends of the bow.
My arrows are kind of sad looking at the moment, because I made my feathers out of white paper due to time restraints. I need to make arrows with actual feathers.
My quiver is made of a Pringles storage can and a piece of worbla to get the right height. I wrapped the whole thing in dark brown faux leather, and the top and bottom in a second layer of lighter brown faux leather. I wish I had some pictures of it, but I had to finish this all in one evening, so I forgot to take pictures, but look below...
The final result


So in conclusion: my shoulder puffs are too big and I need another belt, but overall I am very happy with this cosplay and I think I will wear her for many occasions to come. I know each Merida is different, but I hope this might help in your construction process.
0 notes
Photo

Happy Halloween!
2 notes
·
View notes
Photo

I love being Merida so much!
3 notes
·
View notes
Photo

"I am no ordinary woman. My dreams come true."
I absolutely love this shot. It perfectly shows every element of this dress.
Photo by Sigfried Jardel.
1 note
·
View note
Photo

I am Merida and I'll be shooting for my own hand! Picture taken at Elfia Arcen.
4 notes
·
View notes
Photo


Whoa, I kind of totally forgot that I also have a tumblr for my cosplay adventures... So, I am back!
My Elinor is the lovely Little Miss Spookiness (unfortunately only on Facebook), photographers are Gerry de Jonghe and Frank Fotografie.
9 notes
·
View notes
Photo

Had a photoshoot last weekend in Amsterdam, first results are slowly coming in!
2 notes
·
View notes
Photo


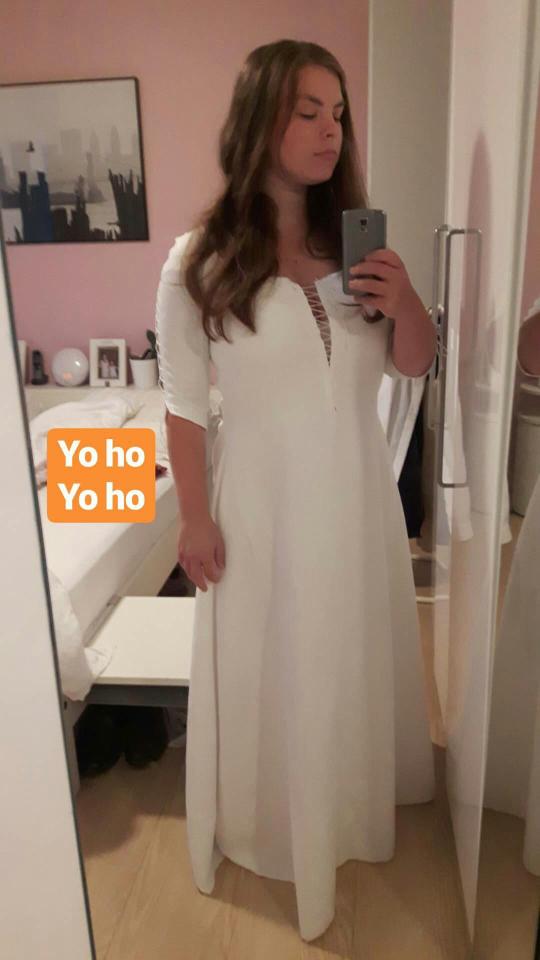
I am a Disney princess but I still need to make my dress
1 note
·
View note
Photo


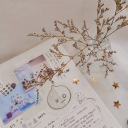
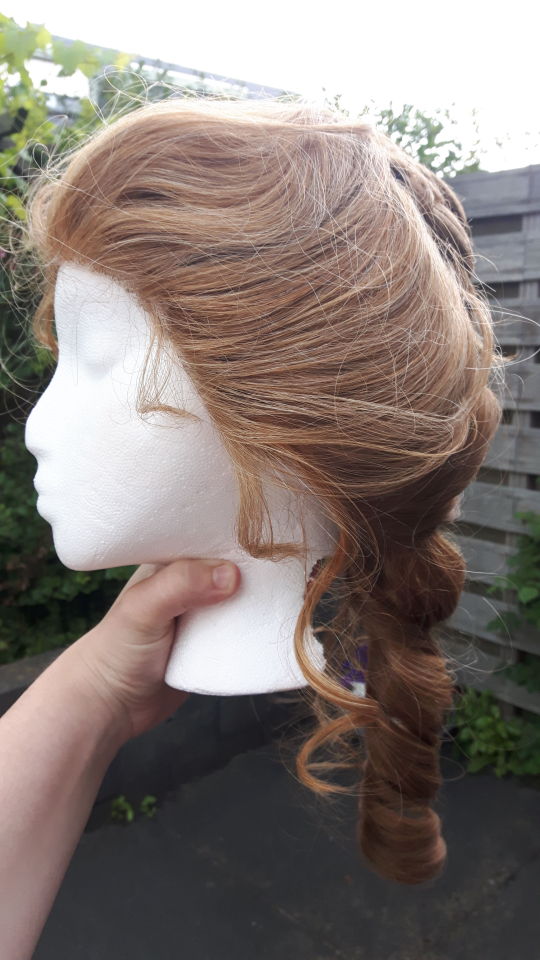
Just restyled my Daenerys wig, accidentally matching the EW photoshoot from a couple of years ago.
4 notes
·
View notes
Photo


Curious if I could pull off the White Queen. Why do all my favourite characters either wear blue or have platinum blonde hair?
2 notes
·
View notes