
Last Seen Blogs

anothermasseffectblog
Aka Space Family

alezaneti69
Untitled

windmaedchen
The Complete Sherlock Holmes

philmoorebooty4u
Untitled

etbtours
ETB Tours Egypt
Link
0 notes
Text
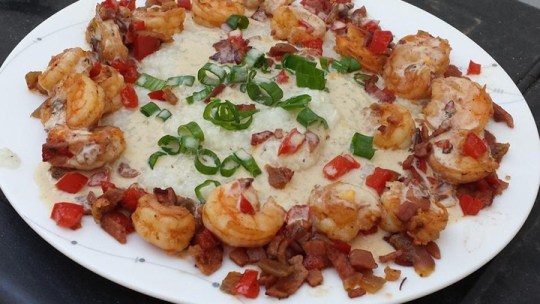
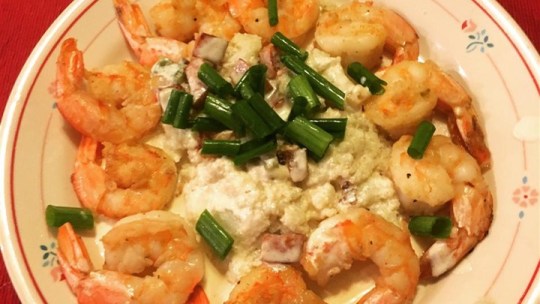
Shrimp and Grits Louisiana Style
"Probably the best shrimp and grits recipe I have made! Easy and low ingredient count!"
Ingredients:
1 cup water
1 pinch salt
6 tablespoons grits
2 tablespoons olive oil
1/2 cup diced tasso ham
2 tablespoons diced onion
2 tablespoons diced green bell pepper
20 medium shrimp, peeled and deveined
1/4 cup white wine
1 cup heavy whipping cream
salt and ground black pepper to taste 1 tablespoon chopped green onion, green parts only
Directions:
Prep Cook Ready In 20 m 20 m 40 m
Bring water and 1 pinch of salt to a boil in a saucepan and slowly mix in the grits, stirring constantly. Reduce heat to low and simmer grits until tender and smooth, about 20 minutes; stir often. Set aside and keep warm.
Heat olive oil in a large skillet over medium-high heat; cook and stir tasso ham until crisp. Stir in onion and green bell pepper and cook until onion is translucent, about 4 minutes. Lightly stir the shrimp with the vegetables and olive oil just until pink, 30 to 45 seconds; remove shrimp from pan and set aside.
Pour white wine into the skillet and stir, dissolving any browned bits of food in the bottom of the skillet; slowly add the cream, reduce heat to low, and simmer until thickened, about 10 minutes. Season with salt and black pepper.
Divide the grits onto 2 serving plates and line the edge of each plate with 10 shrimp. Pour cream sauce over grits and sprinkle each serving with chopped green onion tops.
Footnotes
Cook's Notes
Tasso is a Cajun cured ham and is often hard to find outside of Louisiana, and sometimes in Louisiana - particularly north Louisiana. But you can find it at some specialty gourmet shops. If not, you can substitute salt pork, pancetta, or prosciutto, just adjust your seasonings as tasso is very flavorful.
For a great wedding and reception ideas, use martini glasses or shot glasses to serve shrimp and grits with the grits on the bottom and shrimp and sauce on top. Add cheese if you like.
Tip
Aluminum foil helps keep food moist, ensures it cooks evenly, keeps leftovers fresh, and makes clean-up easy.
Link:
https://www.amazon.com/All-Sorts-Compartment-Microwavable-Containers/dp/B01GOEGZ22?keywords=Meal+Prep+Food+Storage+Containers
��Gp�F�


0 notes
Text
Chantal's New York Cheesecake
Chantal's New York Cheesecake
"This cake is easy to make, and it's so delicious. Everyone that's tried it has said it tasted just like the ones in a deli! You'll love it!"
Ingredients:
15 graham crackers, crushed
2 tablespoons butter, melted
4 (8 ounce) packages cream cheese
1 1/2 cups white sugar
3/4 cup milk
4 eggs
1 cup sour cream
1 tablespoon vanilla extract
1/4 cup all-purpose flour
Directions:
Prep Cook Ready In 30 m 1 h 7 h 30 m
Preheat oven to 350 degrees F (175 degrees C). Grease a 9 inch springform pan.
In a medium bowl, mix graham cracker crumbs with melted butter. Press onto bottom of springform pan.
In a large bowl, mix cream cheese with sugar until smooth. Blend in milk, and then mix in the eggs one at a time, mixing just enough to incorporate. Mix in sour cream, vanilla and flour until smooth. Pour filling into prepared crust.
Bake in preheated oven for 1 hour. Turn the oven off, and let cake cool in oven with the door closed for 5 to 6 hours; this prevents cracking. Chill in refrigerator until serving.
Footnotes:
Tip
Aluminum foil can be used to keep food moist, cook it evenly, and make clean-up easier.
https://www.amazon.com/All-Sorts-Compartment-Microwavable-Containers/dp/B01E49YG8O/ref=sr_1_744?s=home-garden&ie=UTF8&qid=1486063357&sr=1-744&keywords=Food+Storage+Containers+with+Lid
0 notes
Text
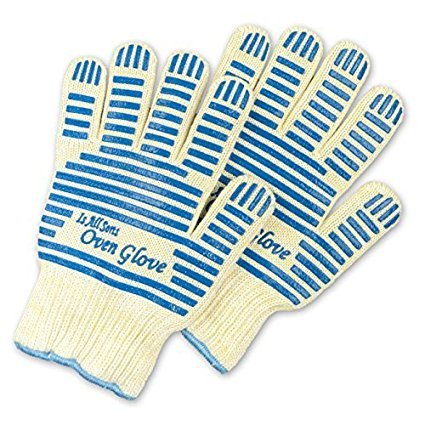
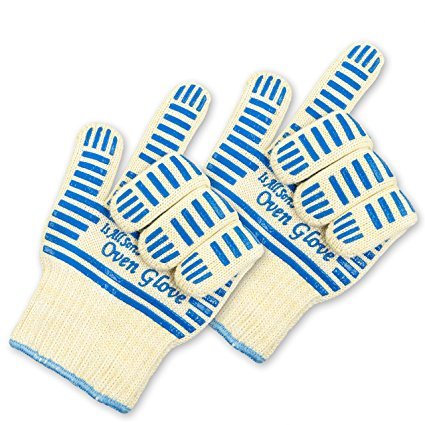
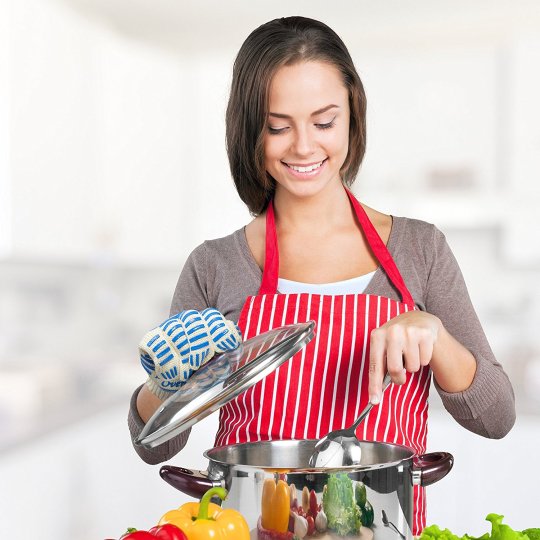
Silicone Oven Mitts Grilling Gloves
Ovens are some of the best modern day cooking equipment that have revolutionized cooking. However, as important as they are, they can also inflict very serious injuries when handled inappropriately. Therefore, it is important that you use silicone oven gloves while using an oven.
Silicone oven mitts have arrived from the future as they come with unique features such as superior heat resistance, waterproof capability, non-porous and stain proof among other features. These mitts are specifically designed to enhance great safety while cooking with an oven.
WHY ARE SILICONE OVEN GLOVES DIFFERENT FROM OTHER TYPES OF GLOVES?
There is no doubt that silicone oven gloves are much better than the conventional cloth oven mitts. The FDA recommends them, and so do we. Several factors make them stand out:
Silicone oven gloves are manufactured from high-grade silicon, making them heat-resistant even in very high temperatures
Unlike conventional cloth mitts that have been known to carry loads of disease-causing microorganisms when left damp and unwashed, silicone oven gloves do not let bacteria to imbed since they are waterproof.
Silicone oven gloves provides a better grip compared to traditional oven mitts.
A quick glance at silicone oven mitts may make you think they are best when used in the garage. Far from it. Silicone oven mitts are actually a cook’s best friend in the kitchen. This is because these gloves are very resistant to heat. They can withstand temperatures as high as 260 Degrees Celsius.
What’s more unique about these gloves is that they also make it very easy to place items in boiling water by gently placing the items you want without splashing water. In addition to this, these gloves are able to withstand steam thus making them exceptionally suitable to drain pasta and boiled potatoes without suffering any burns whatsoever.
If you are fond of preparing Chinese dishes, then silicone oven gloves should be your best choice. This is because these mitts will provide you with the much needed protection from burns from splatter and hot oil. And because these gloves are non-porous , you should not be bothered about hygiene standards as they are easy to clean. It’s also worth noting that there are various brands of silicone oven mitts that come with removable liners for better comfort.
What to consider when purchasing silicone oven mitts
When purchasing silicone oven gloves, there are a couple of factors you need to consider. These include:Pricing – High quality gloves are highly priced but are economical in the long run as they are very durable.
Degree of hardness- Hard silicone oven mitts are very ideal as they are able to provide ultimate protection from burns and steam while cooking.
Quality- The quality of these gloves should always come first as the higher the quality of the gloves, the more useful and reliable the gloves are.
You should avoid buying silicone oven mitts that are made using conventional rubbers. This is because these rubbers are not as heat resistant and hard as the genuine silicone reinforced rubbers.
Great Ways for Using Silicone Gloves
I’ve been trying to think of all the ways these gloves might be helpful in the kitchen and came up with some ideas I’ve listed below. If you have some of your own ways to use silicone gloves, please share them with me in the comments section below.
Barbecuing – removing charcoal chimneys, removing and adjusting hot grates, handling big cuts of pork or poultry, moving a hibachi or tabletop grill
Indoor Cooking – removing hot pans from the oven, draining hot pots of boiling water, grabbing lobsters out of a pot of water, handling cast iron cookware, removing and replacing pot lids for stirring
Frozen Foods – We have a chest freezer out in the garage and after about 30 seconds of moving cryovaced meats, chicken pieces, ice cream, leftover containers and frozen foods, my hands are burning cold. These gloves will help.
Carving – holding onto hot food items for carving without burning those fingertips
Platting – removing hot plates from the oven or microwave before platting, transferring hot plates to the table
Camping – working with fire pit grates, pulling hot pans out of the fire or off the fire grate, protecting your hands when making smores with a stick that’s too short
Miscellaneous – opening those incredibly hard to open jars, grabbing an oven thermometer from whatever you are cooking, removing hot light bulbs around the house.
Link:
https://www.amazon.com/All-Sorts-Silicone-Glove-Short/dp/B01AUTTNGW/ref=sr_1_226?ie=UTF8&qid=1486490751&sr=8-226-spons&keywords=Silicone+Oven+Mitts+Grilling+Gloves&psc=1
�W�u

0 notes
Text
Cape Cod Cocktail Meatballs
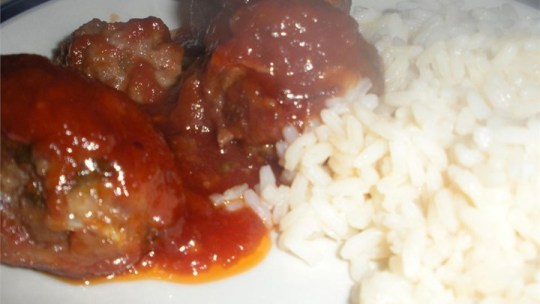
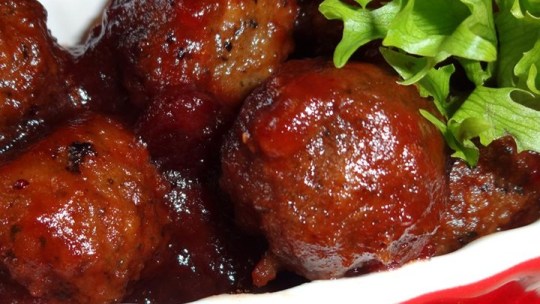
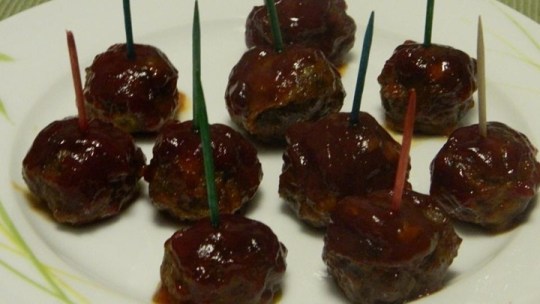
"These cocktail meatballs are perfect for a Christmas, New Year's Eve, or any party that you want to impress. They are the first appetizer to go, and everyone wants the recipe. The recipe originated in Cape Cod (cranberry country). Bon appetit!"
Ingredients:
2 pounds ground beef
1 cup bread crumbs
1/4 cup chopped fresh parsley
2 eggs
2 tablespoons grated onion
2 tablespoons soy sauce
1/4 teaspoon garlic powder
1 (16 ounce) can jellied cranberry sauce (such as Ocean Spray®)
1 1/2 cups ketchup
2 1/2 tablespoons packed brown sugar
1 tablespoon lemon juice
Directions:
Prep Cook Ready In
30 m 50 m 1 h 20 m
Preheat oven to 375 degrees F (190 degrees C).
Mix ground beef, bread crumbs, parsley, eggs, grated onion, soy sauce, and garlic powder in a bowl until thoroughly combined. Pinch off about 2 teaspoons of meat mixture per meatball and roll into small meatballs. Arrange meatballs in a large, deep baking dish.
Bake in the preheated oven until meatballs are browned, about 25 minutes. Drain excess grease.
Combine jellied cranberry sauce, ketchup, brown sugar, and lemon juice in a saucepan and place over medium heat. Stir the sauce until cranberry sauce has melted and brown sugar has dissolved.
Pour the sauce over meatballs and bake until sauce forms a glaze and meatballs are no longer pink inside, 25 to 30 more minutes.
https://www.amazon.com/All-Sorts-Compartment-Microwavable-Containers/dp/B01E49YG8O/ref=sr_1_744?s=home-garden&ie=UTF8&qid=1486063357&sr=1-744&keywords=Food+Storage+Containers+with+Lid
��>>�Qa
0 notes
Link
0 notes
Text
Tex-Mex Burger with Cajun Mayo
"A jazzy way to spice up the boring basic burger that will tantalize your taste buds! Cajun spiced mayonnaise is the perfect complement to these spicy beef burgers."
Ingredients:
1/2 cup mayonnaise
1 teaspoon Cajun seasoning
1 1/3 pounds ground beef sirloin
1 jalapeno pepper, seeded and chopped
1/2 cup diced white onion
1 clove garlic, minced
1 tablespoon Cajun seasoning
1 teaspoon Worcestershire sauce
4 slices pepperjack cheese
4 hamburger buns, split
4 leaves lettuce
4 slices tomato
Directions
Prep Cook Ready In
25 m 15 m 40 m
Preheat grill for medium-high heat. In a small bowl, mix together the mayonnaise and 1 teaspoon of Cajun seasoning. Set aside.
In a large bowl, mix together the ground sirloin, jalapeno pepper, onion, garlic, 1 tablespoon Cajun seasoning, and Worcestershire sauce using your hands. Divide into 4 balls, and flatten into patties.
Lightly oil the grilling surface, and place the patties on the grill. Cook for about 5 minutes per side, or until well done. During the last 2 minutes, lay a slice of cheese on top of each patty. Spread the seasoned mayonnaise onto the insides of the buns. Put burgers in the buns, and top with lettuce and tomato to serve.
Link:
https://www.amazon.com/All-Sorts-Compartment-Microwavable-Containers/dp/B01E49YG8O/ref=sr_1_194?ie=UTF8&qid=1486148945&sr=8-194-spons&keywords=freezer+containers&psc=1
0 notes
Photo
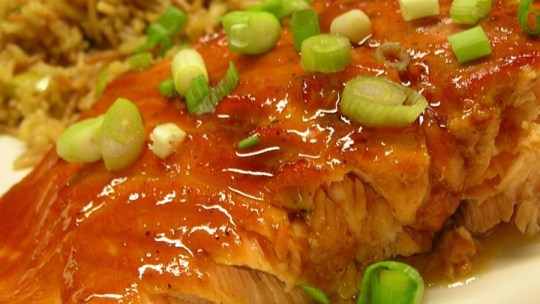
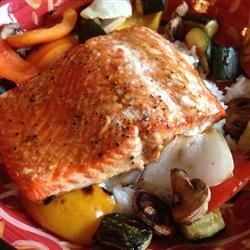
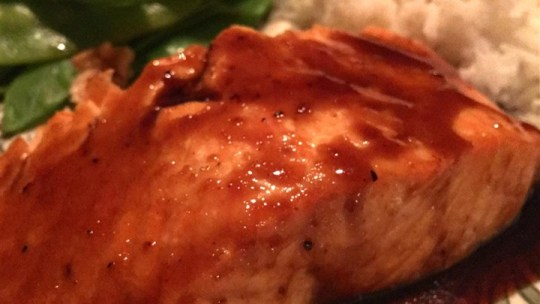
#Pepper-Honey Cedar Plank Salmon
"I live in Alaska and have 3 sons that love to fish. I have had to come up with some pretty creative ways to prepare salmon, this is by far my family and friends favorite way to eat fresh salmon. I soak an untreated cedar plank in water and bourbon while they are out fishing for the day and fix the barbeque sauce so that's it is ready to get grilling....."
#Ingredients:
2 (12 inch) untreated cedar planks
1/4 cup pineapple juice
1/3 cup soy sauce
2 tablespoons white vinegar
2 tablespoons lemon juice
1 tablespoon olive oil
3/4 cup honey
1/4 cup packed brown sugar
1 teaspoon ground black pepper
1/2 teaspoon cayenne pepper
1/2 teaspoon paprika
1/4 teaspoon garlic powder
6 (6 ounce) skinless, boneless salmon fillets
1 pinch salt and pepper
Directions:
Prep Cook Ready In
15 m 30 m 1 h 45 m
Soak the cedar planks in warm water for 1 to 2 hours. Add a splash of bourbon to the water if desired.
Bring the pineapple juice, soy sauce, vinegar, lemon juice, olive oil, and honey to a simmer in a saucepan over medium-high heat. Reduce the heat to medium-low, and stir in the sugar, 1 teaspoon black pepper, cayenne pepper, paprika, and garlic powder. Simmer, stirring occasionally, until the sauce has reduced to a syrupy consistency, about 15 minutes. Set the sauce aside.
Preheat an outdoor grill for medium heat. Place the planks on the grate. They are ready to cook on when they start to smoke and crackle just a little.
Season the salmon with a light sprinkling of salt and pepper. Place the fillets onto the smoking cedar planks, close the lid of the grill, and cook for 10 minutes. Spoon a small amount of the sauce over the salmon fillets, and continue cooking until the fish turns opaque in the center, about 5 minutes more. Serve with the remaining sauce.
Footnotes
Tip
Aluminum foil can be used to keep food moist, cook it evenly, and make clean-up easier.
Link:
https://www.amazon.com/All-Sorts-Compartment-Microwavable-Containers/dp/B01E49YG8O/ref=sr_1_744?s=home-garden&ie=UTF8&qid=1486063357&sr=1-744&keywords=Food+Storage+Containers+with+Lid
���\��� Pݵ2���(��ȹh�h$�.�
0 notes
Link
0 notes