
Statistics
We looked inside some of the posts by flan-slime and here's what we found interesting.
Average Info
Notes Per Post
6K
Likes Per Post
4K
Reblog Per Post
2K
Reply Per Post
7
Time Between Posts
8 days
Number of Posts By Type
Text
17
Last Seen Tumblr Blogs


Fun Fact
12.7% of mobile users access Tumblr.

Text


Brutes! These are some big hungry boys for my Garlic Grenadiers. I converted these out of Wargames Atlantic Landsknecht Ogres and a few Ork helmet bits. Really cool kit, love the weapons and rifles, perfect for Turnip28.
Closeups under the cut!


89 notes
·
View notes
Text
Shout out to reddit user walking_throughlife who saved me from a random fuckup with my matte varnish. Thread was too old to interact with but they deserve more than 3 upvotes.
I don't understand the science behind it, but it worked! I spent basically my whole afternoon painting this war wolf and the thought of having to redo all that work gave me conniptions...


63 notes
·
View notes
Text
🜏 Endless hunger, boundless evolution.
Tyranids embody adaptation—their form shifts with every planet consumed. What traits would the swarm gain after devouring your world? 📧 Evolve your miniatures from grey to glorious—contact us at: [email protected]
24 notes
·
View notes
Text


28mm Mongrel Miniatures IDF with 3D printed M113s and Merkava.
4 notes
·
View notes
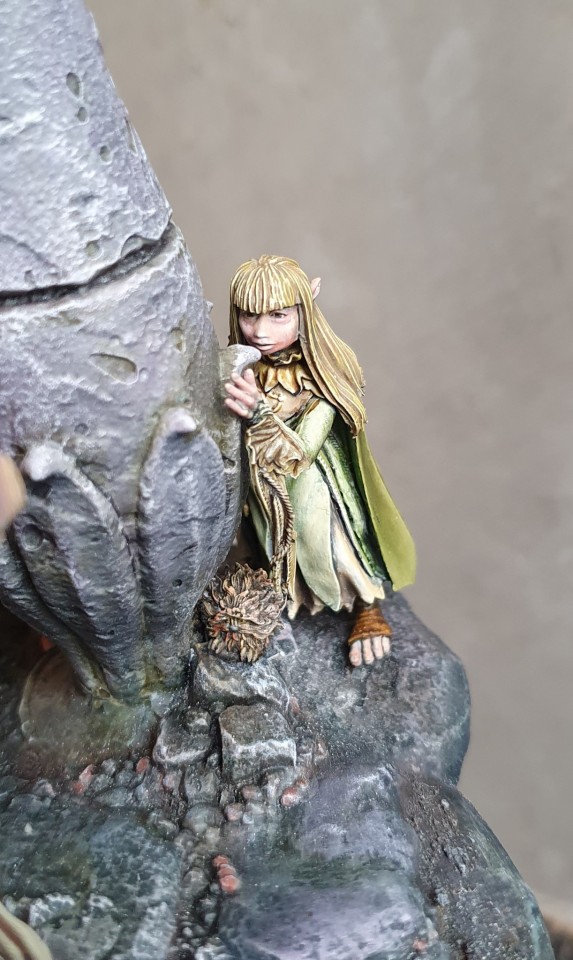
Text
Finished this diorama from Jim Henson's 'The Dark Crystal'. Awesome mini to paint!


273 notes
·
View notes
Text


Happy new codex day! Here’s my first model of the year, the Rogal Dorn “Payback Pig” with the new tank commander option. Absolute monster of a kit and I had a ton of fun putting it together and dirtying it up!
96 notes
·
View notes


Text

How To Paint: Canopy Glass Pt. 3
After a catastrophic absence (I was taking care of a very nice but grabby dog) the series is back! So far we've done cockpits an easy way with normal paint and an easy way with contrast paint. This time around, we'll be looking at the way I do some of my more complex colored cockpits. I apologize for some of the photography on this one- not all of the steps were properly recorded.
Paints I used:

For the Starslayer I chose to go with a orange/yellow tint for the glass, however you can easily adapt this to any dark -> bright paint gradient you like. Make sure your darkest color is something neutral- I usually like deep browns for hot colors and a deep sea green like incubi darkness for cool colors.
Army Painter Matt White (whit)
Citadel Yriel Yellow (bright yellow)
Citadel Trollslayer Orange (bright orange)
Citadel Ratskin Flesh (orange)
Citadel Mournfang Brown (brown)
Citadel Dryad Bark (dark brown)
Citadel Lahmian Medium (acrylic thinning medium)


Once you finish the rest of the model area around the canopy, begin by base coating it with your dark brown paint with two thin coats. Once this is applied and dry you're going to paint one of the bottom corners of the canopy glass in with your brown paint.


Now unfortunately this next section is both the most fiddly part of the process and the one past-me forgot to take any pictures of. We're going to use a glazing method to build up a color transition from one side of the canopy to the other. First, we'll make a mixture of about 2 parts of our thinning medium with one part of our brown. Then we'll load the thinned paint onto a medium sized and dab off most of the runny excess on our palette- you want the brush to still be damp and have a little color but not leave a visibly wet trail if you drag it across your fingernail. Then with our brush we're going to gently paint in this very thin brown over the dark brown everywhere but the top corner opposite our brown bottom corner. Give the paint a few minutes to dry and then repeat, except this time paint even less of the upper corner area, leaving some of the previous thinned brown layer exposed. Continue this process multiple times, painting less and less of the canopy each time to build up a smooth transition of brown.
I have done this process with just water before and while it does work I find thinning medium works way better.

Next, we'll apply the same technique again but covering an even smaller area using our orange. Mix it with our thinning medium in a 1:2 ratio and repeat the glazing process, focusing just on the lower corner of the canopy. Make sure to leave a small border of brown showing on the bottom and side of the orange. You should have a soft gradient from dark brown to burnt orange across the canopy.

Finally some finishing touches. Take your bright orange paint, thin it, and sketch an 'L' outlining the orange you just glazed on. Then add a dot of yellow in the corner of the 'L' and dot the upper dark brown corner with a little bit of white.

And here's the finished product! This is fundamentally a similar technique to the method I used on the Firefly with some extra tricks and it inherits the strengths and weakness of it- as a flat painting technique this works easiest on models with simple cockpit geometry and straightforward sight lines, but because it's a more labor intensive technique it's best used on models where you want to draw the eye to the head.
38 notes
·
View notes


Text


Darius art doll
Commission I made for talented AbzJHarding, and this character is from their comicbook Parliament of Rooks. (I hightly recommend you to go and check out their illustrations especially if you're into gothic stuff)
Doll is 75cm full length from the tip of beak to the tip of tail, fully poseable with wire skeleton inside. Green parts glow in UV light.
Head and claws are printed in durable resin. Fabric fur, feathers, wire, acrylic paint, varnish.
5K notes
·
View notes
Text


Some miscellaneous models for my Old Guard warband. Stump gun with crew and 12 Black Powder Fodder. The Fodder I had built and sculpted for nearly a year, glad to finally have them painted and ready for the tabletop.
35 notes
·
View notes
Text


As promised, pics of the DAO Union hover transport.
Had a lot of fun painting it and I'm very happy with how it turned out. There's definitely some places I didn't try as hard as I could so I wouldn't say this represents my best work, but with a model this size and the amount of other models I have to paint for my own army upscaling to 1000 points, this will have to do. Not quite display quality, but at least "Tabletop plus."
113 notes
·
View notes
Text

another Brute for the 13th Trenchfoot Harvesters
29 notes
·
View notes
Text

“The Mark X Phobos pattern suit’s lighter-weight ceramite and streamlined design allow for greater mobility, and its servo-motors are engineered to be completely silent. The design, however, sacrifices protection for stealth and speed.”
•Excerpt from WH40k Lexicanum: Space Marine Power Armor•
Warhammer 40k Space Marine Phobos Strike Kill Team Incursor Minelayer - Dark Krakens Chapter
60 notes
·
View notes
Text
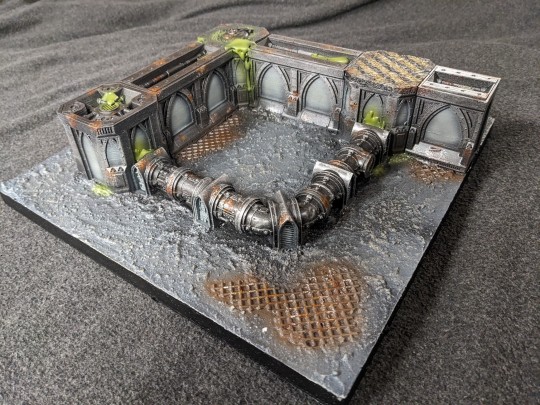
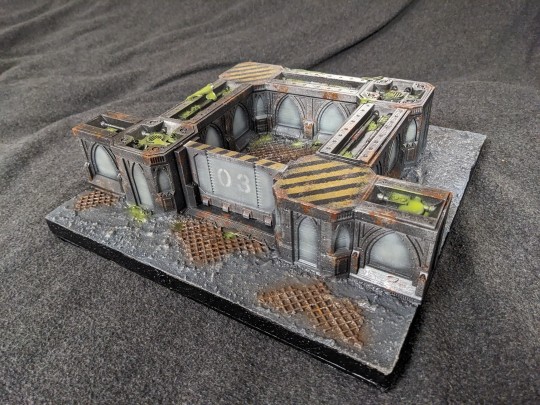
Welcome to Gutter Town
Just in time for the beginning of my gaming group's Necromunda campaign! This is a modular 3'x3' Zone Mortalis board, complete with multiple resin toxic waste pools and magnetic walls for pipe markers.
This project was built and painted in only a month and a half and I'm very proud of the final result. We're going to have players add graffiti as they play and win games, so I'm hoping by the end of the campaign the board will be completely covered in tags from all the players!
Closeups under the cut!


117 notes
·
View notes