
furbyfreakazoid-blog
Furby Freakazoid
19 | F | SFW blog | trying to get the hang of this Tumblr thing 🫧
9 posts
Don't wanna be here? Send us removal request.
Last Seen Blogs

langle-y
Elite Pilot 02

nico-reposts
花ちゃん desu!!

yoonsnymph
向宝

waywardsou2
"Good Soldiers Follow Orders" ~ Crosshair

furryfbi
FurryFBI
Text
📸
Been a while since I’ve posted anything! Here’s one of my keychain pals on his respective 2000 McDonald’s Happy Meal box.

#furby#furbys#furbies#furby community#furby fandom#furblr#all furby#2000 furby#furby 2000#keychain furby#furby keychain#McDonald’s furby#mcdonalds#happy meal
40 notes
·
View notes
Text
🧮 Poll time, friends…
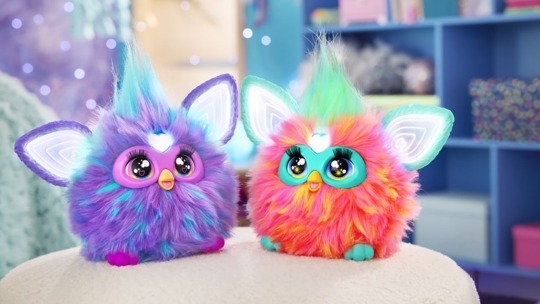
Will you be buying the new Furby? (Poll)
The all-new, 2023 model Furby will cost you about $70 (USD) on Amazon. As of now, Purple and Coral are the only two available colors. Furby stands at around 6 inches tall. Each package comes with a charm necklace and brush. Furby’s ears, eyes, and feet move (yes, the feet move individually), but its beak does not move at all. Furby responds to your voice, has over 600 responses, and has five modes, including “Dance Party,” “Copycat,” “Tell My Fortune,” “Let’s Chill,” and “Light Show.” Two Furbys can interact with each other. There is no internet connection required to play, and there is no app.
35 notes
·
View notes
Text
📸
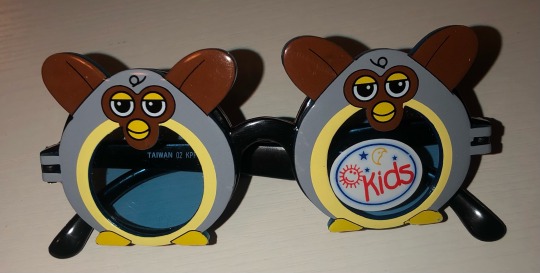
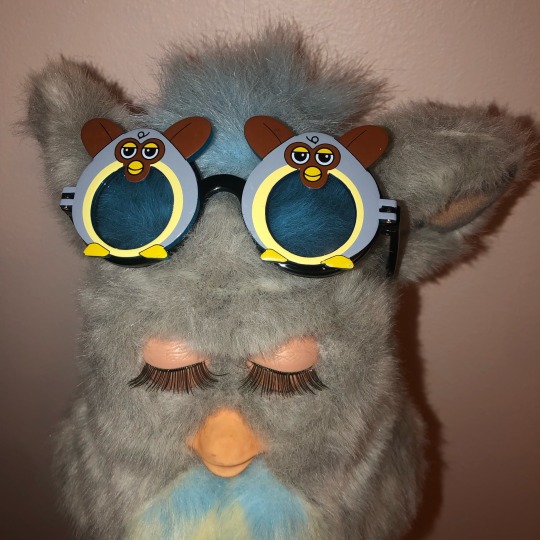
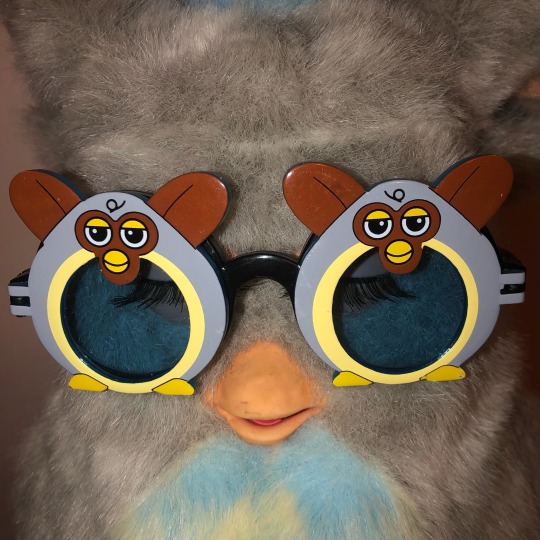
Rare knockoff Furby sunglasses! I couldn’t find these anywhere else online aside from the Furby Fans Wiki. There are meant for kids, but here is Bubbles modeling them!
#furby#furbys#furbies#furby community#furby fandom#furblr#all furby#2005 furby#furby 2005#emototronic furby#sleepy blue furby#f bubbles
66 notes
·
View notes
Text
📸
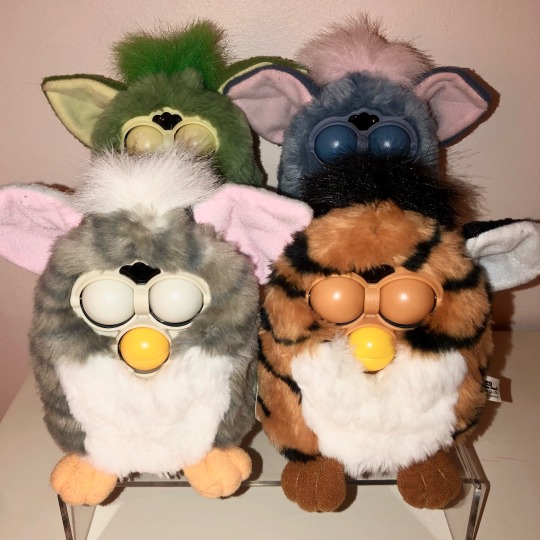
Some of my collection! I think that the frog in the back is going to be given custom eyes and be for sale soon.
You can get the acrylic shelves from Amazon.
#furby#furbys#furbies#furby community#furby fandom#furblr#1998 furby#furby 1998#frog furby#elephant furby#church mouse furby#tiger furby
36 notes
·
View notes
Note
Hi there! I was wondering if you would do a tutorial on didasembly & washing of furby coats. If not maybe you know where I can find one? Thank you!!
Hi, thanks for asking! You’re actually my first question so I really appreciate that!
To answer, there are so many good 1998 Furby washing/fur removal tutorials out there that I never really considered making any. You can find a lot on YouTube or here on Tumblr. Here’s a really good one.
But I think I might try to make one someday that includes how to remove all types of 1998 Furby skins, since ’98 Furbies’ faceplates can be attached in one of two different ways (screwed on or glued on). If you don’t know how to remove one or the other, it can be just a little tricky to get the hang of it.
1 note
·
View note
Text
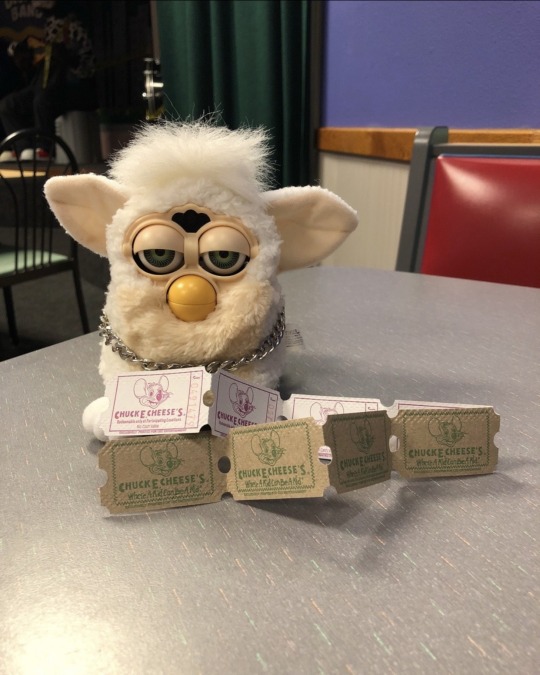
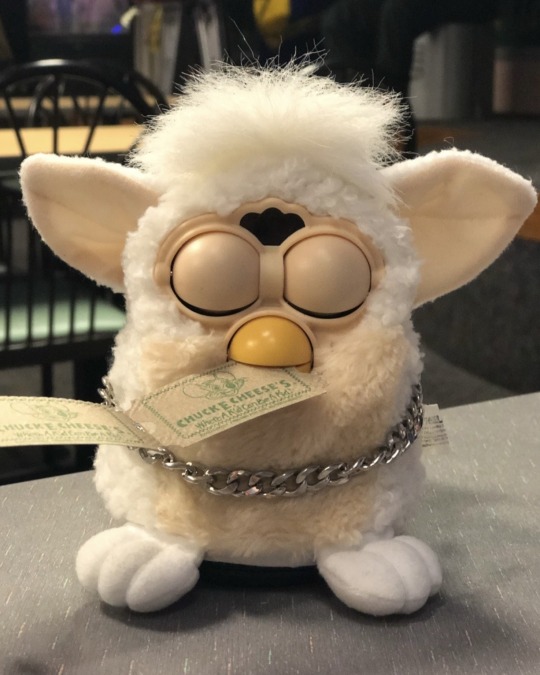
Meet Overkill!
Year: 1998
Type: Lamb
Fashion style: “Nu-metal”, punk
Fun fact: He’s named after Men at Work’s song, Overkill!
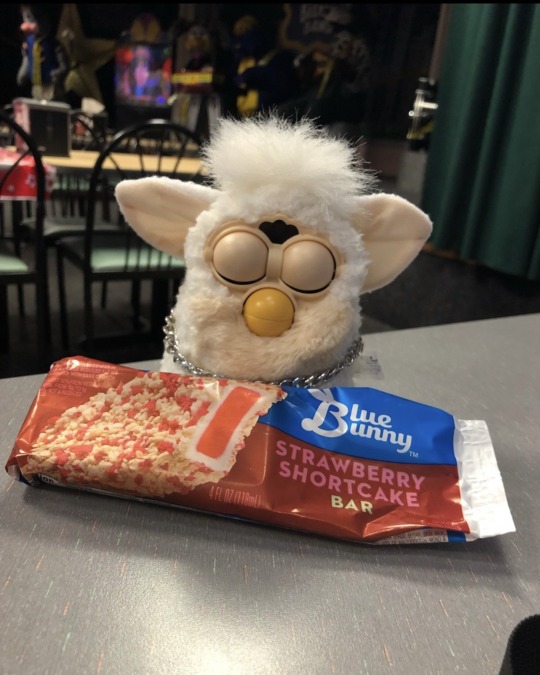
Overkill may favor 80s rock over anything else, but nu-metal fashion is his go-to. He loves to wear chains, headbands, and band tees. Underneath the sleepy and rebellious exterior, he has a soft spot for things like ice cream, arcade games, and being a jokester. He can also hold a conversation surprisingly well - just talk to him.
55 notes
·
View notes
Text
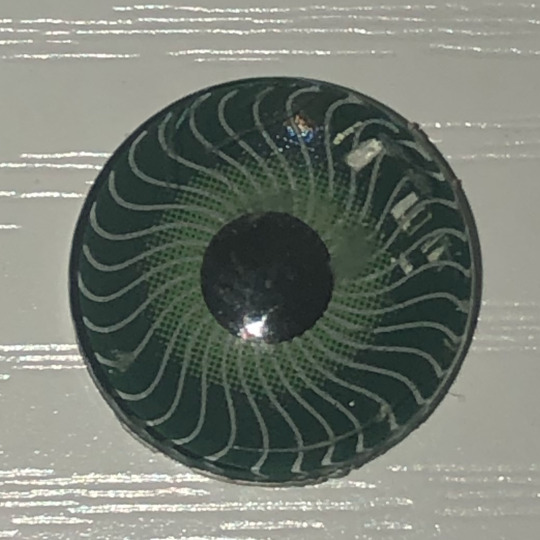
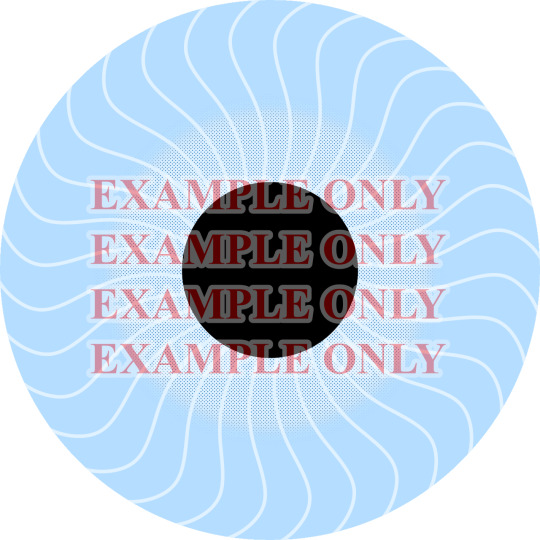
MAKING ACCURATE 1998 EYE CHIPS - AN IN-DEPTH GUIDE ! ! !
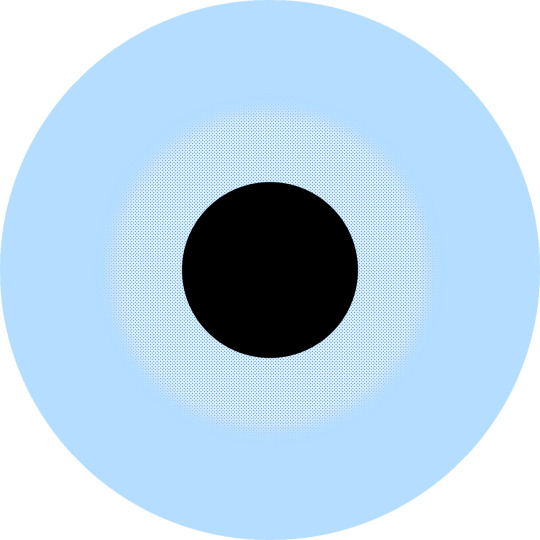
Hey Furby friends! I recently decided to practice making eye chips for customs that look similar to factory Furby eye chips. I took a picture of an old eye chip for reference, and then I decided to draw my own in Ibis Paint X. The green eye chip is the reference image, and the blue one is the one that I drew.
I’m going to show you all how I got to this point. Below are some things I noted about factory Furby eye chips and how they relate to actual human eyes!
EYE CHIP DESIGN NOTES
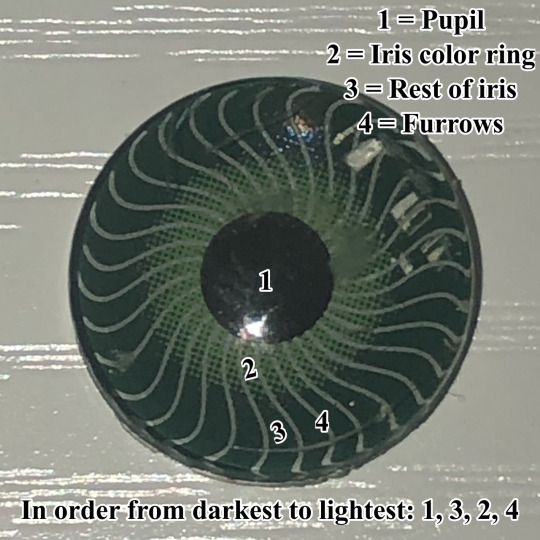
1. PUPIL: So, the first thing you should know is that regardless of eye color, the pupil in the very middle is ALWAYS going to be black.
2. IRIS (COLOR RING): Surrounding the pupil is a RING of color that is lighter than the rest of the iris. It takes up a little bit less than half of the iris. It has a sort of “comic book” dot effect going on.
3. IRIS: The rest of the iris is a darker color than the ring.
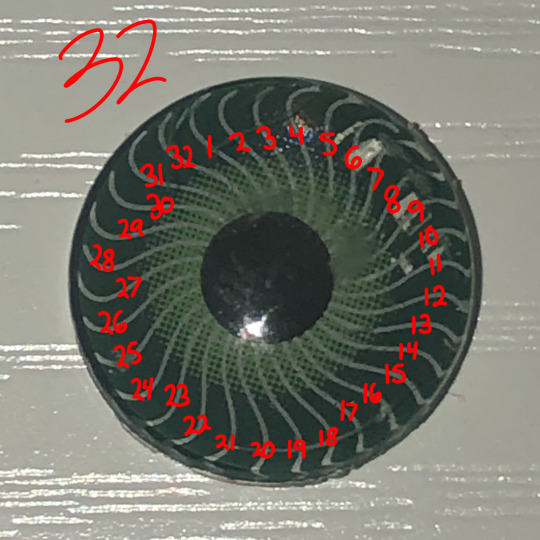
4. FURROWS: The lines in the iris, called furrows, are just a little bit lighter than the ring. Amount may vary, but I personally counted 32 of these.
Now that you know these general design rules, you can play around with them and bend them to your heart’s content!
TOOLS TO USE
Now it’s time to actually draw your custom eye chips. I use a free digital art program, Ibis Paint X, which I highly recommend for making Furby eyes with, so that is what these next steps will be in reference of.
What I do is make sure that I create a SEPARATE LAYER for EACH PART of the eye. There should be four layers in total. The very top layer is for the pupil. The next layer underneath that one is for the furrows. The next layer underneath that one is for the color ring. The very bottom layer is for the rest of the iris. It is important to keep your layers in this order so that you won’t get weird overlaps.
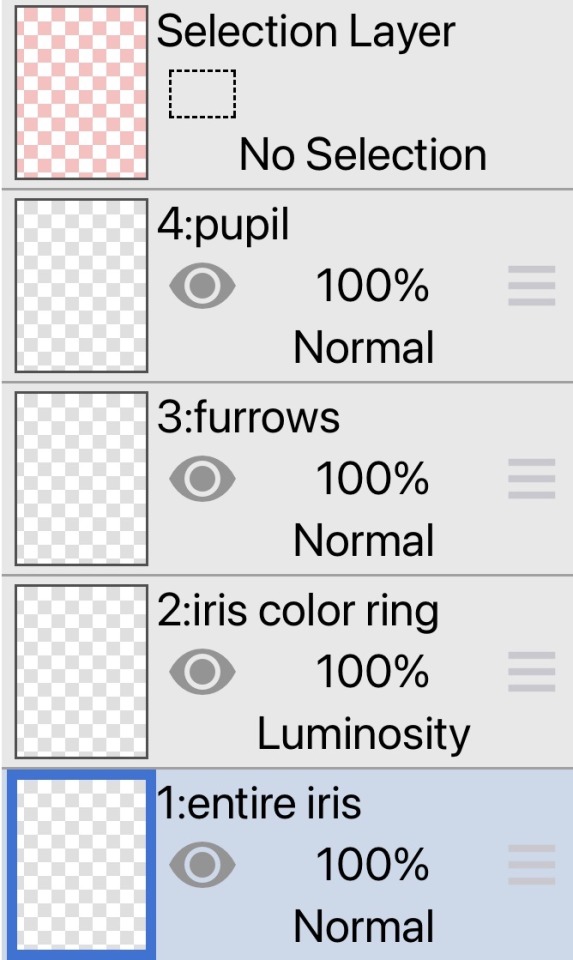
First, I use the circle tool for the entire iris and then color it in to be the color that I want.

Second, I use the circle tool for the pupil and color it in black.

Third, I use the circle tool for the color ring and color it in. I use a dot filter to create the comic book dot effect, and set the layer type to “Luminosity” to help everything blend together nicely.
I also add some color beneath the ring on the iris layer as a touch-up and blur it. (You may not need to change the layer type depending on the program you use!)
Finally, I use the Rotation Ruler (a type of symmetry ruler) and set the division amount to 32 for the furrows. For the furrows, I draw the same “hook” shape that factory eye chips use.
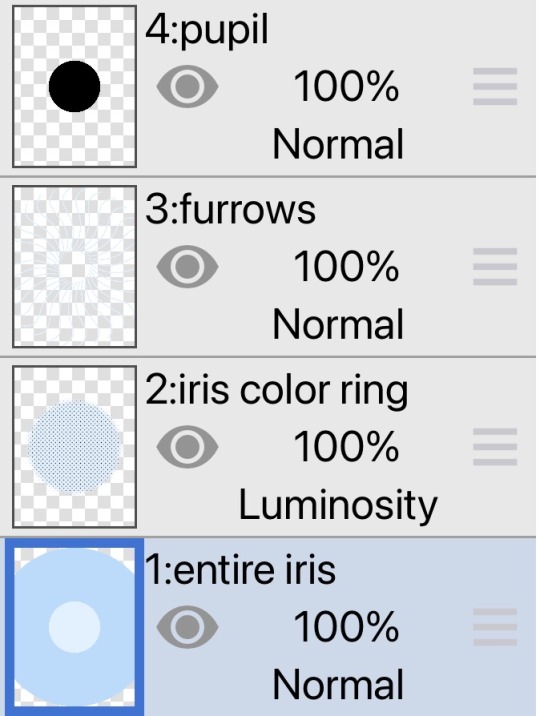
Here is what my layers look like at the end.
USING YOUR EYE CHIPS
Please refer to these mini guides by pancake-furby for printing out your eye chips the correct size…
PART 1: https://at.tumblr.com/pancake-furby/how-to-print-furby-eyechips-the-correct-size-using/bj1rb1o7cj09
PART 2: https://at.tumblr.com/pancake-furby/ok-part-2-then-go-to-size-and-change-the-width-to/81w3lefgu6rt
To create that “dome” effect that factory eye chips have, you will want to buy some glass cabochons. They can be found on places like Etsy, AliExpress, and Amazon. They come in many sizes, but 15mm will fit 1998 adults. 12mm will fit babies. After you have put in the paper eye chips you’ve printed out, simply pop in the cabochons on top and you’re done!
141 notes
·
View notes
Text
Hey Furby friends! I’m Furbyfreakazoid-blog (my OLD username Furbyfreakazoid was taken due to inactivity, oops).
I post Furby-related tutorials, and I’ll post the links down below to every tutorial I make!
I also post about my own Furbies sometimes.
Tutorial links
Brushing your Furby
Making accurate 1998 eye chips
My Furbies
1998 - 9 - Overkill (Lamb), Max (Tiger), Kairel (Ladybug), Elephant, Santa, Reindeer, Church Mouse, Frog, Tie Dye
Babies - 1 - Kismet (Very Purple)
Buddies - 1 - Shake (Leopard)
2005 - 1 - Bubbles (Sleepy Blue)
2012 - 4 - Gertie (Plum Fairy), Tay-Tay (Pink Puff), Piggy (Loveby Furby Party Rocker), Peacock
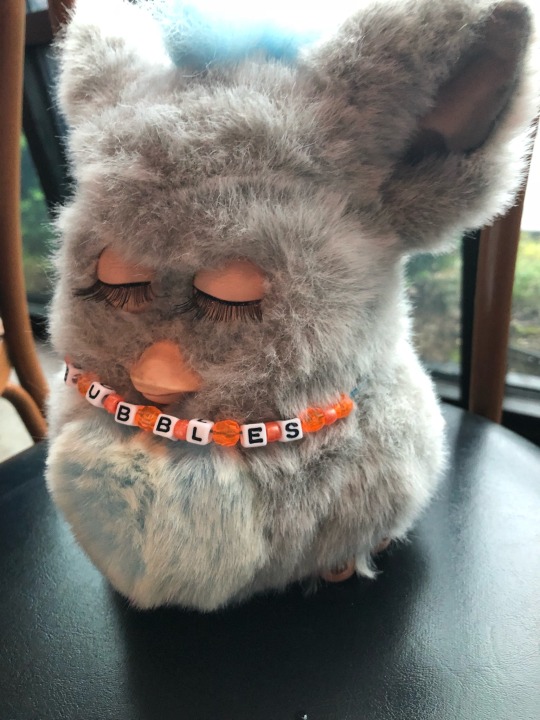
Here’s my blog mascot, Bubbles, in all of his glory.
I hope you all enjoy my page. :)
0 notes
Text
HOW TO BRUSH YOUR FURBY - AN IN-DEPTH GUIDE ! ! !

Hey Furby friends! Today, I’m making an in-depth guide on how to brush your Furby, AND how to pick out a good brush for your Furby.
Chances are, if you own a used Furby, the fur might look like the Tiger Furby skin as shown here on the right. In comparison to the Church Mouse Furby skin on the left, the fur has a “fluffed out” appearance, feels matted to the touch, and goes in different directions all over the place!
While this fluffy look is still pretty cute, if you want your Furby to look as if it came fresh out of the box, this small guide is perfect for you.
(I highly recommend washing your Furby skin before brushing it out. It will look a lot cleaner in the end.)
CHOOSING A BRUSH
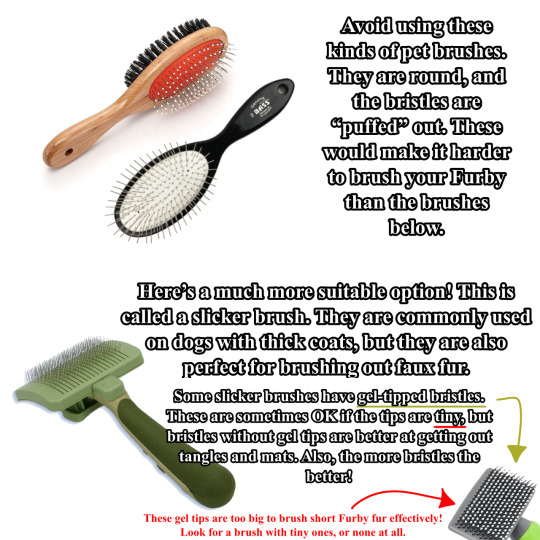
If you don’t already have one, now is a good time to pick out a brush for your Furby. Avoid using brushes like the ones on the top - they tend to not have many bristles, and are spaced out in a way that giving a consistent brushing is difficult.
Instead, choose a brush like the one on the bottom. This particular brush is called a slicker brush, often used for brushing animals with thick coats. It is rectangular and has many metal bristles that are relatively sharp, which are perfect for getting out little tangles and mats in faux fur. Some slicker brushes have gel tips on the bristles to make brushing less painful for the animal being brushed, but in this case, it’s best to skip out on the gel tips.
BRUSHING
Now that we know which brushes are best, it’s time to actually do the brushing! As I mentioned above, I highly recommend washing your Furby skin before brushing it out, so that the end result will be extra clean and soft.
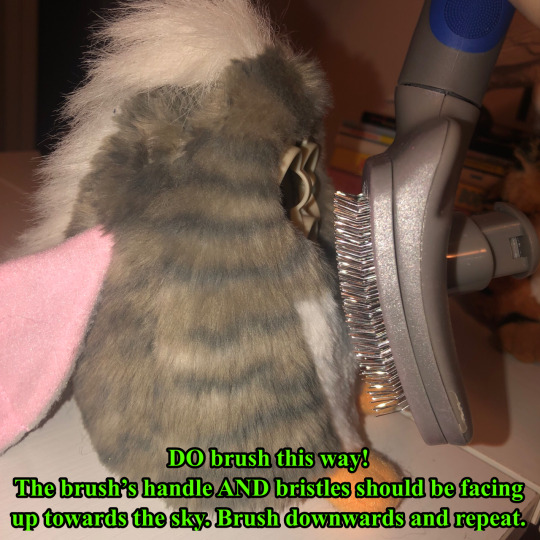
When brushing your Furby, it is important to use your slicker brush correctly. DO hold the brush upside down, as shown in the first image. The brush’s handle and bristles SHOULD both be facing up towards the sky, NOT down. Now, simply brush in the direction that the fur is flowing (brush downward). Brushing like this minimizes the chances of pulling out too much fur. After all, the bristles are sharp, and it’s easy for them to get caught in the fabric by accident.
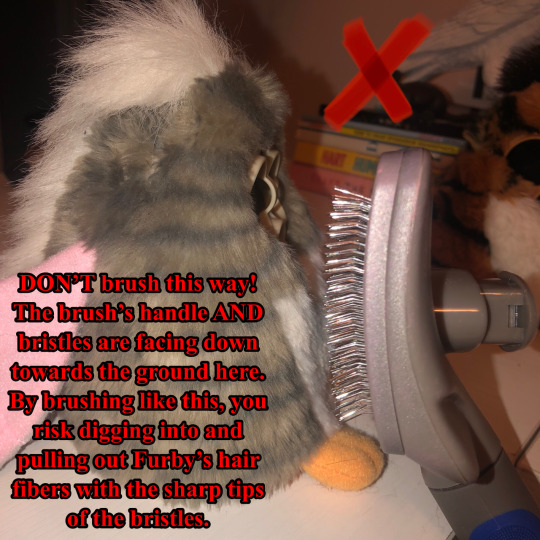
DON’T hold the brush right side up, as shown in the second image. The brush’s handle and bristles should NOT both be facing down towards the ground. Please refer to the last paragraph on how to properly use your slicker brush.
RESULTS
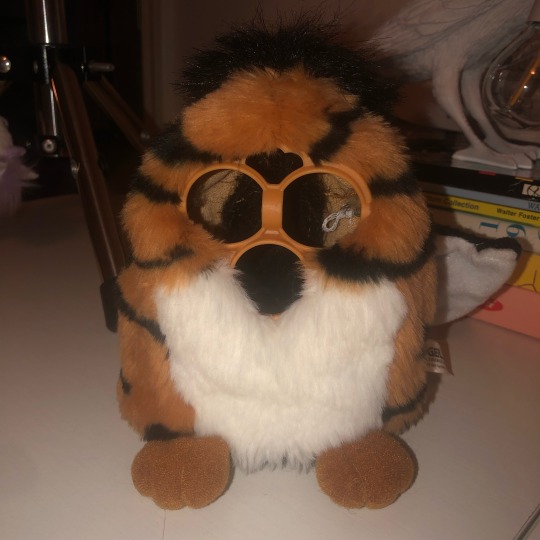
Remember that Tiger skin from the beginning? Well, here he is all brushed out. It might be a little hard to see any difference, but in real life, he feels so much softer and looks almost like he was never even played with.
I hope that this tutorial helped you or anyone who needed it! I plan on posting more tutorials very soon! Thank you for reading.
#furby#furby tutorial#furby guide#tutorial#1998#1998 furby#1999 furby#adult furby#guide#furby community#furby fandom#furbys#furbies
412 notes
·
View notes