
goosetrainer
can't believe this URL wasn't taken
marigoos's pokémon blog so I can find my shit
☆guides & trading☆
23 posts
Last active 2 hours ago
Don't wanna be here? Send us removal request.
Last Seen Blogs

designsbylindanee
Designs by Linda Nee

hotcarsforme
Hot Cars for You

thecandyman1972
Untitled

chi0leapictures
Sweetly Sexual Chi
Text
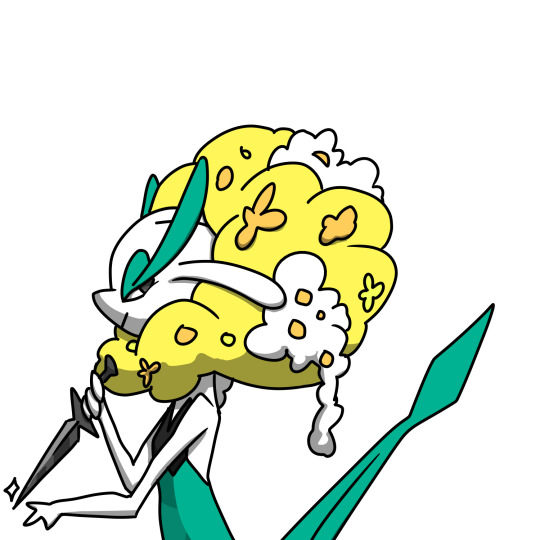
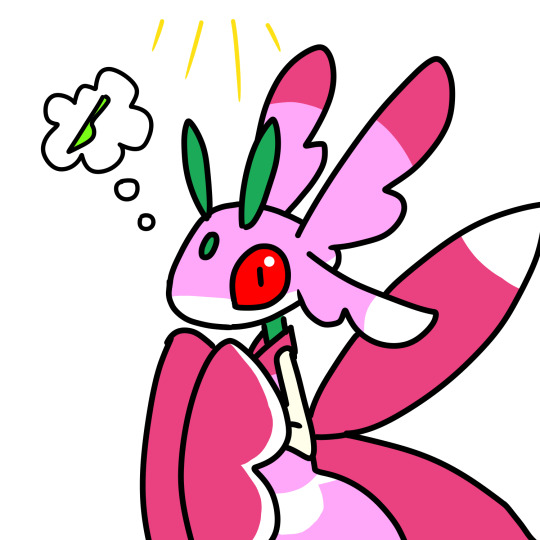
Mari's Tera Raid Guide #15 - Primarina
I hate that this thing has Sing.
Counters I'm proposing:
-Gholdengo (best)
-Tinkaton
-Vigoroth
Gonna try more but I'm gonna need a bit, busy weekend.
Gholdengo lv.100
Nature: Modest (/Mild)
Item: Shell Bell
Tera type: Steel
IVs: max HP, special attack, special defense, speed
EVs: 252 special attack, 252 special defense, 4 HP
Moveset:
-Flash Cannon (TM) (1 PP-up recommended)
-Nasty Plot (level up)
-Light Shield (TM)
-Recover (level up)
Usage:
First of all: if you can afford the time, try to reset to get the Bellibolt NPC. Saves time in setting up Light Screens. (Other useful allies are Sylveon and Gardevoir)
You should use a Light Screen on turn 1 regardless, though. Since you're faster.
With that done, you have to spend some turns until the one and only player stat reset (80% time left). Since Good As Gold has been patched to work some time since the last raid I tried, you should in theory be safe from Sings. There's a scripted Encore that Primarina will try just after she nullifies your stat boosts and ability, but apparently, being scripted, it counts as another turn and your ability works again (or at least it did when I tried. Hopefully it wasn't a lucky bug).
In this first phase, if you don't waste time, you should be able to drop 2 Nasty Plots followed by 2 Flash Cannons, in the first phase. Wait for Encore to be used, check that it says it didn't affect you (if it did: idk man, use a couple of cheers maybe? Run away and retry, maybe after using some more PP Ups on Flash Cannon?) and resume with Nasty Plot.
No change to Gholdengo's stats after this point will be wiped, so you can use 3 Nasty Plots in a row (though, if you don't have the Bellibolt by your side, keep track of how many turns the Light Screen has been up and use it again as soon as it fades), then finish charging your tera orb with Flash Cannon if it isn't done, then terastallize and start attacking. At this point you shouldn't need any more Light Screens, but if you get critted Recover is there. Ideally you shouldn't use Flash Cannon with less than... 50 HP left? Give or take?
I died once to a critical while I was doing the post-stat-reset Nasty Plots, and still won, so it should leave some wiggle room. No need to run away and retry if you die just once, unless it happens when you're already terastallized and Primarina still has her shield up.
TL; DR: Light Screen, 2x Nasty Plot then Flash Cannon until stats reset on your side and Encore (failed), 3x Nasty Plot (with another Light Screen and/or Recover if needed), finish charging tera with 1-2 Flash Cannons as needed, terastallize, Flash Cannon until end (with Recover/Light Screen for emergencies).
Pros:
-pretty useful pokemon with a great ability
Cons:
-not so easy to get in one day, if you still don't have one/need to train a new one
-needs tera type changed (gimmighoul is just ghost)
-----
Tinkaton lv.100
Ability: any
Nature: Adamant (/Lonely)
Item: Luminous Moss
Tera type: Steel
IVs: max HP, attack, special defense, speed
EVs: 252 attack, 252 special defense, 4 HP
Moveset:
-Gigaton Hammer (level up)
-Swords Dance (TM)
-Skitter Smack (level up)
-Sleep Talk (TM)
Usage:
Here, too, you could use some help from the Sylveon/Gardevoir/Bellibolt NPCs, Mudsdale is good too. Try to get at least one of them
Unlike Gholdengo, this one has no immunity to sleep nor Encore, so the first thing we're doing is... wait until Encore has passed. Do nothing, no moves, no cheers. Trust the process!
When the Encore threat is gone, you're free to start setting up. You want to do 3 Skitter Smacks (dropping Primarina's special attack by one stage for each, and charging the tera orb), followed by 3 Swords Dances. There's a good chance Sing will hit you once or twice in this phase: it's better to get rid of it with the healing cheer rather than wait.
When you have your attack maxed, you can terastallize and attack with Gigaton Hammer. It's stupid powerful, but you need to alternate it with Skitter Smack since it can't be used twice in a row. UNLESS Tinkaton falls asleep again: now that you're done setting up, you can try your luck with Sleep Talk instead of healing right away. Best case scenario, Sleep Talk will select Gigaton Hammer twice or thrice in a row (and it will work!), worst case scenario it keeps selecting Skitter Smack and Swords Dance (if you see your HP dropping too low, do use the healing cheer to heal and wake up), maybe you get one Gigaton Hammer and one/two of the other now useless moves... just keep an eye on your HP bar and you should be fine.
TL;DR: wait idle until after Encore, 3x Skitter Smack + 3 x Swords Dance in this order (using healing cheer if you fall asleep), terastallize, alternate Gigaton Hammer and Skitter Smack until end (healing cheer if low on HP, if asleep try Sleep Talk but if you have bad luck you might want to wake up with the cheer again).
Other Options:
Need to try Shell Bell (I don't have high hopes for it, I'm afraid the early sp. def. boost from Luminous Moss is non-negotiable)
Pros:
-common pokemon
-any ability will do
-tera type is one of the native ones of the pokemon, 50/50 chance that you won't have to change it
Cons:
-needs some luck
-abilities don't really do much
-----
Vigoroth lv.100
Nature: Adamant (/Lonely)
Item: Eviolite
Tera type: Steel
IVs: max HP, attack, special defense, speed
EVs: 252 attack, 252 special defense, 4 HP
Moveset:
-Tera Blast (TM) (2 PP Up necessary, 3 recommended)
-Amnesia (level up as Slakoth / TM)
-Slack Off (level up as Slakoth)
-Curse (TM)
Usage:
This time it is NECESSARY to get at least one NPC that will aid with special defense and healing, possibly two (Sylveon, Gardevoir, Bellibolt). Again, Mudsdale can help by dropping Primarina's defense.
Vigoroth's only ability prevents them from falling asleep, but even with Eviolite their defenses are on the low end of the spectrum, so better not get stuck on a single move. Unfortunately, given the lack of fire power, we can't really wait idly, it's better to attack. Use Tera Blast, aim to hit 2-4 times and go K.O. By going K.O. you will come back with your full health after Encore has been used on someone else, or failed on your empty space.
When you come back, if you're sure Encore has been used already, terastallize if you can, then use 3 Amnesias; if your orb isn't charged yet, use the 3 Amnesias first, THEN use however many Tera Blasts you need to charge up, then terastallize.
Now, start with Curse. You'll need 6 of them. After 1-2 of them your speed will have dropped to be lower than Primarina's, so keep that in mind for when you need to heal (calculate one more turn's worth of damage before you can Slack Off; if you think you won't make it, use the cheer instead. It heals a random amount but it acts first).
Now you can start spamming Tera Blast (which should be steel-type because you ARE terastallized, right?). Don't waste time between turns, but also keep an eye on your HP, since you don't heal passively you may need to throw in a Slack Off at some point (unlikely if one of your allies is Gardevoir, it should be healing you every once in a while).
TL;DR: use Tera Blast as many times as you can at the start and let yourself faint, so that you come back after Encore; then: a) if you can terastallize right away, do so then 3x Amnesia (with Slack Off if needed) or b) if you can't terastallize yet, use 3x Amnesia, then charge your orb with more Tera Blast(s), then Terastallize; 6x Curse (Slack Off if needed); Tera Blast spam (Slack Off if needed). Don't waste time, every second is precious
Pros:
-Sing is not an issue at all
-Encore also is not as long as you follow the strategy
-extra common pokemon with only one ability
-leaves more to skill than to luck
Cons:
-really needs the NPCs
-tera type change
-you can't waste even one second to think, even on the best runs it gets very close
-doesn't have any better options than Curse to boost own attack
0 notes
Text
Mari's Tera Raid Guide #14 - Meganium
I have a Rabsca and I have a Skeledirge. Have I said that I love Skeledirge in raids? Because I love Skeledirge in raids. You should get a Skeledirge. For the raids. Do you want a Skeledirge
Rabsca lv.100
Ability: any
Nature: Modest (/Rash)
Item: Shell Bell
Tera type: Bug
IVs: max HP, defense, special attack (speed?)
EVs: 252 defense, 252 special attack, 4 HP
Moveset:
-Bug Buzz (level up)
-Lunge (level up)
-Iron Defense (TM)
-Calm Mind (TM)
Usage:
Meganium only wipes away your stat modifications once and quite early, at 79% time left. We're going to take advantage of that!
Use no more than one or two Iron Defense to open, then keep doing Lunges to charge the tera orb while keeping Meganium's attack boosts at bay, until you get your stats wiped. Do not terastallize for now. After your stat reset, start with 3 Iron Defenses, then 6 Calm Minds. You could need to heal with a Heal Up cheer once or twice between Calm Minds. As soon as you have your +6 defense and +6 special attack, heal again if you're very low on health (~ less than 50 HP), then terastallize and use only Bug Buzz for the rest of the battle.
Quite easy except for the occasional critical hit.
TL; DR: 1-2 Iron Defense, Lunge until player stat wipe (at least 3x); 3 Iron Defense, 6 Calm Minds (heal with cheer as needed), terastallize, Bug Buzz spam.
Pros:
-common pokemon
-extra common tera type
-ability is nbd
Cons:
-lots of turns to set up
-----
Skeledirge lv.100
Ability: Unaware (hidden)
Nature: Modest (/Rash/Quiet)
Item: Shell Bell
Tera type: Ghost
IVs: max HP, defense, special attack
EVs: 252 defense, 252 special attack, 4 HP (probably also viable with 252 HP/252 sp.atk./4HP)
Moveset:
-Torch Song (level up)
-Shadow Ball (level up)
-(Slack Off (egg move))
-(Hex (level up))
Usage:
GUYS I love this reptile. It's a bit harder to obtain if you're playing solo and without NSO, but iirc you should get a copy of each paldean starter with their hidden ability with Pokemon Home, so you can breed that one. Unaware 'dirge is just a beast in high level raids in general, I keep a fire tera one always ready. Ghost tera Skeledirge was also the only non-legendary pokemon to be confirmed able to solo the mewtwo raid! How cool is that!
Ahem, anyway. We don't have many defensive options on this one, because we're letting Unaware do most of the work. But, since it's an ability, it gets nullified on the turn in which our stat modifictions get wiped (if you haven't read above: once, at 79% time left). To avoid dying, we have to make it so Meganium reaches that point with no attack boosts, and to do that... we wait.
DO NOT MOVE UNTIL YOU GET YOUR STATS RESET AND YOUR ABILITY NULLIFIED. "Do not move" means NO ATTACKS and NO CHEERS.
I know it seems counterintuitive to just waste a whole fifth of the time bar, but it works. Once this phase is over, you're safe to go. Use 6 Torch Songs to max out your special attack, then terastallize (not as soon as your orb is charged, wait after all 6 the Torch Songs. Don't wanna lose the resistance to Seed Bomb before you're done setting up) and simply use Shadow Ball for the rest of your life.
I only included Slack Off for the emergencies (2 or more critical hits while you're setting up) and Hex for if one of your ally NPCs happened to apply a status condition to Meganium (poison, paralysis etc). In that case you can use Hex to deal more damage than Shadow Ball would do, but it's not so necessary. Meganium goes down comfortably in 7-9 Shadow Balls, plenty of time left.
TL;DR: wait until your stats get wiped, then 6x Torch Song, then terastallize, then Shadow Ball spam.
Pros:
-so easy T-T
-this is probably the dumbest strategy I've posted since I started
-very useful pokemon you should be using on raids in general
-an Unaware Fuecoco is available for free with Pokemon Home (don't remember the details but they're not hard to look up)
Cons:
-tera type must be changed
2 notes
·
View notes
Text
Also announcement: I'll probably skip the next raid, if I'm right it's the same Charizard as in late 2022, and guides for that are readily available all over the internet.
I remain available to lend trained pokemon for it, or to explain the process in detail, though. Just send an ask or a message or whatever.
#I know some of ya didn't get it the first time#I also missed it. I was busy ~enjoying the plot~#this is why I hate time limited events
1 note
·
View note
Text
Mari's Tera Raid Guide #13 - Blastoise
ARGH Home maintenance how am I supposed to move this thing around and try more scenarios, HUH? Jail for Nintendo!
Btw I recycled the Gallade from last time. I also forgot to change his tera type back to fighting and I still won with a lot of time left, lol. Dare I say it was easier?
Why is that turtle so fast
Edit: final version of the post now <3
Gallade lv.100
Tera type: Fighting/Grass/Water
Ability: Sharpness
Nature: Careful
Item: Shell Bell
IVs: max HP, attack, special defense
EVs: 252 attack, 252 special defense, 4 HP
Moveset:
-Sacred Sword (move reminder)
-Swords Dance (level up)
-Light Screen (TM) (only necessary for Fighting and Grass teras)
-Mystical Fire (egg move) (commonly learned by Gardevoir)
More tera types this time, order of moves changes a bit depending on which one you have. Grass type is for if you used my build for Venusaur, so that you don't have to use up more resources.
Usage:
Just like last time, open with 3 Mystical Fires - the difference here is that you're not in as much danger of dying with Blastoise, his opening moves are all defensive, and his AI will favor Hydro Pump over the other moves - it's strong but it has low accuracy. Yay for us! Be ready to use a healing cheer in case of a critical hit, though.
Next, 3x Swords Dance (again with healing from the cheer if needed), then terastallize, using Sacred Sword.
Here comes the tricky part, so pay attention:
The next phase has 4 dangerous scripted actions, in rapid succession, and in varying order depending on when you hit each threshold (2 Blastoise stat wipe, 1 player stat wipe, and 1 Shell Smash). What those do is first negate the sp.atk. drops from your Mystical Fires, then bring Blastoise to +2 sp.atk. (=damage doubled, compared to neutral), then wipe all your boosts so that you can't even count on those to survive.
This is why I chose Light Screen over Calm Mind, it won't be erased. And you can only use it once every 5 turns, so it takes less time. When and if to use it depends on a variety of factors:
-if one of your NPC allies is the Bellibolt, you may not need to use it all, because it may have put the screen up for you (To check: press Y while out of the moves menu, then select your pokemon. It should be towards the top-right of the screen, and the numbers next to it will let you know how many turns are left until it vanishes)
-fighting tera: try to use it after the first of Blastoise's self-stat modifications-wipe (should happen after your first Sacred Sword). That way it should be up for all of the scripted actions, which will happen in the span of 1-2 turns only, given how much damage you're dealing.
-grass tera: the timing here is important, because you deal less damage and it will take more turns to get there. If you use Light Screen too early, you risk it being down when you need it most. Wait for the turn before you break the shield (give or take after 4 Sacred Swords). Don't panic if you forget or the shield breaks too soon because of some crits on your part, it's actually pretty forgiving and you can put the Screen up after Blastoise's scripted Shell Smash.
-water tera: screen? Who needs a screen?
Break the shield with more Sacred Sword(s) if you haven't yet, and now Blastoise should use Shell Smash. Drop everything and use two more Mystical Fires (or a Light Screen if you need it and it's not up - see above - and then two Mystical Fires). No more than that, they will be wasted because of the next Blastoise stat wipe. And, actually, if you have Sylveon among the NPCs check Blastoise's status before using the second Mystical Fire - there's a chance the Sylveon lowered his sp.atk. already with Moonblast. The goal is neutral special attack, so as long as you don't see green upwards arrows next to Blastoise's special attack in the status menu, you're done with this phase.
Keep your eyes open for when Blastoise wipes your stat modifications. If it hasn't happened yet, use more Sacred Swords; when it happens, do 3 more Swords Dances (with healing cheer if needed), and then you're safe to spam Sacred Swords until the end. If you're out of heals, or if you're having bad luck with those and you can't heal enough, you can do 2 Swords Dances only and then start attacking right away to keep yourself alive, it'll just take some more time to finish. If it went well, you should still have plenty of time left!
On tera types:
Fighting was my first choice. You can find wild Gallades with it (as long as you have the bottle caps to train them), is defensively neutral to all of Blastoise's moves, is offensively supereffective on Steel, and makes Sacred Sword a monster of an attack. The drawback is that it does not resist Hydro Pump, which means little at the start of the fight, but can be a problem later when dealing with a +2 sp.atk., under the rain, murder turtle that's also faster than you. You have to be religious with defending yourself if you chose this tera, a forgotten Mystical Fire or Light Screen will be your end.
Grass was a happy accident. Sacred Sword deals less damage with it, BUT that means that Blastoise's scripted actions will have some time between them, and you can breathe. Plus it resists Hydro Pump - once you're terastallized, Blastoise will start using Flash Cannon instead. It's weaker and it doesn't get powered up by the rain, so it's easier to survive. Con 1: Flash Cannon has a chance of lowering your special defense. It hasn't happened to me, but I fear it could ruin the entire fight, so keep that in mind. Con 2: less damage = takes more time to win. It was still a good 1/5 of the total when I tried, so not too bad. Con 3: grass shards 🙄
Water: Better than Grass, honestly. Same situation offensively; better situation defensively, because it resist Hydro Pump and Flash Cannon, so it forces Blastoise to prefer Aura Sphere, which is his weakest attack, and without the annoying sp.def. drop. It can be a little annoying to have to use all those Sacred Swords in a row but you can go in with mo more than 3 moves, amazing! (advice: do not be tempted to use Aqua Cutter over Sacred Sword here. I chose Sacred Sword because it ignores changes to the target's defense, and that carapaced menace has Withdraw and Iron Defense. You will not make it)
TL;DR: 3x Mystical Fires (Heal Up cheer if needed), 3x Swords Dances (Heal Up cheer if needed), terastallize,start attacking with Sacred Sword, Light Screen (if it's not already up) before you break the shield, break the shield with Sacred Sword, 2x Mystica Fires after Blastoise's Shell Smash. If your stat modifications haven't been reset yet, use more Sacred Sword(s); when they have, 3x Swords Dance (with healing cheer if needed), then Sacred Sword all the way.
Pros:
-again, common pokemon to find
-you get some choice regarding the tera type this time
-recycled build if you used my grass Gallade with Venusaur
-only 3 max IVs
-less setting up than usual!
Cons:
-none of the tera types listed is readily available by breeding so you have to choose if you want to use bottle caps, tera shards, or try your luck with the tera dens
#pkmn#pokemon#gen 9#pokemon sv#guides#tera raids#blastoise#gallade#I think I'll stop adding images for a bit. not that happy about the ai scraping#not that I'm using my best skills for this blog. I've been keeping the drawings low in quality#still...
1 note
·
View note
Text
Mari's Tera Raid Guide #12 - Venusar
There are better options if you have been playing other games / been winning 7☆ raids for a while (Chesnaught and Hisuian Goodra, namely; you can find their sets elsewhere so I won't repeat them here) but in this blog we do it the cheap way.
Lawnmower Gallade build under the cut (edited after some experimence)
[Pic goes here once it's done]
Gallade lv.100
Tera type: Grass
Ability: Sharpness (evolves from Trace Ralts/Kirlia)
Nature: Careful (/Adamant if you really must)
Item: Shell Bell
IVs: all 31 except special attack, speed
EVs: 252 attack, 252 special defense, 4 HP
Moves:
- Leaf Blade (move reminder)
- Calm Mind (move reminder)
- Swords Dance (level up)
- Mystical Fire (egg move) (Gardevoir learns it by level up)
Usage:
Might need more than 1 try!
Recommended NPCs: Arboliva and/or Gardevoir (for the healing) (strongly recommended, if not necessary); Bellibolt (Light Screen for free); Intimidate users (again, not necessary, but they can help at the start); Sylveon (can lower Venusaur's special attack).
Don't spend too much time resetting, but I would at least reset for one between Bellibolt Arboliva and Gardevoir uu
The critical phase is at the start: you can't avoid the scripted Sunny Day + Growth + Petal Blizzard, but that alone shouldn't be enough to kill you; the following moves can, though.
Your chances are best when Venusaur spends one of the first turns using Amnesia, preferably the very first one (after Petal Blizzard); if he used another move you can still try, but be prepared to lose.
Regardless, your first turns will be spent bringing Venusaur back down to neutral - possibly negative - special attack, with Mystical Fire (at least twice, then a 3rd time to finish charging the tera orb). Do NOT terastallize now. You CAN go K.O. here, just once, and still win the battle, but it'll be harder. Just, don't bother wasting all your healing cheers now if you are at like 10HP, not worth it
After the 3 Mystical Fires you should use some Calm Minds (NEVER before the player stats&status wipe! Thankfully it happens quite soon and only once, and if you went KO you're probably skipping it). 6 is too much, too slow (will waste too much time, you won't win in time and the extra special defense doesn't really make much difference in terms of survivability); in theory 3 is enough, as long as you have a Careful nature. If you're using Adamant, make it 4, maybe more if your special defense got lowered by Earth Power. Use the healing cheer sparingly in this phase, but try not to be left with less than 1/3-1/4 of your max HP. Then, 3 Swords Dances.
Ideally you should have at least ~80/90 HP left before you terastallize, use another healing cheer if not. Terastallize and ignore anything Venusaur does, just keep Leaf Blading until victory. Should be 2 Leaf Blades to break the shield, then 2-3 more to win; no further setting up needed. In this phase you're weak to Sludge Bomb, but you should have enough special defense to only get around ~55-60HP in damage, plus whatever chip damage from eventual poisoning, so not really an issue save for crits.
TL;DR: [try to go with Arboliva and/or Gardevoir and/or Bellibolt NPCs if possible] 3x Mystical Fire (best if the first move after Petal Blizzard is Amnesia) (1 KO allowed here), 3-4x Calm Mind (+1 for each time your sp.def. got lowered by Earth Power) (heal as needed), 3x Swords Dance, make sure you have 80-90 HP left at the end of the turn, terastallize, Leaf Blade until victory
Pros:
-available in main game, both versions
-look, no TMs!
-regular ability
Cons:
-needs tera shards (unless you found a grass type in a tera raid)
-needs some luck
-we can't escape the NPC curse, huh
1 note
·
View note
Text
Mari's Last Minute Tera Raid Guide # 11 - Empoleon
Ooof much trying, such fail. Found the solution tho, fear not :D I have a Florges set! Man I love Florges. Reminder that I can lend it via Home trading if needed
Apparently Skill Swap works in raids now. It wasn't always the case, right? I'm not going senile, right???
Florges lv.100
Tera type: Steel
Ability: any~
Item: Shell Bell
Nature: Modest (/Mild)
IVs: all max except attack and defense
EVs: 252 sp.atk., 252 sp. def., 4 HP
Moveset:
-Tera Blast (TM)
-Calm Mind (TM)
-Skill Swap (TM)
-Moonblast (level up) / Psychic (TM) / Energy Ball (TM)
Usage:
First things first: do yourself a favor and flee immediately if you see you have an NPC ally with Intimidate (Arcanine, Staraptor, Tauros).
Empoleon has an ability that raises his special attack twice every time his stats get lowered by the opponent, so you're very easily starting the battle with an enemy with +4 sp. atk. if you try it with Intimidate. Don't do it!
The same ability is the whole reason I'm bringing Skill Swap: I checked the NPC list and there's like. 3. Of them. That can't lower Empoleon's stats in any way, and that's a very small number and we do not want to lose our sanity resetting for them (if you DO want to lose your sanity, though, I won't stop you. They're Clodsire, Dudunsparce, and Heracross).
The max speed is needed to act asap and possibly before one of your allies tries a stat-lowering move; if that's not enough and you see Empoleon's Competitive being activated, again, flee. It's not worth it
The following strategy works pretty reliably, but the remaining time is very little. Do not lose too much time thinking and waiting.
The main reasons for failure are: Competitive activated at least once, time ran out, you got freezed, and failure to trigger both player stats resets soon enough (see below).
Now that the foreword is over, to the battle. Once you have non-Intimidating NPCs, mock that penguin's pitiful attempt at Blizzarding you (but flee if it freezes you...), then QUICKLY use Skill Swap. That'll take care of Competitive permanently! Congrats! You can forget about it now! 50% of the battle is done!
And now for the boring part. Florges have astronomical special defense, but they're still weak to Flash Cannon. Which is why we need the steel type tera btw. You ARE going to die, but not before the third turn.
Until then, you're going to use the non-tera-blast damaging move (so, Moonblast/Energy Ball/Psychic), twice. (Re: choosing the move: Moonblast is more powerful because STAB, needs no TM, and has a chance of lowering the opponent's special attack; the other two are basically the same move but in different types, they have a chance of lowering the special defense instead. The secondary effect doesn't activate all too often anyway, so choose whatever. Energy Ball may be sliiiightly better than Psychic but only if you end up with Arboliva as an ally - it gets more powerful with Grass Field).
Once you come back from the inevitable K.O., use the same move once more so that your tera orb is charged.
This is where you have to start keeping count of the moves you used: Empoleon resets your stats at 80% HP left and at 50% time left; they should happen very closely, but make sure you trigger both asap. Terastallize as you start using Calm Mind; 3 Calm Minds in a row and 2-3 Tera Blasts should be enough to reach the 80% HP treshold, while the time will pass regardless. The time-triggered one should activate first in my experience; you'll have to attack once or twice more to activate the second (it's not easy to see, but it should be slightly to the left of the mid-point between the left-most end of the shield and the 100% HP point).
Once you see the second player's reset (and probably Empoleon's stats reset too), you can start setting up again. The time bar should be at around 30-40% now, it may seem too little but should be enough. It's pretty straightforward from now on, 6x Calm Minds in a row (ideally you should not need to heal now) and then as many Tera Blasts as needed. The main difficulty now is that at some point, towards the end, Empoleon starts acting twice each turn; not too worrisome for your HP since you'll be beefed up by then, but it wastes precious time for nothing and there's a chance he'll use Ice Beam - which could freeze you. Just keep spamming A to attack and pray (I suggest putting Tera Blast in the first slot because of this).
I have won once with literally 0 time left, and once more with enough time bar to cover the clock symbol (so before you see the warning that the pokémon is collecting energy), so it's doable but may be scary. May need a couple of tries.
Also: I didn't pay too much attention to the NPCs except to avoid the ones with Intimidate, but if you're having a hard time you may want to reset some more for better ones: Sylveon has a move that can lower Empoleon's special attack; Umbreon, Drifblim, Arboliva, and Gardevoir can lower his special defense; Bellibolt can use Light Screen and paralyze even during the shield. If you need to go to these lenghts, I suggest checking the trick to keep the same NPCs for more than one raid, I should have the link in a past guide!
TL;DR: Skill Swap, Moonblast/Energy Ball/Psychic x2, die, Moonblast/Energy Ball/Psychic x1, terastallize, Calm Mind x3, Tera Blast x1-3, keep attacking until you're sure Empoleon reset your stat modifications TWICE, Calm Mind x6, Tera Blast xwhatever, be quick.
Pros:
-no DLC no version exclusives required
-any ability will do
-once you're terastallized you'll basically not die, very reliable
Cons:
-needs a tera type change
-lots of setting up + one inevitable K.O. will leave you very little time (unless you somehow manage to drop Empleon's special defense. I couldn't)
-you have to avoid some common NPCs
-crits and freezing are rare but can happen and they will ruin the entire run
I'll stop adding the screenshots because it's too many steps and I hope you guys believe me by now...
0 notes
Text
Every Pokemon move by how much it would take to make them a guaranteed hit
--Normal--
95% (Wide Lens)
Crush Claw
Cut
85-90% (Zoom Lens)
Double Hit
Giga Impact
Hyper Beam
Hyper Fang
Population Bomb
Present
Sonic Boom
Super Fang
Wrap
Barrage
Bind
Comet Punch
Double Slap
Fury Attack
Mega Punch
Rock Climb
Screech
Swagger
Tail Slap
Take Down
80% (Compound Eyes)
Fury Swipes
70-75% (Compound Eyes + Wide Lens)
Egg Bomb
Lovely Kiss
Mega Kick
Slam
55% (Gravity + Wide Lens)
Sing
Supersonic
30% (Do Not Use)
Guillotine
Horn Drill
--Fighting--
95% (Wide Lens)
Flying Press
Jump Kick
85-90% (Zoom Lens)
Axe Kick
Circle Throw
Hammer Arm
High Jump Kick
Sky Uppercut
Triple Kick
Rolling Kick
80% (Compound Eyes)
Cross Chop
Submission
70-75% (Compound Eyes + Wide Lens)
Focus Blast
50% (Gravity + Zoom Lens)
Dynamic Punch
--Flying--
95% (Wide Lens)
Aeroblast
Air Cutter
Air Slash
Floaty Fall
Fly
85-90% (Zoom Lens)
Dual Wingbeat
Sky Attack
Bounce
80% (Compound Eyes)
Bleakwind Storm
70-75% (Compound Eyes + Wide Lens)
Hurricane (Rain also works)
--Poison--
85-90% (Zoom Lens)
Poison Gas
Toxic (Being Poison-type works too)
80% (Compound Eyes)
Gunk Shot
70-75% (Compound Eyes + Wide Lens)
Poison Powder
Smog
--Ground--
95% (Wide Lens)
Drill Run
High Horsepower
Mud Shot
85-90% (Zoom Lens)
Bone Rush
Bonemerang
Bone Club
Mud Bomb
Precipice Blades
Sand Tomb
80% (Compound Eyes)
Sandsear Storm
30% (Do Not Use)
Fissure
--Rock--
95% (Wide Lens)
Diamond Storm
Rock Tomb
85-90% (Zoom Lens)
Meteor Beam
Rock Blast
Rock Slide
Rock Throw
Rock Wrecker
Rollout
Stone Axe
80% (Compound Eyes)
Head Smash
Stone Edge
--Bug--
95% (Wide Lens)
Fury Cutter
Pin Missile
String Shot
85-90% (Zoom Lens)
Skitter Smack
Megahorn
--Ghost--
90% (Zoom Lens)
Poltergeist
--Steel--
95% (Wide Lens)
Metal Claw
Steel Beam
85-90% (Zoom Lens)
Meteor Mash
Steel Wing
Gear Grind
Metal Sound
Mirror Shot
70-75% (Compound Eyes + Wide Lens)
Iron Tail
--Fire--
95% (Wide Lens)
Fire Fang
Sacred Fire
V-create
85-90% (Zoom Lens)
Blast Burn
Blaze Kick
Heat Wave
Overheat
Pyro Ball
Blue Flare
Fire Blast
Fire Spin
Will-O-Wisp
70-75% (Compound Eyes + Wide Lens)
Magma Storm
50% (Gravity + Zoom Lens)
Inferno
--Water--
95% (Wide Lens)
Razor Shell
Steam Eruption
Triple Dive
85-90% (Zoom Lens)
Aqua Tail
Crabhammer
Hydro Cannon
Clamp
Muddy Water
Octazooka
Origin Pulse
Whirlpool
80% (Compound Eyes)
Hydro Pump
--Grass--
95% (Wide Lens)
Chloroblast
Razor Leaf
85-90% (Zoom Lens)
Frenzy Plant
Leaf Storm
Leaf Tornado
Leech Seed
Matcha Gotcha
Sappy Seed
Power Whip
Seed Flare
Syrup Bomb
70-75% (Compound Eyes + Wide Lens)
Sleep Powder
Stun Spore
55% (Gravity + Wide Lens)
Grass Whistle
--Electric--
95% (Wide Lens)
Electroweb
Supercell Slam
Thunder Fang
85-90% (Zoom Lens)
Charge Beam
Thunder Cage
Thunder Wave
Bolt Strike
80% (Compound Eyes)
Wildbolt Storm
70-75% (Compound Eyes + Wide Lens)
Thunder (Rain also works)
50% (Gravity + Zoom Lens)
Zap Cannon
--Psychic--
95% (Wide Lens)
Glitzy Glow
85-90% (Zoom Lens)
Mystical Power
Psycho Boost
Psyshield Bash
Zen Headbutt
80% (Compound Eyes)
Kinesis
60% (Gravity)
Hypnosis
--Ice--
95% (Wide Lens)
Glaciate
Ice Fang
Icy Wind
85-90% (Zoom Lens)
Freeze Shock
Freezy Frost
Frost Breath
Ice Ball
Ice Burn
Ice Hammer
Icicle Crash
Triple Axel
Mountain Gale
70-75% (Compound Eyes + Wide Lens)
Blizzard (Hail/Snow also works)
30% (Do Not Use)
Sheer Cold
--Dragon--
95% (Wide Lens)
Spacial Rend
85-90% (Zoom Lens)
Draco Meteor
Dragon Tail
Dual Chop
Eternabeam
Roar of Time
Scale Shot
70-75% (Compound Eyes + Wide Lens)
Dragon Rush
--Dark--
95% (Wide Lens)
Baddy Bad
Night Daze
Snarl
85-90% (Zoom Lens)
Ceaseless Edge
Ruination
50% (Gravity + Zoom Lens)
Dark Void
--Fairy--
95% (Wide Lens)
Strange Steam
85-90% (Zoom Lens)
Fleur Cannon
Light of Ruin
Nature's Madness
Play Rough
Sparkly Swirl
80% (Compound Eyes)
Springtide Storm
70-75% (Compound Eyes + Wide Lens)
Sweet Kiss
10 notes
·
View notes
Text
Mari's Tera Raid Guide # 10 (if we count the palkia/dialga one) - Blaziken
Woohoo happy 10th guide! GUESS WHAT

BELLIBOLT AGAIN do you hate me yet
REDUCE
REUSE
RECYCLE
Bellibolt lv.100
Tera type: Electric
Ability: Electromorphosis
Item: Magnet
Nature: Modest (/Quiet)
IVs: all max except attack and speed
EVs: 252 sp.atk., the rest freely spread between HP, defense, special defense (252 defense more useful for this raid, 126-126 HP-defense second best)
Moveset:
-Parabolic Charge (egg move)
-Acid Spray (TM)
-Reflect (TM)
Usage:
I'm gonna copy-paste this Bellibolt very often, lol.
Unfortunately Blaziken has a scripted Swords Dance and Bulk Up. Earthquake and Low Kick can hit Bellibolt quite hard, making an Intimidate NPC (Arcanine, Staraptor, or Tauros) mandatory. (If you can find two, that's probably overkill. Go for it!)
You can survive easier if you throw a Reflect at the start of the battle, but it wears off after five turns and it might be difficult to renew. That's why we need something to Intimidate that chicken continuosly c: so that we can forget about defenses at some point.
You can alternate Acid Spray and Parabolic Charge, trying to stay alive as you work your way through Blaziken's life bar (remember that you will most certainly act slower, so keep that in mind when calculating when to use Parabolic Charge to attack+heal); or, the strategy I prefer, use 3 Acid Sprays in a row at the start of the battle, let Bellibolt faint, and when it comes back to life terastallize and start using Parabolic Charge like it's your last day on earth (no need to reapply Acid Spray after the reset, as long as the shield is down you should win in 4 more moves even at neutral sp.def.) (I like it because when Blaziken is at -6 sp.def. and Bellibolt is terastallized you can destroy the shield in ONE Parabolic Charge. However, you have to land all Acid Sprays before Blaziken does his single own stat modifications reset at 70% of his HP left, meaning that you can't use Parabolic Charge too soon or you'll end up triggering it. One KO is inevitable here. Also, in theory, specially offensive NPCs that can deal enough damage could trigger that scripted action too soon and ruin everything, but I haven't seen it - if it happens to you, try changing NPCs, favoring ones that have less special moves or are more defensive).
All in all a very quick battle once you've found the right setup. I won with a lot of time left
TL;DR: Drop a Reflect every 5 turns. Other than that, Acid Spray x3, die, come back, terastallize, Parabolic Charge spam. OR alternate Acid Spray (when you're at full or almost full HP) and Parabolic Charge (when you risk going under 50% HP in the next turn) according to situation.
Pros:
-come on I'm tired of repeating Bellibolt's pros every single time lol
Cons:
-NPC dependent
#gen 9#guides#tera raids#pokemon#pkmn#pokemon sv#blaziken#bellibolt#ah shit I missed the iron bundle raid. I was on a plane TT#will mari remember to add the screenshot at some point? bets are open
0 notes
Text
Thank goodness the palkia/dialga raids are 5☆, couldn't have dealt with another mewtwo fiasco.
Quick guide this time, them being lv. 75 makes them much easier to deal with and leaves more options to choose from; but they're still legendaries, so I'll drop some guidelines and a couple builds.
About both:
They're both dragon tera, both know Draco Meteor (only dragon type move of their set) and Fire Blast. They wipe the player's stats modifications and ability once at 80% HP left, and their own twice at 75% and 50% time left.
Draco Meteor can be exploited if you can survive it comfortably once (bring a non-fairy type with enough special defense/HP), let it hit you so the enemy's special attack goes down by its own and you only have to care about your offensive power.
However, since there are TWO enemy side stat wipes, and they are fairly close, you would have to survive a full-strenght Draco Meteor thrice!
The other way is to bring a fairy type and make your own special defense (via Calm Mind and Amnesia).
In any case, it's more efficient to buff your own statistics than debuff the enemy's.
DIALGA
Lots of coverage here, mainly in the form of Steel Beam (BAD news for fairies!). It also has a move that can lower your special defense (Earth Power) and a once-per-battle scripted Iron Defense.
It looks incredibly hard to beat on paper, but in reality it's still only lv. 75 and can be done with a common all-purpose Azumarill (you know the one: fairy tera, max attack & HP, huge power, shell bell, belly drum + play rough? Remember to teach it or make it remember Amnesia)
The trick is to NOT terastallize. It'll be a bit slower, but Steel Beam hurts a lot when you lose the resistance from the water typing and maybe it was me but it kept critting >:(
Instead, use Amnesia at the start of the battle, attack until the shield goes up (NO Belly Drum before that), Amnesia again - possibly 2-3x, then check how much life you've got left and see if you can slip a Belly Drum before attacking with Play Rough.
Keep in mind that you will probably die at some point (not gamebreaking, I won after fainting twice in the same try so it's doable) and if you do you have to reapply at least one Amnesia each time you come back. On the other hand you don't need to use Belly Drum, because Dialga will have a preference for Steel Beam which, while strong, also hurts the user - you can literally spend the entire duration of the shield setting up and watching it go down by itself.
Use healing cheers sparingly, keep them in case you get burned by Fire Blast, or for when you're done maxing out your attack and special defense but you risk going k.o. and the Shell Bell won't heal you enough.
You could try Leftovers instead, too. It's a bit more annoying but the healing is better (and not dependent on how much damage you deal, which is not a whole lot, this time...)
Azumarill can also learn Light Screen via TM, forgot about it so I can't say how efficient it would be and when to use it, but could def help
All in all not the cleanest solution in my repertoire, but I would hope everyone and their mother has a raid-grade Azumarill by now u-u
PALKIA
Would have loved to use Azumarill on this one as well, but it has Thunder (AND Rain Dance) so no can do.
Great results with Florges, though (which is nice since there are event mass outbreaks of Flabebe rn). Any other pure fairy type with good special bulk and access to Calm Mind (OR both Amnesia and Nasty Plot/Swords Dance/Belly Drum, depending on which offensive stat is higher) and Moonblast (or whatever other strong fairy type move your pokemon of choice can learn) will do. Other strong contenders we didn't try are Sylveon, Clefable (especially with Magic Guard!) and maybe Scream Tail.
Palkia, too, between Draco Meteor, Fire Blast, Hydro Pump, and Thunder, has great supereffective coverage, but thankfully they all only hit fairy neutrally. Just need enough special defense to tank everything.
Our Florges had 252 EVs in special defense and special attack (and 4 in HP), a Shell Bell, and only ended up using Calm Mind and Moonblast. Sylveon-Clefable-Scream Tail would use the exact same build of course.
They're less common pokemon to have for raids (unless that was your choice for the Charizard event), but once they're ready the battle is extremely easy. Use one single Calm Mind at the start of the battle, Moonblast until your stat modifications get nullified, now use 6x Calm Mind, terastallize if you can (if not use more Moonblast(s) to charge), and simply more Moonblasts until Palkia goes down.
You can use a healing cheer if you end up paralyzed by Thunder, but there's plenty of time so you can even ignore it and let your walking bouquet miss a couple of turns, without fear of being kicked out. You can 100% ignore burns from Fire Blasts too, as it doesn't have any effect on your special attack and you heal much much faster than the chip damage it deals.
If you want to be safer you can bring moves like Draining Kiss, Wish, or Synthesis for emergency healing, but again you could literally do this battle with 2 moves only >:)
More info
Other useful things you may want to know.
-the natures seem fixed (Quiet for Dialga, Modest for Palkia). The IVs apparently not, though. They will have 4 stats at random with max IVs, and the other 2 with random IVs. I didn't reset a lot but I think the IV spread is fixed as long as the location is (in other words: if you're looking for a different IV spread, you have to change the date - or wait for it to change by itself. If you save in front of the den - or, really, anywhere - the IV spread is fixed again, and needs another date change to change again). Keep it in mind if you're looking for certain stats.
-they do not have their signature moves yet (will learn them at a higher level)
-their ability is basically useless in these raids, so pretend they don't have one
-I didn't mention that Dialga also has Trick Room (it actually works to your favor if you bring Azumarill, but only for the first 5 turns) and Stealth Rock (deals some damage upon reentering from a ko, not much of a problem unless you bring like. A Talonflame. Do not bring a Talonflame).
-advanced trick for Dialga: if you think you're going to die on the next turn (let's say you are at 10HP left, no sp.def. boost, and you can't be sure Heal Up will bring you back to over half HP): you try and terastallize. If you're lucky, Dialga will kill you with Steel Beam instead of Earth Power or Fire Blast, and the doubled damage to you (because of your type change) will mean double recoil damage to itself. If you're EXTRA lucky and Azumarill acts first you can also get more direct damage from a tera-boosted Play Rough. Not a game changer but anything helps!
-Dialga again (sorry that's the one from the version I own so I had more time to mess with it, lol): Dudunsparce, Umbreon, BELLIBOLT, and Mudsdale npc allies are... not as necessary as with Mewtwo, but definitely very very welcome
4 notes
·
View notes
Text
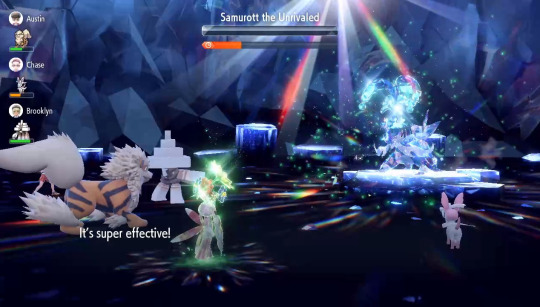
Mari's Tera Raid Guide #8 - Hisuian Samurott
Oh man, I shouldn't have said the last raids were easy. This one was a lot of pain
I come offering a solution in the shape of HA Lurantis, but it needs some specific NPCs to work. More under the cut
[usual reminder that I more than happily lend my pokèmon via Home to anyone who asks]
Lurantis lv. 100
Tera type: Grass
Ability: Contrary (hidden)
Item: Shell Bell
Nature: Impish/Relaxed/Lax (made it work with Adamant/Brave/Naughty but it's worse)
IVs: max HP, atk, def
EVs: 252 atk, 252 def, 4 HP
Moveset:
-Solar Blade (level up)
-Sunny Day (level up)
-Superpower (egg move) (PP up x1-3 optional but recommended)
-Worry Seed (egg move)
There are a lot of moving parts in this raid, and we have to be mindful of everything. First of all, the NPC partners.
We need AT LEAST one pokémon with Intimidate (Arcanine, Tauros, Staraptor)
One intimidator is NECESSARY (without it, you will ALWAYS die without even having the time to attack once. With only one Intimidate user in the roster you still have a chance of dying, but it's mostly due to RNG; if that happens, run from the raid - or let the time run out - and try again)
In addition, if you feel like resetting a bit more, you could look for one or more of the following:
-Arboliva (very welcome ability that heals you every turn and boosts Solar Blade's damage output by a good bit)
-one or both of the remaining Intimidate users
-a paralyzer (Dudunsparce, Umbreon, Bellibolt)
It's not that important to have good NPCs other than the one with Intimidate, but if you really want to have more control over them you can check this video with instructions for keeping the same set of NPCs (it's a Mewtwo raid video, but it has the instructions in the first 45 seconds or so. The trick itself works with any raid)
Usage:
Lurantis is weak to X-scissor. And it will always be the first of H. Samurott's moves after the scripted Swords Dance. There's a chance (don't ask me about % I don't do that) that it will OHKO you before you act; if that's the case, run from the raid and retry, it's so buggy that dying right now will make the raid unwinnable with this strategy. ¯\_(ツ)_/¯
Anyway, your first move will be Worry Seed, to take Samurott's stupidly op ability out of the equation for the rest of the battle. If you survive the turn, it will be with like 5-20 HP and there's a really good chance you're fainting right after that to the scripted Bulldoze; if not, it will be the following turn. Make your peace with it, and try not to waste a Superpower PP or a cheer on turn 2, it won't help you. Use a Solar Blade instead. Incidentally, the timing of this KO lets you skip the effects of the first player's stats wipe, which is good!
Once you're back in play, use 3 Superpowers to both charge the tera orb and boost your attack and defense. Don't do any more, it's not needed and you risk dying to a stray critical hit. Heal with the cheer if you need to (this is probably the most delicate phase of the raid, after turn 1), then use Sunny Day, heal again if you're at give or take 1/4HP or less, and only then terastallize and do some Solar Blades to break the shield (took me 3 of those on all tries).
When the shield is down, keep an eye open for the second player 's stats wipe. If it doesn't happen immediately, you should still have a turn of sun and you can drop an extra Solar Blade just because (DO NOT USE SOLAR BLADE WITHOUT THE SUN); when you get your stat modifications reset, DO NOT USE SUPERPOWER ON THE SAME TURN! The other effect is that your ability gets nullified for a turn, and if you use Superpower without Contrary active you will end up debuffing yourself - don't do that. In any case, the NPC(s) with Intimidate, by fainting and coming back, will have lowered Samurott's attack enough that you can afford a couple of turns without raising your defense. Use a cheer on this turn, whichever you want, or another Solar Blade but only if the strong sun is still up.
When you're sure Contrary is back in play, use 2 more Superpowers, then reapply Sunny Day. I didn't have to heal during this phase, but never say never. Once that's done, 3 more Solar Blades should be sufficient to win.
TL;DR: Worry Seed, die (or use Solar Blade while you wait to die), Superpower x3 (with Heal Up cheer if needed), Sunny Day, 1 more Heal Up if needed, terastallize, Solar Blade until the shield is broken and your stat boosts are up; a random cheer on the player stats wipe turn, then Superpower x2-3, Sunny Day, Solar Blade spam (usually 3x).
Other options:
You could probably use a less powerful physical grass-type attack in place of Solar Blade, something like Leaf Blade, to avoid depending on Sunny Day. And sub Sunny Day (which would now be useless) with Swords Dance or Synthesis. Superpower and Worry Seed aren't optional though.
Pros:
-pokémon available in both versions, base game
-easy tera type
-if you survive the first turn, it's a pretty easy battle and faster than average for a 7☆ raid
Cons:
-hidden ability
-NPC dependent
-you're supposed to faint once and it can be scary.
0 notes
Text
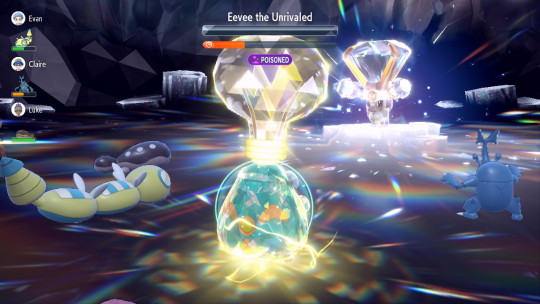
Mari's Surprisingly Early Tera Raid Guide #7 - Eevee a.k.a small marketable mammal from hell: part 2 non-electric boogaloo
Tbf I was excited to bring something different this time; Lucario looked very good on paper but, bless his soul, not enough bulk. If that sounds ridiculous it's because it is.
Good news is that we get to reuse an old friend for this raid! No need to train anything new. If you still don't have a raider Bellibolt I'm judging you. (Yet, you can borrow from me any time)
Bellibolt lv.100
Tera type: Electric
Ability: Electromorphosis
Item: Magnet
Nature: Modest (/Quiet)
IVs: all max except attack and speed
EVs: 252 sp.atk., the rest freely spread between HP, defense, special defense (this one raid in particular calls for more HP and defense, but not enough to spend time and consumables on an already trained mon)
Moveset:
-Acid Spray (TM)
-Parabolic Charge (egg move)
-Mud Slap (level up)
-Electric Terrain (level up)
This Eevee is something, yall.
2x player stat wipes (8 and 40% remaining HP), 2x eevee stat wipes (95 and 65% remaining HP), one tera charge theft, lots of attack debuffing, and most of all SHIELD FROM START TO FINISH (= less damage, no status moves that target the enemy, for the entire duration of the battle).
As for the NPCs, I made it comfortably with the worst possible set of them, but if you think it would make your life easier you could try to reset once or twice for ones with Intimidate or Arboliva (only if you don't plan on using Electric Terrain though) or the other Bellibolt (for paralysis). Arcanine is probably the best NPC ally you can get for this raid (Intimidate + chance of burn).
Usage:
Now, given the timing of the stat modifications resets, it's easier to focus on debuffing Eevee more than on buffing yourself, because the first one is so early that it's virtually useless. It's as if it only happened once >:)
Your first turn will, thus, be used on any damaging move - Parabolic Charge, Acid Spray, Mud Slap, really whatever - to trigger the first of Eevee's resets, then my strategy was:
-between 1st and 2nd reset (95-65% Eevee's HP): 1x Mud Slap, as many Acid Spray I could safely do without risking KO (max 3) (keep in mind Eevee is probably faster), healing via Parabolic Charge or Heal Up cheer if in danger, terastallize ASAP, Electric Terrain (optional), and Parabolic Charge spam till the end of the phase;
after 2nd reset (65% Eevee's HP - end): 1x Mud Slap again, Acid Spray x3 again (with a Parabolic Charge in the middle if Bellibolt's HP is dangerously low), Electric Terrain (optional), Parabolic Charge spam.
As you can see it's pretty straightforward, just the same order of moves repeated twice; the biggest challenge is in being able to time your setting up and your healing well enough that you don't waste time healing with an underpowered Parabolic Charge nor wait too much to heal and watch your frog die because you forgot the enemy would attack first.
It's not too hard anyway, Eevee only lowers your attack (which is unused on a special attacker) and she only deals slightly less than 1/3 of Bellibolt max HP of damage with each attack even with her most powerful attack.
Other Options:
Mud Slap and Electric Terrain weren't particularly game-changing. You can sub one or both with Reflect or Light Screen (both from TMs) for better defenses, particularly if you have a Bellibolt that was trained to be more specially defensive (Eevee's most powerful attack is Double-Edge, and has slightly more attack than special attack) and you don't want to waste stuff rearranging its EVs. Just slap a Reflect on it and call it a day.
Basically any combination of Mud Slap/Electric Terrain/Reflect/Light Screen will work, choose the one you vibe the most with. I chose Mud Slap because while not so reliable but it brings a chance to evade both physical and special moves, and Electric Terrain just because (didn't do the math but pretty sure ET doesn't do anything that one more turn of Parabolic Charge couldn't).
TL;DR: any damaging move x1, Mud Slap x1, Acid Spray x3 (with healing - either Parabolic Charge or Heal Up cheer - if needed), terastallize asap, Parabolic Charge x however many are needed to trigger the 65% HP Eevee stats wipe; then repeat Mud Slap x1, Acid Spray x3 (with healing from Parabolic Charge if needed), Parabolic Charge until end.
Electric Terrain optional (best used right after each set of Acid Sprays)
Pros:
-old friend means no time spent on training a new mon!
-if you didn't have it before, it's very easy to obtain
-I can't keep repeating this frog's pros each time I use it in a guide, go check the others if you must
Cons:
-will probably attack last and doesn't have extremely reliable def/sp.def boosting moves, so your eyes must always be on Bellibolt's HP. Takes a bit of art to choose which move to use while setting up, and it changes each time depending on Eevee's accuracy.
#pkmn#pokemon#pokemon sv#tera raids#guides#gen 9#eevee#bellibolt#eevee raid#surfing pikachu was harder tbh
0 notes
Text
*full shield* AHAHAHAH ok time to make it work
*Checks news* *normal tera eevee*
"Oh that's too easy" and now that I've said that it's gonna be like that hard af surfing pikachu, The Small Marketable Mammal From Hell part 2 Non-Electric Boogaloo. It can't be that bad, can it?
We shall see.
#at least it's pretty straightforward#a special attacker with good buffs/debuffs will do. possibly fighting type#and here I was wondering if I could skip one...
2 notes
·
View notes
Text
Most of the time, you want to bring your best to a raid battle.
And then there's Ditto, where the goal of the host is to be useless.
#the flaming rage when host brings their azumarill to a 6* ditto raid#this is true for solo raids too btw. bring a lv.1 with no damaging moves - better if something like tail whip
3 notes
·
View notes
Text
*Checks news* *normal tera eevee*
"Oh that's too easy" and now that I've said that it's gonna be like that hard af surfing pikachu, The Small Marketable Mammal From Hell part 2 Non-Electric Boogaloo. It can't be that bad, can it?
We shall see.
2 notes
·
View notes
Text
Back after winning with a Whiscash! Cheaper than Vaporeon (by virtue of 50% Chance of Getting One With The Right Tera Type From An Egg), bit slower but it works.
Build under the cut as usual
Whiscash lv.100
Tera type: Water
Ability: Hydration (hidden)
Item: Shell Bell
Nature: Adamant (/Lonely)
IVs: max in HP, atk., sp.def. (speed? not sure if necessary)
EVs: 252 atk., 252 sp.def., 4 HP
Moveset:
-Amnesia (level up)
-Rain Dance (TM)
-Liquidation (TM)
-Dragon Dance (TM)
Usage:
This poor fish has overall worse stats than Vaporeon, especially for a battle like this that calls for more specialized stat distributions. But it is cheaper to obtain in certain situations (if you have a Barboach-Wiscash with its hidden ability but not the right tera type you can just breed it, and no need for a water stone), and it solves its strenght issue brilliantly by having access to ✨Amnesia✨
The other issue is that it has better physical options (because of Dragon Dance and Liquidation) so it MUST be under the rain always. You can't afford to attack while burnt!
The strategy doesn't differ that much: set up, charge orb, set up again, terastallize and spam offensive move. Also make it rain. Except, because of the weaker defenses, we gotta Amnesia x2 each time to be really safe. The order of moves will look like this:
Amnesia on turn 1, Rain Dance on turn 2 (if it hasn't happened yet, wait a few instants for Sunny Day. GO AFTER), Amnesia again on turn 3, then for now do Liquidation x4 to charge the tera orb (but heal with the cheer if you start going too low on HP - like, if you hit 1/5 or 1/4 of total health - and take a turn to reapply the rain immediately after it stops, so this step will take more than 4 turns).
Terastallize and use Liquidation again if you haven't reached any important threshold, but use 2 more Amnesia once your stat boosts get nullified, and now you can add 1-2 Dragon Dances (I only used one because I got lucky w/ Liquidation's defense drops) (keep checking your HP while you set up, this is probably the most delicate stage) and again Rain Dance after the second Sunny Day. And then Liquidation until you win. Won't take long :)
TL;DR: Amnesia-Rain Dance-Amnesia, Liquidation x4 with a healing cheer (if needed) and a Rain Dance (wait for the rain to stop) in the middle, terastallize, Liquidation until you wait for the player-side stat wipe, immediately reapply 2x Amnesia and 1-2x Dragon Dance in this order (heal in the middle if needed), Rain Dance after second Sunny Day, Liquidation spam.
Pros:
-you will literally grow tired of seeing Barboach and Whiscash in the wild
-this time the tera type is easier to obtain!
-amnesia makes it bulky faster than Calm Mind
-Liquidation has built-in defense drop... if you're lucky.
-after you're done setting up, you're actually getting very little damage. And you still don't need to max anything
Cons:
-still needs the HA (I can trade a hatchling with it for free)
-meh stats. they're distributed more evenly but since we only need 4 out of 6 we could have used something more specialized
-much slower so you only get to act fast after you Dragon Dance, or if Typhlosion gets paralyzed/slowed down by an npc or the game starts bugging(very likely)
-slower to set up (will die if you don't take your time)
-needs rain more often
-kinda ugly. Sorry it needed to be said 😞
I forgot to take a screen [imagine picture of levitating fish triumphing over sopping wet honey badger]
Mari's Surprisingly Early Tera Raid Guide #uhhhlemmecheck6 - Hisuian Typhlosion
Heeeeeey people sorry for the radio silence I've been busy trying to solo the Mewtwo raid (failed)(fuck Nintendo) and then I skipped the Hisuian Decidueye post too because I downloaded the data like in the last 5 minutes, I figured it would be too late to make a guide. Maybe if they run it again.
Anyway! Post-Mewtwo raids all seem too easy. Vaporeon time! (But let me tell you I was considering many many more options that I think would be viable, will reblog if I find the spoons to try something else)
[Beware: I edited the post after some more tries, I found a simpler and faster strategy]
Usual reminder that the pokémon I used for this guide is available to borrow for free to anyone who asks (Pokémon Home needed - both on Switch and mobile)
Vaporeon lv.100
Tera type: Water
Ability: Hydration (hidden)
Item: Shell Bell
Nature: Modest (/Quiet/Mild in a pinch)
IVs: max in HP, sp.atk., sp.def.
EVs: 252 sp.atk., 252 sp.def., 4 HP
Moveset:
-Surf (TM)
-Rain Dance (TM)
-Calm Mind (TM)
-Wish (egg move) (I ended up only using two healing cheers instead, but might as well have a full moveset)
Usage:
So, the nice thing about H. Typhlosion is that he doesn't mess with stats. He still wipes stat modifications on both sides, but only once, and can't boost his own stats nor drop yours.
The Sunny Day + Will-O-Wisp + Flamethrower + Infernal Parade (x2 damage when you have a status condition) looks scary, but it's all special damage that can be heavily mitigated with some simple boosts on your part. Noice
Oh, I should mention that serebii.net has started listing all the scripted actions of event raid mons, so give it a look! Extremely useful!
Anyway, back to our raid. What we have to look out for is Sunny Day - luckily for us it's a scripted move, it will happen at 95% of the time bar (so ~turn 2) and once more at 40% of the time bar.
We want to keep the rain on as long as possible, because it activates Vaporeon's ability (Typhlosion's AI seems to prioritize keeping you burnt, and rain + Hydration neutralizes it) AND completely flips the power balance in our favor, BUT since the first Sunny Day will not be in the first turn, it's actually better to open with a Calm Mind and wait for the sun to go up before our first Rain Dance. Just so we don't waste two turns in a row playing with the weather, you know.
Once it's raining we're basically safe - the only move that's still worrisome is Focus Blast, and only because it can lower your sp.def. but it won't happen too often.
THUS don't bother getting your special stats up to the max, I find that the single one from the opening is enough. Get your 4 Surfs in (for the tera orb, counting one more because Typhlosion steals your charge once).
Less special attack on the Vaporeon is actually helpful here: you deal enough damage to recover reliably with Shell Bell, and not enough to trigger the shield until ~3 Surfs are done.
You can reapply Rain Dance if the rain stops much sooner than the 40% time threshold, but it's not heavily needed, depends on how lucky you've been until now.
Just keep an eye open for the scripted player-side stat reset (drop everything and do 1-3 more Calm Mind, heal when you need to either with Wish-Heal Up or from using Surf if you're already terastallized) and the second Sunny Day (drop everything and reapply rain). When you are ready and terastallized and with more than half HP, start spamming Surf and don't look back.
TL;DR: Calm Mind x1, Rain Dance right after his Sunny Day, Surf (x4 or more) and heal (Wish or Heal Up cheer as needed), terastallize when possible, Rain Dance after 2nd Sunny Day, Calm Mind x3 (+ healing as needed) after Vaporeon's stats are reset, Surf until KO.
OTHER OPTIONS:
Wish is a fancy move but not so easy to use, and you can use the healing cheer just as effectively (in this battle).
Instead of Wish, one could use Fake Tears (TM) to harshly drop Typhlosion's sp.def. but, since it doesn't work when he's shielded, it must be done after Typhlosion's negative stat wipe (85% time) and before the shield goes up (either 70% time or 60% time remaining, whichever comes first).
That is the time you'd use Surf to charge the tera orb in the strategy above, so this means that you're delaying the terastallization (and counting exclusively on cheers to heal) in exchange for more attack power. It's very likely that you will deal so much damage, after 3 Fake Tears, that you won't even need to terastallize, but you have to pay more attention to your health.
Pros:
-no DLC no transfer no trading required
-great special bulk
-also enough special attack to never need a full boost to any stat
Cons:
-the fact that it requires both the HA and a tera type that's not one of the native types of the first evo stage (Eevee) means that (unless you got very lucky with tera dens) you either have to use an Ability Patch or 50 water tera shards (I'd choose the shards,annoying to farm but less rare)

Afterword (feel free to skip): this one was really easy. I think there's a lot of space for playing around with other pokémon. I went with Vaporeon because it was one of the more common ones and I gave priority to those that can be found in the base game, but it's not the only one, and I think I can give some suggestions :)
The biggest threat is - unusually - Will-O-Wisp, because it makes the ghost type STAB move twice as strong and you can't even bring a normal type for this fight (unless you like being Focus Blasted in the face). And yeah of course you don't want anything weak to fire in general...
Water types look good. As long as you have rain and the means to boost both your special defense (or drop enemy's special attack) and boost your attack/special attack (or drop enemy's defense/special defense), you're basically done. Physical attackers also need some burn protection, be it from Water Veil or Hydration; special attackers appreciate it but if they have enough special bulk and can withstand the stronger Infernal Parade they can even do without. I wouldn't try Misty Terrain on them though, you already have another field thing that lasts 5 turns to keep track of (rain). (Best bets imo: Whiscash, but maaaaybe if you're lucky you can get away with Dondozo, Tatsugiri, Basculegion(F), Clawitzer, Lumineon, Milotic...? Gastrodon? probably the legendaries too)
Fire types look good on paper but you need to terastallize them to another type if you want to break the shield. I suggest tera ground, and Flash Fire as the ability. But whatever you use here probably has no good ground-type move and needs Tera Blast which is... mid. (If I had to take a guess, I'd say the ones with a chance would be Rapidash-Ninetails-Flareon-Arcanine(Kanto), and maaaaaybe Armarouge-Ceruledge-Typhlosion(Johto))
Guts may be an option? But idk, all mons with that ability look like poor counters...
Dachsbun's Well-Baked Body also looks fun (throwback to that time I used it against Johtonian Typhlosion! It would be so funny if it worked LOL but it would need yet another tera type change, fairy on fire is eh)
Misty Terrain... I was this close to transfer a Galarian Weezing with its HA but then I gave up because, as I said, priority to easily obtainable pokemon. Not everyone has swsh. Other Misty Terrain users don't look too promising because they're almost all fairy types and again, probably gotta change tera type unless you can power through the shield without super effective moves, ahah
Magic Bounce has a similar problem. All available pokemon with it are psychic types and thus weak to ghost. I guess maybe Hatterene if you give her looooots and lots of special defense?
Walking Wake looks interesting, but I can't see anything in its arsenal to raise its special attack or lower the enemy's special defense... might still make it, who knows
#tera raids#pokemon sv#guides#gen 9#typhlosion#hisuian typhlosion#typhlosion hisui#self reblog w addition
10 notes
·
View notes
Text
Mari's Surprisingly Early Tera Raid Guide #uhhhlemmecheck6 - Hisuian Typhlosion
Heeeeeey people sorry for the radio silence I've been busy trying to solo the Mewtwo raid (failed)(fuck Nintendo) and then I skipped the Hisuian Decidueye post too because I downloaded the data like in the last 5 minutes, I figured it would be too late to make a guide. Maybe if they run it again.
Anyway! Post-Mewtwo raids all seem too easy. Vaporeon time! (But let me tell you I was considering many many more options that I think would be viable, will reblog if I find the spoons to try something else)
[Beware: I edited the post after some more tries, I found a simpler and faster strategy]
Usual reminder that the pokémon I used for this guide is available to borrow for free to anyone who asks (Pokémon Home needed - both on Switch and mobile)
Vaporeon lv.100
Tera type: Water
Ability: Hydration (hidden)
Item: Shell Bell
Nature: Modest (/Quiet/Mild in a pinch)
IVs: max in HP, sp.atk., sp.def.
EVs: 252 sp.atk., 252 sp.def., 4 HP
Moveset:
-Surf (TM)
-Rain Dance (TM)
-Calm Mind (TM)
-Wish (egg move) (I ended up only using two healing cheers instead, but might as well have a full moveset)
Usage:
So, the nice thing about H. Typhlosion is that he doesn't mess with stats. He still wipes stat modifications on both sides, but only once, and can't boost his own stats nor drop yours.
The Sunny Day + Will-O-Wisp + Flamethrower + Infernal Parade (x2 damage when you have a status condition) looks scary, but it's all special damage that can be heavily mitigated with some simple boosts on your part. Noice
Oh, I should mention that serebii.net has started listing all the scripted actions of event raid mons, so give it a look! Extremely useful!
Anyway, back to our raid. What we have to look out for is Sunny Day - luckily for us it's a scripted move, it will happen at 95% of the time bar (so ~turn 2) and once more at 40% of the time bar.
We want to keep the rain on as long as possible, because it activates Vaporeon's ability (Typhlosion's AI seems to prioritize keeping you burnt, and rain + Hydration neutralizes it) AND completely flips the power balance in our favor, BUT since the first Sunny Day will not be in the first turn, it's actually better to open with a Calm Mind and wait for the sun to go up before our first Rain Dance. Just so we don't waste two turns in a row playing with the weather, you know.
Once it's raining we're basically safe - the only move that's still worrisome is Focus Blast, and only because it can lower your sp.def. but it won't happen too often.
THUS don't bother getting your special stats up to the max, I find that the single one from the opening is enough. Get your 4 Surfs in (for the tera orb, counting one more because Typhlosion steals your charge once).
Less special attack on the Vaporeon is actually helpful here: you deal enough damage to recover reliably with Shell Bell, and not enough to trigger the shield until ~3 Surfs are done.
You can reapply Rain Dance if the rain stops much sooner than the 40% time threshold, but it's not heavily needed, depends on how lucky you've been until now.
Just keep an eye open for the scripted player-side stat reset (drop everything and do 1-3 more Calm Mind, heal when you need to either with Wish-Heal Up or from using Surf if you're already terastallized) and the second Sunny Day (drop everything and reapply rain). When you are ready and terastallized and with more than half HP, start spamming Surf and don't look back.
TL;DR: Calm Mind x1, Rain Dance right after his Sunny Day, Surf (x4 or more) and heal (Wish or Heal Up cheer as needed), terastallize when possible, Rain Dance after 2nd Sunny Day, Calm Mind x3 (+ healing as needed) after Vaporeon's stats are reset, Surf until KO.
OTHER OPTIONS:
Wish is a fancy move but not so easy to use, and you can use the healing cheer just as effectively (in this battle).
Instead of Wish, one could use Fake Tears (TM) to harshly drop Typhlosion's sp.def. but, since it doesn't work when he's shielded, it must be done after Typhlosion's negative stat wipe (85% time) and before the shield goes up (either 70% time or 60% time remaining, whichever comes first).
That is the time you'd use Surf to charge the tera orb in the strategy above, so this means that you're delaying the terastallization (and counting exclusively on cheers to heal) in exchange for more attack power. It's very likely that you will deal so much damage, after 3 Fake Tears, that you won't even need to terastallize, but you have to pay more attention to your health.
Pros:
-no DLC no transfer no trading required
-great special bulk
-also enough special attack to never need a full boost to any stat
Cons:
-the fact that it requires both the HA and a tera type that's not one of the native types of the first evo stage (Eevee) means that (unless you got very lucky with tera dens) you either have to use an Ability Patch or 50 water tera shards (I'd choose the shards,annoying to farm but less rare)
Afterword (feel free to skip): this one was really easy. I think there's a lot of space for playing around with other pokémon. I went with Vaporeon because it was one of the more common ones and I gave priority to those that can be found in the base game, but it's not the only one, and I think I can give some suggestions :)
The biggest threat is - unusually - Will-O-Wisp, because it makes the ghost type STAB move twice as strong and you can't even bring a normal type for this fight (unless you like being Focus Blasted in the face). And yeah of course you don't want anything weak to fire in general...
Water types look good. As long as you have rain and the means to boost both your special defense (or drop enemy's special attack) and boost your attack/special attack (or drop enemy's defense/special defense), you're basically done. Physical attackers also need some burn protection, be it from Water Veil or Hydration; special attackers appreciate it but if they have enough special bulk and can withstand the stronger Infernal Parade they can even do without. I wouldn't try Misty Terrain on them though, you already have another field thing that lasts 5 turns to keep track of (rain). (Best bets imo: Whiscash, but maaaaybe if you're lucky you can get away with Dondozo, Tatsugiri, Basculegion(F), Clawitzer, Lumineon, Milotic...? Gastrodon? probably the legendaries too)
Fire types look good on paper but you need to terastallize them to another type if you want to break the shield. I suggest tera ground, and Flash Fire as the ability. But whatever you use here probably has no good ground-type move and needs Tera Blast which is... mid. (If I had to take a guess, I'd say the ones with a chance would be Rapidash-Ninetails-Flareon-Arcanine(Kanto), and maaaaaybe Armarouge-Ceruledge-Typhlosion(Johto))
Guts may be an option? But idk, all mons with that ability look like poor counters...
Dachsbun's Well-Baked Body also looks fun (throwback to that time I used it against Johtonian Typhlosion! It would be so funny if it worked LOL but it would need yet another tera type change, fairy on fire is eh)
Misty Terrain... I was this close to transfer a Galarian Weezing with its HA but then I gave up because, as I said, priority to easily obtainable pokemon. Not everyone has swsh. Other Misty Terrain users don't look too promising because they're almost all fairy types and again, probably gotta change tera type unless you can power through the shield without super effective moves, ahah
Magic Bounce has a similar problem. All available pokemon with it are psychic types and thus weak to ghost. I guess maybe Hatterene if you give her looooots and lots of special defense?
Walking Wake looks interesting, but I can't see anything in its arsenal to raise its special attack or lower the enemy's special defense... might still make it, who knows
#pkmn#pokemon#pokemon sv#tera raids#guides#gen 9#sv#typhlosion#hisuian typhlosion#typhlosion hisui#with the reviewed strategy I won more or less with the same remaining time but only bc of a lot of bad luck#focus blast kept critting and I had to heal too often TvT which was still just twice#I forgot to teach him wish so I went into battle and won with 3 moves
10 notes
·
View notes
Text
Experimented a bit, here to report.
Tried: Hisuian Goodra, Skeledirge, Ceruledge, Mimikyu, Galarian Slowbro, Iron Hands, was gonna try my luck with Farigiraf but then I noticed its moveset does not include decent defense boosters, so I gave up preemptively.
Of these, the only one who succeeded was Skeledirge, but it wasn't much easier than with Bellibolt. Will leave the build down here just for the sake of completion :)
(I'd still like to try with some other poison types if I have the time - particularly looking at Muk, Swalot, Glimmora, Revavroom, Overqwil)
Skeledirge lv.100
Tera type: Fire
Ability: Unaware (hidden)
Item: Shell Bell
Nature: Modest (/Quiet/Rash will do)
IVs: max HP, def., sp.atk., sp.def.
EVs: 252 defense, 252 special attack, 4 HP
Moveset:
-Torch Song (level up) (PP Up recommended)
-Fire Blast (level up)
-Sunny Day (TM)
-Slack Off (egg move, see Slakoth & Hippopotas lines)
Usage:
the cool thing about Skeledirge is that its hidden ability, Unaware, makes it ignore the opponent's stat changes, meaning that you only have to worry about Rillaboom's raised attack when he wipes your stat changes, which is when he also locks your ability for one turn.
Great typing makes it immune to normal and fighting type moves (3 moves in Rillaboom's set, including the one that paralyses!), resistant to grass, and only neutral to flying. Acrobatics is one of the least powerful of the bunch in this fight, so yay us.
Given all of that, Intimidate-having NPCs are less important (yet still useful for that single turn), Arboliva is actually beneficial since we're not getting attacked with grass moves so often and it brings some extra healing, and paralyzing/burning allies are even better.
The trick is to increase Skeledirge's special attack via continuos Torch Songs, but only after the player-side stat wipe. We still have to use Torch Song to bring his health down enough to trigger that, so start attacking. IMPORTANT do not terastallize as soon as you can, wait a minute.
Once the shield is up and you see Rillaboom reset your stat changes and nullify your ability, play safe by using 1-2 defensive cheers, then hold your horses and start building you special attack up by using Torch Song 6 times. This is the critical part, because since Rillaboom is shielded and you're not terastallized, you're inflicting less damage and thus healing less with Shell Bell. When you find yourself in the 100-130 HP left range, use Slack Off to heal. Probably gonna be 2 times.
Once you have the +6 special attack bonus, Slack Off once again if you're around half life or less, use Sunny Day, and ONLY NOW terastallize. The reason we didn't do that before is that by becoming a pure fire type we lose immunity to a lot of moves and, while Boomburst isn't that worrisome, Low Kick hits Skeledirge quite hard, and Body Slam does that plus chance of paralysis. And we want to keep the number of wasted turns to a minimum.
Once that's done, no need to set up anything else, start Fire Blasting. You basically won't need to heal anymore too, since you're now dealing big damage >:) the worst that can happen is you fail because of accuracy, and that CAN make you lose the battle, but less powerful moves weren't enough when I tried. Middle risk high damage strategy. You could try to spam Torch Song and bring Blast Burn(TM) to use for a last-turn-only damage burst, but I haven't done that so I can't vouch for it. Overheat sounds good but you'd still have to use more Torch Songs after that to make up for the loss of special attack.
TL;DR: Torch Song, until Rillaboom nullifies your stat changes, then 2x Hang Tough cheers + 6x Torch Song interspersed with Slack Offs when low HP (100-130), Sunny Day, terastallize after Sunny Day, then Fire Blast until end.
Pros:
-available in the game natively
-no need to change the tera type
-less dependent on allies, so less time spent on resetting
-you'll be done setting up before the shield is down, and it's a bit easier to survive after that
Cons:
-hidden ability and can't be found in tera dens (yet), so you either need an ability patch or to know someone who can breed you one
-starter, so maybe you have it maybe you don't.
-still pretty slow to set up
-once terastallized, can be paralyzed
-dps strategy relies on a low accuracy move, could be necessary to try more than once
Mari's NOT SO LAST MINUTE (wow) Tera Raid Guide #5 - Rillaboom
It's Bellibolt again. I wanted to be more creative but it works and it recycles an old pokémon, so why change? Also busy
It's a bit ~close~ (you need not lose time selecting your moves and it requires a bit of NPC hunting) so if I have time in the next days I'll see if there's something better. In the meantime, reminder that I'll let anyone borrow my own pokémon if you can't train your own (need Pokémon Home)
Bellibolt l.100
Tera type: Electric
Ability: Electromorphosis
Item: Magnet
Nature: Modest/Quiet
IVs: max HP, def, sp.atk, sp.def
EVs: 252 sp.atk, 252 def, 4 HP
Moveset:
-Acid Spray (TM)
-Parabolic Charge (egg move)
-Electric Terrain (level up) / Reflect (TM)
- ¯\_(ツ)_/¯
If it looks familiar, it's because it is the same Bellibolt from the Walking Wake/Iron Leaves guide, literally just took it out of the box and tried it and it worked. Just swapped Light Screen with Electric Terrain.
Usage:
Rillaboom has mostly physical attacks + one special move (Boomburst)(not so dangerous, low special attack). Wipes your stat modifications the turn after his shield went up, wipes his own the turn after the shield went down.
The biggest threat is the fact that he has TWO (2) attack-boosting moves, Growth and Bulk Up. By the end of the fight he'll have them used ~4 times... which brings us to the important part of the fight
RESET FOR THE RIGHT NPC ALLIES
-favour pokémon with the ability INTIMIDATE. One is necessary and technically sufficient, two is ideal, three is an unicorn but if it happens it's good! (They are: Tauros, Staraptor, Arcanine)
-optional: Dudunsparce, Umbreon and Drifblim can apply paralysis/burn status and it helps, either with the occasional free turn or the very welcome attack debuff. In theory Sylveon has Charm but I can't recall seeing it use it...? If you got an Intimidate mon but none of these, it should work just fine, try your luck.
-IMPORTANT if you get Arboliva RUN AWAY and retry. Rillaboom already generates Grassy Terrain on turn one making his grass type move the most dangerous, no need to prolong that suffering for the rest of the fight.
What you're gonna do is: Electric Terrain on turn one (gets rid of the Grassy Terrain, making Drum Beating weaker and helping with at least one Parabolic Charge's damage) OR Reflect (protects against all physical moves but no offensive boost for you). Only use one or the other, don't waste turns in my experience Electric Terrain worked better but maybe it's just me.
Then the usual 3x Acid Spray - you will die in the middle, after the first or second Acid Spray, don't panic. IMPORTANT if you manage to get all 3 done before dying, but end up with less than half life, DO NOT TERASTALLIZE. You'll just die the next turn and lose your terastal. Rillaboom is very fast, if your Bellibolt's nature is Quiet his speed is more than double yours, don't think you can heal at this point! Let yourself faint.
Terastallize when you're sure you'll survive, and go with the 2-3 Parabolic Charges that you need to break the shield.
Now, this point is a bit weird, there's a chance of the game bugging a bit with the order of action but use either Acid Spray or Parabolic Charge. [Technical rant here: in theory Acid Spray is the one you should select - Rillaboom will get rid of his own stat debuffs before you attack, meaning that his special defense goes back up to neutral again and you start getting it down on the same turn, but sometimes for some reason you attack first and he resets his stats after, and if he attacks on the same turn you find yourself with less HP on Bellibolt, and neutral special defense on Rillaboom, it's weird. Keep an eye on what happens during the previous turns and act accordingly I guess.]
In any case, the post-shield fight will have you alternating Acid Spray - Parabolic Charge - Acid Spray - Parabolic Charge, etc. Rillaboom's attack will likely be at +3 at this point, so you can only really spare one turn at a time to mess with stats before you need to heal. Two Acid Sprays should be enough, but if you have the time and the life you can use it a third time. Much more likely that you'll only have the time to do that only twice though, and then finish with 1-3 Parabolic Charges, it should hit hard enough by then.
TL;DR: Electric Terrain/Reflect on turn 1, Acid Spray x3, die and resurrect anytime during the Acid Sprays, terastallize, Parabolic Charge until end of the shield, Acid Spray > Parabolic Charge > Acid Spray > Parabolic Charge > Parabolic Charge spam
Pros:
-it's literally a returning build. Reduce Reuse Recycle!
-no transfer required from other games
-immune to the secondary effect of Body Slam (paralysis)
-idk check the last time's pros
Cons:
-bit slow, bit too close with the time limit
-heavily dependent on NPCs 😞 sorry
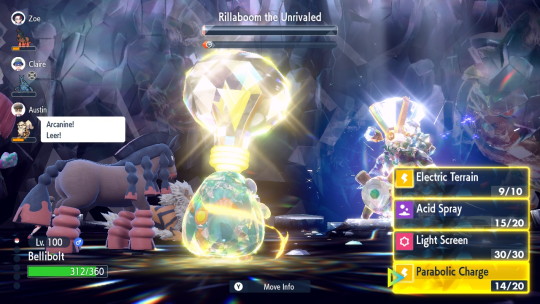
^this attempt was won, just took a screen before the last attack to show how close it was. Also notice that I have Light Screen instead of Reflect, lol! I used Electric Terrain that time, instead.
#guides#pokemon sv#pokemon scarlet violet#gen 9#tera raids#rillaboom#other tera types don't work very well. I would have loved to do with ghost for the immunities#but if the tera type doesn't match the move type you inflict risible damage to Rillaboom when it's shielded#and he's immune to ghost moves.#wack#self reblog w addition
2 notes
·
View notes