
This blog is for my 1972 AMC Gremlin that I bought in 2016
Don't wanna be here? Send us removal request.
Statistics
We looked inside some of the posts by gremlin-project-x and here's what we found interesting.
Average Info
Notes Per Post
54
Likes Per Post
33
Reblog Per Post
21
Reply Per Post
0
Time Between Posts
1 month
Number of Posts By Type
Text
17
Last Seen Tumblr Blogs


Fun Fact
Tumblr has 4 main sources of revenue.
Text


Valve cover shenanigans. When your new valve cover to stop oil leaks doesn't fit your older style PCV valve.
0 notes
Text

It's my 1 year anniversary on Tumblr 🥳
I've got a whole bunch of progress to document. I've had some adventures with wiper mechanisms, washer tanks, exhaust gaskets and my current project, the cooling system.
2 notes
·
View notes
Text


Project X lives!!!
This blog has been quiet due to school for the last few months, but rest assured, there is more to come. In fact, for the last month, I've been driving the gremlin around, and it sure is a blast! I'll try and upload some more pictures and progress I made over the fall and winter months.
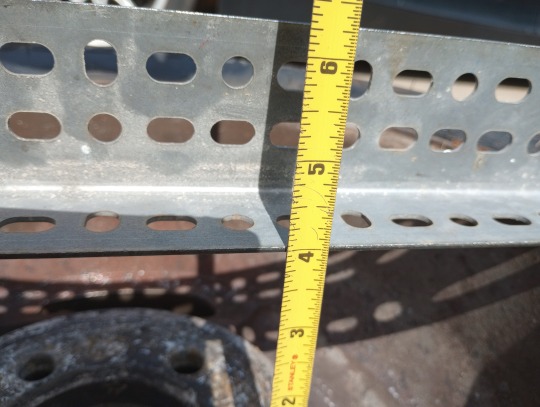
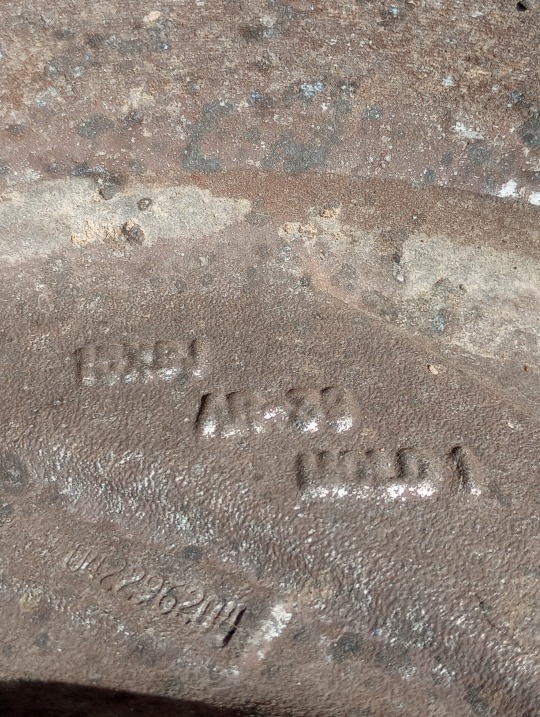
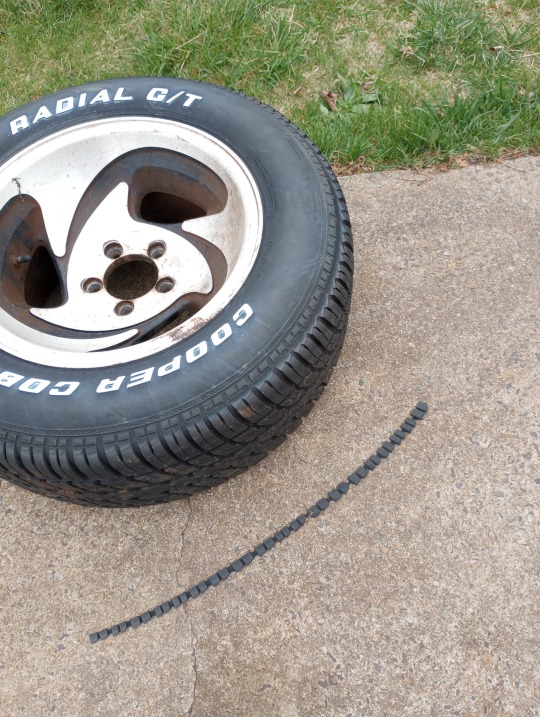
Right now I'm trying to make good upgrades and also figure out why some aspects of the project are falling flat...such as my cool wider tires. These scuff the fronts of the front fenders, so I'm going to see what can be done to make them not scuff, or if I just need to go down a size.
3 notes
·
View notes
Text

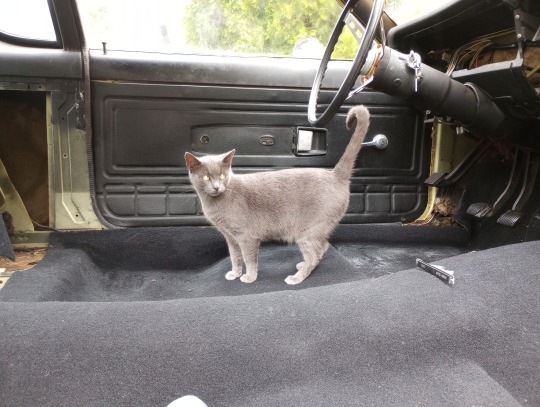
Yesterday it was very rainy, so when I went out to plan my day, our domesticated stray thought she could stay dry.
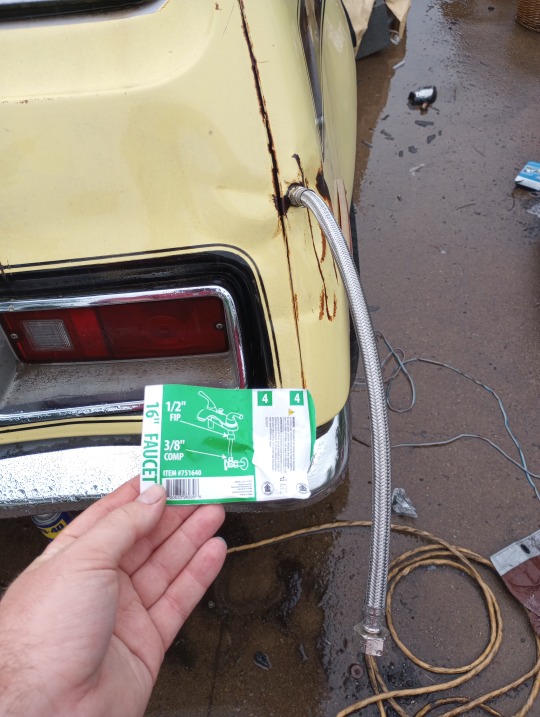

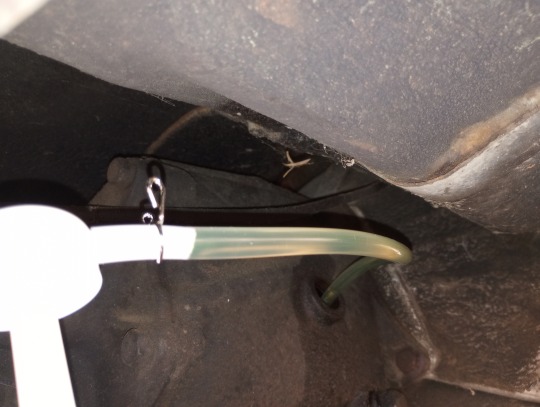
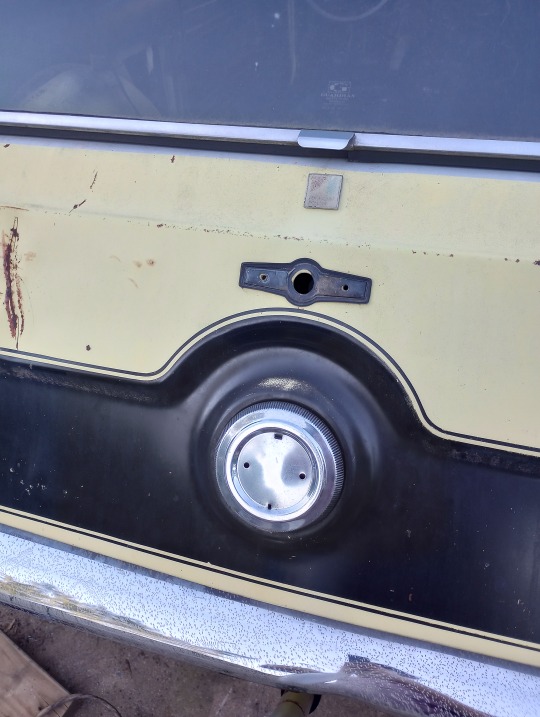
I noticed the hole in the back was leaking, so I figured I'd try and stem the problem with my funny idea. I have no exterior bodywork experience, so welding and bondo-ing are currently not in my wheelhouse. Plus I wanted to do this anyway. Since this Gremlin will never be a show car, I want to have a little fun with it. It's a diet rat rod, and some cars get a "bomber" designation whether the racing class or painted up like a bomber plane. Here, I'm making a 'fuse' for the 'bomb' that is my car. I got a pipe fitting that wound up screwing right nicely into the hole (in the future I will rust-proof this area). And then putting a sink hose on to look like a big visco fuse (I'll have to paint it later). I want to put a two or three-piece acrylic end on the fuse to make it look like it's lit up. But that's a future project!
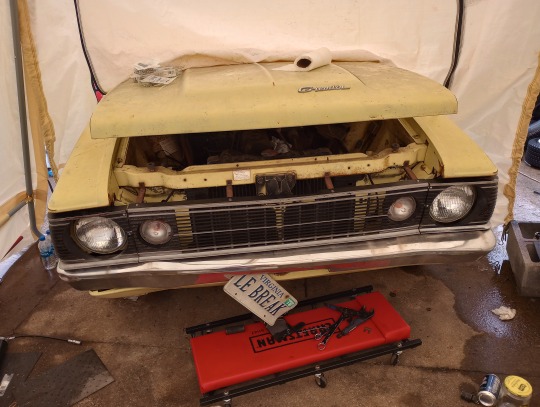
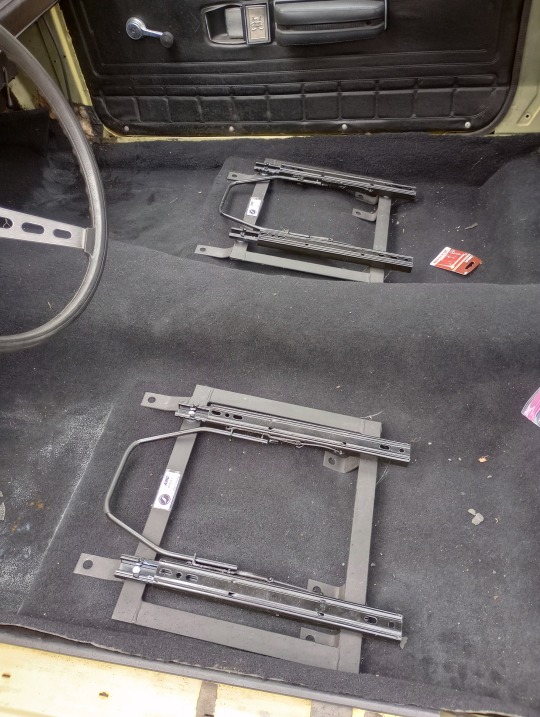
I put on the Hornet grill I had and it mostly fits. I just hope it holds up while I'm driving it. Then I mocked up the seat tracks for about where they're going to go.

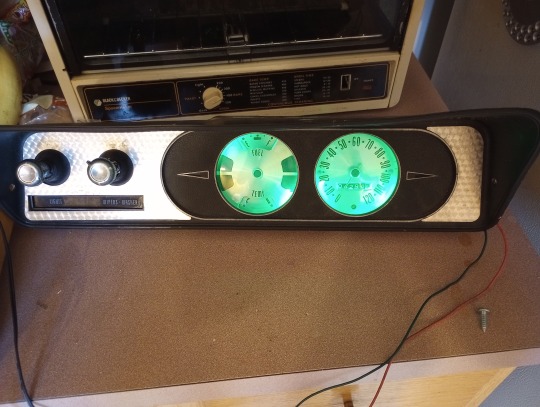
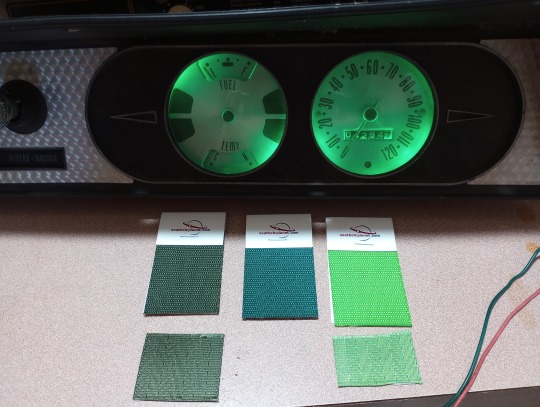

I put green LED's in a while back, but even with the incandescent bulbs, the dash lit up green when I got the car. I have my doubts that AMC used green filters for the X packaged Gremlins, but I could be wrong. I also tried to match some seat belt colors to the lights.
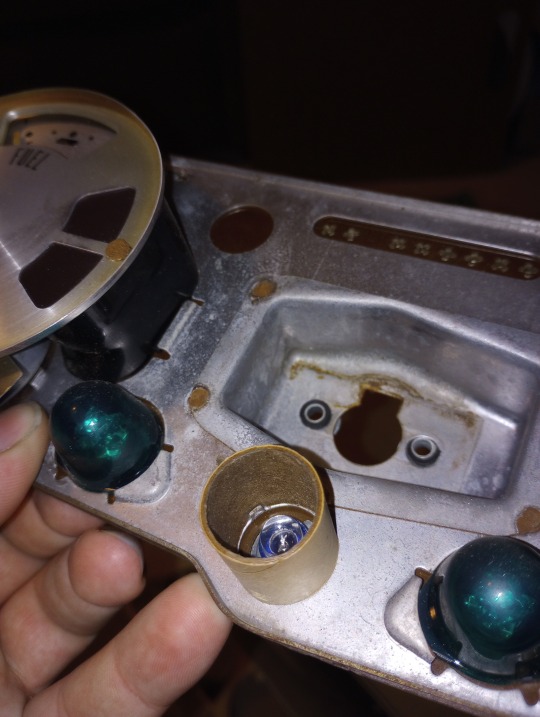
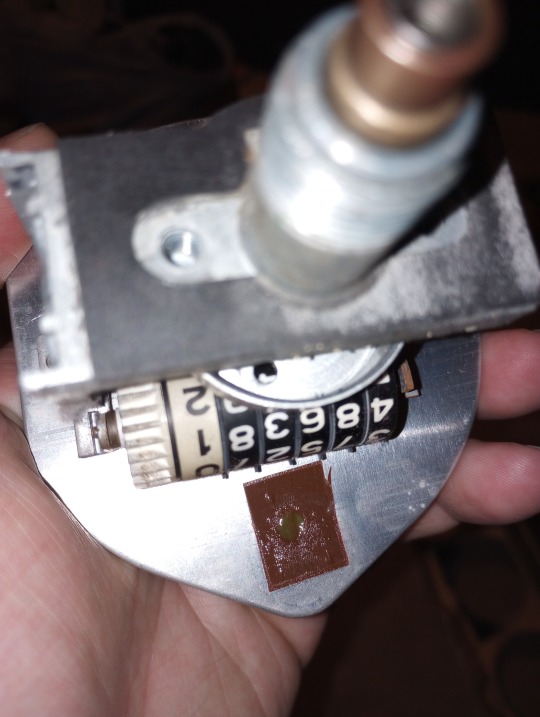
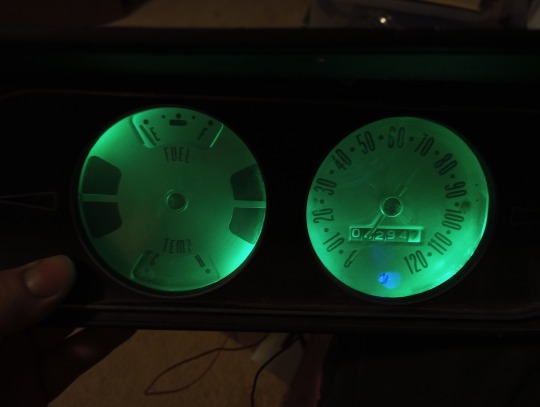
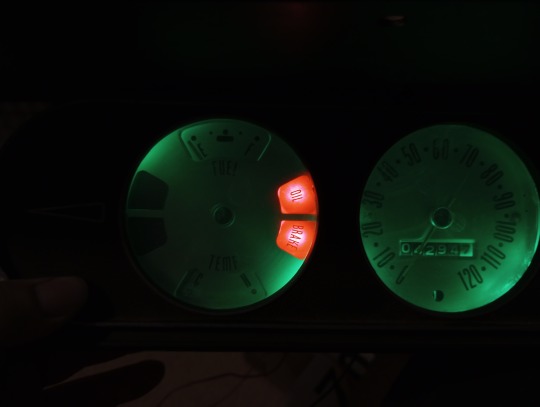
I got a blue led light for the high-beams indicator, but the original gauge has a piece of yellow or brown tape(?) on it to make the indicator light yellow. It was clouded and miscolored, so I removed the bit over the hole. I may change it to yellow. Also checking out the warning lights. You can also see the cardboard tube "light pipe".
August 15 2022
Today I made some big steps to being finished.
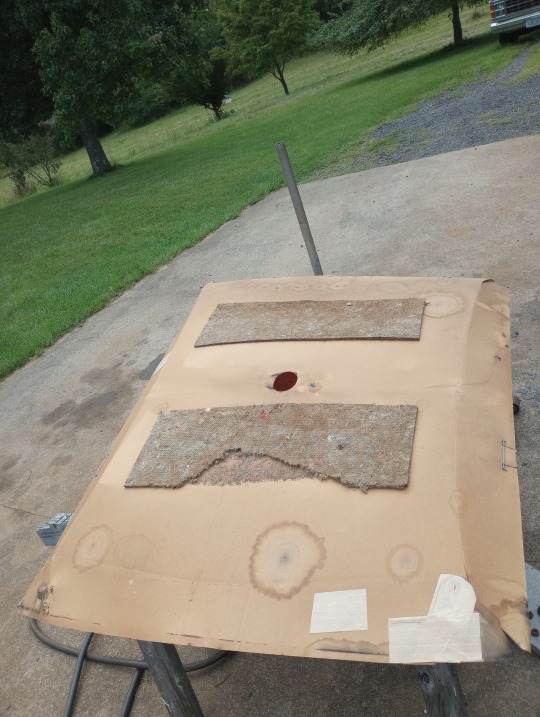
I took the headliner out of the garage where I had done some repairs last year. For repairs, I mostly used wood glue, cardboard, and string-reinforced packing tape. The headliner is a sandwich layer of thin hardboard, polystyrene (styrofoam), hardboard, and the plastic layer you see. I sprayed the backside down with Thompson's Water Seal aerosol to help prevent further moisture deterioration.
While waiting for that to dry, I finally got a useable oil pump for quart bottle sizes, and drained/refilled the transmission oil. This is the T14 3-speed, which is recommended about two pints of SAE 80w gear oil first and foremost. The TSM also says you can use engine oil, but that's the only place I see that. The 1972 Owner's Manual only says 80w gear oil.


As the headliner had dried, I went to put it in the car. It went in a LOT easier than it came out. The TSM does give a helping handy tip on how to re-assemble it in. The headliner is held primarily in place by two small steel channels with some AMC-specific metal pop clips. The channels have provisions for four clips, with two holes per spot. I suspect the channel gets used on the Hornet too, which has more roof line than the Gremlin, so the Gremlin only has three.
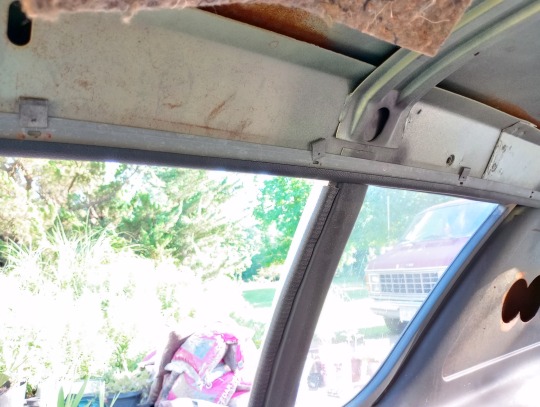
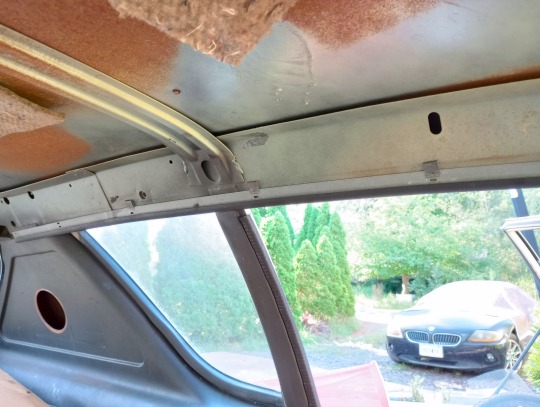
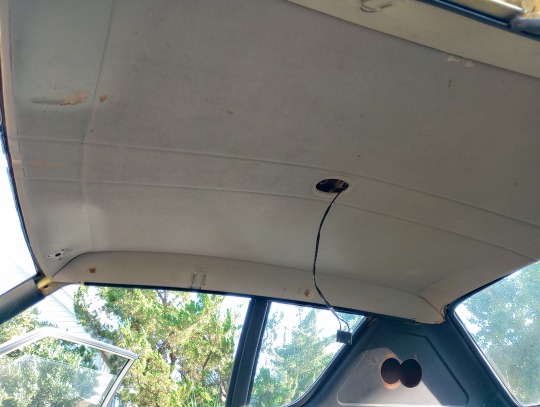
At the start, you have to put the clips so the tab is in the top hole. You then have to pop the clips into the roof. Once that's done, you take the headliner and put the edges inside the channels. Take a moment to make sure the headliner is oriented right, then push the channels upwards so the clip tabs snap into the lower holes. At this point, the headliner is in! Hope you didn't forget to snake the dome light cable over.
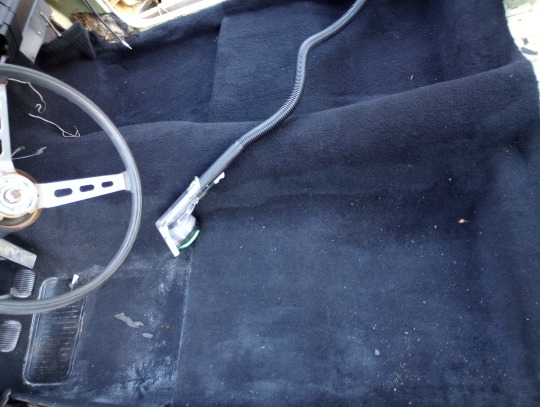
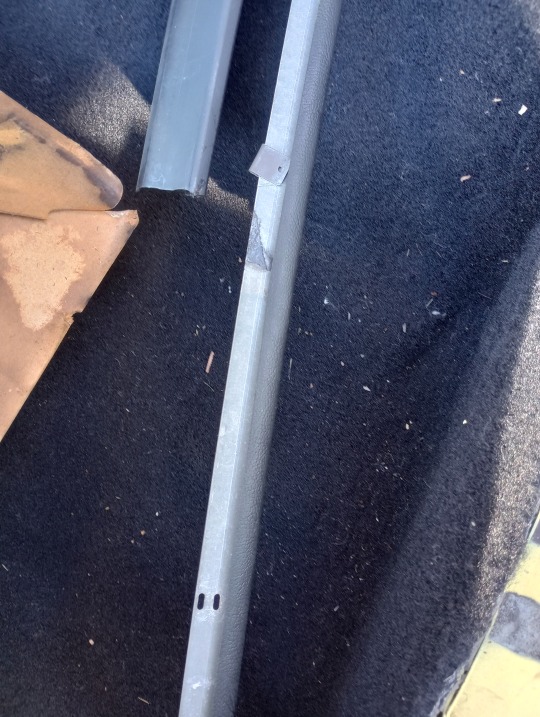
At the suggestion of my dad, I got out the carpet cleaner and cleaned up the gunk on my carpets. Wow! See the difference!

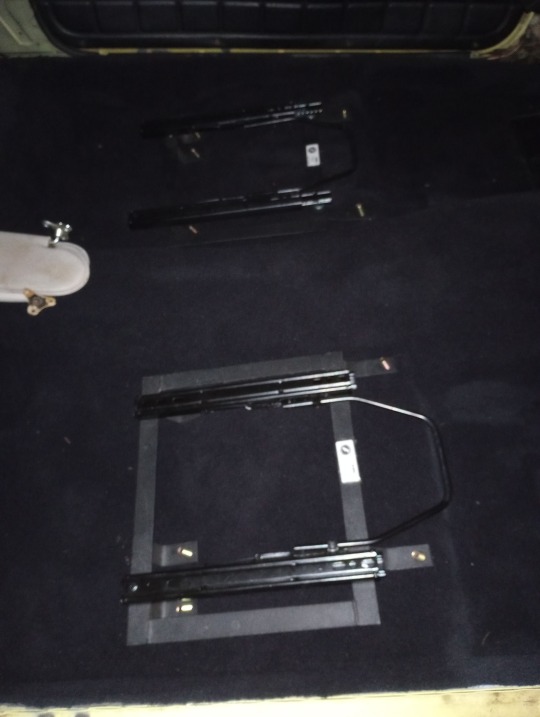
Got my dad to help me find the mounting holes for my seat brackets, It's looking great!
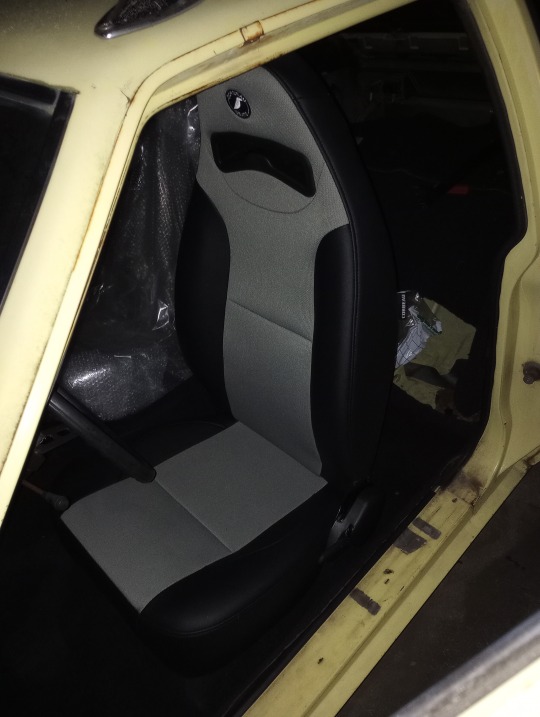

Wahoo! Seats are almost in! They look great and I'm excited to drive the car!
August 16 2022
#AMC#AMC Gremlin#1972#Project-X#Restoration#cat#interior#exterior#grill#headliner#carpet#seats#assembly#dashboard
6 notes
·
View notes
Text

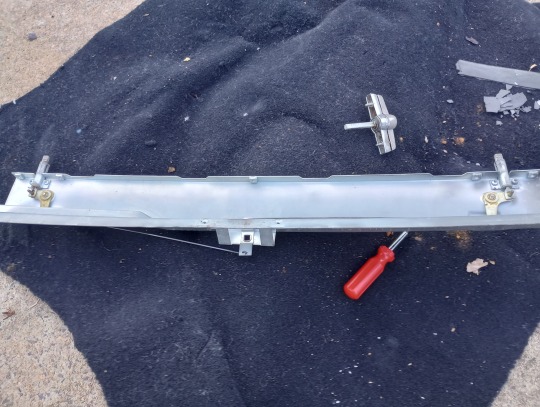
Starting with August 12, I decided to tackle the mysterious hatch latch mechanism that has plagued me since I bought the car. The system was never able to close and keep the rear window latched. So I took it apart!


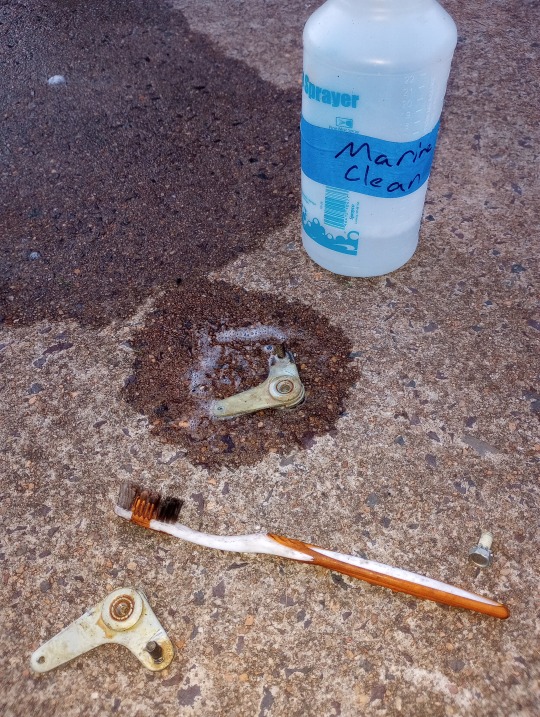
Here you can see the rather simple mechanism. The handle turns a plate which tugs on some wires, rotating the armature and pulling on some spring-loaded fingers that latch the window. The "L"-shaped arms were covered in a nasty, sticky yellow gunk. I proceded to clean and re-grease all the moving parts with white lithium grease.
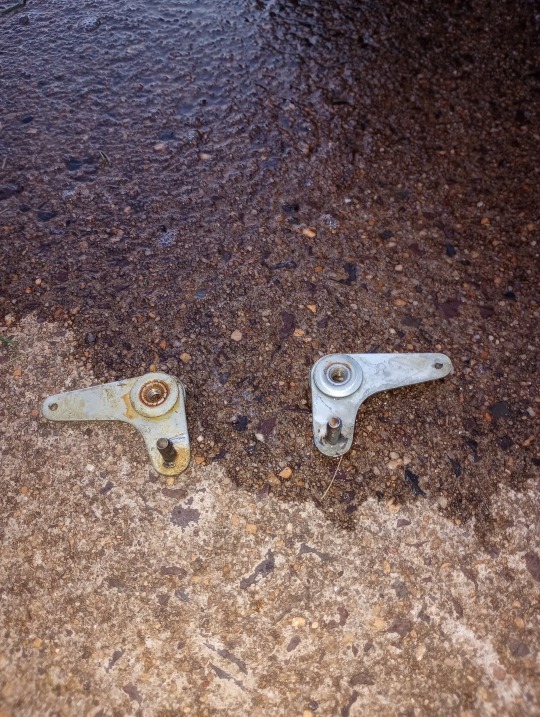

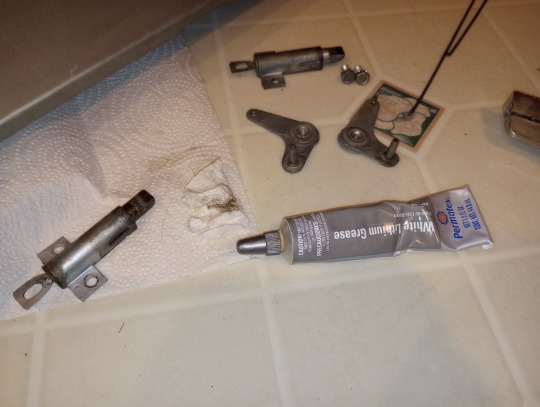
Clean! Greasy! I then reassembled the guts into the car at 1:30 am on the 13th. The system works now, but the window latches a little too nicely. The fingers now don't let go, so I will have to pursue that later.
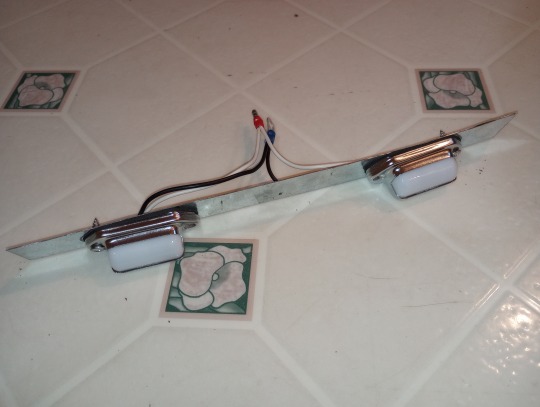

Today, I worked on making a new license plate light and mounting bracket. I used 26 gauge galvanized steel I picked up from Lowe's. Really easy to cut through with a cutoff wheel or dremel. The wire holes aren't the nicest cuts, but nobody should be looking at them. I still want to trim the edges past the lights down.
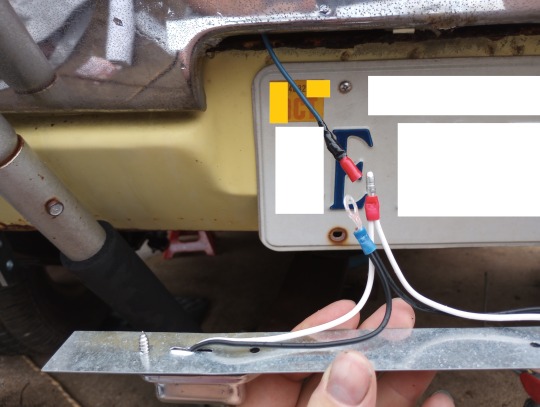
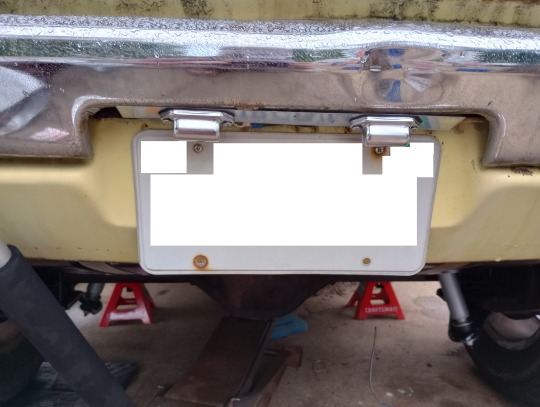
Here it is on the car. This is an old plate we had lying around I used for mocking this up. It's not original, but I think it looks good! I need to ground the negative wire, but it just needs a bolt.
August 14 2022
6 notes
·
View notes
Text


Yesterday and today I torqued bolts to the what the book calls for. I got the tie rods on and greased. My dad and I bled the front brakes, and then I put the wheels back on!
Tomorrow I will get the rear brakes bled and then pop the driveshaft back in and hook up the parking brake.
August 10 2022
4 notes
·
View notes
Text

Yesterday, I didn't get around to working on the gremlin until about 4 pm, so all I was able to do in my remaining daylight was putting the upper and lower control arms and bump stop in.
They went in surprisingly easy, compared to the other side.

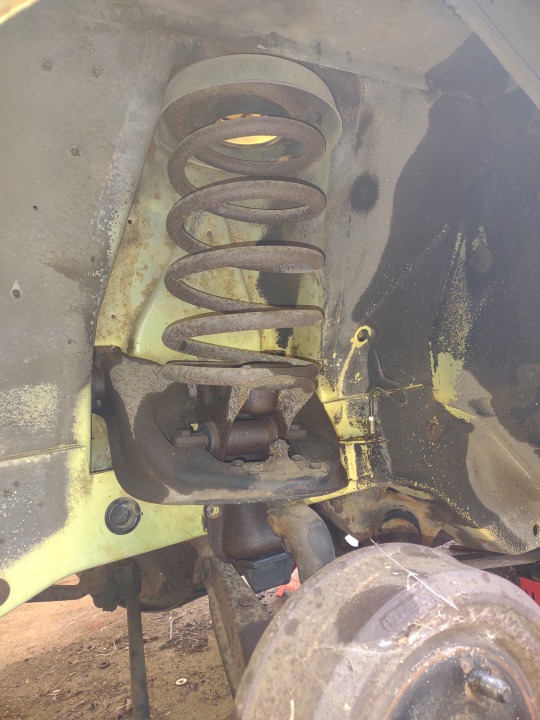
Today, I got to work, putting in the knuckle, and other wheel parts. I used my grease gun to squirt some grease in the ball joints to make moving the knuckle easier. Then came the spring, which went in without any fuss at all. The tool from autozone works very well here.

Like the other side, I went ahead and cleaned up the spindle, added more grease, and cleaned the outer bearing and hardware. I wound up re-cleaning the bearing because the brakes were too far apart and upon going to adjust them, the bearing fell out of the drum onto the dirty concrete.

I torqued down the ball joint castle nuts to a hair over 45 ft-lbs (the TSM calls for 45) just so they would line up with the cotter pin holes. Then I bolted on the steering arm and torqued all the hub/knuckle bolts down to 65 ft-lbs. You have to take the steering arm off the hub before going after the lower ball joint and you have to torque the lower ball joint nut before putting the steering arm back on during assembly because there is no way you can get a socket on the nut. The steering arm curves just over top of it.


Last thing I did today was bolt down the shock absorber. As you can see, this was right around 9 pm, so I need to get some hanging lights to work later into the night.
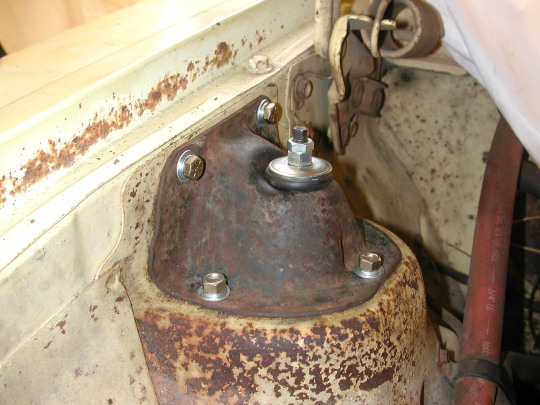
A previous owner had been in here before me. The rear shock tower stud was missing and they had drilled and tapped a 5/16 bolt into the tower and cover plate. The spring pad cushion on the other side had no indent from a stud head, so I figure they had replaced bushings and other bits at some point. But a simple 5/16 carriage bolt fit perfectly, which upon closer inspection, all the other studs were just factory-done carriage bolts with the square bit between the threads and the head.
I still have to go around the car and torque down some hardware, adjust the strut rod arms, and change out the tie rod ends, but the front end is almost done!
August 8 2022
2 notes
·
View notes
Text

I got my dad's old Nikon Coolpix 990 camera out of storage to substitute for my phone.
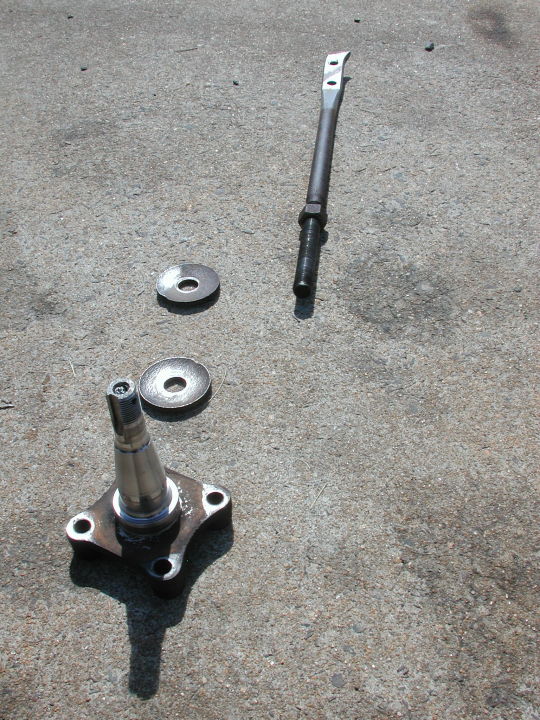
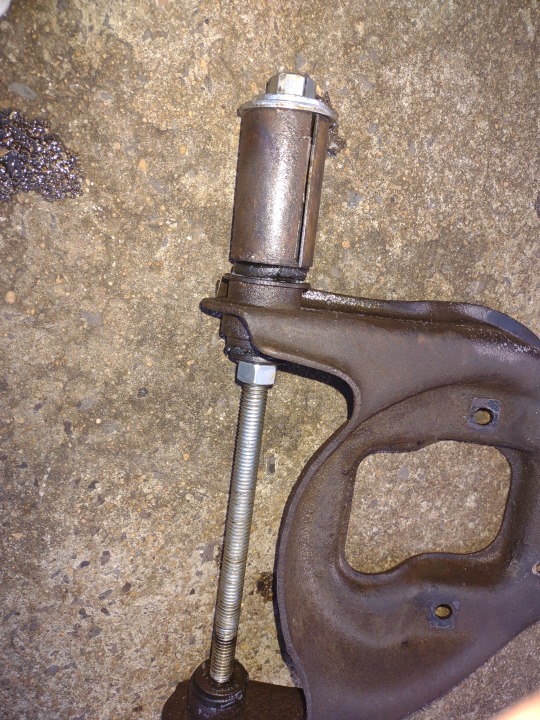
During the disassembly process, I had to take the front drums off to access the spindle/steering arm/knuckle bolts. The spindle had to come off, so I told myself I'd just do a thorough job of cleaning and re-greasing the wheel bearings and spindle. I used diesel fuel to clean the outer bearing, washer, nut, and locking castle ring. For the spindle, I first wiped the old grease off with a paper towel, then used carburetor cleaner while gently scrubbing the rustier, gunkier spots. The carb cleaner seemed to leave the spindle prone to rust, so I sprayed some WD-40 on it for a thin protective film while I got some proper wheel bearing grease. Also pictured is the left side strut rod arm, which is a pain in the butt to get to on my car as the end on the frame pokes very close to the exhaust pipe. As with the other one, I used marine clean and a hand wire brush to scrape off old gunk, rinse, then apply WD-40 to the threads. I clamped it in my vise and spun the adjusting nut to help access and clean the threads around it.
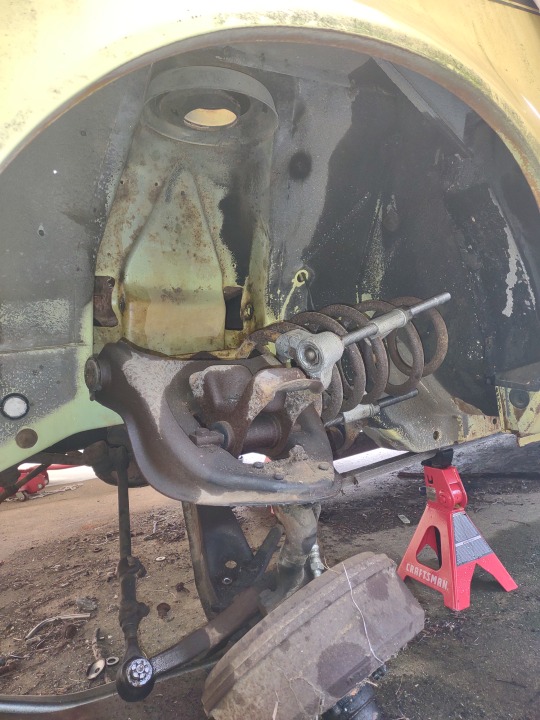
Here is the suspension mostly put back in! I have a few more items to torque down, but the car is almost back down on the ground!
I decided to use the rubber shock bushings supplied with the shocks, since I did the same for the rear and I don't want to feel every vibration. I tried to use grade 8 bolts and nuts where I could just so I was sure things wouldn't break apart, but all the hardware that has come off so far seems to be grade 5 at most.
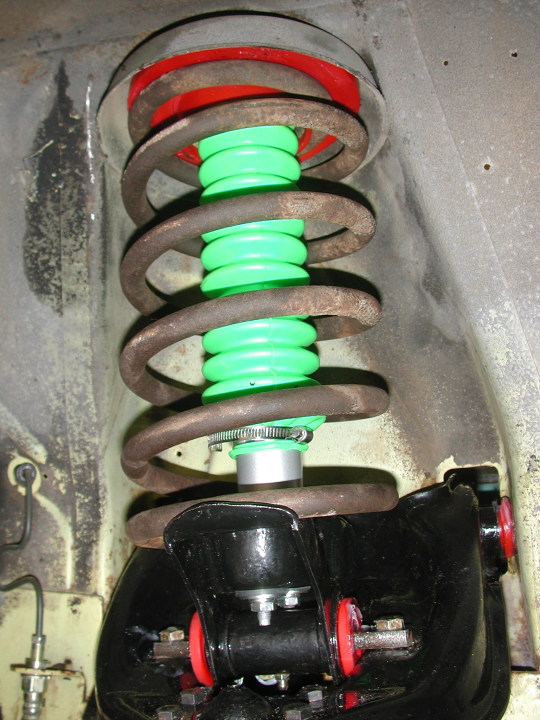
And here is my shock absorber bolted in! Kind of reminds me of that old book, the hungry caterpillar. Despite all the red, I'm trying to go for a green secondary/accent color where I can. These shock boots were $5 each on amazon and I hope they work. The original shocks just had the bare shaft exposed on the front, so hopefully these will extend the life of the shocks, and I don't have to worry too much about water and mud getting in because it's a street car not a mud bogger.
August 6 2022
2 notes
·
View notes
Text


Today I drilled, tapped, and fitted grease fittings in the left side suspension parts.
Also the poly dust boots for my tie rod ends and ball joints came in. Tomorrow, I will start re-assembling the suspension onto the car.
August 4 2022
4 notes
·
View notes
Text

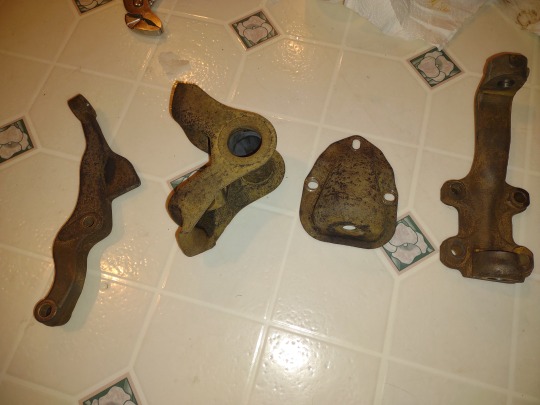
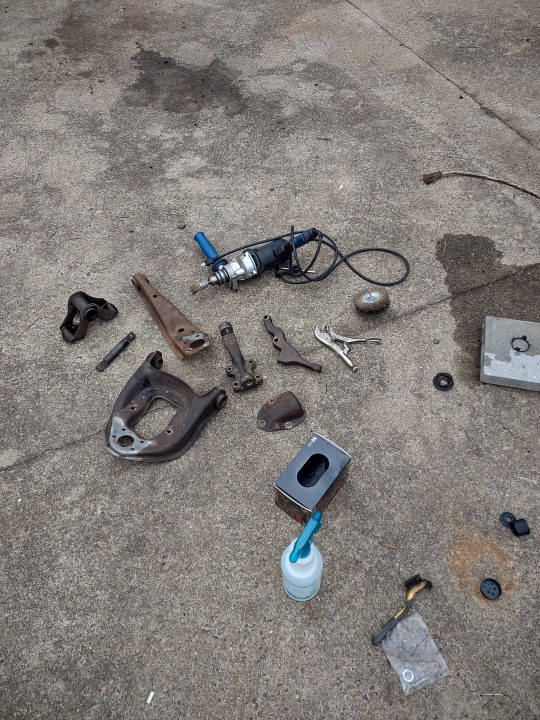
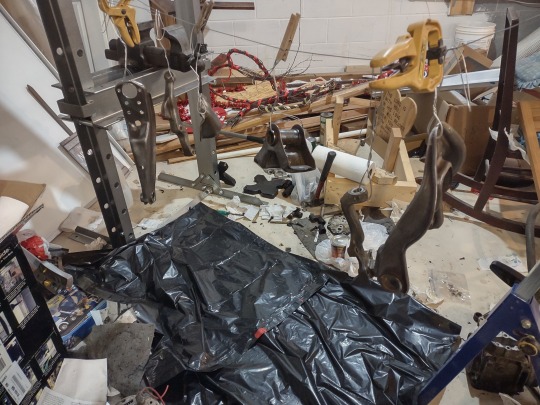
Took all my parts out today, spent two hours using my drill wire brush to get as much surface rust off. Because these components are So Shaped, I couldn't get every spot, having to use my hand brush to get the nooks and crannies. The lower arm tapers to where it mounts on the car, so even the hand brush couldn't get all the way in there.
I used my Marine Clean de-greaser again and hosed the parts down. They sat in the hot sun for about half an hour to dry off before I took them down into the basement for painting.


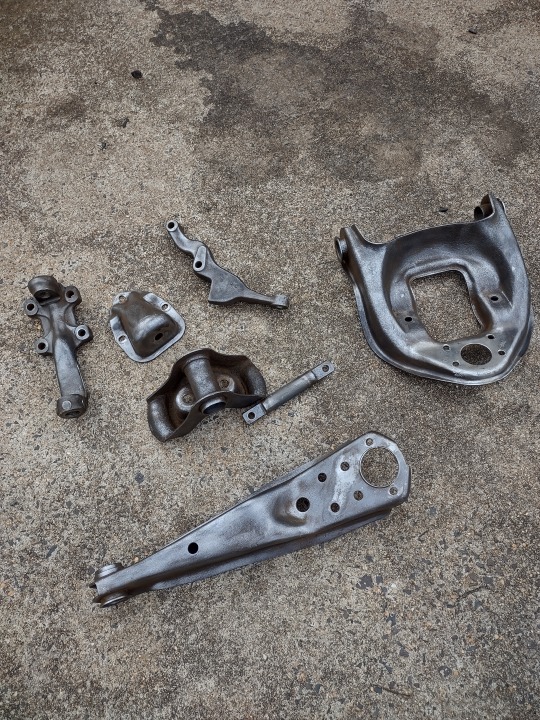
Just like last time, I strung the parts up and painted them with the gloss black POR-15 rust prevention coating. This stuff is supposed to dry better with more ambient humidity, but even in our dry, de-humidified basement, the first coat dried pretty thoroughly in just under two hours.

All in all, here is the left side components fully painted and dried enough to touch. I'll still let them set up for tomorrow's drilling/tapping job.
Hopefully, I get my tie rod ends and polyurethane dust boots tomorrow, and I can begin the task of reassembling my front end. I'll have to learn how to do a basic alignment job.
August 2 2022
4 notes
·
View notes
Text
Just being mesmerized by what's going on in the bath.
2 notes
·
View notes
Text
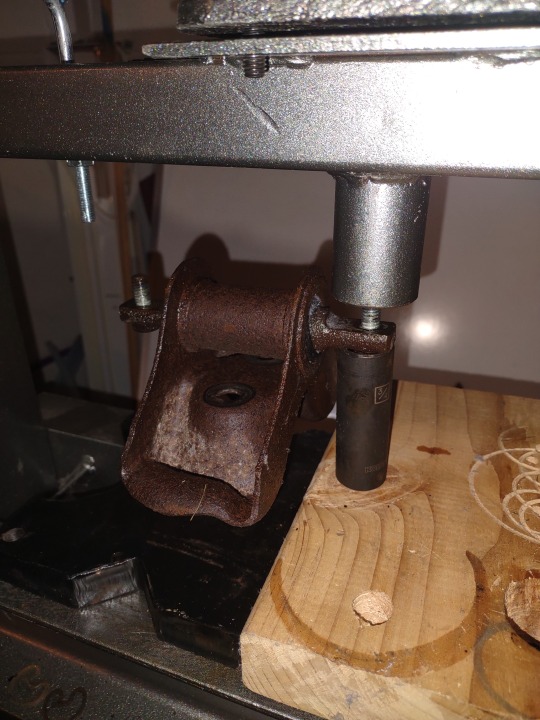
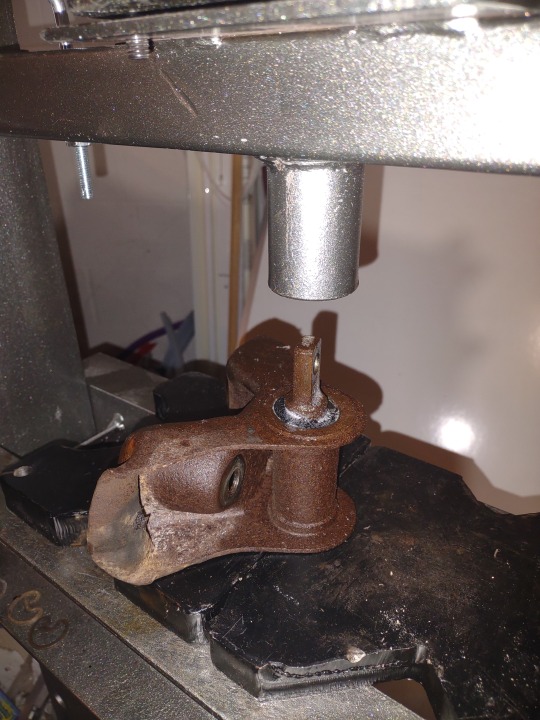
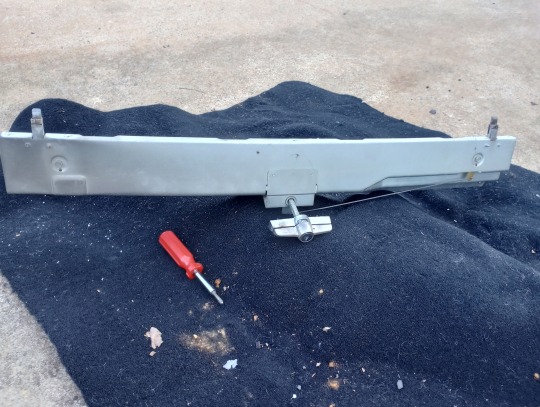
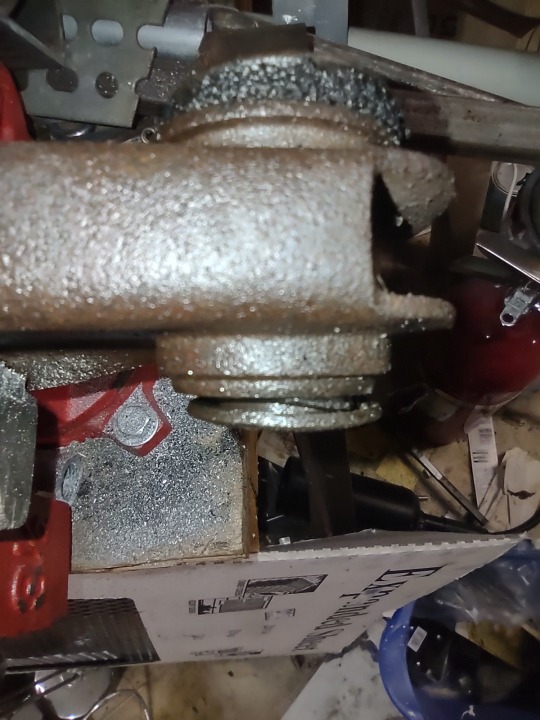
I started today off by pressing the bolts and mounting pin out of the spring perch. Easy stuff.
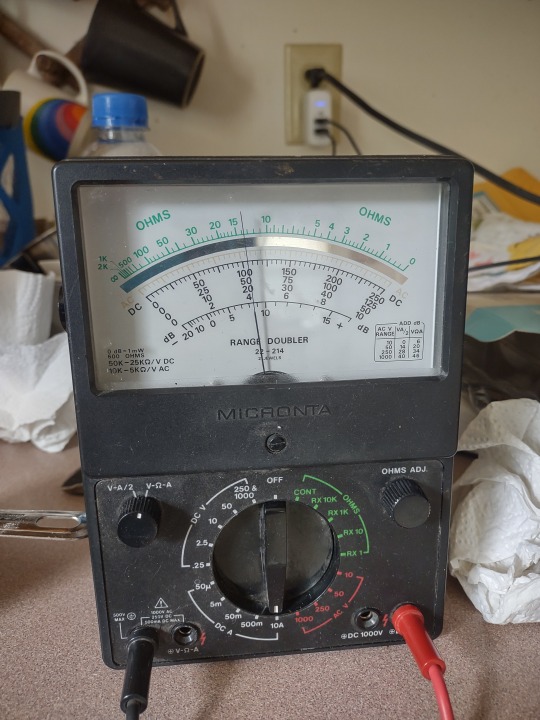
Next up, all the smaller suspension parts I pulled out of the car yesterday got cleaned with my Marine Clean solution and hosed off outside. Then into the electrolysis bath! I decided to put all of them in at once to see if the process could be sped up. Turns out, it wanted to chug along nicely at four amps.
After a quick lunch and some errands run, I got my dad to help hold the suspension arms while I chiseled the rivets out. They went a lot smoother this time than last. A couple good swings with the 2.5lb persuader, and the old ball joints popped right out.
For the lower arm, I was going to press the old bushing out, but I found that over the last 50 years, the bushings had shifted and now the mushroomed ends were hanging over the lip of the bushing sleeve. I had to take a hack saw to the small end, which took a surprisingly long 15 minutes to saw through. After my cardio saw workout, it was easy to press the bushing out the rest of the way.
The upper arm gets my makeshift Upper Arm Bushing Puller tool, which works surprisingly well. I make sure to squirt some WD-40 on the bushings and my tools before doing any pressing work, it just makes things go smoother and easier.
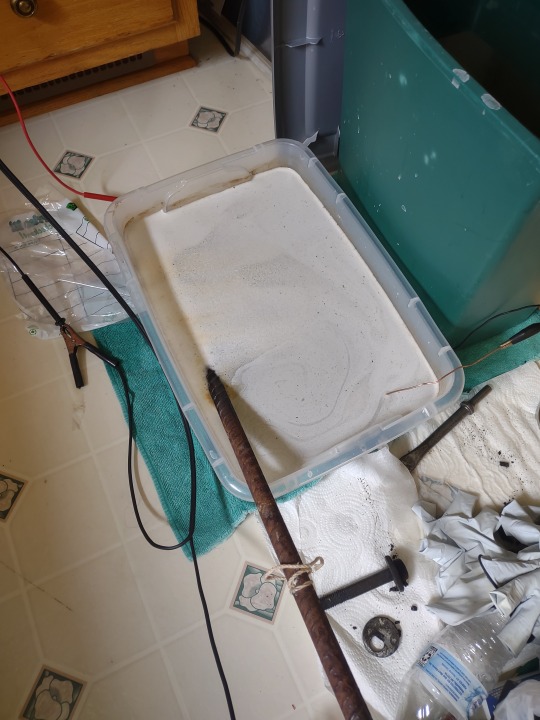
The smaller parts after coming out of the bath of 4-7 hours. They have some surface rust after drying, but that's going to be brushed away tomorrow.

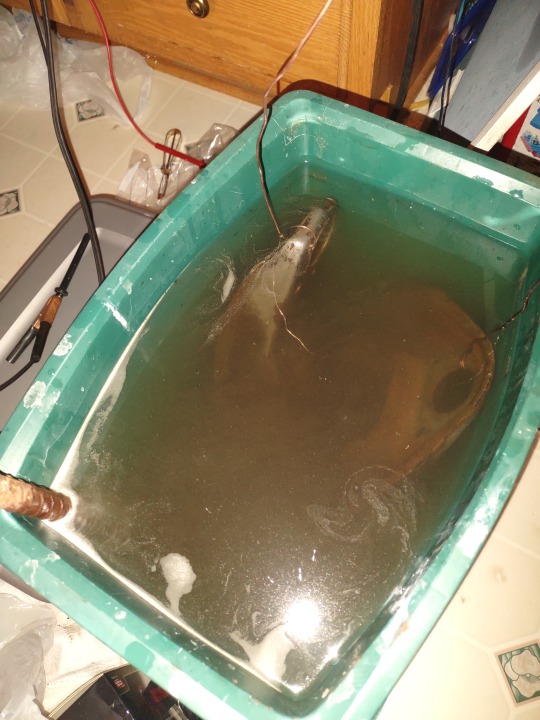
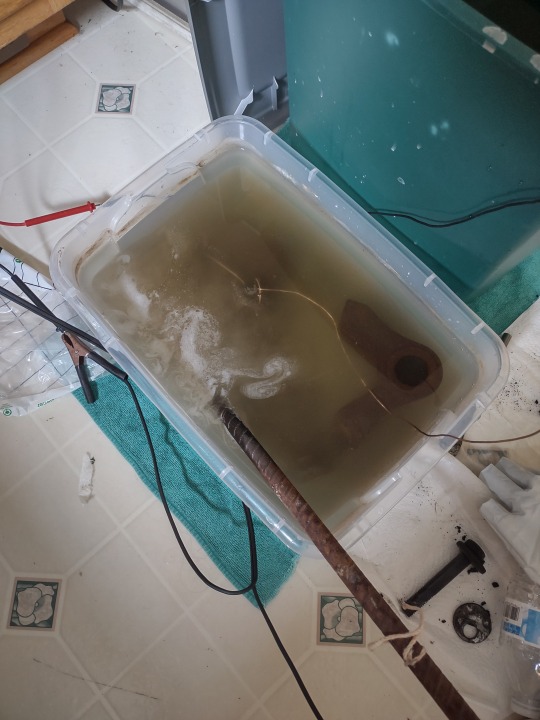
And lastly for today, I cleaned off the control arms and put them in the bigger bath. The system was going around three amps when I put them in at 9:30, hopefully getting a little higher as crud flakes off.
Tomorrow, I hope to get the parts wire brushed and then painted.
August 1 2022
#AMC#AMC Gremlin#1972#Project-X#Restoration#front suspension#parts cleaning#rust removal#electrolysis bath#disassembly
4 notes
·
View notes
Text


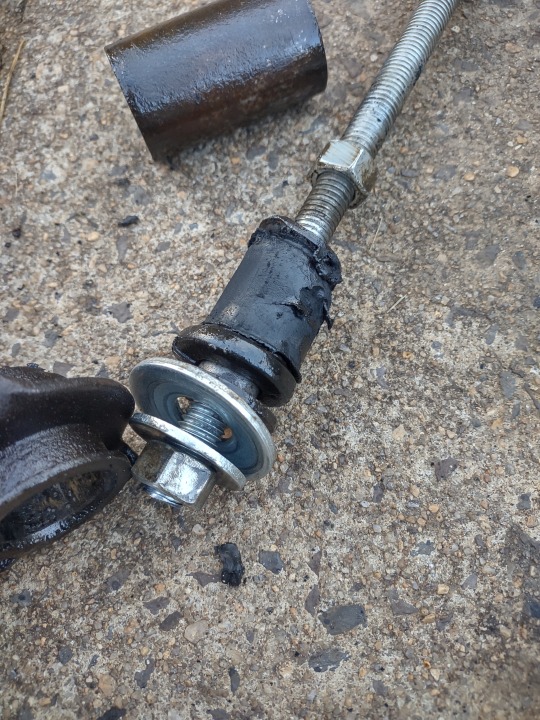
So yesterday I ordered tie rod ends because some of the rod ends look old, some look less old and crumbly, but I wanted to make sure that everything matched age. I also have read on many AMC forums that even though they are new replacement parts, the rubber boots on tie rod ends and ball joints are not great. However, poly dust boots apparently last a very long time. Waiting on those to come in, so I'll take apart the other side.
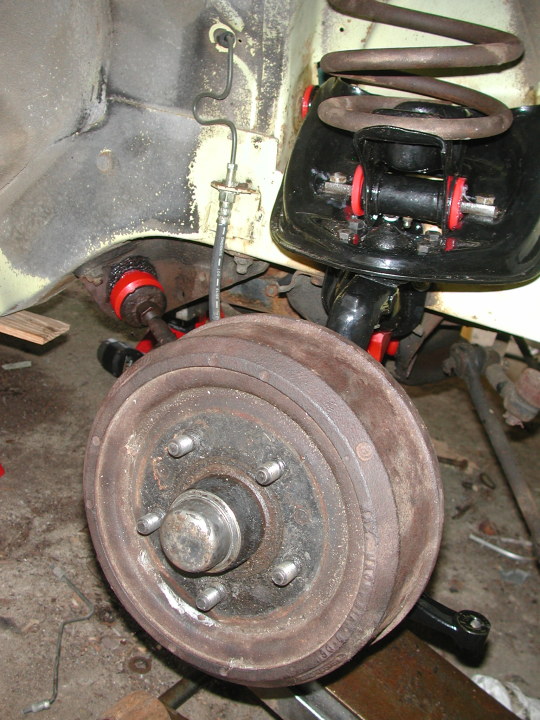
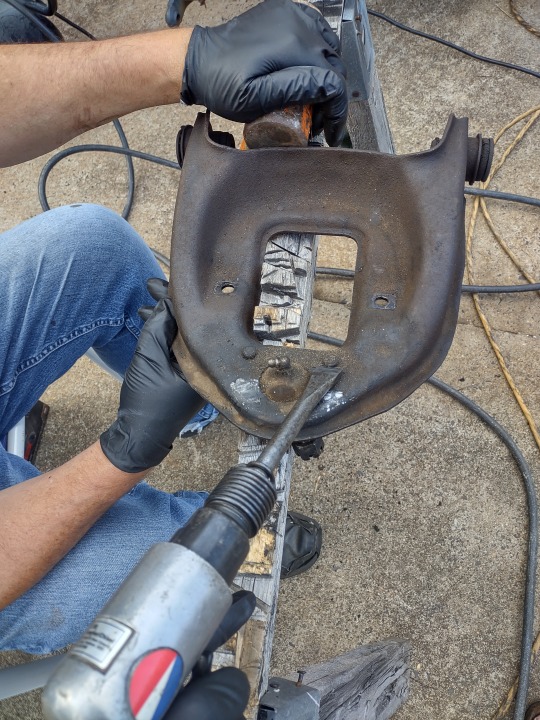
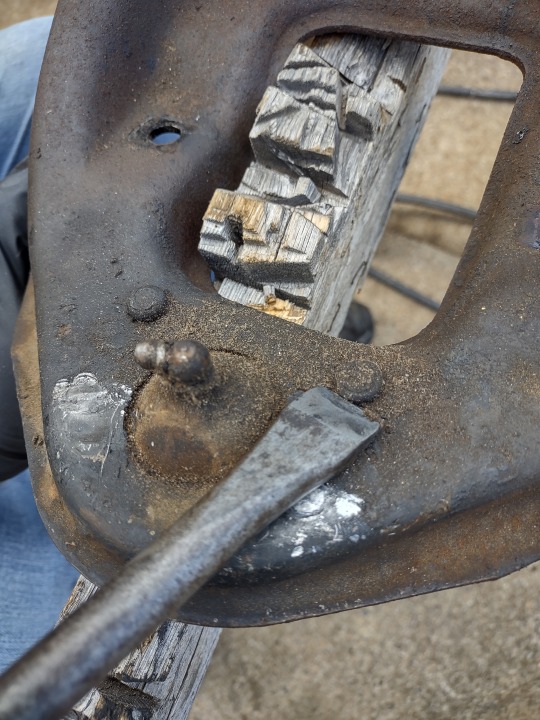
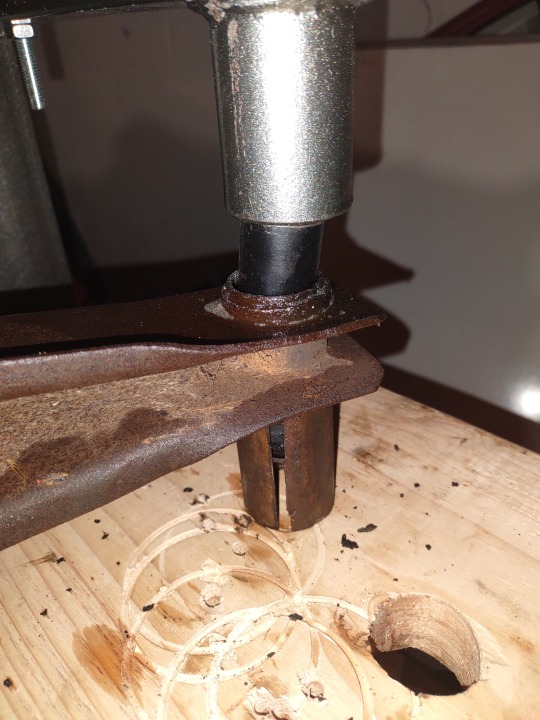
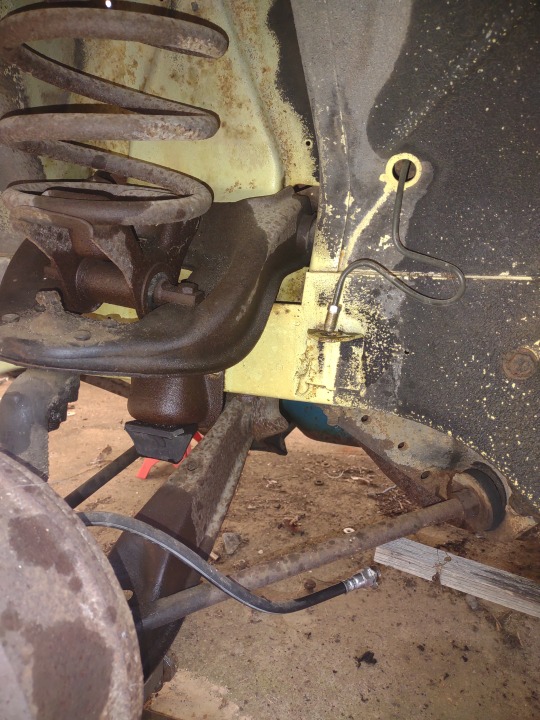
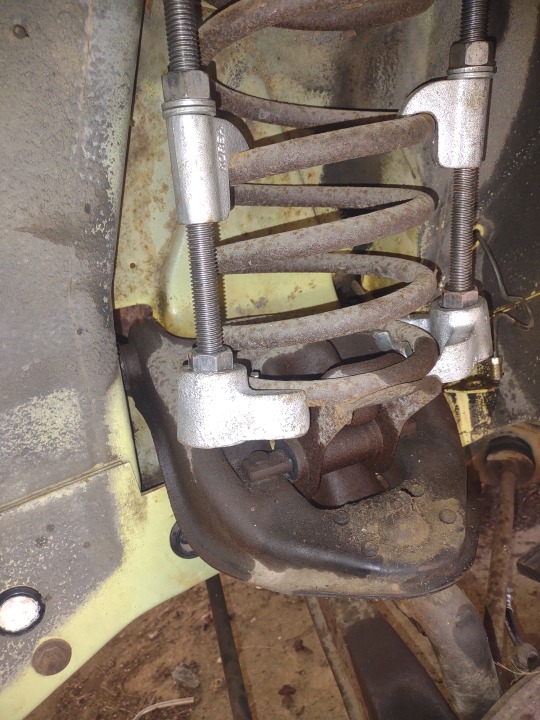
This time, I documented my process a little better. According to the Technical Service Manual, you have to take the shock absorber out first. All the hardware is half inch or 9/16 inch heads
The upper shock mount is held in with three nuts and two bolts. The shock bolts to that and in two spots on the coil spring perch. The upper part is pretty explanatory as all the hardware is visible and easily taken out even with a big air impact wrench. The bottom two are a little trickier. I found that the easiest way is to jack up the car on the suspension arm, compressing it, and the angle of the arm widens the window of the arm. The outer nut can be removed by a ratchet-end wrench, or as I like to call them, "Flatchets" (flat ratchet). The inner nut has to be removed with the suspension compressed, and I got it off with a 3/8 inch drive socket and six inch extension.
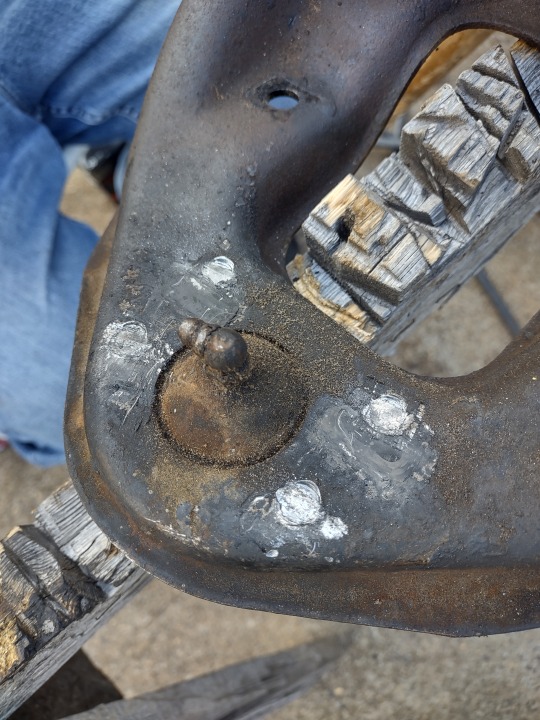
After the hardware and upper shock mount are removed through the fender, I started taking off extraneous things that would hold the assembly in to the car. I removed the brake line, because the assembly is heavy and the brake line is small rubber. I removed the steering tie rod, and while the rubber boot looked nice and pliable, it was stuck on and the rod end was rusty. It had to be removed with an air impact hammer with pickle fork tool.
From there, I removed the nuts for the Upper Control Arm bolts, so that when I compressed the spring, they would just need to be knocked out.
Again, the suspension needs to be compressed, the TSM basically calls for every operation on the front suspension to start with removing shocks and compressing coil springs. I have the car on jack stands, but the car needs to be lifted beyond what my jack stands were set to in order to get the compression needed. I then put on my grandfather's old Horrible Fright Harbor Freight spring compressors, tightening them down as equally as possible. After a bit, I let the floor jack holding the car up down, letting the car rest back on the jack stand and the spring made some grumbling. I had my dad help me tap out the UCA bolts, and the assembly and spring fell out.
I carefully took out the spring and released the compressor. It's scary to have a loaded spring ready to break free. From there, it was just a matter of undoing hardware.
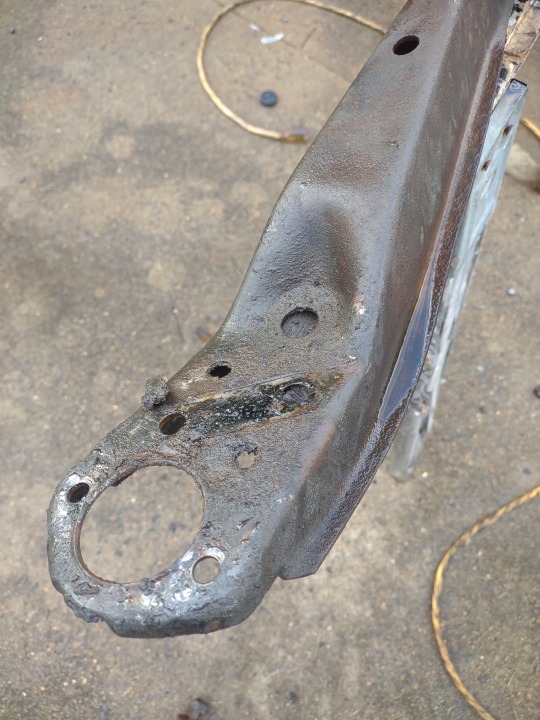
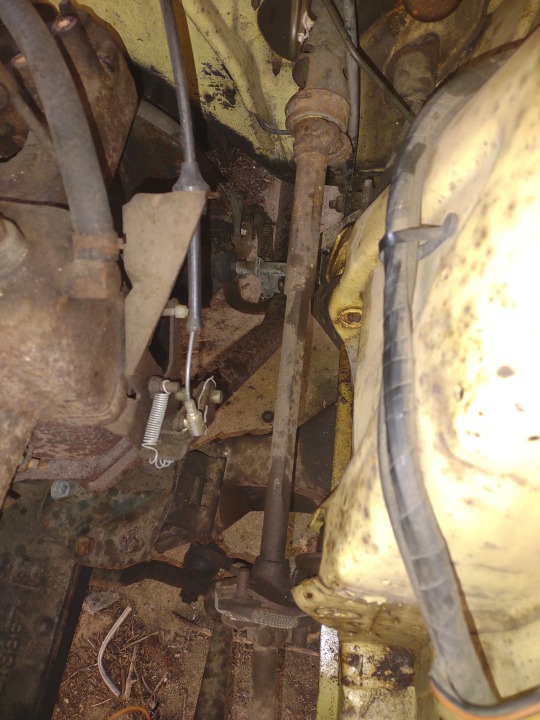
I couldn't reach the nuts holding the strut rod to the car because the exhaust pipe is right where I need to put my impact wrench, so that's staying there for now.
Since my car has drum brakes in front, I had to take apart the drum from the brake and undo the four bolts holding the steering arm, knuckle, spindle, and brake housing together.
Lastly, the upper and lower ball joints had to come out. A couple squirts of WD-40 and blasts of the air impact pickle fork, and my parts came free!
It was about 8:30 by that point, and rainy all day so I'm done for the day. Tomorrow, I get to clean my suspension components and remove the old, torn ball joints. It's gonna be more bath time!
July 31 2022
4 notes
·
View notes
Text


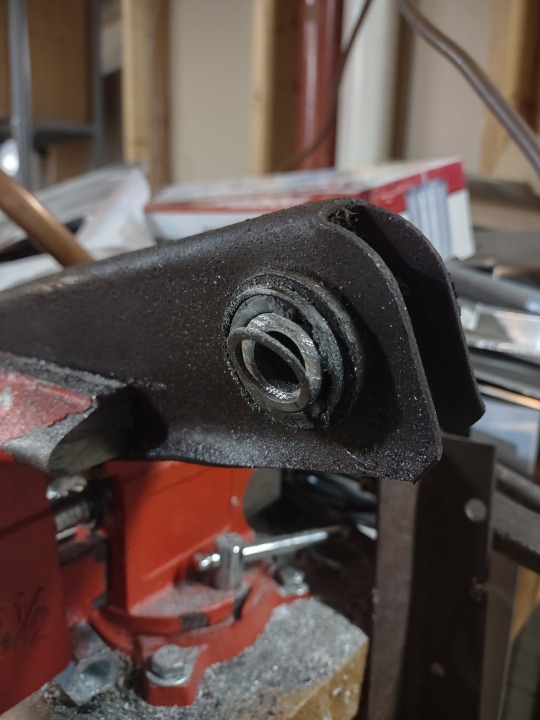
I didn't have much time today to work on this project, but I did drill and tap some holes for grease fittings. I thought I might not be able to get the Upper Control Arm to have reachable grease fittings, but when I looked at the car, the back side of the UCA bushings are accessible through the inner fender. I drilled holes where a grease gun could reach without much interference, and as close to the middle of the bushing as possible. The Lower Control Arm was a little easier, as the grease fitting can be accessed easiest from directly below.
For the spring perch, I followed John Elle's poly bushing replacement. The bushings are currently listed for '73 Ford f350 rear shackles. The part # is: 4-2132R. They fit snug inside the perch bushing shell with space in the middle for the grease fitting. If I use a grease gun, there will be a lot of excess grease as the cavity around the grease fitting is kind of big. The bushing inner diameter is also a little too big, so the bar that goes through is very loose.
I used one of my dad's hand drills to carefully drill into the bushings themselves after tapping the steel, making sure to rotate the bushings so the lengthwise grooves cross through the grease fitting hole so grease can go along the full length. I stepped up to a #4 bit at the end. For my last step, I ran the 1/4-28 tap through the steel and poly bushing to clean up the hole. The grease fittings fit great and don't touch the internal metal sleeves!
The rearward UCA bushing has an extra steel band around the bushing sleeve, which requires a longer grease fitting.
July 30 2022
2 notes
·
View notes
Text
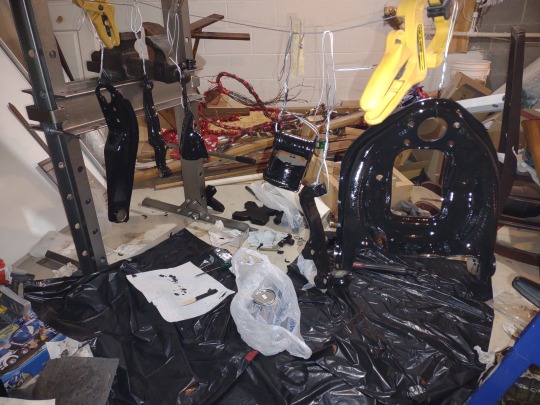
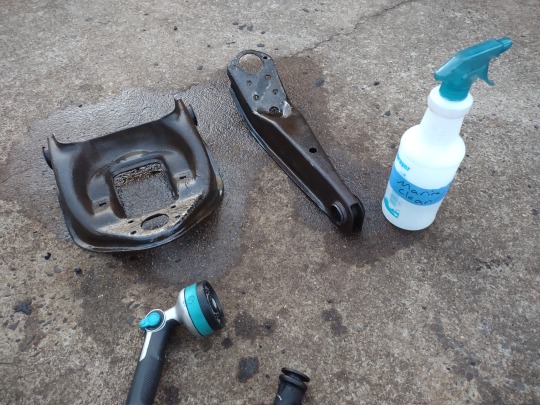
Paint time!
I got all my parts from the electrolysis bath out on the pad, wire brushed them down with my drill and a set of wire brushes, as well as my hand wire brush for the tight spots. We had some POR-15 Marine Clean degreaser concentrate left over from previous projects, and I mixed up a solution to help clean off the rust dust. I sprayed them down with the garden hose, let them dry off in the basement and got ready to paint.
This time, I have a pint can of POR-15 rust protective coating in gloss black (I thought about silver but I already had the 6-can sampler of gloss black and this stuff is expensive) and I got to painting. I am being careful to not get too much into the bushing sleeves, but I figure it's not too critical. I am trying hard to keep the paint out of the ball joint conical holes.
July 27 2022
#AMC#AMC Gremlin#1972#Project-X#Restoration#queued#rust removal#rust prevention#front#suspension#part cleaning
5 notes
·
View notes
Text


Some other things that happened today:
I got center caps for my wheels! These came off amazon for $2.99 each. The bore of these wheels is a standard of older aluminum rwd wheels of 3.25 inch. After an extensive search of the internet, I could not get a cheap set of four, black, metal center caps in 3.25" There are chrome options, but I felt like any paint job I do would be worse than what these come with, on top of having to do extra work on a $30-$50 set of caps. Somebody used to make black 3.25" metal caps, but I could only find one cap on eBay for $10. These caps are 3.18" diameter, so I figure I can put a rubber band or o-ring around them, or under the lip to center them.
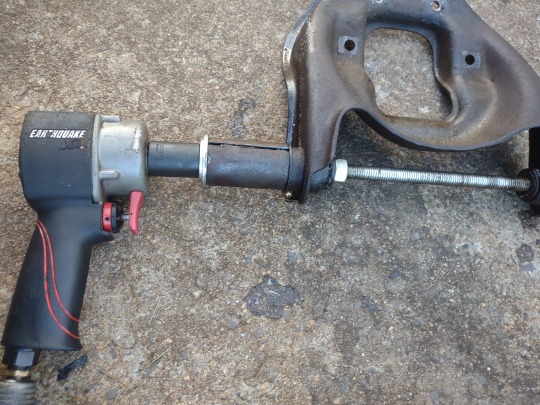
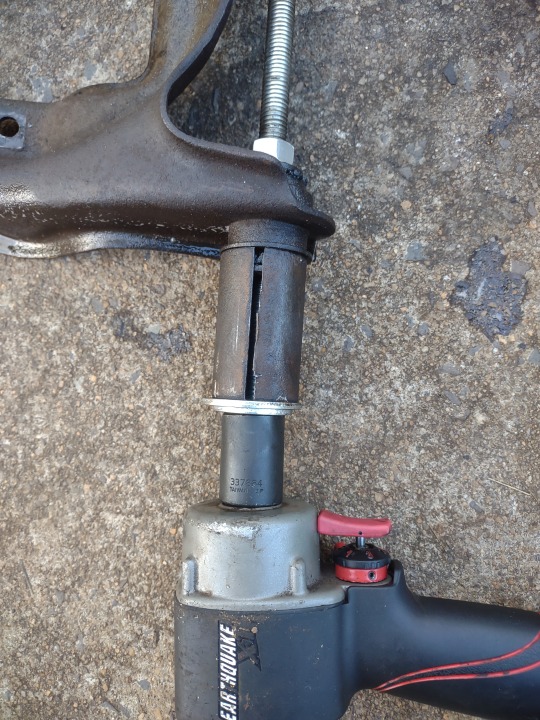
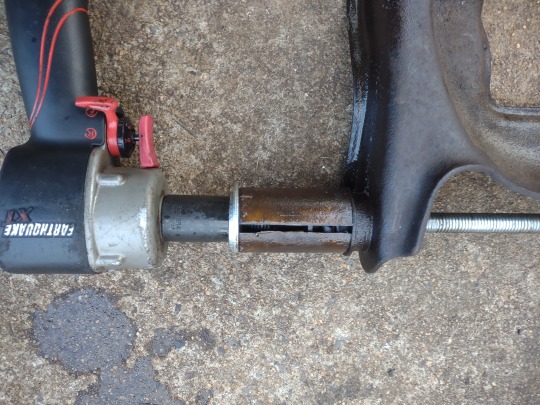
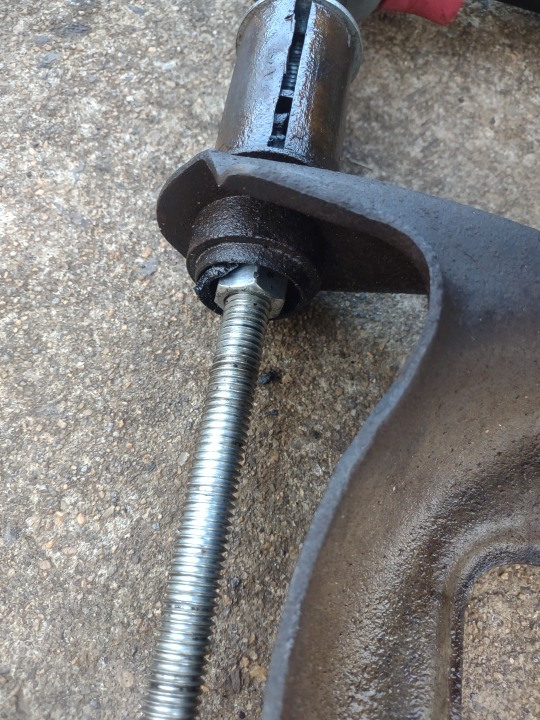
My Upper Control Arm had an initial issue with pressing the bushings out. The bushings are pressed in from the outside of the arms, so to get them out, I had to press from the inside-out. The book called for the technicians to use a special tool, using ratchets. The UCA also wouldn't fit in the press, and the ball joint tool I used on the leaf springs also wouldn't fit. The simple tool I used wound up being a lighter duty version of the AMC tool. I went to Tractor Supply Company, bought a 1/2 inch x 18 inch fully-threaded-rod, some nuts, and two washers. I placed the leaf spring eye sleeve from earlier on the outside lip of the bushing sleeve. The threaded rod goes through the bushing with a nut on the inside metal bushing face. I then place my washers over the metal sleeve, and then a nut. Using my air impact wrench, I tightened the outside nut, spinning the rod, pulling the inside nut closer, which pulled the bushing out. This process trashes the bushings, but not the sleeves. Since I'm replacing the bushings with poly bushings, I need to save the bushing sleeves.
I noticed before the bushings were out, that the rear bushing was somewhat misaligned, as over 50+ years, the rubber deformed, letting the arm settle out of alignment. I wonder how that affected alignment?
I cleaned up the UCA, getting it ready to go in the electrolysis soup before bedtime.
July 26 2022
#AMC#AMC Gremlin#1972#Project-X#Restoration#queued#front#suspension#bushings#tool manufacture#disassembly#electrolysis bath#wheels#new parts#rust removal#part cleaning
2 notes
·
View notes
Text


Today's projects: Finish pressing out bushings and parts from the suspension components so they can go in the soup.
The Lower Control Arm bushing pressed out fairly easy with some helping WD-40. I don't have proper press accessories, so I use impact sockets. Supposedly while about the same strength as regular sockets, impact sockets have less chance of shattering into shards when they fail. I also used a leftover bushing retainer sleeve from the front eye of one of the leaf springs as it fit nicely over the lip of the bushing sleeve in the LCA. It was long enough so the bushing pressed out and didn't run into my pressing surface.
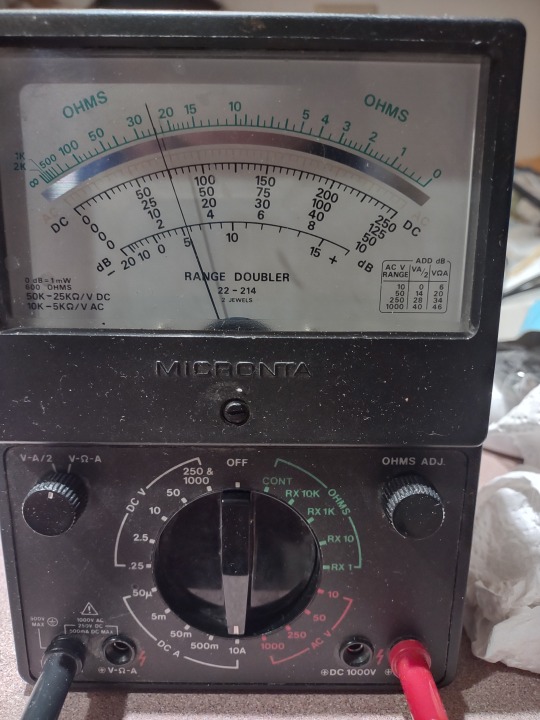
Once out, I cleaned it up with some paper towels and brake cleaner, then into the soup! I had to get a larger bucket to fit the arm. Dad found an old trash can tall enough but narrow enough so it's not a ton of water. I started using 1/3 Cup of washing soda, letting it dissolve into the approximate ~4-5 gallons of water. The amperage flowing through the system was just under 2 amps. I added a couple more 1/3 cups of washing soda. At 1 1/3 cups of washing soda, the amperage shot up to almost 3.5 amps, and the frothy reaction increased dramatically.
While the LCA was busy de-rusting, I pressed out the bolts from the coil spring isolator and then the isolator from the lower coil spring mount. Again, using WD-40 makes pressing old bushings out super easy with little to no scuffing damage.
July 26 2022
#AMC#AMC Gremlin#1972#Project-X#Restoration#queued#front#suspension#electrolysis bath#rest removal#disassembly#parts cleaning#bushings
2 notes
·
View notes