Adding my hyperfixations into Skyrim one brainrot session at a time!
Don't wanna be here? Send us removal request.
Statistics
We looked inside some of the posts by hackeraxedev and here's what we found interesting.
Average Info
Notes Per Post
232
Likes Per Post
160
Reblog Per Post
70
Reply Per Post
0
Time Between Posts
4 days
Number of Posts By Type
Text
14
Last Seen Tumblr Blogs


Fun Fact
1,644 Tumblr posts in 1 second.
Text
⚠️ April Progress Report! ⚠️
Hello! It's been a while since I've made any updates to my tumblr, so I wanted to let you all know where my Hazard mod has been and how it's been coming along! I've recently moved into a new home, so sorry for the late update!
So far, the Hazard mod has been great visually! As you've seen, his bones, facial expressions, and materials are all in working order. I've extracted his voice lines and hand-picked which he should say in certain basic follower situations. (i.e. enemy detection; normal-to-alerted, alerted-to-combat, normal-to-combat. hellos and goodbyes. trading, favors, wait, return-from-waiting, etc.) Unfortunately, unlike the other mods I've made of my Uruks in the past, there isn't a lot of appropriate dialogue for idle chatter that he could say randomly in the middle of the day, so he'll stay rather silent while he follows you. (Unless I decide he'll sometimes say random in-game voice lines as if he was a player deciding to spam them in a match, which might be kind of cute tbh.) More or less, he's ready for release, but the last thing I want to be able to happen is for him to be a marriageable follower. He won't have special dialogue to say to the player as a spouse, but for roleplaying reasons, it would be neat. It won't be difficult, but I know it might take a moment to implement the marriage dialogue as there's a lot of tedious copy-paste to do.
I have backed up my modding files to my external hard-drive and then cleaned out my main computer. This will allow me to have a lot more space to keep working on my mods on a nice, clean SSD drive, but also will allow me to write my tutorial for making custom followers easier as I'll be going step by step from scratch! Now that my computer is all set up in my new place, I'm very excited to start!
1 note
·
View note
Text
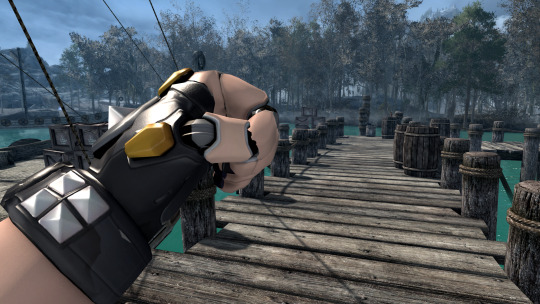
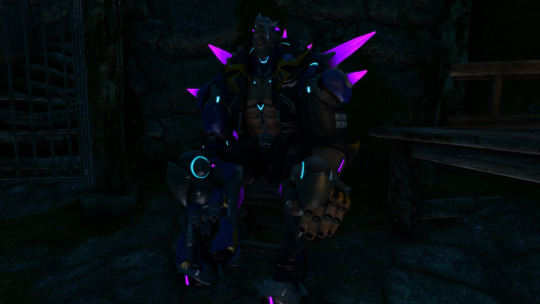
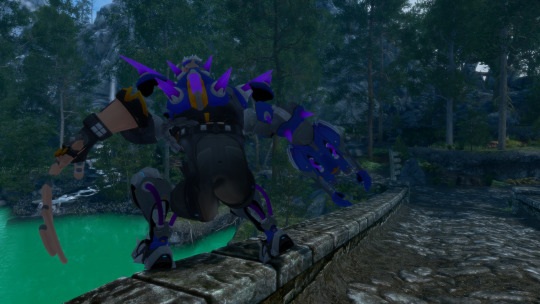
Day 7 - Exploring PBR and Broken Bones... 🦴🩹


After riding the high of my last major success with the Hazard mod, I started to play test Hazard more thoroughly... and unfortunately, I made a terrible mistake while making Hazard's bones.
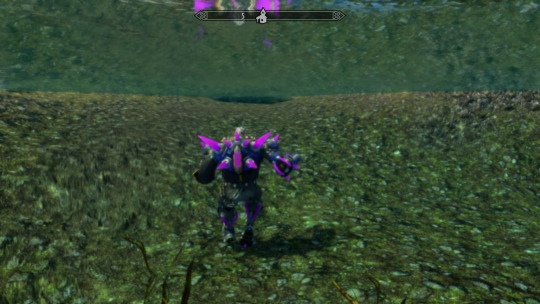
In the method I described before in my earlier posts, I never exported the collisions from the skeletons because I didn't know how through the pynifly Blender addon. This caused issues with him in game, such as phasing through fences and even floating in midair. I tried copy-pasting his collisions through Nifskope, but that didn't work either. There was only one thing left to do, which was restart his skeleton once again, but figure out how to keep the collisions. Thankfully, a modding peer of mine had a solution! 💡
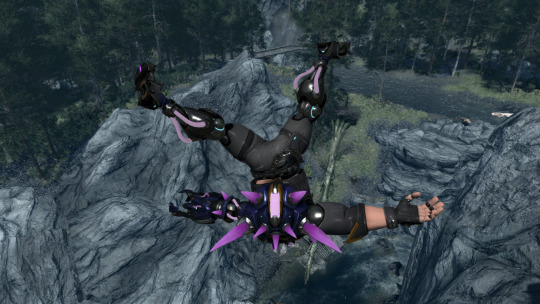
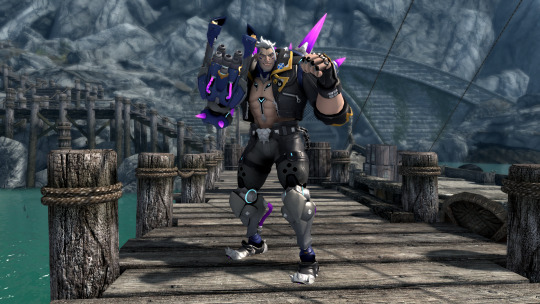
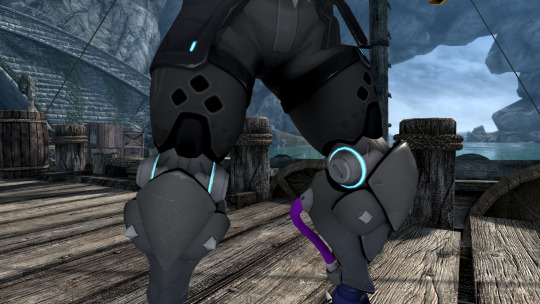
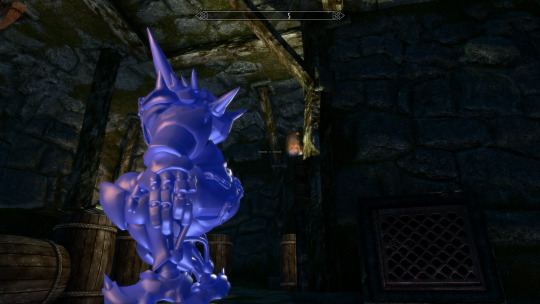
While the solution was rather time consuming, it proved to be successful in maintaining the collisions. I would do the same steps of aligning the bones inside the mesh, then aligning the skeleton that would actually be in-game... but instead of exporting that skeleton to be used in-game for Hazard's race, I would use it as a reference to copy the XYZ coordinates on to a normal skeleton! It made perfect sense to me, so that's what I ended up doing for the next... about 2 hours. The good news is, his collisions turned out great, he didn't phase through objects anymore, and I could do these fun ragdolls!
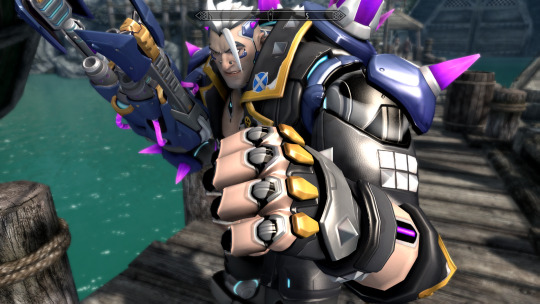
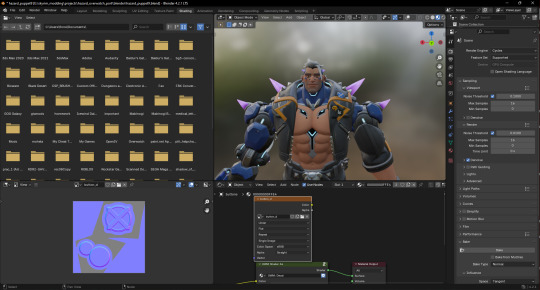
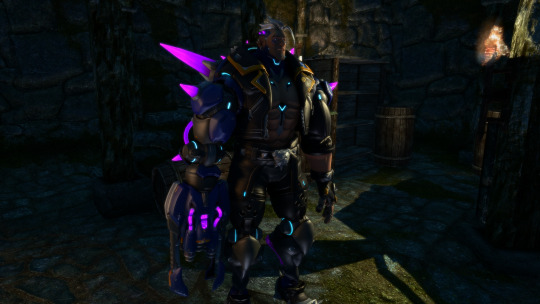
As far as his textures go, you'll notice that he has very nice metallics, subsurface scattering, emissions, speculars, and ambient occlusion in one mesh! I can do all this thanks to the community shader's addition of PBR. I read up on how to get their mod installed as well as adjust my textures to fit it, and it turned Hazard into looking even better than I thought I was able to! In my opinion, he's looking rather stunning.


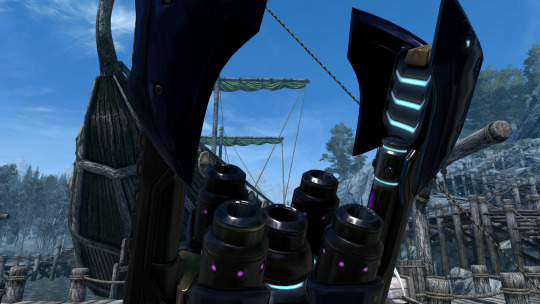

I think it would be neat to make a community shaders release and a non-community shaders release for people whose computers may not be able to handle it. There's still tweaking that must be done to get the spikes and tubes just right... and somehow along the way I accidentally broke Hazard's pinkie, but I think appearance wise he's doing a-okay!
Time to make him into a follower!
6 notes
·
View notes
Text
youtube
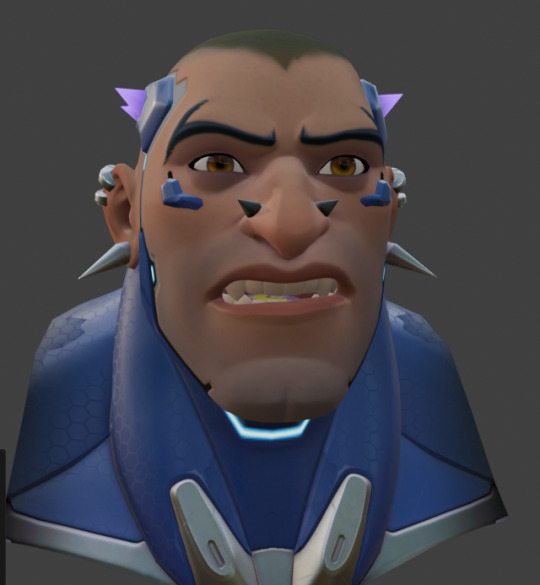
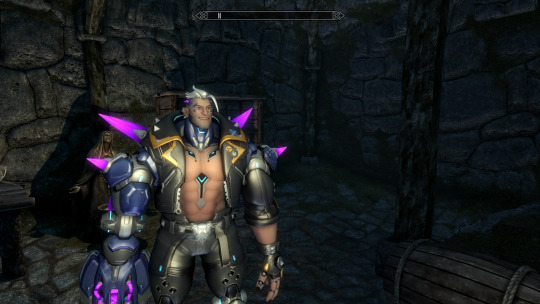
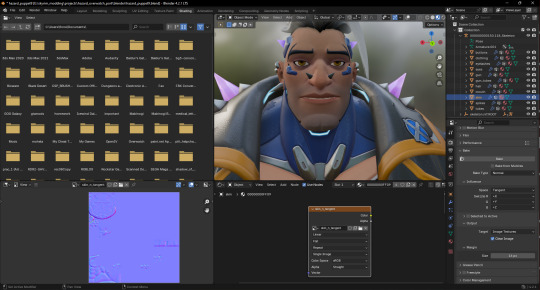
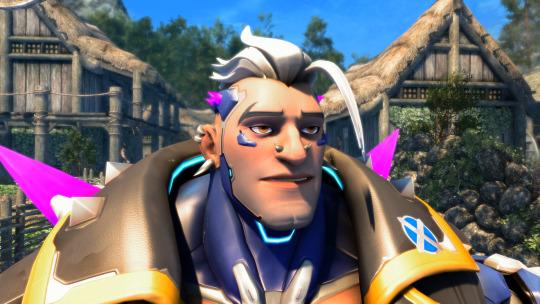
Day 6 - Our Special Boy grew up so fast...
Today is the day, everyone! Hazard's bones work, his knees aren't messed up anymore, his fingers are flawless, and after a long night and a longer afternoon while watching Smackdown... his expressions now work! I hope this video of his faces working make you happy, because it has made me very happy to do this process!
In just a week, we have gotten Hazard into the game with remarkable quality, in my opinion. A lot better than I thought I'd be able to. When I first ported a custom race into Skyrim... it took me an entire year to get it done! Now, it has only taken us a week! And, should I do this again (which I do intend to do and write a guide about this,) It might take even less time!

🎊 The Next Steps 🎂
From here, the next steps is to make him a follower instead of just a race. Similar to my last follower mod, now that all his pieces are functional, I will make him custom voiced and have voice reactions to various situations, combat scenarios, and more. Thankfully, making custom followers isn't something very difficult and there's lots of tutorials on that, but it will be quite time consuming to probably get all the voice lines he has in game then organize them in such a way where it feels fluid and believable that he's in Skyrim. On the side, I may or may not import another character when it gets too boring to keep adding voice lines and I need a break from it.
Today is the day I take a break and take things a little slower with modding in Hazard. But in the meantime, have this gif! I'll be back with my next bout of modding soon!

4 notes
·
View notes
Text
Day 5 - Time for a face lift!
Today is finally the day we add life to Hazard's face! In order to do this, we have to separate Hazard's head from the rest of his body. Before, Hazard's mesh was just one giant mesh that was all of Hazard, but now we separate him into parts: His head, his accessories on his head, his hair, his eyes, his eyelashes, and his mouth. These are all separate nifs now, and they require their own tri files. The tri files are what animate the nif to move. By making our expressions in shape keys on our tri file, we can make all sorts of blinks, talking animations, and etc.
One thing to note is that in Outfit Studio, make sure you set your nifs to dynamic before you export. ⚠️If you do NOT set your nif to dynamic and you try and add a tri file to it, it WILL CRASH THE GAME! ⚠️Your nif has to be ready to move before you make it move!

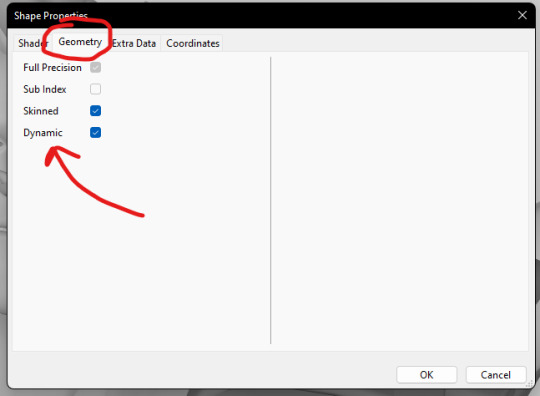
And when you export, select the shapes you want inside your nif and right click.

Don't forget about thinking about paritions if you're confused as to why certain parts may not show up in game, by the way!
Figuring out the right way to move his face around proved to be a challenge, but what I did know is I wasn't going to do what I did LAST time and move around all the vertices manually. It made expressions very unnatural to both make and to look at! So, I wanted to take advantage of the bones that were already on his original model to make expressions. After trial and error, I decided the best approach was this:
Give Hazard a default resting face.
Export the model from Blender then Import it into Outfit Studio as we did before.
Export the head parts as .tri files through Outfit Studio.
Import the .tri files into Blender
Put the .tri files into the armature in Blender and transfer the bone weights of the head parts.
Move the tri file through Hazard's original skeleton.
Save every expression as a shape key.
Export the tri file!
This method proved VERY well as I could keep the vertex count of the .tri file vs the nif AND get very nice expressions. ⚠️(THIS IS ALSO VERY IMPORTANT. IF YOUR NIF AND TRI FILE HAVE DIFFERENT VERTEX COUNTS, IT WILL CRASH!) ⚠️
So now, all I had to do now is just sit back, relax, and make... 40 something expressions... oh boy. Take a vanilla Skyrim head tri file as a reference and study how they look, then do the same to Hazard! BlinkLefts, BlinkRights, BigAhh, all of those fun things.
In blender, I made his default face by posing the bones, applying the armature to the parts of his mesh that moved, setting the pose as the rest pose, and then reattaching the armatures to the meshes I applied earlier.


Now I put these face parts into outfit studio, since I already have the rest of his body. Once the tri files are into Blender, it now starts the long, long process of making an expression for every one listed on the default tri... (sighs)

It IS pretty fun at least! Though I've been at it for hours now so it's time to sleep... (It's 4:29AM!!!) Stay tuned!
1 note
·
View note
Text
A helpful tutorial I found on transferring bone weights in Blender!
0 notes
Text
Day 4 - The Bone Mystery FINALLY Solved!

Everyone! I'm happy to announce that I finally figured out the mystery of creating custom humanoid bones! And it was actually a lot easier than I thought it would be. A lot of the issues I faced with bones not ending up exactly where I wanted them to be were due to just a simple misreading... I'll explain!
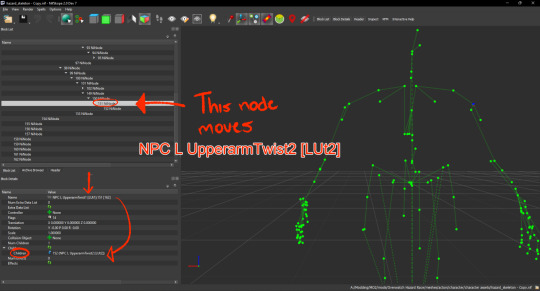
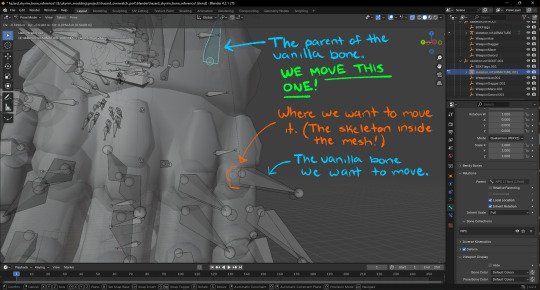
The issue: Whenever I would begin moving bones, I was getting confused on which bones I was supposed to be moving. Remember, I said myself that in order to move the vanilla bones, you had to make a parent node of the vanilla bone you would like to move, then move the parent. But the reason nothing ended up the way I wanted to was because I misread the names of the bones!
For example, if I wanted to move NPC L Forearm [LLar], you would assume that the parent of this node (the bones are called NiNodes in NifSkope, I may jump frorm calling them bones or nodes...) would be named something with NPC L Forearm, right? Wrong! The parent's name is actually NPC L UpperArm [LUar]:219! This is because in NifSkope, when the node is first created, the parent node of the bone you'd like to move starts out with a blank name. Then, on saves, it 'auto-sanitizes,' which means the blank name gets the name of it's parent, but with a special number next to it.
⚠️⚠️ If you save your nif and it does NOT auto-sanitize and name your parent bone, YOU NEED TO NAME IT YOURSELF! Or else, the bone will disappear after you close NifSkope and BREAK YOUR SKELETON!⚠️⚠️

It's a little confusing, but in order to move the forearm, you have to move the bone named the bone's former parent + a number next to it. The reason this caused issues is because I thought I had to move a none called NPC L Forearm [LLar]:226 or something to move the vanilla forearm bone... but this would actually move the hand! NOT the forearm!
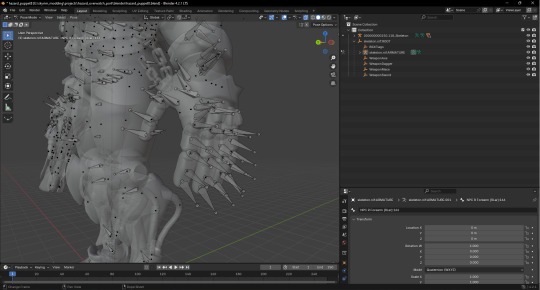
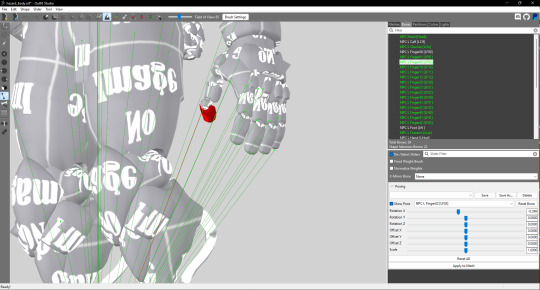
So... after an embarrassing amount of failures, I was able to figure out this simple mistake and respond accordingly. I would move the proper parent nodes, sort of like a puppet's handle bars, and pay attention to where the vanilla bone would go. The vanilla bones should go to where the bones in the mesh are. And the bones inside the mesh should be at the correct joints in which the mesh should move.
Here's a picture of what I mean - take note of the dotted lines between our "puppet handle and the puppet" persay.
As a reminder in Blender, be sure to always apply your pose as a rest pose when you're done making changes to your skeleton in pose mode.

Also if it hasn't been clear already, I'll jot down a reminder! There are two skeletons you need to be worried about. The skeleton inside of the .nif mesh file (in our case, Hazard) and the skeleton the character uses in game (this is stored in "meshes/actors/character/character assets". Your custom skeleton must be selected in your mod esp to work just for your race.) The skeleton inside the .nif must have its bones where you want it to move. The skeleton that's used in game must have its joints positioned using parents to the locations inside the .nif... and as accurately as you can!
If the meshes joints and the skeleton's joints are different, you end up with very ugly contorted figures like this.


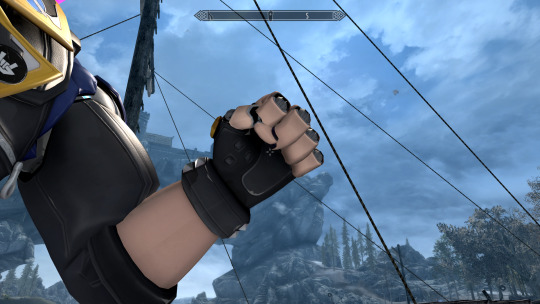
Now with all of that done, I present to you the fruits of our labor! His fingers perfectly curl into a fist, his knees don't poke out too far, his shoulders are the correct length, and his feet are posed correctly.
From here, the rest is thankfully very simple. There might be a few more tweaks to his bones if I find the need to, but I doubt I'll tweak anymore TOO much, personally. I'll tweak up the textures and fix the ambient occlusion I glued on, and then... sooner than I expected, I can finally start the facial animations!
Hazard is finally well on his way to becoming a finished race!

5 notes
·
View notes
Text
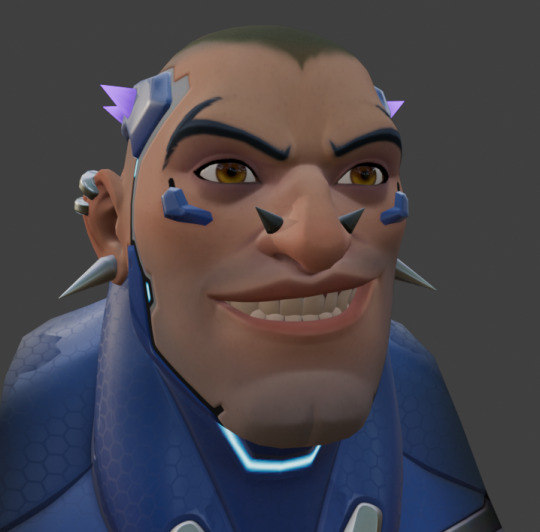
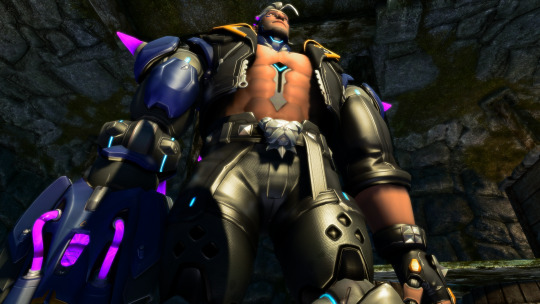
Bonus - Late night tweaks
I told myself I would take a break, but yet again I've found myself doing more tweaking for my own sanity. While he has no tri file to animate his face yet, or even a head mesh that is separated from everything else, I decided to move his mesh around to make him smirk. This won't be in the final product of course, but it helped me appreciate my progress pictures a lot more!
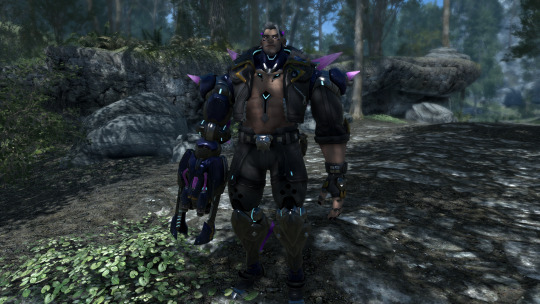
Secondly, the screenshots I've been posting have all been in an ENB. Turning the ENB off made oddities in how his lower abdomen was shaded lessen or even disappear. Here's some shots about how it looks now!


Here's a good comparison of the ENB shot vs the non ENB shot. I think the difference is pretty clear, and I prefer how his skin looks without the ENB effects on. Though, I don't like how desaturated it makes everything else looks when the ENB is off... I wish there was a way to get a good mix of both worlds.


Again, once his hand is fixed, I will be able to proceed with a proper face! Stay tuned!
3 notes
·
View notes
Text
Freebies - jointmap.cfg for Hazard
This mapping file was an extremely important and helpful piece of information for making this mod happen. It's not a lot more than just a text file, but I have hopes that, potentially, this file might be somewhat applicable to other Overwatch models that were ported using Overtools in Blender, albeit some tweaking required. Hopefully by sharing this file it saves others a lot of work. I linked it via Google Docs!
If you're unsure what I'm talking about, read my other posts! And if you weren't sure where to get the FBX joint renamer I've been talking about, you can find it here. Enjoy!

#hazard#modding#overwatch 2#overwatch 2 hazard#skyrim#skyrim modding#overwatch hazard#modding resources
2 notes
·
View notes
Text
Day 3 - It's time to bake some cookies- I mean, textures.
Day three into modding, and it's time to clean up these bones... or so I thought. Everything was going pretty well with readjusting the bones until I realized something from my last post. If the skeleton is the reference and the modded skeleton, wouldn't it be the case that the bones inside the .nif attach themselves incorrectly? I brought this up because of some oddities I saw with the .nif in outfit studio where the bones looked subtly off.
I figured that if I took the skeleton and moved the vanilla bones, knowing they'd return back to where they originally went, directly overtop of the parent bones, things would be okay... but this ultimately made the mesh worse and contorted it beyond recognition. I started to think I'd have to use a separate skeleton in Blender without any parent nodes and move them into the place of the other skeleton's bones that HAS the parent nodes to achieve a perfect placement of bones just how they looked in Blender...
...But all that was too much thinking and work, so I've switched gears to just getting his textures to look pretty, and ignoring his really fucked up hand for now! 🤪
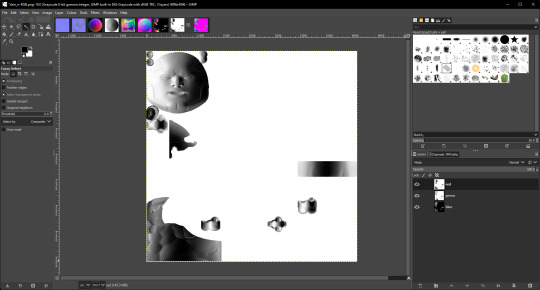
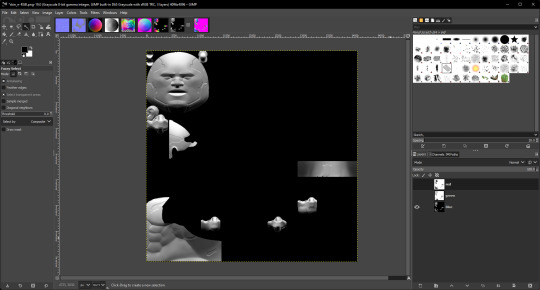
Thankfully this wasn't too hard. All I did was load up Blender, go to the shading tab, and bake the normal maps, emission maps, and ambient occlusion maps for Hazard. Since Skyrim doesn't have an AO texture section in Nifskope, I'd just merge the AO directly onto the diffuse using Gimp or something later on.
For his fleshy Skin textures, his skin will be rendered using Skyrim's skin type rather than default. When this happens, normal maps must be object space rather than tangent space. Secondly, the RGB channels must be facing specific ways for Skyrim for it to work.
Red: The light is facing the left.
Green: The light is facing the top.
Blue: The light is facing directly at the viewer.
These settings can be adjusted in Blender directly, but I wasn't thinking of doing that at the time, so I had to adjust it in Gimp manually. I did that by going into Gimp, Colors > Components then Decompose on the normal map. This splits the channels into layers you can edit.
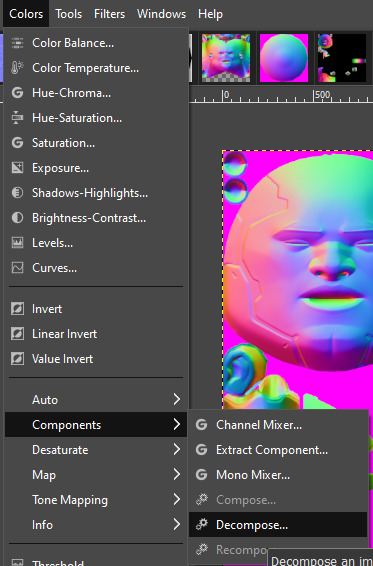

I inverted the red channel so the light faces to the left. The green channel was the blue channel (because the light was facing directly at the user, except it was inverted for some reason) so I knew that I'd have to swap the positions of the green and blue (I'll get on that later), and also fix that texture to not be inverted, and the 'blue' channel looked okay so I left it alone.

Once I've made all my changes, I went to Colors > Components > Compose. This is where I switched the channels around.
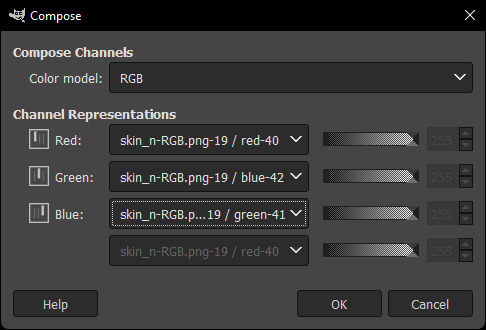
Then the normal maps look good!


I've had to do this song and dance a lot with my Shadow of War modding journey.
Fast forward a couple hours later, after baking the textures, turning them into .dds files, and doing a little bit of editing with Clip Studio Paint, I got the textures to look very nice. But not without their fair share of hiccups and drawbacks.
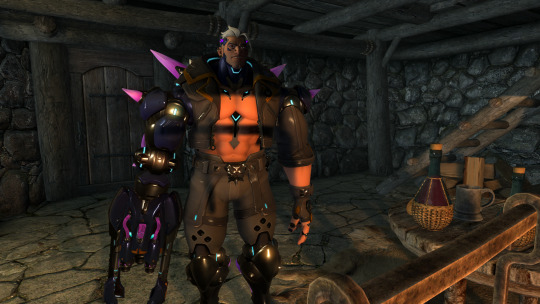
As you know, Mr. Phreaky Hazard has a *lot* of LEDs. This requires me to use the Glow Shader and thus an emission mask. (Tutorial on Glow Maps Here) But the thing about it is I cannot use the Skin Shader AND the Glow Shader at the same time! So, I had to turn his beautiful skin shader to a glow shader, ruining the realistic, soft skin-like feel into something more plastic-y. This also sucked because I went through all that hard work just earlier to make the object-space normal map for the skin shader! Though I'm hoping I can figure something out in the future to make this less of an issue... but no promises there. There were also some hurdles in making sure his eyes showed up correctly (sometimes in-game they'd show up black,) but I simply copy-pasted the BSLightingShaderProperty from an existing pair of working eyeballs.
In the end, in NifSkope, he ended up looking like this. I really liked how he looked!

Now, this is what he looks like in game!


There's a few hiccups that I want to fix:
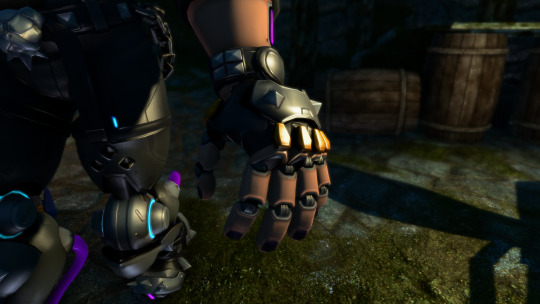
His fingers are the biggest issue I want to tackle. Everything else is passable, but the state of his fingers are unacceptable to me! I'm still unsure how to get these bones accurately where I've placed them, but by golly I'll figure it out. It might require me to just move the bones blindly until they cooperate, which isn't something I'm very ecstatic about...
The chains on his bahookie need to be attached to his pelvis instead of his thigh, and the diffuse map I made needs to be adjusted because I put the ambient occlusion on it as well, but some parts are far too dark. and grainy. I'll have to either re-bake the ambient occlusion map, or manually blur out the grain myself, but results may vary there.
Similar to the issue with his fingers, I need to fix how his knees bend as they are not bending in the correct location.
Overall, I'm very proud of myself and how far I've come so quickly with this. Now that his materials are on here, I can save a copy of this file to use as a reference. With this reference, I can use it for any future copies of Hazard I'll be making as I experiment with my rigging. I absolute do not want to touch anything with his face until his fingers are working because I don't want to be in a position where I work very hard on his face, but because the hands don't work, I am forced to start over. As much as I can't stand his bored face, I gotta persist...
Don't worry Hazard, you'll be in game soon enough!

1 note
·
View note
Text
Day 2 - Deeper into the boneyard...
The second day of modding was a shorter one because of other irl duties that needed taken care of, but we still got a lot done in terms of exploring custom skeletons and movement! The goal was to mainly fix his knees, palm, and fingers.
The first struggle was learning how to use PyNifly, a nifty and sleek tool for importing and exporting .nifs in Skyrim and FO4. (For context, I am using Blender version 4.2 and the latest version of this plugin!)
BadDogSkyrim/PyNifly: Export/Import tools between Blender and the Nif format, using Bodyslide/Outfit Studio's Nifly layer. Supports Skyrim LE, Skyrim SE, Fallout 4, Fallout New Vegas, Fallout 76, and Fallout 3.
The instructions on the wiki made it seem pretty easy, and I have used this tool in the past for doing small edits to meshes, but I still was left in the dark about how to import and export a skeleton without it turning out wrong. I ran into a couple issues.
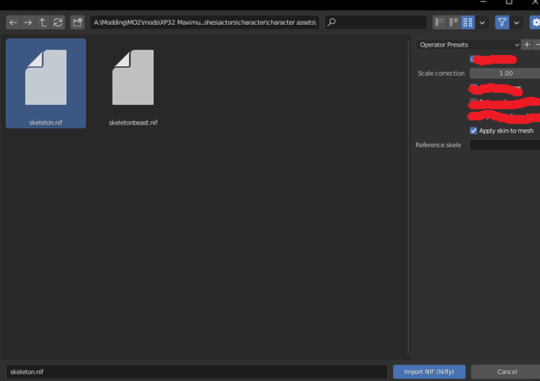
The common issue I found myself in was that, when I exported the skeleton, the nif file would turn out blank. Turns out this happened because I selected the "export animations and collisions" options on import, when I should have set this to false. I selected the bounding boxes for collisions alongside the armature that contained the skeleton on export, resulting in an empty file. When I ignored the bounding boxes and only selected the armature, I was able to export the file without it turning empty.
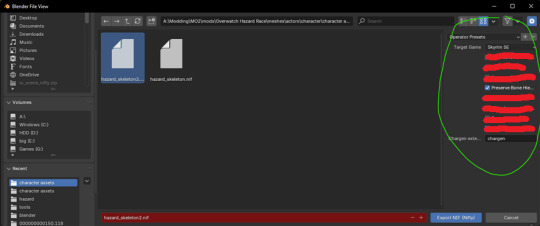
Sometimes, after I would export the skeleton, the bones would be all over the place or not there at all. I solved this problem by ticking and disabling a few settings. On import, I disabled all the settings except the skin to mesh setting, then on export, I disabled all the settings, but ticked "preserve bone hierarchy," which was the golden ticket I needed to finally import a skeleton through blender then export a skeleton through blender without it doing anything wrong!
The last issue was moving the bones, but not seeing the changes in game. You would think that it would be as simple as moving the finger bones where Hazard's finger joints are, right? Unfortunately not. Skyrim's animations will snap the skeleton back into place if you move the vanilla bones. That's why, in spite of moving the bones in Blender, Hazard's body would shrink like a soda can! What you need to do is make a parent to node on the bones you wanna move and scoot that around instead. So you take the skeleton in nifskope, select the bones you would like to move, right click it, add a parent node, then select NiNode. Then you move the NEW bone you had just created in order to move the vanilla bone, not moving the vanilla bone directly.
Importing properly:
Exporting properly:
This here was an instance of me trying to experiment with moving the bones, but I realized that it wasn't working right because the skeleton I was editing and the reference skeleton that was inside Hazard's mesh was different. Hazard's reference skeleton had the actual vanilla bones moved when they weren't supposed to, and the skeleton that was used in the mod esp was moved into position with the parented bones, causing this strange mess...

With all of these issues answered between the hours, I finally came up with a proper workflow for how to handle humanoid skeleton editing for custom models. I described the process I've made with Hazard so far in particular.
Import Hazard's Overwatch model using Overtools (You can get the tool by going to their Discord here.) in Blender, and scale it to the size of Skyrim's skeleton. Don't worry about it being too perfect because we'll be fitting our own skeleton later.
Create a jointmap.cfg that maps each of Hazard's bones to Skyrim's bone naming conventions. (i.e bone_0066=NPC L Thigh [LThgh] or something for a whole group of bones from 0066-006F.) Have outfit studio on the side so you can import the FBX and see what custom bone highlights where. So for instance, if you saw bone_08B3 highlight somewhere on Hazard's nose, you should probably put that bone under the NPC Head [Head] category in the cfg. This is the most time-consuming part, but will save you a lot of headaches of having to weight paint manually, especially if you find yourself in the position where you must reimport the entire fbx again...
After you have a jointmap.cfg that's the way you want it to be (you'll know you're there when, not only is everything mapped, but they're mapped to the proper group without any oddities), the model probably won't be moving correctly at all because the reference skeleton in outfit studio is set to the basic skeleton by default. This is when we make our custom skeleton. Take a skeleton and parent all the nodes you want to move. I had a friend of mine with a skeleton that had most of all the bones I wanted to move parented already, so I didn't have to do too much work here. But it might take a little bit of time.
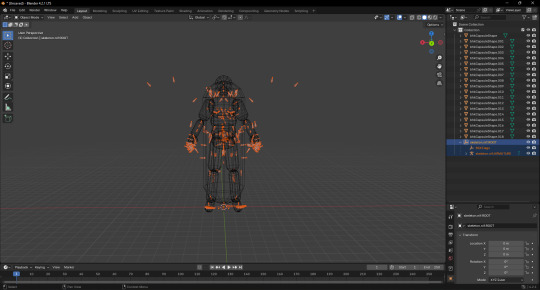
Import the skeleton into Blender where your model is, and make sure you don't have an armature selected. (Pynifly might do something funky, idk.) Select the armature of the skeleton you just imported, then in pose mode select the parented bone. That's the bone that's going to look like "NPC R Clavicle [RClv]:225". It's going to have a number next to it, move that one! It's very important you make sure you're moving that one, and NONE of the vanilla bones.
When it looks right to you, go into the settings of outfit studio and set that skeleton as your reference skeleton. Create a new outfit with no reference mesh and import your FBX. If you go to the left and turn on the visibility of bones, you should see your bones in the spots you moved them. Pose your mesh around and make sure it moves the way you expect. If not, tweak the movement then repeat this step until it's correct.
Go into your mod esp in creation kit and make sure your custom skeleton is being used instead of the default skeleton. Now with the skeleton on your nif being the same skeleton used in-game, Hazard should be moving the way you expect him to. If not, repeat step 4-6 until he does, as you will have to update the mesh again. (This is why it was useful for us to have that output file made from the fbx renaming machine!)
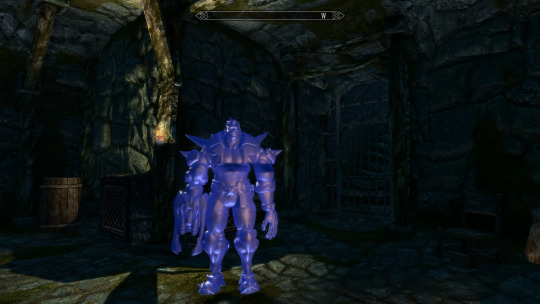
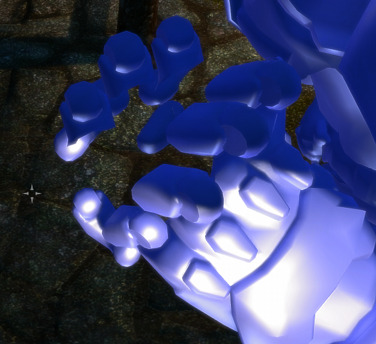
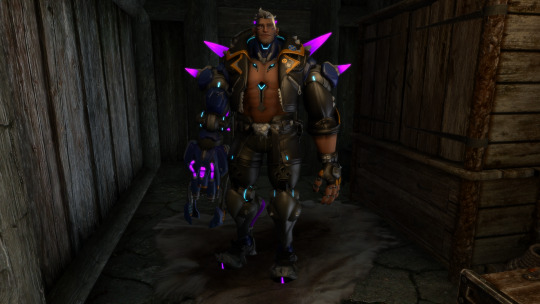
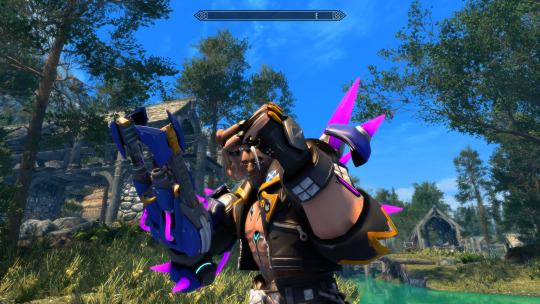
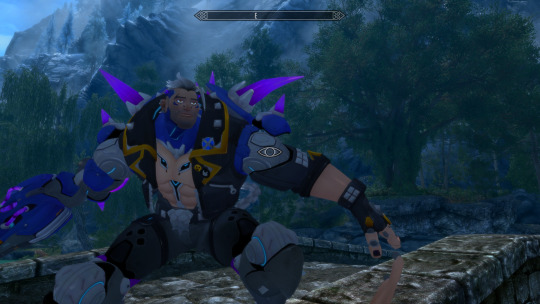
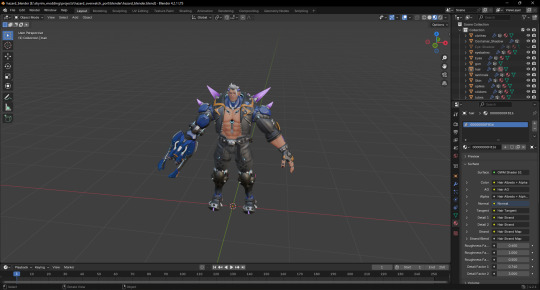
For now, this was the result of all my hard work. Don't mind the fact he's blue! I just didn't feel like putting his textures on. I still need to do adjustments on his hand, though. But they should be simple tweaks. I also want to make his fingers connected, as for right now, they seem to all be disconnected for some reason. I also want to fix how his chains on his butt look, too.
After the tweaks on his bones, my next plan is either to begin rigging his face, or fixing his textures to look better. I think it would be best to tackle the more demanding task of doing facial animation first to get it out of the way. And besides, I'm getting really tired of looking at Hazard's sleepy, bored expression! Time to liven him up a little!
===========================
Welcome to the chicken scratch section! This is where you'll see the raw notes I write down for modding before I write it in an organized way for the dev blog. I figured the chicken scratch of raw information might help someone, and I just think it's neat, so here you go! You'll know it's the chicken scratch section by the equal sign divide and the🐔 emoji.
Chicken Scratch 🐔:
In pynifly, I think what I'm supposed to do is import the bones without renaming anything, without importing the animations, and export without renaming things... and things seem to be okay.
parent the bones with empty nodes.
move the bones with the numbers next to them in blender
export the skeleton, preserve the bone heiarchy.
use that same skeleton as a reference skeleton in outfit studio. dont import a reference mesh.
select the fbx that was outputted by the renaming fbx machine
delete the custom bones from the project or it'll crash
edit the skeleton in blender and repeat to tweak
7 notes
·
View notes
Text
How to make skeletons of unusual shape in Skyrim
So someone asked me a few days ago how I make those horrible fucking spindly bodies, giant headed Thalmor, etc.
Thing is, it’s really quite simple to do. So here’s a guide, I’ll cover two things in it, how to resize skeletal parts, and how to move them around.
This guide will assume you know how to create races and stuff. You will also need nifskope.
The first thing you need is the skeleton for the thing you want to modify. These can usually be found in the meshes/actors/character/character assets folder. You’ll be looking for a file called “skeleton.nif” copy that file to your workspace, and open it up in nifskope.
The thing is basically a bunch of dots, which are nodes, connected by lines, and roughly forms a stick figure. All the bones are interconnected, and you can click on one of the nodes to highlight it in the actual list of objects. If you click the arrows to see what child nodes it has, you’ll see additional bones (expand an arm, you’ll see forearm and hand bones for example).

Right clicking on these nodes, and going to transform -> edit, will bring up the menu you need to change the position and size of the node, and consequently, the size of that bone.


Here’s where things come important, the scale field will resize your bones, making them bigger or smaller. All you need to do is change the number. Don’t click the apply option after you make your changes, it can fuck things up. Be sure to remember that all the children bones connected to what you scale will scale as well. If you shrink the arm, the forearm, wrist, and hands will all follow.
However, you cannot change the position of bones. The game will reset them when it plays animations.
What you need to do instead, is make them the child of a blank parent node. To do this, right click on the bone you want to move around. Go to node-> attach parent node.

A big list of possible nodes will appear. Select NiNode. Your bone, and all the bones under it, will become the child of this new parent ninode, said NiNode taking the place of the original bone.

Now go to Transform-> Edit. The x, y, and z values under the translation box will allow you to reposition your bone. Realize that this again, also reposition all nodes under it.

And that’s pretty much it, now you can create fucked up things to your heart’s content!


To use this skeleton in a new race, the body data tab in a race object holds the skeleton file, just change that to your new skeleton.
Some things to keep in mind
I haven’t found any upper limit on how much bones can be stretched, but realize that the NPC’s feet can end up not touching the ground. You can essentially make floating NPCs this way, but realize if you scale up or down the legs, they might float or clip through the ground.
Objects held in their hands scale appropriate. Really tiny hands will end up having really tiny swords.
I’ve never tried this for non-humanoids, so I’ve no idea what would happen if you tried it for spiders, centurions, etc. Still worth a shot.
195 notes
·
View notes
Text
Day 1 - The bonesss, the bonesss!
So far as I'm typing this, it's been about five hours of modding when I told myself I would only be modding for one! For all these hours I've been picking up where I left off to carefully rename each vertex group to the appropriate Skyrim bone it belongs to. At this rate I don't even know if I'm using the right terminology, but I do know that it makes my life a whole hell of a lot easier, even if it's more time consuming!
This is the tool I'm using to make this happen: L0rdCha0s/FBXJointRenamer: A command line tool to rename joints for retargeting in FBX files

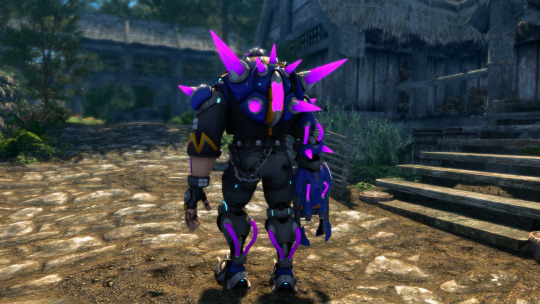
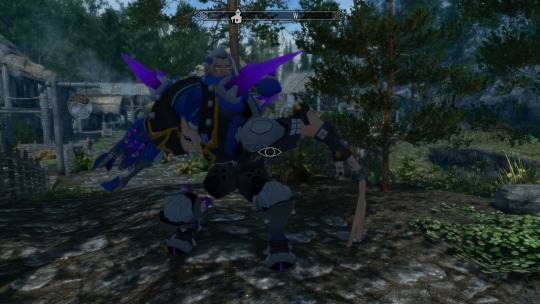
As you can see this is a whole lot of bones I gotta rename from bone_blahblahblah to a Skyrim NPC L whatever. But essentially all of this will help me pose his bones correctly to the actual Skyrim skeleton. But... the bad news is, the Skyrim skeleton does NOT fit Hazard's model perfectly. So, what ended up happening is that at first he started to look like this in game...


The good news is that once I finished renaming most/all of the vertex groups to Skyrim conventions and then shrunk Hazard's model down to fit the skeleton closer (but not perfectly,) he looked like this now!


Now his shoulders and head align much better to how you think they would, but the only issue now is his hand remains to be atrocious. Other than inserting his model and texture into the game, there wasn't a lot of heavy lifting mentally that went into doing this. Just a lot, and I mean, a lot, of tedious renaming and wiggling Hazard's body around to see what bone matched up to what - it took around 4am for me to finally put the keyboard down and head to bed. The good news is that, thanks to this configuration file, I can use it to reimport Hazard's raw model as many times as I want without having to redo so much weight painting work later, and I already know that's something I'll have to do most likely. It does feel good that only a day in, I got his model in and he looks relatively alright!
For Day 2, my goal is to fix his fingers. I don't expect it to be easy at all, though. It's time to really put the thinking cap on, now.
2 notes
·
View notes
Text
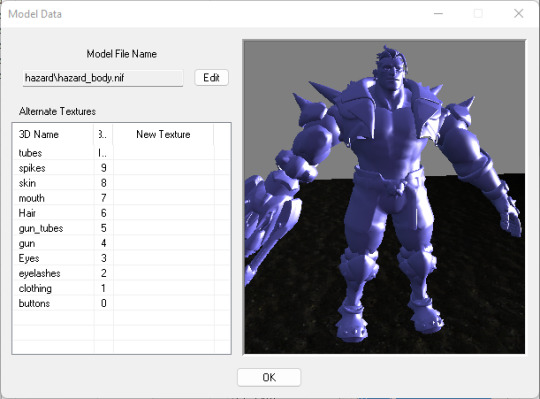
The Foundation
This is it, Step 1! The strong foundation for organization. I go into Mod Organizer 2 and set up a new mod, then make the meshes and textures file structure. The last screenshot's made clear that I have Hazards model and all of his necessary images, but before we get anything into Skyrim the images need to be in .dds format. Right now, they're .TIF files. Have no clue what those are but his normal maps are looking like this, and I'm not too sure about it.

That means it's time to look it up! After splitting apart the channels in RGBA, he has a red and green, but his blue is black. Maybe that's why it looks all barf green and not the cool pink/blue hue I'm used to. If I remember correctly about RGB's and tangent space normal maps, the red channel means the light is facing to the right, the green is the channel where the light is at the top, and the blue is the light shining directly at the character. So I'm guessing Overwatch's normal maps don't have the, shining directly at the character normal map. I'll ignore it for now, but I downloaded some tutorials for Skyrim normal maps on the side just in case. Later on, I will need to make object space normal maps (the cool rainbow normal maps that kind of look like candy) for the parts of him that are skin. I remember I can do that in xNormals and will explain that more in depth when we get to that step. I'll leave all these textures more or less unchanged and just port them to .dds.

Back to Blender, I'm now organizing the parts of his model that are skin vs that aren't. His mouth bag was separated from his face, so I attached it back on by using the merge by distance feature. Since I didn't move anything around in his mouth, so I was able to merge everything correctly. This is important for when we do expressions later on. Now, I'll be doing the same to his eyelashes to his face so I can move those neat as well.
Now as I was doing my separating, I realized something horrifying - I was going to have to, at this rate, redo all the tedious rigging and weight painting MYSELF for this huge man if I didn't use a tool I used for the Uruk project, the FBX bone renaming tool. But in order to do that, I'd have to save this armature as an FBX *and* I would have to go get the bones back that I deleted. (That's why you didn't see them in the first screenie.)

This is a lot of bones to rename, and to make matters worse, all the bones aren't even named anything useful in the armature! So I'm likely going to have to go and rename everything manually myself anyways both in Blender and in a notepad document for the tool to work. (The tool renames all the bones in the FBX and deletes the duplicates that aren't needed I think.)
We'll have to see how that goes later. I deleted weird duplicate meshes inside Hazard, reattached his arm (because when you put him in, his gun arm is on the floor for some reason), then decided to take a break. The next step from here would be renaming this list of bones into useful details, like his pelvis, upper body, lower body, left arm, right arm, etc. Whatever the standard bone naming tree is. I'll likely just reference a Skyrim skeleton and see how they did it.

So I was SUPPOSED TO take a break but the adhd brainworms got to me, so I exported his entire model into outfit studio just to see what would happen.
Oh, when I exported the model to Outfit Studio, his arm fell off, so I had to go back into blender, delete the armatures on his gun arm, apply the pose to the armature, then put the armature modifier back on the gun arm for it to stay put on export.


The circled bones are the bones I need in order to have Hazard move. The ones I crossed out are the ones I don't need. There's a whole, whole, WHOOOOOOOLE list of bones I don't need that I need to get rid of so he exports correctly. But even then, these aren't really the 'bones' I'm worried about, it's the bone weight thingies. Even when I export this, he's going to look weird because his body is gonna implode and squish to the vanilla skeleton. That's when I'll have to adjust the skeleton myself to get it to the shape of Hazard, sort of like what I did with this big Olog from Shadow of War a while back:

I'll cut it here for today since I spent about 3 or so hours on sniffing around the modding so far. Seems like the first big hurdle will be bone stuff!
2 notes
·
View notes
Text
Day 0: Welcome to the Blog!
Hello! Unbound by the limits of Twitter's word count, I am free to describe and ramble my modding process in as much verbose detail as I please! You'll find a lot of info-dumping, thought processes behind certain decisions, and screenshots of my modding/development journeys. Everything will be saved here in hopes that people who stumble upon my blog who are looking for information on my exact issues I cover and solve will find an answer. I also might reblog posts that give me answers to my own questions I struggle to answer.
My first modding journey I'll be going on is trying to mod Hazard from Overwatch 2 into Skyrim. Every hyperfixation I end up loving goes through the tradition of being ported to Skyrim one way or another, and Hazard won't be any different. The only caveat is that it's been months since I did a port-over mod for Skyrim... and I can't remember a lot of the steps I did before. But now, coming back with the urge and dedication to sink my teeth into this hobby again, I want to be serious about it and write down everything so I don't forget so easily.
My last big hyperfixation was Shadow of War, and as such I taught myself how to mod Skyrim to get the main character, Talion, into the game, as well as my favorite Uruk Ogbur the Judge in as well!
Talion Custom Race at Skyrim Special Edition Nexus - Mods and Community
Ogbur the Judge - Custom Voiced Uruk Follower at Skyrim Special Edition Nexus - Mods and Community
My goal is to step up from the last mod with every mod I do. So first, it would be a port that'd be similar to how I did the others, but eventually I would like to make my own model of Hazard in Zbrush to have more control over how he looks and what I could add to him. Lastly, I hope this blog's existence motivates me not to let this become another project that dies out for me.
Well, welcome aboard! I don't know what you'll be in for, but we'll see I guess!
😈💜
3 notes
·
View notes