
Don't wanna be here? Send us removal request.
Statistics
We looked inside some of the posts by holland-aucoin-blog and here's what we found interesting.
Average Info
Notes Per Post
0
Likes Per Post
0
Reblog Per Post
0
Reply Per Post
0
Time Between Posts
2 days
Number of Posts By Type
Photo
17
Last Seen Tumblr Blogs


Fun Fact
Total funding amounts to $125.3M.
Photo
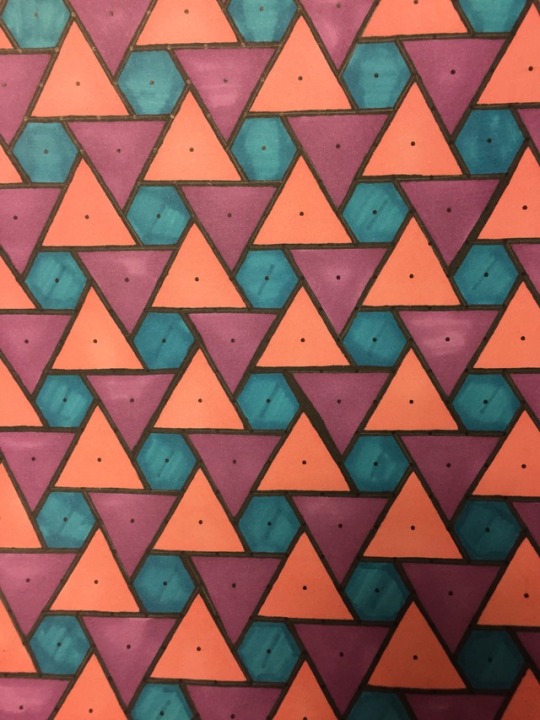
This is the tessellation I created. It was made on the dot paper with triangles and pentagons, but when putting those shapes together there are also ninja stars. I didn’t really have anything in particular inspire me, besides knowing that I wanted to use the dot paper. I thought it was interesting on how I was able to make a ninja star within my piece because, at first glance, I wouldn't think a ninja star would be able to tessellate. I decided to color all of the pentagons blue, all of the right-side-up triangles pink, and all the upside-down triangles purple. I was happy with the outcome!
0 notes
Photo
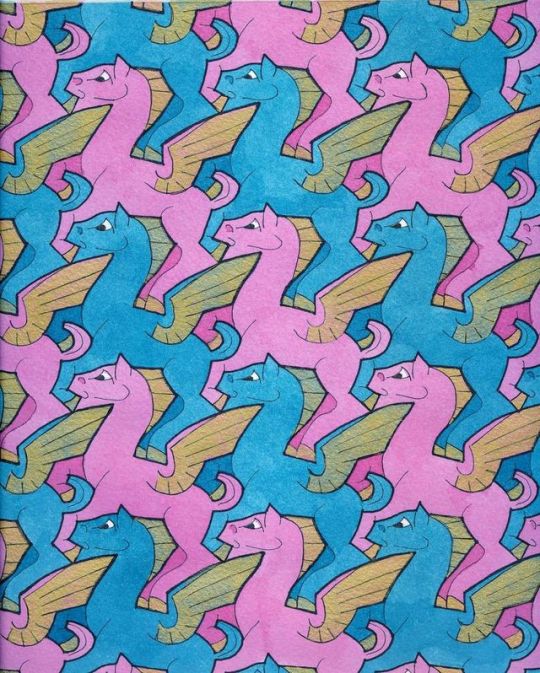
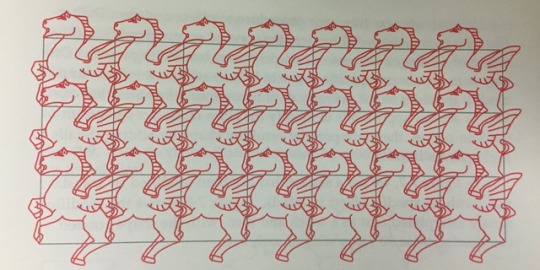
I chose the Pegasus design by MC Escher. This design’s base shape was originally a square before being manipulated into this image. He took the head piece out from the bottom of the square and added it to the top, as well as the legs from the top and added it to the bottom. This is where the mathematics come in of the shapes really fitting together, however, there doesn’t seem to be symmetry in this because the shapes are so unique. The second picture gives a visual representation of how the shape was made. He did not rotate the pegasus, but just translated it in every direction. The finishing touch was to add the details of the pegasus to make it really look like one.
https://i.pinimg.com/736x/4a/ee/61/4aee61070279a345a28db95472d350d4.jpg
0 notes
Photo
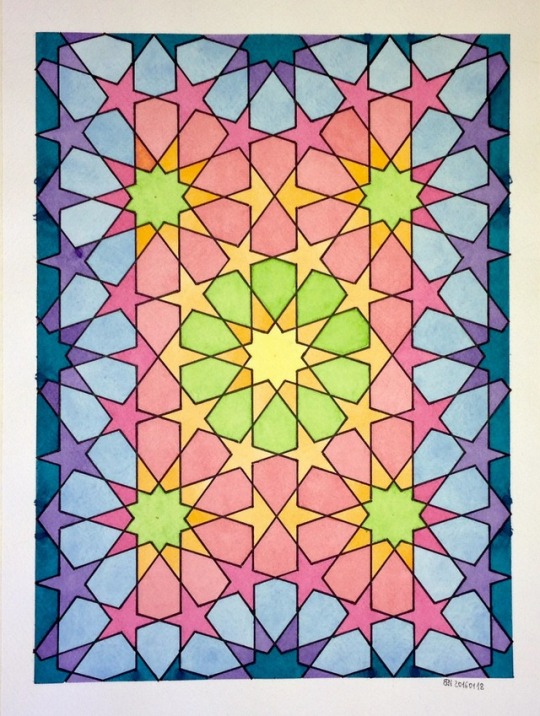
Here is my example of a tessellation that is Islamic Design. It is a tessellation because it can be extended indefinitely in the plane going all directions, and it complete fills 2D space. It is Islamic Design because it is one of the 3 types, which is repeating geometric shapes. Many of them reveal semi regular tessellation patterns like the one above. I see many triangles and pentagons within these various shapes, and I picked this image because it seems different than most of the ones I have seen. It doesn't really look like it would continue to tesselate, but it does. The pretty colors were also a bonus :)
https://i.pinimg.com/originals/38/c1/37/38c1379d8032c4aec509dcace1fcc187.jpg
0 notes
Photo
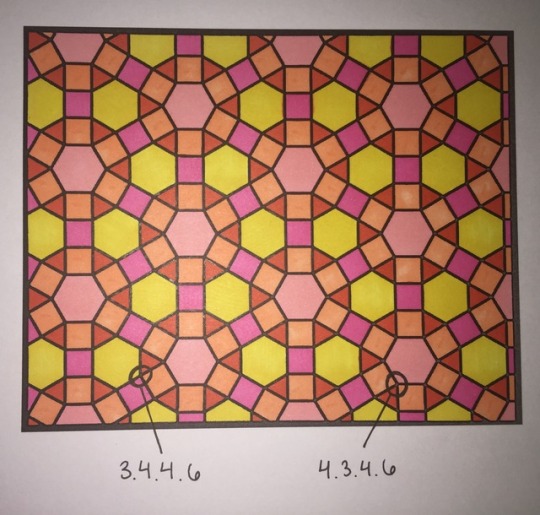
Here is one of the tessellations from page 57 in the book. As you can see towards the bottom of the photo, I circled the two different types of vertices within this tessellation. The one on the left has a triangle, then a square, another square, and a hexagon. The code is shown above as 3.4.4.6. The vertex on the right has a square, then a triangle, another square, and a hexagon. The code is 4.3.4.6. These two vertices are everywhere within this tessellation, and those are the only shapes involved throughout.
0 notes
Photo

Here is my triangle tessellation. I used Figure 1.5 in our ‘Introduction to Tessellations’ as my inspiration. I know this image will fill the tessellation plane because it is made of equilateral triangles. Equilateral triangles have 60 degree angles, and there are six triangles coming to one point. That means that there are six 60-degree angles, which add up to 360 degrees. Therefore, the math proves that my tessellation fills the plane.
0 notes
Photo
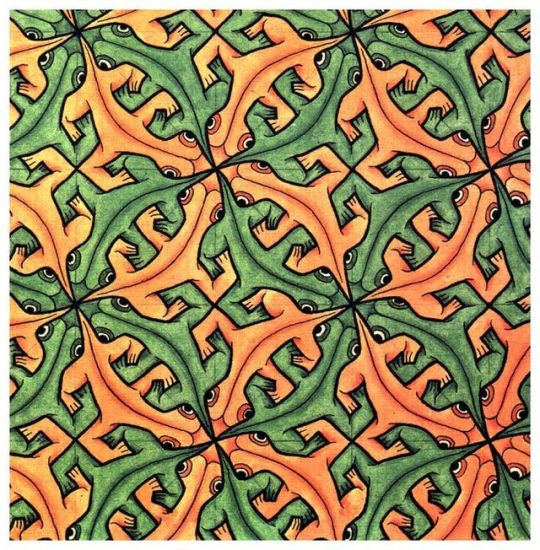
A tessellation is a geometric pattern made up of one or more shapes, that completely covers a surface without any gaps or overlaps. It comes from the Latin word “tessella”, which was the small, square stone or tile used in ancient Roman mosaics.
An artist that did work with tessellations is Maurits Cornelis Escher, known as M.C. Escher. Escher was born in Holland on June 17th, 1898. He is known as the ‘Father’ of modern tessellations. He quoted, “Filling two-dimensional planes has become a real mania to which I have become addicted and from which I sometimes find it hard to tear myself away." His first tessellation was created in 1922 called ‘8-heads’.
However, I chose to focus on a different piece of his artwork. The piece above is called ‘Lizard’ and was created in 1939. I chose this piece because it seems more unique that most. It is created by lizards, which are not just a normal shape.
http://www.tessellations.org/tess-escher8.shtml
https://i.pinimg.com/originals/66/62/38/66623889a554719ad359b28f03442a28.jpg
0 notes
Photo
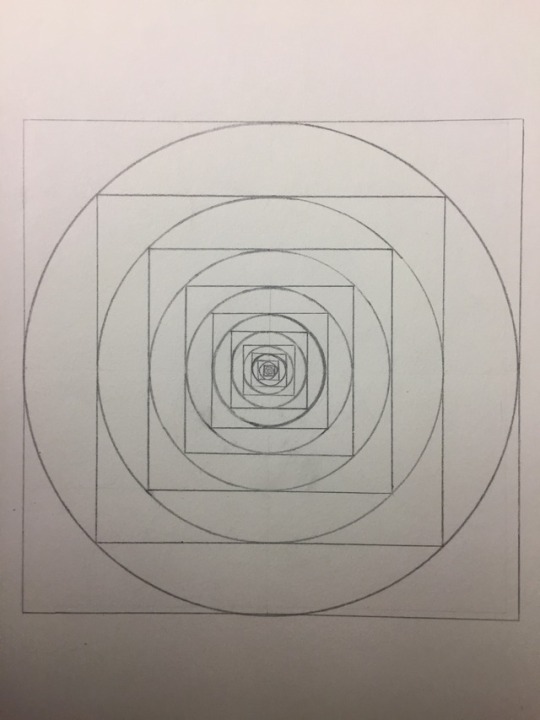
I decided to create my own fractal. The system for making this was to draw a square, and inside the square draw a circle, and then back to the square. It’s a pattern over and over again, but always making sure that the square stays proportional, and then the circle lines up with the lines of the square. Once this pattern continues it goes all the way in to the center of the original square and circle.
0 notes
Photo
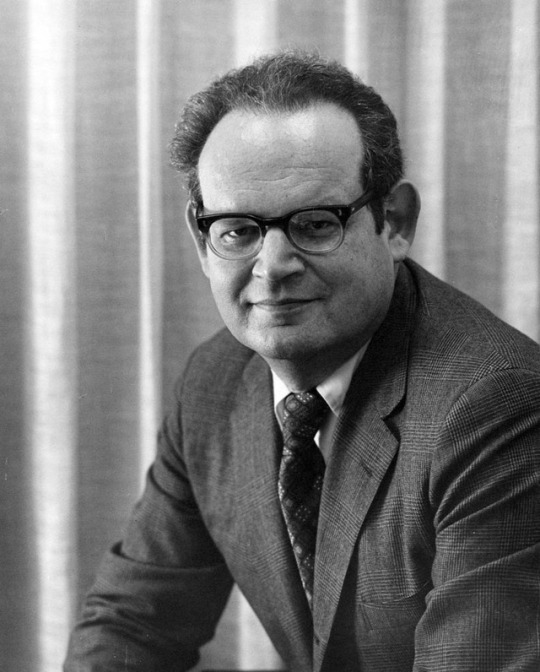
Overall, the movie surprised me. I didn’t think fractals were in so many things around us, and it’s still hard for me to believe. For example, when they were talking about a mountain being made up of fractals, I don’t understand how that could really work even though it does. One of the parts that amazed me the most (which was also a topic we discussed in class) was how the coast line is infinitely long. To research more into this I read ‘How Long Is The Coast of Britain?’ by Benoit Mandelbrot himself. This was his abstract idea: “Geographical curves are so involved in their detail that their lengths are often infinite or, rather, undefinable. However, many are statistically "self- similar," meaning that each portion can be considered a reduced-scale image of the whole. In that case, the degree of complication can be described by a quantity D that has many properties of a "dimension," though it is fractional; that is, it exceeds the value unity associated with the ordinary, rectifiable, curves.” If you were to try to measure the coast line, there is constantly another rock or grain of sand you can go around, making it impossible to really get an answer. As hard as it is for me to wrap my head around, this idea has been researched and it has so far been proven true.
0 notes
Photo
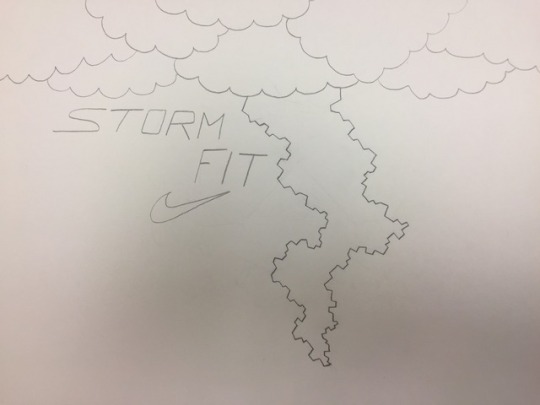
The real life object I chose to draw was the lightning bolt. The process of making this was beginning with a simple lightning bolt (3 lines), and from there using that same shape on each line. So the lightning bolt started with 3 lines, and on each of them I drew another lightning bolt, and continued to do this pattern 4 times. Then I erased all of the previous lines besides the last set and it created this unique lightning bolt. I decided to go with the logo route, and made my lightning bolt into an ad for Nike’s Storm Fit brand.
0 notes
Photo
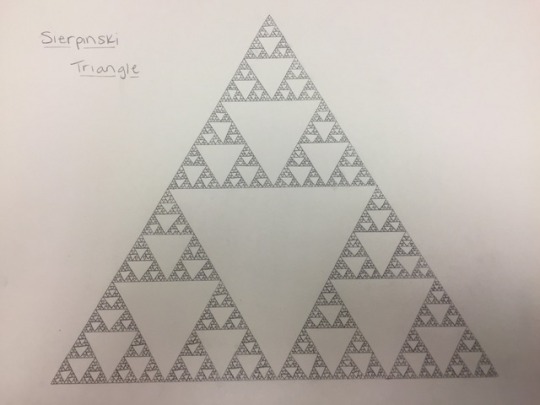
The famous fractal I chose to recreate was Sierpinski’s Triangle. The process of making this fractal is to start with a basic equilateral triangle. From there, find the mid point of each line the makes the triangle and connect them. This will put an upside-down triangle in the middle. Then continue to repeat this technique on every right-side up triangle. It will become pattern of triangles inside triangles, becoming the Sierpinski’s Triangle
0 notes
Photo
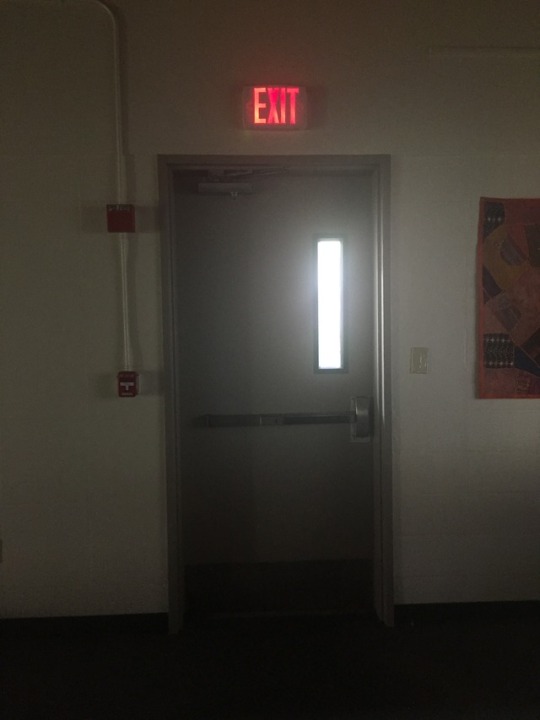
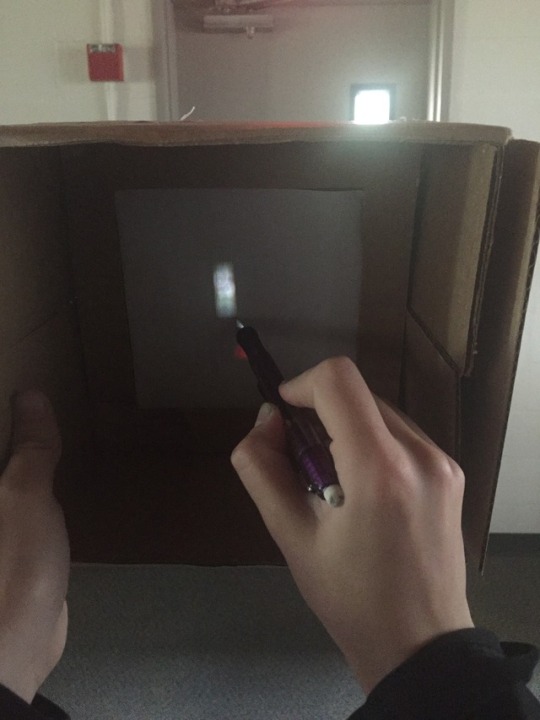
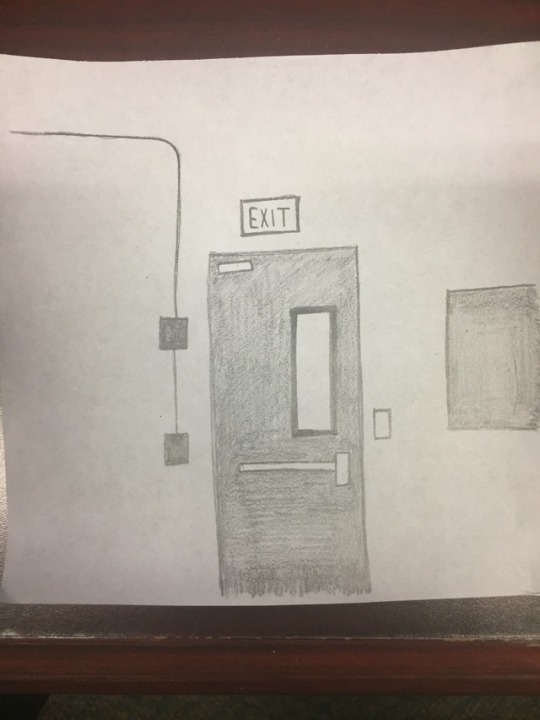
So I forgot to take a picture of my drawing before adding details, but here is the process of making my image (I could see the door outline a lot more than you can in the picture). I decided to draw an exit door in the lobby of North Hall. The hardest part was definitely keeping the box aligned with my previously draw lines. To improve my camera, I thought making it darker would help. An idea for this might be to have a blanket over my head and the outer edges of the camera so no light can get inside. Another way to improve it might be to strategically pick somewhere that I can set the camera down so I don't have to worry as much about making sure everything lines up with previous lines.
0 notes
Photo
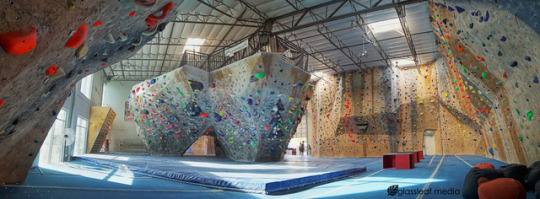
Looking for something to do around Redlands? In 2 locations in Riverside, check out an indoor climbing gym called Hangar 18. Hangar 18 is the perfect spot for anyone from first-time climbers looking for a fun afternoon adventure, to hard-core climbers looking to push their limits and get to the next level. The facilities offer a wide variety of amenities, and are fantastic for groups events or parties of any size.
They offer memberships where you pay monthly ($36 for students), as well as day tickets. If you want an even better deal, every Tuesday is “Two-for-Tuesdays”, where all day passes, rental gear, and intro passes are 2-for-1. This means that if you sign up for a day, or an intro package, you can get a friend the same thing for free- just mention the 2fer deal at the front desk and the staff will set you up.
If you want to go for just a day, prices range from $18 to $33, with the additional $6 for gear rental. FYS 16 day at Hangar 18?
0 notes
Photo


These images were taken by a photographer named Daniel Malikyar, who is also the Creative Director for Marshmello (a world renowned producer and performing artist). Daniel is actually a friend of my sister, who she met at Chapman University. Through his passion for photography, he has become 1 of 20 official FujiFilm X-Photographers in the United States. His work has been used in advertisements and has received over 1 billion views online, as well as has been featured across a variety of advertising platforms including Times Square, Fox News, and more.
His viewpoints tend to be more of an aerial view, and often of nature or the city. I like his work because of it is not easy to replicate. He mostly chooses a unique viewpoint that can only be captured while in a helicopter, so it shows an angle that most people don’t get to see.
http://www.danielmalikyar.com
0 notes
Photo
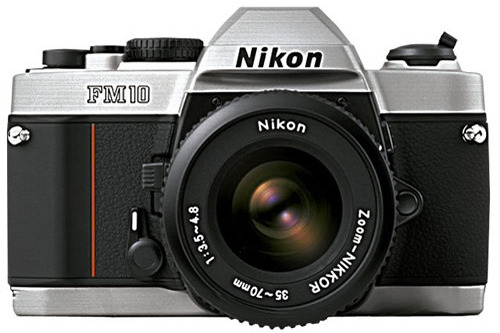
I have always been interested in cameras since I was a little kid, and always had a dream to buy a big fancy one like my aunt. That dream came true about a year and a half ago when I spent $2,800 my own Nikon D500. But it is interesting to learn how cameras actually work on the inside. It has 3 basic elements: optical (the lens), chemical (the film), and mechanical (the camera itself).
A lens itself is just a curved piece of glass. In order for us to see the image through the camera as it looks in real life, the light beams bounce of the object and into the lens at an angle, which then bounces off the curve and gets redirected to form the image. The bending angle is determined by the structure of the lens.
When you expose film to a real image, it makes a chemical record of the pattern of light. It occurs with a collection of tiny light-sensitive grains. They are spread out in a chemical suspension on a strip of plastic, and when exposed to light, the grains undergo a chemical reaction to create the images on the film.
Many other variables go into the creation of a photo, like aperture, shutter speed, and ISO, but that is the background idea of how photos are made in a camera.
https://electronics.howstuffworks.com/camera.htm
https://static.bhphotovideo.com/explora/sites/default/files/nikonfm10.jpg
0 notes
Photo
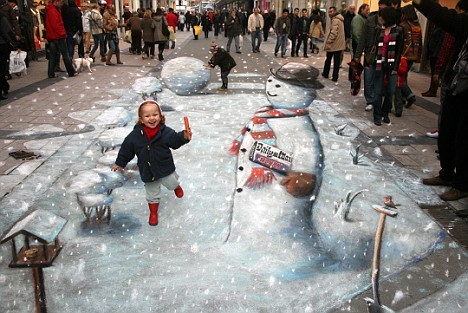
Julian Beever is a commercial chalk artist who is able to create a 3D looking masterpieces on flat pavement. His work always seems to tunnel down into the pavement or rise up above it (in this case, the objects rise above). This piece is called “Making Mr. Snowman, and was made in 2008. At the time, 49 year-old Beaver of Belgium took only 2 days to draw it with chalk on the streets of Brussels. He biggest fear while making his creation was that it would actually snow, and wash away his art. Despite this fear, Beever stated “I wanted to take Christmas to the heart of Europe and thought the Snowman could spread the message with his Daily Mail.” That seems to be what it did!
In a piece like this, it can be hard to find the vanishing points. The only real obvious one is the point between the outer lines of the scene, which basically line up with the darker colored road. Since the whole scene is 3D it seems like almost every object has it’s own vanishing point, each of them behind the object. http://www.dailymail.co.uk/news/article-1099596/Mr-Snowman-great-nose-robbery-The-Christmas-artwork-British-Pavement-Picasso.html
0 notes
Photo

Here is my strange viewpoint drawing. I chose a soccer ball, which is normally hard for me to draw to the correct portions, so I wanted to see if changing the viewpoint would make it easier or harder. I used the technique we learned in class of making a grid with the ball in it, and then transforming the grid to the new perspective point, and drawing in each square. The hardest part was getting the circle itself to look correct, but other than that I think it might have been easier to draw than the original. It worked pretty well because when I looked from that side viewpoint it looked normal!
0 notes
Photo
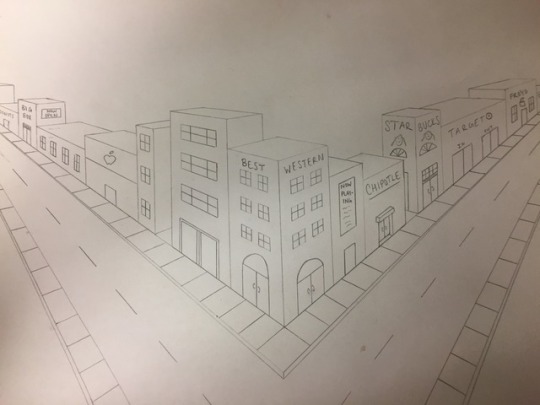
Here is my 2 point perspective drawing. I used a longer piece of paper to put the vanishing points off the page, and every line is aligned with those points. I added the details of the windows, store names, and sidewalks that also were made from aligning with the vanishing point. The technique of drawing these two point perspective pieces isn’t really that difficult, it is just very tedious and time consuming. I feel like I spent forever trying to make this. Although the hardest parts were probably the curves above some the doors and windows. The easiest parts were the sidewalks.
0 notes