
I will be sharing all the updates on what's going on in the Honey Thistle workshop, including tutorials, contests, and new product ideas.
There will also be the occasional reblog of the awesome crafts I peep around the interwebs.
1061 posts
Don't wanna be here? Send us removal request.
Last Seen Blogs

happyhunters-blog
Knock Knock

exit-babylon
Exit Babylon

jftreenursery
无标题

nebudaze
Dusty

onedaughterofman
Sophia has gone softly into the night
Text

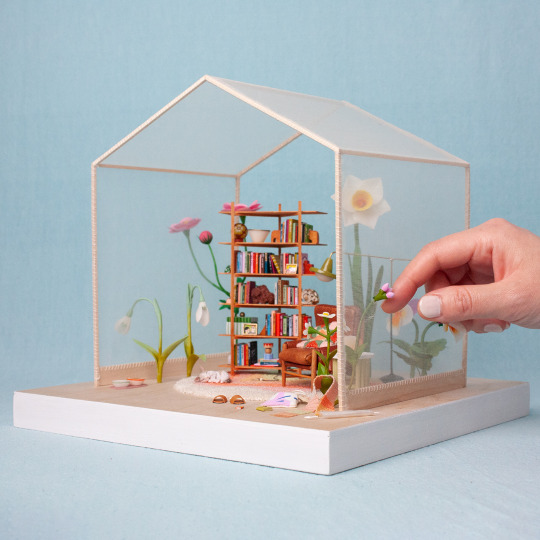
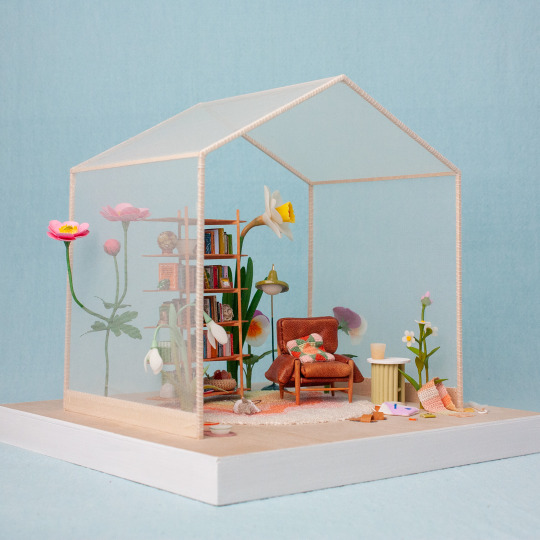
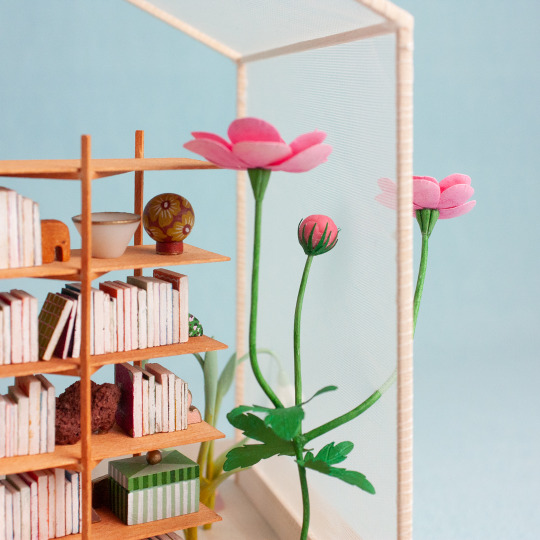

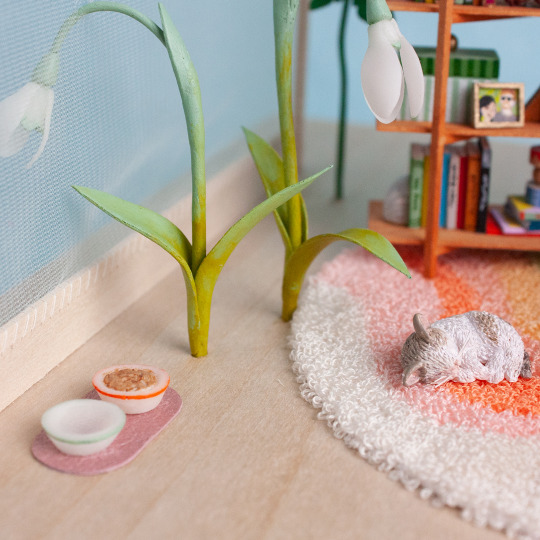
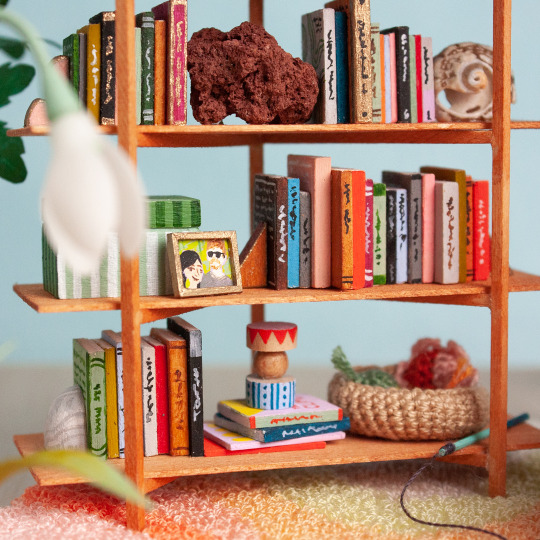
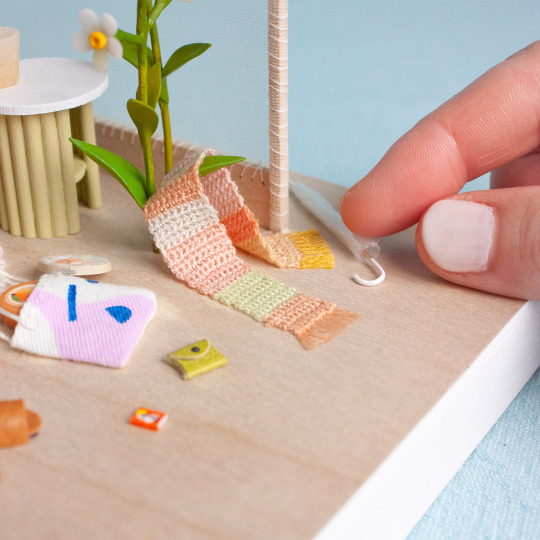

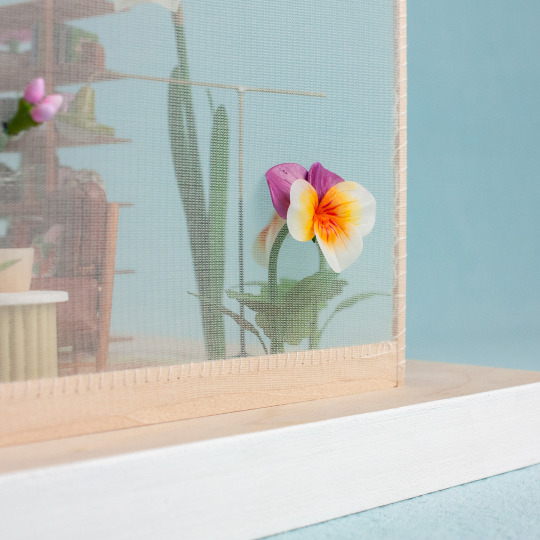
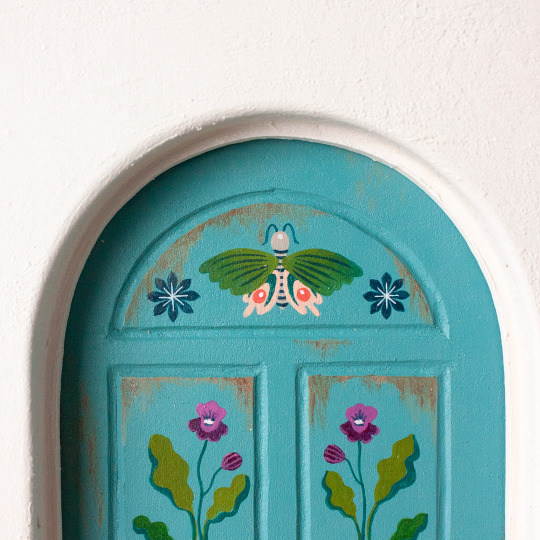
Just wanted to share my latest miniature - I'm calling it 'Bloom' and it will be part of the 'Stories of Home' exhibit at the Peel Art Gallery, Museum and Archives later next month :)
I tried a few new techniques for this, and I'm happy with how it all came together. The flowers posed some slight issues here and there, and I have a few floral rejects. I'll probably revisit this technique again in the future and make a few other smaller versions.
133 notes
·
View notes
Text
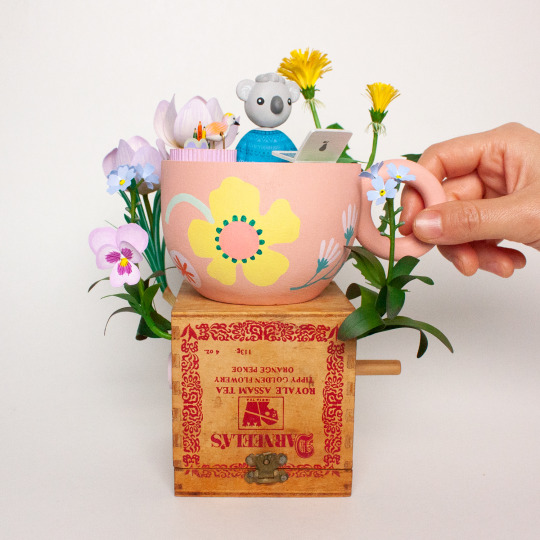
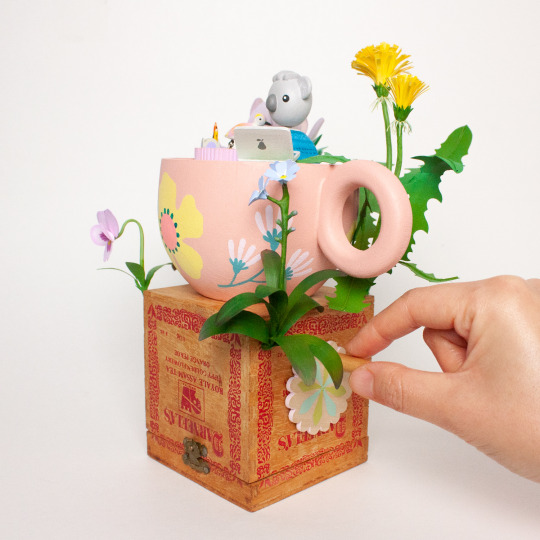

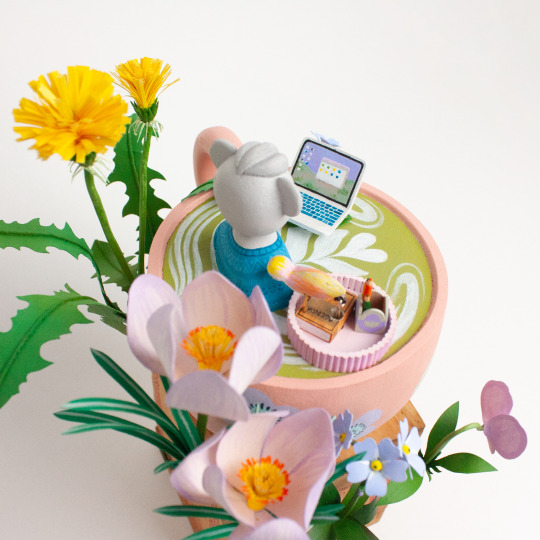
Back at it with a new automaton! This was all inspired by inheriting an empty wood tea box :)
Head over to instagram to see it in motion, and I'll be posting a process video there in the next couple of days to show how I constructed it. One of these days I'll figure out how to post a video on tumbles (or gif most likely) in a format that I like, but until then...
Anyway, here's to 2024 being a better year than 2023 :)
#honey thistle#portfolio#handmade#art#automaton#automata#kinetic art#garden#paper flowers#spring#easter#tea time#cup of tea#upcycling#recycling
29 notes
·
View notes
Photo

My cartoon for yesterday’s @Guardian books.
P.S. you can order my books of cartoons here: https://tomgauld.com/comic-books-v2
18K notes
·
View notes
Text

My latest cartoon for New Scientist
47K notes
·
View notes
Text

Howdy folks, I'm having a little seconds sale (heavily discounted miniatures that have a tiny blemish or just old work that I'd like to clear out) in support of a fundraiser supporting the building of a garden at The Littlest Lamb orphanage in Egypt🙂
This garden project is being spearheaded by Dina Amin, a stop motion artist from Egypt, and the project is currently just past its halfway funding mark so please pitch in if you're able ^_^
#miniatures#arts and crafts#figurines#miniature plants#potted plants#shop update#interior decor#tiny things#post modern#fundraiser
21 notes
·
View notes
Text


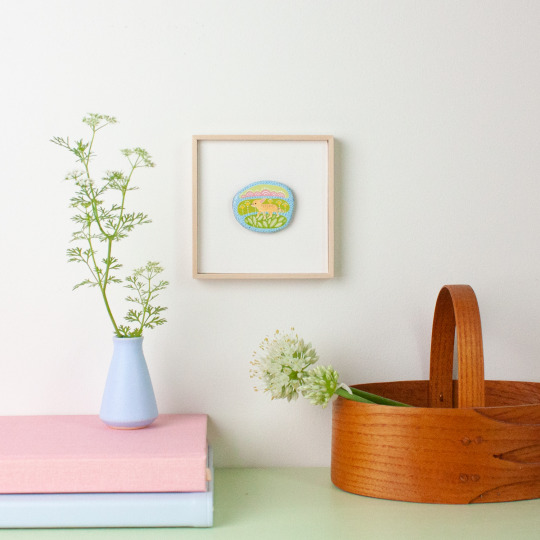
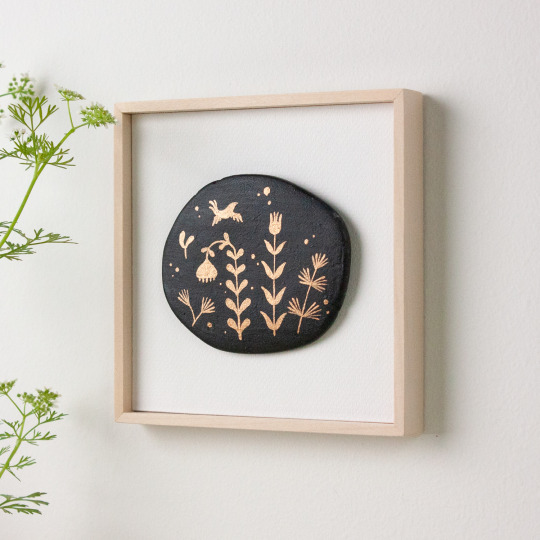

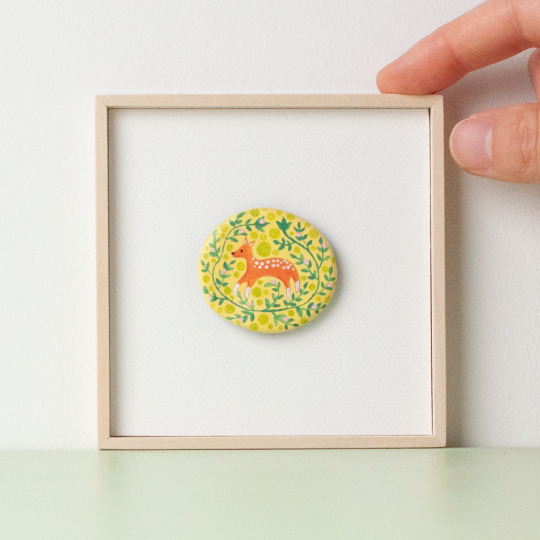
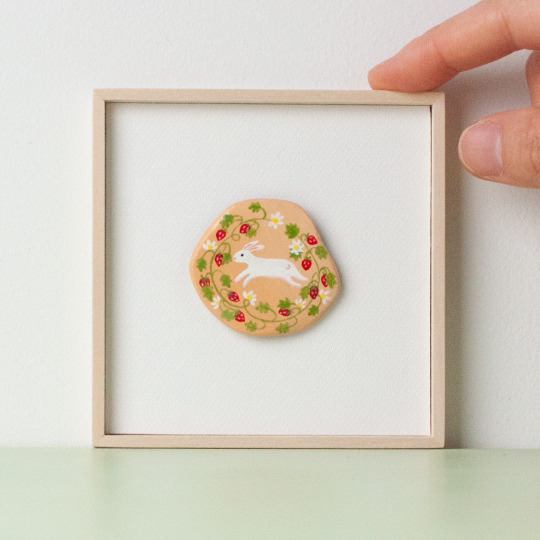
Found these lil paintings I did years ago and finally framed them with some wood strips I had laying around 😊
They'll be up for grabs next Friday (August 4th) in my shop along with a bunch of miniatures and real size decor :^)
Hope y'all are staying as cool as possible in this summer heat 🥲
#honey thistle#miniature#portfolio#art#pebble art#rock art#small painting#wall hanging#wall art#wall decor#fennec fox#bunny#nature art#botanical#floral art
16 notes
·
View notes
Text


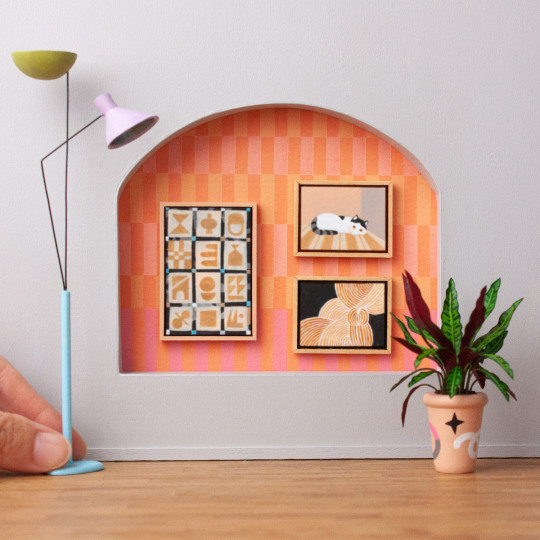
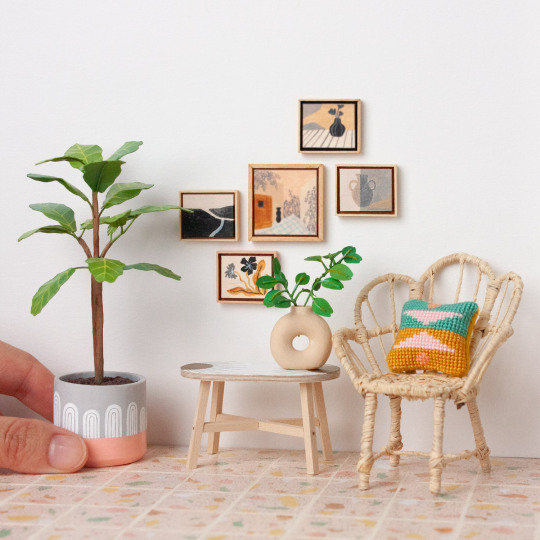
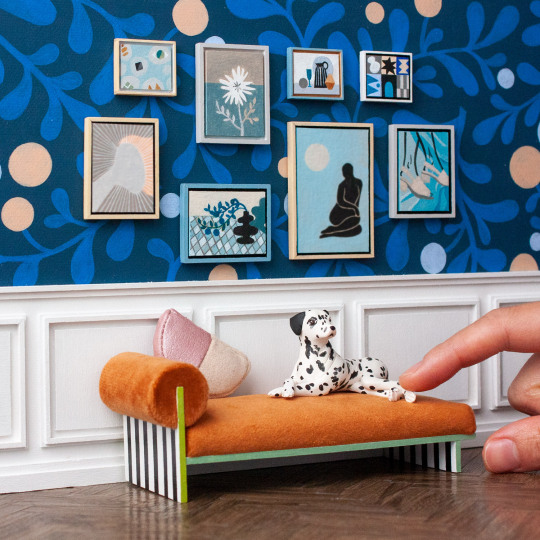


Just a lil photo dump of some of the miniature paintings I've created in the last few months :3
I've made all of them available as printable downloads if you want some easy modern art for your miniature setups/dollhouse, and half of them are also available for purchase as tiny originals.
On a side note, I'm kinda tempted to recreate some of them in actual scale 😅... so I guess these also kind of function as tiny mockups?
#dollhouse#miniature#tiny art#miniature painting#modern art#postmodern#postmodern art#home decor#honey thistle#portfolio#furniture#home design#dalmatian#art print#wall art#wall decor#pdf download#painting
200 notes
·
View notes
Text
This is so beautiful 🥲

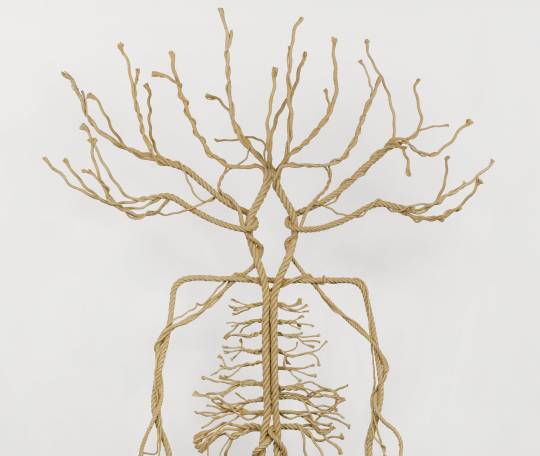
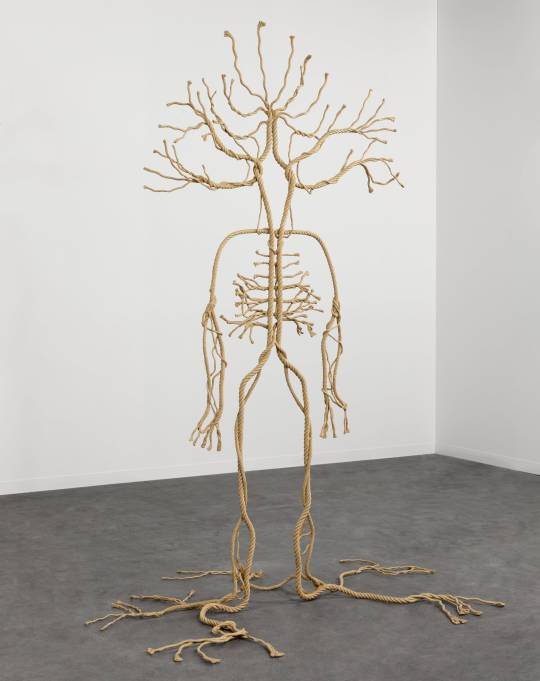
Through Trompe L’oeil Bronze, Prune Nuorry Fuses Human Anatomy and Arboreal Roots
2K notes
·
View notes
Text
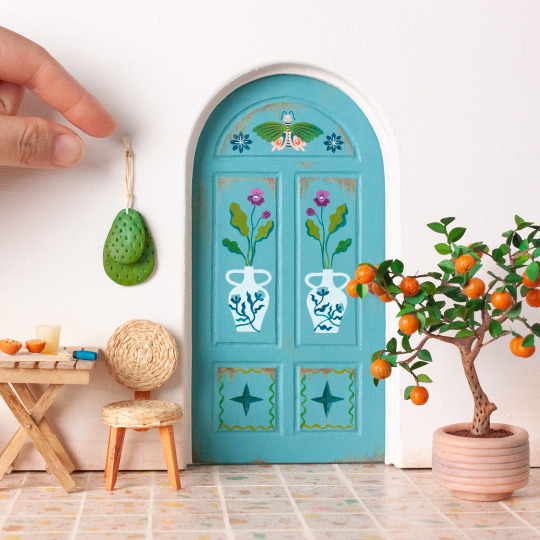


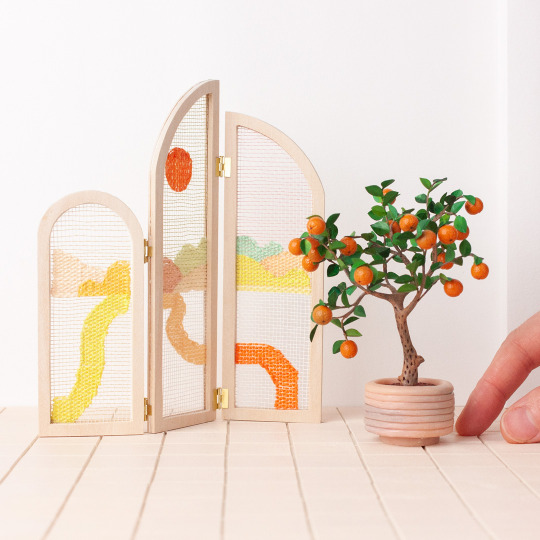
Just a few stills from my last lil animation posted to instagram.
Sorry if you don't use instagram :( Just imagine my hands setting up the table and chairs, then plucking an orange from the little potted tree to slice and juice into a cup... that's pretty much all that happens but that did take a lot of work to bring to fruition 🥲
You can find the tutorial for how to make a little potted fruit tree here, and I still have a few of the fully functional folding tables here. And whenever I get my act together, I will be updating my shop with the little chairs along with a few other minis :)
#honey thistle#portfolio#miniatures#dollhouse#crafts#patio ideas#backyard#orange tree#potted plants#tiles#terrazzo#model making#colours
173 notes
·
View notes
Text


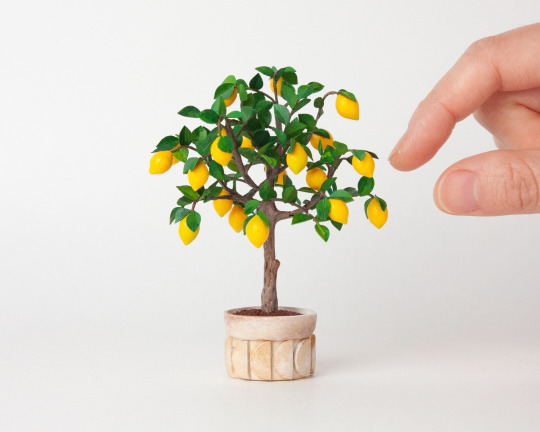

I first made a tiny lemon tree a couple years ago, and I've been meaning to write a tutorial about it ever since.
Recently I completed a tutorial that goes into detail about how you can make your own tiny citrus tree (mainly just lemon, lime, or orange) and I'm pretty chuffed about it!
Anyway, this is all for 1:12 scale builds (although I'm sure you can stretch the technique for anything between 1:16 - 1:10) and I'd love to see your own tiny fruit tree if you follow this tutorial :)
#honey thistle#portfolio#tutorial#lemon tree#arts and crafts#crafting#miniatures#dollhouse#mini garden#mini plant#plants you can't kill#orange tree#citrus#potted plants
580 notes
·
View notes
Video
So so cool 🥺
A phonograph that “reads” and transforms a rock’s rough surface into music | source
20K notes
·
View notes
Photo
Piranesi was hands down my favourite book that I read last year 🥲
It's a relatively short read so give it a shot if you haven't picked it up already 👌🏼

Fan art for “Piranesi” by Susanna Clarke, one of my favorite books in recent years :)
#I'd start a bookstagram if I had the time...#or read physical books instead of listening to audiobooks all day lol#piranesi#susanna clarke#favourites#fan art
4K notes
·
View notes
Text
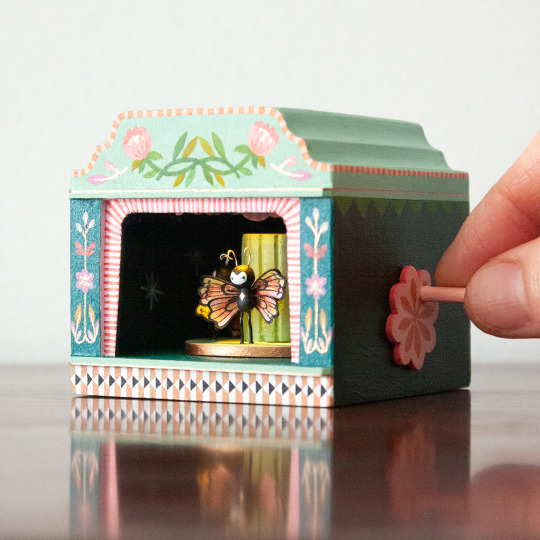
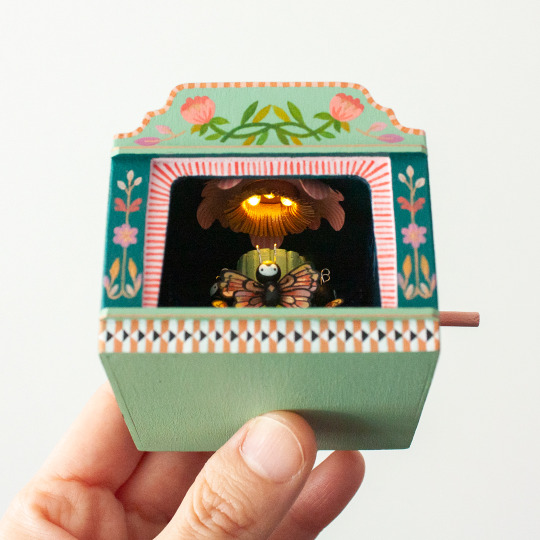

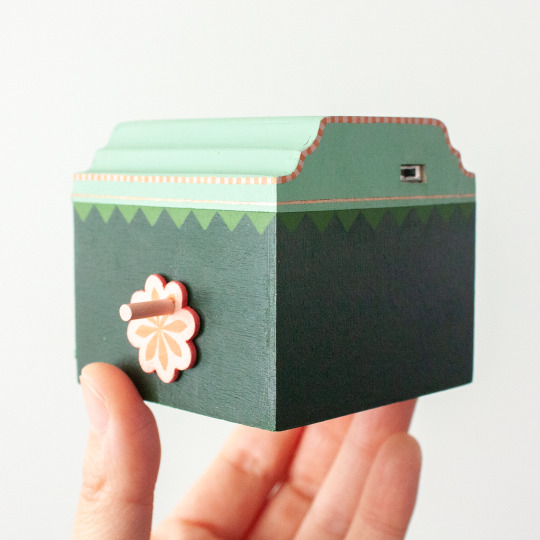

Made a little butterfly zoetrope, as an escape from writing a tutorial that I've been picking up and putting down for two years now 🙃
I'm not stoked about the video format on tumblr, so to see it in action, tap here for the instagram reel 🥲
Hopefully more zoetropes to come!
P.S. this is currently not for sale since I'll be using it in an upcoming stop motion hopefully, buuut it might be later in the year 🤠
#honey thistle#portfolio#zoetrope#craftblr#crafting#animation#miniature#dollhouse#painting#butterfly#insect art#botanical#floral#flowers#tiny art
182 notes
·
View notes
Text

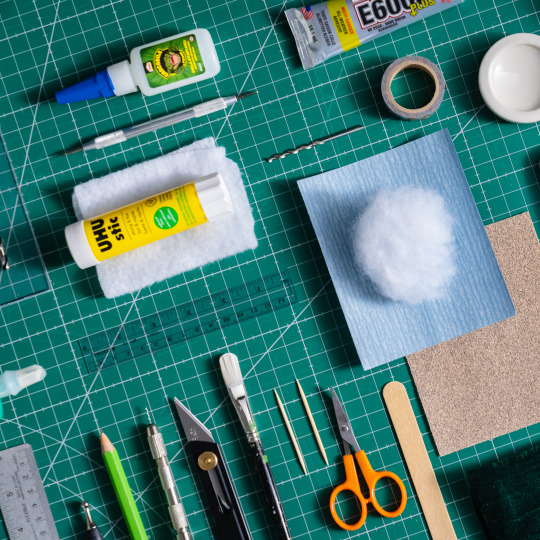
This isn't my normal miniature project but I had purchased this wreath form last winter with the intention of making some sort of christmas wreath with it... and as the new year dawned with that wreath still unmade, I realized that I should probably figure out something else to do with the form. Hence, this odd little pompom creation to celebrate a couple of life events in the last year. I'm outlining my process below just in case anyone else is interested in making this style of wreath as well :)

The form is made from chipboard, and I first painted it in acrylic.
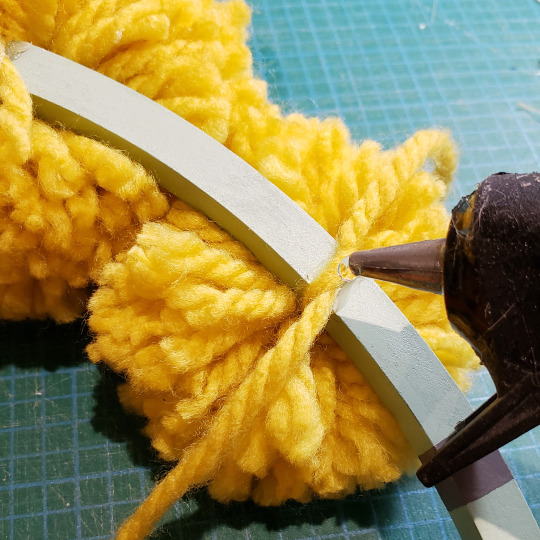
I then attached some handmade pompoms to it via good old glue gun, and some firmly tied knots.
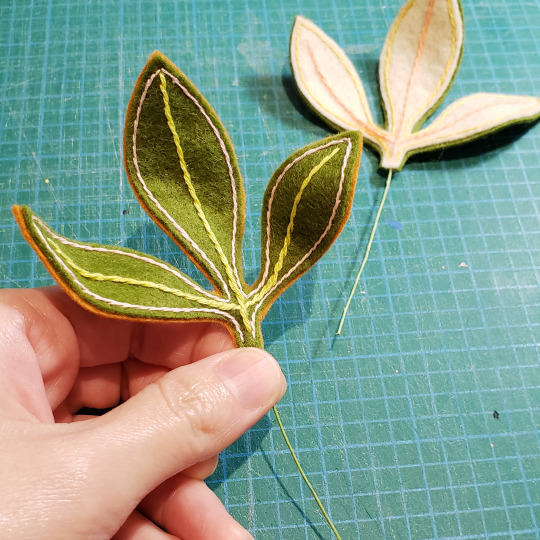
I made some leaves from felt and wire, to make the fronds poseable - there's a short video of the process on my instagram (2nd slide in the post carousel). This is probably... the lengthiest part of the whole process since I embroidered the middle of each leaf first (on both sides), then stitched the two sides of each leaf together, sandwiching the wires inbetween.
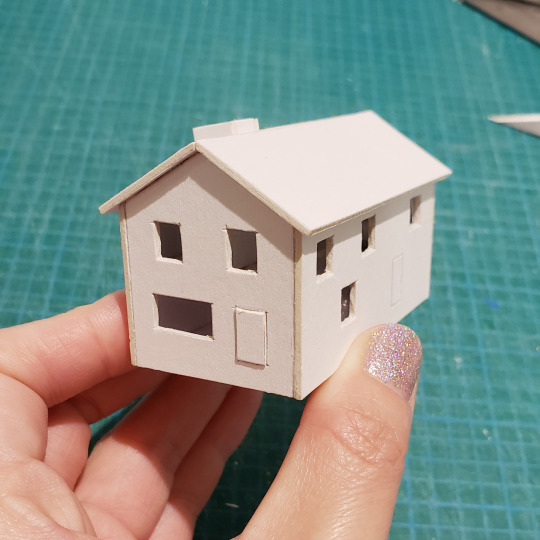
Next I made a little house from matboard - the stuff used for framing. I've really latched onto this material for a lot of crafty uses, since it is sturdy, easy to cut, and also takes on paint well since it's essentially a thick block of pressed paper.

To create the two little proteas, I took a piece of cardstock paper (used for the printer essentially), and painted it in red acrylic on both sides. Then I dry brushed some light pink and white paint across the paper, again on both sides.

When the paper was thoroughly dry, I snipped tiny petals from it and used them to cover a central form that I made from polymer clay. I didn't want to construct the whole flower from paper since I needed it to be a bit more robust... something that could take a few knocks or falls without breaking or deforming, so polymer clay was my choice. If I had any foam around, I might have tried to use that since the clay is a bit heavier than preferred, but all in all, it worked out.

The petals were glued on in layers, and I also added a thin light streak to each petal afterwards to really help differentiate them from previous layers.

Lastly, I added some leaves to the stem, making sure to shape them around a pen first. You can kind of see the wire of the stem poking out the bottom - this is intentional! That's what I used to attach the proteas to the chipboard frame. I drilled a small hole (the exact size of the wire) into the frame where I wanted the flowers to go, and then pushed the wire in with some super glue. There was still a bit of wire poking through the other side, which I bent against the frame to really hold the protea in place :)

The wire-poking-through-frame is largely the method I used to attach the felt leaves and the house as well. With the leaves, I wrapped the wires a couple times around the frame after gluing them in, just for extra security.

And that's it! Not quite a tutorial (that would have been very lengthy), but hopefully a clear enough explanation for recreating something along these lines. I plan to hang this wreath year round, as opposed to the original plan of a christmas wreath ^_^
#honey thistle#portfolio#pompom craft#diycrafts#diy ideas#DIY#crafting#arts and crafts#fiber art#wreath#home decor#wall art#handmade#felt craft
61 notes
·
View notes
Text

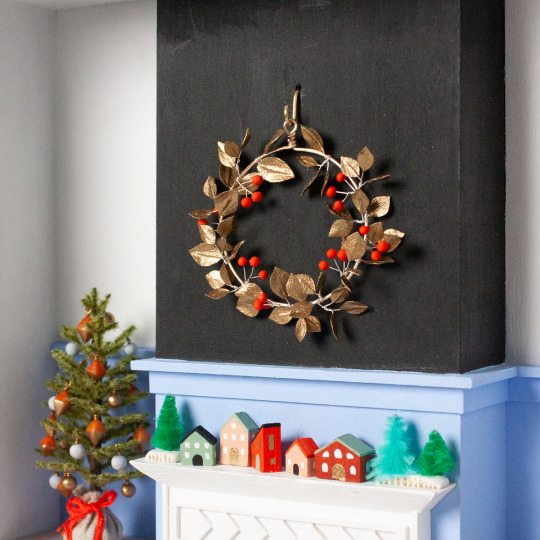
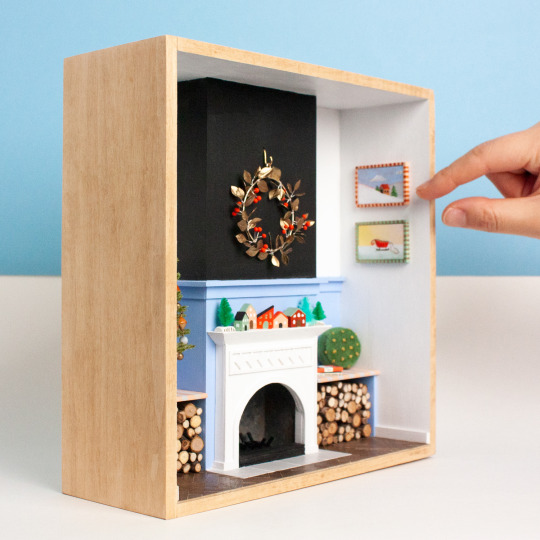

Made this lil Christmas-themed niche recently, and I created a tutorial for the tiny wreath :)
If you're looking for something to do over the holiday break (or maybe just wanna tiny wreath for the heck of it), I'm offering the tutorial as a free pdf download for anyone signing up for my *new* *dazzling* newsletter until the end of December ^_^
I'm pretty bad with updates here so if you're in the mood for a newsletter that will make its way to your inbox maybe like 4 or 5 times a year, then this is gonna be perfect ;) There will be some miniature updates, some life updates, and maybe even some happy-tear-inducing cat gifs...
In case ya missed it above, you can find my newsletter here :^)
#christmas#decor#miniature#diy#arts and crafts#wreath#hohoho#happy holidays#honey thistle#portfolio#wall decor#wall art#fireplace#cozy aesthetic#colorful
110 notes
·
View notes
Text
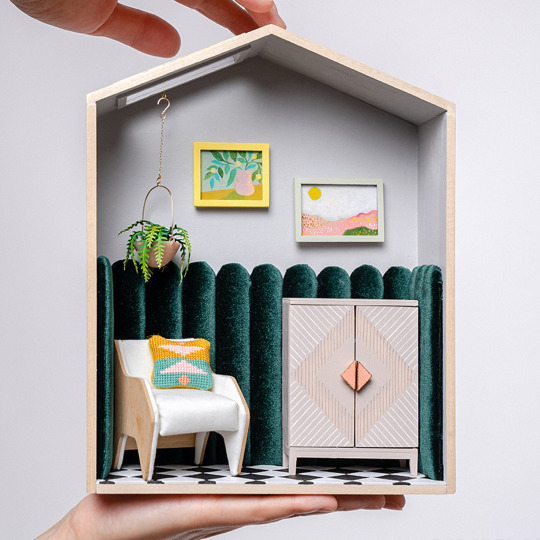


Hidey ho folks! I've got a new tutorial... or rather, a complete video course on how you can create your own miniature niche up on Domestika :)
I've been meaning to develop a video course for a while now (although I will still be writing and creating PDF tutorials too!) and it seemed like the perfect opportunity when the Domestika team reached out with this idea.
The course will cover all the basic skills you need to create a miniature niche (just like the one in the first photo) from scratch, and I created this project specifically so that it is accessible from a space perspective to anyone. I renovated a medium sized dollhouse a couple years back and it took up sooo much space on my table, I wasn't able to do much else. City living isn't easy on the miniature loving heart 😭
Anyway, hope y'all enjoy the course, and if nothing else, please enjoy the brilliant creative directing from my photographer Daniela in that last photo :^)
#handmade#arts and crafts#miniature#tutorial#diy#domestika#interior decorating#interior decor#dollhouse#portfolio#honey thistle#reading nook#crafting#patterns
101 notes
·
View notes
Photo
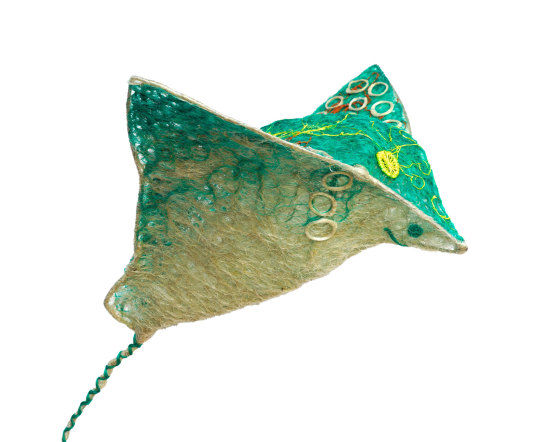


Tons of Discarded Fishing Nets Are Formed into the Wildlife They Entangle in Sculptures by Ghost Net Collective
2K notes
·
View notes