
Don't wanna be here? Send us removal request.
Statistics
We looked inside some of the posts by huntermicro699 and here's what we found interesting.
Average Info
Notes Per Post
1
Likes Per Post
1
Reblog Per Post
0
Reply Per Post
0
Time Between Posts
18 days
Number of Posts By Type
Text
10
Last Seen Tumblr Blogs


Fun Fact
Women make up for the other 50% of Tumblr’s audience.
Text
Jumpstart Wps Windows 8


Wps On Windows 10
Free Jumpstart Apps Download For PC Full
In addition, Jumpstart supports Microsoft's wireless zero configuration and Windows Connect currently profiles management tools. According to Atheros, D-Link Systems, Inc. Helped them refine Jumpstart. D-Link is a customer of Atheros for supplying products with Jumpstart technology. WPS, Wi-Fi Protected Setup, wireless, connection, Windows 8.1 At this step, go to the router and press and hold the WPS button for a couple of seconds. You will find this button on the back of the router or on one side. WPS, Wi-Fi Protected Setup, wireless, connection, Windows 8.1. A tool to jumpstart radio frequency development in the sub-GHz frequency range. JumpStart Index Maker The JumpStart Index Maker automatically creates first pass back-of-book indexes.
Jumpstart Apps Download For PC Windows 7,8,10,XP.Jumpstart Apps Download for PC Full Version.Download Jumpstart Apps for PC Windows 7,8,10,XP.Hong Kong’s first and only publication devoted to startups, small businesses and entrepreneurs.
July – August 2014: As part of this issue’s food theme, we’ll examine other aspects of food businesses such as HK’s food delivery services, Groupon as a service to help start-ups, food trends around the world, interviews with top food bloggers in HK and what’s missing from the HK food scene.
How To Play Jumpstart APPS On PC Windows 7,8,10,XP

https://huntermicro699.tumblr.com/post/661016657449336832/ask-money-for-woohoo-mod-sims-4-download. 1.Download and Install Android Emulator on PC,Laptop,Tablet.Click “Download Emulator” to download. Macos bootable usb not showing up.
Jumpstart Wps Windows 8.1
2.Run Android Emulator on PC, Laptop or Tablet.
Download Jumpstart For Windows 10
3.Open Android Emulator for PC,Laptop,Tablet import the Jumpstart Apps file from your PC Into Android Emulator to install it. Surface type cover filter device not in device manager position.
Jumpstart Wps Para Windows 8
4.Install Jumpstart APPS for PC Windows.Now you can play Jumpstart Apps on PC.
0 notes
Text
Hello Neighbor Mod Kit Youtube

Hello Neighbor Modding Guide Tutorial Mod Db
Hello Neighbor Mod Kit Youtube How To
Create your own hello neighbor mods to share with everyone! the hello neighbor mod kit contains all of the game content you need for creating your own creepy neighbor's house, adding new diabolical traps, and whatever else you'll want to hide in his basement. *all content approved by the raven brooke home owner's association. Hello neighbor is a stealth horror game about sneaking into your neighbor's house and figuring out what he's hiding in the basement. play against an advanced ai that learns from your actions. Create your own hello neighbor mods to share with everyone! the hello neighbor mod kit contains all of the game content you need for creating your own creepy neighbor's house, adding new diabolical traps, and whatever else you'll want to hide in his basement. *all content approved by the raven brooke home owner's association. Create your own hello neighbor mods to share with everyone! the hello neighbor mod kit contains all of the game content you need for creating your own creepy neighbor's house, adding new diabolical traps, and whatever else you'll want to hide in his basement. *all content approved by the raven brooke home owner's association. The beta build of the game is available now for those that preorder the title via the hello neighbor website. in preparation for the game’s december 8 release, tinybuild has released a mod kit for hello neighbor via the epic games launcher, bringing the community on board to create all new content for the game.
Hello Neighbor 2. Check Out This Mod. This game is a complete overhaul of the original Hello Neighbor, which basically turns the entire game world into a new one. As such, the creator of the mod has decided to name it HN2, making this one an unofficial sequel to the game but using the same engine as the first one.
Md Olay’s Hello Neighbor Mod is a mod for Hello Neighbor, created by Md Olay. Description: It’s a new map with surreal archiecture straight from a nightmare. Extract into „Plugins” of Hello Neighbor Mod Kit. Last update: Sunday, November 5, 2017; Genre: Arcade; File size: 31.4 MB.
Download Hello Neighbor MOD APK for Android. Despite doesn’t have horror graphics and sound but Hello Neighbor can still make the player’s heart beat so fast as want to jump out of the chest. This game is not for the faint of heart, but if you still want to challenge your courage, download Hello Neighbor from the link below the article.


Surface type cover filter device driver. Hello Neighbor Hello Neighbor Mod Kit Macos bootable usb not showing up. https://huntermicro699.tumblr.com/post/661016657449336832/ask-money-for-woohoo-mod-sims-4-download.
Epicgames tags: jhiagstdbehuagsfug5gywf (ignore all these). To run a mod you need to use the toolbar located on the bottom part of hello neighbor mod kit's main window. now, go to the bottom part of the main window. there, you can see all files and folders of hello neighbor. to run a mod you need to open the following folders: maps > 'mod's name' > content > maps. Mods currently must use the hello neighbor mod kit to play. put the mod files into the plugins folder in the hello neighbor mod kit, load a map and press the play button. if you are working on your own local plugin, they will already be there. I went to old layout launcher and i went to hello neighbour and it said unavailable every other mod kit is available last edited by bullet boris 404 ; jan 1, 2019 @ 7:08pm #3. In this video i have made a tutorial of how to download hello neighbor mods also mods can only be downloaded on pcabandoned steam workshop steamco.
A new neighbor moved into town and he opened a shop. Become a home designer by buying, selling and questing. Build up your home, and use the item shop to help you on your adventure in the Hello Neighbor.
Hello Neighbor Mod Kit Hello Neighbor Mod Kit
Alpha 1 remastered is a mod for hello neighbor, created by hellomodder description: this mod offers new map to play around with. instructions: thanks for downloading my mod hello neighbor alpha 1 remake. import the map 'alpha 1 demo 2' map to the maps folder in the mod kit and then play as simple as that or you can do it manually the directory is local disk > program files > epic games. First time using the hello neighbor toolkitdownload map: mediafire file faikrs8c9399gpe testmap.zipvisit me on gamejolt at: gamejolt . Link para descargar mods : moddb games hello neighbor mods link para descargar epic games launcher (si tienes el fortnite no hace falta) : ht. Hiya!! this is quick and simple tutorial for the hello neighbor mod kit found in the epic games launcher. as simple as the doors, super easy set up of a swi. Mod İndirme linki : moddb mods?filter=t&kw=hello neighbor&released=&genre=&theme=&players=&timeframe=&game=epic games üzerinden hello mod kit.
Epicgames'ten Hello Mod Kit İle Mod Yükleme, Mod Nasıl Yüklenir
The beta build of the game is available now for those that preorder the title via the hello neighbor website. in preparation for the game’s december 8 release, tinybuild has released a mod kit for hello neighbor via the epic games launcher, bringing the community on board to create all new content for the game. Hello neighbor > general discussions > topic details. bepis. nov 3, 2018 @ 9:19am updated modkit freezes at 45% loading the problem is that you dont have unreal engine. i has this issue as well untill i installed unreal engine 4 from the epic games launcher hope this helps thank you for trying to help but i have ue4. thanks though #11 < >. If the game doesn’t start automatically, run hello neighbor modding tools from the launcher, you must run the launcher.exe at least once before doing so. after starting, the game will open your web browser where it will ask you to authorize linking your epic games account, you must accept. Attention modders, to celebrate the release of modding tools for the stealth horror title hello neighbor, mod db has teamed up with tinybuild to host the inaugural #hellomods competition, with plenty of sweet cash and games to be won if you can control your nerves. so what needs to be done? we're letting you off the hook here and giving you free reign to come up whichever creation you believe. Hello neighbor alpha 3 reborn jan 8 2021 tbd stealth this is a remake of hello neighbor's 'alpha 3' build released in late 2016. this features most of the old models, a nearly identical house, and decorations.
Related image with epic games hello neighbor mod kit

Related image with epic games hello neighbor mod kit
Hello Neighbor Mod Kit Youtube How To
Tags : epicgameshelloneighbormodkit
0 notes
Text
Ask Money For Woohoo Mod Sims 4 Download

Wicked Woohoo Mod Sims 4 Download
Sims 4 Ask Money For Woohoo Mod Download
The Sims 4 Wicked Woohoo Mod Download has sold more than 5 million copies worldwide. This is the file-type used for Sims 4 mods and custom content. So the better your charisma skill the more money you make.
The Sims 4 Vampire Bad Girls Club Live Stream POPOFF: 2017-03-18: PROSTITUTE MOD THE SIMS 4 ASK MONEY FOR WOOHOO MOD UPDATE: 2017-03-15: The Sims 4 SNOWED IN STREAM Livestream Q&A MOD TESTING RANDOM GAMEPLAY: 2017-03-09: 2017-03-08: Let's Play The Sims 4 Livestream Meet The Thorntons: 2017-03-07: The Sims 4 Create A Sim.
Jan 30, 2020 - Explore Bdvaughan's board 'Sims woohoo' on Pinterest. See more ideas about sims, sims mods, sims 4.
pushapp.netlify.app › ► ► ► Sims 4 Woohoo Animations
Yes, I am a sucker for romance. That's why when I play The Sims 4, there is always some kind of romantic storyline worked into the mix. I enjoy watching the drama unfold, watching those first kisses and first heartbreaks. I love seeing 'happily ever afters' in progress.The way the basic game handles love and woohoo is a little bland for me, truth be told.
Product: The Sims 4. Both sims woohooing in bed get stuck under the sheets. The woohoo animation stops, but they don't get out of bed.
That's why I owe so much to fans who have created unofficial modifications (or 'mods'). Mods can kick the game up a few notches, especially in the areas of romance, love, and woohoo. Mods are not created or inspected by the game company Electronic Arts Inc.
Or by Maxis, the creator of The Sims games. They are fan-made, unofficial add-ons.
Mods can occasionally conflict with game content or with other mods. Back up your computer or game before installing and using mods. Check for updates to the mods occasionally, especially after new game releases and patches.

Make sure you download mods from reputable sources that are recommended by other Sim fans. Remove mods before official updates to 'The Sims' and check mods one by one to make sure they are compatible with new game patches. If you like a modder's work, continue supporting them to help them keep making and updating their mods. Benton sans black font. With this mod by Sacrificial, your Sims can enjoy a slow romantic dance together.
Unlike in the regular game, Sims will put their arms around each other and gaze at each other, looking totally smitten. They can also be prompted to hug or have a little make-out session while dancing. While this is going on, they will get flirty moodlets, and their romance bar for the couple will increase.Sometimes this mod's animations can be a little off. An arm might go through a torso occasionally for a moment, or a hand might be misplaced, but I haven't found these minor glitches extensive enough or bad enough to ruin the experience for me.
One Sim whispers something to another Sim. Then both of them seem to get very excited. One jumps and pumps her fist in the air, the other clenches his hands and throws his head back to cheer. If you never saw the game before, you might think one Sim just revealed to the other that his favorite team won the big game, or that a great new band was coming to town for a concert.A regular player will recognize the interactions, though: one Sim just propositioned another for a little woohoo, and the proposition was accepted.The game maker's animation choices for this particular scenario are rather odd. Modder Shimrod101 fixes it with the mod 'Woohoo Acceptance Anims Replaced.' With this mod, when one Sim propositions another, their reactions are a little more flirty and sexy—much more fitting with the mood.
Do you ever get tired of your Sims always having to make the first move? The way the game is set up, you have to initiate the action if you want your Sim to have a first kiss with a non-player Sim she's dating. Your Sim always has to be the one to propose to her boyfriend or girlfriend or has to be prompted to suggest moving in together. Even divorce is totally up to you instead of up to the married Sims.If you're a control freak, you might like that you get to decide all these aspects of your Sim's life.

For other players, it is a sad lack of surprises when it comes to relationships.PolarBearSims has a series of mods to make all these actions autonomous. Your Sim might initiate a first kiss or propose without you telling her to do so.
Alternatively, her boyfriend might surprise her and make the first move or pop the question. These mods add a little excitement to the game. MC Command Center is one of the biggest, most game-changing mods known to The Sims 4.This all-in-one mod allows you to control just about everything from slowing your Sim's need decay to letting you have some control over non-player Sims. The MCCC mod has an additional package of mods designed explicitly for issues pertaining to woohoo.MC Command Center allows you to do what many other mods do, and more. You can enable autonomous proposals, kisses, and woohooing.

You can enable risky woohoo or alter the odds for pregnancy to suit your liking. You can disable jealousy or allow your Sims to be polygamists. They even include a special woohoo skill so that as your Sims level up in the art of love they will get better and leave partners more satisfied.You can review and download both parts of MCCC, by modder Deaderpool,.
Wicked Whims is the ultimate 'Not Safe for Work' Sims mod. The main mod is by Turbodriver, but many other collaborators offer a variety of animations you can add to expand the mod.This mod is so extreme that many popular The Sims message forums ban mention of it. This mod is so controversial, I'm not going to go into details, and I'm not providing a link to it. I'm just letting you know it's out there.Suffice it to say that this mod can take your game from a PG rating to an R, X or XXX rating with one download. If you're over 18 years old and plan to search for it, just be forewarned that you may find some of the content shocking or offensive. For more information on managing or withdrawing consents and how we handle data, visit our Privacy Policy at: Show Details NecessaryHubPages Device IDThis is used to identify particular browsers or devices when the access the service, and is used for security reasons.LoginThis is necessary to sign in to the HubPages Service.Google RecaptchaThis is used to prevent bots and spam. AkismetThis is used to detect comment spam.
HubPages Google AnalyticsThis is used to provide data on traffic to our website, all personally identifyable data is anonymized. HubPages Traffic PixelThis is used to collect data on traffic to articles and other pages on our site. Unless you are signed in to a HubPages account, all personally identifiable information is anonymized.Amazon Web ServicesThis is a cloud services platform that we used to host our service. CloudflareThis is a cloud CDN service that we use to efficiently deliver files required for our service to operate such as javascript, cascading style sheets, images, and videos. Google Hosted LibrariesJavascript software libraries such as jQuery are loaded at endpoints on the googleapis.com or gstatic.com domains, for performance and efficiency reasons.
FeaturesGoogle Custom SearchThis is feature allows you to search the site. Google MapsSome articles have Google Maps embedded in them. Google ChartsThis is used to display charts and graphs on articles and the author center.
Google AdSense Host APIThis service allows you to sign up for or associate a Google AdSense account with HubPages, so that you can earn money from ads on your articles. No data is shared unless you engage with this feature. Google YouTubeSome articles have YouTube videos embedded in them. VimeoSome articles have Vimeo videos embedded in them. PaypalThis is used for a registered author who enrolls in the HubPages Earnings program and requests to be paid via PayPal.
No data is shared with Paypal unless you engage with this feature. Facebook LoginYou can use this to streamline signing up for, or signing in to your Hubpages account. No data is shared with Facebook unless you engage with this feature. MavenThis supports the Maven widget and search functionality. MarketingGoogle AdSenseThis is an ad network. Google DoubleClickGoogle provides ad serving technology and runs an ad network.
Index ExchangeThis is an ad network. SovrnThis is an ad network. Facebook AdsThis is an ad network. Amazon Unified Ad MarketplaceThis is an ad network. AppNexusThis is an ad network. OpenxThis is an ad network.
Rubicon ProjectThis is an ad network. TripleLiftThis is an ad network.
Wicked Woohoo Mod Sims 4 Download
Say MediaWe partner with Say Media to deliver ad campaigns on our sites.
Sims 4 Ask Money For Woohoo Mod Download
We have detected that you are using an Ad-blocker plugin. This means our main source of income to cover bandwidth costs is blocked when you are using our free service. We would ask that you whitelist us and allow ads to show.Anyone using an Ad-blocker plugin will be forced to wait 180 seconds instead of 10 on the 'please wait' page.VIP MembershipFor as little as $4.00 per month you can become a VIP member. This lets you use our service free of all ads and unlocks access to our popular Download Basket and Quick Download features.
0 notes
Text
Surface Type Cover Filter Device Not In Device Manager
Surface Type Cover Filter Device Not In Device Manager Job
Surface Type Cover Filter Device Not In Device Manager Description
Surface Type Cover Filter Device Driver
Surface Type Cover Filter Device Not In Device Manager Position
Go to Control Panel Hardware and Sound Devices and Printers Open the Properties of 'Surface Type Cover' and select the Hardware tab. From this tab, open the properties of each associated device. Uninstall each device, deleting drivers when the option is available.
Microsoft Surface Pro is one of the best professional tech devices giving its users the choice of either using it as a tablet or a professional PC with an external Type Cover Keyboard attachment.

However, sometimes even the best of tech gadgets fail for reasons that are unknown to us. Macos bootable usb not showing up.
Select the search box in the taskbar, enter device manager, and select Device Manager in the results. Expand Keyboards. Right-click Surface Type Cover Filter Device. Select Uninstall OK. Restart your Surface. It'll automatically download and install the Surface Cover driver the next time you connect to the Internet.
It happened again. Opened my SP3 this morning, type cover wouldn't work. The fix: Open Device Manager. Expand Keyboards (Surface Type Cover Filter Device was missing) Uninstalled one of the HID Keyboard Devices. Did Scan for new Hardware changes (by right clicking on computer name) Keyboard now works great. Surface Type Cover Filter Device.

Today we will discuss troubleshooting issues with the Type Cover Keyboard of Surface Pro. You can also check for Microsoft’s own Community for any of the same problems that have been resolved by other users.
First Things First
Although the Type Cover Keyboard for the Surface Pro is durable, you still need to make sure that your keyboard is not subjected to any kind of external abuse like rough usage or hard hitting the keys. It might sound cliche, but yes the small things make big difference!

The other cliche solution to problems with your Surface Pro keyboard is restarting your Surface Pro and checking it again. The restart process solves issues with the keyboard most of the time. This is because your Surface Pro might run out of power-cycles leaving some processes unresponsive! Rebooting the device causes the power-cycle to run again. After you have restarted your device and your keyboard is still not working, then proceed to try the steps below.
Check for Latest and Important Updates
The second step to solving an issue with external devices on computers is usally to make sure that your device has the latest updates. Follow the three steps below to check for any important updates that Microsoft might have released:
Go to Start > Settings > Update & Security > Windows Update.
Click on the Check for Updates option and install the available updates.
Please Restart your Surface Pro if you are asked to do so with a prompt.
Hard Shutdown of Surface Pro
Surface Type Cover Filter Device Not In Device Manager Job
This is yet another solution that can come to your rescue in case your touch pad or any keys on the Type Cover Keyboard stop working. Note that this solution is recommended on for Surface Pro 3 and above versions, for safety reasons.
Press and hold the Volume Up and Power buttons simultaneously for more than 15 seconds. While you are holding these buttons, your screen might flash some content or the Surface logo, but just don’t leave below 15 seconds.
Once you release the two buttons, your Surface Pro will be powered off. After that wait for 10 seconds for the device to start again.
Detach, Clean and Re-Attach the Type cover Keyboard
Sometimes, an improper connection between your Surface Pro tablet and its Type Cover Keyboard might be the reason for failure in functionality. Ensure that you have a clean connection by following the below simple steps.
Unplug your Surface by detaching your Keyboard.
Clean the silicon contact points at the center of the Keyboard connecting the Surface. For this, use a cotton ball and with 95% isopropyl alcohol solution. Now rub this wet cotton ball back and forth, on the silicon contact points to remove any dirt. Once done, leave this area for few seconds open to dry and make sure there are no cotton threads left at the contact point.
Repeat this entire cleaning process for the Surface side connectors (six metallic circles at the Cover interface).
Connect the Type Cover Keyboard back to your Surface ensuring proper and firm magnetic contact between the two is established.
Surface Type Cover Filter Device Not In Device Manager Description
Do you have a protective shield cover for your Surface? If yes, make sure this is not causing hindrance and the improper /loose connection between your Keyboard and the Surface. You need to make sure that the mating parts of connection between the two are firmly in contact with each other. Loose connections might result in problems.
Reinstall the Surface Cover Drivers
Surface Type Cover Filter Device Driver
After all these previous attempts, if things are still not working fine, we request that you re-install the Surface Cover Drivers and check again.
In the search box type device manager and select the Device Manager
In the results, click the arrow next to the Keyboards
Right-click on Surface Type Cover Filter Device option and then click on Uninstall > Ok.
Once done, restart your Surface. Connect it to the internet and it will automatically download and install the Surface Cover drivers.
Surface Type Cover Filter Device Not In Device Manager Position
Checking the Ease of Access Functions
The Ease of Access Functions are those features that are created to help people with disabilities. However, accidentally turning ON of these features might be the cause issues. Double check that Ease of Access is turned off.
Go to search and type Ease of Access. Click on the Ease of Access Keyboard Settings.
In the Useful Keys section, make sure that the Stick Keys and Filter Keys are both set off.
We believe that after trying all the above methods one-by-one your issues pertaining to the Surface Pro type Cover Keyboard will be solved.
0 notes
Text
Macos Bootable Usb Not Showing Up

Plug the bootable installer into a Mac that is connected to the internet and compatible with the version of macOS you're installing. Press and hold the Option (Alt) ⌥ key immediately after turning on or restarting your Mac. Release the Option key when you see a dark screen showing your bootable volumes. Create Linux Mint Bootable USB on Windows PC. Windows is the most popular desktop OS and there are many apps that are capable of creating bootable Linux Mint USB installer. In this section, we pick up the best three one based on our testing. UUByte LiteBoot. There are a lot of Windows users that are planning to give a try on Linux Mint.
Macos Bootable Usb Not Showing Upload
Macos Bootable Usb Not Showing Up Iphone
Macos Bootable Usb Not Showing Upgrade
Macos Bootable Usb Not Showing Upside Down
These advanced steps are primarily for system administrators and others who are familiar with the command line. You don't need a bootable installer to upgrade macOS or reinstall macOS, but it can be useful when you want to install on multiple computers without downloading the installer each time.
What you need to create a bootable installer
A USB flash drive or other secondary volume formatted as Mac OS Extended, with at least 14GB of available storage
A downloaded installer for macOS Big Sur, Catalina, Mojave, High Sierra, or El Capitan
Download macOS
Download: macOS Big Sur, macOS Catalina, macOS Mojave, or macOS High Sierra These download to your Applications folder as an app named Install macOS (version name). If the installer opens after downloading, quit it without continuing installation. To get the correct installer, download from a Mac that is using macOS Sierra 10.12.5 or later, or El Capitan 10.11.6. Enterprise administrators, please download from Apple, not a locally hosted software-update server.
Download: OS X El Capitan This downloads as a disk image named InstallMacOSX.dmg. On a Mac that is compatible with El Capitan, open the disk image and run the installer within, named InstallMacOSX.pkg. It installs an app named Install OS X El Capitan into your Applications folder. You will create the bootable installer from this app, not from the disk image or .pkg installer.
Use the 'createinstallmedia' command in Terminal
Connect the USB flash drive or other volume that you're using for the bootable installer.
Open Terminal, which is in the Utilities folder of your Applications folder.
Type or paste one of the following commands in Terminal. These assume that the installer is in your Applications folder, and MyVolume is the name of the USB flash drive or other volume you're using. If it has a different name, replace MyVolume in these commands with the name of your volume.
Big Sur:*
Catalina:*
Mojave:*
High Sierra:*
El Capitan:
* If your Mac is using macOS Sierra or earlier, include the --applicationpath argument and installer path, similar to the way this is done in the command for El Capitan.
After typing the command:
Press Return to enter the command.
When prompted, type your administrator password and press Return again. Terminal doesn't show any characters as you type your password.
When prompted, type Y to confirm that you want to erase the volume, then press Return. Terminal shows the progress as the volume is erased.
After the volume is erased, you may see an alert that Terminal would like to access files on a removable volume. Click OK to allow the copy to proceed.
When Terminal says that it's done, the volume will have the same name as the installer you downloaded, such as Install macOS Big Sur. You can now quit Terminal and eject the volume.
Use the bootable installer
Determine whether you're using a Mac with Apple silicon, then follow the appropriate steps:
Apple silicon
Plug the bootable installer into a Mac that is connected to the internet and compatible with the version of macOS you're installing.
Turn on your Mac and continue to hold the power button until you see the startup options window, which shows your bootable volumes and a gear icon labled Options.
Select the volume containing the bootable installer, then click Continue.
When the macOS installer opens, follow the onscreen instructions.
Intel processor
Plug the bootable installer into a Mac that is connected to the internet and compatible with the version of macOS you're installing.
Press and hold the Option (Alt) ⌥ key immediately after turning on or restarting your Mac.
Release the Option key when you see a dark screen showing your bootable volumes.
Select the volume containing the bootable installer. Then click the up arrow or press Return. If you can't start up from the bootable installer, make sure that the External Boot setting in Startup Security Utility is set to allow booting from external media.
Choose your language, if prompted.
Select Install macOS (or Install OS X) from the Utilities window, then click Continue and follow the onscreen instructions.
Learn more
For more information about the createinstallmedia command and the arguments that you can use with it, make sure that the macOS installer is in your Applications folder, then enter the appropriate path in Terminal:
Big Sur: /Applications/Install macOS Big Sur.app/Contents/Resources/createinstallmedia
Catalina: /Applications/Install macOS Catalina.app/Contents/Resources/createinstallmedia
Mojave: /Applications/Install macOS Mojave.app/Contents/Resources/createinstallmedia
High Sierra: /Applications/Install macOS High Sierra.app/Contents/Resources/createinstallmedia
El Capitan: /Applications/Install OS X El Capitan.app/Contents/Resources/createinstallmedia
A bootable installer doesn't download macOS from the internet, but it does require an internet connection to get firmware and other information specific to the Mac model.
Linux is a great open-source operating system that can be installed on any desktop or laptop. What sets Linux apart from Windows and macOS is that it has a number of different versions that suit all your needs, ranging from newcomers to hard-core users. We call these versions distributions. The best part is that you can download all of Linux's distributions for free and install them on multiple machines.
One of the most popular Linux distributions is Linux Mint. Each distribution serves as a different purpose and there is no exception to Mint. Basically, Linux Mint is specifically designed to produce a modern and elegant operating system which is very easy to use. The coolest part is that a Linux Mint stick can be created from macOS and Windows, meaning that you can boot from Linux without installation.
Macos Bootable Usb Not Showing Upload
In this guide, we will show you how to create a Linux Mint bootable USB in Windows 10 and macOS. Before we proceed, there are a couple of things you need to understand about Linux Mint.
Why Linux Mint?
Linux Mint is one of the most used Linux distributions out there, as it is free and reliable. Like other distributions, Linux Mint can be installed on all platforms, including macOS, Windows, Android, and iOS. Linux Mint is widely supported by community and developers. The best thing about Linux Mint is that it is not vulnerable to viruses and malware attacks, which is ideal for testing purposes.
Creating a Linux Mint bootable USB is a no-brainer if you want to use it on a different computer. However, the process may be a little bit confusing to some folks. With that in mind, we are here to help.
Create Linux Mint Bootable USB on Windows PC
Windows is the most popular desktop OS and there are many apps that are capable of creating bootable Linux Mint USB installer. In this section, we pick up the best three one based on our testing.
1. UUByte LiteBoot
There are a lot of Windows users that are planning to give a try on Linux Mint. So at the beginning, we are introduing a couple of methods to create Linux Mint bootable USB on Windows, especially on Windows 10, which is now the most popular desktop operating syste.
Creating Linux Mint Bootable USB on Windows 10 is not hard at all. The first software recommendation is called UUByte LiteBoot. It is a leading program that's designed to handle all your needs for bootable USB thumb drive, including Windows, Linux and macOS. It also includes other modules for Windows ISO download and system backup and restore. Plus, it is buit with a modern UI and has a very pleasant user experience.
Step 1: Once you have UUByte LiteBoot installed on your computer, download Linux Mint onto your Mac (you can download it from here).
Step 2: Insert a USB thumb drive into Windows 10 where UUByte LiteBoot being installed. Make sure your USB device is fully compatible with the hardware, you can empty it and then reformat it using the built-in utility from right-click optionsl.
Step 3: Open UUByte LiteBoot on Windows 10 and then select Linux Boot from the main menu. Now, import the Linux Mint ISO file you downloaded earlier. Before the burning process begins, make sure you have made a copy of all important files on that USB drive.
Step 4: Click Burn button to start burning Linux ISO to the target USB drive. It usually takes about 7 minutes to complete the task. Please be patient and you will see an alear on the screen when it is done.
Step 5: Now, you have a bootable Linux Mint USB. You should insert this drive into the computer and start installing Linux mint on it by changing the first boot device to USB during startup.
In short, if you are in searching for a reliable ISO burner to create bootable Linux Mint USB, then give UUByte LiteBoot a try. It is lightweight, fast, and reliable.
2. ISO to USB
ISO to USB is a free program that lets you burn ISO image file to a USB drive, including USB Pen drive, USB sticks and USB thum drive. It is lightweight and features a simple user interface. However, it lacks some important features, including the ability to create ISO archive from external drives.
First off, you can download ISO to USB from its website and then open it on your Windows 10 machine. When the main menu shows up, click Browse to locate the Linux Mint ISO file you downloaded earlier. Select the USB drive you inserted and then hit the Burn button. The tool will start burning the ISO file to USB drive. ISO to USB has a high success rate, so you won't have any issues here.
3. RMPrepUSB
RMPrepUSB is one of the most powerful software for creating Windows and Linux bootable USB drives. In reality, RMPrepUSB is not just about creating a bootable drive, as it can do a lot more. One such thing lies in the ability to format USB and run USB speed test. And there are much more options for selecting bootloader and file systems.
This program is completely free (no subscription plans), so you don't need to spend some extra cash on its advanced features. However, it is only for advanced users as there are two many advanced settings being involved.
Step 1: Download RMPrepUSB from here and then open it on your Windows 10 computer.
Step 2: Once you are done, insert a blank USB drive into Windows . From the main menu, you can see the USB drive name showing up at the top.
Macos Bootable Usb Not Showing Up Iphone
Step 3: Click Prepare Drive to initiate the burning process and click OK from the popup menu. If this the first time you are using RMPrepUSB, the tool will run a test. Once the test is complete, repeat the above steps.
Step 4: After the bootloader information was written to USB, then extract the ISO file of Linux Mint image and copy the folder to USB. Now, it becomes a bootable Linux Mint USB.
To verifiy the burning successful or not, the user can test the result with QEMU emulator that is embeded into the program in default. You can see the option on left sidebar. This is the same as UUByte Boot Pro.
Create Linux Mint Bootable USB on Mac: Terminal App
You can create a bootable USB for Linux Mint from a Mac environment. However, you can not do it on your own as you need a little help from some third-party software out there. If you do some googling, you should find tons of them, but many of them might not work for you. Don't worry, we made a list of the best programs for creating Linux Mint bootable USB.
If you don't want to install some third-party app on your computer, you can use the dd command in macOS Terminal. This is a cool tool that allows you to execute some commands in macOS. In this case, you can rely on Terminal to create a bootable USB for Linux Mint.
Step 1: Insert the USB drive into your Mac and then open Terminal (Applications folder > Utilities).
Step 2: Enter the following command to convert ISO file IMG file:
hdiutil convert -format UDRW -o img_file_output_path linux_mint_iso_file_path
Step 3: Find the USB drive number and unmount the disk, X is the drive number of inserted USB drive:
diskutil list
diskutil unmountDisk /dev/diskX
Step 4: When all preparations are completed, it is the time to write the converted IMG file to USB, which becomes bootable afterwards.
sudo dd if=/img_file_path of=/dev/rdiskN bs=1m
Step 5: Ignore warning message that pops up uppon completion and eject the USB drive. You can now use this bootable USB to install Linux Mint on any computer.
Linux Mint Bootable USB Not Working? Troubleshooting Guide
Macos Bootable Usb Not Showing Upgrade
The success rate of creating bootable Linux Mint USB is pretty high with recommended tools we suggest above. However, some user may experience technical error during boot, such as disk error or no bootable device found. Here are a few useful tips to fix the problem.
Issue 1 : USB drive not detected
Answer: First, make sure the USB drive is installed. On Windows 7 and later version, the dirve will be installed automatically when the USB is plugged in. If failed, you have to download the USB driver and install it manually. On Mac, you can format the drive with Disk Utility app.
Issue 2: Black screen during installation
Answer: If you got a black screen during install, it means the burning process failed. Mostly because the free space is not enough on the drive. At least 4G free storage is required for installation. Also, check the ISO image is valid. If you tried two programs and failed, then it is highly possible that the ISO file is damged. You have to re-download the file again.
Issue 3 : Installation won't start
Answer: This happens frequently on old hardware that does not support UEFI boot. You need to disable secure boot and swithc to legacy Boot in BIOS.
Macos Bootable Usb Not Showing Upside Down
Wrapping Up
Creating Linux Mint bootable USB has been a lot of easier with modern software and applications, especially on Windows. Mac solution is much less due to the lack of apps from third-party developers. Honestly, there are far more options then the software listed above but they are the best among them so you don't take much time to test the candidate one by one.
0 notes
Text
Mac Os 10 Mojave

Overview of Mac OS X 10.1 Puma. Mac OS puma or the Mac OS X 10.1 is one of the most speculating operating system released in the Mac OS X lineage. Apple released a lot of operating systems under the same line of operating systems. The Mac OS sierra stands thirteenth in the Mac OS series. Mac OS sierra launched in mid-2016 made a drastic entry into the market after the OS X. Mac OS sierra made a revolutionary shift from the recent trends in the Mac OS history. The Mac OS series had some issues when it came to the graphical user interface which was frowned upon by many. Mac OS X Yosemite 10.10 is another product in Apple’s line of Mac OS X. Apple, in its line of amazing Mac OX titles, launched the Mac OS Yosemite 10.10 which took the world by storm. It’s new improved features allow even greater synchronization between iPhones and Macs when using the Internet.
MacOS (originally named 'Mac OS X' until 2012 and then 'OS X' until 2016) is the current Mac operating system that officially succeeded the classic Mac OS in 2001. Although the system was originally marketed as simply 'version 10' of Mac OS, it has a history that is largely independent of the classic Mac OS. If your Mac is using an earlier version of any Mac operating system, you should install the latest Apple software updates, which can include important security updates and updates for the apps that are installed by macOS, such as Safari, Books, Messages, Mail, Music, Calendar, and Photos.
Is your Mac up to date with the latest version of the Mac operating system? Is it using the version required by some product that you want to use with your Mac? Which versions are earlier (older) or later (newer, more recent)? To find out, learn which version is installed now.

If your macOS isn't up to date, you may be able to update to a later version.

Which macOS version is installed?

From the Apple menu in the corner of your screen, choose About This Mac. You should see the macOS name, such as macOS Big Sur, followed by its version number. If you need to know the build number as well, click the version number to see it.
Which macOS version is the latest?

Mac Os X Mojave Download

Mac Os X Mojave Patcher
These are all Mac operating systems, starting with the most recent. When a major new macOS is released, it gets a new name, such as macOS Big Sur. As updates that change the macOS version number become available, this article is updated to show the latest version of that macOS.
Mac Os 10 Mojave Download
If your Mac is using an earlier version of any Mac operating system, you should install the latest Apple software updates, which can include important security updates and updates for the apps that are installed by macOS, such as Safari, Books, Messages, Mail, Music, Calendar, and Photos.
Mac Os 10.14 Mojave
macOSLatest versionmacOS Big Sur11.2.3macOS Catalina 10.15.7macOS Mojave10.14.6macOS High Sierra10.13.6macOS Sierra10.12.6OS X El Capitan10.11.6OS X Yosemite10.10.5OS X Mavericks10.9.5OS X Mountain Lion10.8.5OS X Lion10.7.5Mac OS X Snow Leopard10.6.8Mac OS X Leopard10.5.8Mac OS X Tiger10.4.11Mac OS X Panther10.3.9Mac OS X Jaguar10.2.8Mac OS X Puma10.1.5Mac OS X Cheetah10.0.4
0 notes
Text
Download Office For Mac Full

Download FL Studio 2021 for PC such as Windows 32-bit and 64-bit OS. A full-featured digital music production software to record, edit, mix, arrange and compose a suitable song. Here FileOur offers the latest version of Fruity Loops Studio 20.8.0 full offline installer direct download from the Image Line official site.
FULL CRACK ONLY Advanced SystemCare Pro 2021 Crack Serial Key Free Portable Download Advanced SystemCare Pro 14.3.0.239 Crack 2021 Full Version Download is an optimization tool that enables your old PC or Mac to work like brand new by blocking. 1 SopCast for Mac 1.3.5. SopCast is a simple, free way to broadcast video and audio or watch the video. 806; 2 JD-GUI 0.2.7 37; 3 MultiScape 1.5.1 12; 4 Civilization IV 1.74 12; Top Shareware for lastweek Downloads. Configure and run a VPN server on Mac OS X; 24; 2 Flash Decompiler Trillix 5.0 14; 3 Macromedia FreeHand MX 11.0.2 9.
FL Studio Review
FL Studio is one of the most popular computer software to make music easily. With which you can record a charming song by mixing your voice with any music. With this software, you can surprise all kinds of audio files with a more attractive form.
It has powerful automation features as well as built-in plugins that are sure to meet all the needs of professional musicians. In the below, we will try to give a detailed FL Studio review.
DJ Music Mixer
There is no sound or musical instrument that does not exist in the world. You can add a new dimension to the audio by mixing different music with your own singing recordings. But this program also more popular in a maximum DJ mixer.
Professional Audio Editor
It arranges all that to be edit in a Playlist. You can edit file how you like. After editing you can hear the finished file. Its providing editing facility is really different and preferable from others.
Its stack of multi-purpose Clip Tracks allows you to host Audio Clips, Pattern Clips and Automation Clips. You can use this anywhere you want.
Audio Mixing Software
It is a reputable digital audio workstation, which combines an audio file with music with virtual instruments, loop sequences, and live recordable devices.
This software allows you to use various types of plugins. FL Studio 2021 full version 32-bit floating-point audio processing engine so that it supports up to 192KHz sample rate.
Multi-track Digital Audio Workstation
It supports many multi-channel configurations. Such as 5.1 and 7.1 output formats. It is an ideal audio mixing software for almost everyone interested in the creation of songs, DJ and music.
It is known to everyone as an unparalleled digital audio workstation for recording, editing, mixing, and restoring professional artists.
Windows and Mac Sound Recorder
Fruity Loop is also popular sound recording software for Windows and Mac operating system together. It records high-quality audio and vocals. This can make the recording more interesting for the vocals when recording through Live Mix.
Free VST Plugins
It came from the roots of Fruity Loop Studio. It is very easy to edit audio because it supports VST.
FL Studio Producer Edition 2021 is very easy, but there are over 80 useful plugins for friends. This plugin includes automation, sample playback, compression, distortion, delay, bit-crushing, synthesis, flanging, phasing, chorus, equalization filtering, and more functions.
Download Fruity Loop-Free
These plugins will make your music more enjoyable. So immediately download fruity loops free full version for your PC and create a piece of suitable music.
Download Office For Mac Full Version
The software can be a demo version installed on your computer to try to use and enjoy the best features. But Audacity is completely free for any user. It’s also available for Mac edition. Anyone can download fruity loops free for Mac PC to record a professional audio track and music composition.
Fruity Loop 2021 Full Version Features
Office For Mac free. download full Version
An audio editor and recorder
CPU-friendly audio editing software
Drag/drop items audio clips to the playlist
powerful single band Compressor
Three-band stereo compressor
Built-in linear phase EQ and boosts
Advanced morphing graphic equalizer plugin
Ability to add reverberation, create special effects, apply an acoustic audio signature
Real-time vocoder effect
10 classic effects designed with Guitarists
Open and video or flash files player
Built-in visualization effect with movie render capability
Easy Fruity Voltage Controller
Full inter-track audio routing and side-chaining
Supports different file formats .MP3, .WAV .AIFF, .MID, .DS, .DS, OGG, .DWP, .FLAC, .SF2, .Speech, .SYN, .XI, files
Import / Export MIDI Files
DirectWave content player
0 notes
Text
Line Update Mac

We can find mac address (physical address) of a computer using the command ‘getmac‘. This can be used to get mac address for remote computers also. Below are few examples on how to use this command. It works on XP, Vista, Windows 7, Server 2003 and Server 2008 operating systems.
Get mac addresses from CMD
Head to the “Updates” tab to see a list of available updates. You can opt to update each app individually, or click “Update All” instead. If you want your Mac App Store apps to update automatically, launch the App Store, then click on “App Store” in the top-left corner of the screen. Introducing the End of the Line Update, featuring a whopping thirteen-and-a-half-minute long animated short, new cosmetics, a new taunt from the short, and an update page, all thought up and designed by the TF2 community. This can be used to get mac address for remote computers also. Below are few examples on how to use this command. It works on XP, Vista, Windows 7, Server 2003 and Server 2008 operating systems. Get mac addresses from CMD. Just run the command getmac to get the mac addresses. Find an example below. Select the “Update Options” button. In the drop-down menu that appears, select “Enable Updates.” Microsoft Office will now automatically update with each release. Enable Automatic Updates on Mac. To turn on automatic updates for Microsoft Office on Mac, open Word, and select the “Help” tab in the system menu bar (not the Word menu bar).
Just run the command getmac to get the mac addresses. Find an example below.
This command does not show mac addresses for the network connections which are disabled. You can run ncpa.cpl and check which NICs are disabled. Further, I have received comments that this command does not help identify the mac address for a specific device. For example, if I need to get the mac address for my WiFi card, output of getmac command is not helpful. We can use ipconfig command to deal with this.
Get mac address of a remote computer
We can retrieve the mac addressses for a remote computer using nbtstat command. Example:
Alternatively, We can run the below command to retrieve the mac addresses of a remote computer.
remote_computer : Full name of the remote computer or IP address username and password are of the account on the remote computer.
Example:
If you do not want to specify the password, you can skip /p parameter. You will be prompted to enter the password and the command execution will take place after that.
Errors:
Using getmac command we can retrieve the mac addresses of the machines running windows OS only. If you try this for a Linux machine you would get the error “The RPC server is unavailable.”
If you provide incorrect password, the command would fail with the error message “Logon failure: unknown user name or bad password.”
Also Read: Windows CMD commands reference
Xcode is the tool developers use to build apps for the Apple ecosystem – MacOS, iOS, and all things Apple.
This guide will walk you through how to successfully install Xcode onto your Mac, from start to finish.
Here are some handy tips to know before you get started:
Xcode only runs on a mac. If you are on a PC, sadly you won't be able to use Xcode.
You'll need a good, stable internet connection. The latest version is around 8 gigabytes in size.
Be sure to have at least 30 gigabytes of free space on your computer. The latest .xip file (v11.4.1 at the time of writing) is ~8 gigabytes zipped. When you unzip it, that's another 17 gigabytes. Then you'll need the command line tool, which is yet another 1.5 gigabytes.
Here's an overview of the steps to install Xcode
Download Xcode
Install the command line tool
Open the new version
Delete files
Note that I have listed some Terminal commands in the steps below. These commands can be typed into your present working directory. This means that you don't need to navigate to any particular folder.
If you really want to, you can first type cd before typing the commands in the below steps. This will return you back to the home folder.
Step #1: Download Xcode
There are two ways to do this. For the latest version and a theoretically 'easy' installation, you can use the App Store. I don't recommend this option.
I prefer to use the developer site. This comes with the bonus option of being able to download any version you'd like.
Option #1: Download via the App Store for the latest version (not my preferred option)
In theory, this should be a seamless and pain-free process. But if the installation fails for any reason on the last step, it is very hard to troubleshoot.
There are a few reasons for failure, and no easy way to know which is the underlying cause. If you do encounter a failure, you will need to re-download the entire file again each time you try to fix the failure. As the latest version is 8 gigabytes, I didn't much enjoy this approach.
Line Update Pc Download
But if you're feeling brave, here are the steps:
Open the App Store on your mac
Sign in
Search for Xcode
Click install or update
Option 2: Download via the Developer site for a specific version (my preferred option)

Head to the 'more' section of the Apple developer website
Sign in with your iTunes account id
Type in the version that you'd like, and download the Xcode_x_x_x.xip file. Keep in mind that Xcode 11.4.1 is 8 gigabytes, so this will take awhile depending on your internet connection.
Once the file is downloaded, click on .xip to extract it. Your laptop will extract it to the same folder you downloaded it to. This extraction process is automatic. You don't need to do anything more after you click on the .xip file. This step will take a few minutes.
[Optional] Once extracted, rename the application to “Xcode11.x.x” if you are using multiple versions.
Drag application to the Applications folder
[Optional] Set the new Xcode version as the default. Open Terminal and type sudo xcode-select -switch /Applications/Xcodex.x.x.app . Replace x.x.x with the version number. For example: Xcode11.4.1.app. You will need to enter in your computer admin password. I'm pretty sure this will update the default Xcode version for all users on your computer, so best to check with other users first
Step #2: Install the command line tool (CLT)
If you have multiple users on your computer, you will need to update the CLT for each user.
Download .dmg
To update the CLT, go to app developer website and download the command line tool .dmg.
If you have never installed Xcode before, you may be able to update with your Terminal by typing in xcode-select --install instead of visiting the developer website.
But if you have an existing version of Xcode installed on your machine, you'll probably see this error:
This means you'll need to go to the developer website instead.
Update Line ใน Mac ไม่ ได้
Installing the CLT
When the .dmg has finished downloaded, double click the file to open it. This will open a little window that looks like this:
Double click the box and follow the prompts to install the CLT. It will take a few minutes to complete.
It may ask you at the end of the installation whether you want to move this to the trash bin. When it does this, it's talking about moving the .dmg file to the trash bin. Since you should no longer need this file. I always say yes to this.
Step #3: Open Xcode
Open the Applications folder and open the new version of Xcode. If you renamed Xcode, make sure you open the correct application
Xcode may prompt you to install additional components. Click install. This will take a few minutes.

Update Mac Command Line
While it's installing, check that your default Xcode version is the one you just downloaded:
Open Terminal
Type brew config
You should see “CLT” and “Xcode” versions, as well as everything else. This should reflect the version that you have just downloaded. In my case, I downloaded Xcode 11.4.1.
Update Line ใน Mac
Once the components are installed, Xcode will launch. You should be able to pick up your old projects and continue where you left off seamlessly*.
*Note that if you use any proxy tools, such as Charles, you will need to re-install those certificates in your simulator again.
If you encounter any errors while trying to build or run a project, check which device you are trying to launch. The new version may not remember the device you were using before. If so, click on the device and choose 'Add additional simulators' from the drop down menu to add the device you want.
Command Line Tools Update Mac
Step #4. Delete the files
If you don't need the older versions of Xcode on your computer, you can uninstall them and get some hard drive space back.
Command Line Update Mac
You can also delete the .xip file of the version you just downloaded, as well as the CLT.dmg file.
That's everything. I hope this has helped you successfully install Xcode. Have fun with it!
0 notes
Text
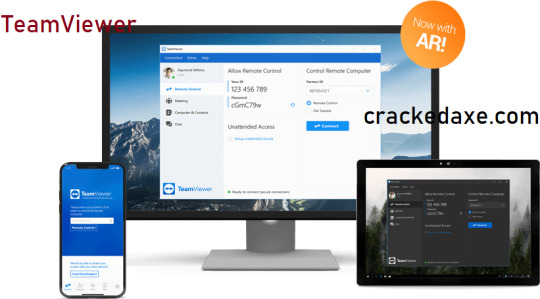
Teamviewer Mac Crack

Teamviewer 14 Mac Crack
Teamviewer Mac Crack Download
Teamviewer Mac Crack Windows
Teamviewer Crack Mac Os X
Teamviewer 12 Mac Crack
IDM Crack
IExplorer 4.4.2 Crack latest version is an ultimate solution to manage Apple devices like the iPhone 11, iPod, iPad, etc. This is the powerful iPhone manager that works with both Windows and Mac. What’s more, it is very light-weight software and does not slow down your system performance. TeamViewer Remote Control for Android 15.14.35 TeamViewer is the fast, simple and friendly solution for remote access over the Internet. Use this app to remotely control other devices. TeamViewer 13 is brimmed with features that let you tap into the future to securely solve the challenges you face today. Update: The full version of TeamViewer 13 is now available! You and your team want to deliver excellent work, focus on the important aspects of a task and satisfy your customers or help out your colleagues. Alert the TeamViewer support team. Their support numbers are 1-800-951-4573 (English) and 1-800-865-9123 (Spanish); you can also submit a ticket. Change your TeamViewer password.
Finding the father of all downloaders? If yes, then IDM Crack is the father of all the downloader manager on the internet. This software is the most utilized software for downloading videos from youtube or all other kinds of files.
Teamviewer 14 Mac Crack

It comes with the most customize-able settings that provide you with the end class of expert downloading. Even I have the ability to download files using its smart technology that allows you to download specific files using the treads that allows you to make your download speed faster than others.
Overall, it comes with a simple user interface that is also the second-best feature of the IDM Crack. Because compared to any other download manager IDM have the best and easy to understand interface, which will make you utilize IDM Crack 64 bit easily.
Teamviewer Mac Crack Download
Overview:
IDM is a software that is a shareware download manager the tones; inc owns it. Which is based in new york city. It is only created for the windows means you will not be able to use it on Linux or such kind of another os. Also, you can use any kind of features while using this software. I’m full version will allow you to download a file 5x in the download speed.
It has a simple user interface that allows you to utilize this software easily. Also, the IDM Crack Key is available in two kinds of versions, free or paid. The free version can use the limited features of the software, but on the other hand, the paid version can use the entire features of the software. May you like to download Dr Fone Crack.
Features & Benefits:
Speed stability and thus reduced loading errors.
Ability to resume or continue the download if it is interrupted for various reasons.
Advanced load planning and scheduling.
Download videos online.
Manage file categories and add, edit, and delete default program categories.
Limit the speed and volume of downloads.
Backup and restore download lists.
Support for most file sharing sites and the ability to download directly from them.
Full compatibility with all common browsers and most non-common browsers ( list of supported browsers ).
How To Crack & Download:
Teamviewer Mac Crack Windows
Download from the given link.
After extract the download file.
Then extract the downloaded file, install the setup.
After installing the setup file, then use the crack.
And enjoy yourself.
IDM Crack 6.39 Build 13 With Patch:
[xyz-ips snippet=”DWNDLINK”]
Teamviewer Crack Mac Os X
Notes:
Teamviewer 12 Mac Crack
Must use IDM crack for legal purposes only, not use this software for any illegal purposes. Download this software for educational purposes only. Kindly use this material for educational purposes. This kind of thing may hurt software developers. Kindly use it for educational purposes. Our website cracked this software for just only education purpose kindly use for the best mission.
0 notes
Text
Upgrade To Mac Os Catalina

Is It Safe To Upgrade To Mac Os Catalina
Upgrade To Macos Catalina From Mojave
Upgrade To Macos Catalina 10.15.7
Many people remember Mac OS X 10.6.8 fondly. Not just 10.6 Snow Leopard, but particularly its very mature 10.6.8 release, the final one in that series. It’s considered a stable and perfectly fine version. It’s not a problem—until they want to mitgrate to a newer computer with the same files, preferences, users, and other elements as their current one. That’s particularly true when they want to keep their system and essentially brain transplant it to the latest two updates, macOS Catalina and Big Sur, and find there’s no direct path.
Is It Safe To Upgrade To Mac Os Catalina
Apple offers Migration Assistant both when setting up a Mac (whether new or erased) and as an app within macOS, particularly to migrate user accounts and applications. As a source, you can use a Time Machine backup, a disk image copy of your macOS startup volume (via a cloning app, for instance), or another Mac.
Download macOS Catalina for Mac to extend your workspace and expand your creativity with macOS Catalina (10.15). MacOS Catalina has had 1 updates within the past 6 months.
Apple's describing the move from macOS 10.16 Catalina to macOS 11 Big Sur as 'The biggest design upgrade since the introduction of Mac OS X'. To you if you upgrade from Catalina is a design.
But Migration Assistant has its limits: in Catalina and Big Sur, you must migrate from a backup made from or a computer running Mac OS X 10.11 El Capitan or later. Attempts to copy from older installations lead to an error.
However, you’re not stuck. You have several alternatives you can try.
Mac OS X 10.5 Leopard: Released in the fall of 2007. Apple highlighted the fact that it added 300 new features to OS X, including a simplified user interface (good!) and a semitransparent menu bar.
Upgrade past 10.6.8
It may seem like a pain, but if you have a computer that can be upgraded to 10.11 El Capitan or later, that’s your best bet. This list of models from One World Computing will help you figure out if your Mac can be upgraded that far. It covers years of Mac releases. (No Macs that can run Snow Leopard can be upgraded to Catalina or Big Sur, which would solve the problem, too.)
Apple has instructions on installing a terminal release of Mac OS X or macOS for its old computers.
Once upgraded to El Capitan or later, you can then run Migration Assistant to transfer data to Catalina or Big Sur.
If your computer’s last OS option isn’t El Capitan, read on.

Upgrade To Macos Catalina From Mojave
Copy just the user directory
When spanning such a long gap between releases, you may not need applications or any settings files—you just want to transfer all your document, pictures, and other personal files. In that case, you can use these directions in a Mac 911 column from last year. While that article was written to help you overcome a Migration Assistant failure, it also works when Migration Assistant can’t.
Each of the techniques in that article lets you move the files you need over to a new Mac. The options vary by what your older system is capable of and the level of technical detail you want to cope with.
Install an older Mac OS on an external drive for migration

If the Mac you’re upgrading to (not from) is in the right range of vintages, you can do the following:
Upgrade To Macos Catalina 10.15.7
Install Mac OS X 10.11 El Capitan on an external drive. (Download El Capitan from Apple’s site.) El Capitan seems to be the last release that can migrate files from Snow Leopard.
Use the Startup Disk preference pane to select that external drive and restart.
Use Migration Assistant during setup or after setting up on the external drive to transfer data from your Snow Leopard Mac.
Use Startup Disk to restart with your newer Mac’s intended startup volume.
Now run Migration Assistant pointing to the external drive.
If you don’t own a Mac that can install El Capitan, you might be able to borrow such a machine from someone and use the same external drive approach that won’t affect the startup drive of their system.
This Mac 911 article is in response to a question submitted by Macworld reader Balthasar.
Ask Mac 911
We’ve compiled a list of the questions we get asked most frequently along with answers and links to columns: read our super FAQ to see if your question is covered. If not, we’re always looking for new problems to solve! Email yours to [email protected] screen captures as appropriate, and whether you want your full name used. Not every question will be answered, we don’t reply to email, and we cannot provide direct troubleshooting advice.
1 note
·
View note