
Don't wanna be here? Send us removal request.
Statistics
We looked inside some of the posts by ifada and here's what we found interesting.
Average Info
Notes Per Post
1
Likes Per Post
1
Reblog Per Post
0
Reply Per Post
0
Time Between Posts
5 days
Number of Posts By Type
Photo
4
Text
10
Link
1
Last Seen Tumblr Blogs


Fun Fact
Tumblr has 4 main sources of revenue.
Photo

Become a WordPress Developer: Everything You Need to Know What does WordPress developer actually do? WordPress developers are the people behind WordPress. They know the platform inside and out and can create custom plugins and modules for WordPress to make your site function in a way that is best for you. WordPress developers need to be experts with PHP, HTML, CSS, JavaScript and SQL (just to name a few) in order to work on the backend of WordPress.If someone wanted their website designed with WordPress but didn’t want any customization or programming done by an experienced developer, they could use themes instead – which would still require a lot of knowledge on how everything works together seamlessly. What is HTML?
HTML stands for Hypertext Markup Language. HTML is what makes up the structure of a webpage – it’s essentially just texting with tags around certain pieces to denote what it should be or how it should function.They are not all required by every website, but they are good things to know in case you need them! If you want to be able to code your own WordPress site, I would highly suggest learning these languages because having this knowledge will help you tremendously, as becoming a developer can mean being self-taught and knowing multiple programming languages that translate into many different languages.This blog post won’t go over everything about each language (that could take forever), so instead, I’ll list some links below where you can learn more!What does CSS stand for?
CSS stands for Cascading Style Sheets. CSS is what makes the design elements of a webpage look how they do – it’s essentially just texting with tags around certain pieces to denote colors, fonts, images and more!Cascading Style Sheets helps developers to style WordPress projects. There would be no themes or plugins without CSS because they are what make the design elements of a website look how they do!What is PHP used for?
PHP is an extremely popular server-side scripting language that’s used on many websites besides WordPress. It helps to make dynamic and interactive features like contact forms, comments sections, shopping carts/checkouts (on eCommerce stores), databases (like the one your site runs on) and more!It also allows for different things to happen based on certain variables or conditions. For example, if someone filled out a form incorrectly, you could have PHP email them back, letting them know what they did wrong so next time they can correct it. This would be way harder than just having PHP do it automatically without any human interaction required at all!JavaScript
As we know, it’s a text-based programming language used both on the client-side and server-side. Which will help you to make web pages interactive. JS gives web pages interactive elements that engage a user. JavaScript can be put into JS files or included in HTML documents with script tags!I’m not going over how JavaScript works because there’s just too much information for this blog post, but I will leave some resources where you can learn more about it if you’re interested!SQL
The SQL stands for “Structured Query Language”, though it’s also known as SEQuel (pronounced sequel) because of its similarities to other languages like JavaScript. SQL queries are the foundation on which WordPress’ code bases stand, so understanding how they work will be extremely helpful when you get started with your new career path.ConclusionIf you are looking for a WordPress developer, contact us. We have developers with years of experience in building websites and fixing issues, – whether you need an editor who can take care of everything or just someone to provide the design. Our team has unparalleled knowledge on how all aspects work together when developing a site using WordPress, so we’re confident that our expertise is what you’re after. Contact us today if this sounds like something interesting!
0 notes
Text
High-Quality Manual Backlinks To Boost Your Ranking
Everyone knows that High-Quality Manual Backlinks Is Hard To Find. I Have More Than 7 Years Of Experience And I’ve Spent A Long Time Searching For This White Hat Backlinks and analyzing them to combine this Collection.
The awful fact is: If Your Website Doesn’t Have Backlinks, You Will Not Be Visible On Google!
With My Advanced Link-building Strategy, You Receive High-Quality Manual Backlinks That Will Improve Your SEO Rankings. These Links Can Skyrocket One Of Your Pages Depending On The Competition Of The Keyword.
High-Quality Manual Backlinks
I’m Going To Deliver Multiple Types Of Top-performing Backlinks All In One Package:
High-Quality DA, PA Edu & Gov Backlinks
Profile 2.0 Backlinks
Article Submission Backlinks
Blog Comment Backlinks
My Strategy is a White-hat Approach. This means No PBNs, No Spam Links, No Black-hat Methods.
All these Links Are White-hat And Safe To Use.
Remember That 1 High-quality Pr Link Is Worth More Than 1000 Spammy Fake Contextual Backlinks!
IMPORTANT: The Backlinks That I will Provide you Will Be Placed On General Sites! It’s Not Contextual Links Placed In Niche-related Posts.
What Are You Waiting For? Start Building Your High-quality Backlink To Boost Your Website’s Ranking.
FAQ
Are Those High-Quality Manual Backlinks Safe?
The service is 100% safe and I only use white hat SEO backlinks (No PBNs).
What do you need to get started?
I only need your URL + up to 5 keywords that you would like to rank. I do not need access to your website.
Are those Backlinks permanent?
I use only Dofollow backlinks. Nofollow links do not transfer any link juice and therefore are useless. The links are, of course, permanent.
Do I accept other languages websites?
Yes, The keywords may be in foreign languages.
When I’ll see the results?
As everyone knows Google Rankings start in 3 weeks after Google’s bots crawling and indexing.
0 notes
Text
Digital Marketing Explained 2021

"Digital Marketing" is a term that refers to an array of internet-based marketing strategies, products, and tools. While companies can be very specific about their online marketing efforts and methods they employ, however, it's worthwhile to learn some of the "big ones" to get an understanding of where to start. These key digital marketing tools have been utilized by many companies to increase customers to their websites, increase leads and bring in new customers. Therefore, whether you choose to decide to invest in one, another, or all it's a fantastic option to increase your profits in the long run. Here are the best digital marketing options to think about in case you're planning to take your company to new levels.
Digital Marketing: Social Media Marketing
It's estimated that nearly 2.9 billion users utilize social media in the world and the amount is predicted to keep growing. Although the majority of entrepreneurs are familiar with the main Social Media Marketing (SMM) channels (Facebook, Twitter, Instagram, LinkedIn, Pinterest, and so on. ) however, not every business is using social media marketing properly. That's the reason SMM is an important part of digital marketing because the majority of businesses require assistance in establishing an effective, data-driven Social Media Strategy. It's not enough just to make a few posts and expect the best. businesses must adopt an approach that is strategic. SMM agencies provide a variety of social media management and marketing solutions to aid businesses to reach their ideal people, share captivating content, drive traffic and drive sales. Businesses can anticipate a better ROI from their social media campaigns and also build a loyal following as well.
SEO (Search Engine Optimization)
As everyone knows Google is the best search engine that has been responsible for driving huge volumes of traffic to businesses' websites on the web. With the number of people searching for services, products, or information as well as brands companies can't afford to rest on SEO. SEO involves optimizing your site and your online presence to be more prominent in the results of searches so that you be noticed by potential clients. International, national, as well as local businesses, can benefit from SEO. When you work together with the help of an SEO agency, you will be able to improve your site's ranking for the most important phrases your customers use to locate similar brands to yours. The chosen SEO team will ensure that your website is safe from technical errors and optimized for mobile search, provides top-quality content, and allows buyers to purchase.
Web site Design & Development
The basis of any effective digital marketing plan is a strong professional, business-oriented website. This is why the majority of digital marketing services begin with the design and development of a website to ensure your website looks professional and appealing. Beyond aesthetics, your website should be user-friendly, functional as well as optimized to work on mobile. A reliable web design company will assist you in building an online site that meets your needs while making sure that your website is able to draw new clients to your site. A professional, attractive website includes: - An intuitive interface and layout - A striking design that represents your brand - A layout that can be accessed via mobile and desktop devices as well as the internet. - Fantastic content that's entertaining and simple to read - Pictures and media that captivate the eyes - On-page and technical optimizations to draw users
Pay per Click (PPC) Advertising
When people think of "ads" they might imagine newspaper advertisements, magazine ads or TV ads. Did you know that a lot of businesses have eliminated traditional advertisements to make way for online PPC advertisements? A few examples that are PPC advertising platforms are Google Ads, Facebook Ads as well as Instagram Ads, which are used to increase traffic and leads at a set rate per visit (CPC). As the name implies, when you use PPC advertisements you pay per user who clicks your ad. This service for digital marketing helps companies increase leads quicker as they don't have to wait for the organic impact of social media or SEO. You can generate leads and traffic right away with a minimal marketing budget, and then gradually expand in time. PPC requires some skill to achieve So, make sure you engage a trusted PPC specialist to ensure that you're targeting the right people, adjusting your ads in a way that is effective, and producing the highest quality results at the least cost.
Email Marketing
The email was around for a long time, but the field of marketing via email has definitely changed. Companies can become focused on their target market and expand their lists by a huge amount and create a huge number of leads from their lists, every month. The most important thing is to comprehend your readers to a T so that you can promote the appropriate information in your emails. It is also important to sort your list in a way that you can keep in touch with offers that the subscribers are eager to purchase. This is an important category of digital marketing as there's plenty of profit to be made from having a well-established email list. We recommend businesses employ professional email copywriters and marketers so that they can obtain the most effective results in terms of emails opened as well as clicks, traffic, and sales.
Content Marketing
Content marketing is a different broad category that includes all forms of marketing that aim to promote content to viewers. It typically includes blogging as a way of driving traffic, as well as video marketing to increase views. A well-planned content marketing strategy will help your company increase the number of potential customers on many platforms without needing to create an abundance of content. It is possible to create new content, distribute the content through various channels, and reap the rewards. One piece of information could aid in generating an organic flow of web traffic (through SEO) as well as clicking (through email) and backlinks (again via SEO) as well as engagement (on the social networks). The best content marketing company will help you drum maximum exposure for your business without the need to be an authoring machine.
Digital Marketing: step to Improve Your Online Marketing
Sometimes it's best to get back to the basics and comprehend the fundamentals of online marketing. The main reason of digital marketing is about getting your company found online and there is a myriad of ways to get this done. We have covered the most important digital marketing tools you can make use of to expand your business. However, these are only the beginning. Read the full article
0 notes
Text
Benefits Of The Sales Funnel OF Online Marketing

The sales funnel of online marketing can be described as a drawn-out route that consumers follow each when they purchase your product on the internet. The concept comes from the notion that all customers go through the same process when making purchases. The funnel of sales is an important component of the marketing plan. You might be asking yourself:" Why do I need a digital marketing strategy?". It's important to comprehend your customers' potential as well as their behavior and the process they need to traverse to get to the point where they can convert on your site. We'll guide you through an entire process, starting from the beginning until the very narrow end.
A Sales Funnel for Digital Marketing - Step by Step
We will break down the funnel of sales into five phases: - Awareness - Take into consideration - Preference - Purchase - Loyalty - Awareness The top stage that the sales funnel goes through. In this stage, the potential customers are getting familiar with your brand while they attempt to find the solution to their specific issue. If you are looking to earn money, customers must be aware that your product is in the marketplace. There are many ways to advertise your company. For instance, you can advertise via social media, mailing direct mail, holding workshops and events. You could even develop your own SEO (Search Engine Optimization) strategy, which will target keywords with low intent from people who might not be aware they're interested in purchasing from you. Certain will progress to the next stage, While others abandon the process and seek a new solution for their issue. The most important aspect in this stage is to ensure that you reach the right audience that is likely to purchase your product. Take into consideration At this point, your client is familiar with the brand. You must now convince them that you're the answer to their issue. A prospective buyer is more likely to believe the opinions of those who have purchased your product. This is why you should provide the feedback of customers on your site to convince indecisive potential buyers. Include the frequently asked questions (FAQ) area to assist your clients in resolving their most pressing questions, concerns, or any doubts they may have. The objective is to dispel any doubts that prospective buyers may have about the quality of the product. Conversion In this phase of the sales funnel, the potential buyers get a better understanding of the product. They know what you can provide them to solve their issues. This is where you need to go the "extra mile" to convince the customer to buy your product. It can be accomplished by a variety of methods. A free Trial is among the most effective options for reluctant customers. It allows the customer to try your product and ensure that they'll be able to make an informed decision before purchasing the product. Give details on the number of happy customers. In this way, you can make customers feel confident when they decide to purchase from you. Include customer assistance and personalized emails and offers that are limited in time. This is in which you decide whether to make or break it. Purchase This part in the funnel of sales is crucial for your company. It's the reason for the previous phases. The consumer has decided that the product is worth the investment. If they enjoyed their overall experience, they will recommend your product to friends and bring us back to the initial stage - awareness. Retention The job is nearly done. The final phase in the funnel of sales is to keep your customers stuck with your company. Give them a reason to keep coming to you. Develop products that are able to meet or exceed the expectations of your customers, and then offer the best price. Your customers will feel special by giving them discounts on your products for loyal customers as well as informing them about your latest products. It is essential to keep in contact with them and take their feedback into consideration to improve the higher levels of the sales funnel.
8 benefits of a Marketing Funnel for Sales within Digital Marketing
There are hundreds of mistakes that you could make while creating your funnel. Most common are poor offerings, ugly design not taking into account analytic data and too many steps within your process, and others. To stay clear of most of these issues, you should consider hiring a professional. Digital marketing firms are experts in marketing strategies, and they can provide tremendous value to your business. Your company will gain from the digital marketing funnel in many ways. Here are eight advantages of a sales funnel: - The advantages of getting potential prospects Every time you make a sale, you have an opportunity to attract new customers to your business. A happy customer is an ideal commercial for any company. - The benefit is that it lets you target the most suitable customers The funnel stages let you know what is which drives your prospective customers to investigate and purchase your products. This allows you to spend your time and effort on sales with potential instead of spending too much time and effort on those that won't make it to the top of the list. - The benefits of gaining opportunities to grow the efficiency of your company The sales funnel can help you identify issues before they get too overwhelming to manage. It's a process of trial and failure. - The benefits of establishing lasting relationships That is nearly impossible without the sales funnel of digital marketing. It is essential to plan every step to be trustworthy and earn the trust of your clients. - The advantage is that you can measure the amount of traffic on your site This will help you determine your sales. With a solid understanding of the future sales and earnings, you'll be able to create an effective plan for sales. It could also help in budgeting and risk management. - The benefits of interacting with customers. You will gain valuable insights into the underlying causes of your client's requirements by incorporating sales funnels into your marketing plan. The information you gather from your customers can help to determine the best approach to marketing your company. - The advantage of HTML0 is a measurement of your business The funnel can reveal which customers you're losing in order to make adjustments to your approach. For instance, if you're dropping customers prior to they arrive at the second stage in your process, then you need to improve your brand's awareness campaign. - The benefits of understanding the customer's path. A structured marketing plan, as well as the various stages of the funnel enable you to refine your marketing strategy to boost sales. That's the main goal.
The Sales Funnel Summary
Your company must have an efficient, rational, and efficient sales funnel to draw in potential customers and turn to pay clients. By slowly becoming familiar with your target audience and, above all, by delivering value, you can create a foundation that will set your company up for success over the long term. Make sure you manage your customers' behavior all the way down using an effective sales funnel. Through careful analysis, a funnel can help you determine what your company can do to make your customers feel more comfortable at specific funnel stages. The bottom line is that your funnel separates the most serious buyers from those who are just looking, which results in a significantly greater conversion rate. Read the full article
#BenefitsOfTheSalesFunnelOFOnlineMarketing#Ifada#IfadaSEO#SearchEngineOptimizationstrategy#SearchEngineOptimizationstrategy2021#Theadvantageisthatyoucanmeasuretheamountoftrafficonyoursite#TheadvantageofHTML0isameasurementofyourbusiness#Theadvantagesofgettingpotentialprospects#Thebenefitisthatitletsyoutargetthemostsuitablecustomers#Thebenefitsofestablishinglastingrelationships#Thebenefitsofgainingopportunitiestogrowtheefficiencyofyourcompany#Thebenefitsofunderstandingthecustomer'spath#TheSalesFunnel
0 notes
Text
Loginizer plugin For WordPress Website Security

Loginizer plugin is an effective plugin to improve WordPress website security. It's easy to configure the settings, and your website will be safe from bots as well as other malware. Installation is quick and simple. The plugin, however, provides only the brute force settings with the trial version. If you wish to utilize additional features in the plugin, you can buy the premium version.

Brute Protection offers high security on your login pages. It blocks IPs trying to hack your site for 15 mins after three unsuccessful login attempts. If multiple lockouts are attempted, it will disable the IP for up to 24 hours. Additionally, you can send errors to users who have more than a specific number of attempts to log in. You can access the blacklist and whitelist IP addresses. These features are available within the version that is free. The pro version includes re-captcha, 2-way verification, password-free as well, as security options. Password Less login offers simple access to login for customers. When you login, the username or email address will be requested to verify the account, as well as an email sent to that email associated with the account along with an indefinite link to log into.
2-Factor Authentication
There is also two-way authentication using email in the premium version. After login into the account, you will receive an email to your email associated with the account, along with a temporary six-digit code that will allow you to login. Additionally, you can avail of two-way authentication using the application features as well. This feature allows users are able to set up the account using a 2FA app such as Google Authenticator, Authy, etc. You can also include Re-Captcha in the login and connect sections. The plugin supports Google's re-captcha version 3 and v2 to the login screen Comment Section, Login Form as well as other forms. To prevent automatized brute-force attacks. In addition, it allows Woo-commerce to be used. If you want to stop new registrations coming into the domain you want to block, You can do this by using the brand new blacklist of registration domains feature. It also has the option of auto-blacklisting IPs. This means that it will automatically block IPs in the event that specific usernames stored by the administrator are used to login by malicious bots or users. All of these features are available in the premium version. Let's look at the fundamental capabilities of this plugin.
Loginizer Features:
The plugin has a user-friendly interface with a quick and easy installation. Loginizer only offers brute force protection options in its free version. If you wish to utilize the re-captcha feature and additional security options, you are able to move into the Pro version. Pro version. But, there are several options to set up in your Brute Settings for Force. You can choose the limit value for retries, lockout times, and emails to notify you of changes. In addition, you are able to issue error messages to users who tried to sign in or out for more than the limits. It lets you blacklist particular IP addresses for users using this version for free. You can opt to have the auto-blacklisting feature integrated into its Pro version. There is also two-way authentication using mail when you upgrade to version Pro version. It will then forward the mail to an email account associated with the accounts, along with the temporary code of six digits to verify the login. The plugin supports Google's re-captcha V3 and v2 configurations for the Login screen Comment Section, Registration Form with this plugin. The plugin will automatically blacklist the IP addresses if certain usernames that are saved by the administrator are used to sign in by malicious bots or users. Password-less login offers simple user login choices. When logging in your username, or email address will be requested for, as well as an email sent to that email associated with the account along with an indefinite link to log into the account. This feature is only available with version Pro version. You can inform your contacts that your website is secured by the plugin's brute protection feature by using Twitter. The plugin also has the ability to create a page layer as well as WPcentral integration. We use Page layer builders to manage and create professional content and pages. In addition, WPCentral lets you manage multiple WordPress websites from one dashboard.
Pricing Details:

Loginizer offers four paid subscription plans, including blogger, personal professional, professional, and business plan. You can get the license for 100 sites. A personal plan is $24 annually. You will get the license for one website. The plan also includes one year's worth of service as well as updates to plugins. The Blogger plan costs $40 per year and includes a license for two websites. Additionally, the professional plan costs $90 per year and includes the option of ten sites. The business plan gives an unlimited license to 100 sites, which is $150.
How to Install and Activate Loginizer Plugin

The process of installing the plugin is simple. After you have activated the plugin on your website, it is now possible to start using the plugin on your website. It is now time to configure your security settings on your site with this plugin. We've given a step by the procedure below on how to utilize this plugin. Brute Force Settings Step 1. The first step is to go to Step 1: First, select the "Loginizer Security" option that is located in the left-hand panel on your WordPress dashboard. Select " Brute Force".

Step 2: You'll be taken into your "Brute Force Settings" page. There are four sections for the settings for brute force. First, look down until you find " Brute Force Settings." You can modify and set several fields within this section. There are unlimited lockout and retries options to protect your website. There will be different fields, such as Max Retries Enter the number of login attempts that fail, which is sufficient prior to lockout. Lockout Time Enter the length of time you'd like the duration for the lockout time to last. The number of Max Lockouts - Enter the number of lockouts acceptable prior to the time an extended lockout takes place. Extended Lockout - Enter the amount of time you would like an extended lockout. Reset Retries Enter the number of hours you'd like to reset to have retries be reset. Email Notification Enter the number of locks that are acceptable prior to receiving an email notification. You can set and configure the above fields however you'd like. After setting these values, then click " Save Settings". You can also turn off Brute Force protection. Brute Force Protection.

Whitelist and blacklist IPs Step 3: Next, go to whitelist and blacklist IPs. You could type the IPs that you wish to whitelist or blacklist. Additionally, you can create a blacklist or whitelist IPs range by clicking to "Add Blacklist and Whitelist range."

Loginizer Error Message Step 4: The next step is step 4: The " Error Message" section. It is possible to customize the error message. Within the Failed Login Try Field you can type in your personal error message. The message will be displayed to the end-user each when the login attempt fails.

Step 5 5. Step 5: In Step 5: In the Blacklisted IP area, enter your own error message. The message will be displayed in the event that a login attempt was coming from an IP that is blocked. Additionally, you can display error messages for failed attempts, minutes left, lockout errors, hours, and minutes left. Click on the Save Error messages button to save the changes you made. The organizer plugin only provides brute force settings when you use the version that is free. Other options, like re-captchas, password-less, as well as security settings, are accessible within the Pro version. It is possible to upgrade to the Pro version if you wish to access the advanced features that this plugin offers. This plugin allows users to send security messages to their contacts via tweets.
Conclusion
Loginizer is the most well-known WordPress security plugin on the market. You have a range of choices to safeguard your site from bots that are malicious. The plugin, however, allows users to only access the settings for brute force protection for free. You can also include Re-Captcha to the login, comment, or registration pages. The plugin allows you to set the limits for login retries and lockouts. Additionally, you can send emails to users in the event of lockouts that are specific to them. You can also whitelist or blacklist the IPs you want to block. The Pro version comes with a variety of advanced options. Installation is easy and fast. Follow the instructions on how you can install and enable the plugin. We have also provided step-by-step instructions on how to set up your security with Loginizer plugin. Read the full article
0 notes
Text
Imagify WordPress Plugin For A Fast Website

Do you have any questions about why your site's principal page takes more time and takes longer to load? Believe me, Imagify it's the solution. Websites are becoming slow, and the cause could be due to the images used on pages. We're not suggesting you pick between speed and beauty. However, it's time to correct the problem by using Imagify.

Imagify is an internet-based and CMS compressor tool that allows image optimization that is accessible to everyone. It helps speed up your site with images that are lighter, helps you save time, and doesn't need to sacrifice the quality of your images. Optimizing your images and enhancing the loading speed takes about 5 minutes. As of now, it appears that present, the CMS extension is available only for WordPress However, you are able to make use of their API to integrate it to other CMS platforms.
Imagify Features:
The image optimization plugin provides more than just compression of images. It's all about making life easier. Let's see the attributes that make Imagify superior to the other options. Optimization for all formats The tool can compress all popular image formats, including PDF formats. The maximum size of a photo is two megabytes. The size limit is not limited to the premium version. Resize on the fly It's been a challenge to change the size of your photos in desired width and height or in percentage. You can utilize the Imagify online application as well as your content management system to make your images to the ideal size. A dozen locations In terms of users' ease and comfort, it never steps back. Similar to the products they offer, this tool is user-friendly. It's the perfect time to put an end to spending time with other programs.
Three-level compression available

With the Imagify Free version, you have three levels of compression for your images to achieve the best result. - Normal: At this point, image quality is the same, and there isn't any visible change in size. - Adverse: At an aggressive level, you can alter the size but not lose the quality. - Ultra: In the ultra mode, you can save a significant amount when resizing your device, but in certain situations, it is possible of quality loss.
Automatic image Resizes
Auto-resize images are the ideal choice for bloggers. There is a choice to reduce the size of your images to the maximum width. If WordPress themes permit 1024-pixel width, the bigger images will be automatically scaled to fit the recommended width. Make sure you are able to optimize for any technology Whichever platform you're working on, you are able to lower the weight of your images with just one button. It is possible to use Imagify, the Imagify web-based App as well as the WordPress CMS, or their API. Save your original images as an archive. The backup option allows you to save the images in the original size for restoration later on. Backup is activated by default when you install The WordPress plugin.
The WEBP Format and compatibility with browsers
One of the most appealing features we love about Imagify is the ability to create WebP formats for images. These formats are fully recognized by Chrome and Mozilla. This feature isn't available in WP Smush or TinyPNG.
Bulk Compress WordPress images
If you look at the Auto-Optimize image after upload and upload, all new images will be automatically optimized. But what happens to your old ones? Visit your WordPress dashboard, click Media>> Bulk Optimization, and all of your older images will be optimized.
Getting Imagify for WordPress

In terms of sophisticated image enhancement, Imagify is an ideal tool. Now you can make use of it on WordPress. It's NextGen in addition to WooCommerce compatible. Converting lighter images, lighter WebP into a speedier version of your website is just a mouse click away. The plugin is accessible directly through your WordPress website. Once you activate the plugin, you'll be able to accomplish the following actions. - Improve all your images in just a click. - Resize your images using advanced tools. - Check out the size of the image before and after. - If you require, restore your data to its original version. - The choice of the compression level will optimize the images automatically. - Each image is efficient and responsive, including the thumbnails. - To ensure performance and resolution, you can adjust the size of the images created by the WP retina x2 plugin. WP Rocket makes the web quicker, and Imagify makes the web more user-friendly. It's among the most effective solutions available on WordPress. WordPress market.
Installation and Set-up procedure

The installation process is like adding additional plugins to the WordPress dashboard. - Log in to the WordPress administrator panel. - Click on Plugins, Then Add New. - Look up Imagify to install and then run it. Another option would be to obtain the ZIP file via the official WordPress repository and install it using the plugins menu and enable it.
Imagify pricing structure

The free & premium versions of the plugin have similar features. There is only one difference in the many files it is able to optimize. The free version allows you to optimize 20MB of data within one month, whereas the premium version costs $4.99 per month. You could optimize for the monthly or yearly plan based on the budget you have. With the unlimited plan, the user can maximize an unlimitable amount of images. Registration is free, and there's no requirement to provide credit card details. Don't forget, once you've reached the limit of your plan, you aren't able to optimize the newly uploaded photos. How do you choose the right Imagify plan? To select the most suitable pricing plan, examine the Media Library size. This will help you in making a wise and informed choice. If you're not sure, connect directly with the Imagify team to receive the most appropriate guidance. To opt-out, send an email to and leave the rest to the team at Imagify. Should you choose Imagify to make your site more user-friendly? Optimization of images is a requirement for every website owner, and, with Imagify, it is not a need to consider it. All that you need to do is to install the software. It will reduce and resize images to speed up your site. If you're ready to begin the process of optimization, then go to try it. Read the full article
#AutomaticimageResize#BulkCompressWordPressimages#Ifada#Imagify#ImagifyFeatures#ImagifyforWordPress#Imagifyplans#Imagifypricing#ImagifyWordPressPluginForAFastWebsite#WEBPFormat
0 notes
Text
Wordfence Plugin For WordPress

Wordfence is a web-based application firewall that detects and stops malicious traffic from WordPress websites. Through an embedded security scanner Wordfence will analyze WordPress themes, files, and plugins for SEO spam, malware bad URLs, malicious redirects, as well as code injections. Wordfence has a focus on total WordPress security by providing a Threat Defense Feed, which includes the most current firewall rules and malicious IP addresses as well as malware-related signatures. With Wordfence users can control multiple WordPress websites and monitor live activity across all websites all in one location. When malicious activity is identified, It can quickly isolate security threats by blocking malicious networks as well as all other activities that could indicate suspicious motives. Overwritten files can be easily restored to the original format by confirming the authenticity of files by using WordPress.org repository. Wordfence also offers 2-factor authentication as well as password security, IP blacklisting, and country-specific blocking.
What is WordFence Security?

WordFence is a plugin for WordPress. WordFence plugin has an endpoint firewall as well as a malware scanner designed exclusively to secure WordPress. It is continuously up-to-date with the latest rules for firewalls and malware signatures, as well as an extensive data catalog that includes malicious IP addresses to help ensure your website is secure. WordFence comes with a Web Application Firewall (WAF) capable of blocking harmful traffic. WAF is a terminal application and is able to integrate deeply with WordPress. The main difference between Wordfence and Wordfence is the fact that it does not breach cryptography, it isn't able to be tampered with and it doesn't expose information. Furthermore, WordFence has an integrated Malware Scanner, which acts to block requests that contain malicious code or. Wordfence safeguards your WordPress from attacks using brute force by restricting the number of login attempts, and also enforcing secure passwords. It also provides other security measures to ensure authentication for login. WordFence premium (paid) version includes additional benefits that make WordFence even more effective. In addition, WordFence can mention the possibility of the ability to update firewall rules in real-time and malware signatures, IP blacklist in real-time, and many more.
Key Security Features of WordFence Security
WordFence offers a variety of security features, However, some of them are considered to be the most significant by the public and WordFence itself. Password Protection One of the most important problems with security is to ensure the security of passwords, stopping any person from accessing your website or application. Wordfence provides protection against this specific risk. The feature lets you stop administrators from logging in if they have compromised passwords. If administrators have their password identified as compromised and it is required for him to change his password so that he is able to log in. It is worth noting the fact that this function was made available by an integration WordFence Login security into the database that Troy Hunt has created through his Pwned Passwords API. The API is a vast database of millions of passwords stolen. Live traffic Wordfence Live Traffic Security Feature is an effective tool. It lets you monitor the activity of users on your website in real-time. Additionally, it will display data that is not displayed in other tools such as Google Analytics and other Javascript Loggers. Thus, this function is among the most sophisticated in regards to live traffic for WordPress. With these features, Wordfence allows you to keep track of different traffic data, including: Monitor cybercriminals or hackers trying to penetrate your site in real-time. This allows you to monitor attacks that aren't seen by other traffic monitors and determine their location and IP addresses and the date/time of the attack. Find out the people who are logging in and out of your website, and the actions they take immediately. This will allow you to better monitor the actions of your visitors. And should you suspect that attacks are taking place or threats, you'll be able to more effectively manage the development of strategies to mitigate the threat. Additionally, it's still possible to verify the IP address, location, and the time and date of user actions. While the focus of Wordfence is security, it's capable of monitoring in real-time the way your site is crawled through Google. This is a fascinating feature, particularly in SEO strategies. It also lets users detect potential problems like the absence of tracking of pages or missing robots.txt files. Secure your intellectual property from theft of content. This means that with this feature, you'll have the security of your content. Restrict real-time tracking. WordFence can detect any actions by crawlers (such as crawlers) which pose threats and block what causes these issues. Advanced Blocking Features WordFence provides powerful options to allow you to control the flow of traffic to any website. This will allow you to effectively and quickly stop attacks on the security of your website. With these options, you can stop things like whole criminal networks, or any suspicious robot or human activity, and more. Wordfence also allows users to carry out IP blocking without the need to alter the .htaccess file to stop IPs. Wordfence lets you set up different rules for blocking, such as: Block the IP addresses of ranges (such as those that are deemed to be malicious networks); Web browsers and particular standards for browsers; websites for reference Furthermore, you can create rules that combine the elements of the rules above. It is important to note that Wordfence allows for country blocking, which enables you to implement security based on geographic security. WordFence's lock for countries is designed to block an attack, stop theft of content, or block criminal activity that originates from a specific geographic area. This is a huge advantage as it's quite common for cybercriminals to make use of a specific region to launch attacks. You can also limit the areas engaged in criminal actions. Additionally, you can do all it quickly and efficiently. File Repair Features Another important feature Wordfence provides includes File Repair. This tool can detect damaged files, and also checking the changes that were made, and then repairing the files. Wordfence examines the source code to detect the changes that have been made and fixes files that have been damaged through malicious actions. If you attempted to do all of this by hand it is necessary to employ a computer system to examine the security vulnerabilities and fix the files individually that requires a high level of technical skills. That is, Wordfence checks your main files, themes, and plugins, and compares them with the ones available within the WordPress repository. WordPress repository, and by doing that, it can ensure all integrity and security of your data! With Wordfence's file repairer, you can observe the changes in your files You can take the old file, and compare it to the latest version, and even examine and fix the files replacing them with a new version. Two-Factor Authentication One of the most efficient methods to prevent permanent brute force attacks is to use two-factor authentication. Today, the majority of people have this feature in mind, since it is commonly used across a range of services and applications like banking, social networks, and others. But it is, in essence, it's a method of authentication that requires the user to not just input the password but also take a second action, which only they have access to the information. Thus, it greatly enhances your security app, and even if a hacker were successful in obtaining your password and username, it would be impossible for him to gain access. Wordfence makes use of this feature to enhance the safety of WordPress. It lets you make use of the TOTP authentication system, like Google Authenticator, Authy, FreeOTP, 1Password among others. Then, you can add two-factor authentication to your WordPress and also ensure the authenticity of the logins you make.
How to Install WordFence Security

After knowing what WordFence can do and the things it's capable of it, it's time to start the installation of the WordFence plugin! Then you need to log into your WordPress Admin Panel, usually through its web address " /wp-admin ". Log in as normal. Then, in the WordPress Administration panel, look at the sidebar to find" plugins" in the sidebar. Click on the " plugins " option and choose " add new ". The next screen will appear to click on the search bar and then search on the screen for " Wordfence Security ". Then, you can select your Wordfence Security extension and click the "Install Now " Install now" option. Take a moment until the installation is completed. Once you've completed the installation process it is necessary to activate Wordfence to activate it. Most likely, after the installation is completed you will see a button as shown in the image below, and you will have the choice for " activate ", so simply click it after which Wordfence can be enabled on your WordPress.
Finalizing Wordfence Security
When you have activated the plugin, you'll be taken to the WordFence administrator page. Since it is your first experience with the plugin, you will be directed to the WordFence administration page. You can sign up with your email address to get WordFence updates. It's also possible to sign up for WordFence's WordFence email list which is where they notify you of updates and other plugin updates via emails. To proceed, agree to the terms and conditions of Wordfence Terms and Privacy Policies (read them before you click) then click"continue" or the "continue" option. In the next step, you will be presented with a screen that asks for your premium Key. This is the option to input the key that you were given when you purchased WordFence's premium version. WordFence. If you've already done this, simply enter the key and then click "install". If you don't have the key and would like to utilize the free version of Wordfence choose"No thanks "No Thanks" option. After these steps, the WordFence Security plugin is already installed and enabled in your WordPress.
WordFence Settings to enhance the security

After completing the installation and activation process of Wordfence on WordPress Now you only have to set it up for your requirements. Wordfence is a great tool with numerous features, with some being simple and others that are more sophisticated. To make the most of Wordfence it is recommended to be familiar with the tool. In default settings, Wordfence already has some basic settings. This way, after installing and activating the plugin, you have already ensured better security on your WordPress. If you get a similar message just like the image below, it asks for your permission to enable Wordfence's automatic update we suggest that you accept it. So, just click "Yes, enable auto-update". The tutorials and tips for configuration that are provided here can be utilized in Wordfence in its free (free) version.
Optimizing the Firewall

But let's improve even more. Go to the Wordfence dashboard. After logging in the very first time a few tutorials may appear at the click of "next" or "got it". If you log in initially, you will get a notification right in the middle of the dashboard asking you to set up your Web Application Firewall (WAF) by clicking on"click here to configure " click here to configure " option. The next screen will appear and an autodetection for the server will take place. Check that it's correct If not, choose the appropriate choice for the server you are using. Additionally, click for the Download button to download the " .htaccess " file and save it as backup. After that, click"Continue" to continue "Continue" option. OK, your WAF is optimized and set up. Then, you can click"close" to close the "close" option. Firewall Learning & Protection Mode Even though we've removed the WAF already optimized, we've got an excellent tip to share with you. Follow this guideline to ensure that your Firewall is functioning at its peak! Then, choose"Firewall " from the Wordfence menu " Firewall " of Wordfence to open to the Firewall dashboard. Choose"manage firewall" and then click on the " manage firewall " option. This screen will take a look to"Web Application Firewall" and "Web Application Firewall Status". It's likely to have it's " Learning Mode " option. That is, it will be learning about your website. WAF will be learning about your site by understanding how it operates. We recommend you stay in " learning mode" during the process of developing your website, and then when you've completed all of the required installations including plug-ins as well as other software. If, however, your site is up and running We recommend to put it in learning mode for 5 to seven days. Then, you can change it from "Enabled and Protecting ". After you've made the modification, make sure to click " Save Changes ". Ready! This way the Firewall will be significantly optimized and will provide better performance as well as greater safety for WordPress. Learn more about LiteSpeed Cache and WP Rocket Which of these cache plugins are right for your needs?
Configuring Wordfence Brute Force Protection
In the WordFence Firewall Dashboard, there is a tab titled "Brute Force Protection ". Also, in this section, you can set up some settings to shield websites against Brute Force threats. In terms of settings, if you're not a professional about the settings, you can leave everything as it is. However, some settings deserve some attention. Lockout following the number of failed login attempts In this option, you can define the maximum number of login attempts that a user can attempt. If the user goes over this limit, he'll be banned. We suggest that you limit between 3 and 5 times. Lockout following how many failed password attempts: This indicates the number of times a user could forget their password. Like the prior configuration, we recommend restricting the number of times. How many failures are counted over what timeframe: The time period during which login attempts that fail are considered. We suggest taking Between 4 and 6 hours. The length of time the users are locked out of: This is the duration that the user is locked out. In this situation it is highly individual, however, we suggest at least one full day (24 days). In essence, these are our suggestions. Additionally choices, you may leave the other protection settings for brute force in default settings or, if you are aware of the ropes and want to stick with them as an alternative, you may choose to modify the settings. Extra Tip for Brute Force Protection As we know there is a different and interesting suggestion It is possible to disable a user that enters specific usernames. This is interesting as the majority of attackers will check on the " admin " user right from the beginning. This is why we have two suggestions: 1. Don't create a user named "admin" in your WordPress 2. Add this username to your account for immediate blocking For blocking it open the option box " Immediately block the IP of users who try to sign in these usernames " enter the username like "admin", and finally hit"enter" "enter" key. Do not forget to click " Save Changes".
Scanning With Wordfence

Now, let's do a Scan of our WordPress. Click on the Wordfence side menu, choose"Scan" "Scan" option. Then, on your Scan dashboard, click"Start New Scans" and then click on "Start New Scan" option to initiate a Scan on your WordPress. This process can take a long time. Just wait and do not close the browser until you've completed the scan. When you do this, Wordfence will be scanning your site for any errors or security problems. If nothing found, then it will notify you on this screen, and provide suggestions. Make the changes you feel are needed! Scanning should be performed whenever you think it is needed. For sites that have low traffic frequency, perhaps twice per month is sufficient. In the ideal scenario you should, however, go through your website regularly or at a minimum every week.
Login Security - Two-Factor Authentication

Through the Wordfence "Login Security" menu You will be able to alter your Login Security settings, such as Two-Factor authentication. After you have selected the Login Security option, you will see an overview of the dashboard. In this stage, you'll need to sign up for two-factor authentication. After that, you can access the authentication software you are using or prefer using your smartphone, for example, Google Authenticator. Then, you must scan the QR Code on the Wordfence screen. Read the full article
#Ifada#OptimizingtheFirewall#Two-FactorAuthentication#Wordfence#WordfencePluginForWordPress#WordfenceSecurity#WordFenceSettings#WordpressBruteForceProtection#wordpressFileRepair#WordpressLoginSecurity#wordpressPasswordProtection
0 notes
Text
Increase The Upload Size In WordPress

Do you wish to increase the maximum upload size of files in WordPress? Sometimes, the largest size limits can prevent users from uploading files using a media uploader or installing themes and plugins. In this post, I'll try to guide you on how to increase the maximum upload size on WordPress to solve the issue.
Upload Size Limits in WordPress
WordPress will automatically display the maximum size of the upload limit whenever you upload media or images. You just need to log into your WordPress dashboard, then navigate to the Media - Add New. You will find the maximum capacity limit to upload on the WordPress website.

3 ways to upload maximum file size in WordPress
- Create / Modify an existing PHP.INI file. - Theme Functions File. - Editing the Htaccess file. 1. Create / Modify an existing PHP.INI file

In this way, you'll need to log in to your hosting account via cPanel, click - file manager, then create the Php.ini file within the WordPress Setup directories root. A majority of WordPress users encounter this issue when using shared hosting. In which case, you won't find the php.ini file within your directory. If you don't see one, you can create the file php.ini and then upload it to the root directory. In that file, add this code: upload_max_filesize = 64M post_max_size = 64M max_execution_time = 300 2. Theme Functions File This method has been able to increase the size of files. This code can be added within the WordPress function.php file, you can improve the size of the upload: @ini_set( 'upload_max_size' , '64M' ); @ini_set( 'post_max_size', '64M'); @ini_set( 'max_execution_time', '300' ); 3. Editing the Htaccess file.

Editing the Htaccess file is an effective method to swiftly resolve the issue. Many users have tried this .htaccess method where by altering the .htaccess file located in the root directory, you are able to increase the upload file size within WordPress. Change the .htaccess file located in your WordPress site's root folder, and add the following code to it: php_value upload_max_filesize 64M php_value post_max_size 64M php_value max_execution_time 300 php_value max_input_time 300 I hope That I have helped you find a way to increase the size of your uploads on your WordPress website. Read the full article
#Ifada#IncreaseTheUploadSizeInWordPress#PHP.INIfile#php.inifilewordpress#postmaxsize#uploadmaxfilesize#uploadmaximumfilesizeinWordPress
0 notes
Text
The Most Necessary SEO Steps For WordPress

After choosing a responsive theme and making the last edits of your WordPress website, it's time to start doing The Most Necessary SEO Steps to drive google search engine spiders towards your website to crawl it indexing and showing it on its search page for visitors. I will show you the best and simple way to accomplish those initial settings. Let's start with the first step:
Permalinks modification:

A URL with a lot of unclear words at the end is much less engaging among visitors than the targeted keyword and simple URL. Choosing the "Post name" format will be the best choice for blog websites. You will let Googlebot recognize your keyword on the URL to prepare it for the upcoming visitors.
XML SiteMap:
The XML sitemap is a file uploaded on your website's server, exactly into your website files' main directory. This file must contain all your website's links to help Google and other search engine spiders crawl your website, and it's one of The Most Necessary SEO Steps. This file is in XML format. I advise you to use Yoast Plugin, then Going to SEO → Features → XML sitemaps, Then click on See the XML sitemap.

It will take you to the URL of your sitemap, just like the screenshot below:

Creating Robots.txt file:
A good understanding of the Robots.txt file will help you to preamble your website for search engines. If search engine spiders can't find a robots.txt file on your website, they will crawl all your pages and archive them normally, but having the robots.txt file will help you first in analyzing the structure of your website and clarifying the directories and pages that you want to hide from the search results, as well as the process. Directing search spiders through the robots.txt file will make your site's most important content get more attention from search spiders. They will not waste resources crawling and accessing unused content. Here is an example of a default robots.txt file:

User-agent: "to target specific bots". Disallow: "to ask robots not to access a certain directory or a page on your website." Allow: It's the default rule that tells bots access to all your pages. For extra information, you could check Google Guidelines. Go to Yoast SEO → Tools, then click on file editor. After that, create a robots.txt file and edit it for your website's needs but Don't forget to include your XML SiteMap URL.
Set up Google Search Console:
It is a free tool from Google that helps webmasters analyze their search performance. It has many features like Website errors related to indexing and mobile optimization, and more... For creating an account, you should go to this link then you will need to log in using your Gmail account. Once you are successfully logged in, add a property, then select URL prefix. It's a much easier way to verify. Add the URL of your website, then click continue.

Next, choose to verify using an HTML tag.

After that, copy the code. Go to Plugins → Add New and search for: Insert Headers and Footers.

Install and activate it, then go to Settings → Insert Headers and Footers past the code in the Header and save.

Go to Google Search Console → Sitemaps → , Enter "sitemap_index.xml," and click Submit.

Heading tags for SEO
H1 is the main title, and each topic is assigned to H2. If these sub-topics contain additional sections, then the H3 title may be used for each section.
Alt Text for Images:
Image optimization for SEO images brings an article to life and contributes to your website's SEO. Several studies have shown that web pages with at least one image tend to rank higher than pages with no images. Let's look at the most important SEO benefits from using images in your content.

First, they make your content more interesting, and this means visitors are ready to read the articles efficiently. It is not a big surprise that content with relevant images gets 90% more views than the content without ALT Images. Readers are ready to share pages with pictures on social media, and the shared post has more chances of getting more attention than plain text posts. It's another easy way to make your SEO stronger by giving search engine spiders the right queries about your content through image alt text. Then Your images can rank higher on google image search and get more traffic to your website. How to best optimize your images for search engines? ALT is the first thing to optimize. Even before uploading the image to your website, image file names must be describing the image. When you take a photo using your phone, phones usually have default names or strange characters. You should rename your image to a specific name that is representative of the picture. The next thing is the size of the image. As we all know, the smaller the image file is Fast the Load, But the greater the large image will take a long time to load. As we know, this will negatively impact the (UX), especially for mobile users. A good practice is to use image compression tools like "tinypng," which can reduce an image's size without losing quality. The alt text is the essential element to configure for SEO purposes because it will help search engines understand the subject of the Image more. It can help your images rank on image search, but it could help your pages rank higher in google web search too. When a page is viewed, the alt will not be shown in the navigator, but it could be noticeable in the (lazy mode) or when pictures can't be loaded. The search engine crawlers read the alt text value, screen readers doing it for a description to the users who cannot see it. Thinking about how to best describe the IMG to users who cannot see it keep the alt text's length below 125 characters but avoid using a single word no need to include the words (images or picture). Search engine crawlers know the type by its extension. So don't repeat that in the alt text. You should add it to Logo, background, etc. Having ALT is the main solution for great accessibility. Keyword Usage: When it comes to keyword usage, you should avoid filling the alt text with keywords but do make sure to include your target keyword or related keywords as stated by google when choosing alt text focus on creating useful information-rich content with focused keywords and is in the context of the content of the page. A nice tip to follow is to use images that are relevant to your content so you can have alt text that is descriptive and keyword-rich. Also, use Image title plus captions to let Search engine spiders understand the subject of it. It is important to provide them with these values. You can further enrich your site-map to send the correct data and information about your images for better SEO purposes. Avoid having a page full of images and no text. Always use text to accompany your images. Please Keep in mind that having no text on a page is a bad SEO practice.
The Meta Description and Title:
Well, these are part of the metadata of a web page, every single web page on the internet has metadata, It's pretty much is just a fancy word used to describe other data. So the metadata is used for google for determining all that your page is about. When you type a query into google you'll find your search results have blue headings, this is called the meta title. And underneath this heading is the black sort of summary text, and this is called the meta description. Meta titles and descriptions not only are used by Google in a really important part of SEO, but they're also what people decide whether or not they're going to click through to your website. Why is metadata important for SEO? It's important obviously because it's what Google uses to determine the relevance of a web page, and whether or not to show it in search results. But it's also important because it's what us searches used to decide, whether or not we want to click through to your website. SEO is all good, and well but it's not much about google as it's actually about the person who's making the search. You don't just want to please google you actually want to please your target audience. In that sense, meta titles and descriptions should accurately describe what is on your web page. It should also make them want to click it should have a nice CTA, that tells them why they should click through to your website and what they're going to find on that page. So with meta titles and descriptions, they have a very specific length that you need to stick to. For meta titles, it's 60 characters. This includes spaces, so if you write longer than this it's going to get cut off and it's going to look crap.

For meta descriptions, it's 155 characters. That's nice there's pretty much, just one sentence. Now you've got to get really good at succinct to the point copywriting.

So now you have a rough idea of what meta titles and descriptions are. Also why they're important. Let's find out what they are on any page on the internet. Read the full article
#AltText#HeadingtagsforSEO#Ifada#KeywordUsage#Metadescription#Metatitle#NecessarySEOSteps#Robots.txt#Searchengineoptimizationguide2021#Seocourse#SEOGuide#Seolearning#SEOlesson2021#Seopilot#SEOpractice#TheMostNecessarySEOSteps#TheMostNecessarySEOStepsForWordPress#XMLsitemap
0 notes
Text
Bounce Rate: How To Reduce IT For A Better Ranking

If you’re new to the (SEO) scene, chances you’ve encountered the phrase “bounce rate” and understand enough to be aware that the bounce rate that is high is undesirable, while a lower bounce rate is beneficial.
However, there are many concerns about this metric shrouded by myth, and whether or not you have the answers are a different story altogether:
What is the bounce percentage in Google Analytics?
How do you know the bounce rate?
What is a decent bounce rate?
How can you lower the rate of bounces?
It is said that the Google Analytics bounce rate is one of the most misunderstood metrics of SEO, even by experts in the field. In this article, we’ll attempt to simplify the subject for you. We’ll help you make an understanding of your website’s bounce rate and show you how to increase bounce rates and hopefully increase your conversion rates in the process.
What Is Bounce Rate (and Why Should You Care)?
Let’s begin with the most crucial query What is the bounce rate of Google Analytics? “Bounce” is the term used to describe a “bounce” as a single-page session on your website, and the bounce rate for your website is the proportion of users who leave your website after having only viewed one page. Visitors who are bounced “bounce” off your site and do not take any action after the page they landed on.
https://www.ifada.net/bounce-rate-how-to-reduce-it-for-a-better-ranking
0 notes
Text
LSI Or Latent Semantic Indexing in SEO
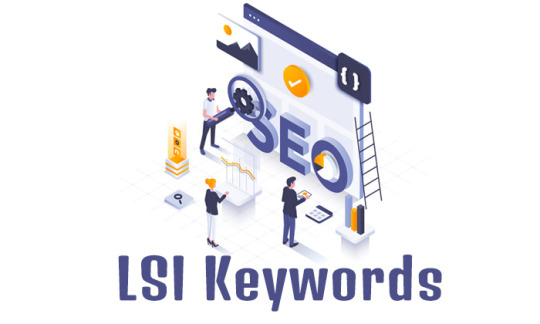
LSI is the acronym for Latent Semantic Indexing in SEO. It is a way to rank websites on the basis of the words they contain and not the keywords. Latent semantic indexing, a new approach to keyword density, is possible. Latent semantic indexing considers that search engines only look for specific keywords when they are mentioned. Let’s suppose someone searches for an SEO as a keyword. Some SERPs assume that they might also be searching for Search engine optimization. Because of the close connection between the words, sites that match the Search engine optimization and SEO perform better in search engines. https://www.ifada.net/lsi-or-latent-semantic-indexing-in-seo/
0 notes
Photo

If you’ve got a WordPress web page, you might have encountered a robots.txt file. Did you know what it was? It’s software that helps by limiting and limiting website access.
The more you know about how to read the robots.txt files, the more transparent its value is for you. In addition, you’ll realize that you can include robots.txt onto the majority of WordPress websites, which allows you to set the rules of your choice.
0 notes
Link

HTML, Visual and XML Sitemaps, in general, is a diagram with a hierarchy that allows you to see the structure of a site. Sitemaps establish the taxonomy of a website. Taxonomy is the term used to categorize objects. Also, to identify the relationships and similarities between content.
0 notes
Photo

Alt tag stands for alternative text for images. Alt tags are a description of the image.
0 notes
Photo

Ifada Is Your Complete Guide To Creating A Combined, Responsive And Wonderful WordPress WebSite That Respects All SEO Guidelines. You Can Also Learn How To Reach The First Rank In Google Search Engines.
1 note
·
View note