
Don't wanna be here? Send us removal request.
Statistics
We looked inside some of the posts by interactivecontrollersyr2 and here's what we found interesting.
Average Info
Notes Per Post
0
Likes Per Post
0
Reblog Per Post
0
Reply Per Post
0
Time Between Posts
12 hours
Number of Posts By Type
Text
17
Last Seen Tumblr Blogs


Fun Fact
In 2020, 44% of users from Denmark used Tumblr daily.
Text
Reflecting on my Project:
Overall, I have been very happy with how this game has turned out. I am particularly happy that I was able to create a controller that fits the criteria of making the game accessible as well as playable for people who suffer from any physical disabilities. If I was to improve this project, I would definitely make a new controller for the right hand so that it gives the player the option to use their preferred hand or both. This would be a big improvement for gameplay.
0 notes
Text
Accessibility: How my game is accessible to others
For this game, my target was to try and make an alternate control system and a game that was able to be all inclusive to the player. I wanted to try and focus on the more common physical disability such as only having one hand or being blind or deaf. I wanted the player to have at least one way of understanding this game no matter what. This is how I came up with several ways to include this:
The Glove Controller: I first off came up with the controller itself which was a Glove. I wanted an accessible controller to make the player feel like they are achieving something in game, as well as being in full control of what they are doing. For this, I made a glove controller that uses inputs on each finger which were all movement keys as well as space bar. Once I built this controller, I was able to playtest and see that I was able to get a resemblance of what I wanted for this game. There was a freedom in mobility and a clear way of making an input on the controller.
Voice AI & Sound Effects: In my menu UI, I created something that would allow the player to listen as to how the game works if they cannot see how it works. I used Voice AI with text to speech in order to say what I wanted to the player. I made sure to include any detail so the player could understand what they are doing and when they do it. This also applied for my sound effects. I used different sounds, to indicate to the player when an input has been registered in game. This then applies for if the player gets something right or wrong.
0 notes
Text
Gameplay Recordings:
Complete Game: This video shows the complete game recording for my unique controller. I was able to capture all aspects of my game including crucial gameplay and all menu screens. I was able to showcase the true potential of this game. I am happy with how this project turned out in the end and I am now very confident going forward into the FMP.
youtube
Timer Countdown: Another small video I made, was just to showcase the timer aspect of my game. For this, I used text in the video to tell the viewer to watch the timer so they know what to look at. They will then be able to see what happens once the count reaches 0.
youtube
Behind the Scenes: This video shows the behind the scenes of how my game was made. It shows a quick summary going over my main game map as well as covering all other important aspects such as the main game system blueprint which was arguably the most important part and all Menu screens and UI. This just gives the viewer another perspective to look from.
youtube
Controller: The video of my controller below just shows a basic overview of how I put it together and how everything works on it. I used both sides of the controller to show this so the viewer can look at thing like the inputs and how accessible they are to people as well as how I have secured any loose wiring.
0 notes
Text
Game Build Settings and Packaging:
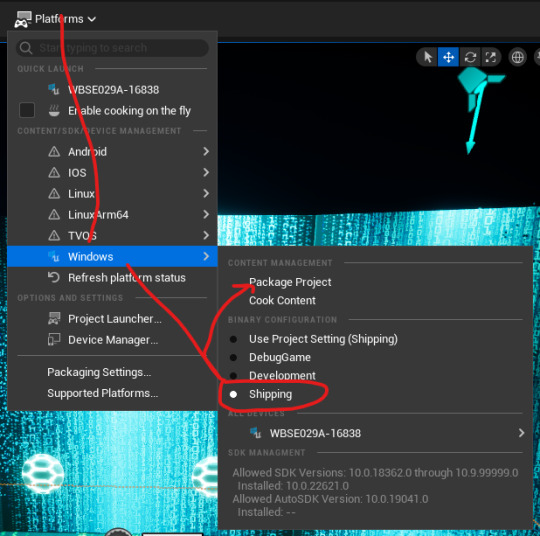
When packaging my project I have to do several things in order for the package to be successful. These processes are all found in the project settings in my game. I first went to Maps and Modes and changed the default game map to be my start menu as this is where I want the game to begin.

I then went to the Packaging settings and scrolled to the bottom of this section to input all map references for my game. This included my main game, main menu, game over and control instruction maps.

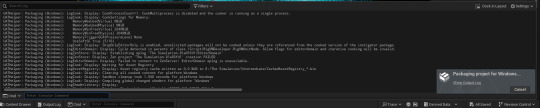
I then proceeded to drop down the platforms menu & scroll to the Windows section. I then set the binary configuration to shipping and proceeded to package the project. The output log shows all assets and blueprints in game packaging successfully.
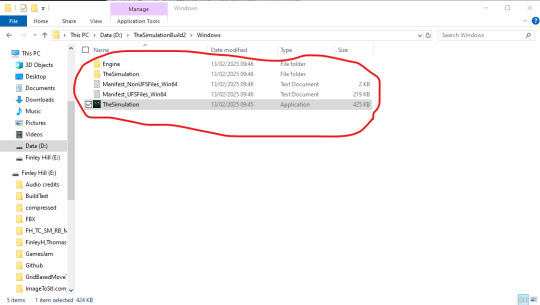
This image shows the successful package of my game. I will show the official gameplay recording for this game in my next blog post. I am happy I can now use this game in my recording as it gives this project a sense of completion.
0 notes
Text
Changing default sphere material:
Another quick detail I chose to add was a different material. I did this, as I thought the default colour needed something more vibrant and relevant to the theme. I chose the Tech Hex material, as this was the best I could find to show this . I then added this material to all default spheres> I then proceeded to go through all of my code and change the default material parts in there to the same. I then went to playtest with this.


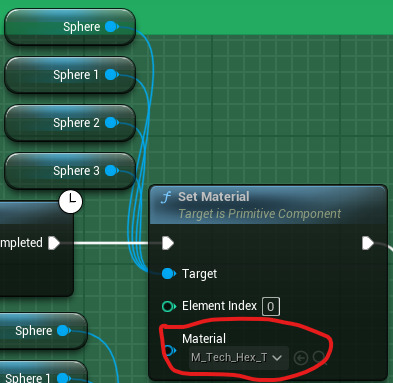
The outcome is very good. I am pleased with how it blends in with the background. I think this new material suits the theme a lot better and I now look forward to building and presenting this game as well as the unique controller I have built.

0 notes
Text
Week in review:
Overall, this week has been about finishing off any outstanding things on my project that need to be fixed before the end. This has included any debugs such as the main game UI with the timer as well as the tin foil stopping any extra mobility in the glove controller. I have been very happy with my progress in this project and hope to finish strong on it as well.
0 notes
Text
Goals for the weekend and next week:
Finish any final debugging
Gameplay Recording. One with the game, one with the controller and one potential BTS video
Write up project evaluation
Submit all projects files (UE game, Built game, any other asset files)
0 notes
Text
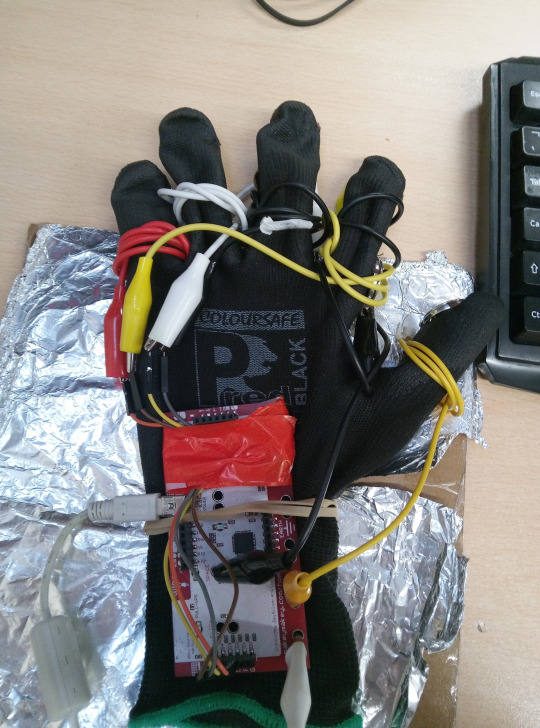
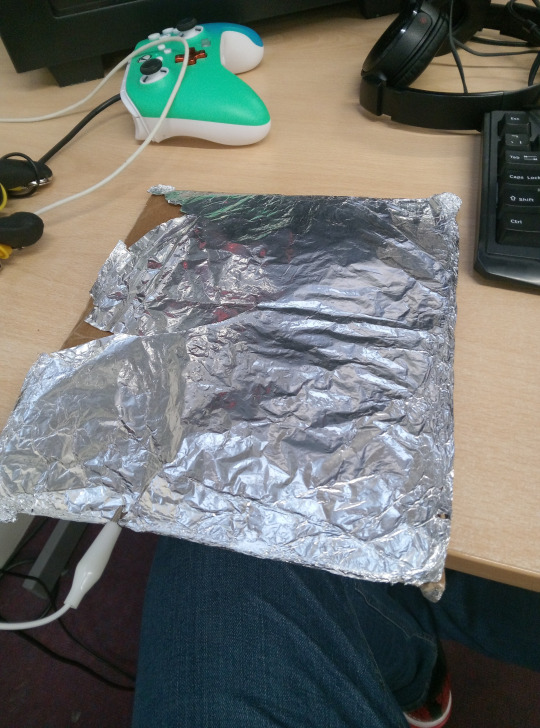
Securing the Controller and Final outcome :
The images below show the new and far more secure version of my glove controller. In order to try and loosen the wire pressure, I folded some of the wiring into a compact part of the makey makey circuit and then used tape to circle around this and secure the wires to a smaller length. As a temporary fix, I used an elastic band to wrap around the glove and circuit. This would help keep this circuit fairly secure for now. This will eventually be secured properly in time for the Norwich Games festival. I am a lot happier with this outcome of my controller and it now feels a lot easier to use when playtesting as shown in the video outcome below. This controller is successfully able to stay intact and remain usable to the player. There is also a lot more mobility in the hand movement now I have disposed of the tin foil pad. I am happy that I have now completed the controller for this project and I can now focus on finishing everything I need to for this project.
0 notes
Text
Discontinuing the Tin Foil controls:
I have decided to not continue with the tin foil input for the controller. I have chose this because I felt it just held back the free mobility of the glove itself and this arguably has helped with it. If I was to add anything else to this controller, I would consider making one for the right hand so that the player has access to either or.
0 notes
Text
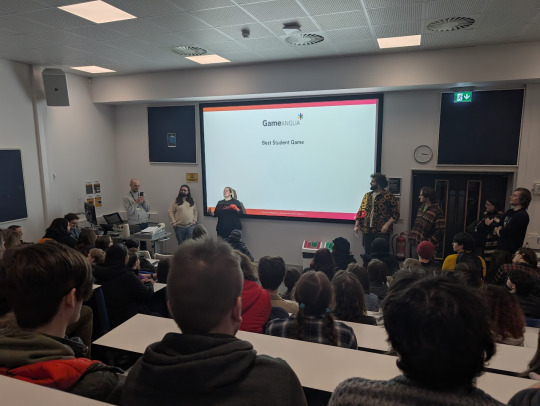
Presenting at Games Anglia:
The following images below show the presenting experience I had at Games Anglia. I was able to get first hand experience of presenting a game that I had made. Overall, I found this process quite interesting as well as nervy as I wasn't sure what people would think of this game and whether it would perform as we intended for it to. I was able to engage and gain small feedback from play testers of our game. This feedback was mainly just small bugs and errors that we made before the main game build. I was able to observe how people were able to get on with playing this game with little assistance from me or any of the others who worked on this game with me. They could clearly understand the objectives of each part they were on and what controls to use via the instructions I left. As we didn't upload the correct version, there were a couple of refinements needed such as some assets not being scaled correctly. Whilst at this event, I did play other games. One that I really enjoyed was a game called Ball. This game had the choice of either 2 or 4 players and the main objective of the game was to knock down two pillars in order to open a football goal up to score. The player has the ability to kick the ball, direct their movement and sprint towards it. This game did include a couple of bugs which the Devs were aware of such as the sprint collectables not adding to the sprint values. I gave them feedback on these and also said that I really enjoyed the main game aspect and that I couldn't wait to see how this turns out once fully developed. I did have a look around at the other Indy games and I was able to understand roughly how most of these games worked. Each had their own unique mechanics which is what made them special. During each talk that was held, I was able to understand that to get into this industry, you sometimes have to start at the bottom and work your way up to bigger and better opportunities so that when they come knocking you can take them. They also showcased all the different areas of this industry that you can squeeze into depending on your specialty. I did enjoy the overall experience and all the different games that were showcased.


0 notes
Text
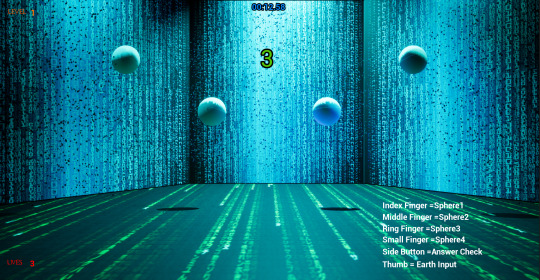
Makeshift instructions UI:
For people who just want to start the game instantly, I have decided to add a mini controls menu into the game, so that the player knows what to use. This just includes all of the finger inputs and what they all control. I stuck this in the bottom right corner, so it is out of view of the main game.

In the outcome, the player can easily see these instructions and still be able to play the game as intended. I am happy that I have included this it now offers a quicker way for the player to begin the game.
0 notes
Text
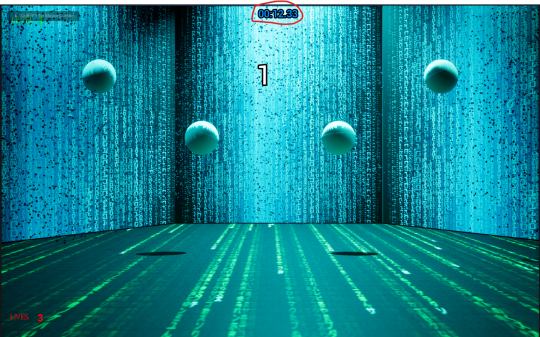
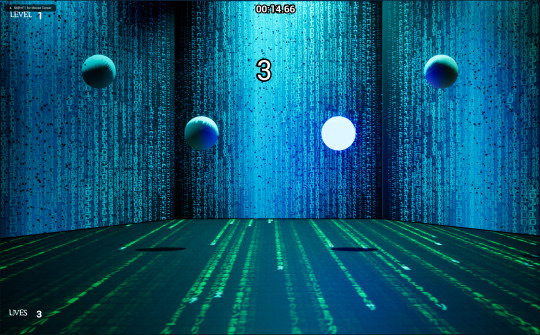
UI Text Colour:
Another small detail feature I wanted to fix with the UI, was the text colour just to present it in a similar way to the theme. I set each colour based on what I thought each part represented. I used each colour shown below and made sure they were all positioned correctly and ready to playtest.


This shows the outcome to this. Each piece of UI is clear and visible to the player when playing through, so they can see what level they are on, how many lives they have and how long is left on the timer.

0 notes
Text
Timer Fix:
Another quick debug I had to sort was an issue I had with my timer. Based on the tutorial, I found it should have just spawned once but in my game it would spawn several times. I worked out that this was due to my main widget spawning multiple times. To fix this, I used a sequence node which would state what order these events would happen. I set the widget to spawn first as well as on a do once so that it would not constantly spawn. I then proceeded to the end of the win/lose conditions, where I would reroute both sequence maker events to the reset of the do once. This would reset the widget so the event could repeat itself for each round.


When playtesting this bug fix, the timer would be able to spawn only once, therefore giving a clear timer being shown on screen. As this reset system is always a reset to this specific code, I cannot think of a way in which I can decrease the timer value by one as this will always be the outcome of the reset. However, I am happy that I have figured this small bug out and that I now have a much clearer UI.
0 notes
Text
Another form of control for the player:
When I had people playtest my game, a thing I noticed about my controller was that it had another way of being able to control the game. This was through the tin foil that I have used as an earth input. When I pressed down onto it using each finger, it was able to register an input in game. The video & image below shows this input in effect. I now might try and add this input into my UI and game instructions so that it can be used as an alternate way of controlling the glove.
0 notes
Text
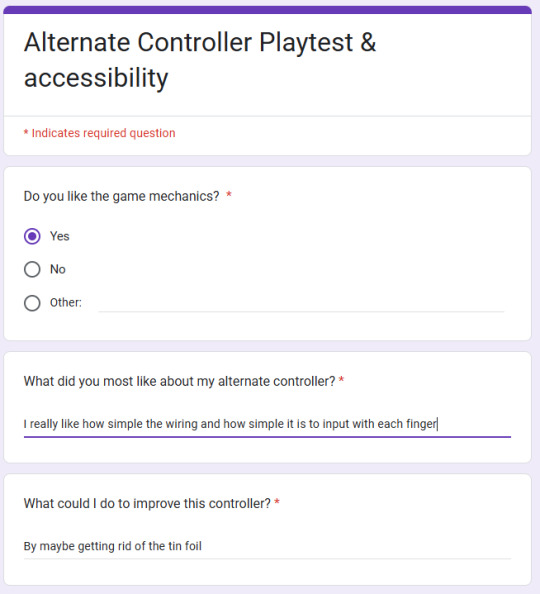
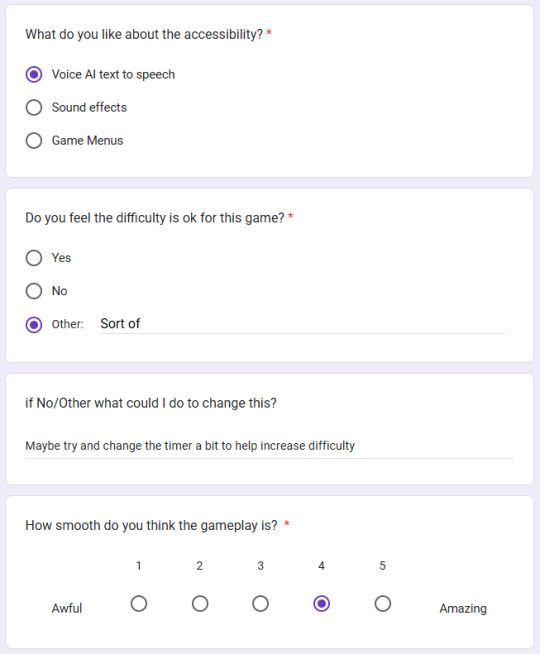
Playtesting new controller Feedback:
Playtester 1: These images show the first person to playtest my alternate controller. This is the quiz they took in order for me to identify any key things I need to add. From this survey, I found that the main game mechanics were good and that each finger input is able to be made quite easily. They thought I could maybe get rid of the tin foil, in order to create better freedom to move the controller around. This person really like the Voice AI and how it helped to be accessible to people who may be blind or have any vision difficulty. They did have a mixed opinion on the game's difficulty, as they felt it could have something else such as a slight change to the timer. In terms of UI and other effects like Niagara, the player liked them both and thought it helped to finalise extra detail to things like the rain code. The rated the game as an 8/10 overall, as they believed there was just a couple of things that was holding the game back.

Playtester 2: The second playtester gave some helpful advice on how I could improve on any slight things I had to change before the project deadline. They did really like the game mechanics and they enjoyed the movement of my controller, making it easy to input through the fingers. The did say that the wiring could be improved as well as the similar tin foil complaint. I think I will definitely listen to these playtesters and consider this. Like the the first person, they really like the voice AI as well as the difficulty of my game. The Voice AI they think is what carries the UI and widgets and really helps to point out the accessibility of it all. The also enjoyed key details like the small Niagara system I made. Overall, they thought my game again solid and gave a 7/10. I think this rating is fair as there are still a couple of small bugs to fix.


0 notes
Text
Niagara System: Background:
Another thing I attempted to do, was make a Niagara system so I could make an effect like that looked like the rain code background was moving. To do this, I used the hanging particulates template, setting the material to the same as the background to blend it in. This made a large cluster of these in one place, which is the configuration I wanted.
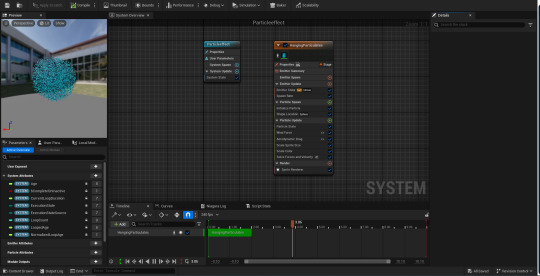

I then put these into my game and scaled them to cover each area this code was in. I set the scales to be fairly large so that they would be visible to the player in game.
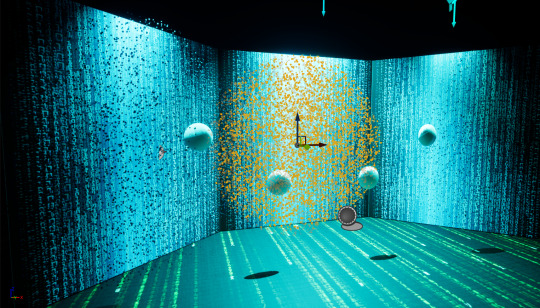
The outcome for this makes the code look realistic as though it were a simulation and not just a material. I am happy that this has worked so well as now I have a MVP for the hand in date. I now just need to figure out how else I can improve this game's final quality.
0 notes
Text
Goals for this week:
Finialise any game detail. What else could be added to this. e.g. Niagara systems, 3d Assets etc....
Fix UI issues such as the timer as well as the colour for the UI text
Make a makeshift instructions UI on screen for people who do not go through the instructions
0 notes