
Don't wanna be here? Send us removal request.
Statistics
We looked inside some of the posts by irisplate9-blog and here's what we found interesting.
Average Info
Notes Per Post
0
Likes Per Post
0
Reblog Per Post
0
Reply Per Post
0
Time Between Posts
3 days
Number of Posts By Type
Text
17
Last Seen Tumblr Blogs


Fun Fact
Tumblr is available in 18 languages.
Text
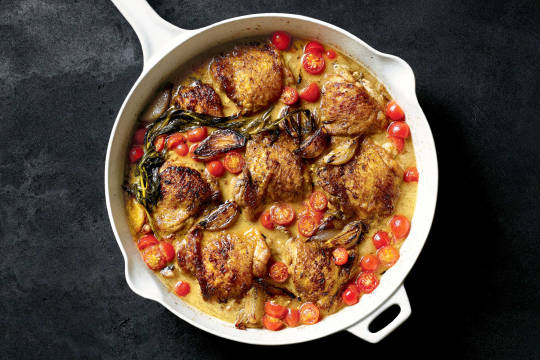
6 min Mor Kulambu (OPOS©)
1. Lets start by making the coconut paste. Add the coconut, roasted channa, chilli (optional), cumin, salt (about 1/2 tsp), turmeric along with 1 tsp coconut oil to a blender. Process to a smooth yet thick paste.
2. Adding water too much will make this paste watery leading to it getting burnt while cooking. So add just enough water (if at all) in order to make it into a smooth paste.
4. Next layer the chopped vegetable in a layer. See Tips for other options.
5. Place the coconut paste last right on top. Make sure the paste is not touching the bottom.
6. Cook on HIGH flame for 2 whistles. Make sure the flame is covering the entire base of the pressure cooker but does NOT come up the sides. That causes burning of the handles. This would take 5-6 minutes. If you don't get a whistle by the 6th minute, switch off the flame. Your PC might be leaking steam.
7. In a few minutes you should see the pressure valve popping up.
8. followed by the whistle soon after.
9. Once done, switch off the flame and release pressure immediately using a spatula.
10. This is how it looks upon opening.
11. The gourd is cooked through yet not mushy at all.
12. Now add the yogurt and
13. mix to combine. Let it sit for few minutes in the cooker itself. The yogurt cooks well enough in the retained heat hence you do not have to switch on the heat.. You can add OPOS Tadka if you like at this point.
Source: http://chefinyou.com/recipe/mor-kulambu-kuzhambu
0 notes
Text
Kalyn’s Kitchen Turns 14 Years Old (and Kalyn Examines Her Bucket List!)
posted by Kalyn Denny on April 24, 2019
Another year has gone screaming by, and today my blog is turning 14 years old! I know, I can’t believe it either. Thanks to my faithful readers and followers for making this 14-year blogging journey so enjoyable. I’m grateful every day for the people who visit here and the many ways that blogging has enriched my life!
Every year when the anniversary date for Kalyn’s Kitchen comes around, I sit down at the computer and write a light-hearted little post about how I never dreamed of the many ways that starting this blog would end up changing my life. And of course that’s still true today when Kalyn’s Kitchen Turns 14 Years Old! Definitely I’m grateful for accidentally discovering what ended up being the best retirement job ever!
But this year I’m going to take a more serious tone and talk to you about the many hours of work I put in daily on the blog, something I’ve been thinking about a lot lately. I never imagined that having a blog would be a 14 year journey of CHANGE, and how much work it would be to keep up with those changes. Of course, the biggest change for Kalyn’s Kitchen came in September 2017 when I switched Kalyn’s Kitchen to WordPress. After that happened I realized every post on the blog would need to be edited, something I talked about in Thirteen Ways Food Blogging Has Changed for last year’s birthday post.
Making that switch to WordPress was something I should have done ten years sooner, and I’ve paid the price for being stubborn because since then so much of my time has been consumed with the tedious work of editing every single post to switch to the Recipe Plug-In formatting that’s preferred by Google. (That’s what puts the nice box around the recipe and gives you a print button with the thumbnail photo on the printer page.) If I hadn’t been working on adding that formatting for over 18 months you wouldn’t find many of my recipes when you search in Google, so it has to be done. And there’s no doubt the WordPress site is great, and far more functional than my old site, so no regrets about the switch.
But maintaining a successful blog is time consuming, even without the added pressure of spending time every day to edit old content. I don’t mean to complain, because I love the work of creating new recipes and sharing them with you. And updating old favorites with new photos is also deeply satisfying. I’m always focused on doing everything I can to make Kalyn’s Kitchen as good as it can possibly be for the people who enjoy the recipes you find here, and working on this blog is rewarding for me in so many ways. But dear readers, there are only so many hours in a day!
Last year I had a very milestone birthday, and I’m well past the age when most people are retired. And even though I have no interest in retiring for many, many years to come (and don’t plan on shutting down the site ever) lately I’m realizing that I don’t want to spend the rest of my life sitting in front of the computer for hours and hours every day.
Thankfully I’m about 80% done with the needed edits for WordPress. But after that’s finished I want to add nutritional information to the recipes, something I’ve been promising I’d do after all the recipes have the Recipe Plug-In formatting in place. When the edits are finally done, I’ll tackle the process of switching to a newer Recipe Plug-In that will calculate nutritional information.
Meanwhile I want to say THANKS to everyone who has been understanding about the delay in providing nutritional information, and especially to the kind people who calculate it themselves and then share that information in a comment! I appreciate people who accept that I can’t just snap my fingers and have that done on 2,000+ recipes, no matter how much I would like to have it for you!
And this behind the scenes peek into my blogging workload is a long way of explaining that I’ve decided to celebrate my 14 year blogging anniversary by easing up a little on the (self-imposed) pressure on myself. I can’t keep up the pace of editing and keep up with all the other work of blogging and the posting schedule that’s become the norm for my blog. I need more time off to work on my bucket list!
I want to read more books, go to more movies, take more walks, and have more dinners with friends and family! But most of all I want to go on more trips, without having to spend days preparing posts ahead and time working on the blog every day while I’m traveling. So there are going to be some small but important changes around here. Freeing up more time for fun in my life means new recipes might show up here a bit less frequently. Some weeks there may not be quite as many posts as usual. And occasionally I might even go on a trip and take a whole week off from the blog (GASP!)
Of course my wise brother Rand reminds me regularly that no one notices the schedule and lots of other things on the blog the way I do, so hopefully my slightly more relaxed approach might not even be noticeable to the readers. I’ll certainly do my best to keep the site updated often enough that you won’t ever feel there’s a lack of recipes! And to everyone who’s read to the end in this post that doesn’t even have a recipe, let me say THANK YOU again for your support! I never would have stuck with it anywhere close to this long without the amazing support I’ve gotten from readers and that means the world to me!
Kalyn’s Kitchen Turns One Kalyn’s Kitchen Turns Two Kalyn’s Kitchen Turns Three Kalyn’s Kitchen Turns Four Kalyn’s Kitchen Turns Five Kalyn’s Kitchen Turns Six Kalyn’s Kitchen Turns Seven Kalyn’s Kitchen Turns Eight Kalyn’s Kitchen Turns Nine Kalyn’s Kitchen Turns Ten (!) Kalyn’s Kitchen Turns Eleven (!!) Kalyn’s Kitchen Turns Twelve (!!!) Kalyn’s Kitchen Turns Thirteen (!!!!)
posted by Kalyn Denny on April 24, 2019
Don’t Miss a Recipe!
subscribe to receive new recipes via email:
We are a participant in the Amazon Services LLC Associates Program, an affiliate advertising program designed to provide a means for us to earn fees by linking to Amazon.com and affiliated sites.
Source: https://kalynskitchen.com/kalyns-kitchen-turns-14-years-old-and-kalyn-examines-her-bucket-list/
0 notes
Text
A simple bean salad and a build-your-own tortilla bowl: 20 best vegetarian and vegan recipes – part 3
David Frenkiel and Luise Vindahl’s vegetarian family-style tortilla bowls
For Luise and me, this recipe is all about building our own Mexican-inspired tortilla bowl, but for the kids it’s just another reason to eat with their hands.
We usually keep the ingredients in the bowls on the table quite simple and fresh; a mashed avocado bowl, herb bowl, bean bowl, greens and yogurt. And we have a couple of favourites that we spend a little extra time on – a smoky tomato and walnut sauce, a herby mango and corn salsa, and sweet and spicy cashew nuts.
Serves 4 For the tomato and walnut sauce virgin coconut oil or olive oil 1 tbsp ground cumin 1 tsp ground smoked paprika 1 tsp ground coriander 1 tsp chilli flakes ½ tsp (optional) red pepper 1, seeds removed and finely chopped tinned tomatoes 800g tomato puree 3 tbsp walnuts 150g, coarsely chopped
For the mango and corn salsa ripe mango 1 fresh corn cob 1 fresh red chilli ½, deseeded fresh coriander 1 large handful (30g), leaves picked extra-virgin olive oil 1 tbsp lime juice of 1, to taste sea salt to taste
For the sweet and spicy cashew nuts virgin coconut oil 2 tsp ground cayenne pepper ½ tsp ground cumin ½ tsp sea salt 1 tsp cashew nuts 125g pure maple syrup 1 tbsp
To serve tortilla chips 1 large bag (we prefer organic, GMO-free) ripe avocados 2, stones removed, flesh scooped out red pepper 1, stalk, core and seeds removed limes 2 black beans 1 × 400g tin (or kidney beans), drained and rinsed thoroughly plain thick yogurt 250mlpaprika to sprinkle mixed leafy green lettuce 1 bag fresh coriander
To make the tomato and walnut sauce, heat the oil in a saucepan and add the cumin, paprika, coriander and chilli (if using). Fry, stirring, until the spices are fragrant, then add the red pepper and cook for a couple of minutes. Add the tinned tomatoes and tomato puree and cook for a further 20 minutes, adjusting the seasoning to taste, then stir in the walnuts. Remove from the heat and set aside.
For the mango and corn salsa, cut the mango in half along the stone. Scoop out and dice the flesh. Cut the corn kernels off the cob, finely chop the chilli and roughly chop the coriander. Place all of the ingredients in a bowl and drizzle over the olive oil and lime juice. Season with salt and toss to combine.
For the sweet and spicy cashew nuts, heat the coconut oil and spices in a frying pan on medium-high heat. When fragrant, add the nuts and let them toast for a couple of minutes, stirring frequently. Drizzle over the maple syrup, stir and toast for a further 30 seconds, then remove from the heat and set aside.
When you’re ready to serve, preheat the oven to 200C/gas mark 6. Scatter tortilla chips on a baking tray and bake for 5 minutes until warm and slightly toasted. Check on them often to make sure they do not burn.
Mash the avocado, dice the red pepper, and cut the limes into wedges. Place
all the serving elements in bowls on the dinner table and let everyone build their own tortilla bowl. From by David Frenkiel and Luise Vindahl (Hardie Grant Books, £25)
Simon Hopkinson’s vegan caponata
Simon Hopkinson’s vegan caponata. Photograph: Martin Poole for the Observer
Serves 4 aubergines 2 large (the fat, purple and white Sicilian ones if possible) salt olive oil 5-6 tbsp red onion 1 large, peeled, halved and thickly sliced celery sticks 4, peeled, halved lengthways and sliced into small lengths yellow pepper 1 small, halved, deseeded and thickly sliced red pepper 1 small, halved, deseeded and thickly sliced water 100ml red wine vinegar 3 tbsp sugar 1 rounded tbsp tomato puree 2 tsp raisins 1 heaped tbsp green olives about 12, pitted and halved capers 1 heaped tbsp, drained and lightly squeezed dry freshly ground white pepper pine nuts 1 heaped tbsp
Peel the aubergines and thickly slice into half rounds. Spread them out on a kitchen surface and sprinkle with enough salt to season generously. Gather them up in your hands, mingle together in a colander, place upon a plate and leave to exude their juices for at least 40 minutes.
Meanwhile, using a frying pan, and in four separate stages, quietly stew the onion, celery, yellow and red peppers separately, each in 1 tbsp of the oil, until softened and only just coloured. For the fifth stage, wash and dry the aubergines and similarly soften in olive oil. Place all five vegetables in a bowl and mingle together.
Now add the water, vinegar, sugar, tomato puree and raisins to the frying pan. Bring to the boil and simmer for several minutes until lightly thickened and the raisins have plumped somewhat. Stir in the olives and capers and tip the entire contents of the pan into the bowl of vegetables. Gently heat the pine nuts in a dry frying pan until golden brown. Add them to the caponata, season with pepper to taste and check for salt. Lubricate with a little more olive oil if you think it warrants it and serve at room temperature. From by Simon Hopkinson (Quadrille, £9.99)
Nigel Slater’s vegetarian salad of beans, peas and cheese
Nigel Slater’s vegetarian salad of beans, peas and cheese. Photograph: Jonathan Lovekin/PR
Among the charcoal and garlic of midsummer’s more robust cooking, a quiet salad of palest green can come as a breath of calm. Last June, as thousands joined hands around Stonehenge in celebration of the summer solstice, I put together a salad of cool notes – a bowl of appropriate gentility and quiet harmony.
Enough for 4 shelled broad beans 250g shelled peas 400g ciabatta 4 small slices olive oil a little salad leaves 4 generous handfuls mint leaves a good handful vegetarian hard cheese 8og, in thin shavings
For the dressing lemon 1 olive oil (fruity and peppery) 4 tbsp balsamic vinegar 1 tsp
Put a pan of water on to boil, then salt it lightly. Cook the beans in this, drain them, then rinse in cold water. Put more water on and cook the peas. Drain them and mix with the beans. Both peas and beans will need barely more than a couple of minutes if they are small and sweet.
Make the dressing by dissolving a good pinch of salt in the juice of the lemon, then using a fork to beat in the olive oil, balsamic vinegar and a grinding of black pepper (alternatively put all the ingredients in a screw-top jar and shake).
Toast the slices of bread on both sides and tear them into short pieces. Drizzle a little olive oil on to each one, then shake over a light dusting of sea salt.
Toss the salad leaves and mint in the dressing, then add the peas, beans and cheese shavings. Tuck in the toasted ciabatta and serve. From by Nigel Slater (Fourth Estate, £30)
Nigel Slater’s vegetarian bucatini with spinach and courgette
Nigel Slater’s vegetarian bucatini with spinach and courgette. Photograph: Jonathan Lovekin for the Observer
Serves 2 Rinse 200g spinach, removing any tough stems. While the leaves are still wet, cook them for a minute or two in a pan with a tight lid, so they soften in their own steam. If you are worried about them sticking, add a tablespoon or two of water. As soon as the spinach has wilted, plunge it into a bowl of iced water to stop it cooking, squeeze it dry with your hands, then roughly chop it. Bring a pan of water to the boil then add 125g sugar snap peas, let them cook for 2 minutes then remove and drain them.
Bring a large pan of water to the boil, salt it, then cook 200g bucatini or other thin pasta for about 9 minutes till just tender, and drain.
Cut 1 large courgette into thick slices and then into quarters. Melt 30g butter in a shallow pan then add 2 tbsp olive oil. Fry the courgette for 3 or 4 minutes until it starts to colour, then add the spinach leaves and the cooked sugar snaps. Roughly chop a small bunch of parsley and add it to the vegetables.
Pour 25ml double cream into the vegetables and combine it gently. Let it simmer for a minute then pour it over the drained pasta and toss together gently. Garnish with lemon and pass round a bowl of grated vegetarian Italian hard cheese.
Yotam Ottolenghi’s vegetarian root vegetable pies
Yotam Ottolenghi’s vegetarian root vegetable pies. Photograph: Martin Poole for the Observer
The filling is also delicious on its own, as a vegetarian rice topping. These are also great reheated and eaten the next day, so don’t be afraid to make the whole batch if there aren’t six of you to eat them first time around.
Makes 6 plain flour 240g, plus extra for dustingunsalted butter 190g, fridge-cold, dicedsoured cream 60g olive oil 3 tbsp curry powder 1 tsp caraway seeds 2 tsp black mustard seeds 2 tsp ground cardamom ½ tsp onion 1 large (180g), roughlychopped green chilli 1, deseeded and finely choppedthyme leaves 1 tbsp, choppedgarlic 2 cloves, crushed baking potato 1 small (160g),peeled and cut into 2cm dice carrot 1 medium (100g), peeled and cut into 2cm dice parsnip 1 medium (100g), peeled and cut into 2cm dice vegetable stock 250ml butternut squash ½ small (250g), peeled and cut into 2cm dice caster sugar ¼ tsp mature cheddar 120g (vegetarian cheddar is readily available), coarsely gratedcoriander 15g, chopped egg 1, beatensalt and black pepper
Place the flour, butter and soured cream in a food processor, with 1 teaspoon of salt, and work until the mixture comes together. Transfer to a lightly floured work surface and gently knead for 1 minute, adding a little flour if needed, until soft and malleable. Wrap in clingfilm and leave to rest in the fridge for 30 minutes.
Place a large lidded sauté pan on medium–high heat. Add 2 tablespoons of oil and, once hot, add the curry powder, caraway seeds, mustard seeds and cardamom. Cook for just a few seconds, stirring and making sure the spices don’t burn, before adding the onion, chilli and thyme. Cook for another 4 minutes, add the garlic and cook for another minute, stirring. Add the potato, carrot and parsnip, stir and then pour in the stock. Reduce the heat to medium, cover and cook for 5 minutes. Add the squash, sugar, ¾ teaspoon of salt and a generous grind of black pepper, and continue to simmer, covered, for 10 minutes, stirring from time to time, until the vegetables are cooked through and most of the liquid has evaporated: you should have about 3 tablespoons of liquid left; add a little water if needed. Uncover, remove from the heat and set aside to cool totally before stirring in the cheese and coriander.
Preheat the oven to 200C/gas mark 6.
Use the remaining oil to brush the sides and bases of an extra-large 6-hole muffin tin (each hole should be 6cm wide and 4cm deep). Line the bases with circles of baking parchment and place the tin in the fridge. Roll out the pastry 2–3mm thick, cut out 6 circles, 14cm in diameter, and press down into the tin. Trim the edges, reusing the spare pastry to roll out for a second time. Cut out 6 more circles, 8cm in diameter – these will form lids.
Fill each pie with about 120g of filling, brush the rims with egg and place the lids on top. Pinch the edges together securely, brush the lids with the remaining egg and prick each pie with a fork in a few places. Allow to rest in the fridge for 10 minutes. Place in the oven and bake for 30–35 minutes, until golden-brown. Remove from the oven and set aside for 5 minutes before serving warm or at room temperature. From by Yotam Ottolenghi (Ebury Press, £27)
Source: https://www.theguardian.com/lifeandstyle/2018/jul/25/best-vegan-vegetarian-recipes-yotam-ottolenghi-nigel-slater-pies-pasta-salads
0 notes
Text
Feed Your Feed: Teen Vegan Haile Thomas’s Top 5 Instagrammers to Follow
Haile Thomas is an 18-year-old health activist, vegan food & lifestyle influencer, and the founder/CEO of the nonprofit HAPPY (aka, Healthy Active Positive Purposeful Youth). Here, she shares her favorite Instagram influencers, ranging from fellow vegan bloggers to self-love advocates.
Hey there! I am so incredibly grateful to have found a beautiful and loving community on Instagram where I can explore food + everything and anything. And I’m so excited to share that love by spotlighting five Instagram accounts that I’m absolutely obsessed with right now! They all inspire me to be my most creative, authentic and flavorful self (pun 100% intended).
@kimjuliehansen
View this post on Instagram
Creamy Mushroom and Spinach Pasta with Balsamic Grilled Tomatoes I made for a project on my other page @bestofvegan (get the printable version via the link in @bestofvegan’s bio) ❤️ . Serves 4 Ingredients: 10oz egg-free fettuccine (dry weight) 1 1/4 cup cashews, soaked 2 cups vegetable broth 2 1/2 tbsp nutritional yeast 2 tsp cornstarch or all-purpose flour 3 garlic cloves, minced 1 yellow onion, medium to large, chopped 12-14oz mushrooms of choice, sliced 2 tbsp + 2 tsp olive oil 8oz cherry tomatoes 1 tsp balsamic reduction or balsamic vinegar 1 handful fresh basil leaves sea salt to taste 1 pinch freshly ground pepper 3 cups baby spinach 2 tsp soy or tamari sauce 2 tsp liquid smoke (optional) Directions: 1.In a large pot, bring lightly salted water to a boil, then add the pasta and cook al dente, which should take about 12-13 minutes depending on the brand you’re using. Once the pasta is cooked, drain and return it to the pot, mixing in 1 tbsp olive oil, fresh basil and ground pepper. Add the lid to keep the pasta warm until you’re ready to serve. 2.While the pasta is cooking, start sautéeing the chopped onion and 2 garlic cloves in 1 tbsp of olive oil in your frypan. Add the mushrooms about a minute later and then sauté over medium heat for 10 minutes, then add the soy sauce and liquid smoke and mix well. 3.Reduce heat to low and start making the cashew sauce. For the sauce, blend the soaked and drained cashews with the cornstarch, 1 1/4 cup vegetable broth, sea salt and nutritional yeast on high until you get a smooth consistency. 4.Add the sauce and spinach to the pan, mix well and let simmer for 5 more minutes mixing in the rest of the vegetable broth little by little (add more if the sauce is too thick). 5.For the balsamic tomatoes, add 2 tsp olive oil and the cherry tomatoes to a grill pan and grill over medium heat for 3 minutes. Add the balsamic reduction or vinegar and 1 minced garlic clove and grill for 3 additional minutes over low-medium heat. 6.Serve the pasta with the sauce and tomatoes and enjoy. #bestofvegan #lunchinspo
A post shared by Kim-Julie Hansen (@kimjuliehansen) on Dec 12, 2018 at 8:12am PST
Kim-Julie is the author of The Vegan Reset and the founder of the very popular and drool-inducing Instagram account @bestofvegan. Not only has her entrepreneurial spirit and animal activism inspired me immensely but also she is truly a brilliant soul who contributes so much light and wisdom to the world. I am always learning something new from her accounts.
@sophia_roe
View this post on Instagram
on dopamine . . Dopamine is one of our body’s neurotransmitters. It has a variety of functions, and is key in behavior, cognition, motivation and reward. When we receive a reward of any kind, dopamine is released in our brains. Over time, this release of dopamine can lead to learning. As we get "rewarded" over and over again for something, our bodies learn that we should keep doing whatever that is A LOT, constantly even. It can be hard to unlearn those kinds of behaviors. . . The exact conditions when we receive our “reward” stimulus are imprinted on our brains. Research has shown that rats that are given chocolate in a given situation learn to expect it, and the same situation triggers reward centers in the brain even without the chocolate being present. So once our brains connect processed sugar with a particular mood or state of mind, it’s hard to reverse it. For example, for some eating dinner is a time when family gets together, giving you a warm feeling. So later in life you’re feeling lonely, you might try eating to make yourself feel better. . . This is especially true for those who were conditioned as kids to associate sweets with a good deed, get an A=have candy. Later, when they want the same feeling of accomplishment, they often turn to the food stimulus to create that feeling. Hence, "comfort food" . . There are things you can do to train your yourself to eat healthier. Obviously, do your damnedest to avoid calorie-packed, super sugary, and generally “bad for you” foods. If you stop eating them, your brain never gets the chance to associate them with the dopamine reward, making it so you don’t crave them. Resisting the initial temptation will help to resist in the future, + instead of getting dopamine boosts from sugar, you’ll get them when you eat healthy meals. Soon, your brain associates “good for you food” with dopamine rewards, + you’ll find yourself wanting to eat healthy when you want a rewarding brain boost. . . But, my biggest tip, will power! It's not easy guys, fighting urges is hard. But, I promise, if you stick to your guns and fight the urge..in just 10 days..you'll be like "sugar what?!? girl bye, Pass me the salad!”
A post shared by Soph (@sophia_roe) on Sep 24, 2018 at 9:26am PDT
Sophia is someone I truly admire and look up to. Her account is nourishment for your senses. Your eyes get to enjoy stunning images of food, DIY beauty recipes, her curls, or all three! And your mind gets to dive into her expressive and beautiful writing that encompasses the stunning and not so stunning parts of life and how she’s grown through it all — with a vulnerability that allows others to blossom too.
@jessicainthekitchen
Jessica is like sunshine on your phone. Not only does her smile and kindness shine brightly but also her food turns on hunger pangs in an instant. Her love and talent for creating comforting, simple and delicious vegan food is truly amazing. We also share Jamaican roots and that makes it 100% more enjoyable to follow her.
@lulusdreamtown
I am in love with all that Lulu has created and is now shifting into with her platform! From food to self-love to interesting conversations, following her is a true joy. I also love that she is a peer within my generation, using Instagram for good by being her true self and bringing up really important topics.
@the.korean.vegan
Joanne’s moody, rich, soulful food and life feed is complemented by her truly incredible writing. She shares beautiful stories from her life with such vivid and expressive detail that you feel as though you were transported into her story. And the Korean food she makes? To live for. From kimchi fried rice, Japchae, dumplings and more — I’ve even had the honor of tasting her masterful creations on a few occasions!
Source: https://blog.williams-sonoma.com/feed-your-feed-teen-vegan-haile-thomass-top-5-instagrammers-to-follow/

0 notes
Text
The Clever Riff on Fish Tacos Antoni Porowski Swears By
Who hasn't developed a mildly concerning avocado addiction at the hands of Antoni, cookbook author and food and wine expert on Netflix's Queer Eye? And whose heart hasn't melted when he patiently, charmingly proves to contestant after contestant that, yes, anyone can cook? (I'm not crying, you're crying.)
By cooking his way through Soul by Todd Richards and How to Eat a Peach by Diana Henry, Antoni finds some new favorite recipes—including ones that give him all the feels—and we've got it on video.
Got questions? We have answers. What is the Piglet? Which books are in the running? How do I catch up on judgments? Is there a handy bracket for me to follow along with?
Source: https://food52.com/blog/23879-piglet-2019-day-4-antoni-porowski
0 notes
Text
How to Make French Bread Pizza (the RIGHT way)
French bread pizza is one of our favorite weeknight dinners. We will show you the RIGHT way to make it so you get flavorful, cheesy, crisp pizza every time.
Why French bread pizza?
The better question is, why NOT French bread pizza? French bread pizza is SO easy to make. You can have dinner on the table in about 20 minutes! This is the perfect recipe for when you just aren’t feeling up to making homemade dough and you don’t want to wait to get pizza delivered to your door.
How to make French bread pizza NOT soggy
There is a simple way to make French bread pizza so it doesn’t get soggy. All you have to do is layer on some of your toppings FIRST, and THEN add the sauce. I like to do a layer of pepperoni and then spread the sauce over it. Pre-baking the bread also helps so it doesn’t get soggy. You will get lightly crisp French bread pizza every time!
How to freeze French bread pizza
When freezing French bread pizza, follow steps 1-7 in the recipe. Instead of baking the pizzas a second time, place the pizza in the freezer for 1-2 hours or until frozen. You may have to carefully pre-cut the pizza into slices so it will fit. After pizza has been frozen, THEN place slices in individual freezer bags and keep frozen for up to 6 months.
How to reheat French bread pizza
To reheat French bread pizza that has been frozen, preheat oven to 400-degrees. Place pizza slices on baking sheet and bake for 15 minutes or until cheese has melted.
French bread pizza toppings
You can be as creative as you want when it comes to French bread pizza. You can add sausage, mushrooms, olives… ANY of our favorite pizza toppings! The only thing you will want to keep in mind is that if you are freezing the pizzas for later use, make sure you are using freezer-friendly toppings. Toppings such as fresh tomatoes don’t freeze well (and they may make your bread soggy).
How to Make French Bread Pizza
First, spread on some garlic butter and bake (this gives it an AMAZING flavor) Next, add a layer of pepperoni (this helps the bread from getting soggy) Then, add your sauce
Then, add cheese and some more pepperoni
Last of all, bake and serve
How to Make French Bread Pizza (the RIGHT way)
French bread pizza is one of our favorite weeknight dinners. We will show you the RIGHT way to make it so you get flavorful, cheesy, crisp pizza every time.
Course: Appetizer, Lunch, Main Course, Snack
Cuisine: American, Italian
Keyword: French Bread Pizza
Servings: 8 servings
Ingredients (with Amazon Links)
Instructions
Preheat oven to 400-degrees.
In a small bowl, melt butter. Add garlic powder and fresh parsley.
Slice French bread lengthwise and brush garlic butter mixture onto the bread.
Place French bread on a large baking sheet, open-side up. Bake 5-8 minute or until bread is nice and golden-brown.
Remove bread from oven and reduce oven heat to 350-degrees.
Place half of the pepperoni in a layer over the bread.
Spread pizza sauce over the pepperoni, then add cheese and remaining pepperoni.
Bake for another 8-10 minutes or until cheese is melted and bubbly.
Cut into slices and serve immediately.
More from Favorite Family Recipes:


Source: https://www.favfamilyrecipes.com/how-to-make-french-bread-pizza/
0 notes
Text
HARVEST CORN CHOWDER WITH BEER AND WHITE BEANS
pin it!
This post is sponsored by Muskoka Brewery.
pin it!pin it!pin it! In the last two weeks of August, we’re eating fresh corn, tomatoes, eggplant, peppers, and potatoes almost every night. Our fridge is stocked to the point of overflowing with all of these things from my family’s garden. Each night is a game of “How can I remix this?” with the same cast of characters. Sometimes it’s super fun and creative, and sometimes I just make a big saute with a splash of soy sauce and garlic, and call it a night. Soup is a frequent destination for the bumper crops as well. Generally when I make soup or stew, we eat it all up within 3 days. I don’t really make-ahead and freeze a lot of stuff. The only cooked thing that’s stockpiled in my freezer is homemade vegetable stock. I just prefer fresh food and (gratefully) I have the time for cooking around that preference. But corn chowder is different and 100% the exception. Summer corn from Ontario exists on this higher flavour plane. It’s so sweet and creamy. When the mini cornfield at my parents’ place is exploding, I fill the bottom shelf of my basement freezer with chowder. It’s a soothing saviour on a cold and dark November night. Can you tell that I’m excited for Fall? Practically everything else in the chowder is local as well–the potatoes, hot peppers, onions, garlic, herbs–and honestly that fills me up with a corny (heh) sense of pride. This version of chowder that I dreamed up has a solid pour of local beer to deglaze the pot. I love the little bit of tang and balancing edge of bitterness that it brings to the finished product. I’m partnering with Muskoka Brewery to showcase their Harvest Ale, which is 100% sourced from Ontario producers. The malt and hops are grown right in the province and the yeast is developed here too. It’s a large batch brew that supports over 260 jobs. This Harvest Ale is a delight in my chowder, and obviously so refreshing and delicious straight up. I’m a fan of the old fashioned wellness approach that’s based in moderation. I love spirulina smoothies and kale salads, but I also LOVE chips and beer. Like I can’t envision the rest of my life without them. Sometimes a beer is the perfect accompaniment to a kale salad too! Enjoyed responsibly, beer is one of the easier and more enjoyable aspects of my mental health regimen. The crack and hiss of a popped can is an immediate signal to my brain that it’s time to put the phone down, reconnect with my people, and just be present. Also, a few extra B vitamins and minerals couldn’t hurt either ;) So I hope that you try this chowder with all that summer corn, and more importantly I hope that you get some relaxing times with an refreshing brew (alcoholic or non) soon! My favourite trick for corn chowder is simmering the scraped cobs with the vegetable stock for at least 20 minutes. Then you strain it off and proceed. It’s a simple step that makes a huge difference! One last thing: for my Ontario locals, keep an eye on my Instagram page for an amazing Muskoka Brewery giveaway! ;)
pin it!pin it!pin it!pin it!pin it! HARVEST CORN CHOWDER WITH BEER AND WHITE BEANS RECIPE Print the recipe here! SERVES: 6 NOTES: I blend half of this chowder to give it a creamy texture, but if you’d like yours to be SUPER creamy, throw a handful of soaked cashews into the blender as well. -I used a freakishly hot banana pepper from my garden here. A jalapeńo would be amazing! -If I know that I’m making corn chowder, I like to simmer some really good homemade vegetable stock with scraped corn cobs beforehand. If you only have time for boxed stock, just give it a boil with the scraped cobs for 20 minutes or so. It will still make a difference! -If you avoid alcohol, just use more stock and add a touch more lime at the end. -Corn and potatoes are starchy and need lots of salt and acidity to come alive. Season liberally! 1 tablespoon oil 1 medium onion, chopped 1 teaspoon paprika 2 sprigs fresh thyme, leaves minced 1 lb potatoes, scrubbed and diced into 1-inch pieces 1 ¾ cups cooked white beans, drained (from a 15oz can) sea salt and ground black pepper, to taste 1 hot pepper/chili of choice (see headnote), minced 1 clove of garlic, minced ½ cup Muskoka Brewery 100% Ontario Harvest Ale (or any beer you like!) 5 cups vegetable stock (see headnote) 5 cups corn kernels (scraped from about 5-6 cobs of corn) ¼ cup fresh lime juice ½ cup roughly chopped fresh cilantro Heat the oil in a large soup pot over medium heat. Add the onions and saute until soft and translucent, about 4 minutes. Add the paprika and thyme and stir. Add the potatoes and stir to coat in the spices. Add the white beans, season everything with lots of salt and pepper, and stir. Add the chili and garlic to the pot and cook until fragrant, about 30 seconds. Slowly pour in the beer. Let it froth up and then gently stir. Bring the beer and vegetables to a boil. Then, add the vegetable stock to the pot and give it another stir. Cover the pot and bring the chowder to a boil. Reduce the heat to a strong simmer and let the soup cook, covered, until the potatoes are completely tender, about 15-17 minutes. Once the potatoes are tender, add the corn and continue to simmer thr chowder until the kernels are cooked and slightly soft, about 5 minutes. Then carefully ladle half of the hot chowder into an upright, vented blender (like a Vitamix). Turn the blender on and slowly bring the speed up to high. Blend the chowder until creamy and smooth, about 40 seconds. Return the blended portion of the chowder to the pot and stir to combine. Stir in the lime juice as well. Check for seasoning at this point and adjust if necessary. Serve the chowder hot with chopped cilantro on top and extra black pepper.
**This post was created in partnership with Muskoka Brewery. All opinions are my own. Thanks for supporting the brands that support this site!
Source: http://thefirstmess.com/2018/08/29/harvest-corn-chowder-beer-white-beans-vegan-recipe/
0 notes
Text
Guide To Way Out West Festival And The Record Shops of Gothenburg
This is a sponsored post in partnership with the Göteborg & Co.. All words and opinions are my own. Thank you for supporting the brands that help us do what we do!
Kasey and I recently had the honor of visiting Gothenburg, Sweden (a.k.a. Göteborg) to cover Way Out West Festival while checking out the restaurants and record shops the city had to offer. If you want to hear about where we ate, what we ate, neighborhoods (and islands) we visited during our trip, you’ll want to check out Kasey’s post.
Below I’ve prepared a guide to our favorite record shops in Gothenburg plus a recap and playlist spotlighting some of our highlights from Way Out West. A big thank you to Fredrik Sandsten of the band The Soundtrack of Our Lives for showing us around and to Nik Ewing of Local Natives for his recommendations.
All photos by Kasey.
Record Stores in Gothenburg, Sweden
Music Lovers Records
Tucked away inside a little plaza just a little off the trendy Magasinsgatan, you’ll find Music Lover Records next to a cozy champagne bar and a cafe. The collection is artfully curated with a wide selection of indie, ambient, kraut, and everything in between. It’s also the perfect place to pick up the limited edition releases by local Höga Nord Records which have albums by San Francisco’s Al Lover and numerous local producers and musicians. A true gem.
Bengans
Easily the largest and most eclectic collection we found during our visit, Bengan’s is a local institution. They’ve boasted in store appearances from David Bowie (among many, many other in-store sets), exclusive releases from their own label, and a small club where you might catch live music on a random night of the week. They have a great cafe upstairs where you can pick up an espresso or cortado and mingle with the locals. Highly recommended.
Dirty Records
One of three record shops we visited on a three block stretch of Andra Långgatan, Dirty Records is both a charming cafe and a excellent spot for crate digging for local releases by artists like Jan Johansson, Made in Sweden, or Tages.
Linné Skivbörs
Just a block down the road from Dirty Records, Linné Skivbörs is a relatively small shop but with a nicely curated selection of vinyl. They’re tastes are eclectic but they had one of the nicest selections we saw of genres like hip hop, jazz and world music.
Skivhandel
Located in a huge space, this shop has a huge selection of new and (especially) used records. Definitely a good choice if you want to spend a couple of hours crate digging.
Way Out West Recap
Located in the beautiful and expansive Slottsskogen City Park, Way Out West is a music festival with character. Alongside a lineup packed full of European and American superstars and up-and-coming artists, it blends in a substantial presence of regional powerhouses.
It’s also n0table for the promoters’ decision to have all the food offered inside the festival be vegetarian. If you’re an omnivore that might sound restrictive, but I assure you the opposite is true. There is a wide variety to the often imaginative offerings including active charcoal burgers, thai noodles, falafels, oatmeal-based ice cream, and more.
Drinking is also restricted to specific areas (often the area directly to the left of the stage). I typically enjoy drinking at festivals (Beer Lands has always been one of my favorite parts of Outside Lands) but I found the change refreshing. We never saw anyone grossly inebriated and you didn’t have to worry about someone spilling beer on your shoes. And, of course, if you want to drink you can. I watched most of Lily Allen’s set from just to the left of the stage in the nearby drinking area. The view was great and the sound was perfect.
More importantly, the lineup was top notch. The headliners included Kendrick Lamar, Arcade Fire, and Arctic Monkeys, alongside a packed lineup that included M.I.A., Lykke Li, Iggy Pop, Patti Smith, Grizzly Bear, Fleet Foxes, Lily Allen, J Hus, Jorja Smith, Brockhampton, St Vincent, Charlotte Gainsbourg, and more. The main festival wraps up well before midnight but then extends to a series of small club shows throughout Gothenburg where you could catch artists like Rhye, Moses Sumney, Phoebe Bridgers, Ariel Pink, Kevin Morby, and more.
The playlist we put together below will give you a good idea of some of the festival highlights:
Source: https://www.turntablekitchen.com/2018/10/guide-to-way-our-west-festival-and-the-record-shops-of-gothenburg/

0 notes
Text
Twenty-Five+ Healthy Low-Carb Mexican Food Dinners for Cinco de Mayo
posted by Kalyn Denny on April 26, 2019
Cinco de Mayo will be here soon, and here are Twenty-Five+ Healthy Low-Carb Mexican Food Dinners for Cinco de Mayo! Now you can enjoy Mexican food without overloading on carbs. Use Recipe Round-Ups to find more low-carb round-ups like this one.
PIN Twenty-Five+ Healthy Low-Carb Mexican Food Dinners for Cinco de Mayo!

You probably couldn’t help but notice that I’m a huge fan of Mexican food around here, and through the years I’ve made so many tasty low-carb favorites with those flavors. And Cinco de Mayo is next weekend, so it’s time to plan the menu! There’s nothing I like more than a good excuse to eat Mexican food for a whole week, so for the occasion I’m updating my collection of Twenty-Five+ Healthy Low-Carb Mexican Food Dinners for Cinco de Mayo.
I’ve divided the favorite Low-Carb Mexican Food Recipes into two categories: Low-Carb and Gluten-Free Mexican Food Dinners and Low-Carb But Not Gluten-Free Mexican Food Dinners (that use low-carb tortillas). Hopefully there’ll be something for everyone in this collection!
All these Mexican food dinners are favorites that I bet your family will like. And I promise I won’t tell if you decide to make one of them right away before Cinco de Mayo gets here; enjoy! If you still want more Mexican Food yumminess, check after the photos for more round-ups of Low-Carb and Keto Mexican Food from around the web!
Low-Carb and Gluten-Free Mexican Food Dinners
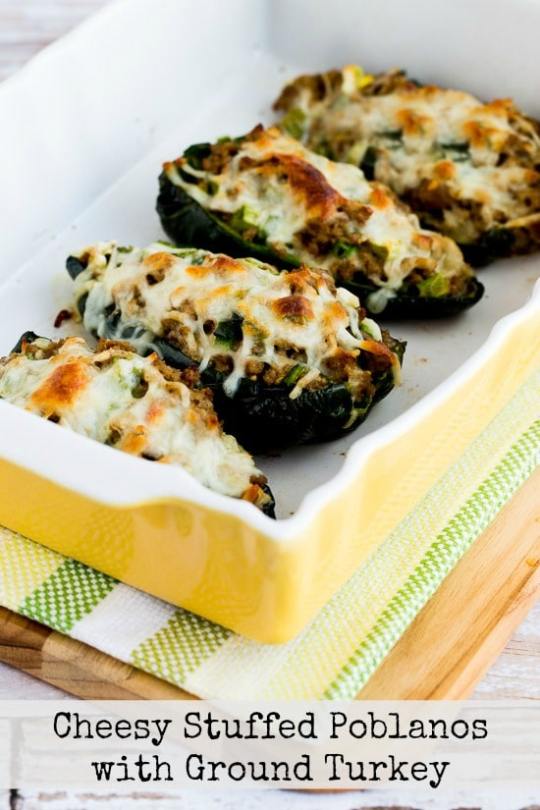
Cheesy Stuffed Poblanos with Ground Turkey (If you like Poblano chiles, you will love this dish!)
Cheesy Low-Carb Taco Casserole This Cheesy Low-Carb Taco Casserole will probably be a hit with the whole family!

Instant Pot or Slow Cooker Low-Carb Green Chile Pork Taco Bowl (We loved this spicy green chile pork on a bed of cauliflower rice, you choose the cooking method you prefer!)

Green Chile and Chicken Mock Enchilada Casserole (Everyone in my extended family loves this recipe!)

Low-Carb Ground Beef Cauliflower Rice Taco Bowls (This is quick and easy for a work night dinner!)
Low-Carb Twice-Cooked Chicken with Green Chiles and Cheese (This new recipe has really been a hit!)

Beefy and Cheesy Low-Carb Green Chile Bake (This is the perfect low-carb casserole with ground beef.)

Instant Pot (or Stovetop) Low-Carb Taco Soup (My favorite taco soup recipe, without the carbs!)
Green Chile Turkey Paleo Taco Salad (I came up with this when my nieces were doing Whole 30.)
Slow Cooker Browns-in-the-Crockpot Spicy Ground Beef for Tacos, Burritos, or Taco Salad (Low-carb tortillas are not gluten-free; eat on taco salad or in lettuce wraps for gluten-free!)
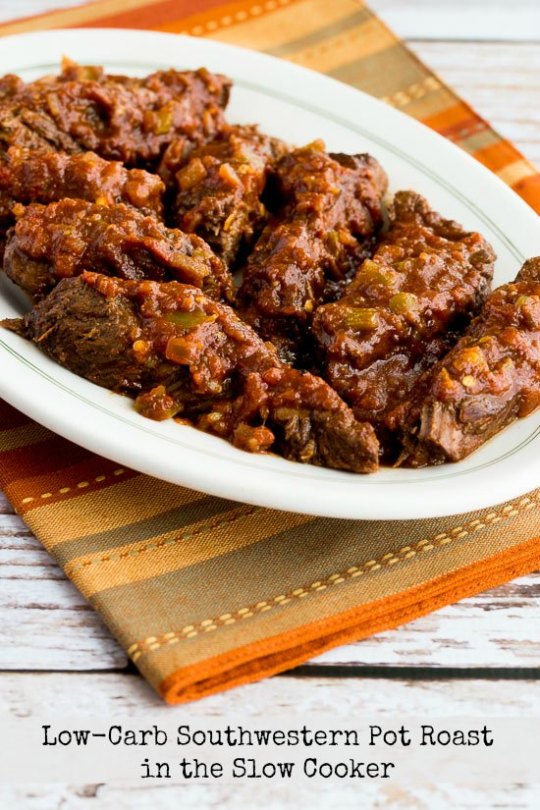
Low-Carb Southwestern Pot Roast in the Slow Cooker (Have pot roast for dinner and use leftover meat for taco salad!)

Southwestern Turkey Collards Wraps (If you haven’t tried a wrap with collards, these might surprise you!)
Fish Taco Cabbage Bowl (If you like fish tacos, you’ll love this low-carb version!)
Instant Pot Salsa Chicken with Lime and Melted Mozzarella (This is an Instant Pot version of an ultra-popular slow cooker recipe, get the slow cooker version here.)

Ground Turkey Low-Carb Enchilada Casserole with Red and Green Chiles (This casserole has whole green chiles and red chile sauce.)

Spaghetti Squash Low-Carb Taco Bowl (All the flavors you love in tacos, in a spaghetti squash bowl!)
Low-Carb Baked Chicken Stuffed with Green Chiles and Cheese (This is a bit more work than some of the other recipes, but oh so worth it!)

Slow Cooker Green Chile Shredded Beef Cabbage Bowl (I’ve made this over and over!)
Instant Pot Low-Carb Green Chile Chicken Burrito Bowl (If you like Green Chile Chicken you’re going to love this meal!)
Low-Carb Vegetarian Chile Rellenos Bake (This is as delicious as battered chile rellenos, but it’s low-carb and gluten-free.)
Low-Carb But Not Gluten-Free Mexican Food Dinners
(These recipes use low-carb tortillas so they’re not gluten-free, but they are low in carbs.)
Ground Turkey Green Chile Low-Carb Tacos with Avocado Salsa (PLEASE do not skip the avocado salsa; that’s what makes these tacos amazing!)

Pressure Cooker Low-Carb Flank Steak Tacos with Spicy Mexican Slaw (We loved these tacos with ultra-tender flank steak. The recipe also has slow cooker instructions!)
Low-Carb Shrimp and Avocado Tacos (We absolutely swooned over this recipe when we tested it!)

Slow Cooker Low-Carb Mexican Lasagna Casserole (Your family will love this one; use low-carb tortillas.)

Slow Cooker (or Pressure Cooker) Shredded Beef Tacos with Spicy Slaw and Avocado (A complete winner; use low-carb tortillas and don’t skip the slaw!)

Low-Carb Breakfast Tacos with Sausage, Peppers, and Eggs (Use low-carb tortillas and have breakfast for dinner!)

Low-Carb Green Chile Chicken Enchilada Casserole (This will be a hit with the family; use low-carb tortillas.)
Easy Guacamole Tostadas (So much YUM! Use low-carb tortillas.)
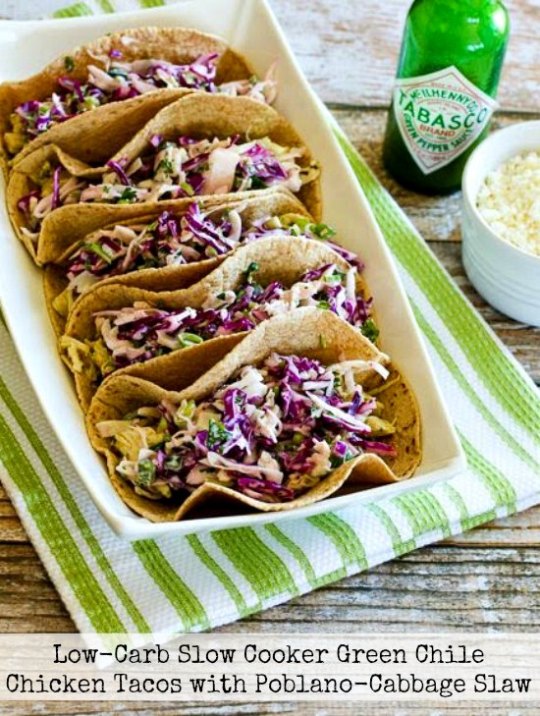
Low-Carb Slow Cooker Green Chile Chicken Tacos with Poblano-Cabbage Slaw (I love the slaw in this recipe; use low-carb tortillas.)
Chicken Fajitas in the CrockPot (Use low-carb tortillas or eat the chicken and veggies with melted cheese.)

Low-Carb Slow Cooker Sour Cream Chicken Enchiladas (This was a huge hit when we tested the recipe!)
More Low-Carb Mexican Food to Try:
15 Best Low-Carb Mexican Recipes ~ I Breathe I’m Hungry Keto Mexican Recipes ~ Seeking Good Eats 10 Low-Carb Mexican Food Favorites You’ll Make Over and Over ~ Kalyn’s Kitchen
Tell us in the comments about what’s going on the Cinco de Mayo menu at your house!
posted by Kalyn Denny on April 26, 2019
Don’t Miss a Recipe!
subscribe to receive new recipes via email:
We are a participant in the Amazon Services LLC Associates Program, an affiliate advertising program designed to provide a means for us to earn fees by linking to Amazon.com and affiliated sites.
Source: https://kalynskitchen.com/twenty-five-healthy-mexican-food-recipes/

0 notes
Text
【フライパン1つ】重ねて焼くだけ!こんがりツナマヨポテトと、ツナ缶レシピ集めました
きてくださってありがとうございます!
このブログは、どこにでもある材料で、誰にでもできる料理を載せています。
◆大さじ1杯の生クリーム、卵黄5個分などの気がひける使い方
◆ローリエ、バルサミコ酢、ワインビネガー、ワタリガニ、備中ぐわ、千歯こき・・・
などオシャレな調味料や農具は使いません。
どうぞゆっくりしていってください。軽い気持ちで。足をくずして。目くじらをもて遊んで。
見た目がちょっと悪いですが、これめっちゃ美味しいです。
今日買い物行ってない・・・・!って時に
常備されていそうな野菜とツナ缶で作れる簡単なおかず。
材料はじゃがいも、玉ねぎ、ツナ缶。あとピザ用チーズ(は無くてもいける)。
味付けは塩こしょう、しょうゆ、砂糖、マヨネーズです。もう想像したら味わかるけど、それより1、3倍おいしいと思う。
アルミホイルを敷いて焼くので洗い物もほとんど無し。
ツナ部分は甘辛くて、じゃがいもが薄切りこんがりなので、ごはんのおかずにもなります。(いや、ここは個人差大きい部分やで)
じゃがいもあるけど茹でるの面倒、という方、よかったら作ってみてください。
ちなみにうちでは今、じゃがいもとツナ缶がないので作れませんけどね。
野菜室見たらニンニクと死にかけの大葉ときゅうりしかない��ら、私がこれ提案されたら「全然役にたたへんわ!」ってタイトなジーンズ噛みちぎるわ。(こっわ。アゴつっよ)
材料(作りやすい量)
●じゃがいも・・・・2個
●玉ねぎ・・・・1/2個ぐらい。嫌いなら省いても。
●ツナ缶・・・・1缶
A砂糖、しょうゆ・・・・各大さじ1/2ぐらい
●塩、こしょう、ピザ用チーズ、マヨネーズ、あればドライパセリ・・・・各適量
①じゃがいもは皮をむいて薄切りにする。玉ねぎは薄切り、ツナ缶は油ごとAを混ぜる。
②フライパンにアルミホイルを敷いてその上に薄く油を塗り(くっつくんで必ず塗って)、じゃがいもをできるだけ重ならないように並べる。いうて2個分もいれたら至る所で絶対に重なるんですけどね。(どないやねん)
玉ねぎを上に広げて塩こしょうをし、サラダ油を適当にまわしかけ、蓋をして弱~中火で7分ぐらい、じゃがいもがやわらかくなるまで蒸し焼きにする。
③ツナを散らしてマヨネーズを絞る。あればピザ用チーズを散らして蓋をし、弱火にかけてチーズが溶けたら火を止める。完成!
まとめると
1 じゃがいもと玉ねぎを重ねて火にかける。
2 ツナ、マヨネーズ、チーズを散らしてチーズを溶かす。
以上です。
★そのままでも、お皿にホッ!!と裏返し、アルミホイルをソーッとはがしても。ぺりぺり・・・ぺり・・・ぺり・・・・って。(くっついとるやないか)
★アルミホイルがなければそのままでもいけます。あると洗い物がほとんどなくなるので敷いただけです。
★私は98円の安いアルミホイルでやりましたが、クックパー的な商品のホイルを使えばくっつかなくて良さそう。
★味付けサバ缶を使えばしょうゆと砂糖無しでもできます。
★マヨネーズ嫌いなのよという方は、塩こしょう多めにしてそのままチーズを。
写真で見ると
(重なりまくりまくりすてぃー)
↑このまま裏返さずお皿に盛っても全然OKです。(結構くずれやすいしこのほうがいいかも。こんがり具合は見えへんけど)
ほか、ツナ缶を使ったオススメレシピをまとめました。
こっちにレシピまで書いたらめちゃくちゃ長くなったので、リンクにして材料の時点で作れそうなものだけ見に行けるようにしましたが、画面変わるの面倒だったらすみません!
◆給食の味!ツナそぼろ
おもな材料:ツナ缶、にんじん、玉ねぎ、しょうゆ、砂糖、チューブしょうが
(記事とレシピ⇒★★★)
◆レンジで1発!ジップロックでツナじゃが
おもな材料:ツナ缶、じゃがいも、玉ねぎ、しょうゆ、砂糖、みりん
(記事とレシピ⇒★★★)
◆包丁不要!レンジで1発!ツナとキャベツのスパゲッティ
おもな材料:ツナ缶、キャベツ、スパゲッティ、コンソメ、塩、しょうゆ、砂糖
(記事とレシピ⇒★★★)
◆ツナとキャベツのゴマドレ焼うどん
おもな材料:ツナ缶、キャベツ、冷凍うどん(ゆでうどんでも)、めんつゆ、ゴマドレッシング
(記事とレシピ⇒★★★)
◆ツナにんじんライス
おもな材料:ツナ缶、玉ねぎ、にんじん、ごはん、コンソメ、塩、しょうゆ、バター
(記事とレシピ⇒★★★)
◆こだわりのツナ丼2種
おもな材料:ツナ缶、玉ねぎ、ごはん、しょうゆ、みりん、チューブしょうが/マヨネーズ、めんつゆ
(記事とレシピ⇒★★★)
◆意外にごはんに合うにんじんとツナのサラダ
おもな材料:にんじん、ツナ、玉ねぎ、マヨネーズ、めんつゆ
(記事とレシピ⇒★★★)
◆そうめんチャンプルー
おもな材料:そうめん、にんじん、ツナ、長ネギ、卵、塩こしょう、砂糖、しょうゆ
(記事とレシピ⇒★★★)
以上です。
小さなものから大きなものまで。
ヤンマーディーゼルの提供でお送りしました。
(追記です。最初更新した時、画像の横に「この画像をシェア」っていう表示出てたんですけど、すみません。何やろあれ)
-----------------------------
ここまで読んでくださって本当にありがとうございます。
お手数ですが、最後に下のバナーをクリックして応援して頂けると嬉しいです。

レシピブログのランキングに参加しています。
------------------------------------
いい加減なブログですが、気軽にコメントして頂けたら嬉しいです。
コメントは承認制ですが、無人の野菜売り場のような、個人個人の秩序で、ずっといい雰囲気を保って頂いてるので、読んで嫌な気持ちになるものじゃなければ完全公開です。
他の方のコメントに対する御返事など、自由にして頂ければ嬉しいです。
質問はコメント欄内でほとんど答えますので、気長にゆるりとお待ち頂けたらありがたいです
Source: https://ameblo.jp/syunkon/entry-12403928117.html

0 notes
Text
Bakery Style Blueberry Scones Recipe
These Bakery Style Blueberry Scones are big, beautiful and so delicious! Fresh blueberries and a hint of lemon zest make these homemade blueberry scones bakery quality.
Blueberry Scones
These blueberry scones are so easy to make. Start by mixing a quick dough, very similar to biscuit dough. You will cut the cold butter into the flour mixture with a pastry cutter. Then create a well in the flour mixture and add the wet ingredients. Once the dough is prepared, turn it out onto a parchment paper lined baking sheet.
Gently pat into a 9 inch round, then use a sharp knife to cut scones into wedges. Do not separate.
Brush with heavy cream and sugar and bake until golden brown.
These blueberry scones bake up so golden brown and delicious!
Once completely cool, store tightly covered at room temperature.
Blueberry Scone Recipe
Bakery Style Blueberry Scone Recipe
Course: Breakfast
Keyword: Scone
Servings: 8
Ingredients
3 1/3 cup all-purpose flour
1/2 cup sugar plus 1 tablespoon
2 tablespoons baking powder
1 teaspoon kosher salt
zest from one lemon
6 tablespoons butter cut into pieces
1 cup heavy cream plus 1 tablespoon
2 eggs lightly beaten
1 teaspoon pure vanilla extract
1 cup fresh blueberries
Instructions
Preheat oven to 400 degrees and line a baking sheet with parchment paper.
In a large bowl, whisk together flour, sugar, baking powder, salt and lemon zest.
Use a pastry cutter to cut cold butter into flour mixture until breadcrumb texture is achieved.
In a small bowl, combine heavy cream, egg and vanilla extract. Whisk until well combined.
Create well in center of flour mixture and add cream mixture. Stir just until combined. Gently fold in blueberries.
Transfer dough to lined baking sheet and pat into a nine inch round shape. Cut into 8 equal pieces, do not separate. Brush with heavy cream and sprinkle with sugar. Bake until golden brown.
You may also like:
Fluffy Blueberry Scones
Sour Cream Blueberry Muffins
Pumpkin Waffle Recipe
5 Easy Dinner Ideas for Busy Weeknights
My five FAVORITE recipes for busy families!
Quick to make
Light on your budget
Easy to clean-up
and...most important...absolutely DELICIOUS
<![CDATA[/* Layout */ .ck_form /* divider image */ background: #fff url(data:image/gif;base64,R0lGODlhAQADAIABAMzMzP///yH/C1hNUCBEYXRhWE1QPD94cGFja2V0IGJlZ2luPSLvu78iIGlkPSJXNU0wTXBDZWhpSHpyZVN6TlRjemtjOWQiPz4gPHg6eG1wbWV0YSB4bWxuczp4PSJhZG9iZTpuczptZXRhLyIgeDp4bXB0az0iQWRvYmUgWE1QIENvcmUgNS41LWMwMTQgNzkuMTUxNDgxLCAyMDEzLzAzLzEzLTEyOjA5OjE1ICAgICAgICAiPiA8cmRmOlJERiB4bWxuczpyZGY9Imh0dHA6Ly93d3cudzMub3JnLzE5OTkvMDIvMjItcmRmLXN5bnRheC1ucyMiPiA8cmRmOkRlc2NyaXB0aW9uIHJkZjphYm91dD0iIiB4bWxuczp4bXA9Imh0dHA6Ly9ucy5hZG9iZS5jb20veGFwLzEuMC8iIHhtbG5zOnhtcE1NPSJodHRwOi8vbnMuYWRvYmUuY29tL3hhcC8xLjAvbW0vIiB4bWxuczpzdFJlZj0iaHR0cDovL25zLmFkb2JlLmNvbS94YXAvMS4wL3NUeXBlL1Jlc291cmNlUmVmIyIgeG1wOkNyZWF0b3JUb29sPSJBZG9iZSBQaG90b3Nob3AgQ0MgKE1hY2ludG9zaCkiIHhtcE1NOkluc3RhbmNlSUQ9InhtcC5paWQ6MUQ5NjM5RjgxQUVEMTFFNEJBQTdGNTQwMjc5MTZDOTciIHhtcE1NOkRvY3VtZW50SUQ9InhtcC5kaWQ6MUQ5NjM5RjkxQUVEMTFFNEJBQTdGNTQwMjc5MTZDOTciPiA8eG1wTU06RGVyaXZlZEZyb20gc3RSZWY6aW5zdGFuY2VJRD0ieG1wLmlpZDoxRDk2MzlGNjFBRUQxMUU0QkFBN0Y1NDAyNzkxNkM5NyIgc3RSZWY6ZG9jdW1lbnRJRD0ieG1wLmRpZDoxRDk2MzlGNzFBRUQxMUU0QkFBN0Y1NDAyNzkxNkM5NyIvPiA8L3JkZjpEZXNjcmlwdGlvbj4gPC9yZGY6UkRGPiA8L3g6eG1wbWV0YT4gPD94cGFja2V0IGVuZD0iciI/PgH//v38+/r5+Pf29fTz8vHw7+7t7Ovq6ejn5uXk4+Lh4N/e3dzb2tnY19bV1NPS0dDPzs3My8rJyMfGxcTDwsHAv769vLu6ubi3trW0s7KxsK+urayrqqmop6alpKOioaCfnp2cm5qZmJeWlZSTkpGQj46NjIuKiYiHhoWEg4KBgH9+fXx7enl4d3Z1dHNycXBvbm1sa2ppaGdmZWRjYmFgX15dXFtaWVhXVlVUU1JRUE9OTUxLSklIR0ZFRENCQUA/Pj08Ozo5ODc2NTQzMjEwLy4tLCsqKSgnJiUkIyIhIB8eHRwbGhkYFxYVFBMSERAPDg0MCwoJCAcGBQQDAgEAACH5BAEAAAEALAAAAAABAAMAAAICRFIAOw==) repeat-y center top; font-family: "Helvetica Neue", Helvetica, Arial, Verdana, sans-serif; line-height: 1.5em; overflow: hidden; color: #000000; font-size: 16px; border-top: solid 20px #3071b0; border-top-color: #3071b0; border-bottom: solid 10px #3d3d3d; border-bottom-color: #1d446a; -webkit-box-shadow: 0px 0px 5px rgba(0,0,0,.3); -moz-box-shadow: 0px 0px 5px rgba(0,0,0,.3); box-shadow: 0px 0px 5px rgba(0,0,0,.3); clear: both; margin: 20px 0px; .ck_form, .ck_form * -webkit-box-sizing: border-box; -moz-box-sizing: border-box; box-sizing: border-box; #ck_subscribe_form clear: both; /* Element Queries — uses JS */ .ck_form_content, .ck_form_fields width: 50%; float: left; padding: 5%; .ck_form.ck_horizontal .ck_form_content border-bottom: none; .ck_form.ck_vertical background: #fff; .ck_vertical .ck_form_content, .ck_vertical .ck_form_fields padding: 10%; width: 100%; float: none; .ck_vertical .ck_form_content border-bottom: 1px dotted #aaa; overflow: hidden; /* Trigger the vertical layout with media queries as well */ @media all and (max-width: 499px) .ck_form background: #fff; .ck_form_content, .ck_form_fields padding: 10%; width: 100%; float: none; .ck_form_content border-bottom: 1px dotted #aaa; /* Content */ .ck_form_content h3 margin: 0px 0px 15px; font-size: 24px; padding: 0px; .ck_form_content p font-size: 14px; .ck_image float: left; margin-right: 5px; /* Form fields */ .ck_errorArea display: none; #ck_success_msg padding: 10px 10px 0px; border: solid 1px #ddd; background: #eee; .ck_label font-size: 14px; font-weight: bold; .ck_form input[type="text"], .ck_form input[type="email"] font-size: 14px; padding: 10px 8px; width: 100%; border: 1px solid #d6d6d6; /* stroke */ -moz-border-radius: 4px; -webkit-border-radius: 4px; border-radius: 4px; /* border radius */ background-color: #f8f7f7; /* layer fill content */ margin-bottom: 5px; height: auto; .ck_form input[type="text"]:focus, .ck_form input[type="email"]:focus outline: none; border-color: #aaa; .ck_checkbox padding: 10px 0px 10px 20px; display: block; clear: both; .ck_checkbox input.optIn margin-left: -20px; margin-top: 0; .ck_form .ck_opt_in_prompt margin-left: 4px; .ck_form .ck_opt_in_prompt p display: inline; .ck_form .ck_subscribe_button width: 100%; color: #fff; margin: 10px 0px 0px; padding: 10px 0px; font-size: 18px; background: #0d6db8; -moz-border-radius: 4px; -webkit-border-radius: 4px; border-radius: 4px; /* border radius */ cursor: pointer; border: none; text-shadow: none; .ck_form .ck_guarantee color: #626262; font-size: 12px; text-align: center; padding: 5px 0px; display: block; .ck_form .ck_powered_by display: block; color: #aaa; .ck_form .ck_powered_by:hover display: block; color: #444; .ck_converted_content display: none; padding: 5%; background: #fff; /* v6 */ .ck_form_v6 #ck_success_msg padding: 0px 10px; @media all and (max-width: 403px) .ck_form_v6.ck_modal .ck_close_link top: 30px; @media all and (min-width: 404px) and (max-width: 499px) .ck_form_v6.ck_modal .ck_close_link top: 57px; .ck_powered_by display: none !important; ]]>

Source: https://www.number-2-pencil.com/bakery-style-blueberry-scones-recipe/
0 notes
Text
Nutella Grilled Cheese Recipe
Legal Notice
© 2018 Condé Nast. All rights reserved.
Use of and/or registration on any portion of this site constitutes acceptance of our User Agreement (updated 5/25/18) and Privacy Policy and Cookie Statement (updated 5/25/18).
Your California Privacy Rights
The material on this site may not be reproduced, distributed, transmitted, cached or otherwise used, except with the prior written permission of Condé Nast.
Ad Choices Source: https://www.epicurious.com/recipes/food/views/nutella-grilled-cheese
0 notes
Text
Zucchini-Aprikosen-Kuchen
Weit gefehlt, wie wir jetzt wissen! Auch wenn wir den ersten Kuchen in die Röhre geschoben haben, ist der Ofen nicht mehr ganz so jungfräulich. Es gab schon einige herzhafte Hefeteige. Gerade sind wir etwas süchtig nach Focaccia und mit dem Ofen ist es ein Kinderspiel den Teig, mit Hilfe der Gärfunktion, innerhalb kürzester Zeit in ein fluffiges Etwas zu verwandeln. Beim ersten Ausprobieren rief Yannic fast schon geschockt: „Susann, komm mal schnell her! Der ganze Ofen besteht aus Teig.“ Das war natürlich übertrieben aber doch sehr erstaunlich, was die perfekte Abstimmung von Wärme und Feuchtigkeit anrichten können. Und das ist nur eine tolle Funktion von vielen.
Auch Designklassiker findet man im Onlineshop von OTTO. Der geräumige Kühlschrank von SMEG** bietet ausreichend Platz für unser frisches Gartengemüse und, da wir leider keinen Keller haben, für Eingemachtes und Eingelegtes. In Berlin haben wir immer von einem Smeg Kühlschrank geträumt, aber leider nie den Platz dafür in unserer Mini Küche gehabt. Ihr könnt euch sicher vorstellen, wie sehr wir uns jetzt freuen, eine so tolle und große Küche zu haben.
Zum Verarbeiten von Teigen aller Art lieben wir unsere Kitchen Aid Küchenmaschine**. Egal ob es Hefeteige sind, die nach 10 Minuten Knetdauer eine unglaublich geschmeidige Konsistenz bekommen oder, wie bei unserem Rezept, luftige Kuchenteige. Im Bereich Kneten und Aufschlagen ist sie einfach ein wunderbarer und verlässlicher Küchenhelfer. Ebenfalls benutzen wir den Gemüseschneider Aufsatz für das Reiben oder Hobeln größerer Mengen Obst und Gemüse.
Da wären wir auch wieder bei unserem Zucchini-Aprikosen-Kuchen…

Source: http://kraut-kopf.de/recipe/zucchini-aprikosen-kuchen/
0 notes
Text
Chicken and Waffle Nuggets
August 6, 2018
This is my ��I drank way too much last night and now I want chicken and waffles for breakfast, but I don’t want to put any effort into making them” version of chicken and waffles.
The recipe is quite simple really. Just throw some chicken nuggets into a waffle iron, spoon waffle batter on top of them, cook until golden brown and then hit those bad boys with some syrup and powdered sugar!
I figured that a recipe for these wasn’t even necessary since they’re so basic, but then again there are also people out there searching for avocado toast recipes where the ingredients and recipe are literally right in the name so what the hell, I’m including it anyway even though that in keeping with the simpleness — and by “simpleness” what I really mean is “laziness” — of this dish I just used the waffle mix from a box where all you have to do is add water. If you’re looking for an actual waffle mix recipe check out my Popcorn Chicken in Edible Waffle Bowls.
Usually when I make these I use microwave chicken nuggets from the grocery store, but if you’re feeling especially lethargic like I was when I made the video below you can just order some Burger King chicken nuggets from Grubhub. You can’t beat their 10 nuggets for $1.69 deal! So, go out this Friday night, get wrecked, sleep in late the next morning and then wake up and make the laziest chicken and waffle recipe of all time! You’re welcome!
Chicken and Waffle Nuggets Recipe
Author: Nick @ DudeFoods.com
10 chicken nuggets
1½ cups waffle batter
Syrup
Powdered sugar
Heat up your waffle iron and add chicken nuggets.
Top each chicken nuggets with approximately 2 tablespoons of waffle batter.
Cook until golden brown.
Top with syrup and powdered sugar.
3.5.3229
Source: https://dudefoods.com/chicken-and-waffle-nuggets/
0 notes
Text
Roasted Strawberry Popsicles
I want to eat one of these Roasted Strawberry Pops right this second. I’m so excited to share this recipe with you because it’s from my dear friend Cassy’s new book, Fed & Fit: A 28 Day Food & Fitness Plan to Jump-Start Your Life with Over 175 Squeaky-Clean Paleo Recipes. This book is incredible. If I was starting Paleo for the first time this is definitely the book I’d grab. Not only do you get over 175 recipes, but you get a 28-day meal and fitness plan to go along with it! This book really has it all.
So if you know anything about me, you know when I get a new cookbook, I skip straight to the desserts. That’s exactly what I did with Cassy’s book because I wanted to see what dessert recipes she made squeaky clean, and these were the first to catch my eye! Then I texted Cassy and was like,
You have to let me share this recipe or I’ll die!
Okay so maybe I wasn’t that dramatic, but you get the idea. Aren’t you guys so lucky to have me on your side?! Anyway long story short, I’m absolutely in love with Cassy’s book. I know how hard she worked on it to make it absolutely perfect for you. The book also has a companion app which you can download to help you on your 28-day journey. How cool is that?!
So another super awesome aspect of Cassy’s book is not only does she have a 28-day meal plan, but she has workouts to accompany each day! I did this workout because it looked pretty simple, and who doesn’t like a simple workout?! I should have known. It kicked my a$$. Like royally. Think of any scene in Rocky and that was me, but not on the winning end. Well #winning because my butt looks fabulous now, but man, it was a good one. Those sprints get you!
This is definitely a workout you could do in ANY gym. I did it in my work gym on a treadmill. I think I ran to .12 on treadmill. I know 400m is .25 (a quarter of a mile) so I divided .25 in half to get .12. I would sprint as fast as I could, usually at about a 10, then I’d stop the treadmill and walk it down as my rest, and then start all over again. I also did static squat holds during the 10 seconds rest to up the challenge…because that booty though. Either way, you’re gonna get a great workout!!!
Workout Warm up, mobility stretches A. 6 x 200m sprints (sprint for 200m, walk back for rest), then
B. 20 seconds on, 10 seconds rest for 4 minutes (Tabata): air squats [0:00-4:00] push-ups [4:00-8:00] sit-ups [8:00-12:00]
So I leave for the Caribbean today! I’m so excited I can barely stay in my skin. I haven’t had a drop of alcohol in 6 weeks. Can you believe that?! It may be a new world record for me. Since the Olympics are going on and everything, I wanted to participate. The crazy thing is…I feel absolutely incredible. Like my sleep is so on point, I never wake up wanting to throw my alarm out the window anymore and I wake up feeling totally rested and ready for the day. Not dragging ass like I normally do. My workouts are at a whole new level, and it’s been easier to stay on track with my meal plan because I’m not all drunk ordering crappy food. My mental clarity is another unexpected benefit that I’ve noticed from not drinking. It kind of makes me not want to drink anymore. This is so out of character for me and I don’t know that I’d stick to it on my vacation, that I leave for today, did I mention that already?
So I came up with a compromise for myself. We actually have a private yacht taking myself and 6 other friends island hopping through St. Vincent and the Grenadines. We have a personal chef on board to make all of our meals and cocktails. How Beyonce and JayZ am I right now?! I know! So again if you know anything about me at all, I’m a bit of an alcohol snob. I like the top shelf stuff. Give me the Ketel One, Hendricks, Don Julio, Rombauer Chardonnay, David Bruce Pinot Noir, etc. I treat alcohol the same as food, I want the good stuff! So if they are serving Smirnoff, Jose Cuervo, and Barefoot wine, then color me uninterested and I won’t be drinking. If they have the good stuff, then I will most likely be drinking. #totalsnob So I guess we’ll leave it up to fate! I’ll report back! Either way when I get back from vacay, I’m back on the wagon. I feel too amazing not to be.
So enough about me! Go get Cassy’s new book! It’s a must have! It’s also where you can find the other 4 roasted fruit flavors you see pictured here as well, like Blueberry, Raspberry, Cherry, and Grapefruit! I’m also hoping to meet up with Cassy for some of her tour dates, I’ll keep you posted on where we’ll be at. Until then, make these and I’ll Snapchat you from the Caribbean!
August 11, 2016 | 2 Comments
You may also like
Tags: Ice Cream, Strawberry
Source: http://cleaneatingwithadirtymind.com/2016/08/11/roasted-strawberry-popsicles/
0 notes
Text
Herb Parmesan Popovers

Hello friends and kind visitors! I'm taking a break from sweets today to share with you the best savory popover recipe I've ever tasted. I make these rolls almost weekly. All of my previous attempts at popovers have been lackluster at best, either too bland or not enough rise. I was beginning to think I just didn't like popovers, but this recipe was a real game-changer!

The batter is simple to mix, but you will need to plan ahead because a resting period of one hour is required before baking. I only have one popover pan with 6 cavities, which is not enough to hold all of the popover batter this recipe yields. I found that two jumbo muffin tins (6 cavities each) are perfectly acceptable replacements, and I almost prefer them to the popover pan.
Before baking, the batter is generously topped with a Parmesan, garlic, and dried Italian herb mixture. As you divide the cheese mixture among the batter in the tins, you'll probably think, 'wow, this is far too much topping!' - but trust me, it's not. All that cheesy goodness is essential to forming the crusty, crunchy cap that develops on top of each roll.


The batter goes in quite flat, and magically inflates in the oven. The rolls become huge, and I can best describe the size and shape of a baked roll as something akin to a small terracotta flower pot!


These are good on their own, but a pat of salted butter in the center of a warm popover is especially good. I also recommend serving them with marinara sauce, or as a side dish on spaghetti night. We also like dipping them in a shallow dish of seasoned olive oil and balsamic vinegar, just as you would a loaf of good Italian bread.
[click to print]
Herb Parmesan Popovers Yields about 12
If you don't have popover pans, use jumbo muffin tins instead. Using the muffin pans will yield 9 rolls instead of a dozen. Don't open the oven as these bake or they may deflate and never reach their full 'pop'!
3 1/2 cups (840 ml) whole milk 4 cups (618g/21.8 oz.) all-purpose flour 1 1/2 teaspoons fine grain salt 1 teaspoon baking powder 6 eggs, at room temperature 1 cup (85g) grated parmesan cheese 3 tablespoons dried mixed Italian herb seasoning (I use McCormick with Flaxseed) 1 teaspoon minced garlic 4 tablespoons of butter, cold
Place the milk in a saucepan and heat until just warm, about 110°F. Remove from heat.
In a large bowl, sift together the flour, salt and baking powder.
Place the eggs in the bowl of an electric mixer fitted with the whip attachment, and beat on medium-low speed until pale and foamy, 3-5 minutes. Pour in the warm milk. Add the flour mixture in 3-4 additions, beating on low speed until just incorporated. Increase speed to medium and beat 2 minutes.
Cover the mixing bowl with a dish towel and let rest, unrefrigerated, for one hour.
Mix the cheese, herbs, and garlic in a small bowl.
Preheat the oven to 450°F.
Grease the cavities of 12 popover cups (2 pans), or 9 cavities of jumbo muffin tins. Place the pans on a large baking sheet.
Cut each tablespoon of butter into four pieces, so that you have 12 small square pieces of butter.
Fill the prepared pans with the popover batter within 1/8 inch of the top of each cup. Generously divide the cheese-herb mixture among the filled cups. Place one square of butter (1/4 tablespoon) in the centers of each cup.
Bake for 15 minutes at 450°F; reduce the oven heat to 375°F and bake for 30 minutes more. When done, the popovers should be well-inflated, and have a golden brown exterior with a crisp-looking top.
Serve warm with salted butter, or a side of marinara, or with seasoned olive oil and balsamic vinegar for dipping (or all three!).
link Herb Parmesan Popovers
By Heather Baird Published: Monday, June 25, 2018 Monday, June 25, 2018Herb Parmesan Popovers Recipe

Source: https://www.sprinklebakes.com/2018/06/herb-parmesan-popovers.html
0 notes
Text
Cat paw cups from Starbucks China spark customer fights
Customers were fighting like cats and dogs to get their paws on some adorable cat-paw shaped cups from Starbucks in China recently. It sounds like we’re kitten around, but no, this story is fur real. And once you see how cute the cups are, you might understand.
The Healthiest and Unhealthiest Starbucks Drinks
Last week, the coffee chain released a limited-edition double-walled tumbler in China. The purr-fect part about the cup is that its interior, where the liquid is poured, is shaped like a cat’s paw, making for a really paw-some look.
The cups went on sale Feb. 26 priced at 199 yuan apiece ($30), CNN reports. But they were in such high demand that they sparked, uh, catfights among customers – and there’s even video of one of the squabbles.
“We launch limited-edition merchandise each season and pay close attention to the preferences within each market when we design and create Starbucks merchandise,” a representative for Starbucks said in an email to The Daily Meal. “On February 26th, we launched the Cherry Blossom merchandise collection in China, which included the Cat Paw Cup. The cup’s popularity exceeded our expectations and is now no longer available across all Starbucks stores (or online).���
According to CNN, Starbucks China later sold an additional 3,000 cups online, and they sold out “in under one second.” Is that even possible? Meowza! You may not be able to get your paws on the cat cup, but you can still learn how to order Starbucks secret menu items like a pro.
Source: https://www.thedailymeal.com/starbucks-china-cat-paw-cups/030419
0 notes