
Don't wanna be here? Send us removal request.
Statistics
We looked inside some of the posts by jackwattersdt3gameuiux and here's what we found interesting.
Average Info
Notes Per Post
0
Likes Per Post
0
Reblog Per Post
0
Reply Per Post
0
Time Between Posts
2 days
Number of Posts By Type
Text
17
Last Seen Tumblr Blogs


Fun Fact
When “GIF” was named word of the year in 2012, Oxford Dictionaries U.S.A. credited Tumblr for pushing the word.
Text
FINAL REFLECTIONS
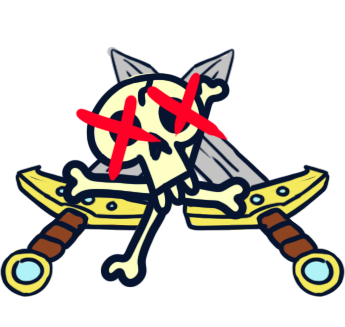
Project 1: UI character select screen.
I really enjoyed this project, and I learnt a lot of interesting tools such as bevel and extrude, half tones, and align, all of which I had never really used before this. I feel good about my final product, I feel like it achieves the sort of style I was aiming for, and the kind of balance between silly violence, and silly cuteness.
Project 2: Clicker Game
Well, there were a whole lot of ups and downs with this project. I felt like I achieved what I was trying to go for, but not perfectly. There's a few things that bother me. Firstly, some of the animations being linked limited some of my plans, there were multiple road blocks with the program just not working at some points, and there are some decisions I regret not making. Well, more specifically one decision I regret not making. I regret not showing context after a level is completed. I thought of this like two days ago and was like "shit, I should've done that". What I mean by context is that each page shows the knight presenting the part of the creature they collected to the king, the king eats it, etc. But you never see the monster dead at the end of the level, or the knight collecting the part of the monster. The current page system felt a little disconnected, but I could never put my finger on why, until two days before hand in of course. Not enough time to implement that feature, but next time I do a comic/page based project, I'm definitely keeping that in mind. But keep in mind I did everything I wanted to (outside of what I just mentioned), and even showed my problem solving abilities with the loading screen, and there was a whole lot I thought I probably couldn't of gotten finished that I did in the end, like colouring all the pages. I also feel like despite the limitations my game still feels quite complete, especially for what we're given. I managed to take inspiration from medieval elements whilst not completely copying the style/designs (apart from the bat) I used as inspiration. It feels like I made it, and only I could've made it, and I'm proud of that. FINAL REFLECTION:
Overall the DT3 game design course was quite fun, but also not really my thing. I much prefer making posters and the sort to doing all this work for games, so I'm not sure if I'm going to continue on with gam design next year. I feel satisfied with my performance here, but not entirely.
0 notes
Text
The Colouring of the Pages


Turns out in the end I did manage to colour the pages. I went for this blue and red colour scheme, where the backgrounds are blue to contrast against the characters' red colour schemes to make the characters pop and be instantly recognizable. It's important to note though that I made a mistake, one I only realised after completing these coloured pages for the first time:


I forgot to colour the face plat to a lighter gray than the knights armour. Two pages above as an example of this. So I had to go back and adjust each coloured page so it matched the buttons.
0 notes
Text
The animation process
Level Transitions:
All level transitions are pretty much the same in terms of animations, so I'll show off the toLevel2 transition here as it's the most advanced.

This is how the screen looks before the animation goes in. The pages placed on the side out of the way from the screen.
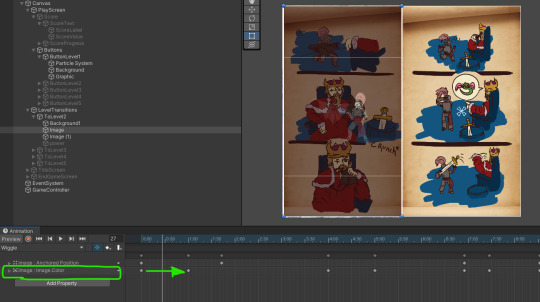
Then once the animation activates the first page is put in front of the screen. I have it fade in by using the colour property, moving it's "a" colour (aka transparency) from 0 to 1. Then I have it stay visible for about 5 seconds for the person to observe, then the next page slides in using the anchored pivot property.

Then it lies there for another 5 seconds.

before both pages fade using the same colour "a" technique, 1 to 0.

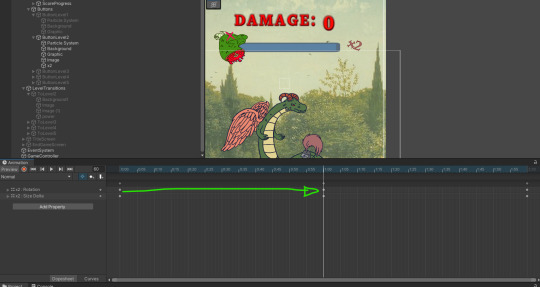
After that page fades the power text comes out. It lays dormant until it's activated using the is active property, turning it on, then I make it larger over time using the size delta property. It'll be stretched out as it gets bigger, but will then stretch horizontally back to a normal looking size. This is to give it a bouncy feeling.

It then fades out using the colour "a" method I used before. Then the animation ends.
Multiplier Animation:
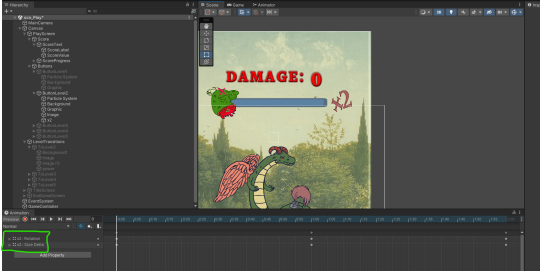
The multiplier animations use the rotation and size delta to move the graphic side to side while changing size.

(I paid for tumblr premium just to upload more photos btw). As you can see here the thing changes size and rotation. This goes for each an every multiplier, except the animation gets shorter over time so it goes much quicker on later levels.
I tried messing around in the animator to have the animation move independently of the button, I probably would've had to make a new animator for that, and I didn't have time for it, so unfortunately the animation stops moving when you press, and then starts moving again when unpressed.
Intro Animation:
my intro animation is composed of two animators and multiple screens. The first animation is the swoop in animation, which takes ages to activate because it's linked to the end screen animation, and the end screen animation is quite long. To band aid this I added a loading screen animation composed of the loading assets repeating over and over until the animation is over.
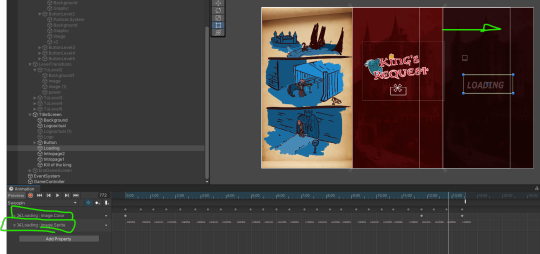
Here you can see the looping loading animation which then fades using the a colour 1 to 0 method I've used in the level transitions. After that the title screen swoops in.


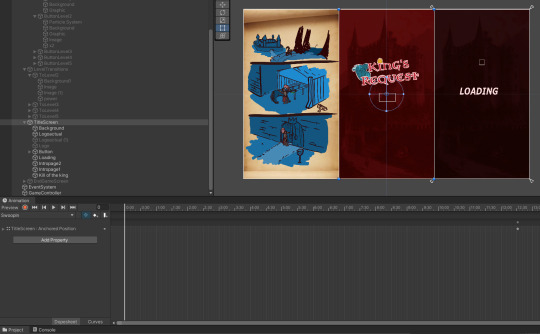
The swoop out animation is quite simple as well. It is literally just the title screen moving it's anchored position to reveal the pages, which function the same way the level transition pages do. Then the kill for the king text comes up, which basically functions the same as the power text.
End screen:

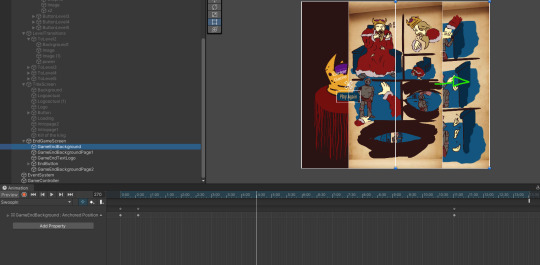
Basically another level transition just without the fade, so even simpler. Just the pages changing anchored positions. But, the animation itself is 13 seconds long in total, giving enough time for people to actually read it.
0 notes
Text
UI Part 3
Level 3 (continued):

This page slides in after completing the level, it shows the knight coming back with sushi implied to be the made from the merman. As you can see te knight looks significantly more worn out here with cracks in the armor starting to show, just like in the button itself. This is some thematic elevation, it means the knight is being pushed further and further out of their limits and wants to escape this situation, hence why they start to run from the king whilst he's distracted, but ultimately fails. The sushi bit is a comedic elevation, and will catch some people off-guard (since its strange to see sushi in a medieval setting).

Again we get the same weapon upgrade text, this time the power text is larger and more vivid, the red mist behind the text is more intense too. These both elevate the transition, making it feel bigger than the previous.
Level 4:


This time the comedic elements are arriving in the button design itself. The elevation here is the giant mallet and the particle effects that reference cartoon confuse effects.


These particles effects are an elevation in the way of sheer numbers, there's four of them this time.
The background also elevates the intensity. I usually add a light sheen to my backgrounds to have my characters pop out over the background, I've done the same thing here except I've also tinted the layer red, which is a much more intense colour than the previous yellow tint. The damage veins have also increased in size, and have a 2 frame animation (which you can see in my backgrounds section).

The multiplier is both faster, more vivid, and larger than the previous level's multiplier, further building intensity.

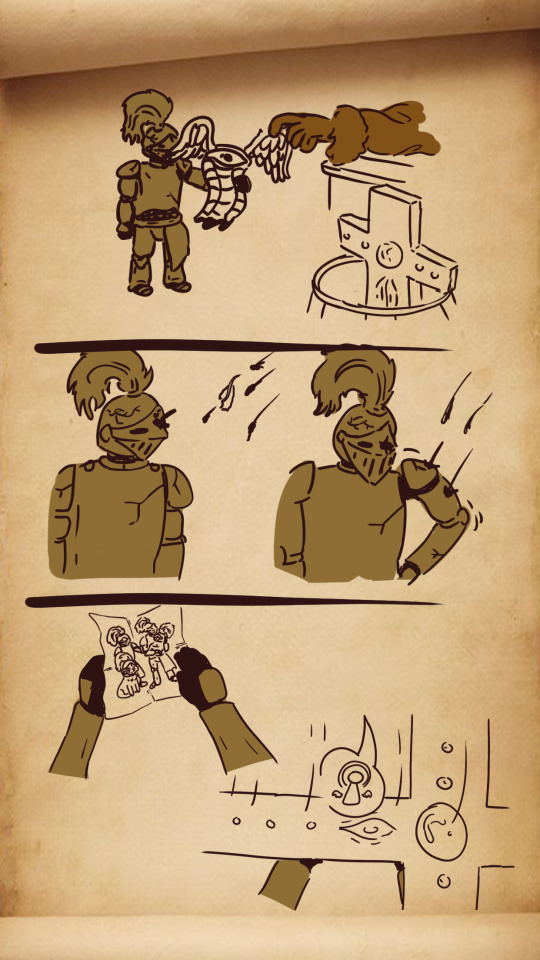
Again, the same slide transition to this page here. This page shows the knight as being more tired and having more cracks in their armor. And for comedic effect, there's a photo of their family. Unfortunately it quite small here as to fit everything else, but the picture depicts their knight family, the couple dressed in knight armor, the baby wearing a knight helmet, and the pet also wearing a knight helmet. It's some comedic elevation I suppose, just to keep people's attention. Also keeping peoples attention is this cross blaster, but they don't know what it does yet, so hopefully setting it will stoke some excitement as to see what it does.

The final power up text. It's at it's largest and most vivid/intense here as to introduce the final level, which is generally just off the wall insanity anyway. I've also added a white mist inside the red as to not completely over take the red text as they're both of the same sort of tone and colour.
Level 5:
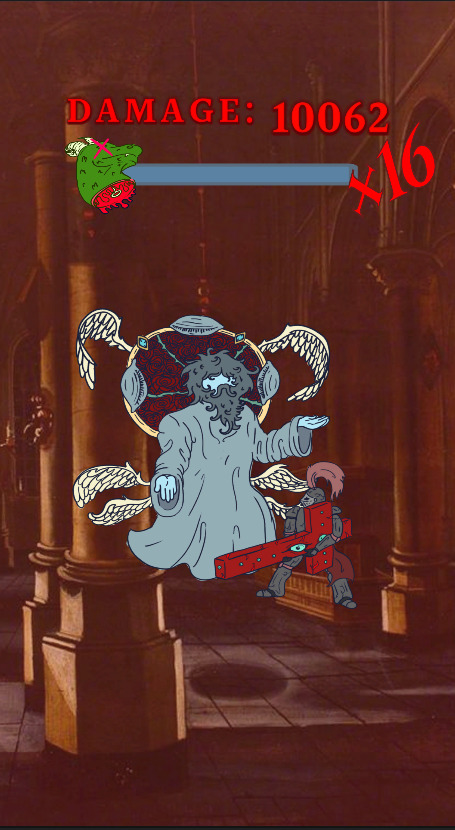

The final level is a total step up from all the previous levels. I wanted the final level to be completely and utterly insane to really make it feel like the last level. The number you have to achieve is massive, you have to achieve 250,000 damage from 10,000, the flashing background animation, the 4 frame vein animation that really ups the insanity visually, the large golden particle effects that fly all over the place, and the red castle background. All that along with the button itself having the most interesting weapon out of all the levels, and the knight looking more disheveled than ever, it all adds up to a crazy final level.

This is the particle effect. It's golden blood. I feel like gold is a very appropriate colour to use here for a few reasons. Gold feels very final, it's always had that quality (gold medals, gold coins, gold tiers, etc.). The gold contrasts well with the button itself with the angel being made of blues primarily, but also light yellows, it looks pleasing. Finally, the use of gold blood fits the thematic element of an angel, gold is a very holy colour.

This time the multiplier is at it's most vibrant, manic, and largest among all the other multipliers, which makes sense, this is the final level.


These pages slide in, though you kinda see the level de-load before they slide in, I don't really know how I change that, but it's ok. The pages here display the king's comeuppance. The first page displays the knight literally starting to fall apart from all this work he's having to do for the king. The second page shows the king choking on his food, and the knight decides to leave him for dead. This shuts off the narrative and theme of the story, the theme of overworking somebody, and how that not a good thing actually. Also, killing is bad, that too. But yeah, it just ends off the whole thing.
The End Page:

The end page is quite simple. It just sort of simplistically gives you the play again button, and image of the crown with blood streaks below it, and the score bar.

The play again button is pretty much a rehash of the play button from the title screen, nothing much to gush over, but it serves it's purpose.
0 notes
Text
UI Part 2
Level 1:
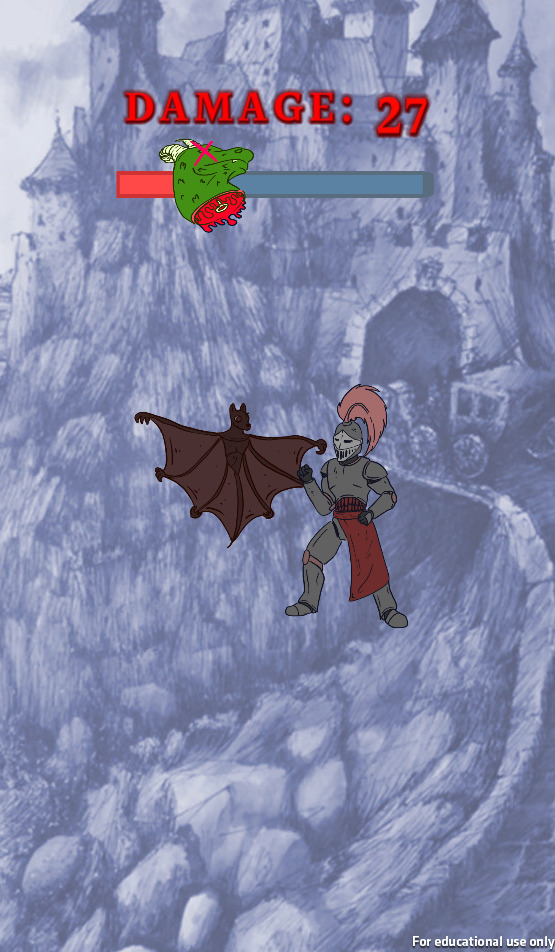

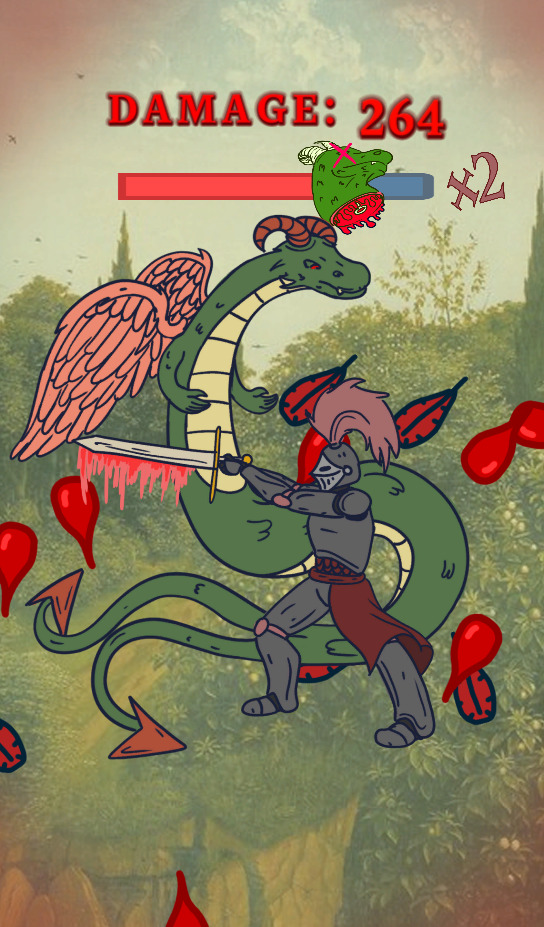
This screen consists of both constant elements which appear across all screens, but also has it's own scene, colour pallet, particles, and level of intensity. The colour pallet is dominated by this calm cool blue background which is contrasted by the warmth of the button, and the vividness of the score bar. Also, when the button is pressed, these blood particles come out and the corners of the screen lightly turn red, this clearly and readably indicates that damage has been delt. When the bat is hit, these blood particles fly out. They fly out in little numbers, and aren't very big. These particles will get more intense as the game progresses as to play into the rising intensity. Sound wise, I chose a punch sound, and mixed it with a fruit smashing sound to get the most satisfying punch sound I could.

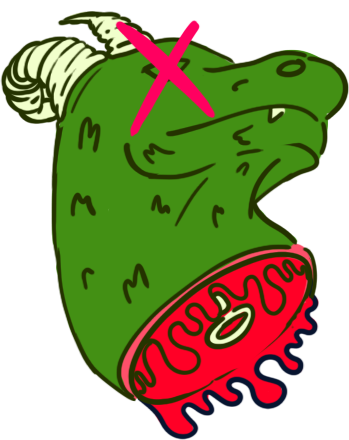
This right here is my score bar. It doesn't really change that much between levels outside of displaying different multipliers of increasing intensity. This first level doesn't have a multiplier because it doesn't need one. The fundimental design of the score bar is quite simple, its a red bar which moves across a blue bar (which becomes more visible in later levels as it has a similar value to the background here (I probably should've made that darker in retrospect) and a bar that's a decapitated dragon head (indicating that this bar is related to some kind of damage/killing ammount). The text displaying the damage is a font that acts as a between for the Vendana font and the Newcomen font I'm using. It's complex, and slightly stylised to look old style, but it's much more readable than the Newcomen font, and contrasts with both Vendana and Newcomen, making it a good middle ground for displaying the damage text in a unique way. I felt I used Vendana too many times, so for the damage text I made sure to use something different, but still readable. The font is Halanet by the way.

These above icons were the original ones I was going to use instead of the dragon, but no matter how many iterations of them I tried, it never quite worked out for me. They just looked too complex and too thin.
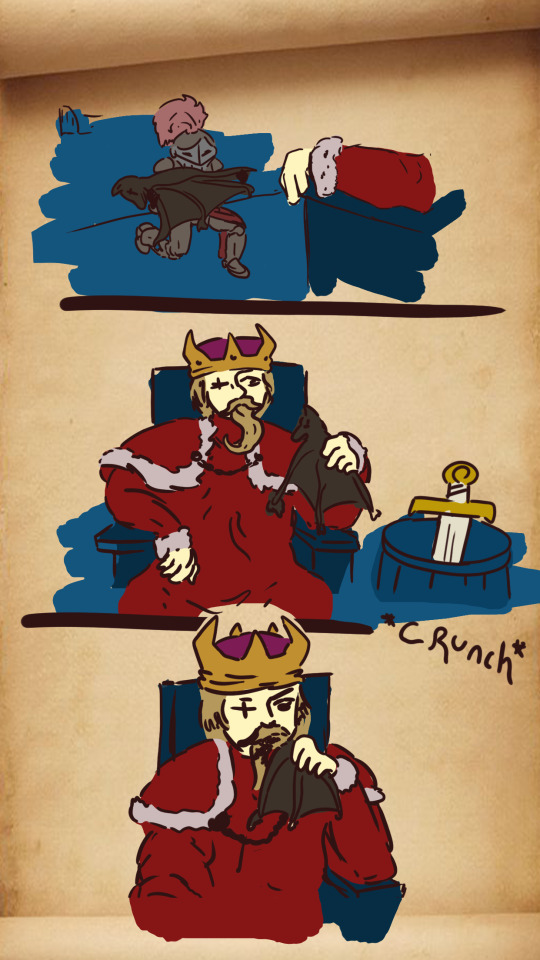

Once the bat is defeated, the transition will activate. It will show these pages of the knight presenting the bat to the king, and the king eating the bat. The next weapon is introduced in the barrel next to the king, and is thrown to the knight as the king commands them to kill the next creature, a dragon. Then the pages fade revealing the next level screen.

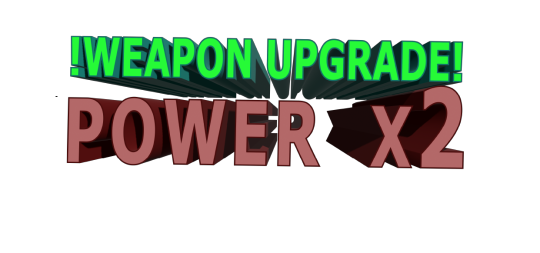
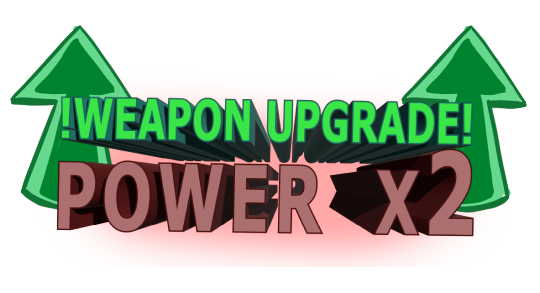
Just as the pages fade this text burst out and stretches into shape. This weapon upgrade text is important as it make it clear there is increased power with new weapons. Also, the colours I chose both contrast each other, red and green, but the reason why the text is a dim red here is because each sequential POWER X(insert number) gets larger and more vibrant with each level, playing into the idea of increasing intensity.
As you can see there were multiple iterations of the logo. Initially I went for something with really unfitting and obnoxious colours, then I went for the text I currently have now, but it didn't feel impactful enough. Then I added some red behind it and some arrows pointing up to further communicate the idea of an upgrade. Level 2:

The second level introduces two major ideas, hopefully capturing the attention and further engaging the player into the game. These two new elements are the double particles, and the multiplier. The screen here displays a more earthy colour pallet to compliment the earth tones of the button. I've made sure to add a light sheen over the background layer as the background was too close in tone to the button making it so the button started to kind of fade into the background a bit. It still sort of happens, but to a much lesser extent. The button itself has increased in size, further adding to that elevation element.


The particles I chose were originally purple blood and red feathers. But after I designed the severed dragon head and how that basically became the symbol of my game I changed the blood to a red to match. It also means that the purple blood for the merman doesn't feel reused from the dragon level. The emission here is much more intense than the previous level, further pushing that idea of elevation.
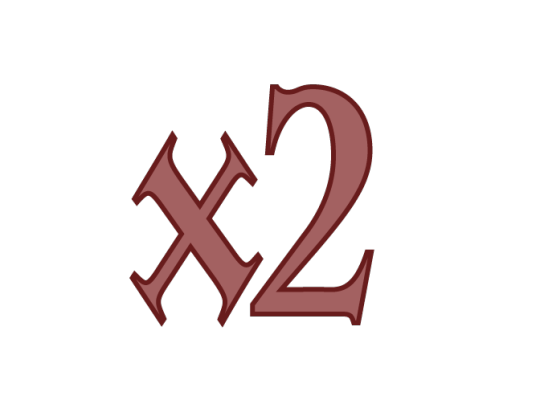
This x2 multiplier UI looks like something that could've been pumped out in a mater of seconds. Not entirely true. I had to make sure the size different between the x and the 2 was right so they didn't overlap with each other as I reduced the between text space to closely relate the two characters. But, this x2 multiplier also represents a major flaw in the way the animator was set up that I couldn't find a way around. I have the x2 text animated so that it rotates from side to side whilst also shrinking and growing in size, this sort of draws attention to it as it's colours at this level aren't awfully stand out (because they increase in vividness as the levels progress). But, since the animation is tied to the normal animator function, which is derived from the any state function, means that if the state changes to pressed the animation stops, then continues after the button is no longer pressed. I want the animation to continue independently of the button being pressed, but I couldn't find a way around that unfortunately. The multipliers placement next to the bar relates it to the bar, meaning there's x2 damage.

This time there's only one page. This was mainly to save on time. The knight brings the severed head to the king, who then takes the head and squeezes dragon blood into his #1 king mug, then hands the knight a spear and commands for the death of a merman. Here there's a slight elevation in comedic effect, this being the gag that the king both has a mug with #1 king on it, and that he squeezes the blood into it.
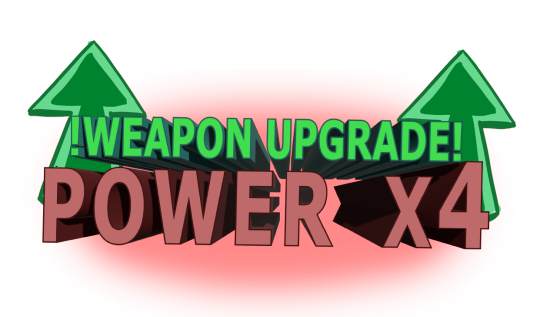
The power x4 text is both larger and brighter, so is the red mist cloud behind it, playing into the increased level of intensity.
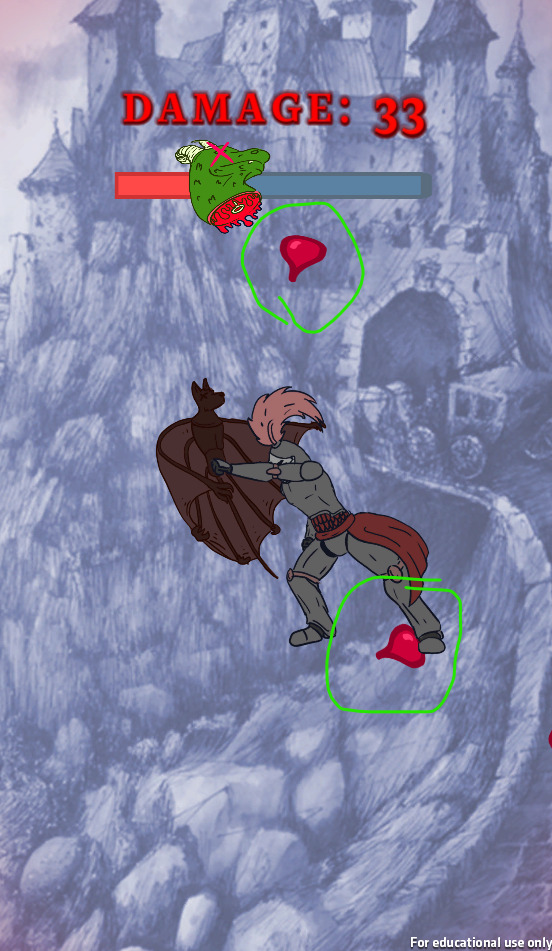
Level 3:


The third level continues the trend of building upon the previous level with multiple elevations. The hit animation now makes the screen turn even redder and now with red veins to further emphasize the pain/damage dealt.
The background here does kind of blend with the character sprite of the merman, but I did put a light sheen over it to reduce it's affect. The background here is an old medieval map, iconic for their depictions of sea creatures, thematically supporting the scene. This time the particles are singular, there's no reason for using double here. But this time they're just purple blood drops. I didn't quite reuse the same colour as the old dragon blood sprite, it's slightly lighter here.

The emission here is a similar amount to the previous level, but the particles are slightly larger.
The multiplier now moves faster and is larger than the previous level's multiplier. This is to increase the intensity of the game with further elevation.
0 notes
Text
Pages/Page Developements
Sketches:

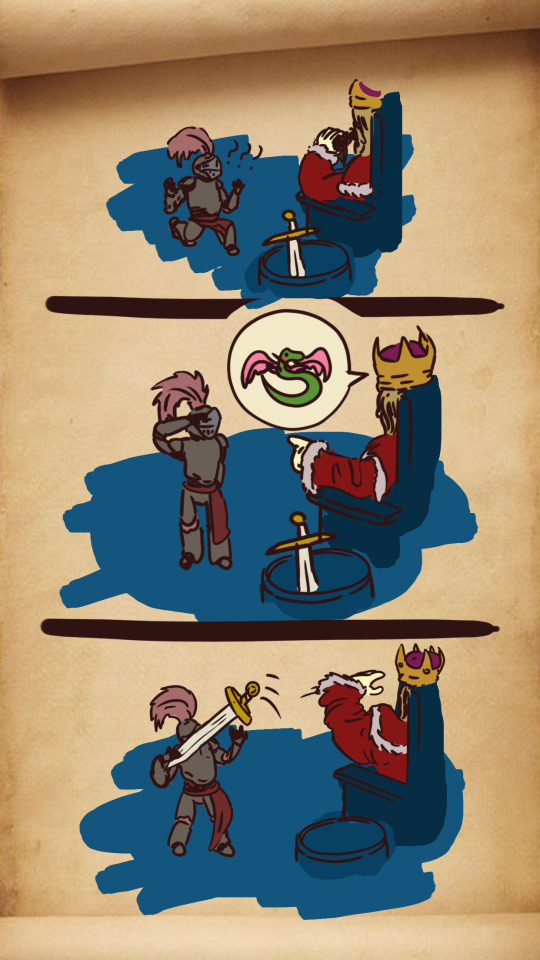
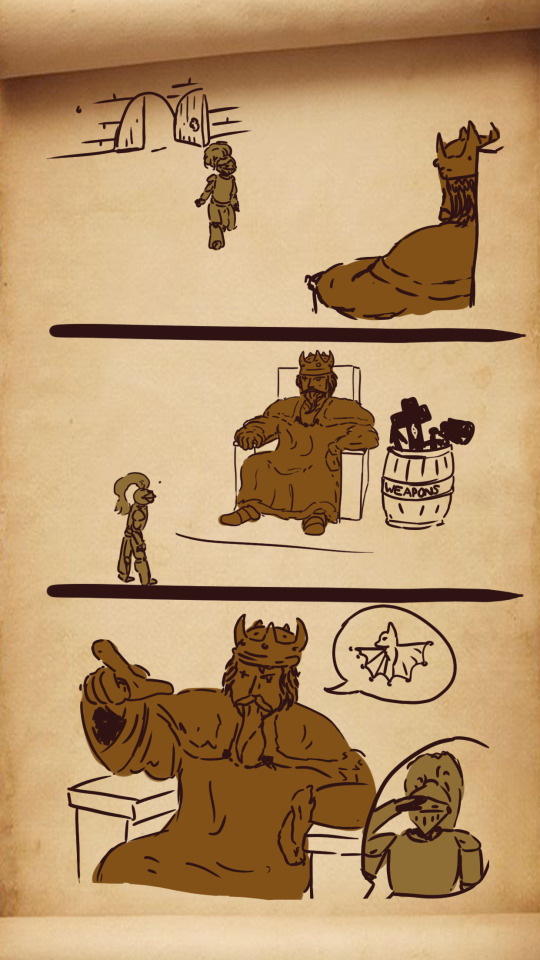
This first page I wanted to really introduce the castle with a wide shot, then zoom in on the knight on their horse. Main cause establishing the location of where the king is first gives some good context to all the other pages which only take place within the king's chambers. It makes the world feel less isolated.

The second page introduces the king, the main antagonist. Hence why he's so massive, he himself looks like a monster, and that's what I wanted. He looks like a guy who would just eat the head off of a bat. I've also made sure to establish the 180 degree rule to keep continuity. The king will always to the right, and the knight to the left.

The third page appears after the knight defeats the bat. Again, keeping continuity here with the 180 degree rule.

This level transition will most certainly be the only one with two pages, it's a little too much of a workload, but I want to really introduce the idea that the king is eating these creatures here, just to hammer that in, and that the knight is surprised by this. The speach bubbles acts to keep the game mainly visual, rather than using text to specifically describe exactly what's going on, which would mean keeping the pages on screen for an extended amount of time. I want the transitions to be snappy.

This level I wanted to introduce some split screen panels, but I think I might be cramming too much information into a small space since I want this to just be one page, so in the final design I might just make it smaller.


This one is currently two pages, but I might have to make it one for times sake. The page's contents are much more comedic, I want to keep the game light. Not entirely serious.


Again, I'll more than likely have to smash this all into one page. I've also made the sketch here more detailed as to make it easier for myself when I eventually have to ink it up in photoshop.


This ending will be a two page transition, the more pages means a more impactful ending to tell. This one has the king choking out on the angel wing, it sort of has a different lay out from the rest of the panels to make it stand out as both a sequence and a final page.


^ Here's all the pages full illustrated in photoshop.
A couple of reasons why it looks the way it does:
I don't think I have enough time to colour every page, but when I initially saw the first pages I wasn't too happy with this visual communication.


^ they looked like this, here's a few examples. The problem here is that while the pages are readable, they aren't really sectioned off well, and characters aren't really highlighted in the scene too well. So, the problem of readability arises. It'll take a long time to take in these pages without proper indicators of where characters are in the scene, and what part of the scene is being displayed. So I just went in and coloured the characters and added slashes to section off the scenes and they look immediately more readable.

The background is a scroll page I found on the internet, I felt like it'd be appropriate to have a scroll page, but if this were like a proper, full on game project, I would've animate the scroll opening upon every transition activation.
0 notes
Text
UI Part 1
TITLE SCREEN:


These are all the assets I've created to put together an interesting and engaging title screen that both presents interest in visual flare and readability. My colour pallet here consists of reds and blues, two contrasting colours, but also some golden yellows to contrast with the blues to increase visibility of the play text upon the dark blue which it lies upon.


A problem I encountered when creating animations for the titlescreen is that it's swoopin animator is the same as the end screen's swoopin animator. Meaning whatever the length of my endscreen is, the same will be for my title screen swoopin. That proposes a very interesting problem where my titlescreen wont appear for approximately 12 seconds because of my endscreen animation's length as it concludes the story told throughout the game. Suddenly I have all this empty space, and I know I won't get marked down for it because it's something I can't control, but I still want to find a way to mask it. So I did. I added these loading screen animations to it. It keeps the audience engaged, telling them the game is loading which will make them wait with the knowledge something is coming, rather than waiting on an empty screen. If it were up to me the game would immediately swing in, but that's something I can't control. I chose a nice light pink colour so it starkly contrasts with the tone of the background as to make it visible, but not the colour as it shouldn't completely take over the attention of the viewer, and it looks more pleasing this way. The font I used was Verdana, a very practicle font I used throughout lots of my UI elements. Consistency is key.

The dark blue button contrasts, but doesn't completely overtake the background (being similar in tone) which means that the play button will be noticed after the title logo whilst still being immediately visible with the contrasting gold text. The font I used was the simple and plane Verdana, it contrasts well with the logo font, and should arguably be the more readable of the two, while the logo should be the more stylized.

The title logo was originally going to be without the dragon head. I thought it looked really uninteresting outside of the crown i dot. So I added the damage meter bar to the logo, recoloured it to fit the colour scheme and to give more context. If you read the name king's request alone, you might wonder what the king is requesting. Since I have the severed dragon head there, the user can assume that the king has requested at the very least the death of monsters. The brightness of the dragon head also plays into the design hierarchy, you notice the logo more because the dragon head actively contrasts against the red background, then since it relates to the play button in colour, it stays consistent to the design of the UI. This font I used is called Newcomen. It's probably the only medieval styled font that's also readable, I still don't really like the "t" shape, but the rest works thematically. And, in all honesty, I think the point of a logo is to communicate thematic, and this font is perfect for that.


When you hit the play button the screen will slide to the side revealing the first page (left), then the second page (right). Both pages focus on two different characters. First introducing the knight, where they arrive at the kingdom, then the second page introducing and focusing on the king, where commands the knight to kill the bat creature (I talk about page design in the page development sections). That page then fades to reveal the first stage and this text:

Which sort of pops out and fades, informing the player that you have to kill for the king. This text is important in introducing two things, 1. You are killing these creatures for the king, 2. 3d text will appear after every transition. I chose this bright green so it stands out.
0 notes
Text
Backgrounds
Title Screen:

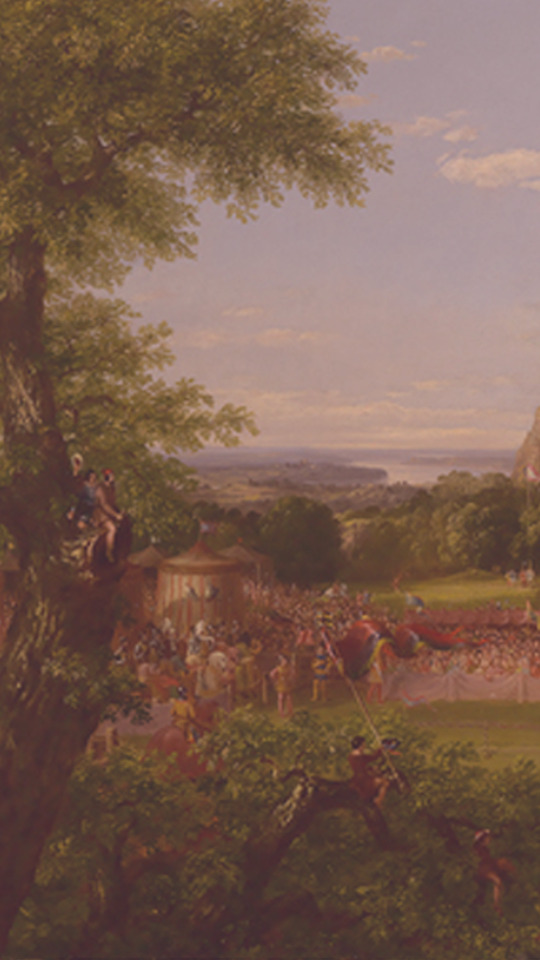
The title screen level is this medieval painting I found, I recoloured it to be red. This works for the title screen as just sort of a bit of filler. It looks nice and enhances the UI elements mainly.
Lvl1:


Here I've got another medieval castle art work, this time it's blue. I feel like transitioning over the levels so that the backgrounds appear as more red and intense in later levels, but much lighter in earlier levels will play into the whole elevation thing.
Lvl2:


This level two background is much warmer than the previous, and the damage frame is much redder in the corners. This ups the intensity from the previous level.
Lvl3
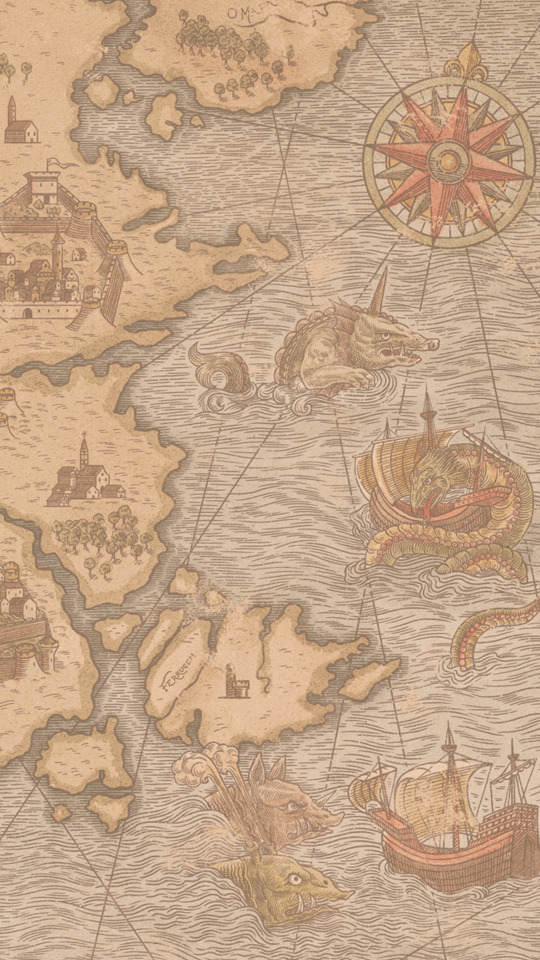

This time I wanted the background to thematically play into the level, so I set it as this map with a slight red tint. The red tint is supposed to elevate the intensity. The map is thematically relevant to the button, which is a sea monster, and lots of the medieval maps have sea monsters displayed. The damage frame elevates from the previous level by being both more intensely red and introducing the idea of veins to really bring out that visceral damaged feeling.
Lvl4


This background is another medieval painting, this time with a more intense red tint to create a heightened sense of danger. This time I've animated the hit frames so that the veins look like they grow when you hit the lionman monk. It looks quite nice and provides some elevation with some visual flare. The red mist in the corners increase in intensity here too.
Lvl 5


This is where the background becomes extremely involved. I wanted the final level to feel super intense, so I created this normal idle animation for the background itself where there's just this pulsating redness from the corners. It's super intense in practice, and looks really nice. Also the hit animation has become even more intense, going from 2 frames to 4 frames and the veins growing even longer than before. In game it looks really smooth too. The background itself looks like a temple, which is what I wanted for the angel, also I've made sure the red tint is super intense here, again, for the elevation.
Note: All the art works here are AI free, real images of historical paintings.
0 notes
Text
Final button deisgns #2
lvl5


Above is the hit frames for the angel, buttom is the fire frames.


This button I wanted to show the weapon charging before firing, so I came up with this trail effect as the knight moves to fire, it looks quite nice. I felt like I could've went a bit bigger on the impact though, at the moment not enough happens to make it feel super impactful. The design changes between this and the proto-button for it is that I've made the roses take up the visual space of the circle interior making it look like a mass of blood, which I think looks really cool. I've also made the angel's hair a whole lot curlier, less outwardly masculine and monk looking, more soft and holy looking I suppose.
0 notes
Text
Final button designs
Lvl1:
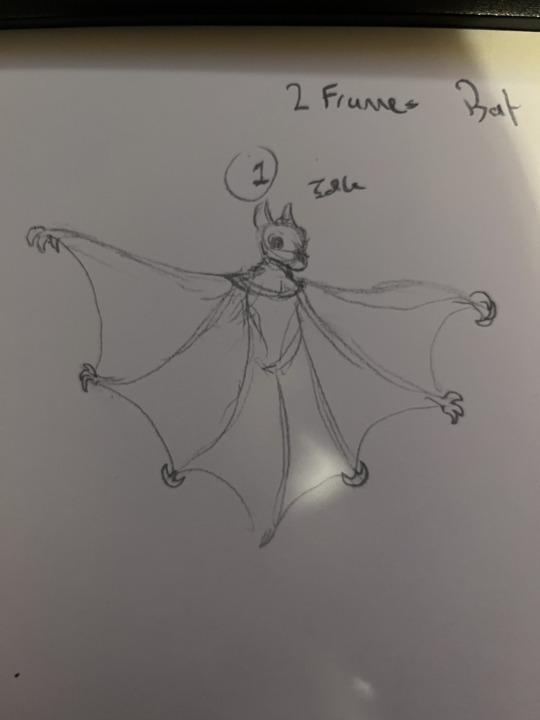


At the top are the two frames for the bat being hit whilst on the bottom I've got three frames for the knight punching the bat. The reason I went for three frames is because that between frame kind of gives the illusion of movement rather than just being a straight a to b animation.
This is much more satisfying to look at and gives some life to the button.


^ This is what the full animation looks like.
Note, the knight here looks different from the sketch. I wasn't satisfied with the knight I sketched out, it looked to disconnected from medieval design, so I adjusted their design to look more like a traditional medieval knight, and more close to the place holder button knights. I've also given the knight this blood red colour scheme. Mainly to fit/relate the design of the king, who also has red as a central colour.
Lvl2:
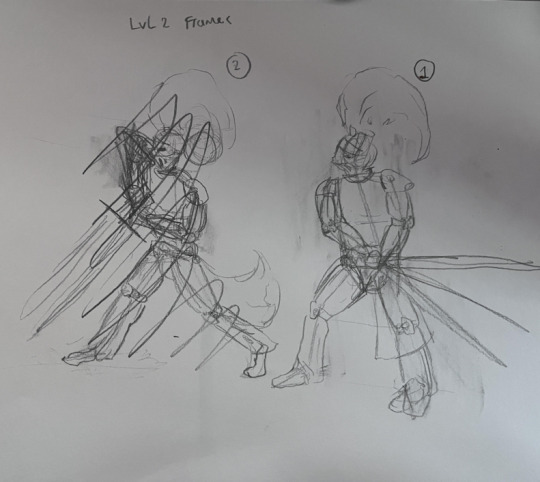
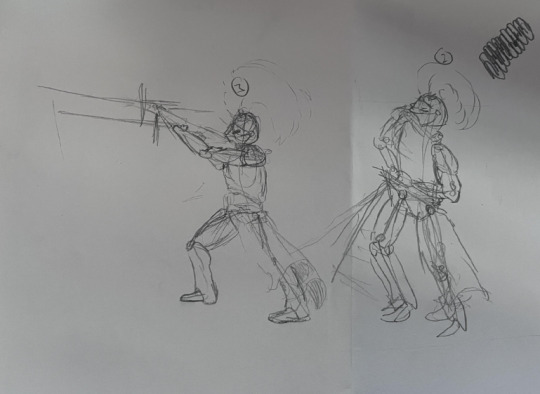

Above is the dragon design, and below is the knight with the sword. This time I went for a frame animation because I felt it would benefit the sword swing if it looked like it swung smoothly. It took ages to illustrate so this is the only button with 4 frames. But, luckily, it does look good.
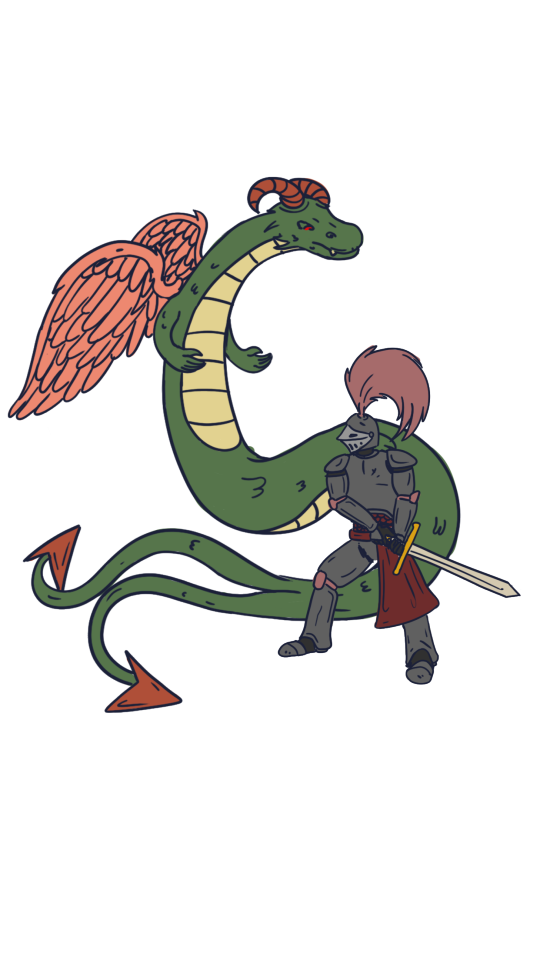

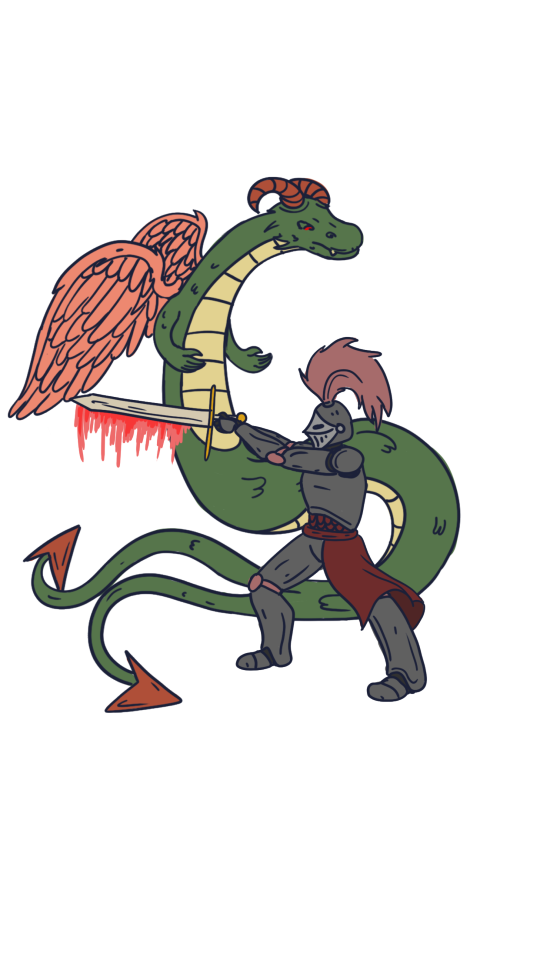

In terms of design here, I just added these swipe streaks to improve the illusion of animation, and it looks quite good and dynamic, that combined with the chunky slashing sound makes this probably my favourite button to press mechanically. I've also made sure to keep my earthy colour pallet here with a classic red/green contrast, but at the same time keeping the colours tame. The dragon is pretty much the same thing as the protobutton, just higher definition.
Lvl3:


Merman at the top, knight at the bottom. This is pretty much the same as the proto button, except instead of the pushing the boat into the merman the knight is just stabbing them with a spear. I found that it'd just save a lot of time not having to redraw the boat over and over again. Also, there's a fun little visual gag with the merman where they're playing the Wonderwall G on the lute thing, just a little reference for those who know.
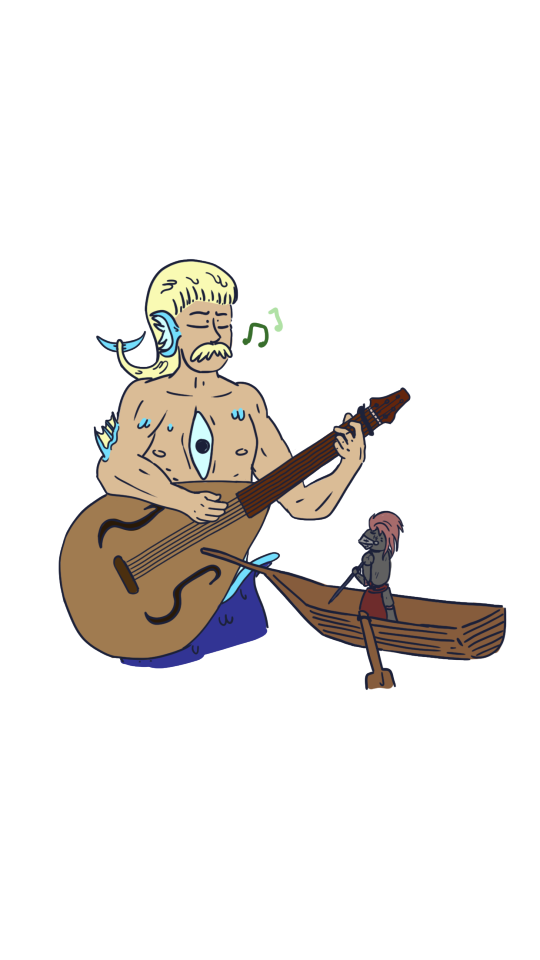

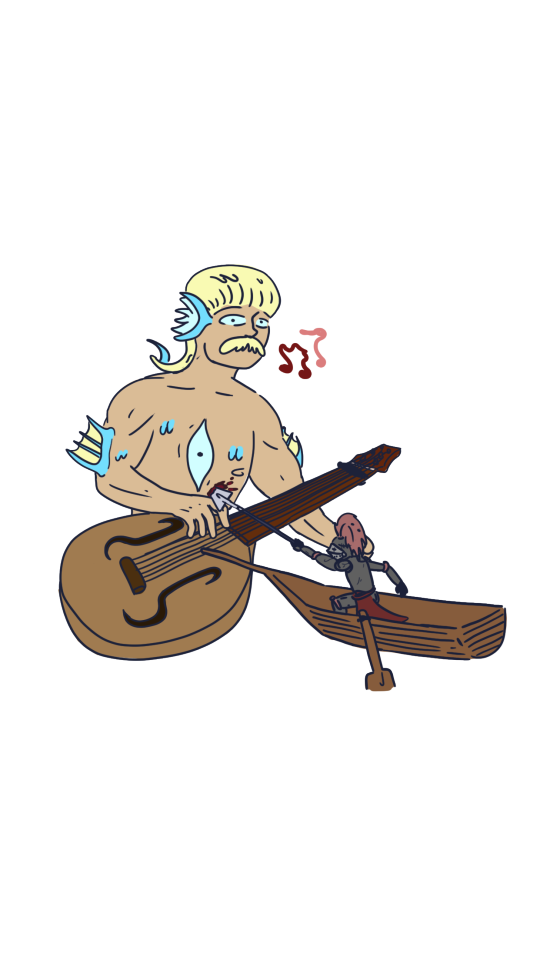
I've changed the design of the merman significantly, and mainly because I want the merman to look more humanlike. So, what I did was change their beard to a moustache, less wise monk and more busker hipster vibes, and I changed the colour of the head and facial hair to a yellow blondish colour. This is to make it look like human hair without actually having human hair. I've added some small scales to increase the fish-like aspect as well, not to make the character look too human like. I've made the merman a whole lot younger looking, I felt like there were too many monk like creatures. There are also little musical around their mouth to make it look like they're singing, but when you stab them, the note becomes dischorded, so it changes from green to red. This is to make it feel more involved than the previous button. The eye's pupil also shrinks when the creature is hit, this is to further exaggerate the pain and make it look like theres some impact. Mainly because I'm not awfully satisfied with this button. It feels like the visibility of the spear is quite low with it being surrounded by similar tones. Next time I would probably make the spear larger and more apparent. Lvl4:


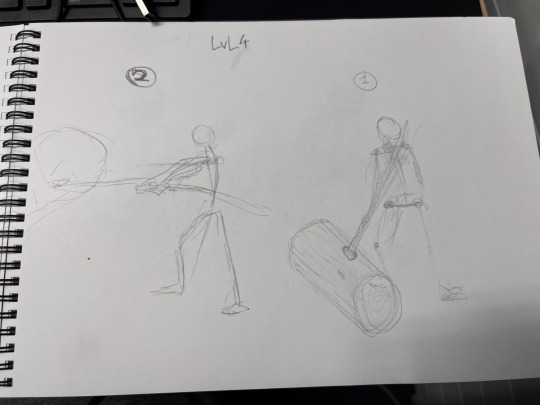

Top is the lion monk getting hit, the bottom is the knight swinging the hammer.

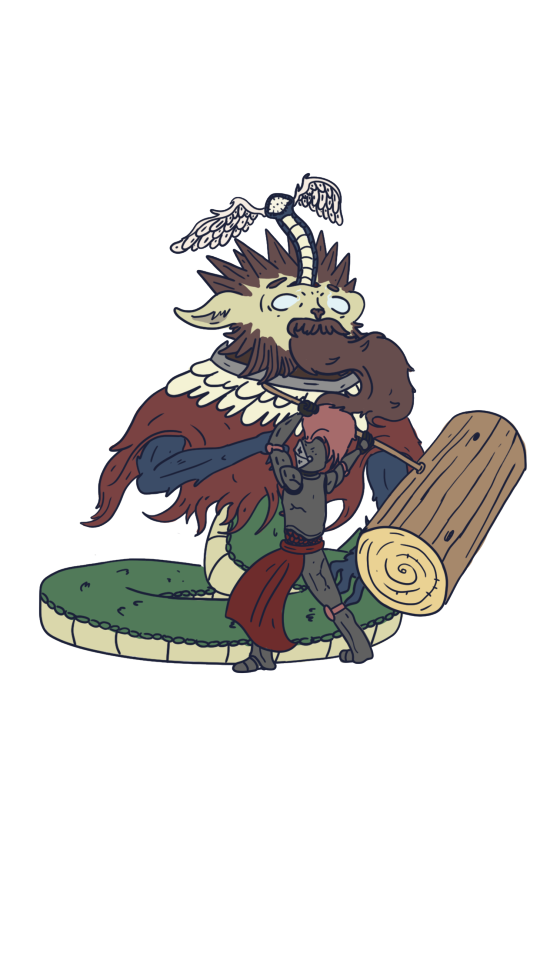
I'm extremely proud of this design here. I think this looks fantastic, especially with the blurred hammer, it looks super dynamic when pressed, feels quite weighty. This time the third eye is more serpentine looking more inline with the design's serpent quality. The knight looks really good, but I feel like I could've done the first frame a bit better, the legs look too cartoonish and the pelvis isn't really present. Other than that I'm quite happy with how this button turned out. This might even be a design I reuse in my own personal projects as I love it so much.
0 notes
Text
Button Design Development
Intro:
What should the buttons look like? Well, my whole idea hinges on this whole idea of the main character, the knight, going out and killing monsters. The button displays the battle between the two, or more specifically the main character beating the hell out of what ever enemy is in the way. This means the button will have to change upon click, meaning frames will have to be made. Preperations:
I've made sure to build each one of my buttons before working on any art for my game. I think it's important to get that down pat first, and in that process I've made some proto buttons of each of my monsters. I'll explain why I chose each one below.
Level 1 = The Bat, The Fists (left is unpressed, right is when the button is pressed)
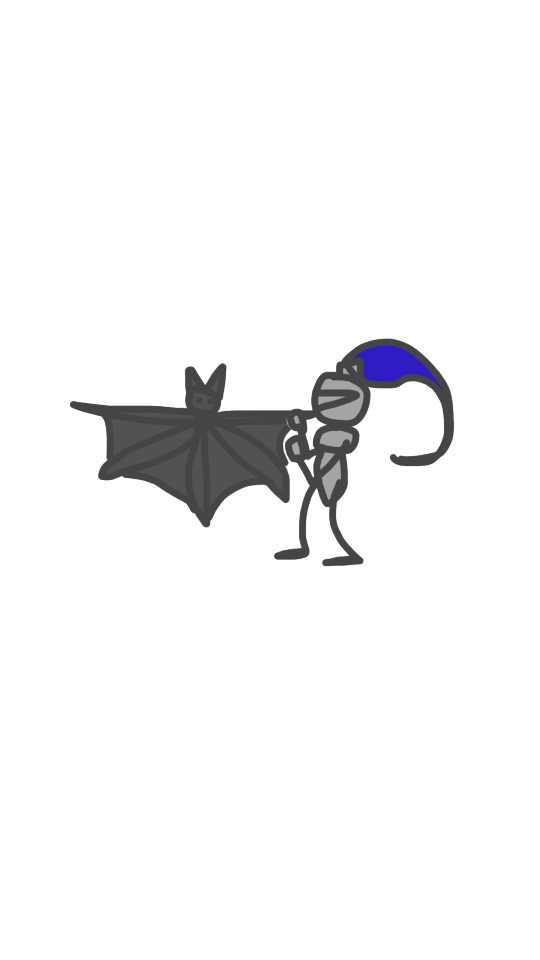

This design is the only one I directly ripped from medieval paintings.

^This one right here. It was probably an interpretation of just a regular bat, but as things are in the medieval age, people's minds usually make something fantastical out of something ordinary. I felt like something as simplistic to understand as this would make for a good level 1 button as it introduces the idea of the weird, fantastical beast design whilst still being recognizable as having a clear place of origin (being a bat). In terms of the knight punching the bat I feel it's appropriate to start off small when it comes to weapons, then increase the intensity.
Level 2 = The Dragon, The Sword (left is unpressed, middle goes into right is when the button is pressed)


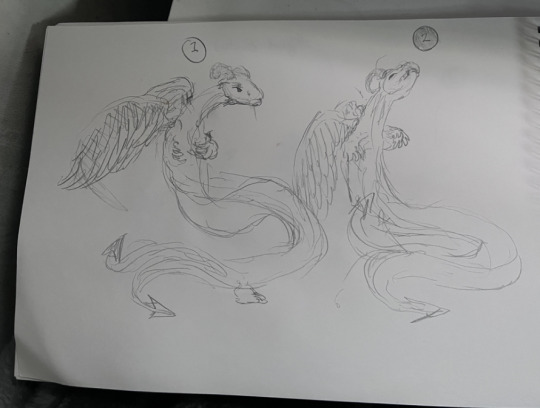
Next is something a bit more recognizable. A dragon. I think having something more traditionally medieval, but also a step up in power/unusualness that's still recognizable would be a good level 2 design. It's a step up in intensity. But it's a non-traditional dragon. I was specifically inspired by two separate paintings.


The one on the left is where the idea of having a more serpentine like dragon came from, more specifically a dragon without legs. It's pretty uncommon to see so it might surprise people. Also, on the right we have a dragon with more bird like wings, which is another uncommon feature for dragons to rock, and is something I really like the look of.
An upgrade from the fists we now have the sword. It's another more traditional element to this button, the knight with the sword slaying the dragon has always been an iconic image.
Level 3: The Fishman, The Spear (left is unpressed, right is when the button is pressed)

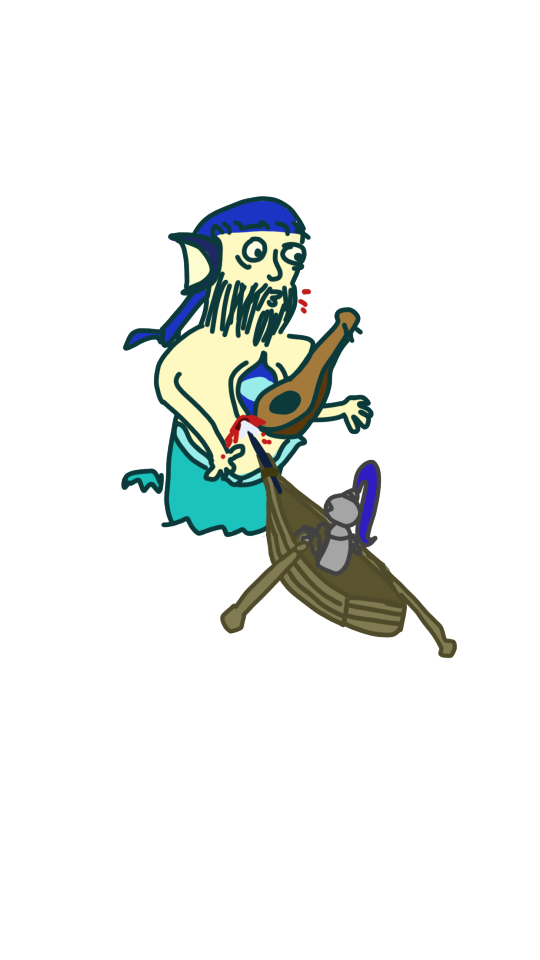
The main idea here was to bring out the weirdness a bit. Adding in human elements such as this fish man ups the stakes, its more relatable I suppose, mainly cause now you're not just killing what could be perceived as a "mindless animal", now you kind of have to face killing something that looks like they're just minding their own business. That's a step up within itself. But also there's just a lot more interesting things going on here too, the creature is playing some lute, a fun little visual thing going on there.
The design was based on a couple paintings:

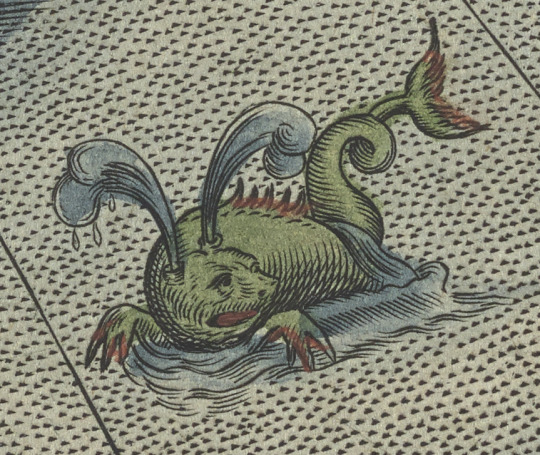
Obviously my main inspiration was the one on the left, but I wanted to include some more fish like features like the one on the right, hence why the creature has fish like ears, and some fins protruding from it's body. The eye on the body is something I came up with, mainly because I wanted to add something extra to separate this creature from regular mermen/fish-folk in media. Also, eyes come up a lot in the next two buttons, so it'd be good to introduce that motif a bit here so it doesn't feel like it comes out of nowhere.
The next few buttons up the ridiculousness in terms of weapons, so here I've got them in a little row boat with a spear tied to the front. More involved than the previous button so to me it's an immediate step up.
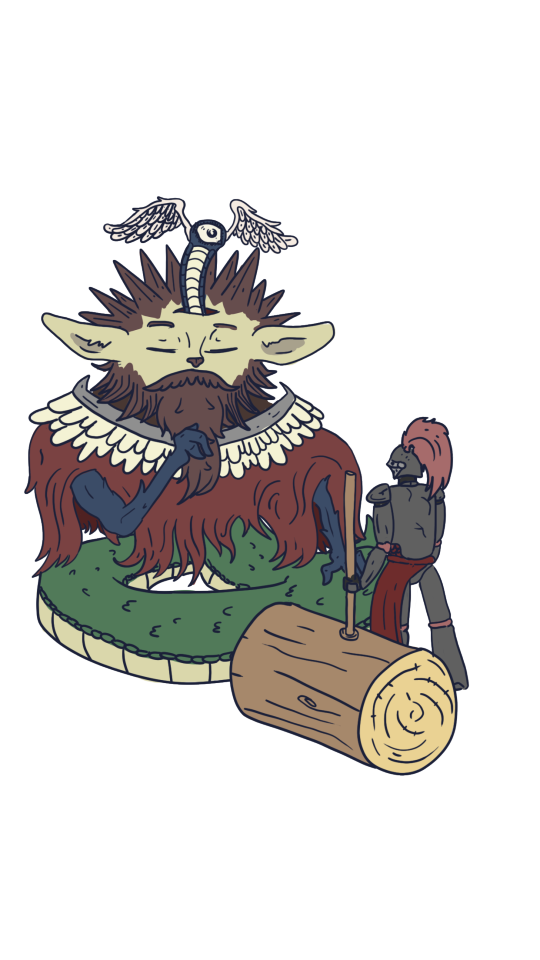
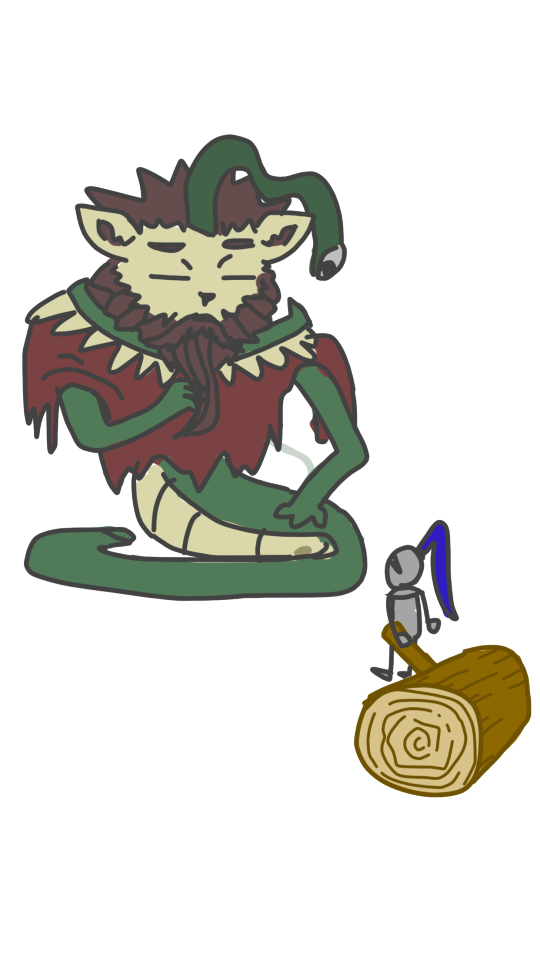
Level 3: The Monk, The Cartoonishly Large Mallet (left is unpressed, middle goes into right is when the button is pressed)


Something I forgot to mention in my dragon discussion was the fact that I experimented with the amount of frames I wanted to have. The more frames there are, the more fluid and fun to press the button will be. That's my general thought process behind this. But that's something to think about for the final art development.
This design is much more unusual, and took me a few tries to figure out exactly what I wanted here. First I went for a three headed chicken type creature, didn't really come together, then I moved onto what was essentially a human head with arms and legs. It didn't jive with me. During that process I was listening to a lot of music, and I started revisiting a band I loved for a long time; Clutch. One of their album cover caught my eye, this one:
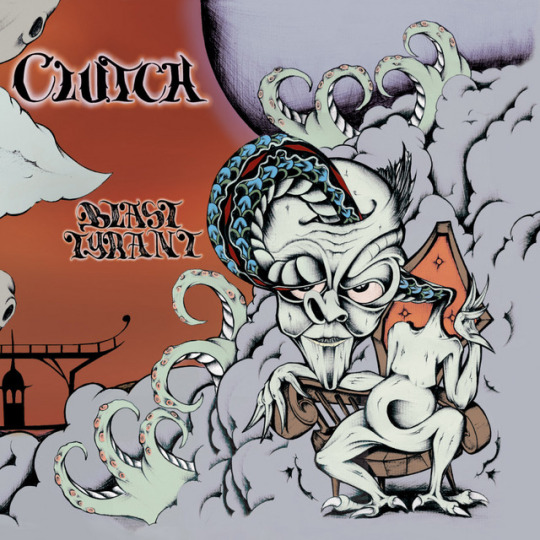
There's something super interesting about this creature on the cover. It's almost monk like, but it's completely and totally unusual looking. It kind of inspired my general design for this monk like beast. This is probably my favourite design so far because it mostly came from me. It's a monk like lion creature with serpent like features and a third eye literally poking out of it's head. It's awesome. Lions are often used in medieval art as a representation of power, bravery and kingship, serpent features are often incorporated into monsters as well, so I mashed the two together. The closest parallel in medieval mythology would be the Chimera, a beast mix usually of a lion, snake, and goat, and usually represents chaos. It's kind of a subversion on that idea of the chimera, like a chimera that has found peace from it's chaos, opening it's third eye. But it doesn't really go that deep, it doesn't have to.
It steps up the intensity again, cause this design is more actively out there and harder to pin down than the previous. It also looks like a wise old man at the core of it's design, at this point the play should really start to question if these creatures really deserve to be brutally murdered.
The knight also steps up in pure ridiculousness, I mean a giant cartoon mallet? It keeps the game grounded in lightness, it is a mobile game after all. It also steps up from the previous, cause a giant mallet will probably garner some chuckles in comparison to the tame weapons from previous levels.
Level 4: The Angel, The Cross Weapon (left is unpressed, middle goes into right is when the button is pressed)


This design is the final button. It's the most extreme looking of all of them, and clearly draws from biblical inspiration whilst also keeping up with the eye motif. The reason I chose to go for this angelic design is because a lot of the medieval art I found has an intense focus on religion, which makes sense of course cause the church basically runs everything during that time.


A lot of these depictions of holy figures usually have this halo and are usually drenched in robes. So, for my angel I pretty much put my on interpretation on that whilst including my eye motif, and also a reference to sin with the roses and thorns. This is most certainly a step up from the previous design, I mean your killing a godly being.
The knight this time is wielding a demonic looking cross, and killing an angel with it. It's quite extreme, which is good for the final level. And the hit is quite explosive as well, it's quite satisfying. The demonic looking cross fits with the theme of this button.
0 notes
Text
The Process of making a function button (2)
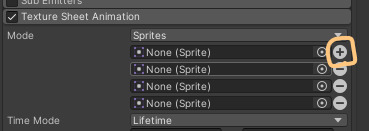
make sure to add as many sprites as you have particles, for me it's 4.

Now open up the sprite sheet by pressing the > button on the icon. drag each sprite into it's corresponding section. Then go to the frame over time and set the lowest number to 0, and the highest number to the amount of particles you have (for me it's 4).
Now it should work.
0 notes
Text
The Process of Making a functional Button

I'm going to be demonstrating how to make a functional button with this button level three. Before anything, it will be benificial to create three child game objects to the button. To create the particle system game object as a child, right click on the button level three in the hierarchy, go effects > particle system. The other two (graphic and background (which I misspelled) are both empty game objects for the moment.


Make the graphics, here I have made some place holder art.

Now go to the graphic object, add an image component and a raycaster component. Add the idle image as the source image. Make sure you delete the image component from the parent game object.
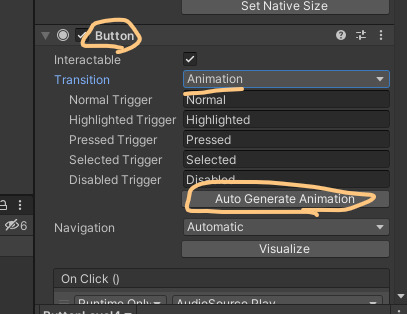
Now go to the parent object, go to the button component, and make the transition from colour tint to animation. Then click Auto Generate Animation and save it to the appropriate folder. This will create the animation controller.

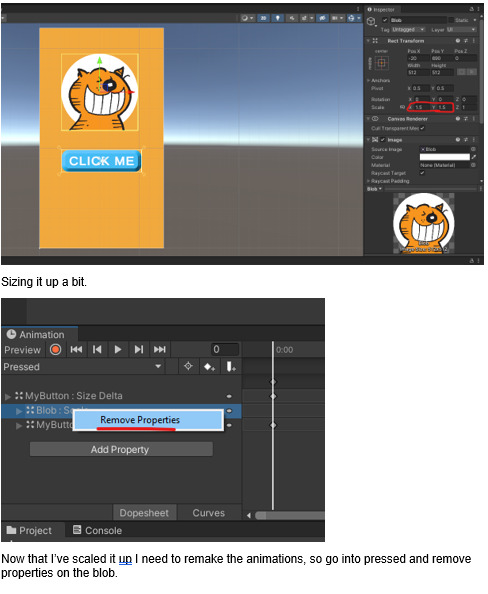
Select the graphic object, then go to the animator and change normal -> pressed (this means we're adding an animation when the button is pressed). Since we're adding the animation to the grahpic object, when you click add property make sure to get the size delta transform from the GRAPHIC object, not the parent object.
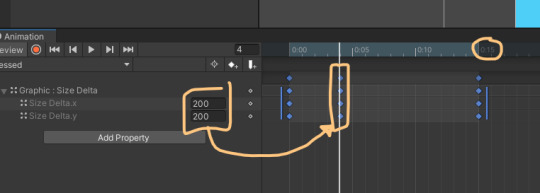
Now, before you shorten the animation to 0:15 seconds, make sure to place the size change first. Generally, I like to place the size change at 0:15 seconds, then shorten the whole animation down to 0:15 seconds. I feel like the instant and quick response of the size changing peaking early then slowly moving back is quite satisfying. It's responsive, but not instant which is what you want (allows people to see the change in size while also not feeling delayed on click). I think just doubling the size is good enough (changing both x and y to 200), any bigger and you won't be able to see the image on screen.
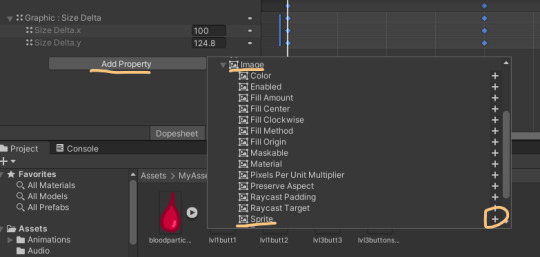
Next we're adding the sprite change. Add property > Graphic > Image > Sprite.
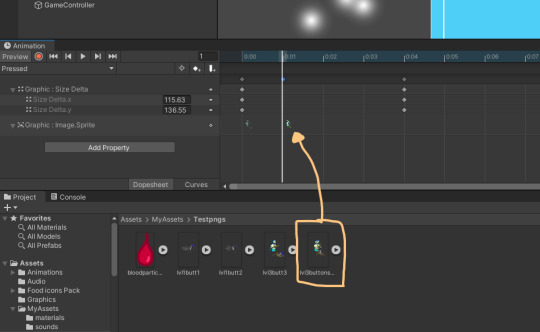
Just open up the sprite property. Drag the desired image into the sequence.
Ok, the animation is finished, but you might notice that it won't actually respond to being clicked yet. That's because the background layer is interfering.
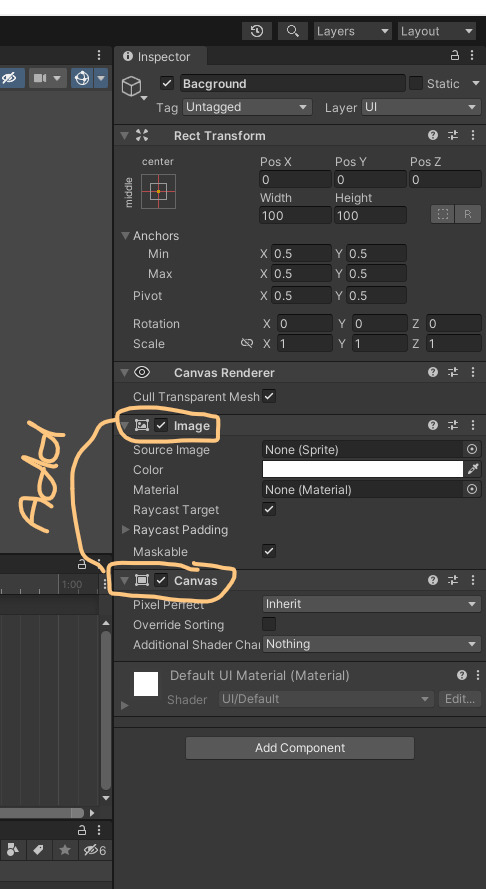
Go to the background object and add an image and canvas component.

Tick override sorting and make order in layer 1. I made the mistake of making it 0 here, make it 1 otherwise it might not show up.

Next go to the grahpic object and it's canvas component and do the same thing except instead of 1 make it 3.

Also make sure to turn off looping in the animation controller.

Go back into the graphic and make sure the blocking mask is set to nothing.

and I almost forgot, make sure you edit the pressed animation by clicking on the controller, opening the animator menu, and then clicking on the link for pressed. Make sure any state -> pressed has solo ticked, then untick fixed duration, and make transition duration 0.
The animation should be working smoothly now, but we don't have any particles. Time to add some.

Here's my stand in merman blood particle.

in your material folder make a material and name it appropriately.

in the material change the rendering mode to cutout, then drag the particle image over to the albedo square and drop it.

after that, change the shader to UI > Default.

Now apply the material to the renderer in the particle system object render component.
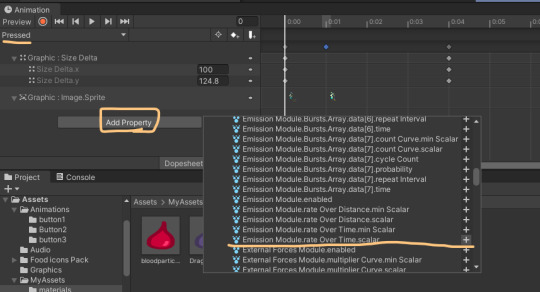
Next go back to the pressed animation and add property. Go Particle system > Emission Module.rate Over Time.scalar.
I like to set it to about 10, though remember this should scale upwards each level to add more impact (make sure the animation starts and ends with the emission at 0, otherwise it will infinitely loop). Also back to the renderer component in the particle system object, make sure it's no.2 in layer.
next it's time for some sound effects.
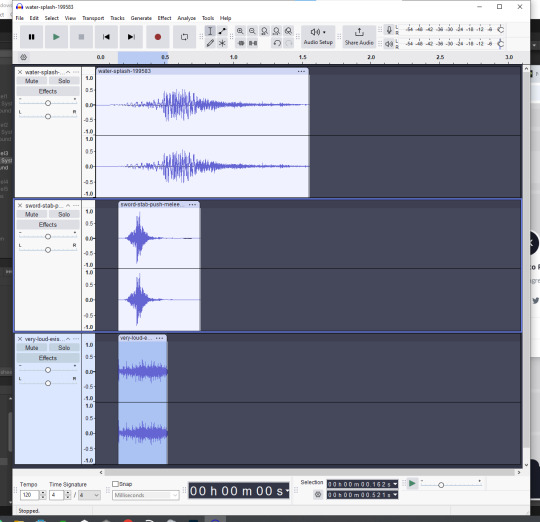
what I like to do is find free sound effects online and combine them together in the audio editing software audacity to create the most thematic and satisfying hit sound. Since this is a boat attack I've combined a water splash sound with a stabbing sound and a gore splat sound.
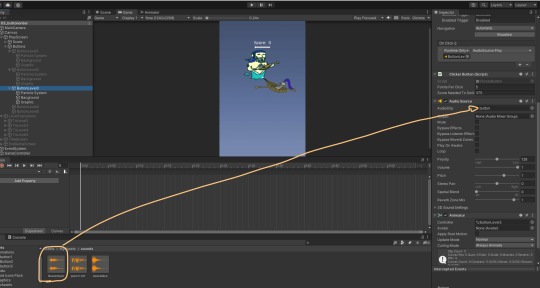
next just go to the parent object and drop the appropriately named sound (saved as a .wav file for least compression) into the audio source audio clip component. Make sure your audio is quite short and immediate because the player will be constantly clicking on the button so they'll want actually hear the clip when they click (since the clip resets on every click, if it's too long there won't be enough time before the player clicks again for the sound to actually play in a satisfying way).
Here's how to set up multiple particles:

Make a image of all your particles next to another horizontally.

Drop it into the materials folder, then click on it. Set the sprite mode to multiple, then go to the sprite editor.

In the sprite editor, go slice, gird by cell count, and C = however many particles you have, here I've got 4 so I put in 4.

adjust the cell sizes using this window here. Then apply once satisfied.

In the particle system object, turn on texture sheet animation.

Make mode = sprites, time mode = life time, and frame over time = random between two constants.
0 notes
Text
Putting the game together test (HEATHCLICK)


Here's a link to the word doc too: Heathclick.docx
0 notes
Text
Wireframes
Title Screens:
I think it'd be optimal to first look at how other mobile games approach title screen design to get a general idea what the industry deems to be sucessful. Examples:


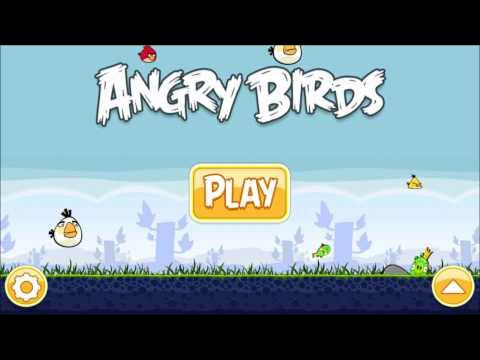


It's interesting to note that all of these title screens, despite having different styles, all follow similar to the same sort of compositional choices. To explain what I mean, I've broken down the candy crush title screen:

Usually, in terms of space used, the main draw is the title/logo of the game, then the play button. The title is usually presented larger than the buttons and is always presented in the top center of the screen. The buttons usually have some space away from the title logo, usually in the middle/bottom center half. Generally, all this information is centered, almost like a column straight down the middle of the screen, usually leaving plenty of negative space for the background to be noticed.


Here's a simple wireframe idea I came up with. It's basically the same approach, except I went for a slant on the logo, just so it doesn't feel stagnant visually. Though, it might do well with some more negative space.


This time I've adjusted the space between the title and the play button, and have sized them both down. Now they feel more together, but it might be worth adjusting it a bit so they're separated a little more. The play and title feel too related now, the size down has pressed them both to the center, maybe the play button is too centered ATM.

Here I've spaced out and sized up the play button to make it more prominent. This feels more definitive.

While I don't have fonts down yet, I want the play button to look a little like this. Simplistic font with the P bigger than the "LAY" to emphasize it more. But now it maybe feels a little too much, like it's the first thing to see.
NEXT: SCENE SCREEN.

The next thing is the scene screen A.K.A the screen where the story is presented. This can be super formulaic to re-enforce a pattern. You win, you get a 3-4 panel sequence, rinse and repeat. The above example is from the game pixel gun 3d, it implements these story sequences every time you beat a level. It's quite a satisfying method, and I remember as a kid trying to beat each level just to see what happens. However, pixel gun 3d was always locked to landscape where as I'm designing for portrait mobile.

Here's something I came up with, though there might be too many rectangles.
0 notes
Text
Unity Project Guide
Keys:
Double click a game object in the hierarchy to focus on it in the view port.
Hold alt while transforming an image using the anchors to make it snap to the canvas.
NOTE: The nine slice method.
A sprite is a graphic that sits on top of other graphics that can move around.
0 notes