
Hi I am Jaclyn Ross 28 years old and I am a project manager for a construction company we install basements and do central ac as well as insulation.WordpressMy Site
Don't wanna be here? Send us removal request.
Statistics
We looked inside some of the posts by jaclynbross1 and here's what we found interesting.
Average Info
Notes Per Post
0
Likes Per Post
0
Reblog Per Post
0
Reply Per Post
0
Time Between Posts
14 days
Number of Posts By Type
Text
17
Last Seen Tumblr Blogs


Fun Fact
12.7% of mobile users access Tumblr.
Text
Ring Battery Security Cam Review
Security cameras. I always thought they were a bit silly. I mean, I know dated old fashioned house alarms are kinda irrelevant nowadays anyway (does anyone even bat an eyelid at sirens blearing down the street?) but as for CCTV, I just felt like it was basically telling the world you have stuff worth stealing.
BUT, that was then and this is now. So many houses have security cameras, it's become normal. A house that has a security camera is no longer standing out from the crowd. It's fitting in. And those left unprotected by CCTV are the houses that are more likely to stand out. Security cameras have also become cheaper in recent years, so I think those things combined, is probably why so many people are buying them nowadays.
Read more » from Tips For Basements http://www.kezzabeth.co.uk/2019/03/ring-battery-security-cam-review.html
0 notes
Text
Another House, Another Reno - A Few Updates...
No, I haven't won the lottery and bagged myself a holiday home by the sea (although I wish I had!), I'm of course referring to Grants parents house, where we've been working and DIYing recently.
If you haven't been keeping up with progress over on Instagram, do come and join me! I'm much quicker at Instagramin' than I am blogging, so you'll see live-updates on there. I'm a little behind with blogging, so I thought it was about time I updated you all with the progress...
Read more » from Tips For Basements http://www.kezzabeth.co.uk/2019/01/another-house-another-renovation.html
0 notes
Text
What We Have Planned for 2019!

2018 was pretty easy-going in terms of home renovating. We did a fair bit of work, don't get me wrong, but it was all casual with no single room being the focus of the year and no major destruction unfolded. Compared to 2016 and 2017 which included living without a kitchen for 18-months, the last year has been an actual BREEZE.
Well, 2019 is the year that will see us going back to the more hardcore days. 2019 is going to be JAM PACKED with DIY and home projects and there will definitely be chaos. So, here's what we have planned...
Read more » from Tips For Basements http://www.kezzabeth.co.uk/2019/01/what-we-have-planned-for-2019-renovations.html
0 notes
Text
Decorating the Christmas Tree and Our Yearly Christmas Traditions

This is the first time in four years that our house has felt finished enough to properly decorate for Christmas. Don't get me wrong, the house is FAR from finished and half of it is still very much in chaos, but we have more semi-finished rooms than we've ever had. And those rooms actually feel kinda homely - not something I've experienced for a very long time! Needless to say, decorating the house for Christmas this year felt quite different from the years before. Cue the Christmas tree of 2016:
Read more » from Tips For Basements http://www.kezzabeth.co.uk/2018/12/christmas-with-christmas-tree-world.html
0 notes
Text
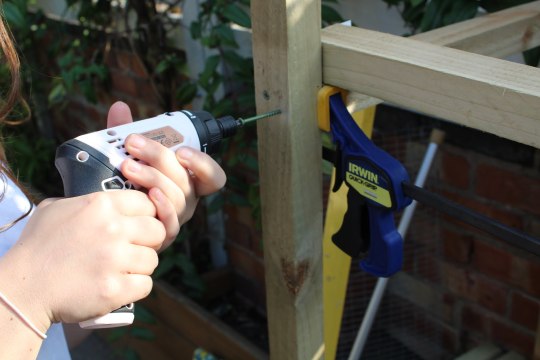
How to Build a DIY Gate From Pallet Wood

If you've followed me for a long time on Instagram, you'll remember I built a gate from pallet wood about two years ago for Grants mum's house, but I actually never got 'round to featuring on the blog. Luckily I'm making one again, bigger and better - and this time for our house and so, of course, I'm sharing it all! This whole project cost me under £10 to make, which is a serious bargain considering you can buy pre-made gates for over £50. It was also super easy to do, so if you want to save yourself some cash and give this DIY a go, then keep reading... Read more » from Tips For Basements http://www.kezzabeth.co.uk/2018/11/diy-how-to-build-pallet-wood-gate.html
0 notes
Text
WIN! £40 John Lewis Voucher with Walton Flooring Centre
Did someone just say it's FIVE weeks till Christmas?! I honestly don't know where this year has gone, and I can't believe in a couple of weeks our house will be fully decked up and ready for those repeating Christmas tunes!
With such little time left before Christmas, I've teamed up with Walton Flooring Centre to give one of you guys the chance to win a £40 gift card to spend in John Lewis. You could call it an early Christmas present perhaps ;)
Read more » from Tips For Basements http://www.kezzabeth.co.uk/2018/11/win-40-john-lewis-voucher-with-walton-flooring-centre.html
0 notes
Text
5 Tools Under £5 You Need In Your Kit
Having now owned a rather extensive DIY supply kit, I thought it was about time I shared some of our favourite tools (and not-so-favourite tools - coming soon...) that we think every toolkit needs.
This list was really hard to narrow down if I'm honest and we've tried not to choose tools that are too task specific. These are all tools that we use relatively often and genuinely find useful. I haven't bothered with stuff like screwdrivers and hammers, 'cos lets face it - if you don't have the bare basics, you probably don't have any interest in DIY and you most likely aren't even going to be on this site.
So, let's get to it!
Read more » from Tips For Basements http://www.kezzabeth.co.uk/2018/11/5-diy-tools-under-5-worth-buying.html
0 notes
Text
DIY Bike Shed with Log Store
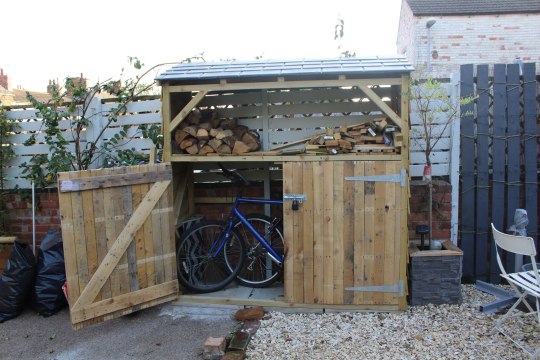
For the last four years, we've had one small storage issue - where should the bikes live? For a while, they lived in the hallway, then in the bedroom and then they just hung out in the garden like a lost sock. Not only was it cluttering up my otherwise (semi-)organised garden, it wasn't so great in the winter, as the bikes would be wet, covered in snow and generally make them prone to quicker wear and tear. Grant uses his bike almost daily, so we needed them to live somewhere accessible, but somewhere they could stay out of sight and dry too.
So, of course, I had a plan - a bike shed. BUT a bike shed with a difference. A combined log store bike shed! Typical bike sheds are usually quite short in height and I felt not making use of the space above would be a waste. So my plan was to have a bike shed at the bottom and then use the area above as log storage. The problem was, no one sold anything that suited my brief - so I decided to make one. And of course, I'm sharing the full DIY with you.
Read more » from Tips For Basements http://www.kezzabeth.co.uk/2018/11/diy-how-to-build-a-bike-shed-log-store.html
0 notes
Text
DIY Geometric Ceiling Light (Icosahedron)
There are so many parts of our home that are finished, but unfinished. Like the random piece of skirting board in the kitchen that hasn't been attached, the door that's lived without a handle for two years, the bits of filler on the walls I never sanded and repainted, oh and the two semi-attached bulbs hanging precariously from the dining room ceiling. You know it goes - nothing is ever 100% complete.
Over the next few weeks though, we're on a mission to fix all these little niggly things and one of those jobs involved buying/creating two light fittings for the dining room ceiling. With a budget of £0, we decided to get creative rather than buy something - and this is what we came up with...

Read more » from Tips For Basements http://www.kezzabeth.co.uk/2018/10/diy-geometric-ceiling-light-icosahedron.html
0 notes
Text
How to Fit a Rebated Door Latch on an Internal French Door
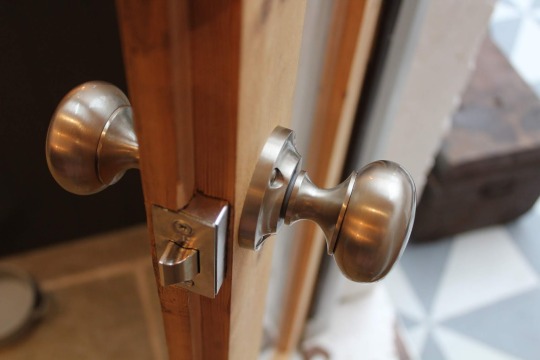
Do you remember almost two years ago we bought a pair of secondhand glazed doors for our conservatory and fitted them? Two years ago. Well, we never got round to fitting any door handles. I know, it's shocking. Truth be told, the handles I had bought turned out to be way too big for the door. They protruded like crazy and for such a small door, just didn't look right. I think they were actually meant to be for an external door (oops!), so we never fitted them.
Now, two years on, I'm on a mission to get finishing all these little niggly jobs off, so the time has finally come to sourcing new handles and getting them fit!
Read more » from Tips For Basements http://www.kezzabeth.co.uk/2018/09/how-to-fit-rebated-door-latch-on.html
0 notes
Text
Creating an Indoor Garden Room: Conservatory Reveal
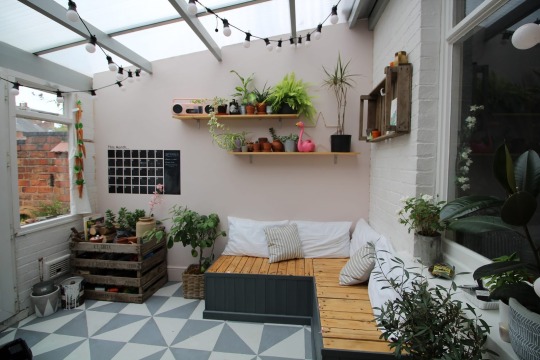
Our conservatory is a bit of a marmite room. It's a very old conservatory (built in the 80s) that heats up to about 1000degrees in summer and then freezes to about -1000degrees in winter. I'm exaggerating, but you get what I'm trying to say - it's not a perfectly formed extension. It's what typical 80s conservatories are known for; being a tad impractical.
Despite that, knocking it down seemed like a total waste since we would only have gained a tiny extra bit of space in the garden. I think having it as a living space is actually more beneficial, plus, I'd always wanted a conservatory. It might not be the conservatory I had dreamed of, but I certainly wasn't letting it go!
Read more » from Tips For Basements http://www.kezzabeth.co.uk/2018/09/creating-indoor-garden-room.html
0 notes
Text
7 Creatively Awesome Staircases Ideas!

If you follow me on Pinterest, you may have seen I've been pinning a ton of attic conversion ideas over the last month. We might still be a long way from beginning any work up in our attic - but a girl can dream right?! Anyway, in my mad month of pinning, I came across some simply awesome staircase ideas. Ideas that make you want to rip out your existing staircase and fit a whole new one. In collaboration with Fontanot Shop, an Italian-design staircase manufacturer, where you can buy contemporary staircases, I'm sharing some of these awesome designs with you. From elaborate luxury designs to simple DIYs, whether you're looking to buy a new staircase or make simple alterations to a current one - I've got a whole heap of staircases to wow you with. So, if you've got a thing for staircases (you will have by the end of this post!) then, check these awesome designs...
1. The Floating Staircase
I absolutely love this idea! These kinds of staircases take up a lot less room than staircases which are 'boxed in', leaving a room to feel more spacious, lighter and brighter and not to mention, make an absolutely stunning feature. Particularly so when paired with lights, such as in the image above. For this design to work, you would need to ensure the wall the stair treads are hung up on is strong enough to take the weight. Otherwise, the design and installation are relatively straightforward and can really bring the 'wow' factor to a room.
2. The Spiral Staircase
Spiral staircases, or otherwise known as circular staircases are great where space is limited. Their design means they don't need to take up a large amount of floor space beneath and they can fit into simple vertical spaces, without the need for a large area to incline. For small houses, this type of staircase is a particularly a good option. Spiral staircases can suit both industrial, modern and classic spaces due to their wide range of styles. I think they're quirky, add a bit of fun and can make a really interesting feature within a room.
3. The Glass Staircase
If you want to simply refurbish an old staircase, adding glass sides is a brilliant way to make an upgrade. It will add tons more light to a room, particularly if your hall or landing has no natural light. It will also open the space up, give a real contemporary modern feel to the room and will add a touch of luxury as well. The only downside to having a glass staircase is that you might find yourself wiping fingerprints off the glass a little more often than you'd like.
4. The Staircase with a Slide
If you want to add a bit of fun to your house, how about incorporating a slide into the stairs? This would be a child's actual dream come true, but let's face it - even adults could have a bit of fun with it as well! A staircase with slide doesn't have to be expensive, in fact, there are loads of great DIY tutorials out there showing you how to adapt an existing staircase to suit this design. I've got to say, I would certainly give it a go!
5. The Bookcase Staircase
This is probably my favourite design. How to incorporate storage within a staircase, in a really simple and effective way. This idea might not be for everyone, but if you like the eclectic design and of course a good book, this would certainly make a unique feature!
6. The Staircase with Pull-Out Storage
Another great solution for maximising storage space. Pull out drawers! Perfect for storing away shoes and winter knitwear whilst having all those things right on-hand when needed. Because who doesn't sit on the stairs whilst putting on their shoes? This design might take some clever planning and would need to be well thought out, but I think this is an ingenious idea that all staircases should have.
7. The Ombre & Patterned Staircase
On a budget? No problem. Painting a staircase is really simple and easy way to add style and give it a whole new lease of life. I absolutely love these ombre and patterned staircases. You can be as bold and as daring as you want, with vibrant colours and punch patterns. Or you can opt for something more simple and understatement, like colourful spindles. I think this is definitely something I would consider for our own house! How about you? So that's it! 7 staircase ideas to add a bit more style and impressiveness to your home. Which one's your fave? *Collaborative Post from Tips For Basements http://www.kezzabeth.co.uk/2018/08/7-creatively-awesome-staircases-ideas.html
0 notes
Text
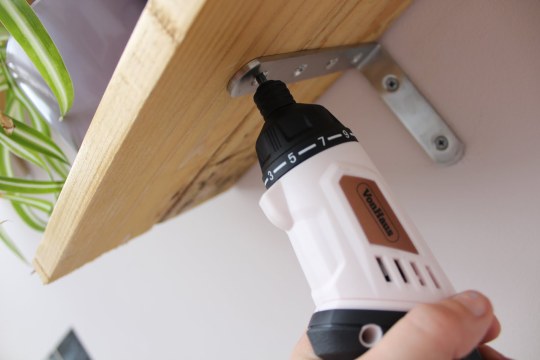
VonHaus Rose Gold Cordless Screwdriver Review

Being a DIYer means I have a fairly large amount of tools, but - I don't any tools quite as stylish as this one! VonHaus have recently just launched a whole collection of new rose gold tools, targetted at your average DIYer and Upcycler who want their tools to look as good as their projects. 'Cause let's face it - why shouldn't tools look good? So, I've been sent their new cordless electric screwdriver set to put to the test - and whilst I LOVE the rose gold colourway, I was really intrigued to see how well it would perform as an actual tool. Because obviously, a tool needs to actually work and not just look good. So, first things first - let's talk about the colour. I already said I love it, and I really do. I am quite partial to a rosy-pink, which I'm sure if you've followed me for a while (particularly on Instagram), you might know. Although I have to say, I wouldn't quite describe the body as rose-gold so much, but more of a very light nude-pink. The colour is subtle, in a good way and it looks sophisticated. I think one of the worries with having a pinky coloured tool is that it could appear a little child-like and almost fake. But, I'm pleased to say this doesn't.
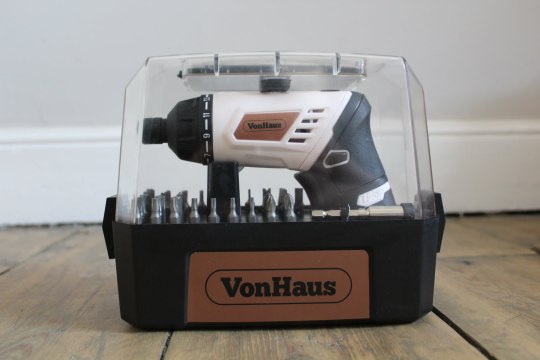
So it comes in this clear case, which I really like - I feel as though it's been designed to show off the tool, even when it's not in use. All the other tool cases I own are stored in basic black fabric bags, which I then have to open each time I'm looking for a tool - cos they all look the bloomin' same! This is stand out, different and almost makes a tool-shelf trendy. I mean, I may need a few additional pretty tools to go with it, but I love that's it's eye-catching and it looks gooood.


So the case isn't just to stylize your shelf with, it's super practical for storing all the different screw-bits it comes with as well, and there's a whopping 50 of them! I'm pretty sure I now have every single one I could ever possibly need. But I also like the fact they each have a 'slot' to fit into and keep them organised, unlike other storage items I have where they'd be rattling around in a loose tin. (Yes, this drives me NUTZ).


So, let's talk features, 'cos looks ain't everything. Luckily though, this cordless screwdriver definitely doesn't disappoint. It has 15 different torque settings and a drill mode. If you're not familiar with torques, the lower numbers are generally for smaller screws. The higher torque is when you need more 'oomph' to drive in, which is generally for tougher wood and bigger screws. I've used this tool on some long screws already and I'm not going to lie, I had my doubts about how good it was going to drive a screw in - but guess what, no problems!

Having the torque settings is absolutely fab because some of the cheaper cordless screwdrivers don't have this - which can surely only lead to stripping a ton of screw-heads. Whilst it does also have the drill setting, I do want to mention that isn't a substitute for a drill. You certainly won't get far drilling into brickwork with this, but it will do you fine for plasterboard and softer wood. Changing bits on this screwdriver is super simple as well as it features a quick-release chuck. You simply pull down on the chuck to release and insert new bits. There's no separate tool to wind them in and out like you might find on some older or basic drills.

My favourite feature though, without a doubt is that this tool can change positions. And by that I mean, it can turn from this, into this...


Nifty huh? Actually, I can't tell you how bloomin' useful this is. It means you can get into certain spaces better, you can use your weight on it better when required and you can even use it as a manual screwdriver when the battery dies (yep, done that). It's a really clever little feature, that I think, is a stroke of genius. Did I mention how much I like that?


The other clever little feature is a torch! Yep, on the bottom of the tool is a torch with on/off button. Again, I really like this feature - I've often found myself in dark spots trying to screw something, so I actually think this also going to be quite useful. And of course, you also just use it as a standard torch when you need one too.

So, my verdict overall, is that it's a pretty good tool. Pretty and good - see what I did there? This might not be the tool for heavy use tradespeople, but for moderate to basic DIY usage, I think it's great. You could easily use this for flatpack, changing knobs on furniture, or just simple DIY building and crafting. It would make a great gift for any new homeowner or DIY hobbyist too.
The way I've been using this tool personally is in conjunction with our drill. In the past, I would constantly be changing between drill bits and a screw heads on the drill, which is not only a massive faff but a massive time-waster. Having this cordless screwdriver as a side-kick has been a game-changer. I can now just switch between tools, and I don't have to worry about misplacing the bits. I'm expecting to get a lot of use out from this little tool - and I'm sure you'll see it more over on the blog too. If you want to buy this screwdriver or check out the other rose-gold tools from VonHaus, you can find them all on Domu.co.uk. And you can find this particular rose gold screwdriver here, which retails at £19.99. I think it's pretty reasonable value considering all the features and extra bits you get with it - and of course, it's a lovely shade of stylish pink. So, what are your thoughts? Are you swooned by a rose gold tool, too? *The cordless screwdriver that features in this post was sent to me to review. As always, I only recommend products I genuinely like and would buy myself. All words and opinions in this post are my own. Thank you for supporting this blog :)

from Tips For Basements http://www.kezzabeth.co.uk/2018/08/vonhaus-rose-gold-cordless-screwdriver-review.html
0 notes
Text
The Blog Has Been Nominated for an Award!
This is a quick post today, mainly to say thanks for whoever nominated me and secondly I'm just sharing a link if you want to vote.
I started this blog almost five years ago now and I mainly started it because I wanted somewhere to document our old home in all its finished fully-renovated glory before we moved on. I wanted a place I could easily access those memories and a blog seemed like a good shout as I could even add words too. Who knew?! From there, I figured my new blog would be a great place to share progress updates on our new home, week-by-week, month-by-month, to document its transformation. Instagram wasn't really a thing back then and guess what? I didn't even have a smartphone - ha!
The blog has been on quite a long journey since it began. After about a year of writing, I realised people were beginning to find my blog through Google, so instead of writing just for my own memories, I started writing for people who would read it instead. I tried to combine simple updates of the house along with how we were actually doing stuff; what we were buying, how much it all cost, what we did wrong. Things that could potentially help others too.
Now, five years on, I have over 300 odd posts on here. I've *tried* to be consistent (and failed) but the blog has really become part of my life. Creating content on here inspires me to create. I love DIYing even more because the blog keeps it fun, and the more you create, the more creative you become. And I love sharing it with you guys. And for that, I love blogging! On the other side though, blogging is hard work. Every little bit of DIY I do takes about 10x longer because I'm constantly taking photos (often with a tripod - no cameraman here!) and faffing. Then when it's done, I spend hours writing about it. The blog doesn't earn me money so it can be hard to find and put so much time into it. Hence the inconsistency. I love it, but it's hard work. And I'm definitely not very pro at it.
In relation to the *blogging world*, this blog is teeny tiny. I'm absolutely shit at promoting the blog (it makes me feels somewhat narcissistic) and I'm even shitter at reaching out to companies and turning a blog into a business. I'm just pretty shit at that stuff and confidence is not my strong point. But that's OK and these things were never my goal. My only hope from blogging is to simply encourage others to give a DIY a try. Give ideas, spend less, do more. You can DIY with no experience, you can renovate on a budget. And you can create a home out of almost nothing. It takes time and effort, but it's doable. Even if it means living without a kitchen for 18 months. If that's you, I feel your pain!!
Over the last 12 months, I've shared how we fitted our whole kitchen DIY-style, how we transformed a cupboard into a Pantry, how we built Scaffold Board Decking, Pallet Seating, Pallet Fencing, I could literally go on. All created on a budget and 100% DIY. I started this journey of DIYing seven years ago with no experience in DIY whatsoever and everything I know is entirely self-taught. So to be nominated for the AMARA Interior Awards, and in the category 'Best DIY and Home Improvement Blog' is pretty craaaazy. I'm certainly not an expert and not even a great blogger, but I do feel really bloody honoured to even be in there. You can find my voting page here.
I'm not going to say it would mean the world to me if you voted for this blog and quite honestly, I'm up against some far more professional and just all-around better blogs who are probably more worthy of a vote. But, if you want to vote - I would be very grateful. Having your support in general (I mean someone even nominated me for this award - that's success enough for me!) is more than I could ever have expected from starting a blog. Having a simple shoutout on Instagram or when someone sends me a photo of something they've created, inspired from reading the blog, is the kind of stuff which keeps me blogging. And I honestly couldn't ask for more than that. So really, I should be saying thanks to you guys for motivating me to keep going! Both with the blog and the home renovation.
So thanks for reading over the years, sticking with this long-ass renovation, and thank you SO much for the nomination! I feel somewhat unworthy but bloody darn chuffed. So, thanks :)
Kezz X
from Tips For Basements http://www.kezzabeth.co.uk/2018/08/diy-blogger-amara-award-2018.html
0 notes
Text
WIN A £50 Voucher to Spend At Skylight Blinds Direct!

I'm super excited to be collaborating with Skylight Blinds Direct on this post today and giving away a £50 voucher to spend on their online shop! Whether you already have a roof window you'd like a new blind for, or you're renovating and have grand plans for putting in new roof windows, this giveaway is for you!
If you haven't heard of Skylight Blinds Direct before, then I definitely recommend checking them out. They essentially create blinds that will fit all major roof window manufacturers. All you need to know is the make or your window and the window code. And if you're not sure, don't worry - there's an easy to follow guide that explains exactly how you can find out! And if you have a very old or bespoke sized window that isn't on their list, then don't worry, they can also create bespoke made-to-measure blinds too! From blackout blinds to waterproof blinds to even motorised blinds, their website offers a blind for every room in a variety of colours and some patterns too and prices start at just £17. So, if you'd like to bag yourself a £50 voucher to put towards a roof window blind, then all you need to do is fill in your details into the Rafflecopter form below. You can gain several extra entries by completing extra tasks too if you'd like - all the info is in the widget below. The giveaway will be running for 3 weeks, and the winner will be chosen at random, so good luck!!
UK entries only, please.
Voucher cannot be exchanged for cash.
Giveaway ends Midnight 26th August.
a Rafflecopter giveaway

from Tips For Basements http://www.kezzabeth.co.uk/2018/08/win-skylight-window-blind.html
0 notes
Text
4 Years On - Our Home Reno Update

I can't believe we've been living in this house for four years already! It seems absolute madness and in many ways makes me realise how far we haven't come within our home renovating journey. I mean, four years and we're barely halfway through?! But I guess that's the reality of DIY renovating and renovating on a serious budget. Tough life, eh?
Despite being far from finished, over the last 12 months, a lot has happened. We've finished the kitchen entirely (well, 95% finished - but that counts as finished right?!), we've finished the dining room entirely (well, 95% again) and we've made tons of progress in both the conservatory and the living room. Not to mention the garden has changed quite a bit too. So, that's five different areas of the house in 12 months - not bad! And, I think this is the first year the house is actually beginning to feel and look like a home.
So, this post is basically going to be a kind of 'up-to-date house tour' showcasing where we're currently at in our home reno journey. I do this post every year, so if you want to see how our journey has unfolded year on year, you can check out each of these posts for the last four years right here:
Moving Day Tour
Year 1 Update
Year 2 Update
Year 3 Update (Last Year)
So let's start at the beginning, shall we? I'll walk you through the house, in the order of the rooms, you would meet. I haven't styled any of the rooms for this shoot, what you see is what you get (sorry!) and it was on a bit of a dark day (mistake!).
The Hallway
This room is unchanged as ever! Actually, we anticipate this will be the last room we possibly ever tackle, so it's barely changed in four years and I don't see it changing much any time soon. But I mean, it's not that bad, right? *said through gritted teeth*


The Living Room
This room has gone through quite the transformation this year. I've sanded floorboards, stripped wallpaper, repaired the ceiling (ish) and bought a whole new secondhand sofa. Let's just say this room is probably the most changed room over the last 12 months. We've taken a break from it for the summer, but we hope to finish it later in the year! If you want to see all the progress made so far, you can find all my living room posts here.


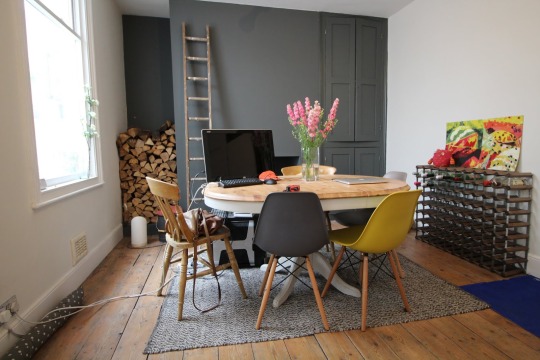
The Kitchen/Diner
Last year at this time, we only had half a kitchen. We still didn't have a working sink, a proper tap, or a worktop along the right-hand side of the kitchen. We basically had run out of cash and had to wait to save for the last missing piece. A whole year on, it's DONE. OK, the hanging lights are still out of place and we still don't have shelves - but other than that, it's done. And it feels good! You can see the full kitchen tour here.

The dining room is also finished, albeit with a plug and light switch still hanging out the wall. But it's done, it's furnished (although I desperately want to build a new table) and it's a room that's finally nice to be in. For three years, this was just a space we walked through; it lacked purpose and we never had somewhere to sit when we ate. Oh, how life has changed in the last 12 months! I've almost forgotten those days... almost.
Conservatory
Well this room has also undergone quite the transformation! Last year I painted the floor on a whim since we had zero budget and I felt like we needed to up the pace of renovating a bit. It's definitely added a punch of character and it's held up pretty well for the most part too. The only issue we've had with the painted floor was during the change from colder to warmer weather, which has lifted up some paint near the air vent - but luckily you can't see much of that. More recently, I've built the pallet seating in here too, which I had been planning for YEARS! And my vision of a garden room conservatory with plants galore is finally taking shape. There's still much to do in here, but I'm really pleased so far.

The Basement
The secret room I very rarely talk about! I am so desperate to get my paws working down here. But, it's going to be expensive and we currently have no money. We have ventilation issues we need to sort out, and I don't want to rush into anything and make the wrong decision. So far, I haven't researched enough to begin work down here - so it basically looks exactly the same. Well, aside from the stack of pallets mounting up. I'd like to start sooner than later with work down here, but we'll see...


The Landing
Another room that totally hasn't changed. We even still have stuff in moving boxes from 4 YEARS AGO. Seriously when does it end?

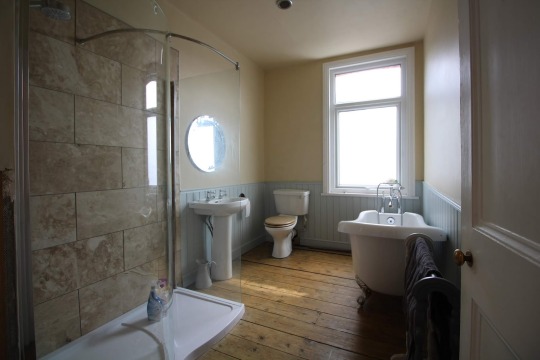
Bathroom
This was the first room we ever tackled and it doesn't look too different now. I'd love to update this room a little because we never quite got round to the 'finishing touches' stage and it feels a little empty and unloved at times. I'm also not digging the cream walls and we STILL have skirting boards missing in places and a cupboard without a door. But, meh. We have a place to shower and pee, that's what counts right?
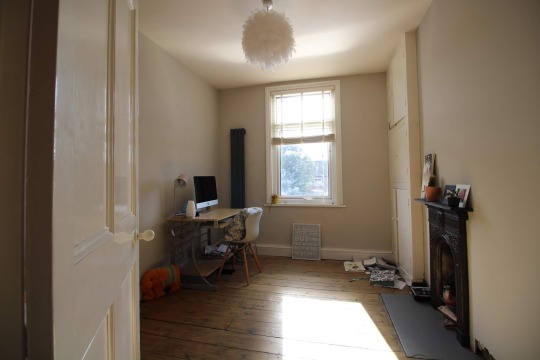
Smallest Bedroom/Office
We use this room as an office, although it doesn't actually see that much use. It hasn't changed at all this year really. Again, I'd love to furnish it better - but there's never the money for that. The negatives of forever renovating eh?!
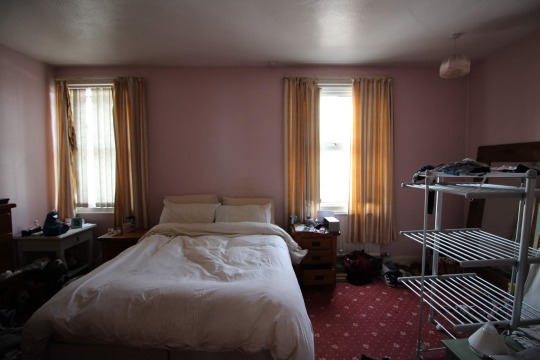
Master Bedroom
Four years on, and this room is another one that's completely the same! From the curtains to the floor, we're still rocking dear old Edna's retro style. Will it be on the to-do list for next year? I kinda hope so. It would be nice to one day not wake up amongst this dark mess!
Attic
At the start of this year, we got rid of SO much rubbish from up here. Stuff we'd been keeping *just in case* - but we had kept it long enough, it needed to go. We burnt a load of wood in the wood burner and took a load more to the recycling centre. It still doesn't look tidy or empty, but it's a great deal better than what it was. This room isn't a high priority on our list, although it definitely need attention sooner than later.


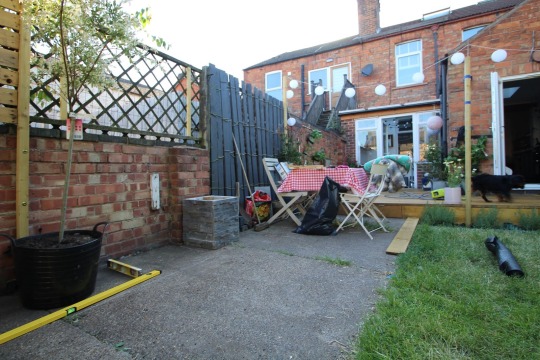
Garden
I've been tackling the garden since day one of moving in! It looks SO much different to how it looked when we moved in and it even looks different from how it did 12 months ago. We've added decking, gravel, fencing and the rubble is almost gone. 4 years of work out here is beginning to pay off. We're not finished yet, but the end is certainly in sight. And we're hoping to have this area ticked off the to-do list by the end of next summer!


So that's the house in 2018, and our four-year houseiverasy update. Yes, I wish we had achieved more - but that's probably always going to be the case. And I think this year has been quite a good one, so I feel good about that. Here's to another year of hard work, ha!
Anyone else on the same long renovation journey out there?! Please come forward and make me feel better ;)
from Tips For Basements http://www.kezzabeth.co.uk/2018/07/4-years-on-our-home-reno-update.html
0 notes
Text
Laying Gravel In the Garden
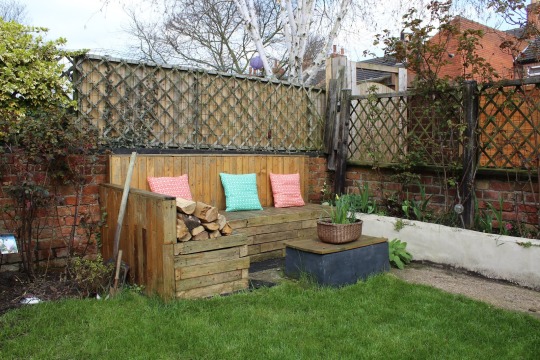
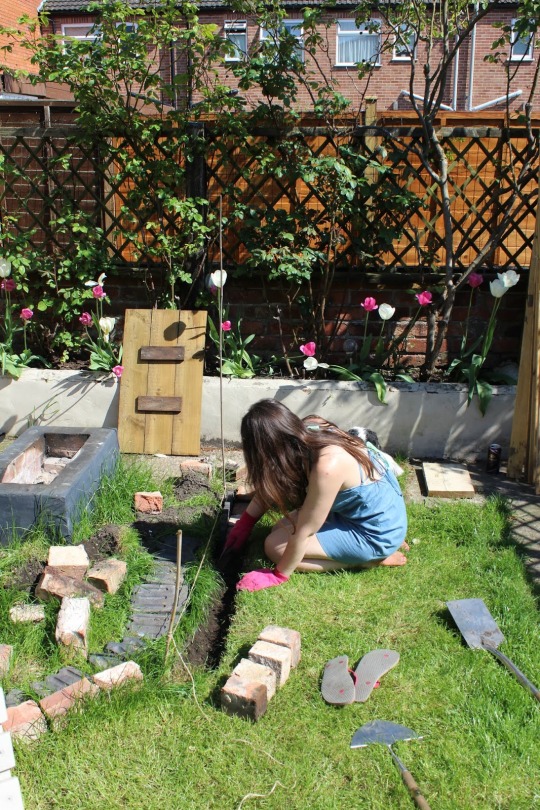
If you've followed me for a while, you'll know I've never had much desire for gravel in the garden. Don't get me wrong - I don't hate gravel and there's certainly a time and place for it, but after having an entire yard full of gravel in the old house (full garden tour here), I was against doing the same this time around. And for a long while, I was pretty adamant about that. Sadly though, our budgets aren't big enough for my dreams and now we've lived in this house for four years (yes, FOUR years), I'm beginning to realise I need to adapt some of my hopes and dreams and reign them in a little. I mean, none of our plans are insanely expensive, but they could always be cheaper in some way or another. We've now been working on our garden renovations since we moved in, back in 2014. I ripped apart the entire garden in a matter of weeks; and since then we've transformed it with a new lawn, a pallet sofa with firepit, scaffold decking and most recently, slat fencing. (You can check out all my garden reno posts here) But as a whole, the garden is still far from finished and the biggest eye-sore has been the old concrete path that runs the length of the garden.

The plan was initially to use part of the path as a lower-patio against the decking for a sit-down area of table and chairs. Then, reduce the width of the rest of the path for a wider lawn instead. I had always envisioned some beautiful dark limestone slabs, but, the cost of this would have been insane. Spending that much money just didn't seem right when half our house is incomplete, and despite my best interests of finding something cheaper, or secondhand, it just didn't happen. So - along came the idea of gravel. Gravel requires little-to-no extra materials, it's inexpensive to buy and can make an instant transformation in a matter of minutes. The negatives, however, are that the dogs are likely to kick it all over the place, it's not an easy material to sweep leaves and other debris from, and you obviously can't walk on it barefoot (oh first world problems!). But, after searching the hashtag #gravelgarden on Instagram for hours, I was completely sold on the idea. Especially as we could buy a large bulk bag and use the extra around the pallet seating corner too, which has been unfinished for the last 3 years. The positives far outweighed the negatives, and it just made sense. So that's what we did. Here's a couple of 'before' shots..
Choosing a Gravel
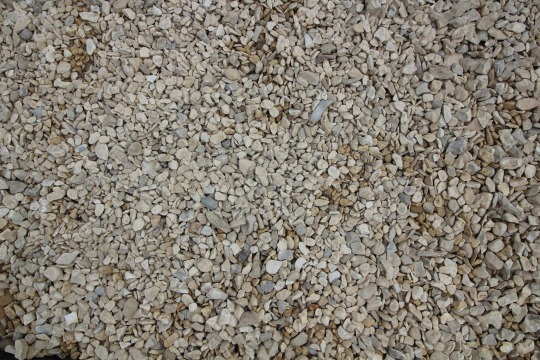
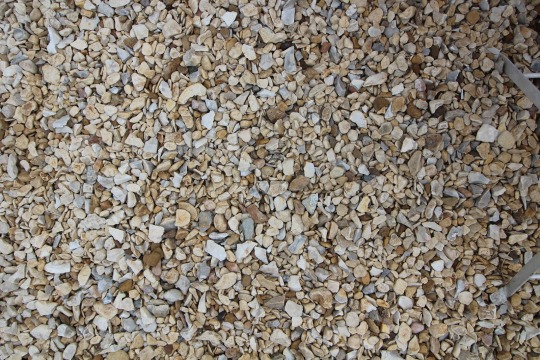
The gravel we used in our old house was Cotswold Chippings, which is a fairly consistent shade of light cream and has quite a modern feel to it. Despite really liking them, they did go a little green in places over the winter and I wanted to do something different in this house anyway. This time around, I wanted something with a more mix of colours to it, but at the same time still light and modern. I found a few websites that offered gravel samples, but the one that stood out as the most affordable (some websites wanted to charge £5 per sample, would you believe?!) along with reasonable prices for bulk bags and delivery, was The Stone and Garden Company. I ordered two samples to keep my choices minimal and I eventually decided on 20mm Yorkshire Cream, which is shown as B in the photo below. The other one in this photo is a 20mm Quartz.

Fitting Gravel Board and Edging Tiles
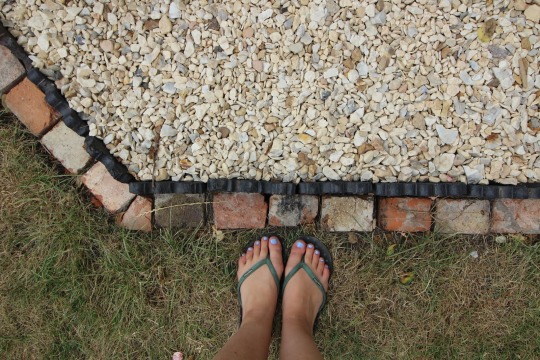
The first step to gravelling the garden was to fit some kind of edging around both the pallet seating corner and lower-patio area so that the gravel would be partitioned from the grass. The last thing we want is gravel all over the lawn (and the dogs are certainly prone to kicking it about!) so a good edging will help against that. For the pallet seating corner, I re-used some of the original Victorian Edging tiles that were in the garden when we first moved in. Some of them aren't in the best condition and I've had to mix and match slightly, but I figure it all adds to that period charm. I've also used some leftover bricks with them too, just because I like the look of it. I think it works and looks really good!
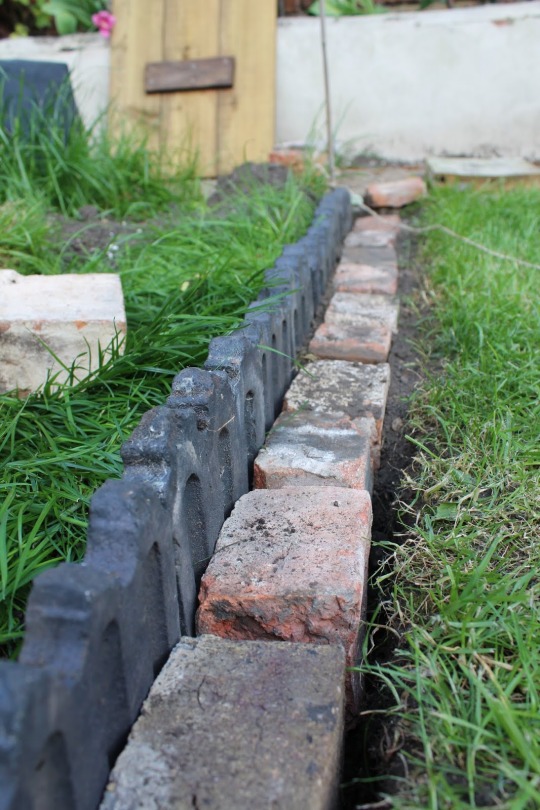
I'll give you a quick talk through the process, but it was seriously simple. Like, zero DIY skill involved.
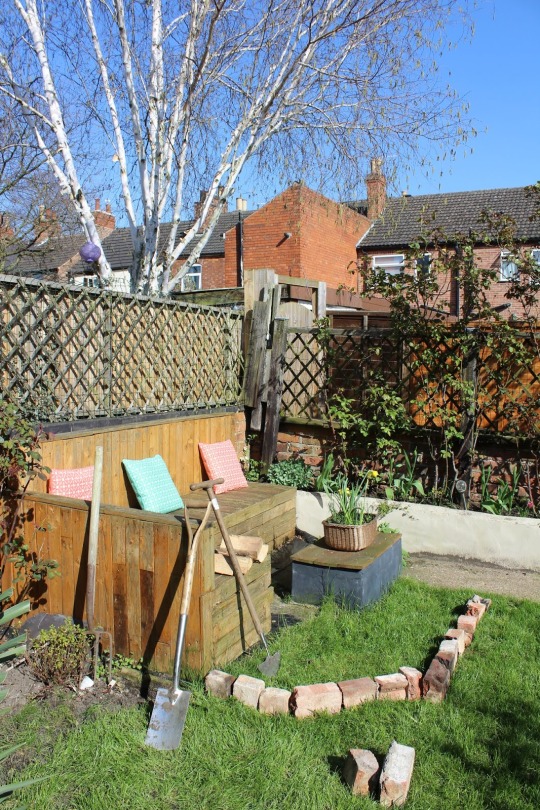
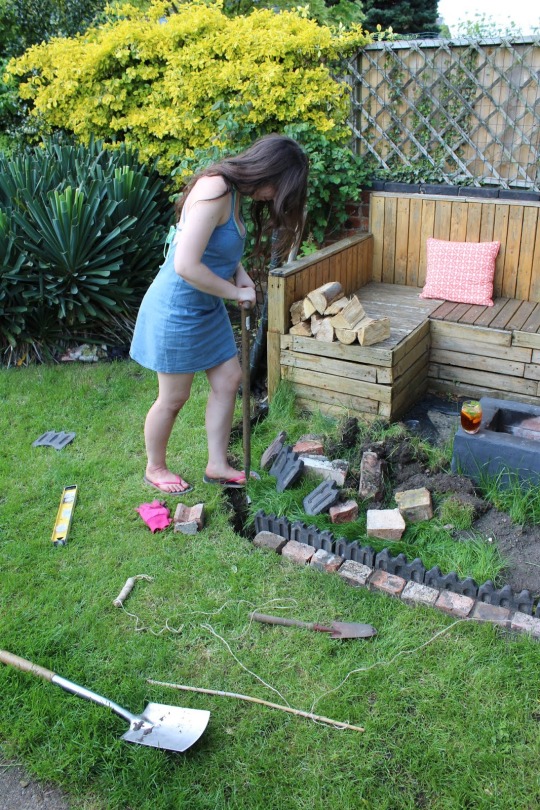
I laid the bricks out in the rough shape I wanted to create, then used a string line to properly mark it out. A string-line will help to keep you keep going straight when it comes to putting it all together.

Then, I simply dug a trench to slot both the edging and bricks into. Simple!

Finally, I back fitted the gaps with mud and voila, one reclaimed brick edging!
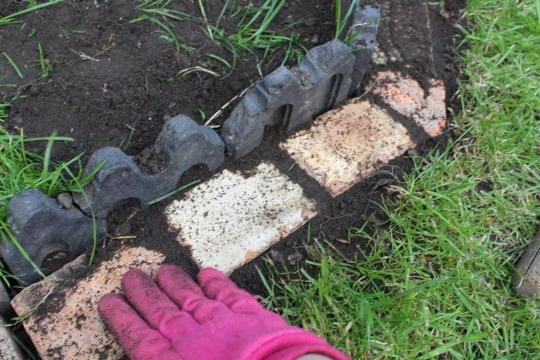
Not bad huh? As for the patio area, I wanted something a little less decorative, so I decided to use a gravel board instead. It's super cheap and once fitted is barely noticeable. I fit the gravel board in exactly the same way, digging a trench and slotting it in. Super simple, although both areas did take a couple of hours to do.

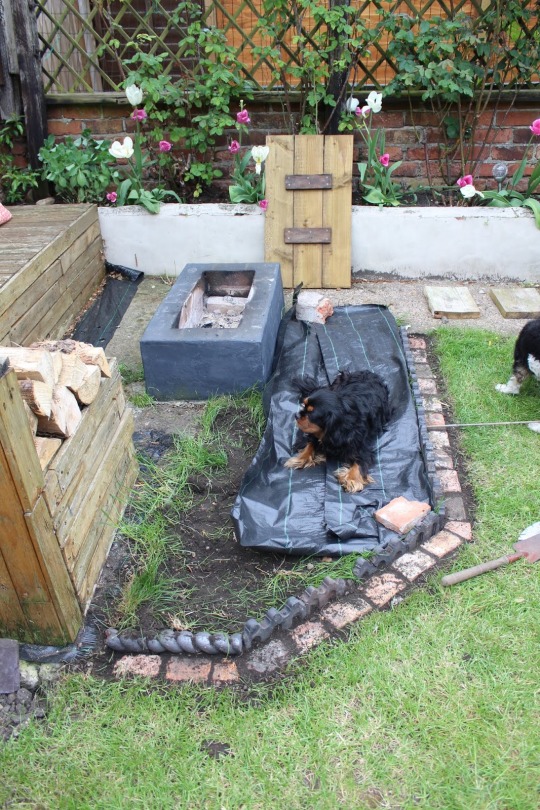
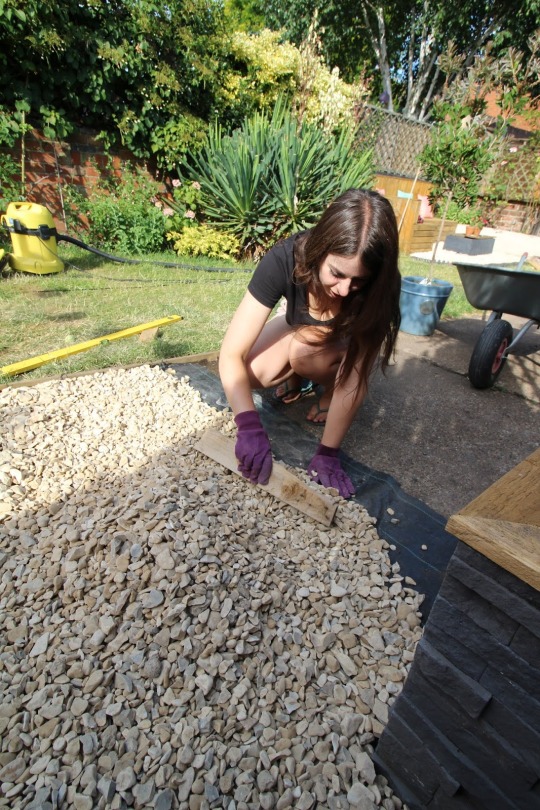
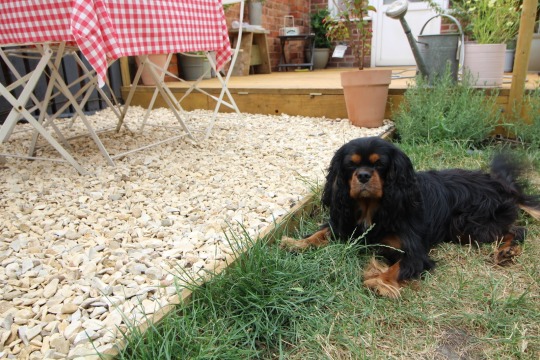
Laying Down Landscaping Fabric
I see so many people just chucking gravel down willy-nilly here and there and in a matter of weeks, weeds are popping up all over the place. You can lay gravel down on-top of anything, but if you want a decent finish that won't turn into a weedy-hell, you do need to prepare the area first. If you're laying gravel onto soil or cracked concrete where weeds may grow, I thoroughly recommend using landscaping fabric underneath first as this will completely block out the light to them. We always use the heavy-duty stuff because it's far more durable, which is really important when using under gravel as normal weed fabric will tear and rip apart within a matter of weeks. And don't worry - it's completely permeable so it won't turn into a swap either. You can peg the fabric down into the soil if you'd like, but otherwise, the gravel should hold it into place, so all you need to do, is cut to size and lay. Here's Doug modelling it fabulously.


Laying the Gravel
We ended up ordering an 850kg bulk bag of Yorkshire Cream gravel from The Stone and Garden Company, as I mentioned earlier, for only £85 (and including free delivery would you believe?!) which meant we had a lot to sift through. Since our garden also has no access for pallet wheels, we had to have the bag delivered to just outside the back gate, on the adjoining road. So, we borrowed a wheelbarrow from Grants parents so we could easily transport the gravel from the bag to the garden, without taking years to do. We used a spade to fill the wheelbarrow up and then simply dumped the gravel where we needed it.
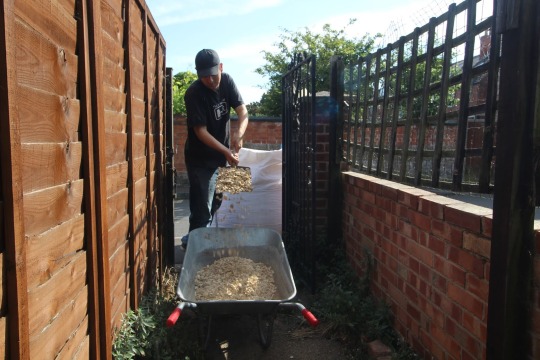
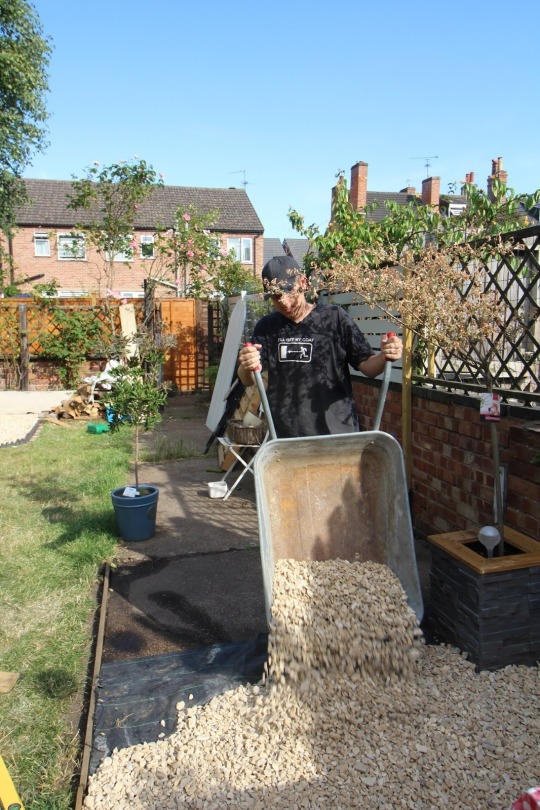
I then used a scrap piece of wood to spread it around and make sure it was all fairly level. Our concrete is actually on a slope, so we've worked with that.
We had so much gravel leftover, we even managed to add some to the back alley as well. This was something we had planned to do eventually, but we never expected to get it done with this single bag alone! Again, we have cracked concrete here so I laid out more landscaping fabric and simply dumped the gravel on top. Oh and I used more bricks to create an edging here too - they're not mortared into place (wouldn't be worth my time or money!) and some are a little rough and ready in places, but I think it looks good! Here's a before and after:
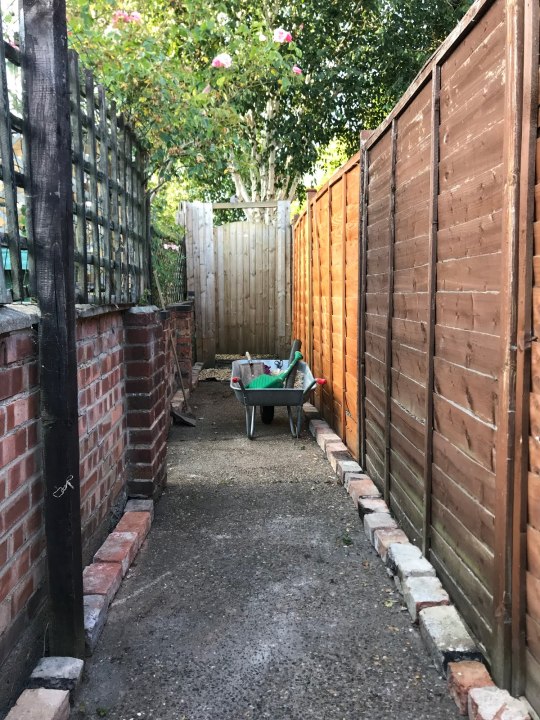


For years this alley has been used as a dumping ground, so laying gravel here has made even more of a transformation than it has in the garden! Grant uses this alley almost daily for his bike, so it feels good to finally have it cleared out and prettied up. We plan on adding some solar fence lights in the future (Lights.co.uk have some particularly affordable ones I'm eyeing up!) and painting and repairing some of the fences too. But the later is probably a job for next year!
Washing the Gravel
After we had laid the gravel, we needed to hose it down for its true colours to be shown. Bulk bags of gravel are usually quite dusty, so this covers the gravel until it's washed away. Here's a couple of photos for you to see the difference:
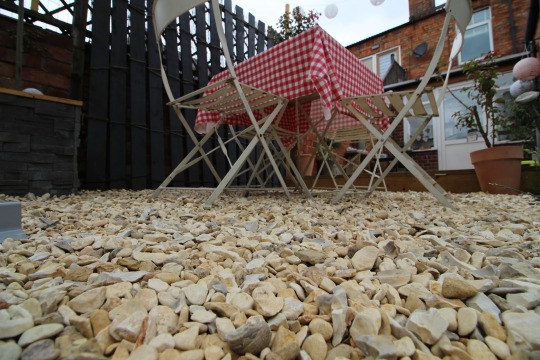
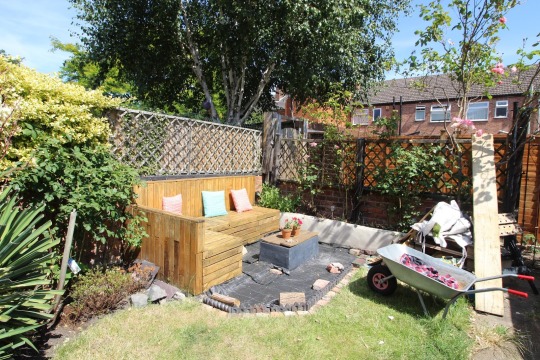
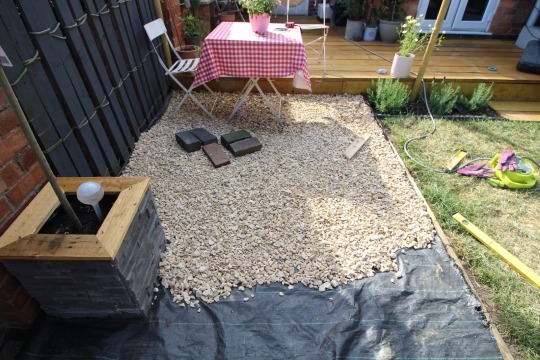
A Finished Look!
And that's it! It really is that simple. So here are some finished pics for you to look at...
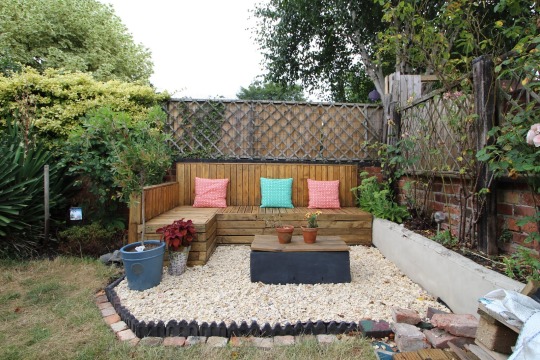
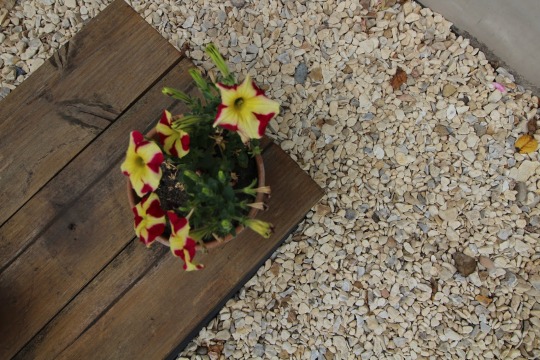
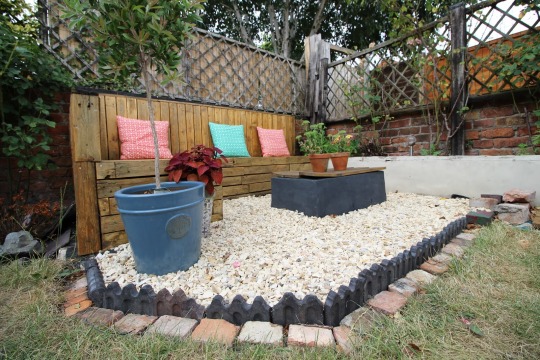
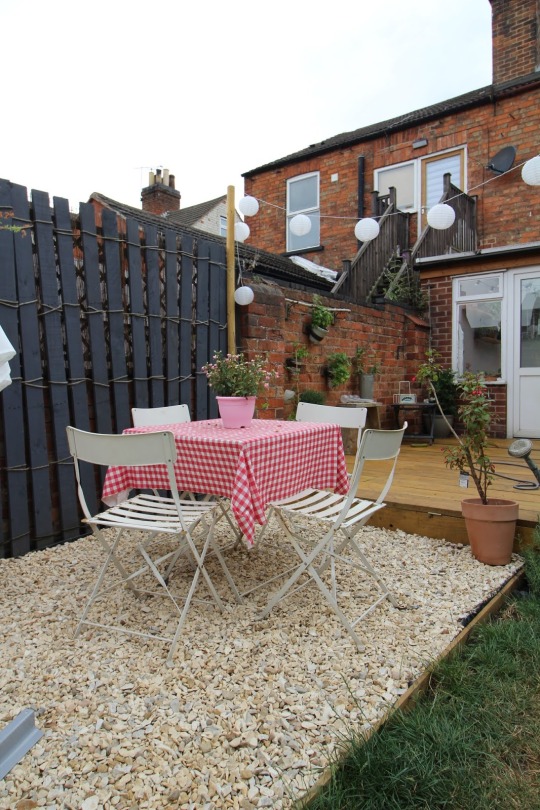
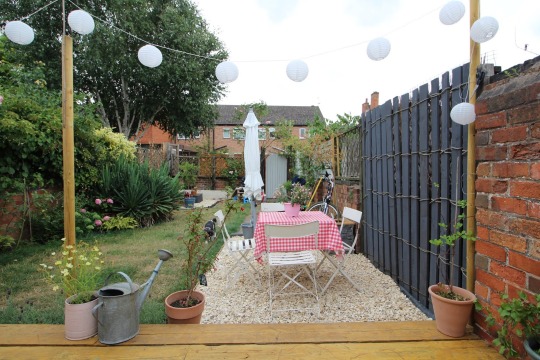
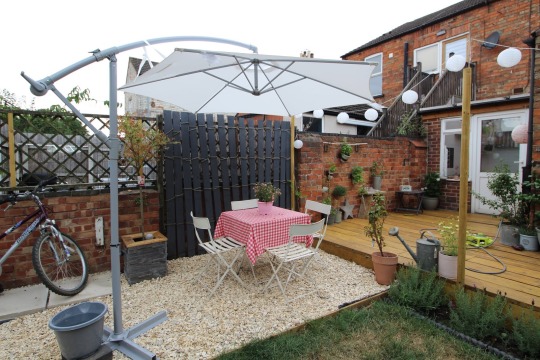
I am dead chuffed with how it looks, and I think it works really well. Sure, it's no limestone paving slabs - but you know what, I think it's a good rival! So, Would I recommend Gravel? OK, so cards on the table. The dogs have kicked it into the grass twice so far (UGH!) and twice already leads me to believe it will happen again, and again. So yes, that is flipping annoying and one of the biggest negatives to gravel. The pallet seating corner is already beginning to stack up with leaves and petals from the rose bushes which obviously I can no longer sweep away and will it soon turn into a leafy mess-pit I can't control? Only time will tell. And lastly, let's talk about the neighbourhood cats. Someone on Instagram warned me that cats love to use smaller sized gravel like a litter tray. I took note and avoided shingle type gravel - this one has much larger chunks within it. But guess what? I've already cleared up three lots of cat poop from the back alley! And it's certainly is not from the dogs, so yes, that is also another huge negative. I mean, who really want to pick up more poop?! BUT, all things considered, yes I would definitely recommend gravel. After all, if you're on a budget, it's the most budget-friendly quick-solution out there. There is literally zero hassle when it comes to installation and it's so bloody affordable! Let's face it - there's a reason we've used gravel twice now. I'm definitely pleased with it - I personally think the positives outweight the negatives, and you know what, if I ever can afford those limestone paving slabs for the lower-patio one day, this won't have been the biggest waste of money. We just need to sort out the rest of the path now... but I reckon that might be a job for next year. Watch this space! Costs (rounded to the nearest pound) New Tools Purchased: None, although we borrowed a wheelbarrow. Materials Used: Gravel Board x2 - £4 Landscaping Fabric - £20 Yorkshire Cream Gravel - £85 Total: £109 Other Items Featured: Parasol - IKEA Table & Chairs - Argos Lantern Lights - Last year, Lidl Outdoor Cushions - Homebase from Tips For Basements http://www.kezzabeth.co.uk/2018/07/laying-gravel-in-garden.html
0 notes