jade-finds-cc
Jade's Favorite CC
Jadeplumbob's CC finds blog
904 posts
Don't wanna be here? Send us removal request.
Last Seen Blogs
robbialy
ROB FK

thiswaytwoinfinity
argumentative, antithetical dream girl
redsheis
Red's Art and Commissions
myway420
MyWay420
3iysa
IF U SEEK AMI
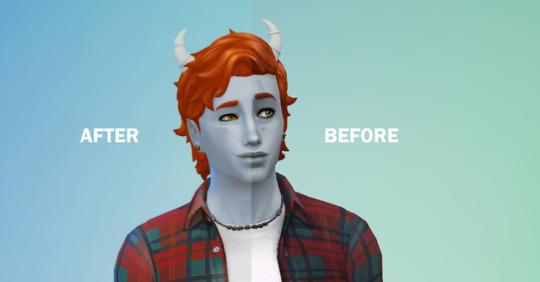
Photo

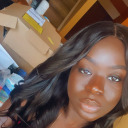
IMPACT default eyes
by ratboysims
hey, these are the default eyes i’ve been using for almost a year now! i’m a huge fan of the euphoria eyes by @pralinesims and wanted them in a more maxis style, so i made these. i hope you guys like them as much as i do :}
• a maxismix-ified version of the euphoria eyes by @pralinesims
• huge credits to praline for the base eye texture, and to @dangerouslyfreejellyfish for the sclera texture!!
• 20 swatches: all EA colors + 2 extra colors that i think are useful.
• for all ages of all sim life stages!!
• included are also heterochromia overlays for all ages, found in the facepaint category.
★ please consider supporting me on ko-fi!
↪ DOWNLOAD (sfs, no ads)
↪ DOWNLOAD (dropbox, no ads)
4K notes
·
View notes
Photo

Pastel Goth Mini Skirt and Crop Top by teamoon
The crop top comes in 17 patterns. It is BGC.
The skirt comes in 12 Pastel Patterns and 4 Pastel Solids. Requires Mesh (Anya Skirt) by @sentate.
Special thanks to @femmeonamissionsims for making the adorable dead teddy clip art for me!
TOU: Keep these free, don’t claim as your own.
CROP TOP: DOWNLOAD
MINI SKIRT: MESH | DOWNLOAD
847 notes
·
View notes
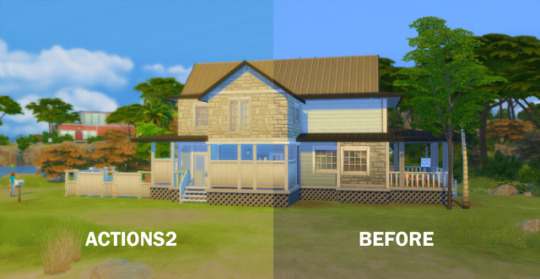
Photo
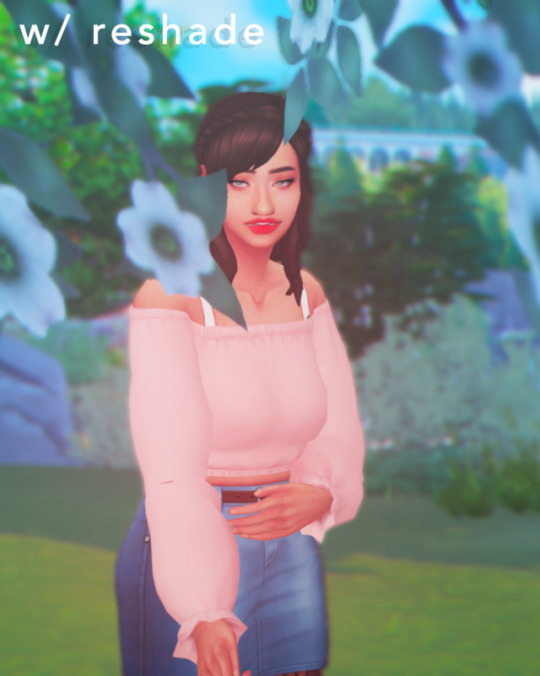
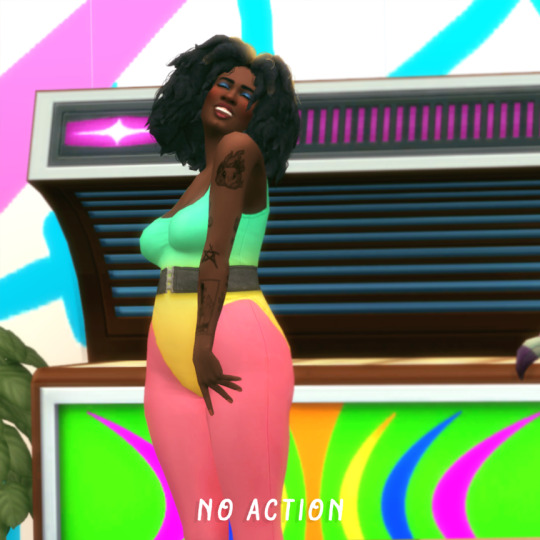
acacia action set.
~ as promised, here’s the action i use. ofc i use reshade, so it’s intended to be an add-on for that, but it can be used without!! it will just give a less intense effect. buT impORTANT:
if you are using the same reshade as me, remove the second vibrance part. (it reduces the vibrance, which is needed w/o as it’s too bright)
if you aren’t using reshade, or another one, remove the first selective colour part. (it increases the green, as the reshade washes it out)
there are lots of extra actions in there, to add white around the edges. ofc you can delete them if you want, but if you want to use them crop the screenshot to a 4:5 ratio, and then run the one you want.
download.
539 notes
·
View notes
Photo


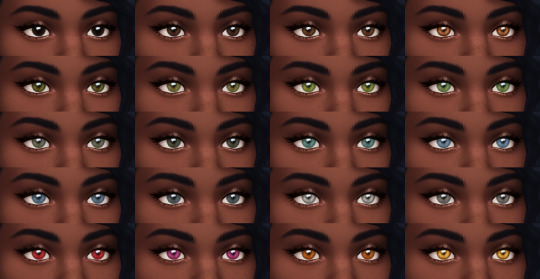
INDIGO PUFF - a reshade preset/psd
i intended to release my own reshade preset a while ago when i hit 1k, kinda as a milestone gift? but then i fell asleep for like a month ig so i’m FINALLY releasing it now. this preset is p vibrant, depending on the season and location in game.
IMPORTANT NOTES:
i use reshade version 3.4.1. if you are using a different version of reshade, my preset may look different for you. as far as i’m aware, this preset is not compatible with 4.0.
in these screenshots, i’m using the qUINT mxao- however it is not necessary. you may wanna tweak it a little, but the normal mxao should work fine with this preset. ^^
if you do not know how to install/use reshade, here is a text tutorial, and here is a video tutorial!
there is an optional psd file in the sfs download! while you do not need to download this, i have made it with the intent of use alongside this preset.
KEYBOARD SHORTCUTS:
dof - shift + f
mxao - shift + 1
- i haven’t put much thought into shortcuts, so feel free to change them as you see fit :D
DL: sfs (no ads).
951 notes
·
View notes
Text

idk i guess it’s finished :}
Keep reading
219 notes
·
View notes
Note
What are some good psds/actions you would recommend?
omG ever since i’ve been using reshade i haven’t used psds/actions but i miss them?????????????? but here we gO
muddy boots, basil & things by @glitchysims
fake it ! by @poolbrop
dimples by @dnasz
sea foam & cherry blossoms by @twikkii
butter by @early-grape
126 notes
·
View notes
Photo


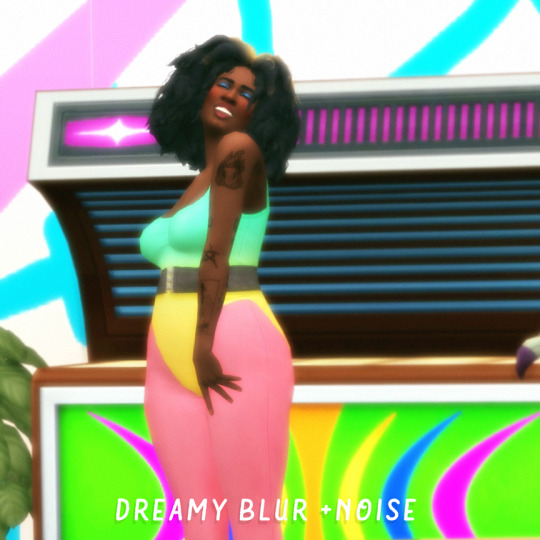

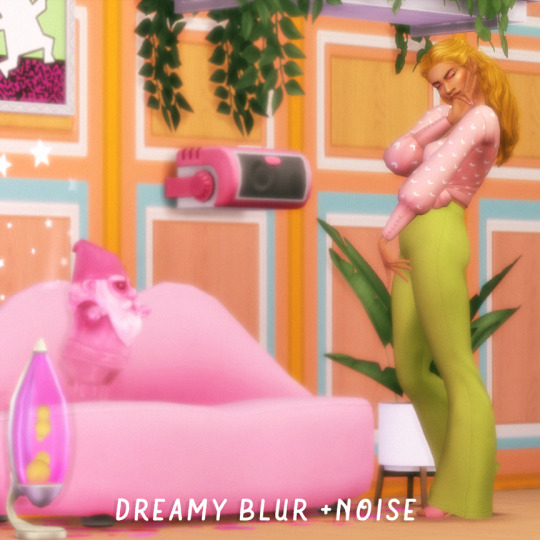
GLOWE KIT
a new photoshop action from me? what is it, 2016??? this is a dreamy, blurry, glowy, bloomy, type of action to add a good retro feel to your screenshots! click the previews to see it better
requires photoshop :)
✨WHAT YOU GET✨
dreamy blur action set to 65% and a curves layer on top you can adjust to avoid whitewashing
noise action set to 15% because who doesn’t love a good grainy texture
i’m aware this action can get pretty bright and obnoxious but if you don’t mind adjusting the opacity depending on the lighting and the screenshot it’s good as gold :))
📁Download✨
1K notes
·
View notes
Photo


🍀 clover psd (+action)
ive been developing a new psd for a while and i think its finally ready for release! my goal for this psd was to make something really simple easy to use, and i think i achieved that!
this is NOT a reshade preset or a mod. this is a psd + action that you use in photoshop to edit your pictures.
more info + dl under the cut
Keep reading
1K notes
·
View notes
Text
i made a brief tutorial for my lovely wife as she enters the world of photoshop and gif icons ! this tutorial details how i make gifs from scratch and is very photo heavy. not an official tutorial but if anyone else finds it useful, i’m happy! See below the cut!

Keep reading
104 notes
·
View notes
Photo
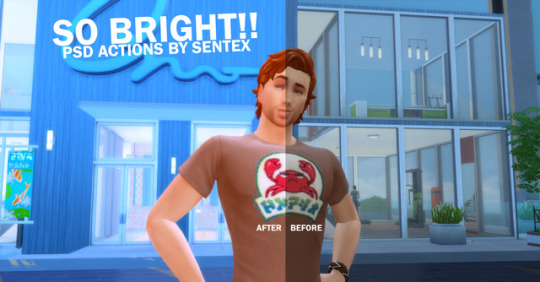

SOOOO BRIGHT! Actions by Sentex
DL: SimFileShare
Don’t claim as your own. don’t redistribute without my permission. if you use it, consider tagging me!
625 notes
·
View notes
Photo

blurry edges action set: download
i always get asked how i achieve my blurred/faded edges on my photos, so i finally made a quick action set for you all.
there are three sizes (which are personally my most used):
square: 900 x 900
rectangle: 1280 x 800 & 1280 x 720
IMPORTANT: before you run the action on your FINISHED, FLATTENED screenshot, make sure your layer is UNLOCKED or the action will not properly work.
enjoy. :o)
737 notes
·
View notes
Photo
bucket o’ sunshine (action + psd)
as a thank you for 100 followers, here is the action that I use for my Taupe gameplay! it comes in both action and .psd form, although the psd does not include sharpening, smoothing or resizing (sorry!!). I’ve been working on this action for a long time, so I hope you like it ❤︎
download (sfs)
375 notes
·
View notes
Photo


Welp I made something.
You can download this as a an action and as a psd (with the psd, the folder is underneath the logo, just duplicate or drag it on your picture)
DL: PSD | ACTION
feel free to tag me so I can see your creations ;P
329 notes
·
View notes
Text
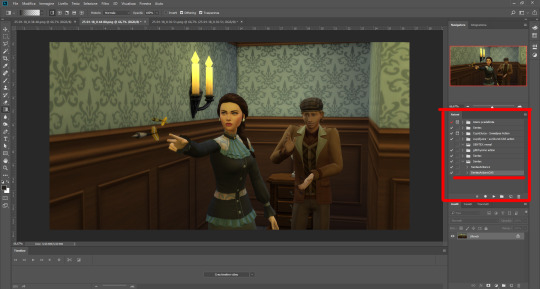
How I edit my Pics.

Step 1. First of all you need my “Sooo Bright!!” Actions for Photoshop (here). Download and open it.
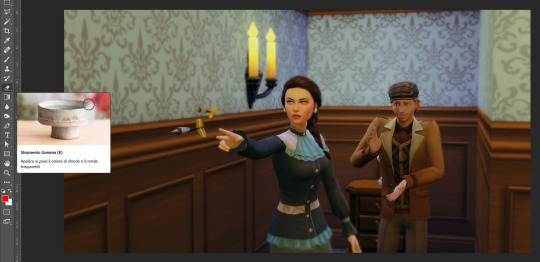
Step 2. Open your photo and use the shortcuts Alt-F9. You will see the window of the Actions. In the folder Sentex, there are two different actions that you can choose. I usually use “SentexActionsCas”. So, select and play it.
Step 3. After the automatic process end, you’ll see some adjustment layers and backgrounds copy in your Layers Panel. I delete the Background Copy 2 (It’s just a Blur effect) and merge all layers together.

Step 4. Some Color Balance to eliminate the “Yellow effect”

Step 5. Duplicate the Background level. Then, to realize a deep effect I add a Gaussian Blur with Radius 2,4. I normally don’t use a high radius because I need a soft effect.

Step 6. Now you need to find your Pic Focus Point. I decided that the faces and the arrows are mine. So, with the Eraser Tool (E) just delete the parts you want to be on focus. Merge all layers together.
Step 7. Duplicate your Background levels (I know, again). We need now to adjust the light point. Go to Filter/Rendering/Lighting Effects. Find your light point. In my pic the point is on top left. Control the light and confirm it. In the Layers Panel select your Background copy and select Lighten as Blend Mode with a 70% Opacity. Merge all layers together.

Step 8. Create a New Level and with the Grandient Tool create the Dark points. Layer’s Opacity about 50% and merge all layers.

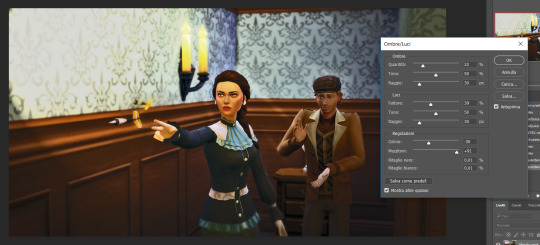
Step 9. Duplicate your Background level and go to Image/ Adjustments/ “Shadows/Hightlights…” . Here edit the Amounts of Shadows, Highlights and the Midtone. Then, click on your duplicated layer and set Opacity about 30%. Merge all together.
Step 10. Now I proceed with some edits with Color Balance, Curves, Contrast, Exposition. This is my Final effect. I hope you enjoy it. I try my best to make all clear and easy. At last it’s more difficult to write this tutorial than doing it. Thank you.

290 notes
·
View notes
Note
different anon but i’d love to see what actions/psds you use to edit!! your screenshots are gorgeous.
Thank u very much!! It’s very nice to hear that someone appreciate my pics lol :D
@anotherplumbob you would be interested in this too ;)
My fav actions:
Bright & Clear by @allisas - it’s the most basic action for my gameplay pics when I don’t want anything fancy, but a bit brighter and lighter
CAS action by @tamo-sim - I use it all the time for CAS pics and sim portraits. Must have!!
Photoshop action by @mjsimblr - I use the topaz action from this kit for almost all my pics
Sunbloom by @plumbjam - I loooove these actions. I use it for my landscapes when I want to make them bright and dreamy. Definitely would buy, 10\10
My fav psds:
Vibrant psd by @snapdragoned - My very first psd lol! It’s still really good to make your pics vibrant (big suprise!)
Basicass psd by jollisims - the name of it speaks for itself. Usually I use it for gameplay pics or tweak it a bit for edits
Pixel pop by @keyloh - the best one for night shots
All in one by @pleyita - one more good psd. I really like the variations of lightning gradients which come with it!
167 notes
·
View notes
Photo

pop! psd collection (v1 + v2)
i made this psd a loooong time ago (2016? 2017?) and it was due for a re-release. i’ve left most of it untouched, but i tweaked a couple things. there will be a comparison between v.1 and v.2 under the cut. this is a collection of the two psds, meaning that the original psd is included as well!
this is NOT a reshade preset or a mod. this is a file that you use in photoshop to edit your pictures.
Keep reading
864 notes
·
View notes
Note
UM hi, you can ignore this if you don't wanna answer it's totally up to you but i saw you changed how you edited and it looks rlly lovely and clear and i was wondering what psd/action you were using now? Thanks in advance lmao ur a good egg
thank u so much!! i was actually a little worried bc i feel like my pics look blurrier on the dash lately but i’m glad at least one person thinks they look good lmao
i’m using nookstone’s happy pills psd for the coloring! i use the base as it is, and add the radial light gradient set to 50% opacity
i’m using reshade for depth of field instead of just the in game post processing, which might be why u think they look clearer….. it’s this preset but it won’t look exactly the same bc i only have the DOF and SMAA shaders installed so that my game isn’t slow lmao
i still use these clean and clear actions, specifically the topaz clean and then texture smoothing over that!
71 notes
·
View notes